
I Switched to Wooden Sewing Tools: Are They Worth It?
Recently, I’ve been using more and more sewing tools made from natural wood. Clappers, point turners, rulers — if there’s a wooden version, I would like to try it. Their natural texture, weight, and smooth feel under my hands make them a joy to use.
Maybe it’s because I’m getting tired of plastic. Plastic this, plastic that — everywhere you look, there’s more of it. It fills our drawers, our sewing rooms, and unfortunately, our landfills. I’m not saying plastic doesn’t have its place. It’s cheap, durable, and sometimes the only practical option. But I’ve started to wonder: is wood a better alternative?
Sewing already encourages sustainability — we reuse, repair, and repurpose. Wooden tools naturally fit that mindset. They’re biodegradable, renewable, and often locally crafted. Many small woodworking artisans create sewing tools from reclaimed or sustainably sourced wood.
Plastic tools, in contrast, are mass-produced and not biodegradable. Over time, they can yellow, crack, and end up in landfills. If you care about keeping your sewing room eco-friendly, wood makes sense — it aligns with the spirit of handmade living.
Yes, wooden sewing tools often cost more upfront. But their longevity usually makes up for it. A high-quality wooden clapper can last a lifetime. Plastic tools are cheaper at first, but they’re more likely to break or need replacing. Over time, the cost evens out — and the wooden version continues to feel and look better with age.
So… are wooden tools better?
Sometimes yes, sometimes no. They’re more sustainable if made well. They feel good to use and look beautiful. But plastic still wins in certain categories — especially where precision, flexibility, or transparency matter.
For me, the shift toward wooden tools isn’t about perfection. It’s about small choices. Using more wood means using less plastic. It’s a quiet way to reduce waste in a hobby that already encourages creativity and reuse.
✅Related tutorial: Sustainable Sewing: Eco-Friendly Techniques For The Modern Sewist
Note: Some of the links on this page are affiliate links. This means I will receive a commission if you order a product through one of my links. I only recommend products I believe in and use myself.
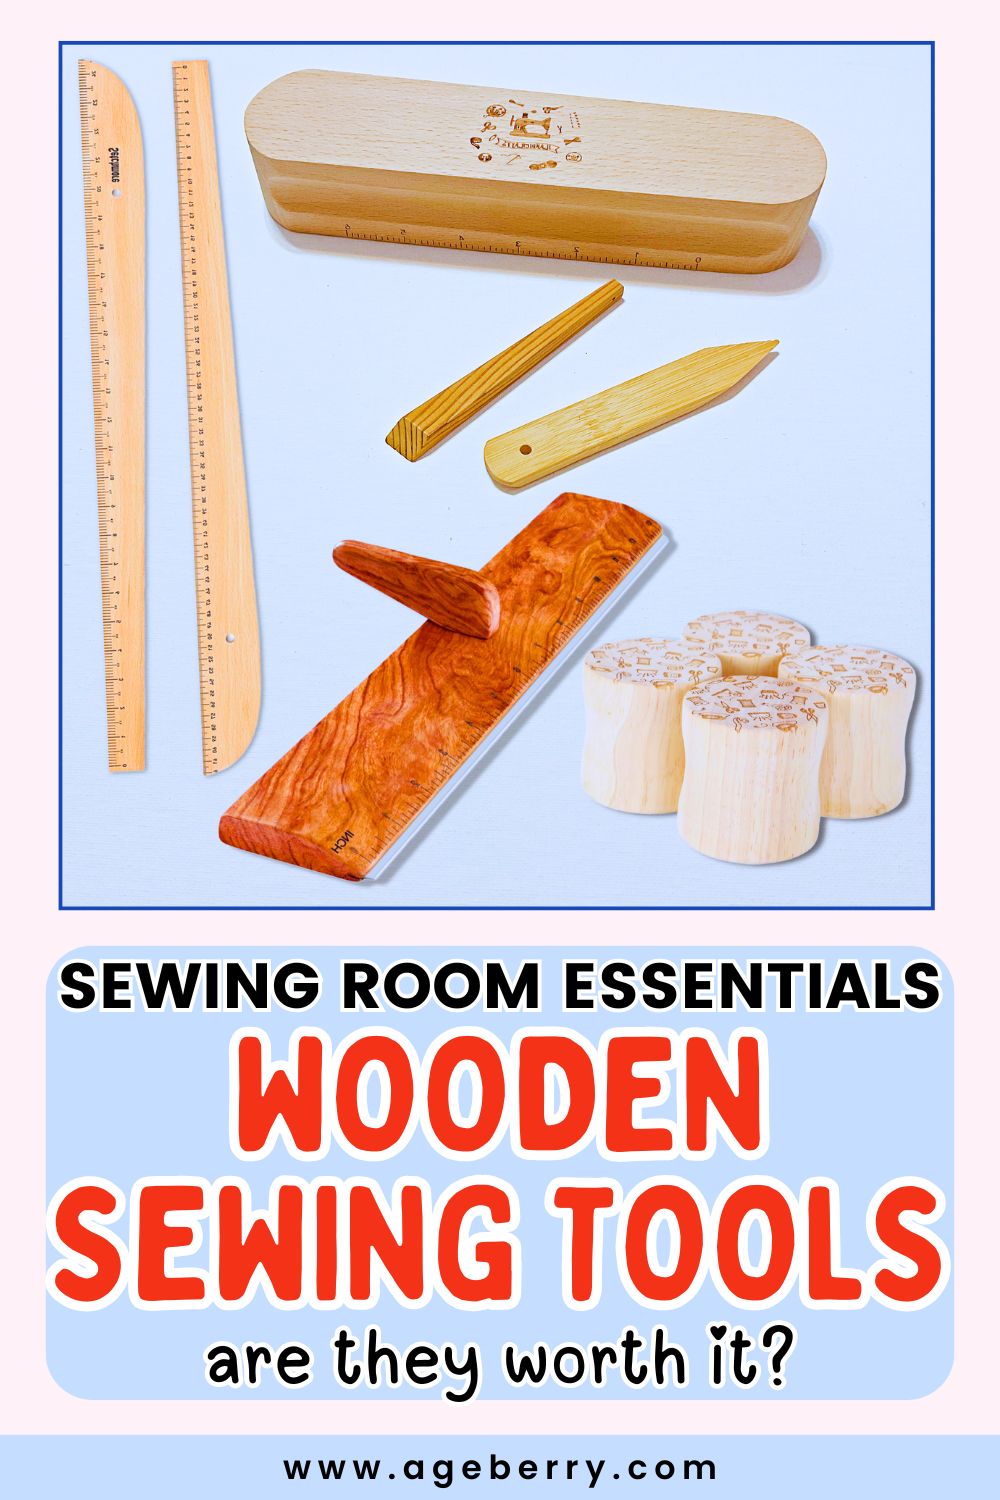
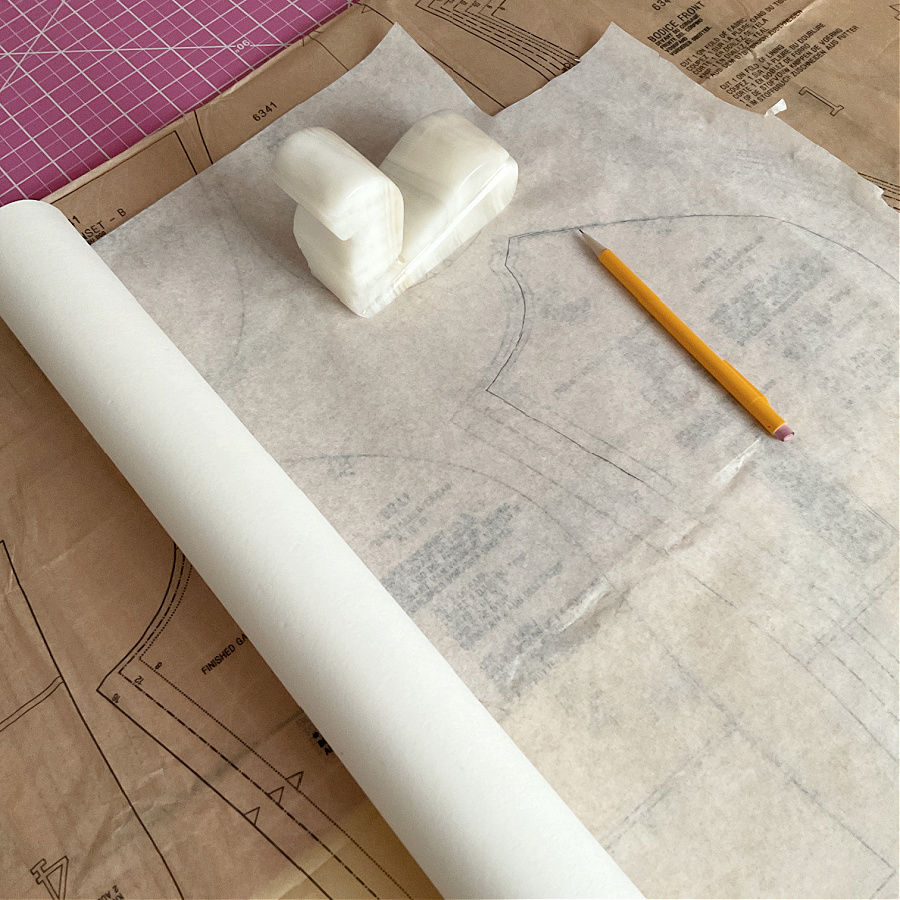
The Wooden Tailor’s Clapper
A tailor’s clapper looks simple — just a solid block of hardwood, usually shaped with smooth, rounded edges for comfort. But in sewing, this unassuming piece of wood works magic on fabric.
A clapper’s job is to make your seams crisp and flat.


So, how does it work? It’s all about heat and moisture. After you press a seam with a hot iron, you immediately place the clapper on top of that area and let it sit for a few seconds. The wood absorbs the steam and traps the heat against the fabric. The result is a beautifully sharp crease or a seam that lies perfectly flat.
Quilters love it for flattening bulky joins. Garment sewists use it for collars, pleats, darts, and hems. And anyone who’s fought with thick fabric layers — like denim or wool — knows how satisfying it is to see them behave after a few presses with a clapper.
Why I Like This Clapper
I bought this clapper on Amazon.
It’s made from solid hardwood with a smooth, even finish — no rough edges to snag my fabric. The shape feels balanced in the hand, and the side grooves make it easy to grip when I’m pressing seams.
I also like that it came with a soft storage bag, which keeps the wood clean between projects.
It has many five-star reviews, and now I understand why. The wood absorbs steam beautifully, and seams are flat and crisp in seconds.
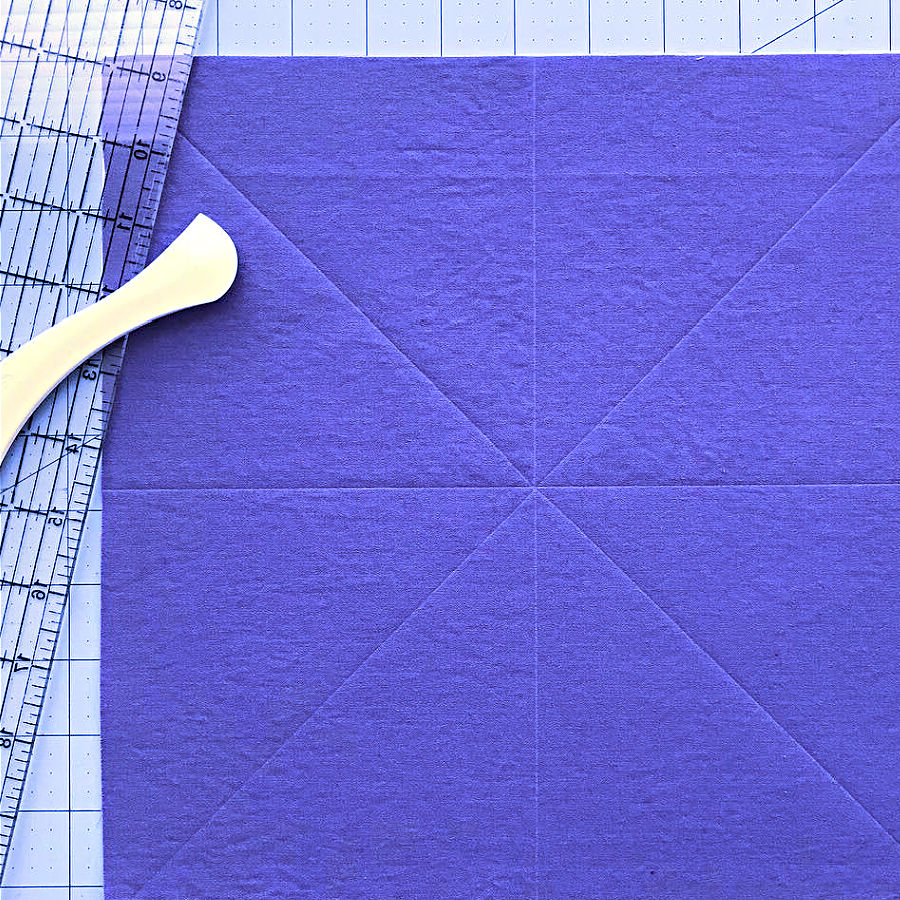
Here’s a quick visual of what happens when you press seams different ways.
In this image above, I used a finger presser to open the seam. It did the job, but you can see the fabric isn’t fully flat. The seam allowances are lifted and have a slight ridge — good enough for a quick press, but not ideal for a quilt block that needs precision.
Next, I used a regular iron press. The seam looks better, but it still has a bit of puff to it. The heat helped, but as soon as the fabric cooled, the fibers bounced back a little.
✅Related tutorial: Pressing Matters: 15 Common Ironing Mistakes to Avoid
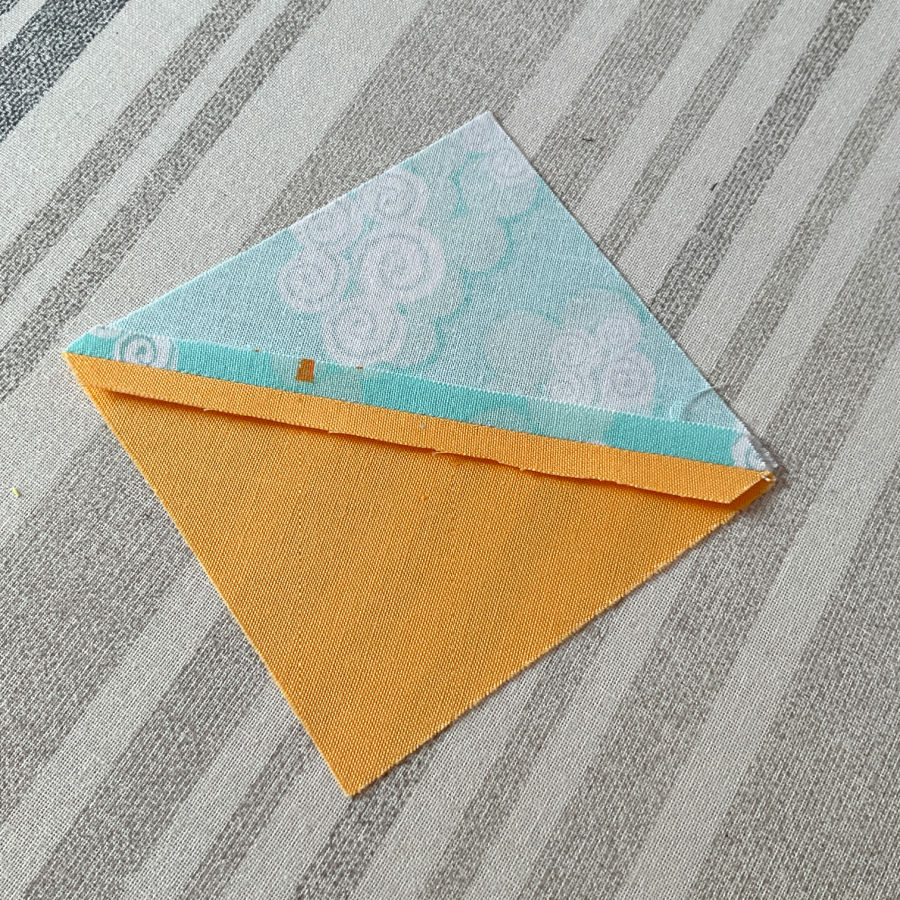
Then came the wooden clapper. I pressed the seam with steam, set the clapper on top for a few seconds, and let it cool. The result looks completely different. The seam allowances are perfectly flat, almost as if they’ve been fused to the fabric.
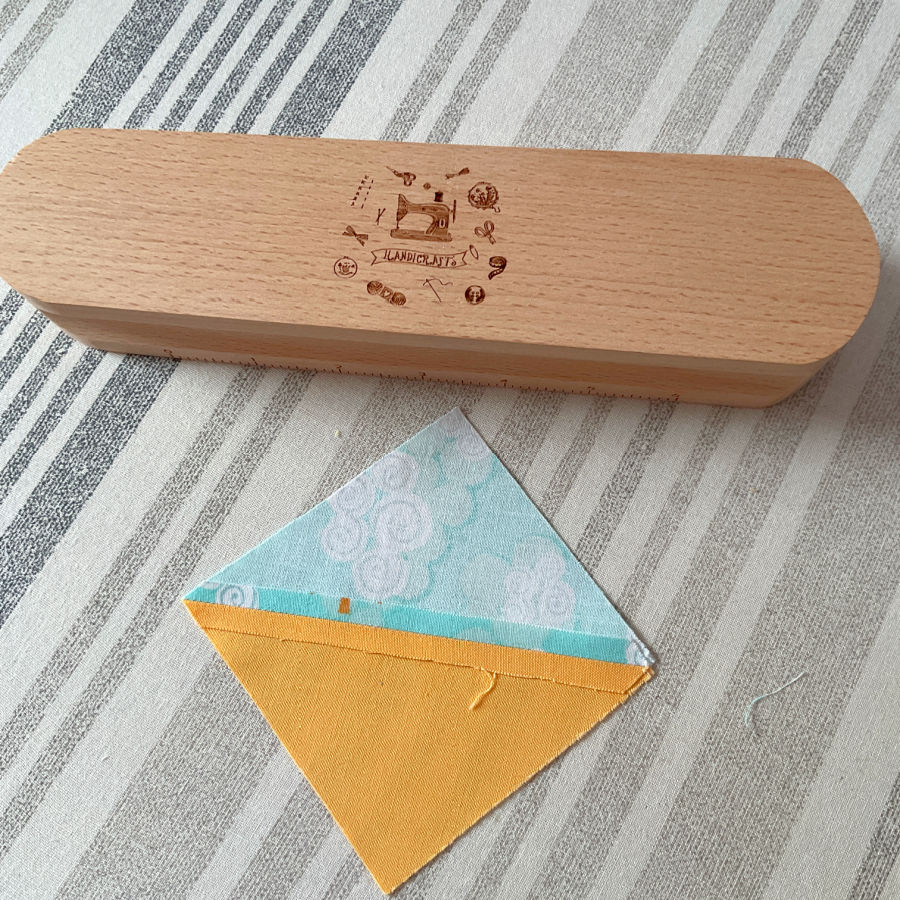
That’s the beauty of a clapper. It locks in the press while the fabric cools, and it does it naturally, without extra heat or effort. For quilting, it helps seams match up neatly. For garment sewing, it gives you those professional, crisp edges you see in store-bought clothes.
If you’ve never used one before, this simple test shows exactly why sewists love it.
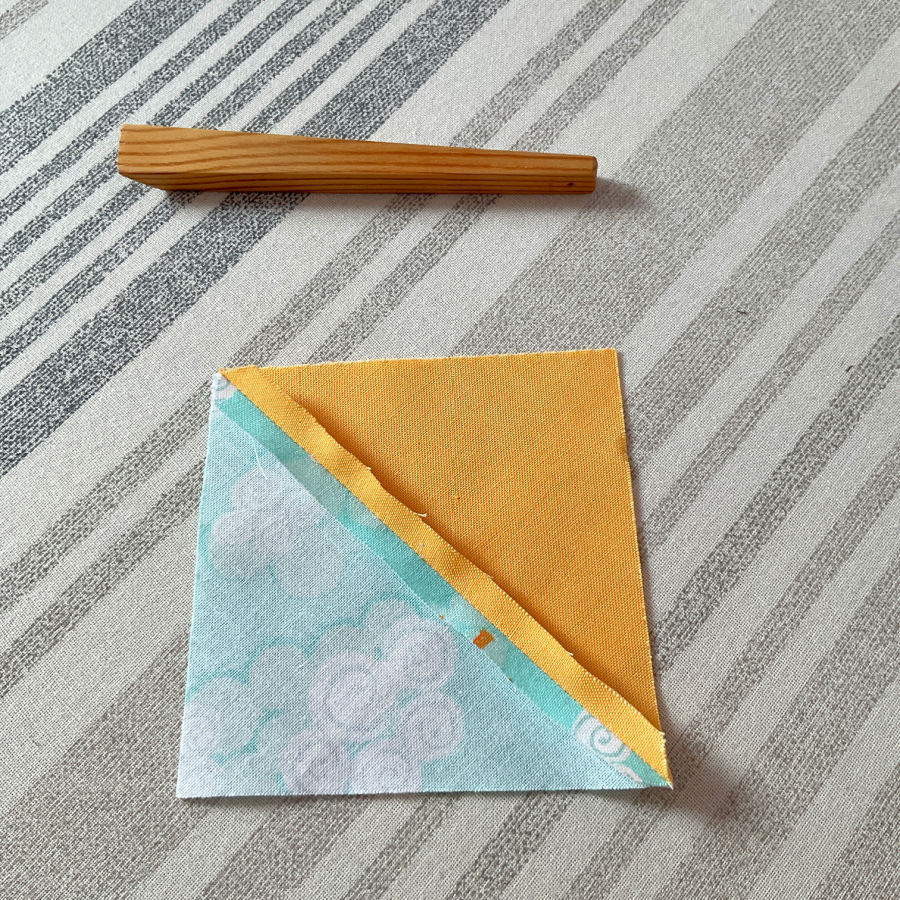
The Wooden Finger Presser
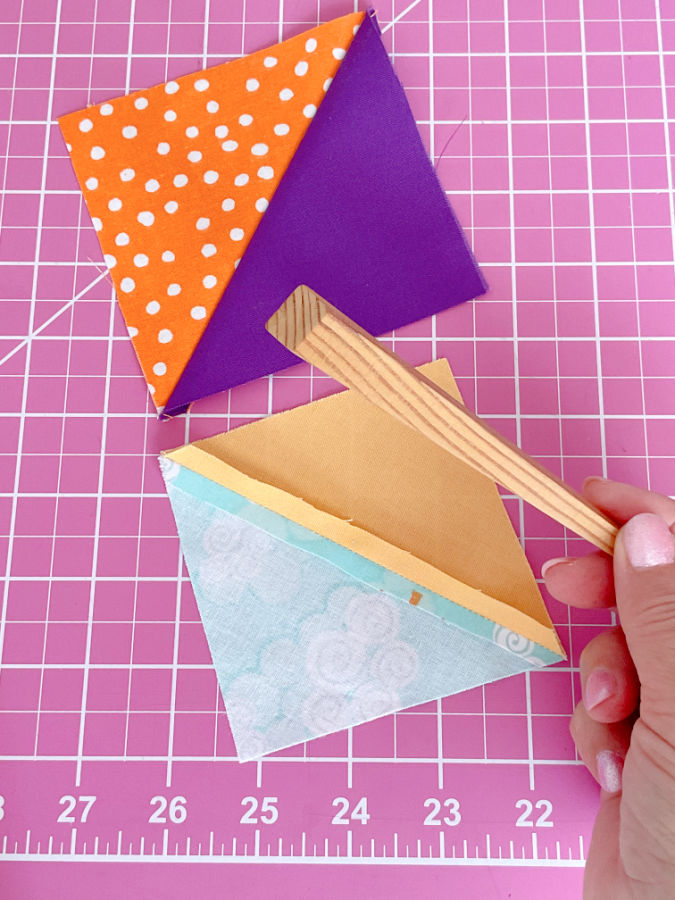
Finger pressing is that quick, no-iron method of pressing or opening a seam before you take it to the ironing board. It helps set the seam direction, reduce bulk, and make piecing easier — especially when you’re chain-sewing or working on small blocks.
Usually, we just run a fingernail along the seam to flatten it, but that can only do so much. After a few seams, your finger gets sore, and the results aren’t consistent. A wooden finger presser solves that problem neatly.
It seems the exact tool I bought long ago (which is in the images) is no longer available but similar tools are:


The tool I use is made of smooth hardwood with a tapered edge that applies just the right amount of pressure. It lets you press seams open or to one side without stretching or distorting the fabric.
I use it constantly — when I’m piecing quilt blocks, pressing curves, or working at my sewing machine and don’t want to get up for the iron every two minutes. The difference is subtle but real: seams lie flatter, and my fingertips stay happy.
✅Related tutorial: Easy Quilting Techniques – Step-by-Step Patchwork Quilt Tutorial
This simple wooden tool is a small upgrade that makes the job easier and far more comfortable.
Watch it in action
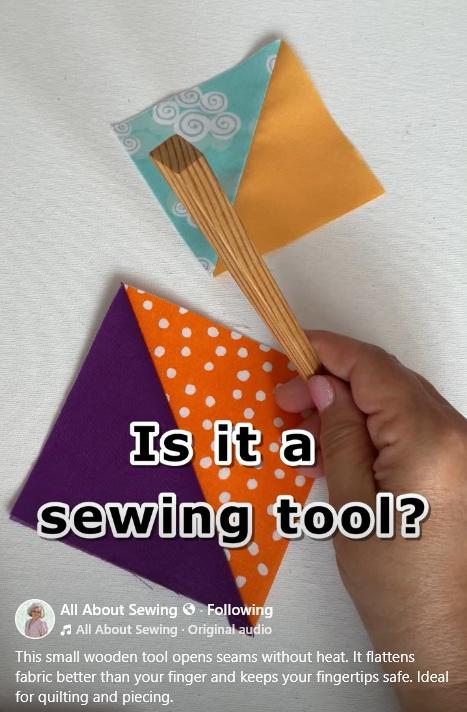
I made a quick Facebook reel to show how this little wooden tool works. It looks simple, but it’s one of those gadgets that instantly makes sewing easier. You can see how I use it to press seams without heat — clean, fast, and no sore fingers afterward.
Wooden Point Turner
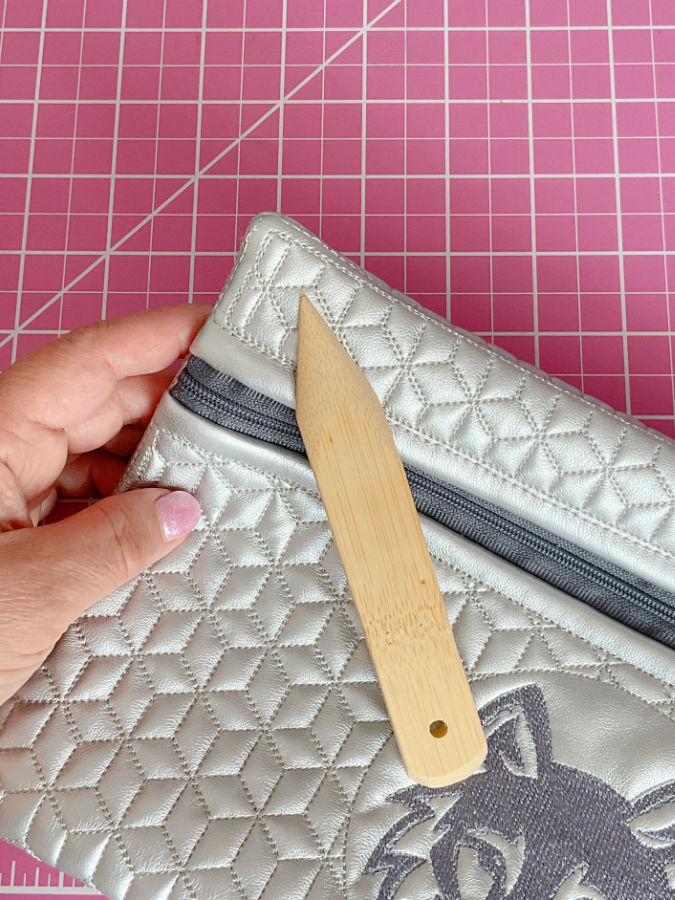
A point turner helps push out and shape corners and curves in fabric—things like collars, pockets, cuffs, pillow corners, or bag flaps. It helps those corners look crisp instead of puffy. When you turn a piece right-side-out, the corner often collapses. The narrow end of this tool reaches into the tip and gently nudges the fabric outward.
The one I have is the Dritz Bamboo Point Turner. The narrow end slips easily into tight corners, and it’s strong enough to give structure without poking through the seam.
✅Related tutorial: How To Make In-The-Hoop Lined Zippered Bags: A Step-By-Step Tutorial, Free Design
Reviewers love this tool — it has hundreds of five-star ratings. People say it gives “sharp, professional-looking corners” and “works better than plastic versions.” Many also mention that it’s comfortable to hold.
The rounded, slanted edge is described as a second feature — it can be used as a finger presser. But honestly, I don’t use it that way. I find that the dedicated wooden finger presser I talked about earlier does a much better job. For me, this tool is a point turner only — and it does that one job perfectly without damaging fabric — exactly what you want from a good point turner.


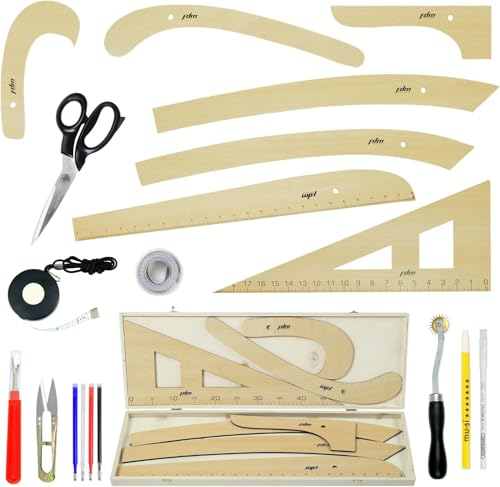
Wooden Sewing Rulers
I’ve been eyeing this wooden ruler set on Amazon, and it looks like a real workhorse for anyone who drafts or adjusts patterns. The reviews are surprisingly good, and people mention that the wood feels solid and smooth — not the flimsy kind of ruler that slides around the table.

The set includes several shapes: French curves, hip and sleeve curves, a straight ruler, and other pattern-making tools for things like armholes, necklines, waistbands, and trouser crotches. In other words, everything you’d need to draw accurate curves and lines while keeping measurements consistent.
According to reviewers, this set works well for both beginners and experienced sewists. Many say it’s easy to handle and comfortable to use because of the smooth edges and the natural feel of wood. A few mention that it helps them draft faster and with fewer mistakes because each curve has a clear, defined shape — no bending or warping like thin plastic templates.
The description also points out that it’s suitable for dressmakers, tailors, quilters, pattern makers, and even collectors who appreciate well-made wooden tools. That makes me comfortable buying it even though I’m not exclusively pattern-making every day.
Some buyers mention giving it as a gift to sewing friends — and honestly, that makes sense. It looks classic and practical, not like another mass-produced plastic set.
I haven’t bought it yet, but it’s on my list. If the reviews are accurate, this might be a great wooden alternative to the usual acrylic rulers — something sturdy, accurate, and long-lasting that feels a little more “workshop” than “classroom.”
Wooden Pattern Weights
I’ve also been eyeing this wooden pattern weight set on Amazon. It doesn’t have reviews yet, but it caught my attention because wooden versions are still rare — and they look much sturdier than what I’ve been using.

Let’s start with the basics. Pattern weights are simply small, heavy objects used to hold fabric and pattern paper in place while you trace or cut. They replace pins and keep fabric flat without stretching or distorting it. If you sew garments or cut slippery fabrics, pattern weights save a lot of frustration (and time).
I’ve been using my stone figurines as makeshift weights — they work fine, but they’re fragile. I’ve broken a few already, and honestly, they weren’t made for the job. That’s why this wooden set looks promising.
According to the description, the weights are made of solid wood with a smooth finish, designed to hold patterns steady while you cut or mark. The set includes four round pieces, which seems like a good number for most small to medium projects. The weight distribution should be even, and the wood finish should prevent slipping without scratching fabric.
The listing describes them as multi-functional — suitable for dressmaking, quilting, and pattern drafting. They’re meant to stay in place while you cut curves or long seams, which is where pins often distort the fabric.
I even found a set of weights that come with an included clapper, but since I already have a good one, I would prefer the weights without:

What I like about the idea of wooden weights is that they’re sturdy but not breakable, and they don’t get cold or brittle like metal ones. If they’re finished well, they’ll last forever and feel comfortable in your hand.
If I end up buying them, I’ll check how heavy they really are and whether the surface is smooth enough for delicate fabrics. For now, they seem like a practical and durable upgrade from my fragile little stone stand-ins.
Wood and sewing tools seem to go together naturally — solid, dependable, and easy to live with.
Wooden Hera Marker
If you’ve only ever used chalk or pens to mark your fabric, the Hera marker is worth a second look. Originally used by Japanese kimono makers, this tool doesn’t leave ink or chalk — it creates a crease in the fabric that you can stitch or press along.
Instead of drawing on your fabric, you use the Hera marker’s thin flat edge to press a shallow line (or crease) that shows up on both sides of the fabric.
That crease becomes a guide: use it to mark hemlines, seam allowances, quilting lines, or fold lines — especially when you don’t want permanent marks.
Because the tool doesn’t deposit pigment or chalk, you avoid staining, ghost marks, or disappearing lines — ideal for lighter fabrics or special‐occasions pieces.
Why I’m Interested in the Wooden Version


I’ve used the plastic Hera marker and it serves me well. But I’ve also found myself drawn toward the idea of a wooden version — partly because I’m trying to swap out more plastic tools in my sewing space.
The wooden version of Hera markers is hand‐sanded and finished with oils or waxes.
✅Related tutorial: Your Guide For Choosing The Best Quilt Marking Pens For Every Project
Choosing the wooden version aligns with my goal of “less plastic” in the sewing room. If it performs well, it’s not just a nice aesthetic—it’s also a useful tool. I may wait a little for the tool to gather some reviews first though
Wooden Seam Allowance Tools.
I recently came across this wooden seam allowance tool set, and I think it’s a clever idea — especially if you often draft, trace, or adjust your own sewing patterns.

So what are these tools for? They help you add or mark seam allowances evenly around a pattern. You place the tool’s edge against the pattern line, insert a pencil or pen into the hole, and then trace around the edge of your pattern. The line you draw becomes your seam allowance — ¼”, ⅜”, ½”, or whatever width the tool is designed for. It’s quick, accurate, and saves you from measuring the same distance again and again.
These are especially handy when:
- You work with patterns that show only stitching lines (common in European or Japanese patterns).
- You draft your own designs and need to add seam allowances consistently.
- You’re adjusting a commercial pattern and don’t want to lose accuracy by guessing seam widths.

I’ve used a plastic version of this type of tool before, and it’s great for speed and precision. The wooden version caught my attention because it looks sturdier and less likely to flex or crack over time. Wood also feels better in the hand — smoother, heavier, and easier to control when tracing around curves.
One reviewer did mention that the wooden tools felt a bit thick, and I can see how that might make it tricky. I’d probably look for a slightly longer graphite to fit better through the holes. But overall, this design makes a lot of sense.
If you do a lot of pattern tracing or like drafting your own patterns, these little wooden guides could save you a lot of time. They turn a repetitive, finicky task into something fast and tidy — and they’re another smart alternative to yet more plastic on the sewing table.
Wooden Shapes for Cutting Appliqués
I have quite a few sets of small wooden shapes — hearts, stars, leaves, animals, flowers — and although they were never meant for sewing, they’ve become my appliqué templates. Most of them are sold as craft ornaments or painting blanks, like these on Amazon, but they work beautifully in the sewing room too.


These wooden cutouts are smooth, sturdy, and reusable. I simply trace around them onto fabric, cut out the shape, and then use it for appliqué. They don’t bend or curl like paper templates, and they keep the same clean outline every time. That makes my appliqués more consistent and saves me from redrawing by hand.
I also like that they come in so many themes — floral, seasonal, geometric, even animal shapes — which means I always have something handy when I want to decorate a quilt block, a tote bag, or a table runner.
Because they’re wood, they don’t slide around much while tracing, which actually helps with accuracy.
They’re inexpensive, last forever, and bring a lot of variety to appliqué projects.
If this post gave you a few new ideas for your sewing room, save it to your sewing Pinterest board before you forget where you saw it and follow me on Pinterest for more tips, tutorials, and inspiration!
latest posts
- What Do You Call a Person Who Sews? I Asked My Readers and Got 1,408 Opinions
- DIY Round Purse: PDF Sewing Pattern and Detailed Instructions
- Mini Wonder Clips By Clover: Useful Sewing Tool Or Just Another Notion?
- Non-Slip Grips For Quilting Rulers: A Small Notion With A Useful Job
- Fabric Eraser for Sewing: What It Removes and When to Use It
- What Is The Best Thread For Sewing Machine Projects? Let’s Find Out!
- Butterfly Quilt Block Tutorial – Foundation Paper Piecing
- How To Sew Quilt Squares So The Corners Match
- Sewing With Fork Pins: How They Help With Pattern Matching, Slippery Fabric, And Seams

I have a lot of those wooden sew tools. I have also made my own. Weights I made with cloth and beans. That Japanese one I never heard of. Will check that out. The ruler set I have in real hard plastic. I like them not changing those. Very interesting article.