7 Essential Tools and Settings for Sewing Denim on a Regular Sewing Machine
Denim is a very common fabric in sewing rooms, but it needs the right tools because it is thick, dense, and often bulky at the seams.
This is true for new denim yardage, old jeans, denim jackets, denim skirts, and fabric scraps from past projects.
Most home sewists are not making jeans or denim jackets from scratch very often. Denim usually appears in more everyday ways. Maybe you want to hem jeans, repair a worn spot, make a tote bag, sew a patch, add pockets to an apron, or turn old jeans into something useful.
A weak needle, dull scissors, wrong thread, or thick seam without support can cause skipped stitches, broken needles, thread nests, and uneven topstitching.
This guide covers seven essentials for sewing denim: needles, thread, presser feet, scissors, seam jumpers, clips, and sewing machine settings. These tools help with new denim yardage, denim repairs, and upcycled jeans projects. Use them as your denim sewing checklist before the first stitch.
If you want this detailed tutorial without ads getting in the way, the printable PDF version is available in my shop to download and keep. No ads, no pop-ups — just the complete guide formatted for easy reading and printing so you can check the essentials before your next denim project.
I also made a Denim Sewing Checklist so you can check your tools and settings. Keep it near the machine when you work with denim hems, thick folds, patches, or upcycled jeans.

#1. Denim Needles
A denim needle is the first tool to use when you sew old jeans, thick denim seams, or sturdy denim fabric.

Denim has a dense weave. It can also have heavy folded areas, especially near hems, pockets, waistbands, and side seams. A universal needle may bend, skip stitches, or break when it reaches those thick spots.
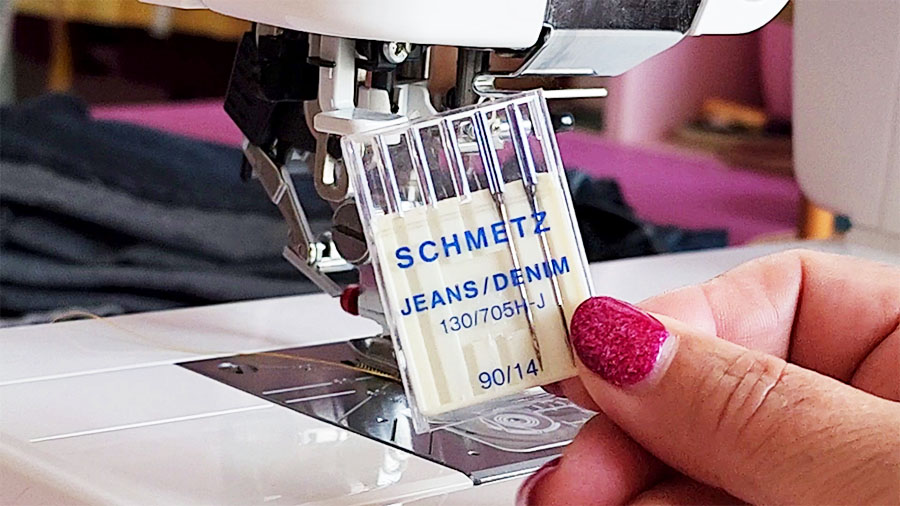
A denim needle, also called a jeans needle, has a stronger shaft and a sharp point. It pierces dense woven fabric more easily than a regular universal needle. This helps the machine form even stitches without extra strain.
For most denim projects, these needle sizes work well:
- 90/14 denim needle for medium-weight denim, soft old jeans, light bags, patches, and simple upcycling projects.
- 100/16 denim needle for heavier denim, thick hems, bag straps, waistbands, and several layers.
- 110/18 denim needle for very heavy denim, but it may not be the best choice for many home denim projects. It needs heavier fabric and thread, and some machines may struggle to sew through heavy denim layers.
Use the smallest needle that sews the fabric well. A larger needle makes a larger hole, and denim does not always hide needle marks. Test the needle on scraps from the same jeans or fabric before you sew the real project.
Old jeans can vary from one area to another. The leg fabric may sew well with a 90/14 needle, while the hem or side seam may need a 100/16 needle. A test sample helps you choose before the project is under the presser foot.
Note: Some of the links on this page are affiliate links. This means I will receive a commission if you order a product through one of my links. I only recommend products I believe in and use myself.
Can you use a universal needle for denim?
A universal needle can work for lightweight denim or chambray-style fabric. It may also work for one thin layer of soft, worn denim.
For most upcycled jeans projects, a denim needle is a better choice. It reduces skipped stitches and lowers the chance of needle breakage, especially where several layers meet.

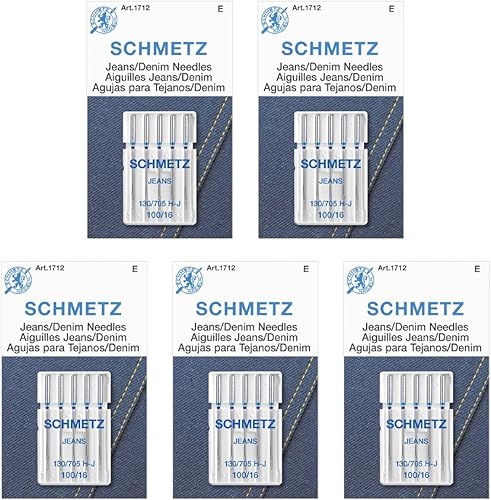
Think of a universal needle as the everyday option. A denim needle is the better match for thick woven fabric, heavy seams, and old jeans.
What about topstitching needles?

A topstitching needle can help when you use thick topstitching thread. It has a larger eye, so heavier thread can pass through with less friction. This can reduce thread shredding and breakage.
Use a topstitching needle when:
- You sew visible stitching on denim.
- You use thicker topstitching thread.
- Your thread keeps breaking.
- Your stitches look uneven during topstitching.


For construction seams, start with a denim needle. For decorative stitching with thicker thread, test a topstitching needle.
Change the needle often
Denim dulls needles faster than lightweight fabrics. Old jeans can be harder on needles because they may have thick thread, worn fibers, lint, and heavy folded seams.
Change the needle if you notice:
- skipped stitches
- uneven stitches
- a dull thudding sound
- thread breakage
- tiny snags in the fabric
- a bent needle
A fresh needle is a small cost compared with a damaged project or a sewing machine repair.
✅ Related tutorials:
Sewing Machine Needle Sizes Explained
How To Choose The Right Sewing Machine Needle
Types of Sewing Machine Needles
Why A Sewing Machine Needle Keeps Breaking
#2. Denim Thread: Special Thread and Regular Thread Options
Thread matters more with denim because the fabric is dense, the seams are thicker, and the stitches often show.

A weak thread can break in the middle of a seam. A thread that is too thick can cause tension trouble. A thread that does not match the job can make topstitching look uneven. Denim is not the place for that mysterious old spool from the back of the drawer.
For most denim projects, you will use one of two thread types: regular all-purpose polyester sewing thread for construction seams and heavier thread for visible topstitching.
Regular All-Purpose Polyester Thread for Denim Seams
Regular all-purpose polyester thread works well for many denim projects. It is relatively strong, easy to find, and works in most home sewing machines.
Regular All-Purpose Polyester Thread for Denim Seams
Regular all-purpose polyester thread works well for many denim projects. It is relatively strong, easy to find, and works in most home sewing machines.
Use all-purpose polyester thread for:
- seams inside denim bags
- denim patches
- repairs
- light and medium denim
- upcycled jeans projects
- seams that will not show much
- projects where thick thread would add too much bulk


Polyester thread has a bit of give, which helps with seams that get use and movement. It is also stronger than many cotton threads of the same size.
For example, if you make a tote bag from old jeans, regular polyester thread may work well for the main seams. You can save the heavier thread for the topstitching where you want the stitches to show.
Denim Thread or Jeans Thread

Denim thread, often called jeans thread, is made for the look of classic jeans topstitching. It is usually thicker than regular sewing thread and often comes in gold, tan, copper, navy, gray, or black.


Use denim thread for:
- visible topstitching
- jean hems
- pocket edges
- bag straps
- patch edges
- decorative seams
- areas where you want a stronger stitch line
This thread gives denim projects that familiar store-bought jeans look. It can make an upcycled project look more finished, especially if you reuse pockets, waistbands, or hems from old jeans.
But thicker thread needs a little extra care. It may not run well through a small needle. It may also need a longer stitch length and a tension test.
Topstitching Thread for Denim

Topstitching thread is another good choice for visible denim stitching. It is thicker and more noticeable than regular thread. It creates bold stitch lines on pockets, seams, hems, handles, and patches.

Use topstitching thread when the stitches are part of the design. A row of gold thread on dark denim can make a plain patch look intentional instead of accidental.
For best results, use a topstitching needle or a larger denim needle. The eye of the needle needs enough room for the thicker thread to pass through smoothly.
Should You Use Heavy Thread in the Bobbin?
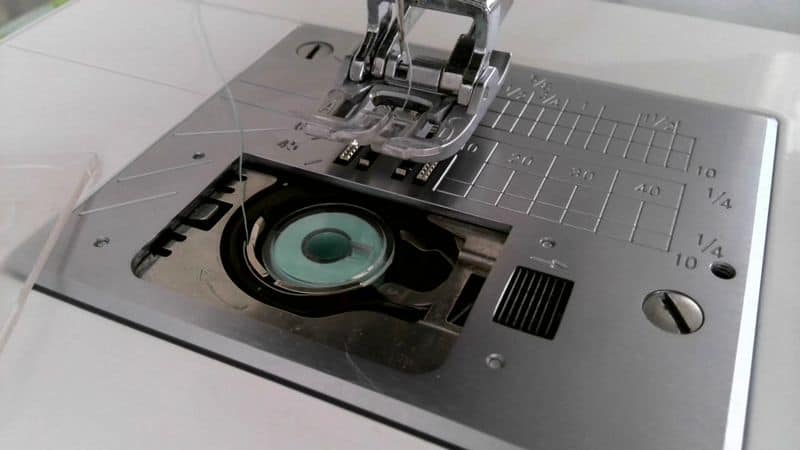
Many home sewing machines work better with regular thread in the bobbin and heavier thread only on top.
This setup often gives better tension and fewer thread nests. The top side still shows the heavier decorative stitch, while the bobbin side stays less bulky.
A good setup to test:
- Top thread: denim thread or topstitching thread
- Bobbin thread: regular all-purpose polyester thread
- Needle: topstitching needle or denim needle
- Stitch length: 3.5 mm to 4 mm for visible topstitching
Some machines can use heavy thread in the bobbin, but test first.
Cotton Thread, Polyester Thread, or Heavy-Duty Thread?
Cotton thread can work for some denim projects, especially decorative stitching or quilting-style projects. But for seams that need strength, polyester thread is usually the safer choice.
Heavy-duty thread sounds useful, but it can be too thick for some home machines. It may cause skipped stitches, tension loops, or thread breakage if the needle and tension do not match it.
For most denim sewing, this is a better plan:
- Use all-purpose polyester thread for construction seams.
- Use denim thread or topstitching thread for visible stitching.
- Use regular thread in the bobbin unless your test sample proves otherwise.
Match the Needle to the Thread
Thicker thread needs a needle with a larger eye. If the needle eye is too small, the thread rubs too much as it passes through. This can cause shredding, breaking, or uneven stitches.
Try these combinations:
- Regular polyester thread: 90/14 denim needle
- Regular polyester thread with heavier denim: 100/16 denim needle
- Denim thread: 100/16 denim needle or topstitching needle
- Topstitching thread: topstitching needle, often size 90/14 or 100/16
Always test the thread and needle together. Denim projects often include different thicknesses in one piece. A sample made from the same fabric gives better answers than a guess.
Choose Thread Color With a Plan
Thread color changes the whole look of denim stitching.
Use matching thread when you want seams to blend in. This works well for repairs, patching, and projects where the shape matters more than the stitch lines.
Use contrast thread when you want the stitching to show. Gold, tan, copper, rust, gray, and white can look good on denim, but the best choice depends on the denim color.
For upcycled jeans, try to match the existing topstitching if you want the new seams to blend with the old details. If the jeans already have copper topstitching, a similar thread color can help a new pocket, patch, or hem look like it belongs.
✅ Related tutorials:
Sewing thread types and uses
Sewing thread sizes and how to choose
All About Topstitching Thread
Reasons Your Sewing Machine Thread Keeps Breaking
#3. Denim Presser Feet: All-Purpose Foot, Bi-Level Foot, Walking Foot, Gliding Foot, and Roller Foot
The right presser foot helps denim move through the machine with fewer skipped stitches, uneven seams, and fabric layers that shift out of place.
You do not need a huge presser foot collection to sew denim. But a few feet are especially helpful, depending on the project. A simple repair may only need the all-purpose foot. A thick tote bag may sew better with a walking foot. A project with drag or surface texture may need a gliding foot or roller foot.
The best choice depends on the denim weight, the number of layers, and the surface of the project.
All-Purpose Foot for Basic Denim Sewing
The all-purpose foot is the standard presser foot that comes with most sewing machines. It works well for many denim tasks, especially when the fabric is not too thick.
Use an all-purpose foot for:
- medium-weight denim
- straight seams
- simple patches
- basic repairs
- light upcycling projects
- single or double layers of denim
This foot is a good starting point. If the denim feeds evenly and the stitches look balanced, you may not need to switch feet.
But take a closer look at your all-purpose foot. Some all-purpose feet have a small black button on the side. It is easy to miss. It may look like a tiny decoration, a screw, or a mystery part added to confuse peaceful sewists.
That black button is a leveling button. It helps the presser foot stay level when you sew over a bulky seam. This is very useful for denim.

When the front of the presser foot reaches a thick denim seam, the foot can tilt upward. The back of the foot stays lower, and the front climbs onto the bulky area. This uneven position can cause short stitches, skipped stitches, or fabric that does not move well.
The black button helps raise the back of the foot so the presser foot stays more level as it crosses the thick area. This gives the feed dogs better contact with the fabric and helps the stitches stay more even.
To use the black button:
- Sew slowly as you approach the thick denim seam.
- Stop when the front edge of the presser foot reaches the bulky area.
- Raise the presser foot.
- Press the black button.
- Lower the presser foot while you hold the button in place.
- Keep sewing over the thick seam.
- After the foot passes the bulky section, the button releases and the foot returns to its normal position.
This little feature is helpful when you sew across jean hems, side seams, pocket corners, waistbands, or folded denim layers.
Not every presser foot has this button. The position can also vary by machine brand. On some machines it is on the right side of the foot, while on others it may be on the left.
For a closer look at this feature, read my tutorial The Hidden Features of Your Sewing Machine: What’s This Button For?.
Less-Known Denim Helper: Bi-Level Or Compensating Foot

A bi-level foot, also called a compensating foot, is a very useful denim tool that many home sewists do not know about. It is made for stitching along a raised edge or seam. One side of the foot rides on the higher layer, while the other side follows the lower layer.

This helps keep topstitching an even distance from a folded edge, thick seam, pocket edge, or bag strap.
This is especially useful for denim because denim projects often have raised areas: jeans hems, pockets, waistbands, belt loops, patches, and bag handles.

The difference between the two levels on a bi-level foot is small, usually about 1/16 inch. But that small height change matters when you sew along a folded edge. It can be difficult to keep an accurate stitch line when the fabric sits at two heights under the presser foot. The bi-level foot solves this problem.
This is different from a walking foot. A walking foot helps feed layers evenly. A bi-level or compensating foot helps the stitch line stay even beside a raised edge.
Check your machine type before buying one. Presser feet can be low-shank, high-shank, snap-on, or screw-on. Also check whether you need a left or right bi-level foot. The raised guide needs to sit on the correct side of your seam.


Walking Foot for Thick Layers and Even Feeding

A walking foot is one of the most useful presser feet for denim. It has an upper feed system that helps move the top layer of fabric along with the bottom layer.
This matters because denim projects often have several layers. A denim tote bag might include outer denim, lining, interfacing, and batting. A regular foot may push the top layer forward while the feed dogs move the bottom layer. The result can be a seam that starts neatly and ends with one layer longer than the other.
A walking foot helps reduce that shifting.
Use a walking foot for:
- denim bags
- denim quilts
- thick patches
- fabric baskets
- chair cushions
- long seams
- layered hems
- stretch denim
- upcycled projects with lining or interfacing
A walking foot is also helpful for topstitching. It helps the layers move at the same pace, so the stitch line looks more even.
I have a full tutorial called Walking Foot Attachment For A Sewing Machine: What It Is And Why To Use It where I explain how this foot works and why it helps with layered projects.
I also have a separate tutorial, How to Use a Walking Foot, with practical tips for different sewing projects. The walking foot is also called an even feed foot, so that term may appear when you shop for one.
A walking foot is useful, but it does not remove all denim bulk. You still need the right needle, thread, stitch length, and slow speed over thick seams. It helps feed the layers evenly. It does not give your home machine superpowers, although that would be a very nice presser foot feature.
Gliding Foot for Bulky Denim and Thick Hems
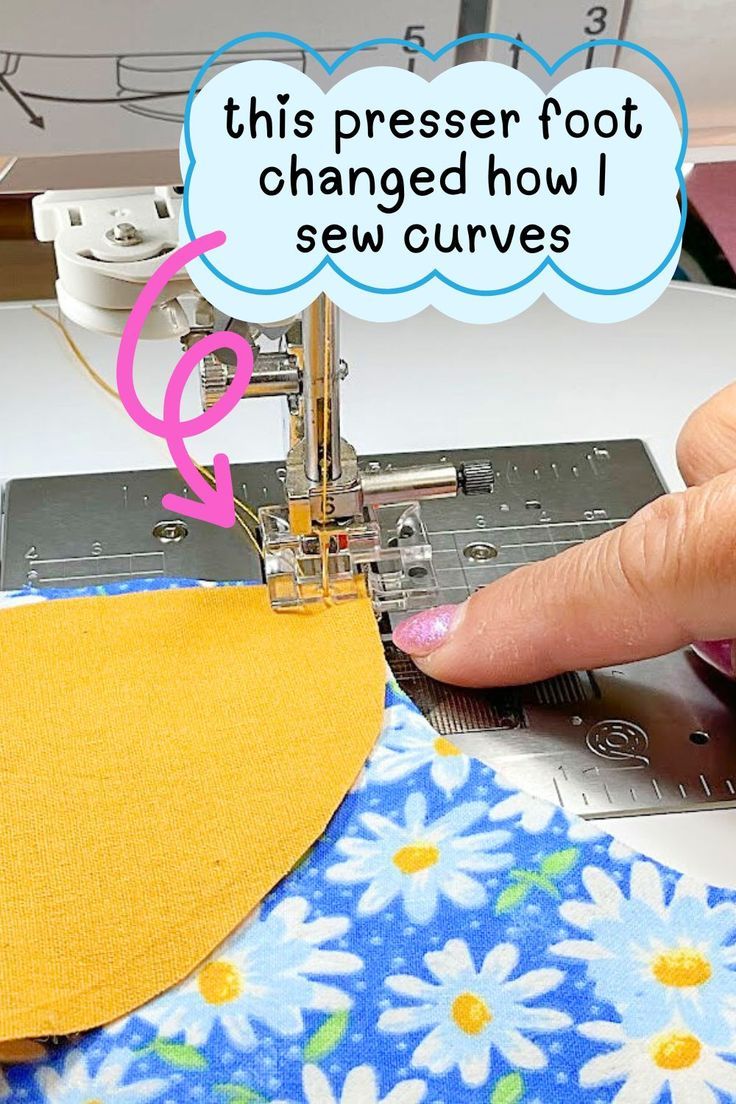
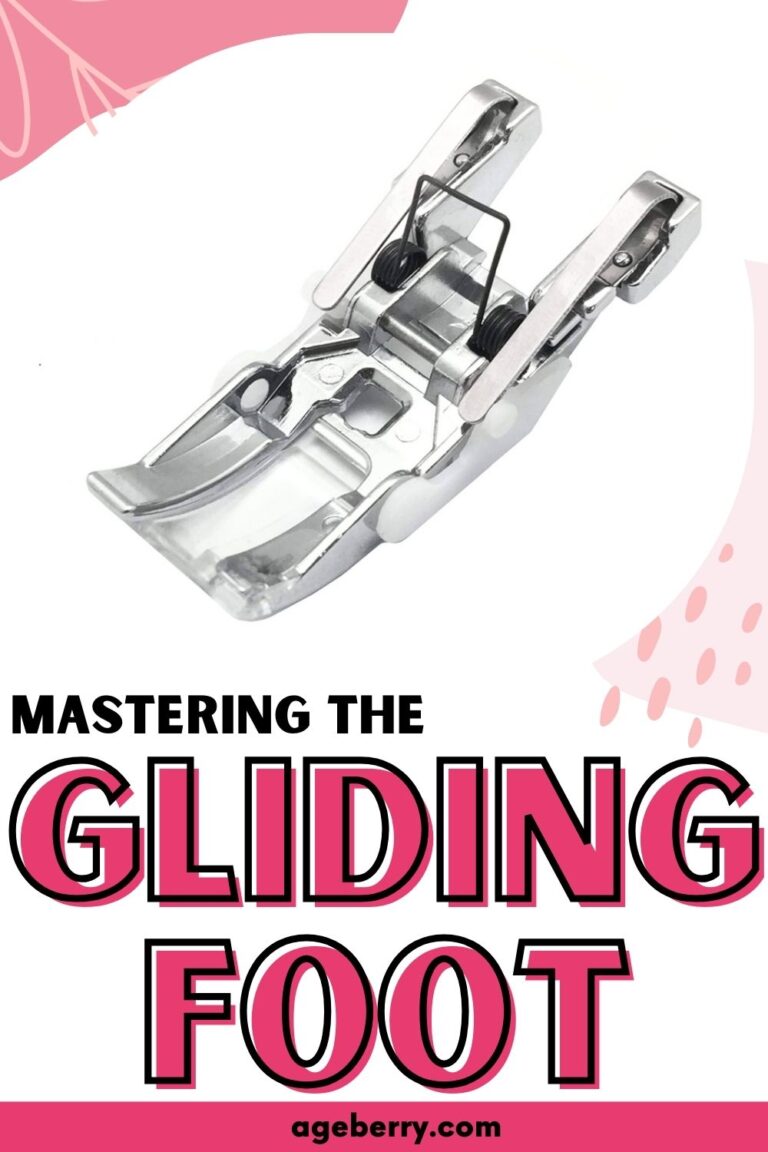
A gliding foot is another helpful option for denim, especially when the project has bulky areas. This foot has a special shape and smooth underside that help it slide over thick seams, raised areas, and uneven fabric layers.

Use a gliding foot for:
- thick denim seams
- bulky hems
- jeans hems
- denim repairs
- denim mixed with leather or vinyl
- bags with thick straps
- projects with raised seams or heavy folded areas
The gliding foot can be especially useful when sewing over old jean seams. Upcycled jeans are not flat yardage. They often include thick hems, heavy side seams, pocket edges, and folded areas. A gliding foot helps the fabric move under the needle with less resistance.

I have a detailed tutorial on this foot here:Mastering the Gliding Presser Foot. In that guide, I show how the gliding foot helps with thick fabrics such as denim, leather, vinyl, and sherpa. My tutorial also explains how to attach the foot and adjust stitch settings for bulky materials.

Roller Foot for Denim Mixed With Tricky Fabrics
A roller foot is not always needed for plain denim, but it can be useful when denim is combined with fabrics that do not slide easily under a regular presser foot.

The roller foot has small rollers underneath. These rollers help the foot travel over fabric with less sticking, dragging, or slipping.
Use a roller foot for:
- denim with vinyl
- denim with faux leather
- denim with leather
- coated denim
- textured denim
- denim bags with mixed materials
- thick seams that need smoother movement under the foot
For example, if you make an upcycled denim bag with faux leather handles or vinyl accents, a roller foot may help the layers move more smoothly. A regular presser foot can sometimes stick to vinyl or drag across textured surfaces. The roller foot gives those materials a better chance to feed evenly.
I have a full tutorial called Must-Have Presser Foot for Sewing Challenging Fabrics: The Roller Foot. In that post, I explain how the roller foot helps with fabrics such as vinyl, leather, fur, velvet, and stretchy knits. It is a helpful companion article for anyone who wants to combine denim with harder-to-feed materials.
How to Change Presser Feet Safely
If you switch between an all-purpose foot, walking foot, gliding foot, and roller foot, take a minute to attach each one correctly. Some presser feet snap on. Others need a screw. A walking foot usually takes a little more attention because it must connect to the needle clamp area so the upper feed can move properly.
Before changing any presser foot, turn off the machine or use the lock button if your machine has one. It only takes one bump of the foot pedal to make the needle move at the worst possible moment.
For step-by-step help, read my tutorial How to Change a Presser Foot on Your Sewing Machine. It explains snap-on feet, screw-on feet, release buttons, and common mistakes to avoid.
Which Presser Foot Should You Use for Denim?
Here is the simple version.
Use the all-purpose foot for basic seams, medium denim, and simple repairs.
Use the bi-level foot when you need even stitching along a folded denim edge, raised seam, hem, binding, or patch edge.
Use the walking foot when denim layers shift, when you sew long seams, or when the project has lining, batting, interfacing, or stretch denim.
Use the gliding foot for bulky denim seams, jeans hems, thick folded areas, and heavy upcycled pieces.
Use the roller foot when denim is paired with vinyl, leather, faux leather, coated fabric, or other surfaces that do not feed well under a regular presser foot.
A test sample will tell you more than guessing. Try the presser foot on scraps from the same project, with the same number of layers. Test straight seams, topstitching, thick seam crossings, and corners before sewing the real piece.
#4. Strong Scissors for Denim
Denim needs scissors that can cut thick fabric without chewing the edge or tiring your hand after three inches.
This matters even more with upcycled jeans. You may need to cut through flat denim, folded hems, side seams, pockets, waistbands, and areas with several layers. Weak scissors can slip, crush the fabric, or leave jagged edges that make the next sewing step harder.
A good pair of fabric scissors should cut denim smoothly from the base of the blades to the tips. If the scissors only cut near the handle but fold the fabric near the tip, they are not the best choice for denim.
Use Sharp Fabric Scissors Only for Fabric
For denim, use strong dressmaking shears with long blades. The longer blade helps you make smoother cuts, especially when you cut jean legs into flat panels for bags, patches, or other upcycling projects.
Good brands to consider include:
- Kai
- Fiskars
- Guggenhein
- Weiss
The best scissors are the ones that feel good in your hand and cut your fabric without strain. Some sewists love heavy scissors. Others prefer lighter ones because hand fatigue can become a problem during long cutting sessions.
My Favorite Scissors for Denim
My favorite scissors for denim are not a famous traditional sewing brand. The Amazon listing calls them Proshear 10-inch heavy-duty fabric scissors, but in my sewing room, I think of them as my no-name scissors.

They cut denim very well for me, and that matters more than the name. A pair of scissors can look impressive on the table, but denim will tell you very quickly if the blades are up to the job.
I made a short Facebook reel where I cut through more than 10 layers of denim with these scissors. That is a serious denim stack. Most projects do not require cutting through that many layers, but it shows what strong scissors can do.
You can watch the reel here:
https://www.facebook.com/reel/1801320931241851

For accurate project cutting, I still prefer fewer layers. A pair of scissors may be able to cut a thick stack, but pattern pieces, patches, bag parts, and pocket shapes come out better when the denim lies flat and the layers are easy to control.
Join the Sewing Scissors Discussion on My Facebook Page
Sewing scissors bring out strong opinions, and that is part of the fun. Some sewists love heavy metal shears. Some prefer lighter scissors because they are easier on the hand. Some choose well-known brands. Others care most about how the scissors cut real fabric on a real sewing table.
We had a big discussion about sewing scissors on my Facebook page. Opinions were divided, which is normal with sewing tools. Hand size, fabric type, budget, and cutting habits all matter.
You can read the discussion here
If you already have scissors you love, test them on denim scraps before buying another pair. If they cut smoothly, feel comfortable, and do not crush the fabric, they may be enough. If they struggle with denim, a stronger pair is worth adding to your sewing tools.
#5. Seam Jumper for Sewing Over Thick Denim Seams
Denim projects often have sudden changes in thickness. One moment you sew through two flat layers. A few stitches later, the presser foot reaches a jeans hem, pocket corner, waistband, belt loop, or bag strap. Now the machine has to sew uphill.
That uneven height can cause trouble. The presser foot tilts. The feed dogs lose steady contact with the fabric. The stitch length can get shorter. The needle may deflect. The machine may skip stitches, stall, or make that sound we all recognize as “please stop doing this to me.”
A seam jumper helps by keeping the presser foot level as it crosses the thick area.
What Is a Seam Jumper?
A seam jumper is a small tool that sits behind or in front of the presser foot to balance the foot over a thick seam. You may also see it called a hump jumper, bulky seam aid, or Jean-a-ma-jig.

Different brands have different shapes, but the idea is the same. The tool fills the empty space under the presser foot so the foot stays level instead of tilting sharply.
I mention this tool in my post about useful sewing tools, and I show it in action in my jeans hemming tutorial. It also belongs with my topstitching tips because straight, even topstitching becomes much easier when the presser foot stays level.
✅ Related tutorials:
How to Easily Hem Jeans at Home: A Step-by-Step Tutorial
How To Topstitch | 17 Topstitching Tips
How to Use a Seam Jumper on Denim
Sew slowly as you approach the thick seam. Stop before the presser foot starts to tilt too much.
I have a short YouTube video on using the seam jumper – check it out here.

Keep the needle down in the fabric if possible. Raise the presser foot. Slide the seam jumper behind the presser foot, close to the back edge of the foot. Lower the presser foot again.
The back of the foot should now sit higher, so the foot looks more level.
Sew slowly over the bulky seam. Use the handwheel if the area is very thick. This gives you more control and helps you feel if the needle meets too much resistance.
Once the presser foot is on top of the thick area, remove the seam jumper from behind the foot. If the foot needs help as it comes down from the seam, place the seam jumper in front of the foot and sew until the foot returns to the normal fabric level.
It may feel awkward the first time. Practice on a denim scrap with a folded seam. After a few tries, the motion becomes simple.
Seam Jumper or Black Button: Which One Should You Use?
Use the black button if your presser foot has one and the thick area is not too high.
Use a seam jumper when the bulky seam is taller, wider, or more difficult to cross.
Use both if needed. The black button can help the presser foot start level, and the seam jumper can support the foot as it moves across a longer thick area.
The goal is not to force the machine through the seam. The goal is to give the presser foot a level path so the feed dogs can move the fabric evenly.
#6. Clips for Denim Layers
Clips hold fabric from the outside edge. That makes them helpful for bulky seams because they do not distort the fabric the way a pin can.

A pin has to pierce through the layers. If the denim is thick, the pin may bend or shift the fabric out of place. A clip squeezes the layers together from the edge, so the fabric stays flatter.
This is especially helpful for bag making. Denim bags often include outer fabric, lining, interfacing, straps, etc. Clips can hold those layers together while you sew around the top edge or attach handles.
For more details, see my post Sewing Clips vs. Pins | Which To Choose?. That tutorial explains when clips are better than pins and compares different types of sewing clips.
When Pins Are Still Useful
Clips are wonderful for denim edges, but pins still have a place.
Pins can mark points, match seams, or hold areas where clips cannot reach. For example, if you need to match two pocket placement marks in the middle of a denim panel, a pin may be more useful than a clip.
Use strong pins if you pin denim. Fine pins are not the right choice here. They can bend in thick denim, and they may not hold heavy layers well.
A good rule is simple: use clips for edges and bulky layers; use pins for precise marks and places clips cannot reach.
#7. Sewing Machine Settings for Denim
A regular sewing machine can sew many denim projects, but the settings need to match the fabric thickness, thread, needle, and seam type.
A few machine adjustments can help the stitches look better and reduce problems like skipped stitches, thread loops, and broken needles.
Start With a Denim Test Sample
Make a test sample before you sew the real project. Use the same denim and the same number of layers.
This matters because one flat scrap does not tell the whole story. If the project has four layers of denim plus a folded seam, the test sample should copy that thickness.
Check both sides of the stitching. The top side may look fine while the underside has loops or uneven tension. Test the needle, thread, stitch length, and presser foot before the project is under the needle.
Use a Longer Stitch Length
Denim usually needs a longer stitch than cotton.
- For regular seams, try a stitch length around 3 mm.
- For visible topstitching, try 3.5 mm to 4 mm.
- For basting, use 4 mm to 5 mm.
Short stitches can look crowded on denim. They also put needle holes close together, which is not ideal for thick woven fabric. A longer stitch gives denim seams a better appearance, especially when you use topstitching thread.
For more details, read my tutorial: What is the stitch length and how to adjust it for different fabrics – a sewing tutorial.
Choose the Right Stitch
For most denim seams, use a straight stitch.

A straight stitch works well for seams, hems, patches, repairs, and topstitching. It is the main stitch you will use for denim. If you want a deeper explanation of this basic stitch, read my post Types of Sewing Machine Stitches: Unraveling the Mysteries of the Straight Stitch.
Use a zigzag stitch when you need to finish raw denim edges or cover a wider repair area. Denim frays after cutting, so a zigzag stitch can help control the edge if you do not use a serger. I explain this stitch in detail here: Mastering the Zigzag Stitch On A Sewing Machine.
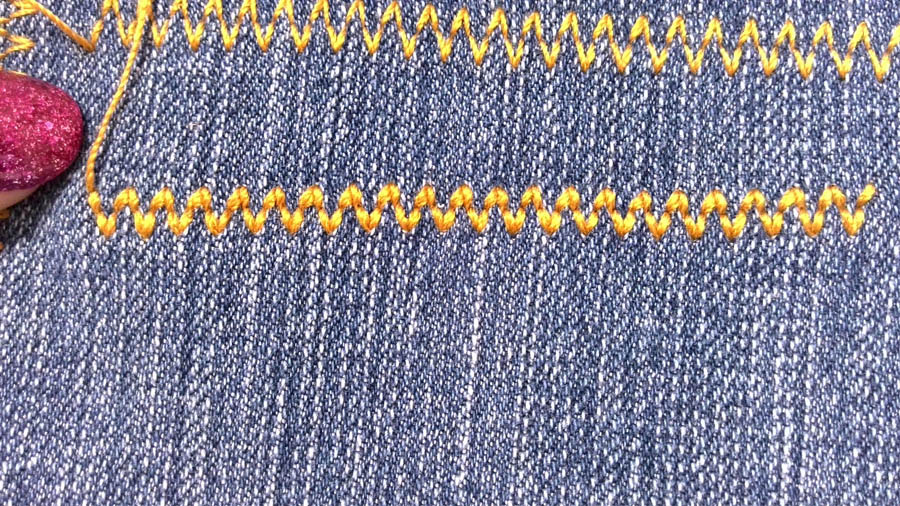
For stretch denim, test a narrow zigzag or stretch stitch. Stretch denim often contains spandex, so some seams need a little movement. A regular straight stitch can break on seams that stretch. You can read more in my post Types Of Stretch Stitches On A Sewing Machine And When To Use Them.
Adjust Thread Tension After Testing
There is no single tension number that works for every denim project. The right setting depends on your fabric, thread, needle, and machine.
Start with your usual tension setting. Sew a test seam and check both sides.
If you see loops on the underside, the upper tension may be too loose. If the bobbin thread pulls to the top, the upper tension may be too tight.
Topstitching thread may need extra testing because thicker thread changes the stitch balance. Adjust the tension a little at a time and test again.
For a full explanation, read Sewing Machine Tension Adjustment. If your stitches still look wrong, my guide Most Common Sewing Machine Tension Problems (+ Solutions) can help you find the cause.
Slow Down Over Thick Areas
Sew flat denim seams at a moderate speed. Slow down at bulky seams, pocket corners, hems, strap ends, and waistbands.
Thick areas give the needle less room for error. If you sew too fast over a raised seam, the needle can bend, hit the needle plate, or break.
For very thick spots, use the handwheel. Turn it toward you and make one stitch at a time. If the handwheel feels hard to turn, stop and check the fabric layers, needle, and presser foot position.
Do not pull the denim from behind the presser foot. Guide the fabric and let the feed dogs move it.
Adjust Presser Foot Pressure If Your Machine Has That Option
Some machines allow you to adjust presser foot pressure. This setting controls how firmly the presser foot presses on the fabric.
If the denim drags under the foot, reduce the pressure slightly.
If the fabric slips or does not feed evenly, increase the pressure slightly.
Not every machine has this option. If yours does not, use the right presser foot instead. A walking foot, gliding foot, roller foot, seam jumper, or black leveling button can help with thick denim areas.
Remove Lint After Sewing Denim
Denim can leave lint inside the machine, especially when you sew old jeans, frayed edges, or heavy thread.
After a denim project, brush lint from the bobbin area, feed dogs, and needle plate area. Follow your machine manual. Do not blow lint into the machine because that can push lint deeper inside.
This small maintenance step helps prevent stitch problems later.
I have a full guide here: Sewing Machine Basics: Simple Maintenance Tips Every Sewist Should Know
This was a long article! Did you find it helpful? If so, save this pin (see below) on your sewing board so you can come to this tutorial later when you are ready, and follow me on Pinterest for more tips, tutorials, and inspiration!


latest posts
- 10 Easy-to-Miss Features on Sewing Supplies You Should Be Using
- Twin Needle Sewing: My First Try Was a Mess, But Here’s What Worked
- 10 Rules That Made Me a Better Sewist
- How to Make a Lightweight Summer Neck Scarf with a Lettuce Hem
- What Sewists Hate About Sewing: Common Complaints and Practical Fixes
- Knit Presser Foot: How It Works, How to Use It, and My Sewing Tests
- How to Sew Neat Mitered Corners at Acute Angles
- Sewing Machine Needle Organization: A Clever System I Tried
- DIY Car Armrest Organizer: Sewing Tutorial