
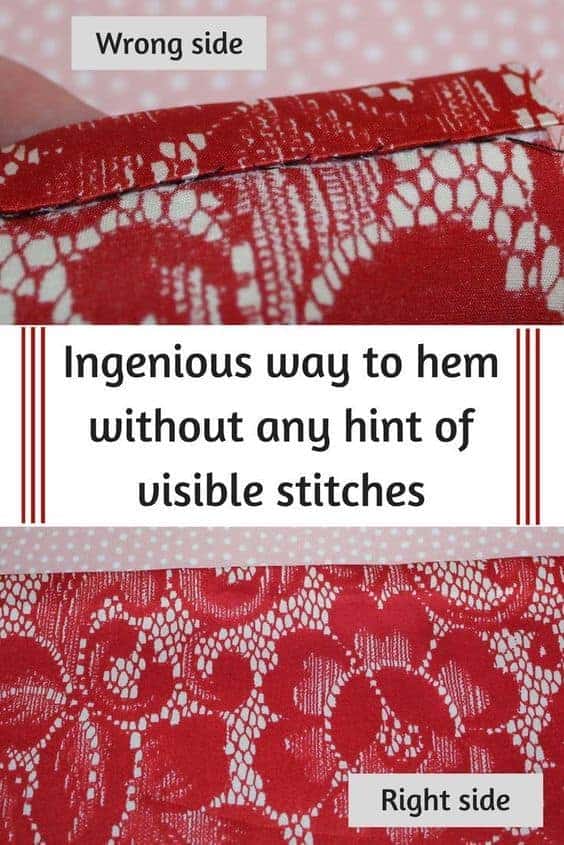
Invisible Stitch by Hand: A Couture Sewing Technique for Silk Garments
In this tutorial, I am going to show you how to sew an invisible stitch, also called a blind stitch, for hemming silk garments. This hand-sewing method keeps hems secure without any visible stitches on the front, making it a great choice for delicate fabrics.
The invisible stitch is considered a couture sewing technique because it follows the principles of high-end garment construction. This technique creates a hem that is completely invisible on the outside of the fabric, which is essential for luxury garments made from delicate materials like silk.
Machine-sewn hems can sometimes look too harsh on silk, leaving a visible stitch line that doesn’t suit the softness of the fabric. The invisible stitch blends right in and create a smooth, seamless finish. It works best for straight or slightly curved hems on garments like silk blouses, skirts, or dresses.
Since this technique is done by hand, it takes a little more time, but the results are worth it. A beautifully finished hem can make all the difference in a silk garment, keeping the elegance of the fabric intact.
I have to warn you that this would not work well immediately without practice, so make a test sample first on scrap fabric.
If you want to remember this article for the invisible hem on silk, please save the pin below and come back whenever you need to refer to the information!
Step 1. Prepare the Hemline
Before you start sewing, check that your hemline is perfectly straight. If the hemline is uneven, the stitches may pull in different directions, creating a visible ripple or distortion in the fabric.
For extra accuracy, mark the hemline with tailor’s chalk or a disappearing fabric marker before trimming.
If you need tips on cutting fabric straight, check out my tutorial 8 simple ways to cut fabric perfectly straight. A precise cut will make the hemming process much easier and help achieve that couture-quality finish.
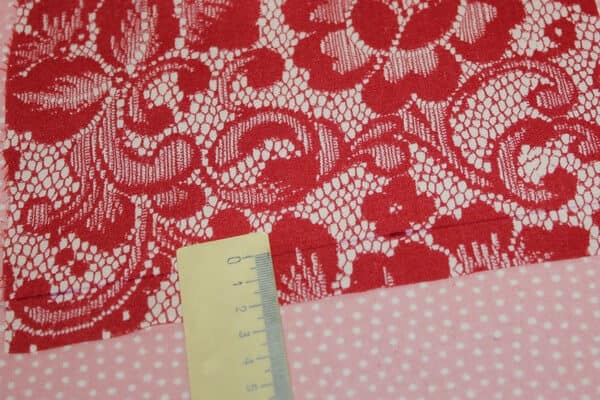
Step 2. Mark the Foldline
Mark a straight line 6/8 inch (about 2 cm) from the fabric edge. A precise marking will help keep the hem consistent.
For accuracy, use tailor’s chalk, or a disappearing fabric marker.

To keep the line perfectly straight, use a ruler or a sewing gauge. If the fabric is delicate or prone to shifting, place it on a flat surface and hold it steady with fabric weights while marking.
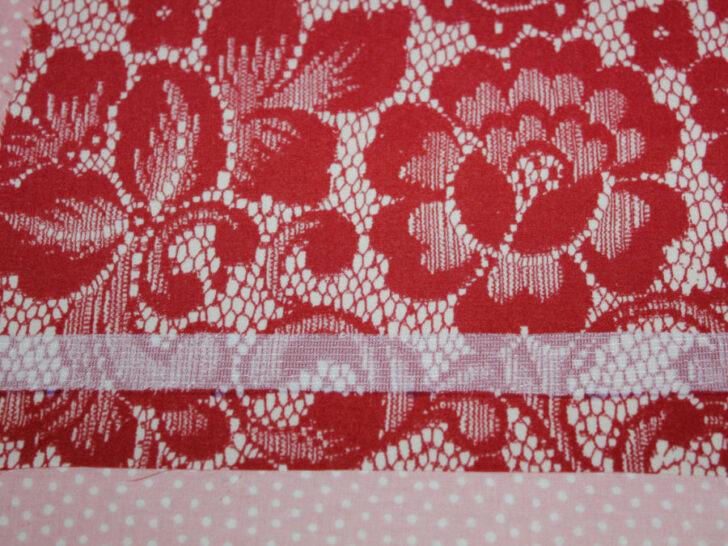
Step 3. Apply Fusible Webbing
Use the thinnest fusible webbing, 1.5 cm (about ⅝ inch) wide, to help stabilize the hem. Cut a strip that is 1.5 cm wide and the same length as the hem. Place the strip just above the line you marked in Step 2, with the bottom edge of the webbing aligning with the line.
Press it in place with an iron on low heat without steam to protect delicate fabrics like silk. Avoid high heat, which can damage the fabric. Make sure the interfacing is completely fused and does not come apart from the fabric. If it doesn’t adhere properly, go over it again with the iron, applying even pressure.
✅ Related tutorial: How To Use Fusible Interfacing (Video + Tips And Tricks)
Note: Some of the links on this page are affiliate links. This means I will receive a commission if you order a product through one of my links. I only recommend products I believe in and use myself.
A Few Notes on Fusible Webbing:
- Ready-made fusible tapes are available, but I prefer cutting my own from lightweight fusible interfacing.
- Regular fusible tape is too stiff for silk, so I always use this Pellon fusible interfacing, which is lightweight and flexible.
- You can also use knit stay tape, but from my experience, it doesn’t fuse very well to silk.

✅ Related tutorial: Knit Stay Tape | Why And How To Use It
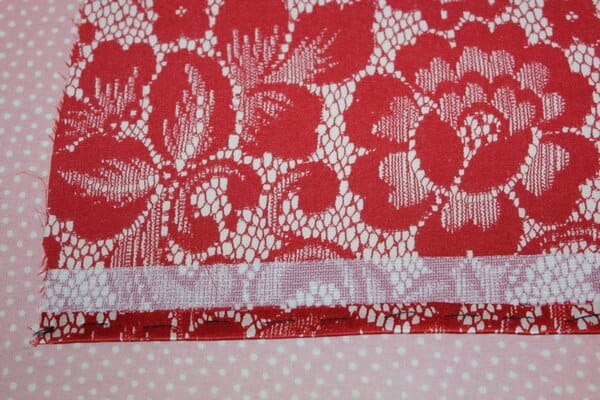
Step 4. Fold, Baste, and Press the Hem
First, fold the fabric edge up to the bottom line of the fusible tape. Baste the fold by hand with loose stitches to keep it in place, then press with an iron on low heat.
✅ Related tutorial: Basting Stitch: Why, When And How To Baste In Sewing
Next, fold the hem again, this time up to the upper line of the fusible tape. This forms the final hem. You can use very thin, sharp pins to hold the fold, but be sure to use pins designed for delicate silk fabric to avoid snagging.
Once the second fold is in place, baste again by hand and press carefully.
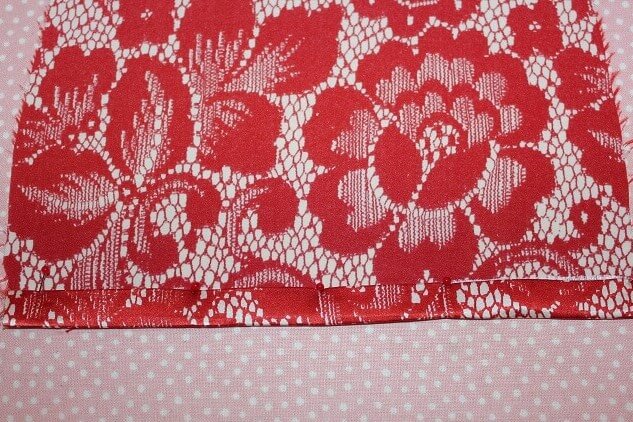
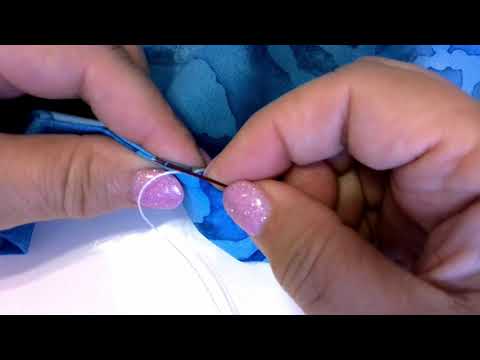
Step 5. Sew the Hem with Invisible Stitches
Now it’s time to sew the hem by hand using invisible stitches. Thread a fine, sharp needle with silk or fine cotton thread in a matching color.
- Insert the needle into the fold of the hem and take a tiny stitch inside the fold. This hides the thread within the fabric.
- Next, insert the needle only into the fusible interfacing and not the silk fabric itself. Make sure not to pierce the silk fabric. This helps secure the hem without any stitches showing on the right side.
Repeat these two steps, spacing the stitches about ¼ inch (6 mm) apart. Work slowly to ensure the stitches remain hidden and do not catch any threads from the silk.
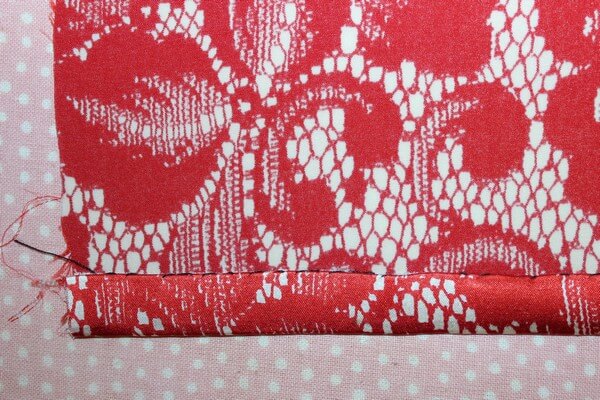
Take out the basting thread and press.
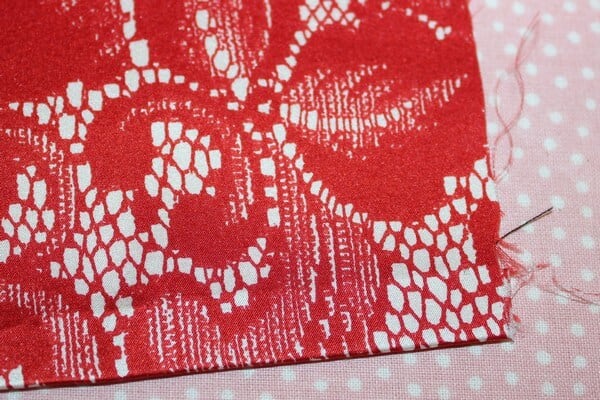
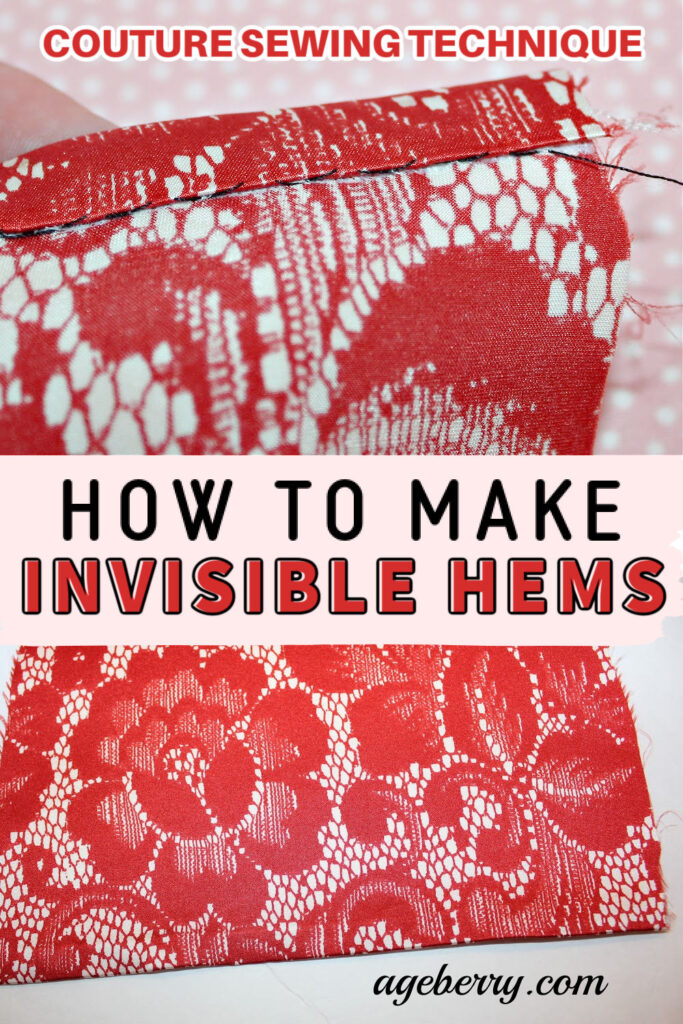
As you can see in the images above, the hemline is clean, without a hint of black thread stitches (I used the black thread just for this tutorial for you to see it clearly).
Tips for Sewing an Invisible Stitch by Hand
Use High-Quality Thread
Always pay attention to the quality of the thread and use strong threads, so you’ll never have an invisible stitch come out because of a broken thread.
You want to choose a thread that’s strong enough to hold the seam closed but isn’t thicker than the fabric. It can be difficult to find an inexpensive, good-quality thread. Thankfully, Amazon’s excellent return policy helps! Just test the thread, and if it’s not good enough, you can simply return it!


Match Thread Color
Choose a thread that matches the project’s fabric color. If you can’t match the color perfectly, pick a thread that is a shade darker than the fabric.
✅ Related tutorial: Sewing thread types and uses
Always Use A Sharp Needle
The goal is to avoid unnecessary puncture marks, so never use a blunt needle.
Before you begin sewing, check the needle to make sure it’s thin enough for the fabric. You also want the needle eye to be small enough that it doesn’t leave large punctures in the fabric.
Needles cost very little and will last a long time when sewing by hand, so it’s better to use a new needle than a blunt one.
Pro Tip: Invest in good quality brand-name needles.

✅ Related tutorial: Types of Hand Sewing Needles and Their Uses: A Guide for Modern Sewists
Space Your Stitches Evenly
For your invisible stitch hem to be truly invisible, your stitches should be uniform and evenly spaced.
Avoid making the distance between stitches too large because those small sections with greater spacing may become noticeable on the finished garment.
Avoid Pulling The Thread Too Tight
Don’t tighten the thread too much. This is good general practice for sewing anyway because you want just a little give and movement in your stitching. Plus, when the thread is pulled too tight, it’s more visible and more likely to break.
————————————————-
If you need a refresher on how to sew an invisible stitch, I have a YouTube video that walks you through the process step by step. Seeing the technique in motion can help you understand how to place each stitch correctly for a truly seamless finish.
Interested in sewing with silk? The below tutorials might be relevant:
- How to sew a flat-felled seam on silk fabric (the easy way)
- How to make a robe without a pattern from silk fabric / a video sewing tutorial
- DIY pillowcase from natural silk fabric for better and healthier sleep
- How to sew a fitted sheet (from 100% silk fabric)
And if you are interested in techniques used in sewing silk, the following might help:
- How to wash and prewash silk fabric
- A tool guide for sewing lightweight silk fabric
- How to sew silk: types of stitches and seams
- How To Sew Silk: Helpful Tips To Avoid Frustration
Did you find this tutorial helpful? If so, save this pin (see below) on your sewing board so you can come to this tutorial later when you are ready to sew an invisible stitch, and follow me on Pinterest for more tips, tutorials, and inspiration!
latest posts
- Corset Pressing Board for Sewing: What It Does and How I Use It
- 7 Essential Tools and Settings for Sewing Denim on a Regular Sewing Machine
- That Purple Thang: 10 Smart Ways to Use This Weird Little Tool
- 20+ Reasons Your Sewing Machine Thread Keeps Breaking (+ Solutions)
- Dresden Plate Quilt Block: 4th of July Fireworks
- How To Sew Curves the Easy Way Using a Curve Master Presser Foot
- 30 Sewing Hacks That Turn Ordinary Items into Useful Sewing Tools
- Seam Allowances in Sewing Patterns: What They Are and How to Use Them
- What Do You Call a Person Who Sews? I Asked My Readers and Got 1,408 Opinions

Dear Olga,
How to sew lace on edge of cathedral bridal veil.
Thanks,
Martha
Here is what I would do.
Lay the veil flat on a clean floor, very clean floor.
Do not hem the edge. Lace will serve as the finish.
For a cathedral veil, lightweight scalloped not wide lace works beautifully.
Place the lace so the decorative scalloped edge extends past the tulle. The straight edge of the lace should overlap the veil edge by about ¼ inch.
For a cathedral veil, you will be working along a long curve. Do not stretch the lace. Let it relax naturally along the curve.
Use fine pins placed perpendicular to the edge. If the curve is tight, ease the lace slightly but do not gather it. You might need to clip tiny notches in the lace straight edge (not into the scallop) to help it follow the curve.
For bridal veils, hand sewing gives the best result. Catch only a few threads of the tulle with each stitch. Keep your stitches small and evenly spaced.