Fabric Eggs DIY: Quick Easter Craft Decorations From Scraps
Soft fabric eggs DIY are the kind of project that makes your sewing table look like spring arrived early. They are quick to make, cheerful, and a beautiful way to use small pieces of spring fabric. If you enjoy Easter sewing projects, this tutorial will fit right into your list of cute Easter crafts and practical things to make for Easter.
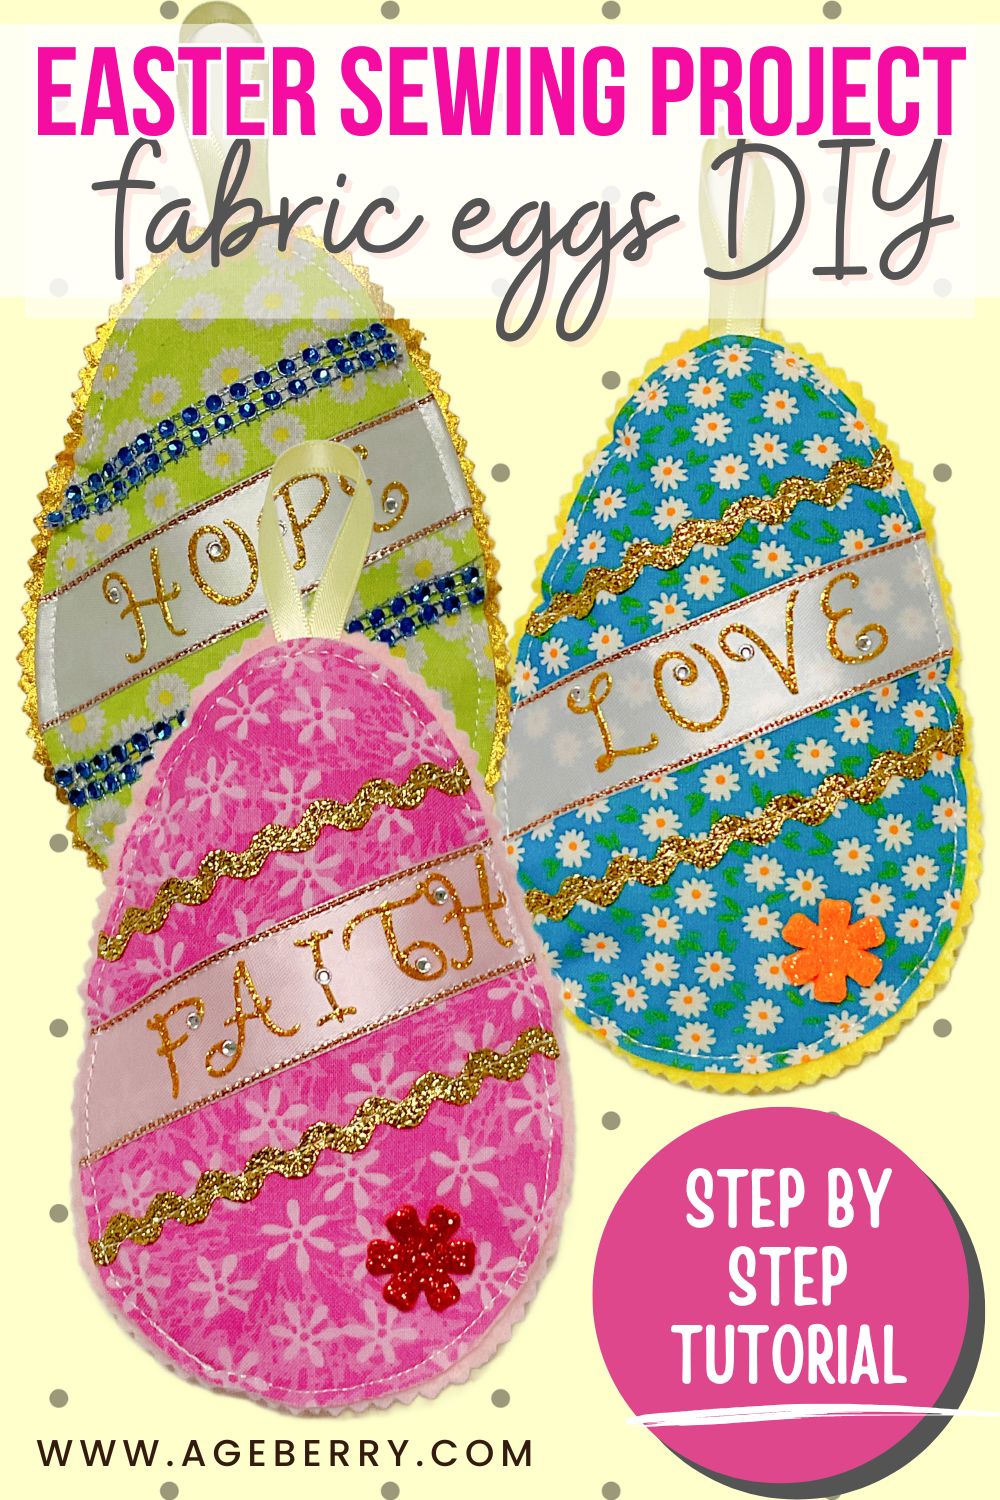
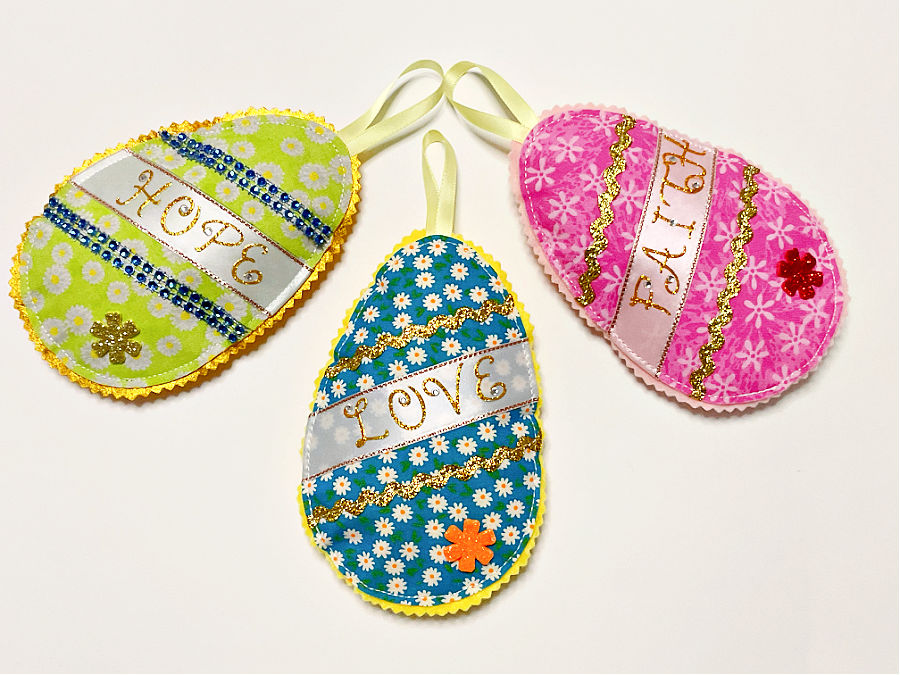
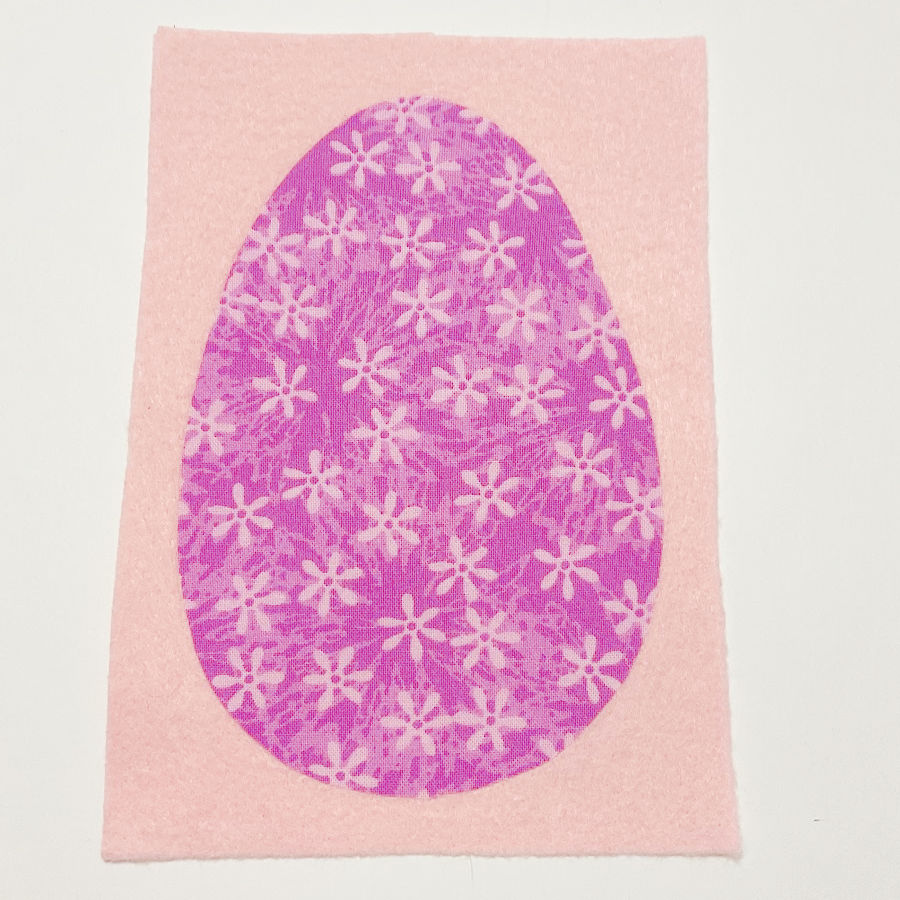
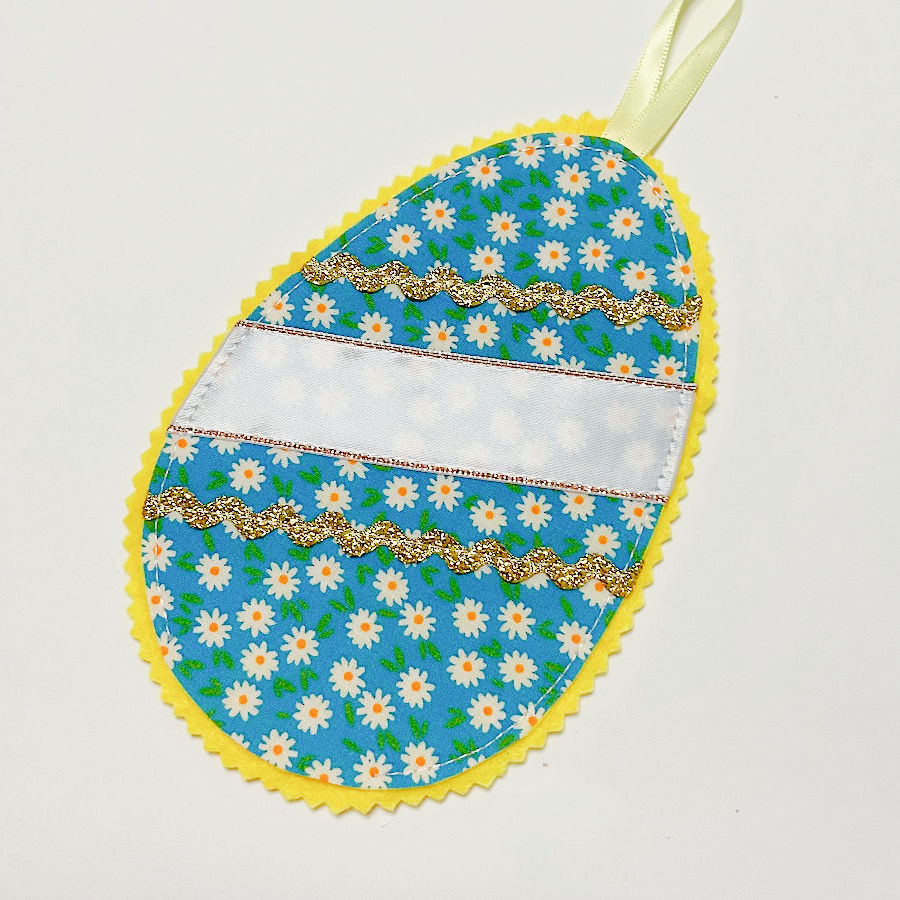
The colors are bright, the golden trims add sparkle, and the words across the center ribbon make them feel meaningful. The pinked felt edges frame each egg and give them a polished finish.
Below is my step-by-step guide for how to make fabric eggs.
Note: Some of the links on this page are affiliate links. This means I will receive a commission if you order a product through one of my links. I only recommend products I believe in and use myself.
Materials You’ll Need for This Fabric Eggs DIY project
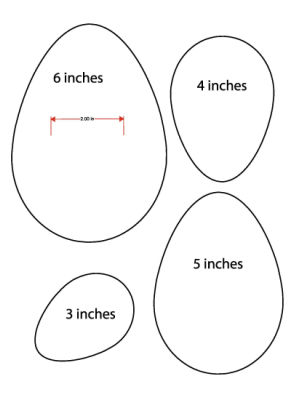
- Fabric egg pattern (paper)
- Spring fabric scraps (cotton works best)
- Soft felt (for backing and lining)
- Double-sided fusible adhesive (Heat and Bond or similar)
- Fabric glue stick
- Sewing machine
- Embroidery thread (for a subtle shine) – optional
- Ribbons (wide and narrow)
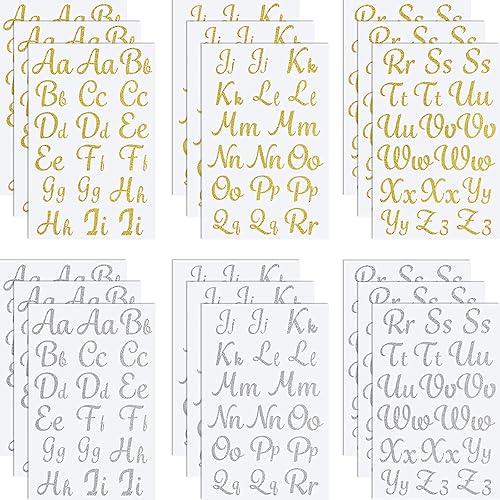
- Sticker letters, fabric markers, or embroidery floss (for words like Hope, Love, Faith)
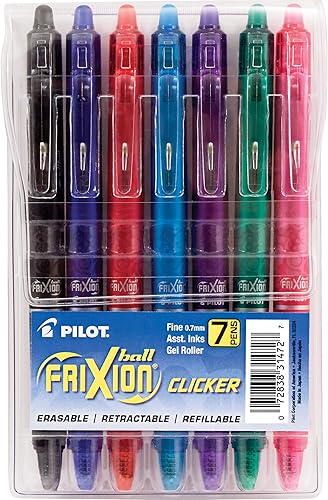
- Frixion pen or heat-erasable fabric marker
- Pinking shears
- Polyester stuffing
If you are a subscriber to my newsletter, you can download the free fabric Easter eggs template from my Resource Library. If you want to become a subscriber, please use the form below.

These supplies are easy to adjust depending on your style. This is one of those spring Easter crafts where small details make each egg unique.
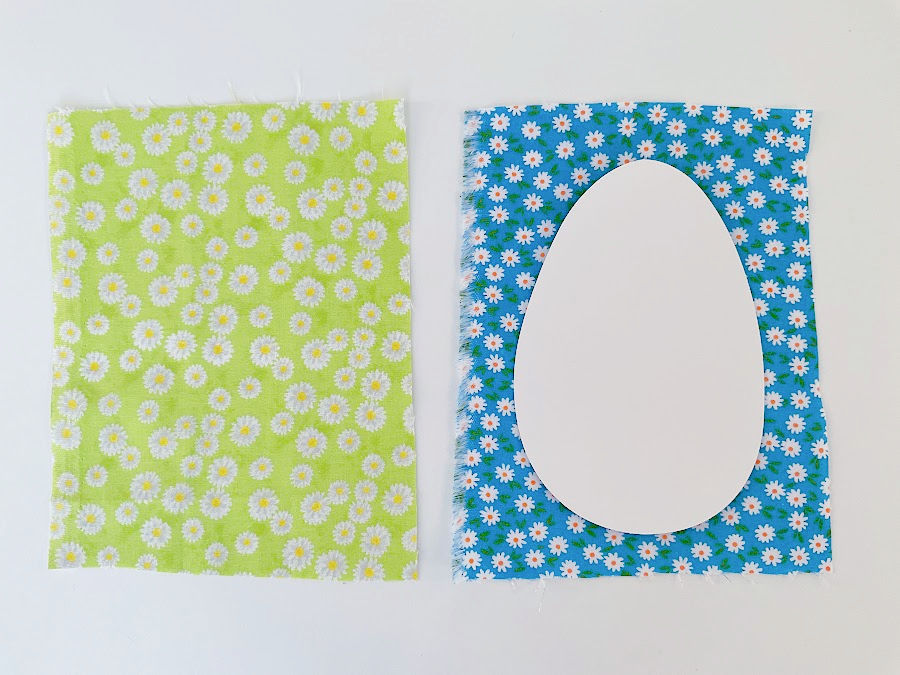
Step 1: Prepare The Fabric Base
Cut rectangular pieces of cotton fabric a little larger than your egg template. Do not cut the egg shape yet.
Cut slightly smaller rectangles of Heat and Bond (double-sided fusible adhesive) to fit inside those fabric rectangles.
Why smaller? To protect the ironing board from the glue, in case it runs a little. But the fusible has to be large enough to accommodate the egg pattern.


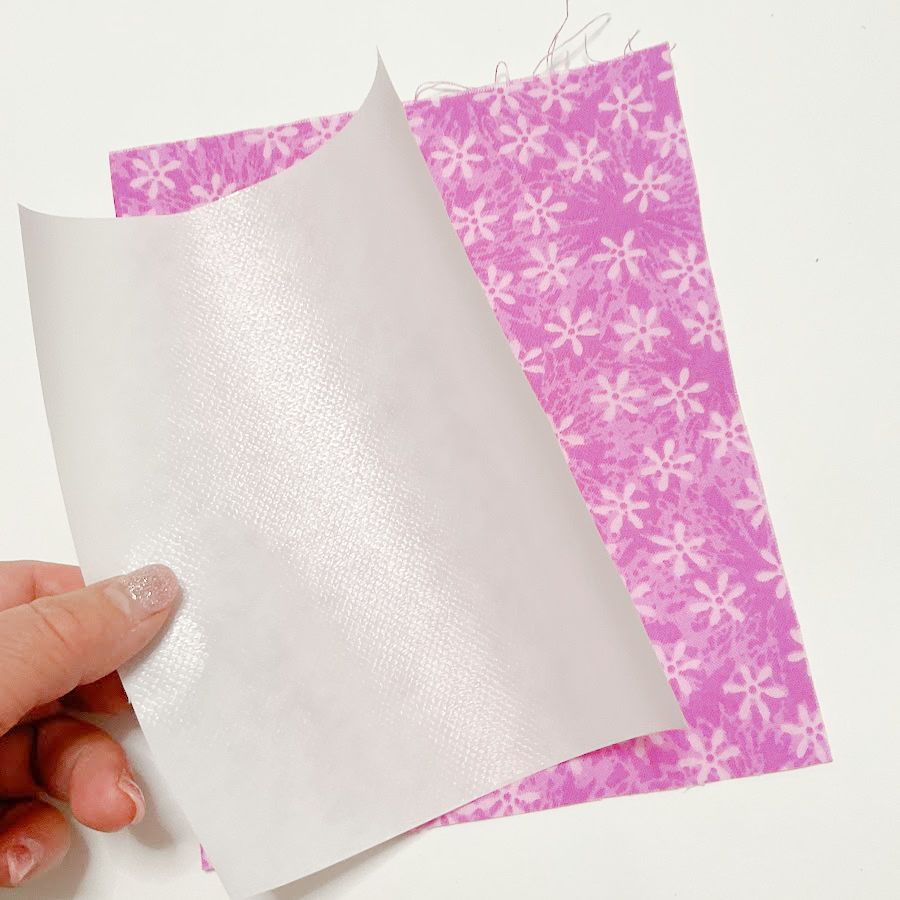
Fuse the adhesive to the wrong side of each fabric piece, based on the actual product (Heat and Bond) instructions.
This double-sided fusible matters. It stabilizes the cotton and helps prevent fraying later.
Step 2: Cut Out The Egg Shape
Place your egg template on the prepared fabric, trace the egg shape (I used a Frixion pen for this) and then cut out the egg shape.
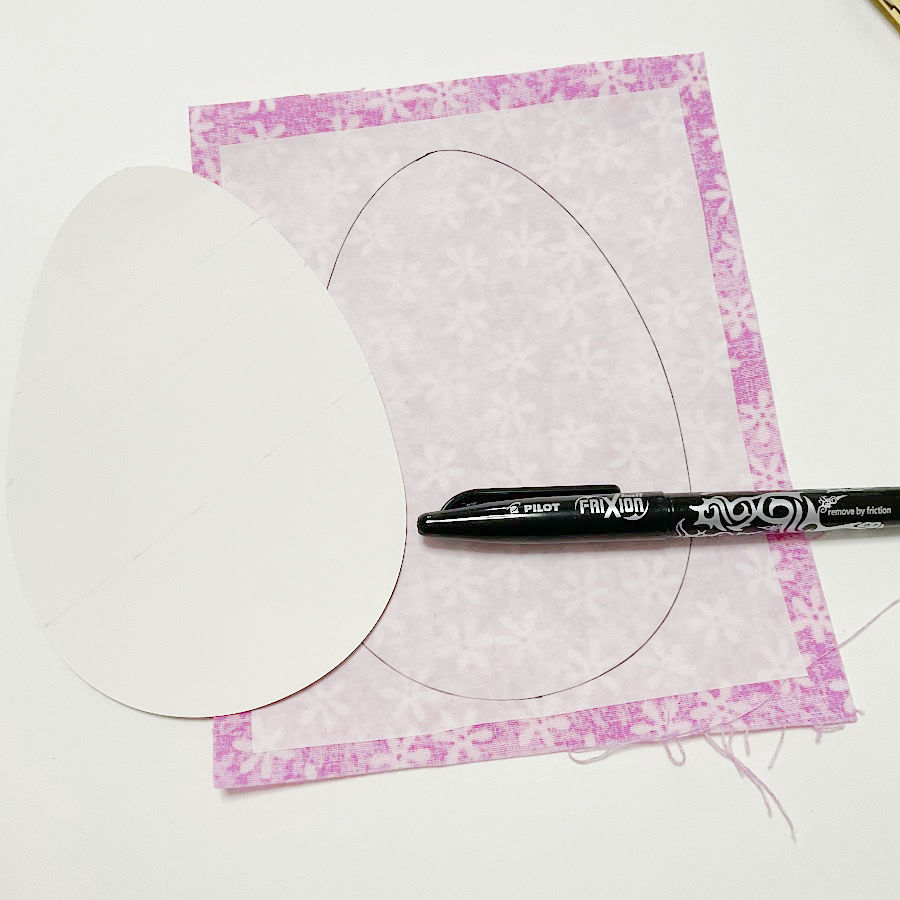
Remove the paper backing from the fusible. Use a pin to scratch or pierce the paper in one spot. The paper will split and lift much easier than it will with your fingernail.
Now the second adhesive side is exposed.
✅ Easter related articles on the site:
– DIY Easter Table Runner with Decorative Ribbons and Sequins – Step-by-Step Sewing Tutorial
– Easy Self-Binding Placemats for Easter – A Fun & Quick Sewing Project
– Easter Sewing Project You’ll Love To Make: Fabric Bowls DIY
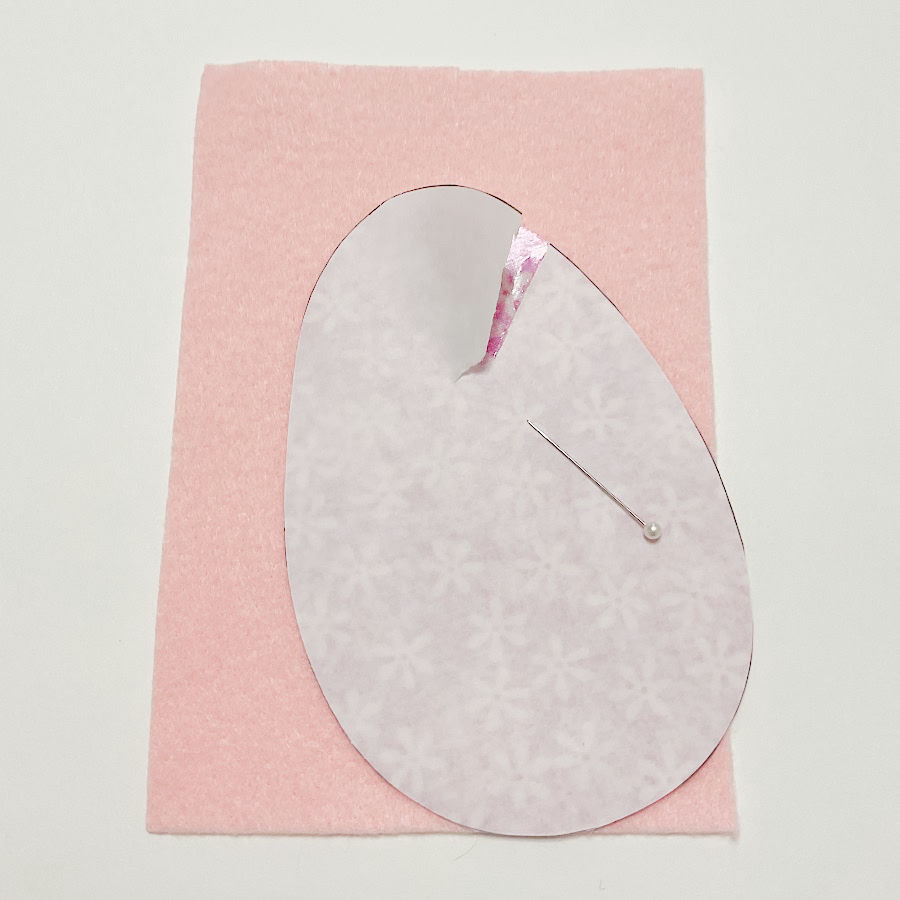
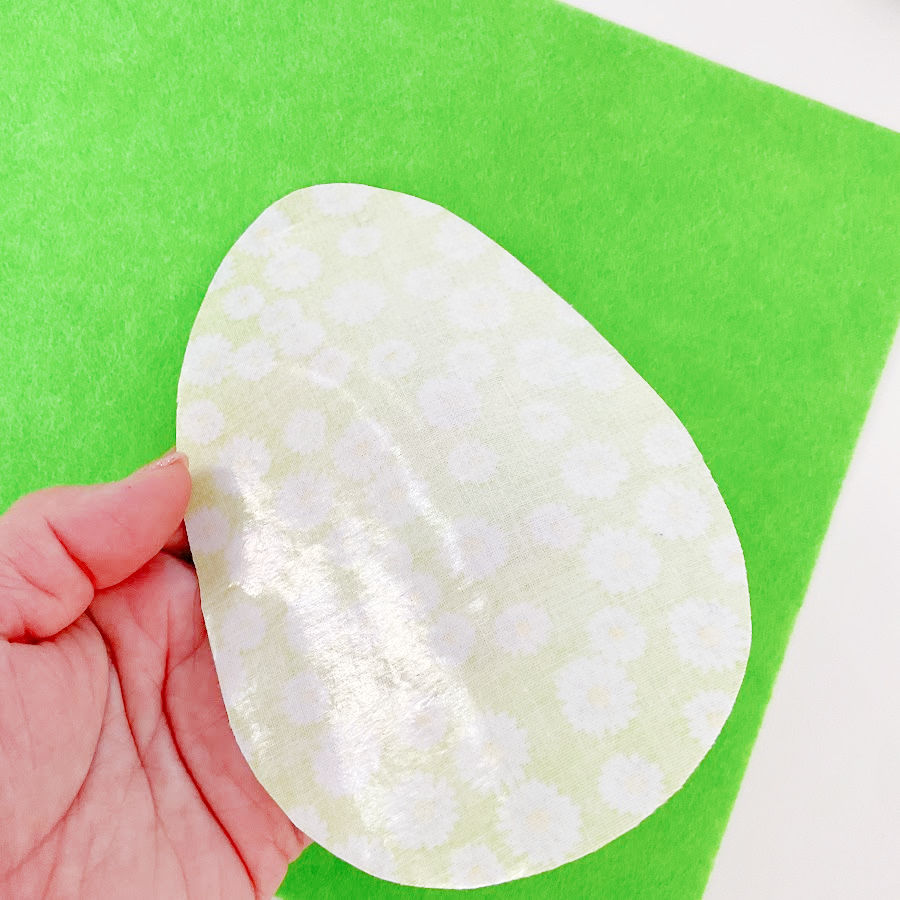
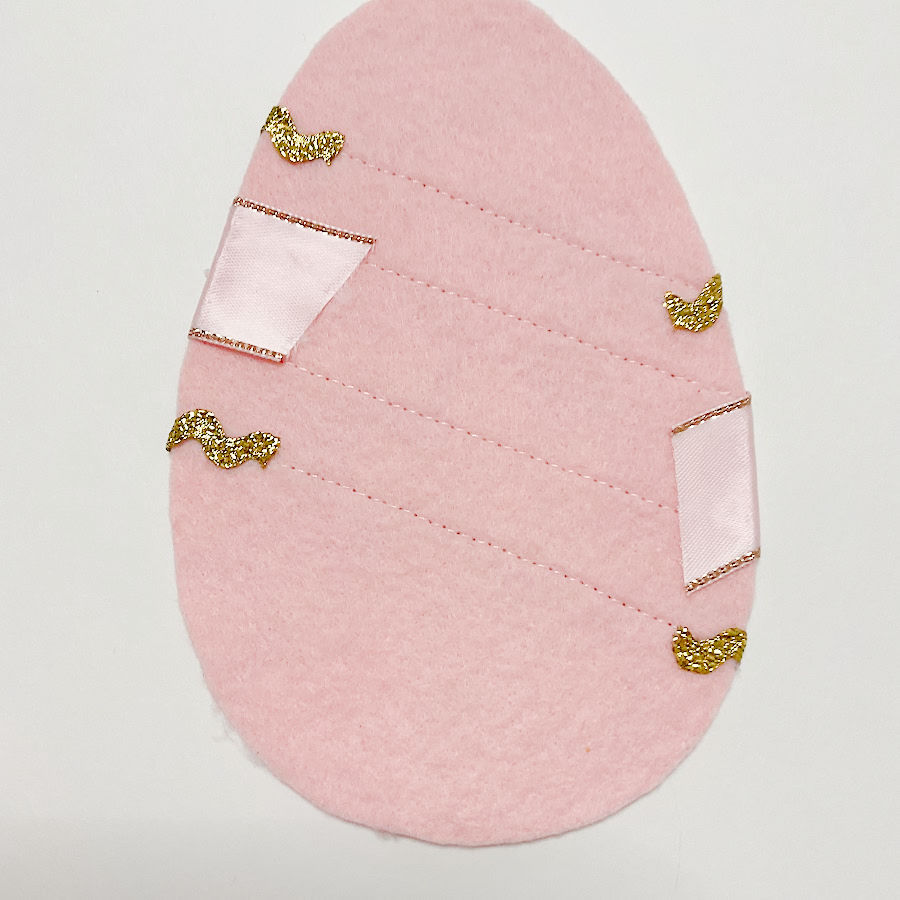
Step 3: Fuse The Egg To Felt
Place the adhesive side of the fabric egg onto soft felt. This felt will not be visible in the final product so the color is not really relevant.
Press with an iron to fuse.


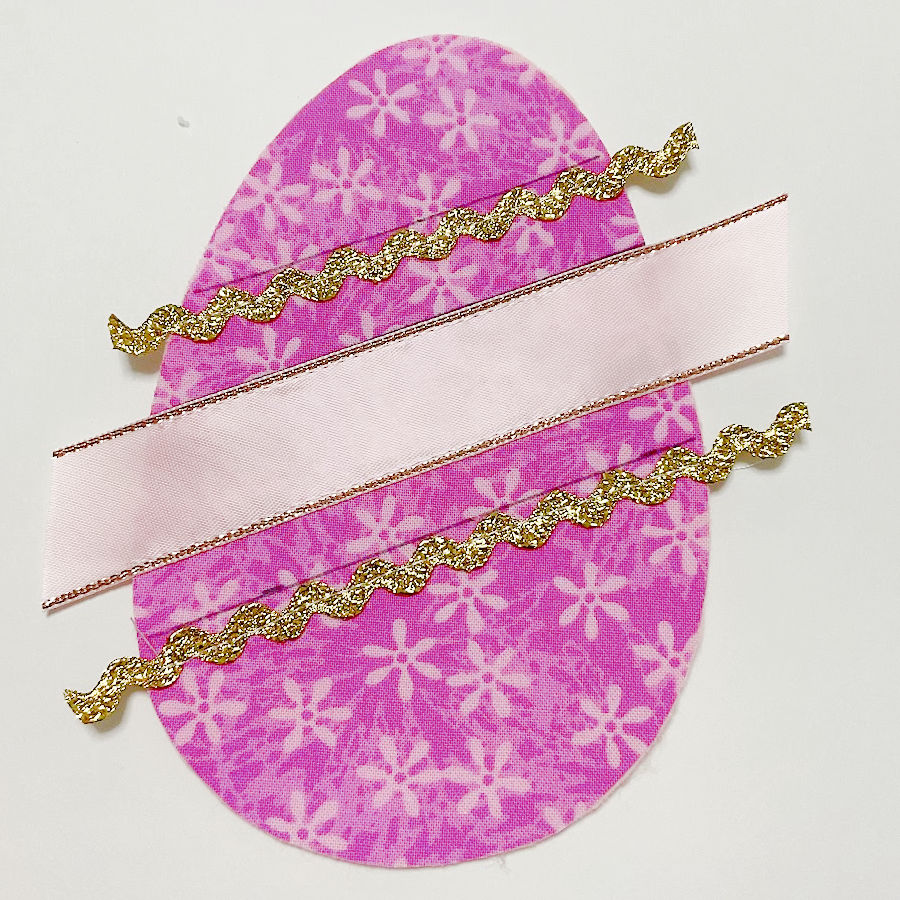
Step 4: Mark Ribbon Placement
Before sewing anything, plan the ribbon layout.
Use a Frixion pen (or some heat erasable marking pen) to mark:
- The center line for a wide ribbon (this ribbon will hold your word). We will align the upper edge of this ribbon with this line.
- The position for a narrow ribbon near the top. We will also align the upper edge of the top narrow ribbon with this line.
We will not mark more lines on the material; the lower piece of decorative ribbon will be placed symmetrically after we place the upper one.
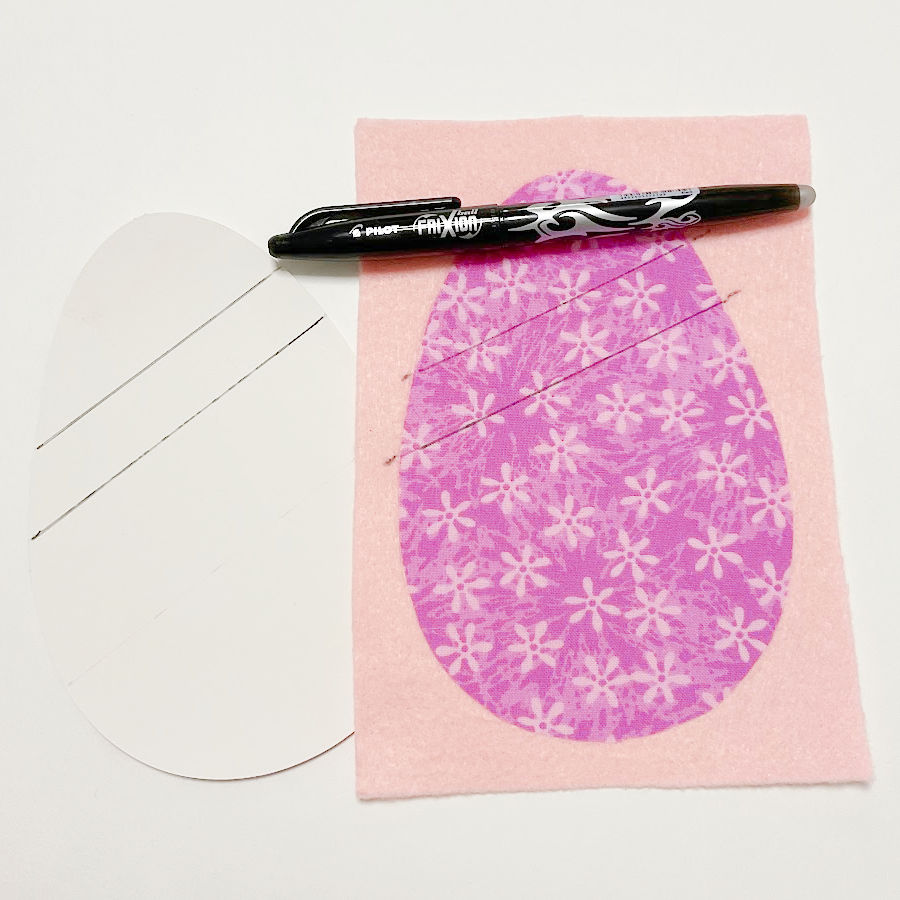
The beauty of a Frixion pen is that the marks will disappear with heat. And they really disappear.
Cut around the egg again so the felt matches the fabric egg shape exactly.
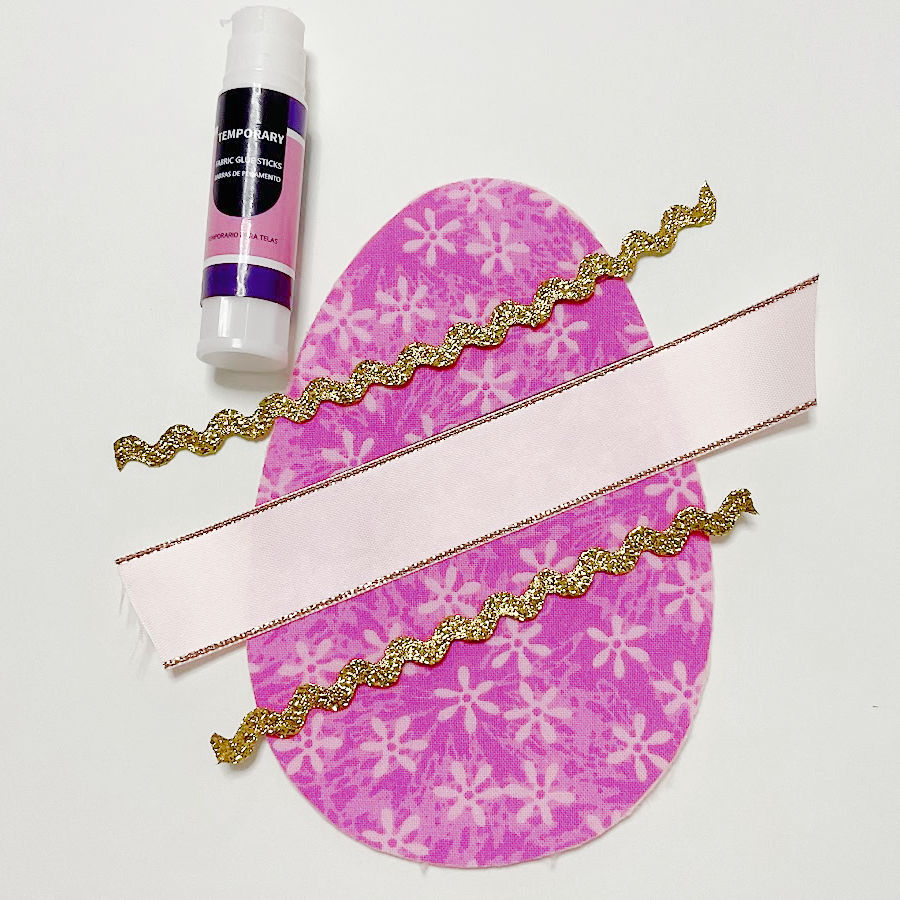
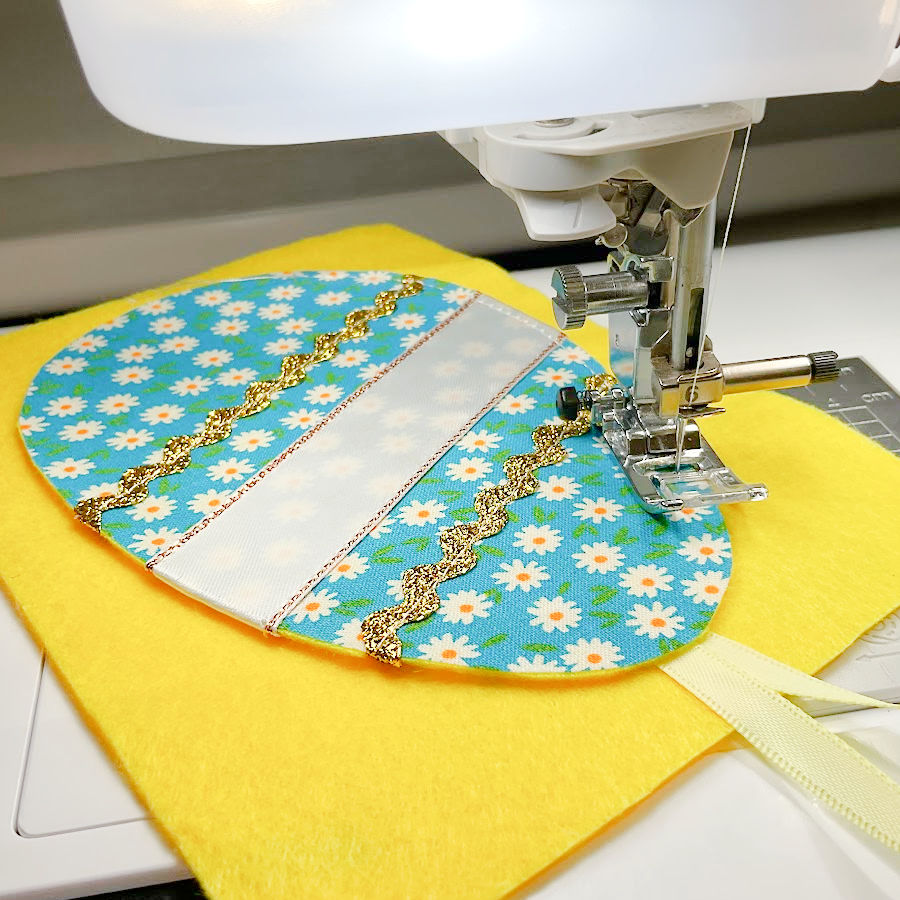
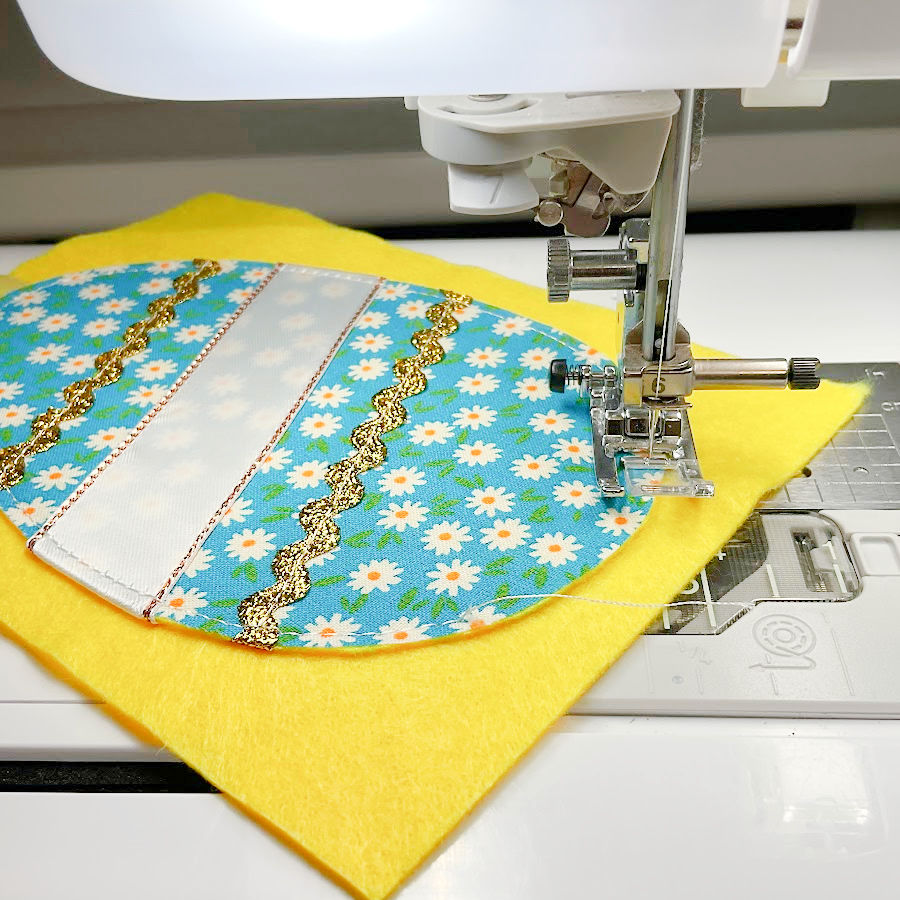
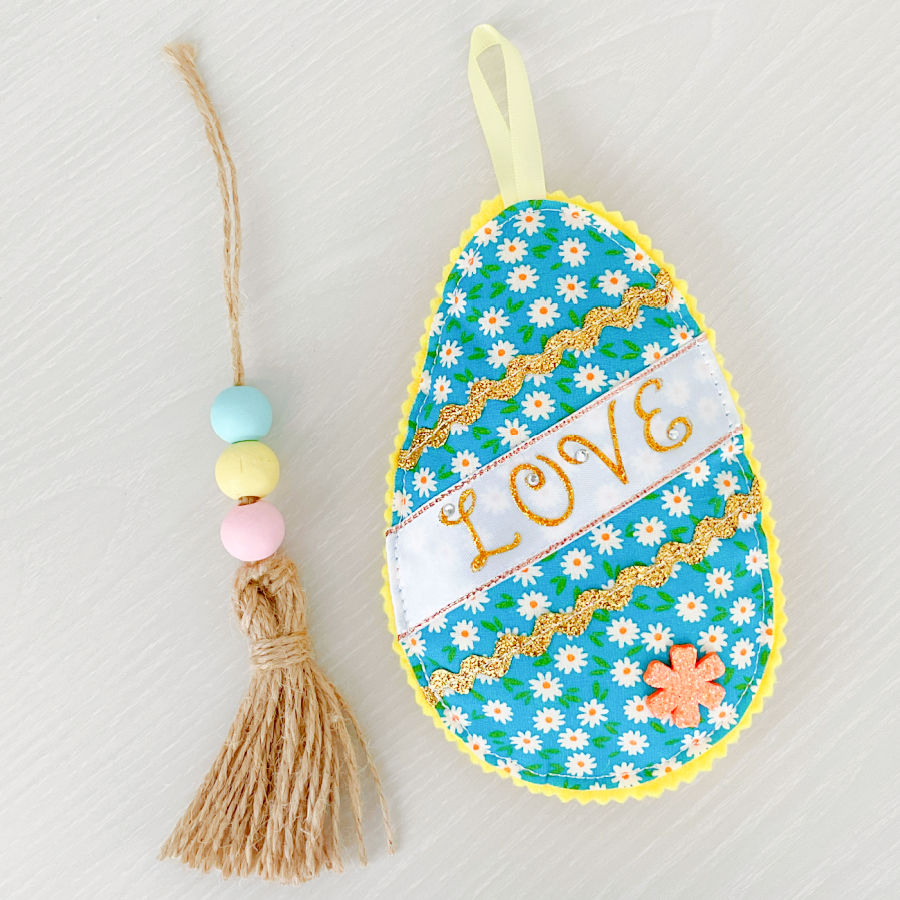
Step 5: Attach The Center Ribbon
Choose a wide ribbon for the middle. This ribbon will hold your lettering, so it should not be too narrow. Cut a piece long enough to go beyond the egg face a little like in the image (less than 1″, 2.5cm on each side).
Apply a thin layer of fabric glue stick to hold the ribbon in place. This works like temporary basting and prevents shifting under the presser foot.
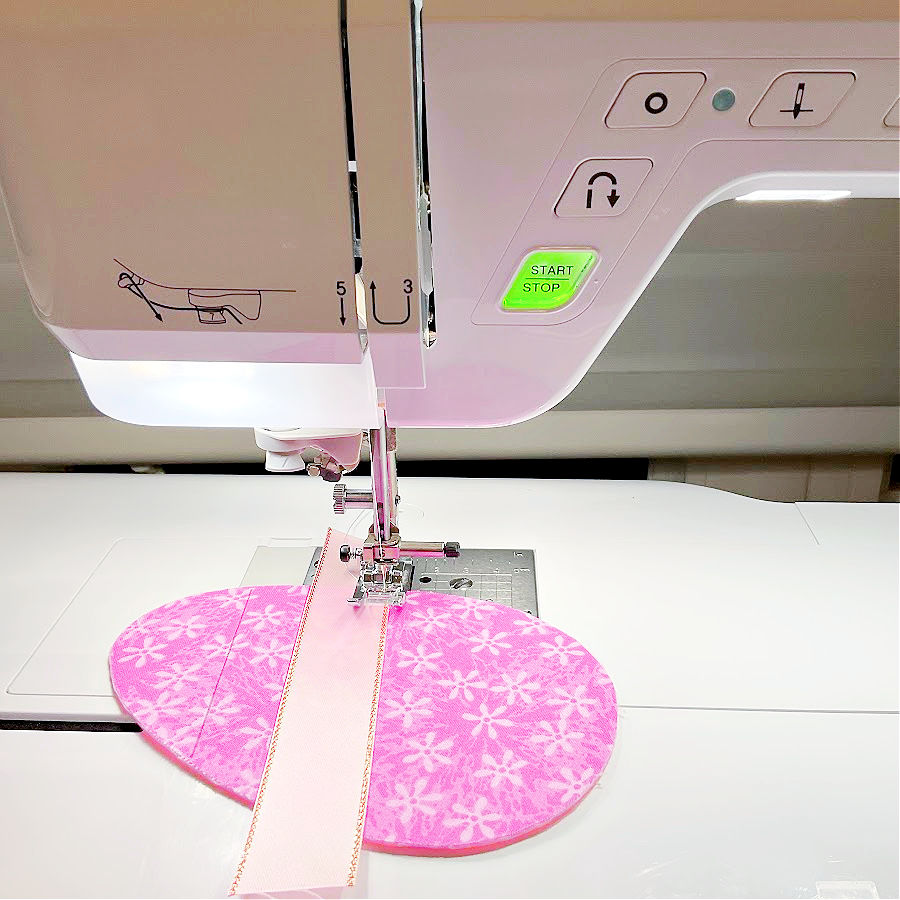
Sew along both long edges of the ribbon.
I like to use embroidery thread in both the needle and bobbin. It adds a gentle shine. Sew slowly and guide the ribbon carefully.
Step 6: Attach The Upper Ribbon
Cut two pieces of the narrow ribbon slightly larger than the egg face as in the above image. Position the upper ribbon and sew it with one row of straight stitches.
Step 7: Add The Bottom Ribbon And Secure Ribbon Ends
Place the bottom ribbon so the design looks balanced. Measure if you want but also step back and check it visually. At first, I did not want to mark the position of the lower ribbon, but in the end I did; perhaps I should have done it from the beginning.
Sew the bottom ribbon in place.
Fold all ribbon ends to the wrong side and secure them with a fabric glue stick.
To remove the marks from the egg, hover the iron slightly above the fabric and use steam. The lines disappear without direct pressing.
Step 8: Add A Hanging Loop
Cut a small piece of ribbon for hanging. Fold it in a loop.
Place it at the top of the egg and secure it with a glue stick.
Step 9: Add The Back Felt And Sew Around The Egg
Place the finished egg on another piece of soft felt. This piece of felt will be visible and will be the back of the fabric egg.
Use a fabric glue stick to hold it in place.
Sew around the egg to attach the layers, but leave a small opening near the bottom for stuffing.
Step 10: Trim The Edge With Pinking Shears
Trim around the egg with pinking shears.
Stay close to the stitching, but do not cut into it. Avoid cutting the hanging loop too.
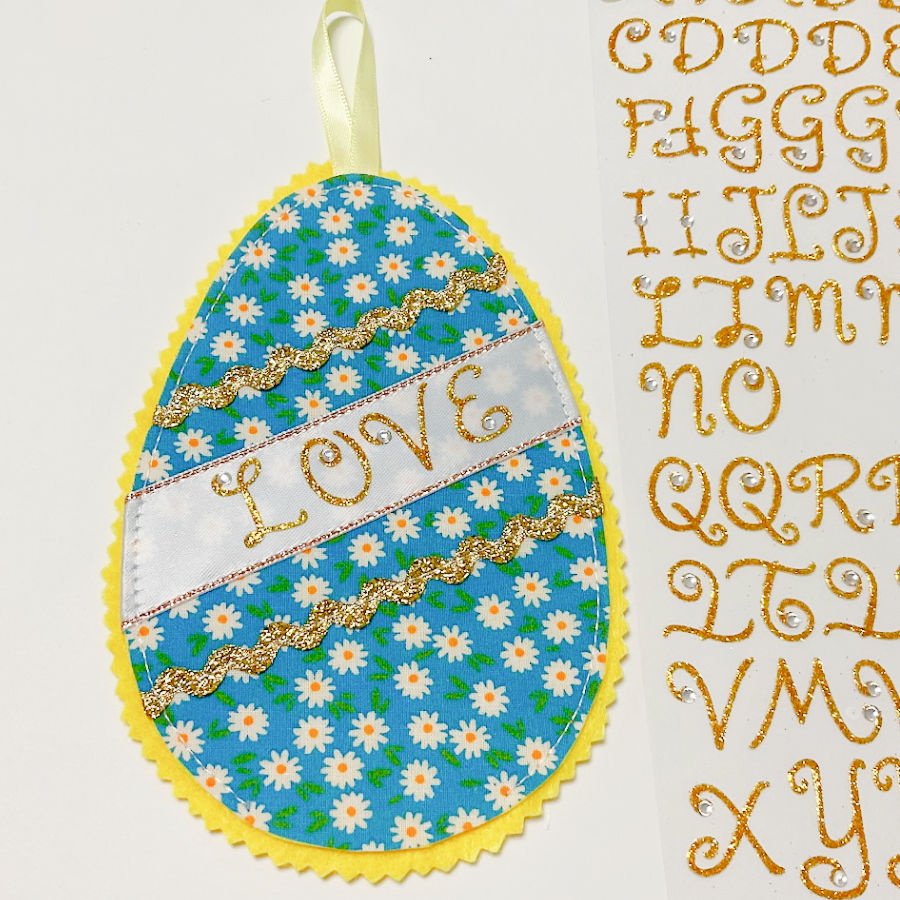
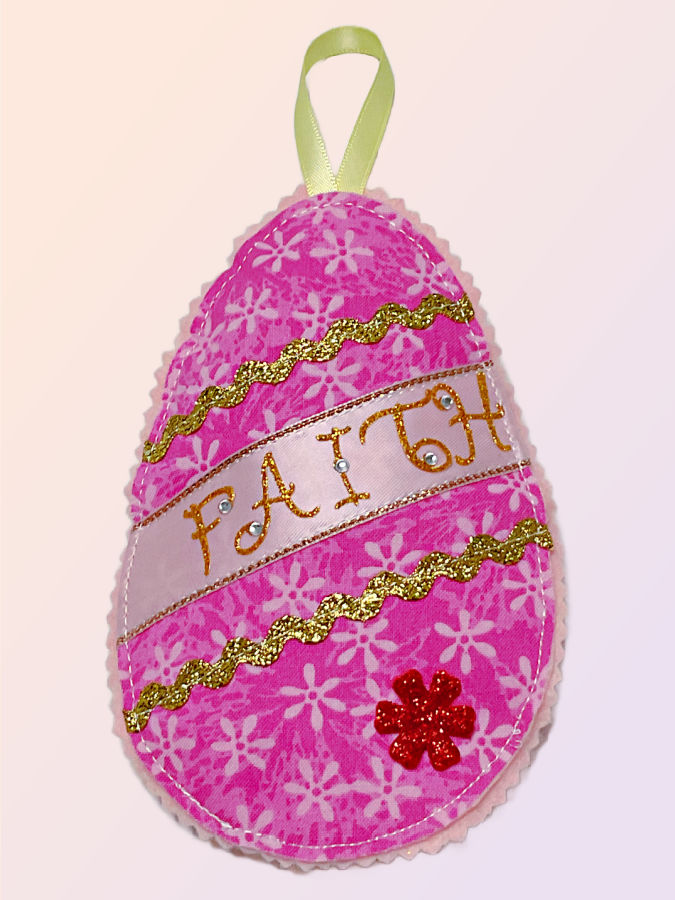
Step 11: Add Words To The Center Ribbon
Add your words to the wide center ribbon.
I used sticker letters for words such as hope, love, and faith. Because I had them handy (I bought them previously for another project), I used simple self-adhesive letters, and they stick to the shiny ribbon quite well. However, a better choice would be heat transfer letters which I recommend.

You can also write the words with a fabric marker or stitch them with simple embroidery.
Step 12: Stuff And Close The Opening
Insert polyester stuffing through the opening.
Add enough to create a soft 3D shape. Do not overfill. The egg should feel plush but not tight.
Sew the opening closed with matching thread.
I also added a small sticker flower. It is just a simple craft-store sticker. It takes two seconds to attach, but it adds a little color break and makes the egg feel more playful.
Now your egg is complete.
Ways to Use Your Fabric Easter Eggs
You can use these fabric Easter eggs in all kinds of Easter craft projects:
- Hang them as individual Easter ornaments
- Create an Easter egg garland
- Arrange them in a decorative bowl
- Tie them to gift baskets
- Add them to spring wreaths
I decided to turn mine into a wall hanging, since it shows the eggs off and keeps everything in one pretty piece.
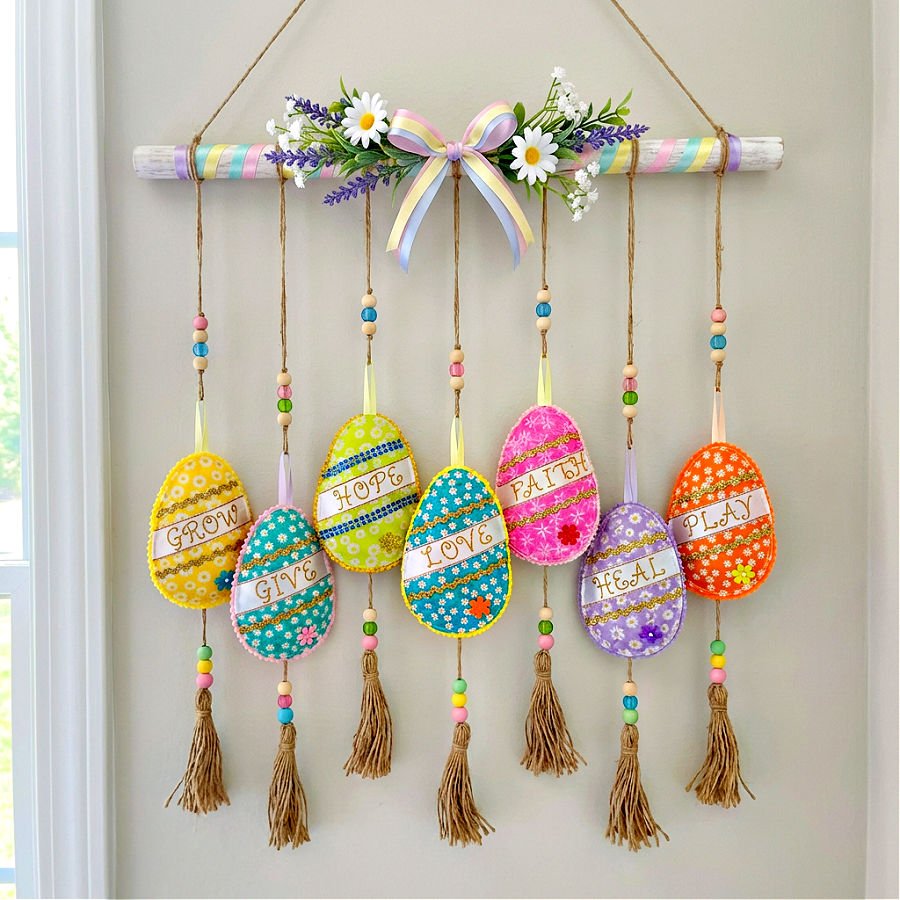
This wall hanging uses a decorated top bar with pastel ribbon wraps, a bow, and a small cluster of spring flowers. Each egg hangs from jute twine, with a few wooden beads on the strand for color and spacing. Jute tassels finish the bottom, so the whole piece has a light, airy look with a little movement.
It is easy to make. You do not need a full step-by-step tutorial for this part. If you like the idea, I suggest look at the photo and copy the idea. Cut a few strands of twine, slide on beads, tie on the eggs, add tassels, then adjust the lengths until the eggs hang nicely and the words stay easy to read.
The words on the eggs are what make this wall hanging feel personal instead of just decorative. Each egg carries a small message, so the whole piece reads like a gentle spring reminder.
I used these words as you can see: love, hope, faith, heal, play, grow, give. They fit Easter so well because Easter is not only about pretty colors and treats. Easter has themes of renewal, kindness, and fresh starts. These words match that mood without feeling heavy.
Together, these words make the wall hanging feel unique. It becomes a decoration that says something, not just a row of pretty eggs.
Did this article inspire you to make sone Easter egg ornaments ? If so, save this pin (see below) on your sewing board so you can come to this tutorial later when you are ready, and follow me on Pinterest for more tips, tutorials, and inspiration!
latest posts
- What Do You Call a Person Who Sews? I Asked My Readers and Got 1,408 Opinions
- DIY Round Purse: PDF Sewing Pattern and Detailed Instructions
- Mini Wonder Clips By Clover: Useful Sewing Tool Or Just Another Notion?
- Non-Slip Grips For Quilting Rulers: A Small Notion With A Useful Job
- Fabric Eraser for Sewing: What It Removes and When to Use It
- What Is The Best Thread For Sewing Machine Projects? Let’s Find Out!
- Butterfly Quilt Block Tutorial – Foundation Paper Piecing
- How To Sew Quilt Squares So The Corners Match
- Sewing With Fork Pins: How They Help With Pattern Matching, Slippery Fabric, And Seams