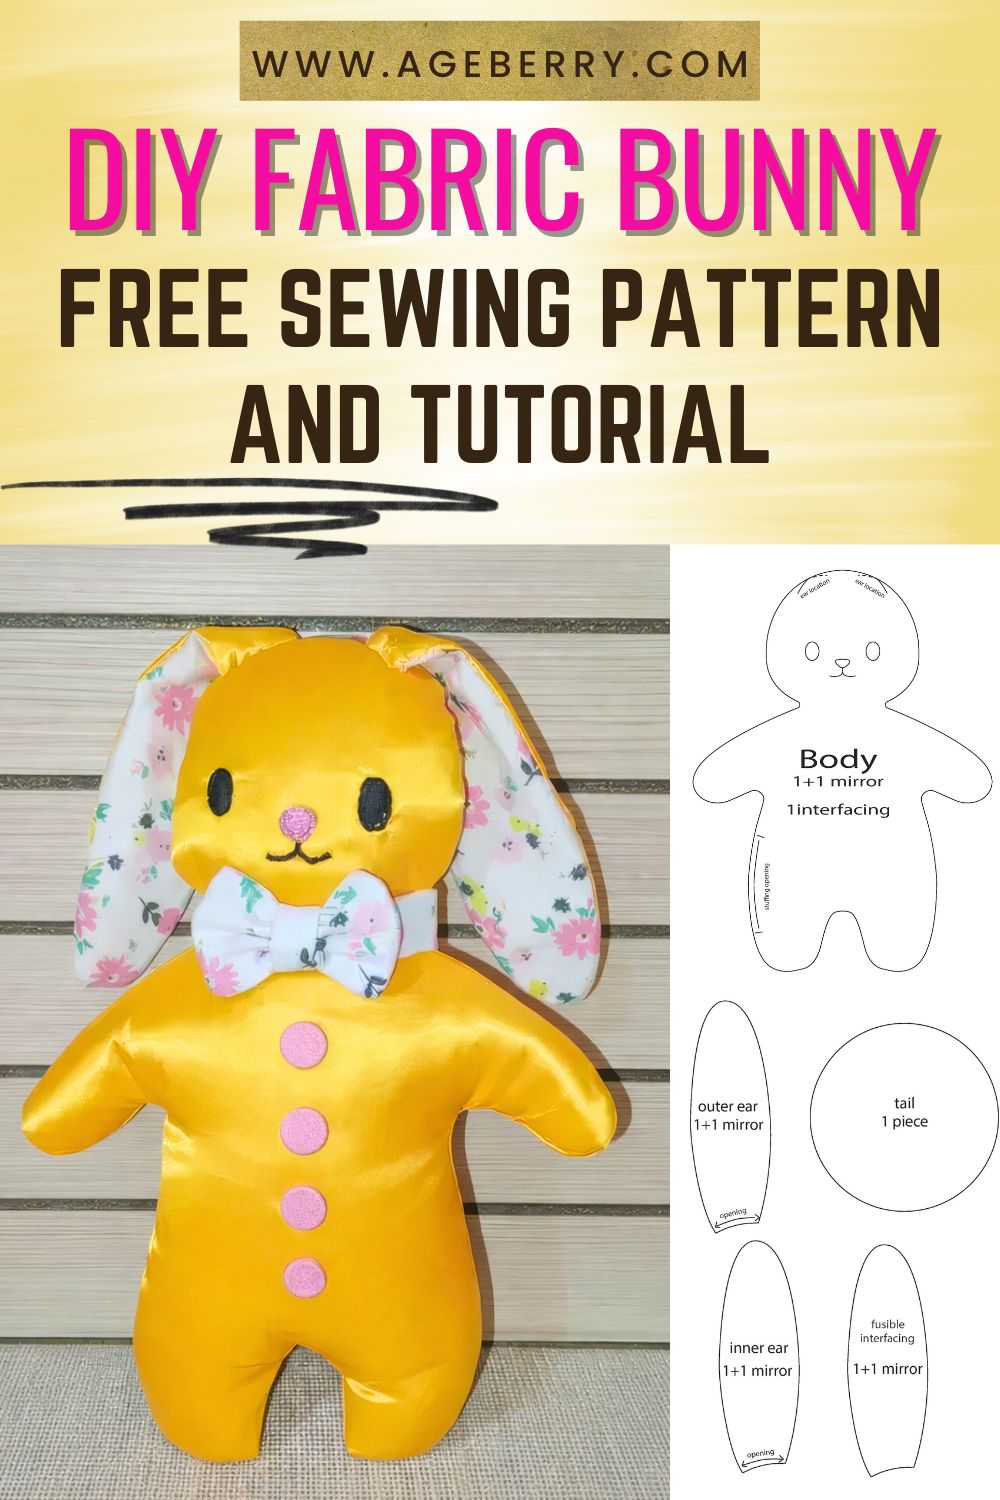
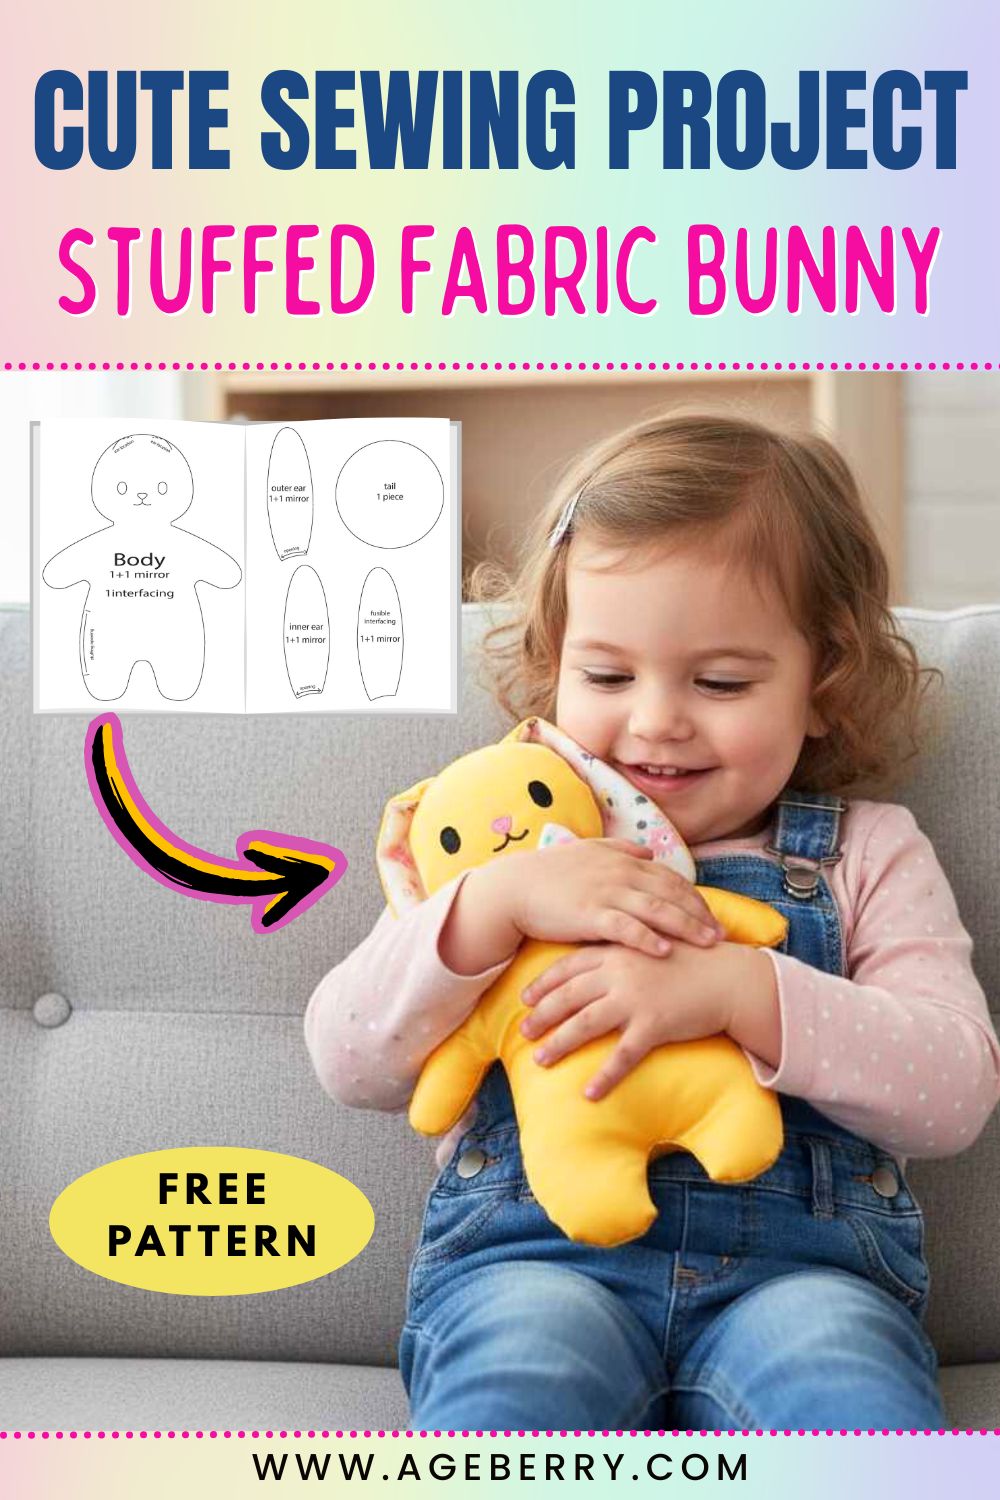
Stuffed Bunny Sewing Pattern And Tutorial (Free Download)
This sewing tutorial will walk you through the entire process of making a fabric bunny step by step. You will get a stuffed bunny sewing pattern (free download), clear instructions, and plenty of tips so your bunny turns out just the way you imagined.
If you have basic sewing skills, you are ready. The design is simple on purpose. Clean lines. Easy curves. No complicated shaping. Think of it as a gentle weekend project that rewards you with something timeless.
There’s something about this little fabric bunny that makes people smile instantly. It’s not complicated. It’s not fancy. But it feels like childhood in your hands.
It’s charming, giftable, and surprisingly easy to customize.
A handmade bunny has a quiet kind of magic. It sits on a shelf and softens a room. It rests in small hands and becomes a bedtime companion. It turns leftover fabric into something meaningful.
Bunny Sewing Pattern (Free Download)
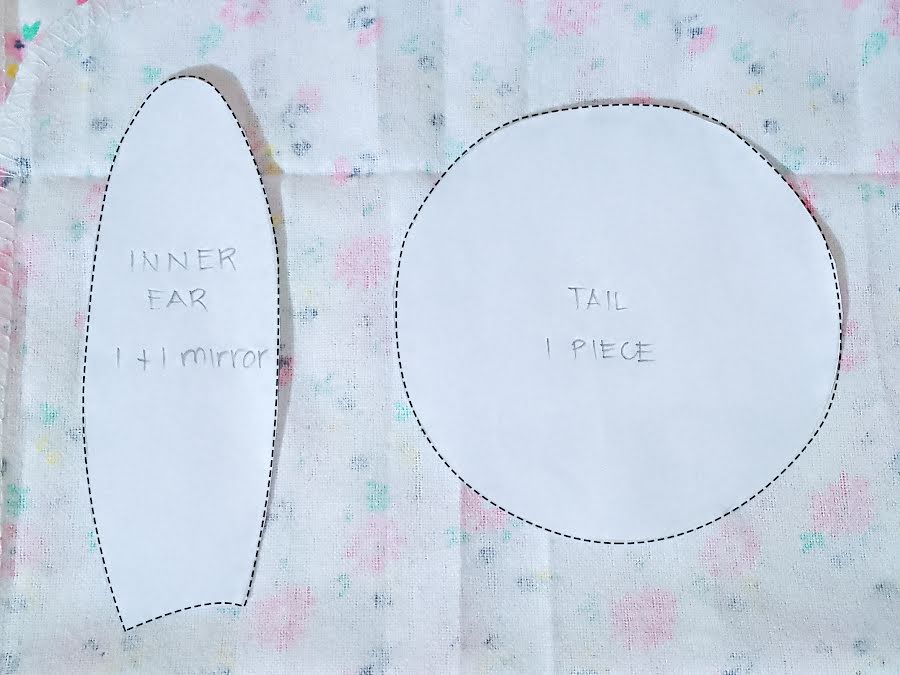
The pattern for this stuffed bunny includes all the template pieces you need for the body, ears, and tail.
It’s available as a free digital download in my shop at this link.
Simply add the pattern to your cart and complete checkout. You will have to enter your name and email address so the system can send you the download link and your order confirmation email with the PDF file. You do not need to enter any credit card information.
When you print it, make sure your printer is set to 100% scale. Do not use “fit to page.” Accuracy matters when using stuffed animal sewing patterns.
Important: Seam Allowances Are NOT Included
There is one very important detail about this stuffed bunny sewing pattern.
Seam allowances are not included in the pattern.
Yes, I know. Most modern sewing patterns include seam allowances. This one does not. And that choice is intentional.
Here is why.
When you sew stuffed animals, especially small ones like this bunny, accuracy matters more than traditional seam allowance rules. The pieces are curved around the neck, legs, and arms. These curves are small and detailed.
If seam allowances were included, you would have to stitch at an equal distance from the fabric edge. That sounds simple. In reality, it is much harder on small curved pieces.
Instead, you trace the pattern directly onto the fabric. Then you sew right on the marked line.
So you don’t measure ⅝ inch. And you don’t worry about keeping your distance from the edge.
You simply follow your drawn line like you are tracing it again with your needle.
For beginners, this method feels much more natural. It gives better control on curves. It also produces a more accurate bunny shape.
This bunny is not large. You do not need a 5/8 inch seam allowance here. For small toy sewing patterns, about 1/4 inch is usually more than enough. The bunny does not have complicated construction marks or deep seam intersections.
So once your pieces are traced, sew directly over your marked lines. This approach makes sewing a bunny less stressful and much more beginner friendly.
What You’ll Need
Before you sew a single stitch, set everything out on your table. A small project like this moves quickly when your supplies are within reach.
This is one of those Easter sewing projects that does not require much fabric at all. A few carefully chosen scraps are enough.
Note: Some of the links on this page are affiliate links. This means I will receive a commission if you order a product through one of my links. I only recommend products I believe in and use myself.
Fabric
- Small piece of plain fabric for the bunny body and outer ears
- Different fabric for the inner ears and tail
- Polyester fiberfill stuffing
For the best results, use a woven cotton fabric. Quilting cotton works beautifully for stuffed animal sewing patterns because it holds its shape and is easy to sew.
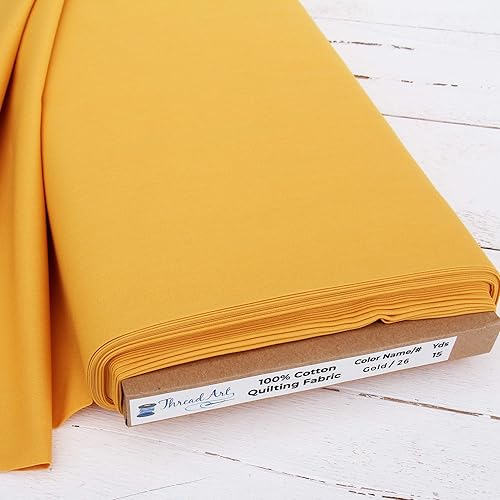

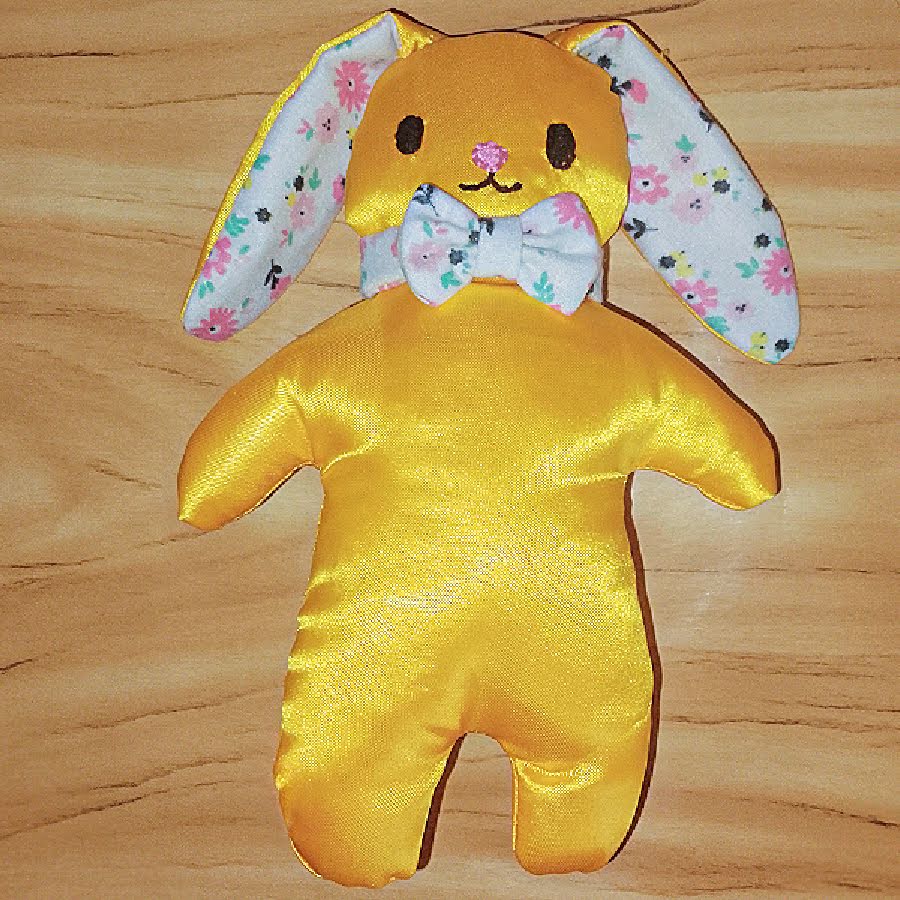
That said, I decided to experiment. I used polyester satin for my DIY stuffed bunny. The fabric has a soft shine, and I was curious how it would behave. Satin is more slippery than cotton, so you need a bit more control while sewing. But the finished bunny has a subtle glow that makes it feel special. The light catches the surface, and it gives the toy a delicate look.
Lightweight Interfacing (Optional but Recommended)
- Small piece of lightweight fusible interfacing
I recommend adding lightweight interfacing to the back of your fabric, especially if you are using soft or slippery materials like satin.


For woven cotton, interfacing is optional. Cotton already has structure. But for polyester satin or other delicate fabrics, interfacing makes a noticeable difference. It stabilizes the fabric and prevents stretching while sewing curved areas.
Stuffed animal sewing patterns often include small, detailed shapes. The neck and leg curves on this bunny benefit from extra stability. Interfacing helps the fabric behave while you stitch directly over your marked lines.
Hand Embroidery Details
- Black embroidery thread for the eyes and mouth
- Pink embroidery thread for the nose
Simple stitched features give this bunny its personality. No plastic safety eyes needed. This makes the project suitable for little ones, too.


Basic Sewing Notions
- Fabric marking tool
- Fabric scissors
- Sewing machine
- Matching thread
- Pins
- Hand sewing needle


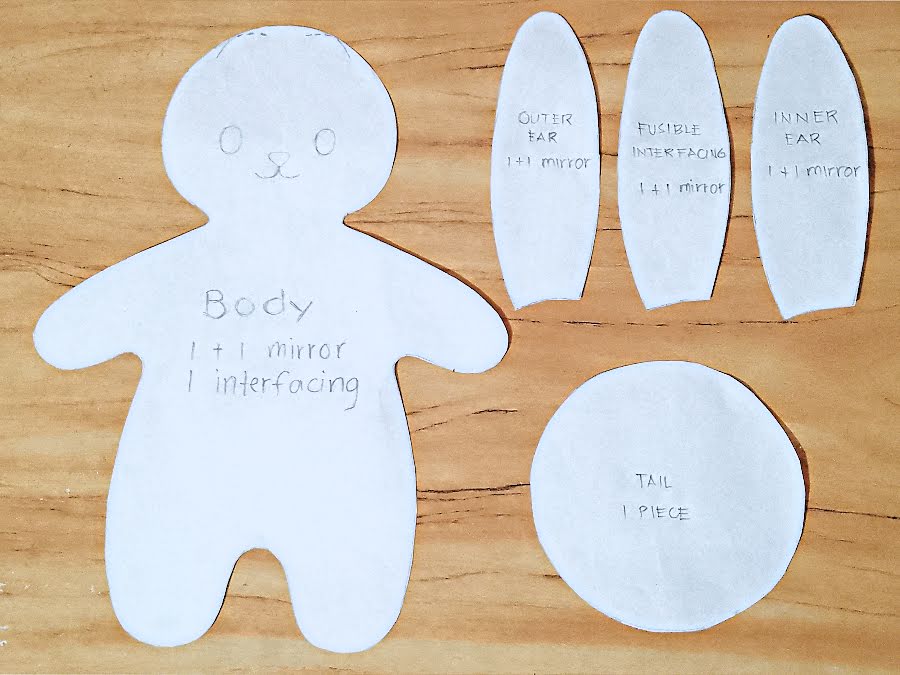
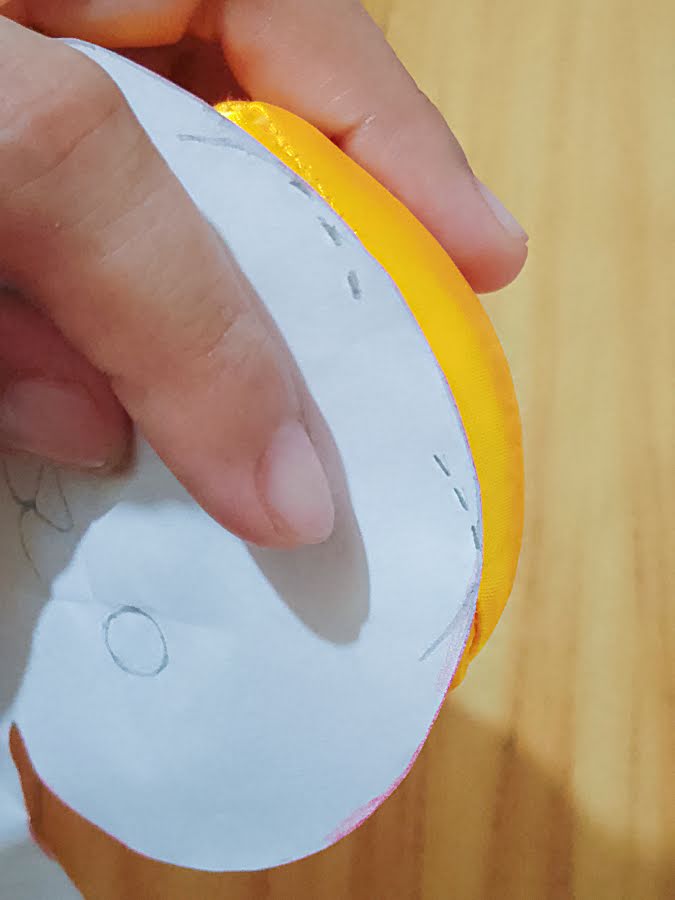
Step 1: Prepare and Trace the Pattern
Start by cutting out your paper pattern pieces from the stuffed bunny sewing pattern (free download). Take your time here. Clean, accurate paper pieces make everything easier later.
If you are new to sewing with printed templates, keep this simple rule in mind: use paper scissors for paper. Use fabric scissors for fabric.
It sounds basic, but it keeps your fabric scissors sharp. Dull scissors and soft fabric are not good friends.
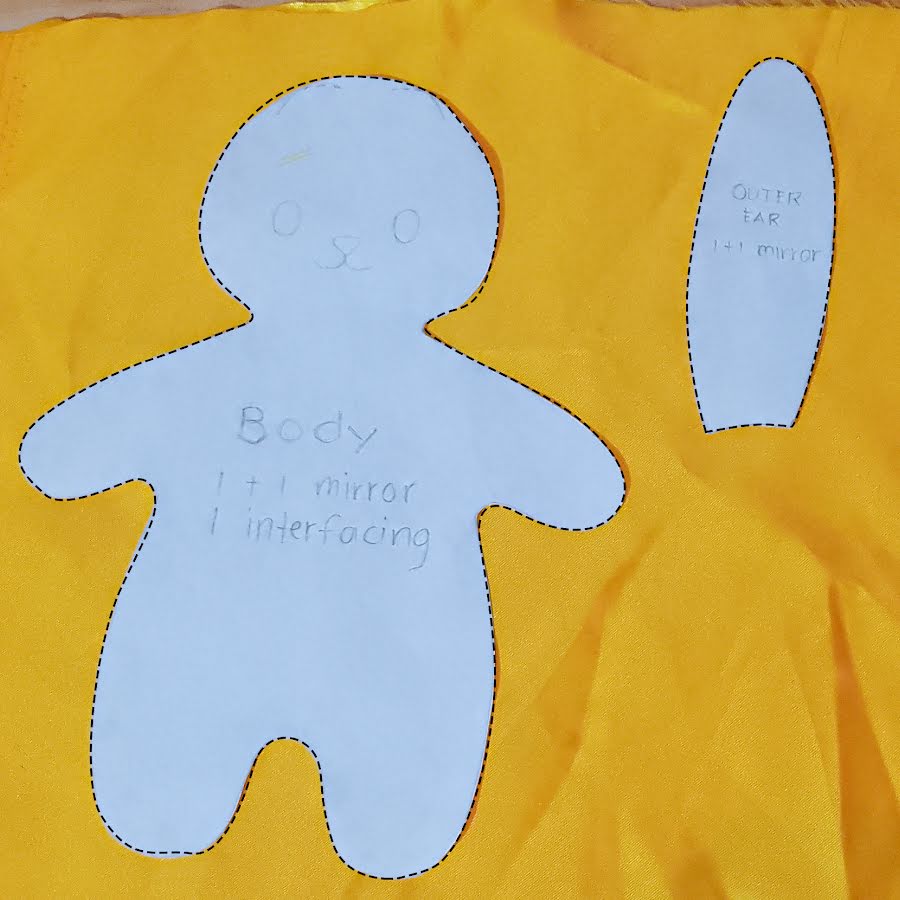
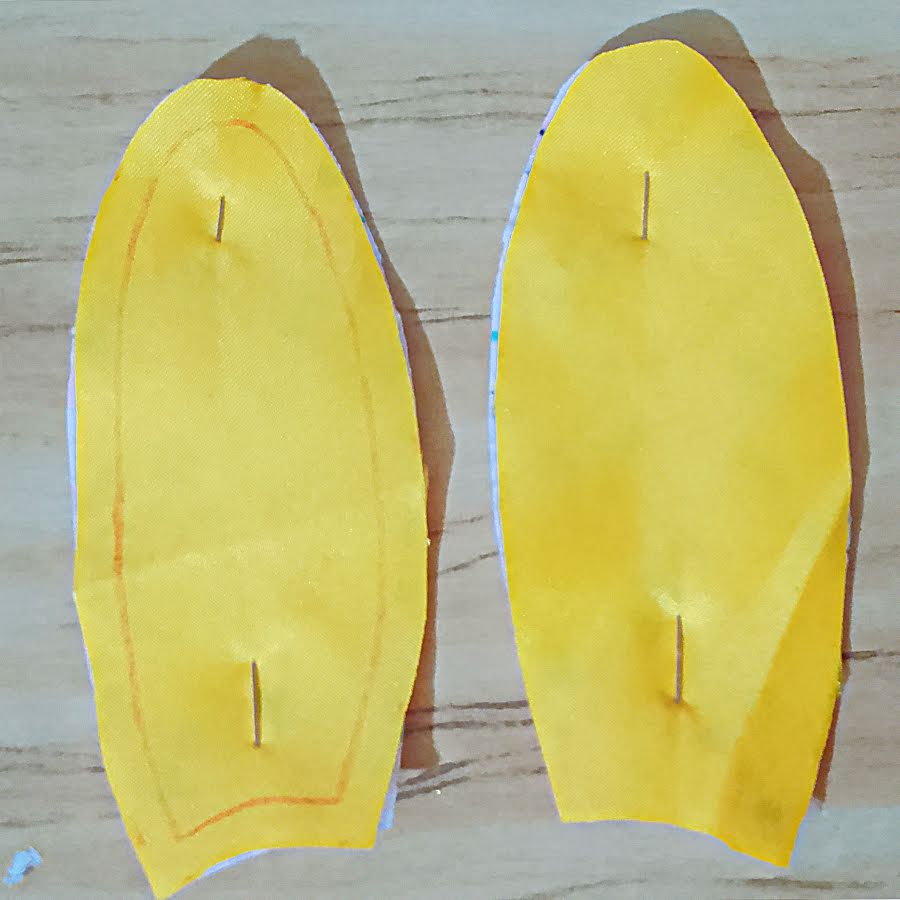
Now place your fabric on your table with the wrong side facing up. Fold it in half so the right sides are together. This gives you two layers for mirrored pieces of your bunny silhouette in one step. It also helps your finished bunny look balanced.
Position the pattern pieces on top of the folded fabric. Pay attention to grainline markings.
Use fabric chalk or a heat-erasable pen to trace carefully around the edges of the pattern.
Stay close to the paper edge. Smooth, steady lines matter more than speed.
Helpful Tip for Beginners – Avoid regular pens or permanent markers. Some inks bleed through fabric. Others never disappear. Fabric-safe tools protect your work and keep your project looking polished.
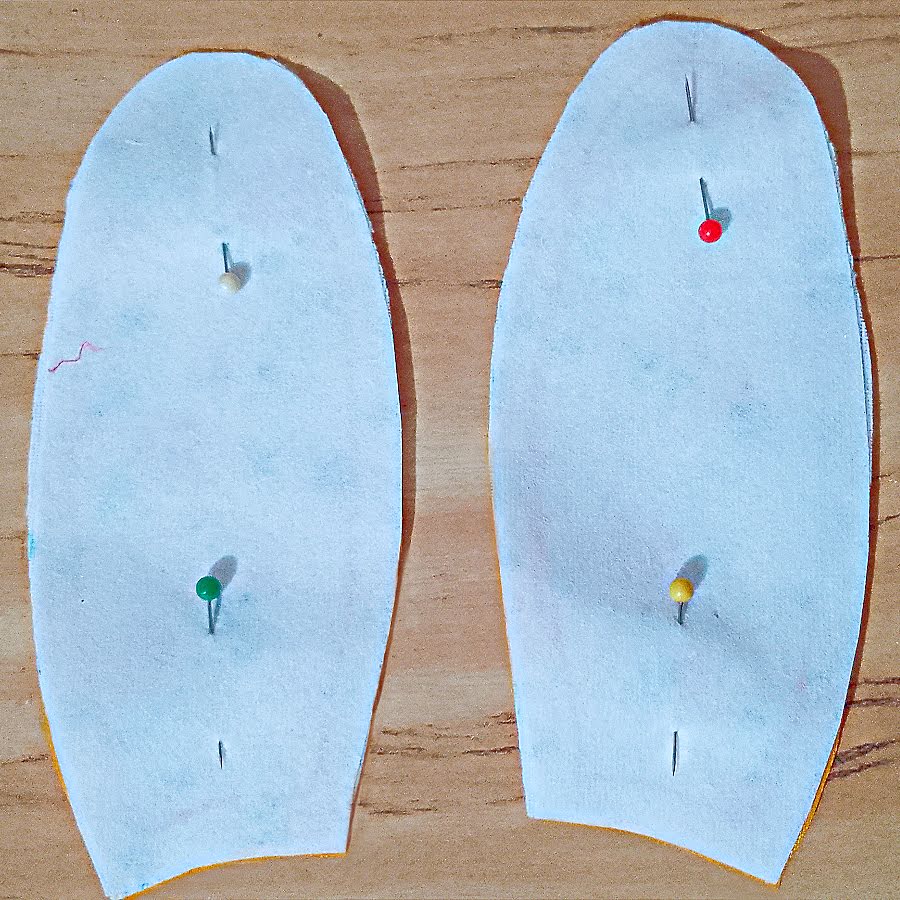
Step 2: Cut Fabric and Interfacing Pieces
Now that your bunny shapes are traced, it’s time to cut.
Cut each fabric piece smoothly, leaving about 6 mm (¼ inch) around the traced lines. Remember, the stuffed bunny pattern does not include seam allowances. That small border you add now becomes your seam allowance.
Do not rush this step. Small curves deserve careful cutting. Think steady hands and clean edges.
You will be cutting:
- Two body pieces (mirror images)
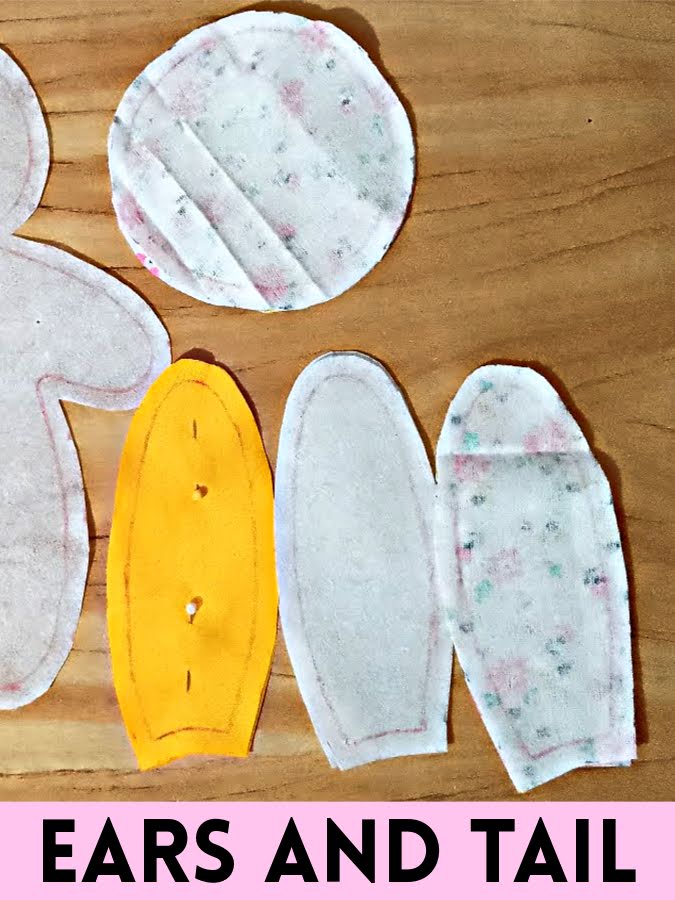
- Two outer ear pieces (mirror images)
- Two inner ear pieces (mirror images)
- One small tail circle
Keep your scissors slightly lifted as you cut curves. This helps you follow the rounded lines without creating sharp corners.
Cutting the Interfacing
Next, cut the interfacing pieces.
Add the same 6 mm (¼ inch) allowance around these shapes as well.
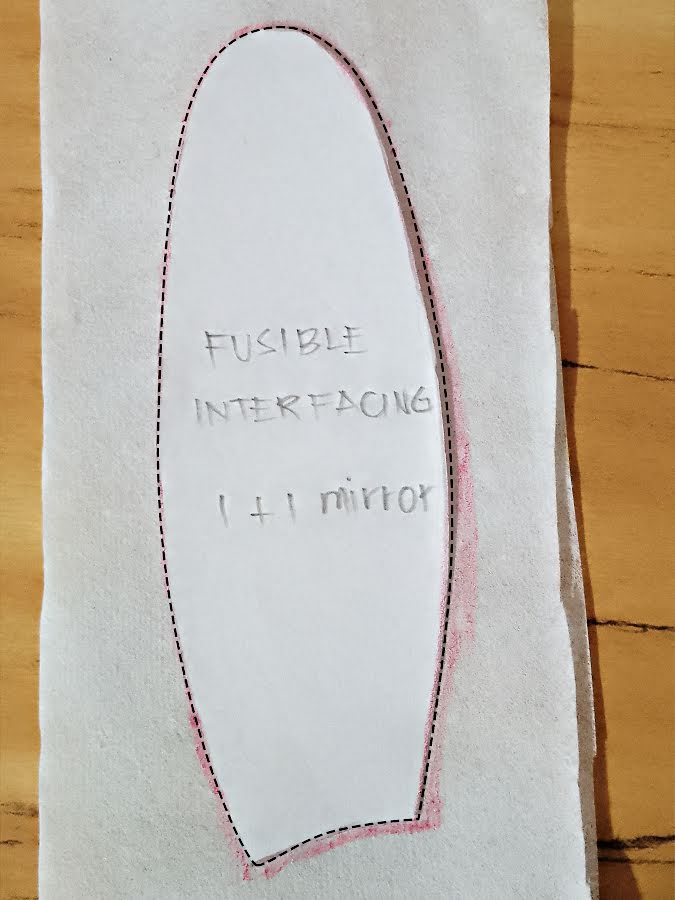
From lightweight fusible interfacing, cut:
- One body piece
- Two mirror pieces for the inner ears
You only need one interfaced body layer because this bunny is small. Adding interfacing to both sides would make it too stiff. One layer gives structure without turning your soft bunny into cardboard.
For the inner ears, interfacing helps the fabric hold its shape. The ears will stand more neatly and look defined instead of collapsing inward.
Step 3: Fuse the Interfacing and Pin the Body Pieces
Fuse the interfacing to the wrong side of the corresponding fabric pieces. Follow the manufacturer’s heat settings. Press. Do not slide the iron back and forth. Lift and press to avoid distortion.
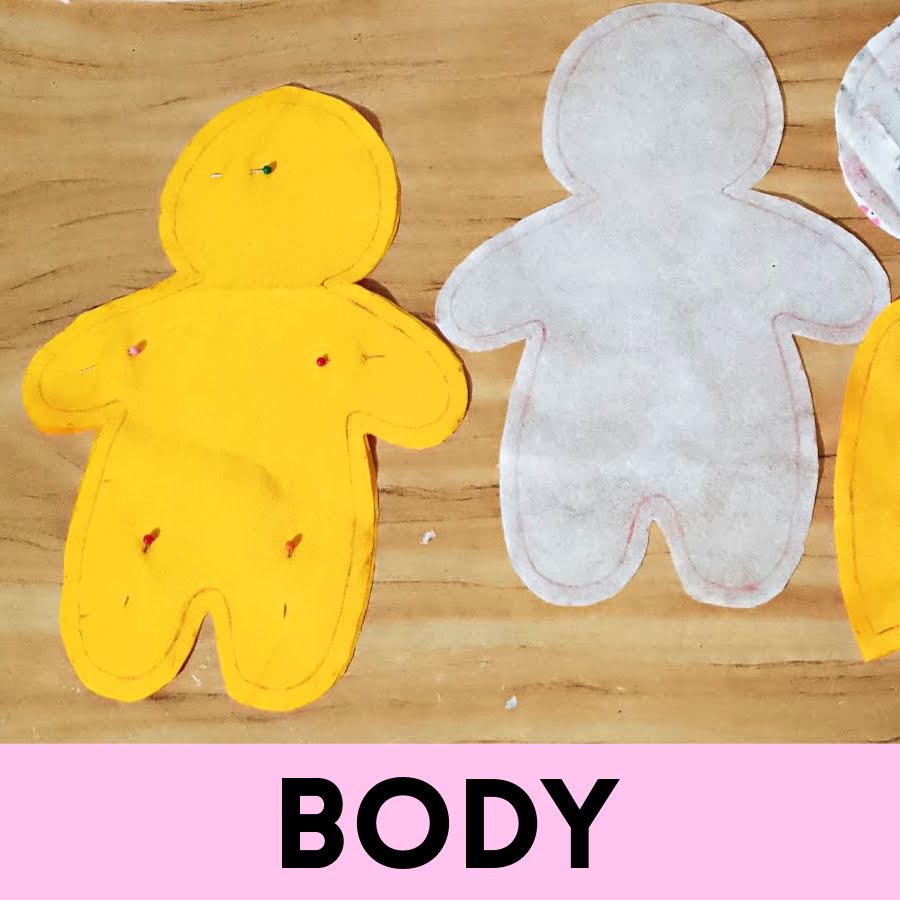
Place the two body pieces right sides together. Align the edges carefully so all curves match — around the ears, neck, and legs.
Pin all around the edges to keep the layers from shifting while you sew.
Leave one small section open.
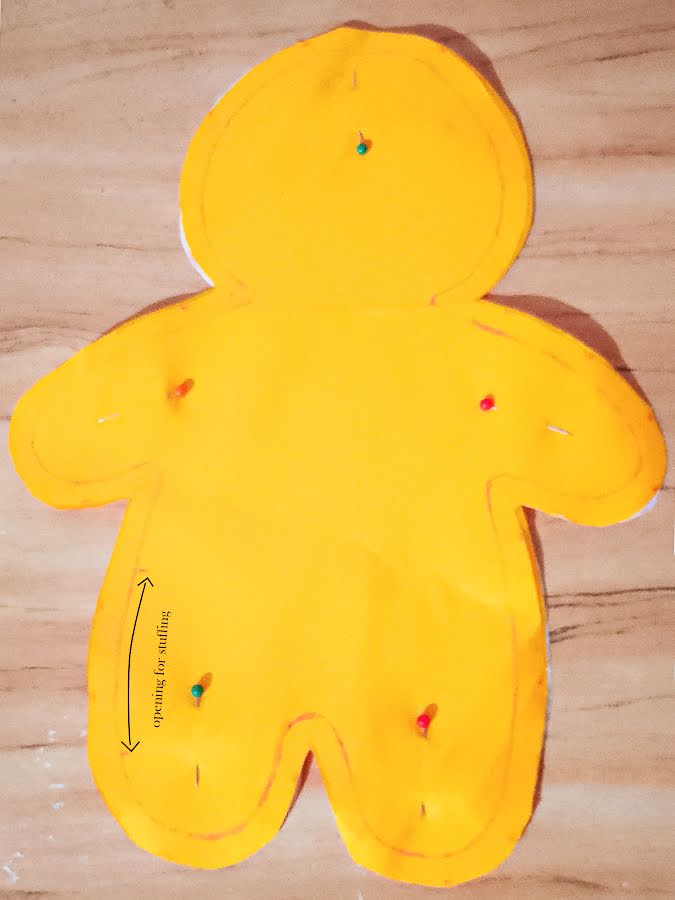
This opening is where you will turn the bunny right side out and add stuffing later. Do not pin this part. Keep it clearly visible.
For a bunny this size, an opening about 1½ to 2 inches works well.
Extra Guidance: Mark the opening clearly so you do not sew it shut by accident.
It is easy to get into a rhythm at the sewing machine and stitch all the way around without stopping. A visible reminder helps prevent that mistake.
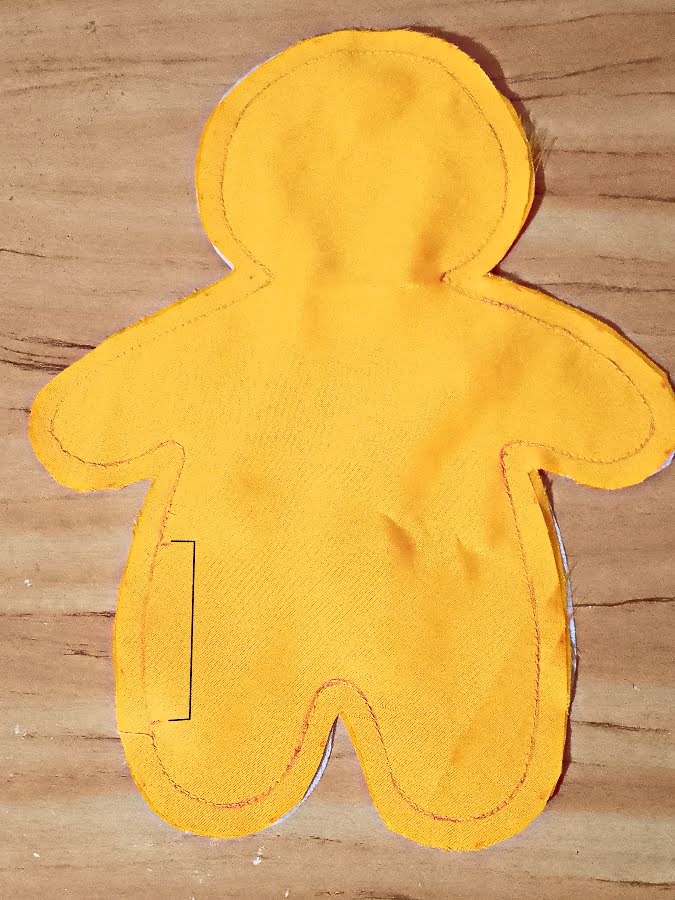
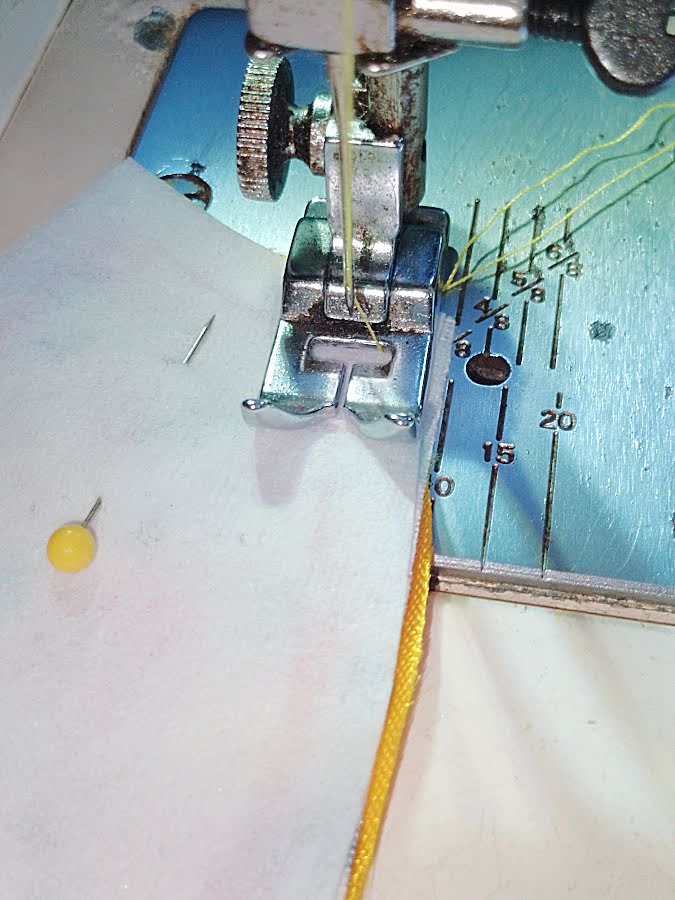
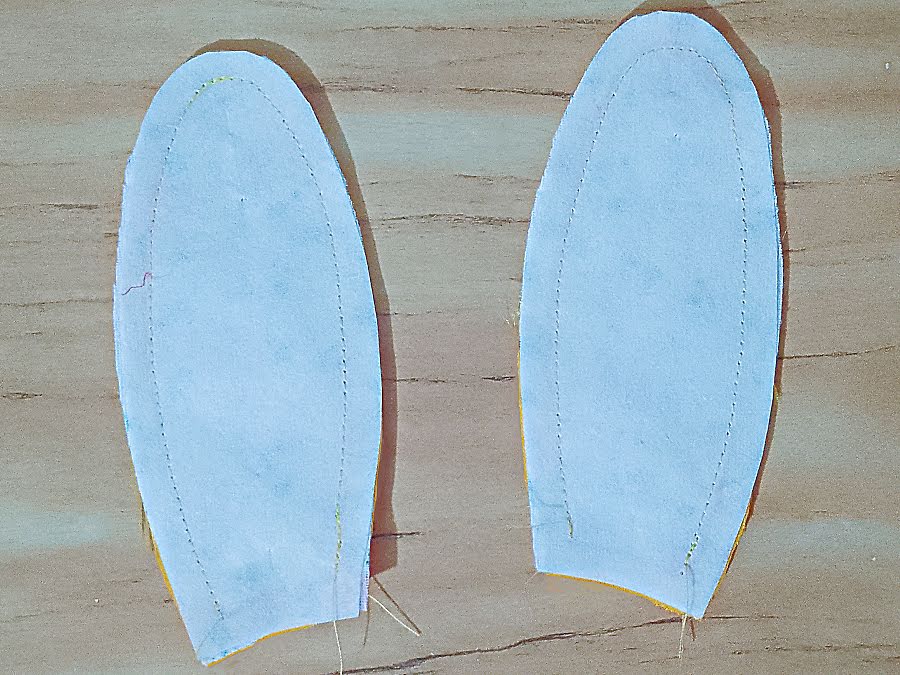
Step 4: Sew the Body Pieces Together
Sew along the traced outline of your body shape. Take your time, especially around curves. Pivot slowly at corners or curves to keep the stitching smooth.
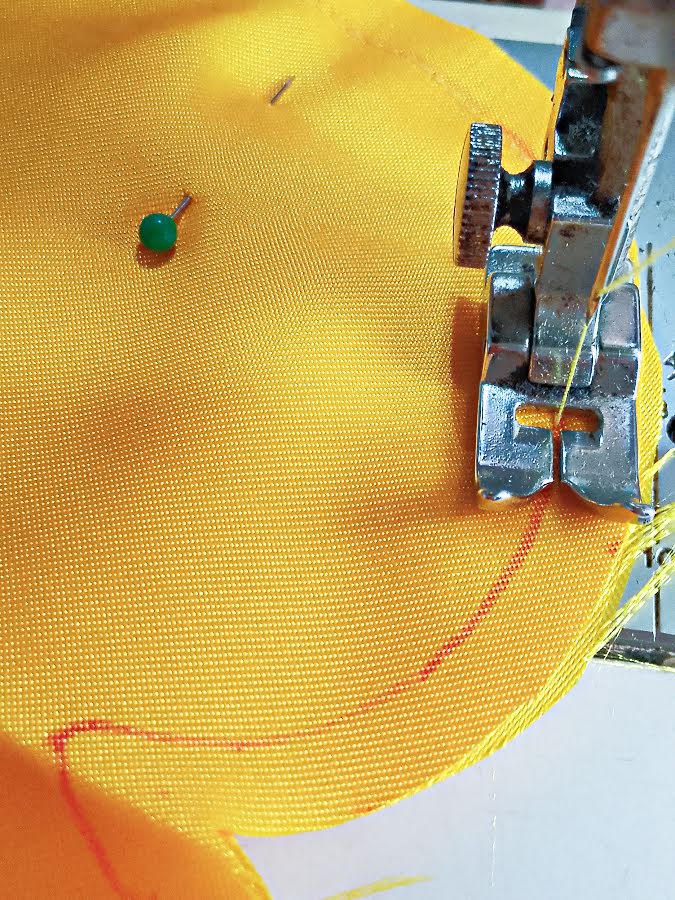
Remember – do not sew the section you left open for stuffing. That part needs to remain open so you can turn the project right side out and fill it
Sewing Tip for Beginners:
- Use a short stitch length (2.0–2.5 mm) for stronger seams.
- Backstitch at the beginning and end of your sewing to secure the stitches.
✅ Related tutorial: Basic Sewing Techniques: How To Sew Corners and Curved Seams
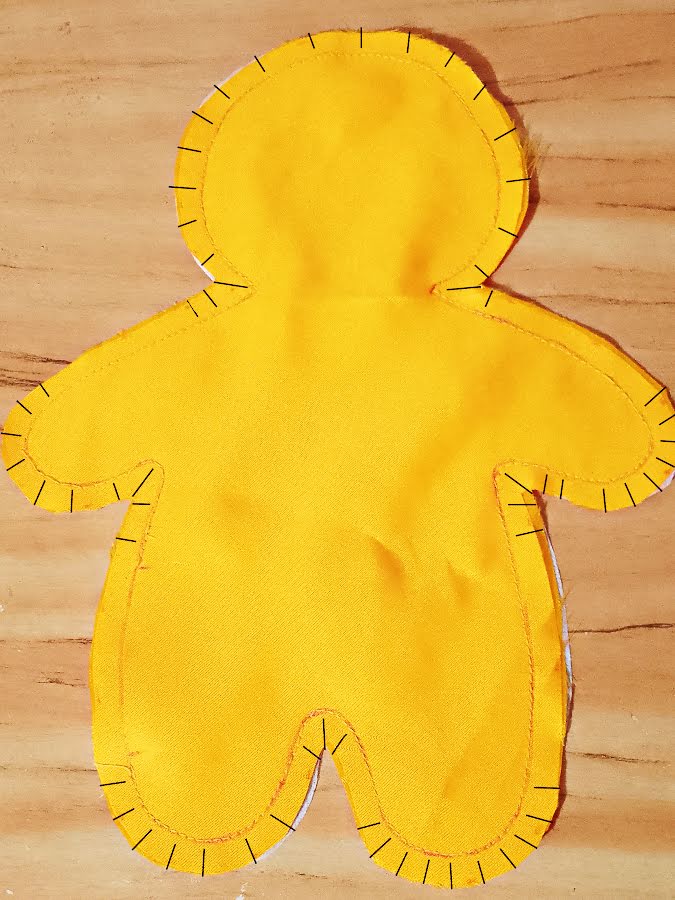
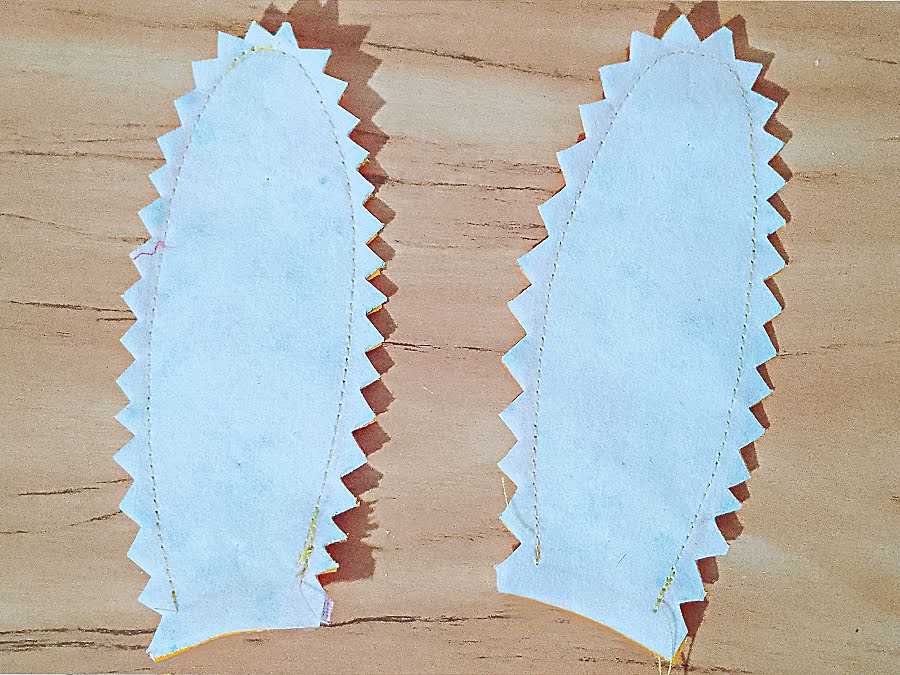
Step 5: Clip the Curves and Turn the Body
Since you already cut with about a ¼ inch seam allowance, there is no need to trim it further unless you see uneven spots. The allowance is already small enough for a toy of this size.
Now focus on clipping the curves.
Make small straight clips into the seam allowance along the rounded areas. Clip close to the stitching, but never through it.
For tighter curves, you can make a few extra clips spaced evenly apart. These small cuts allow the seam allowance to spread when the fabric is turned.
Without clipping, the seam allowance bunches up inside and causes puckers on the outside.
For sharp corners, clip diagonally across the tip, again close to the stitching but not through it.
Now turn the stitched body right side out through the opening you left earlier.
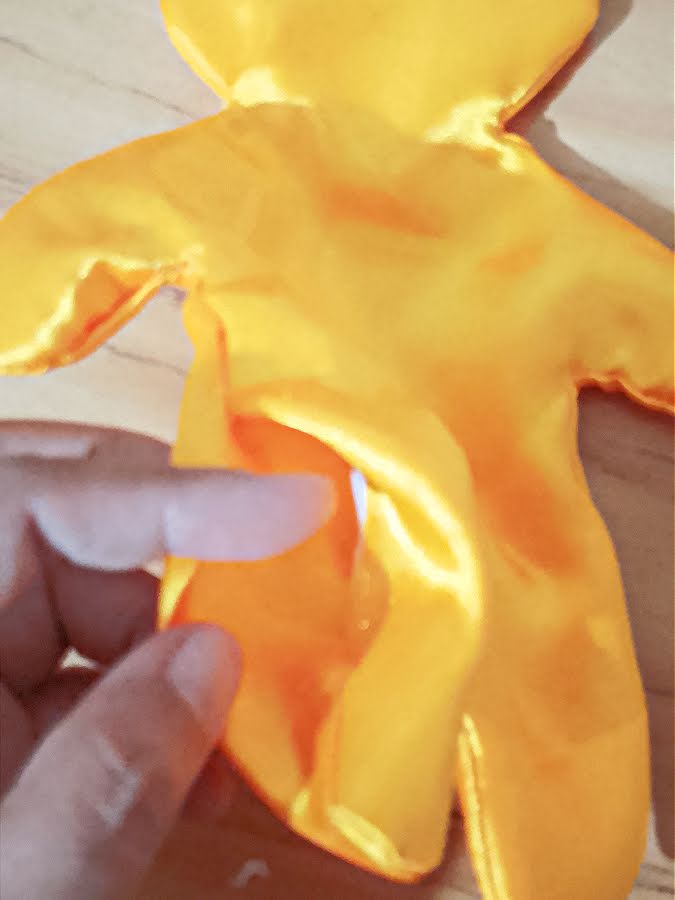
Once the body is turned right side out, use a blunt tool like a chopstick or the end of a paintbrush to gently push out the edges and curves from the inside.
Work slowly and move around the shape. Push out the head, the curves of the legs, and the small areas around the neck. Smooth the seams with your fingers as you go.
This step is important for two reasons.
First, it defines the final shape. When you turn a small stuffed animal, the seams tend to fold inward. If you leave them like that, the bunny will look uneven or slightly dented along the edges. Gently pushing the seams outward allows the curves to look round and natural.
Second, it prepares the body for stuffing. If the seams are not fully turned out before you add filling, the stuffing will press against folded fabric inside. That creates bumps and distortions that are hard to fix later.
Think of this step as setting the structure. You are shaping the shell before you fill it.
Helpful Tip: Avoid using sharp tools for this step. Anything too pointy can poke through the fabric. This is especially risky with small toy sewing patterns and lightweight fabrics like satin.
A tiny hole at this stage feels very discouraging. Use something smooth and blunt instead. Gentle pressure is enough.
Once the seams are fully shaped and smooth, your bunny is ready for stuffing.
Step 6: Stuff the Body Evenly
Now it’s time to fill the bunny with stuffing. Use small pieces at a time. Start by pushing stuffing into the furthest corners first, like head or arms, then work your way toward the center.
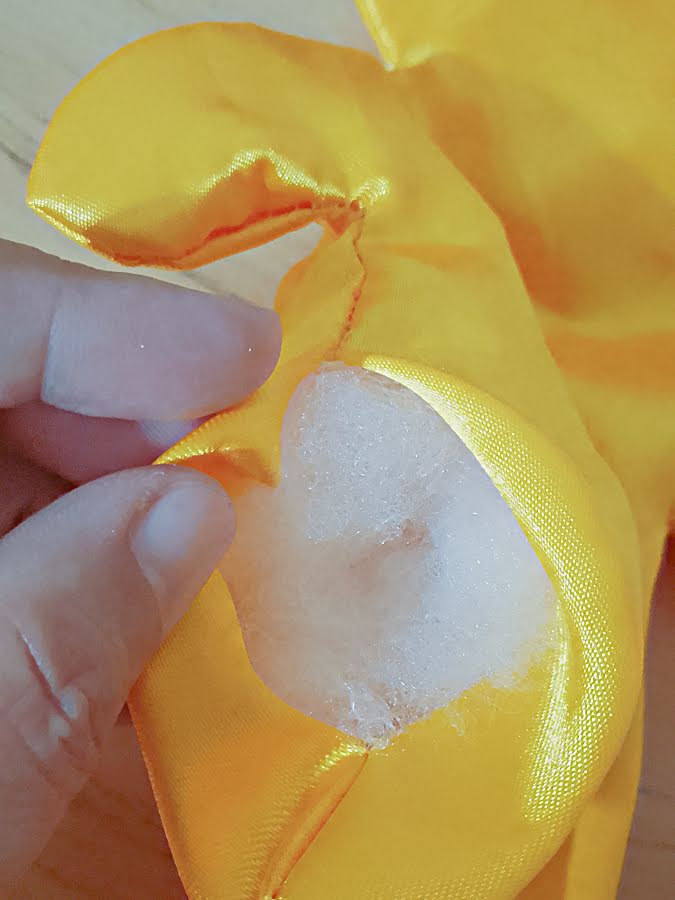
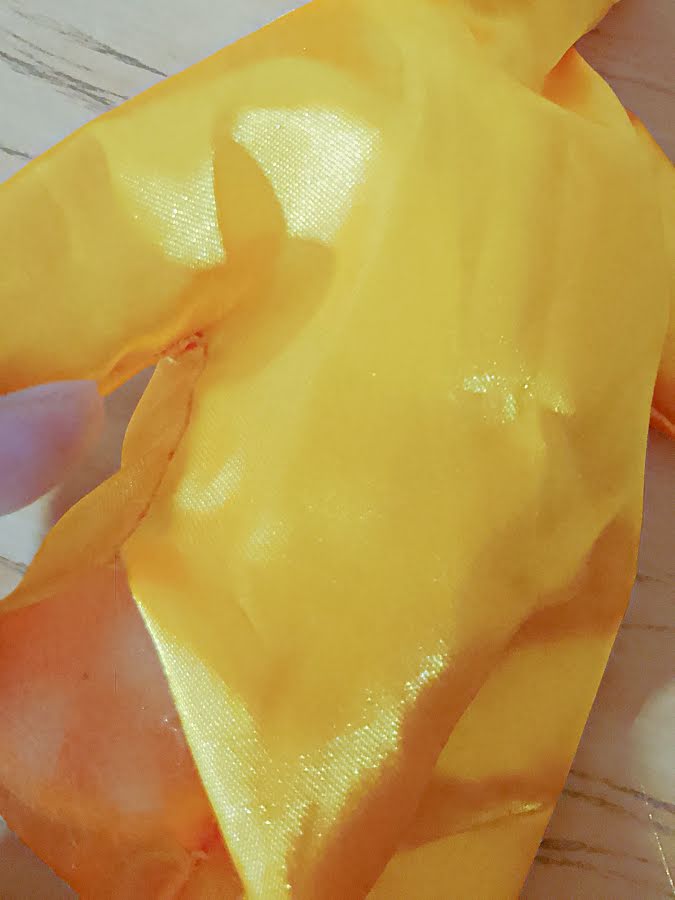
Firm stuffing gives structure, but don’t over-pack. Too much stuffing can stretch the seams or create lumps. Aim for a smooth, balanced shape.
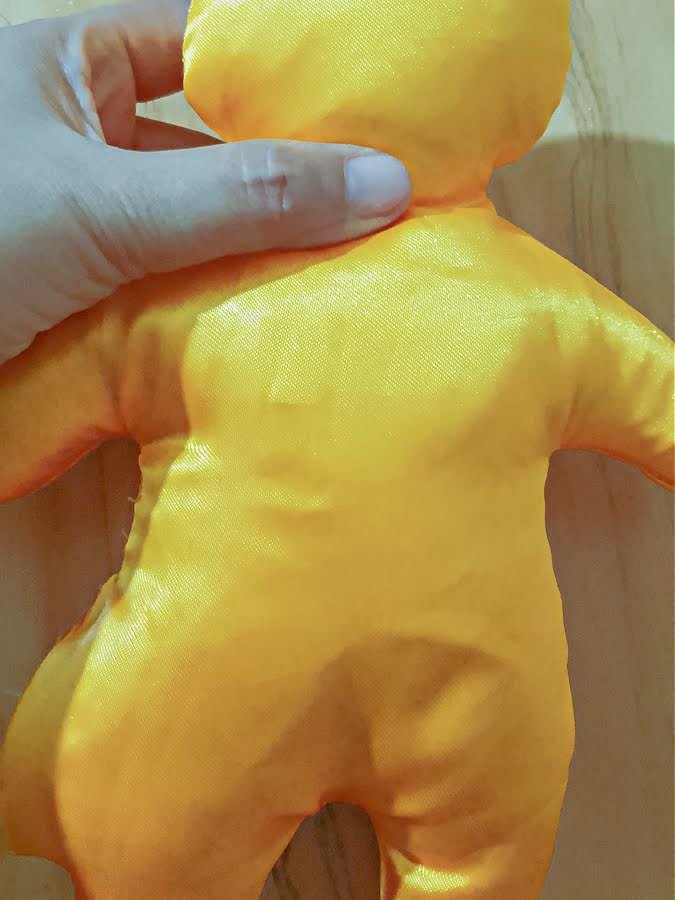
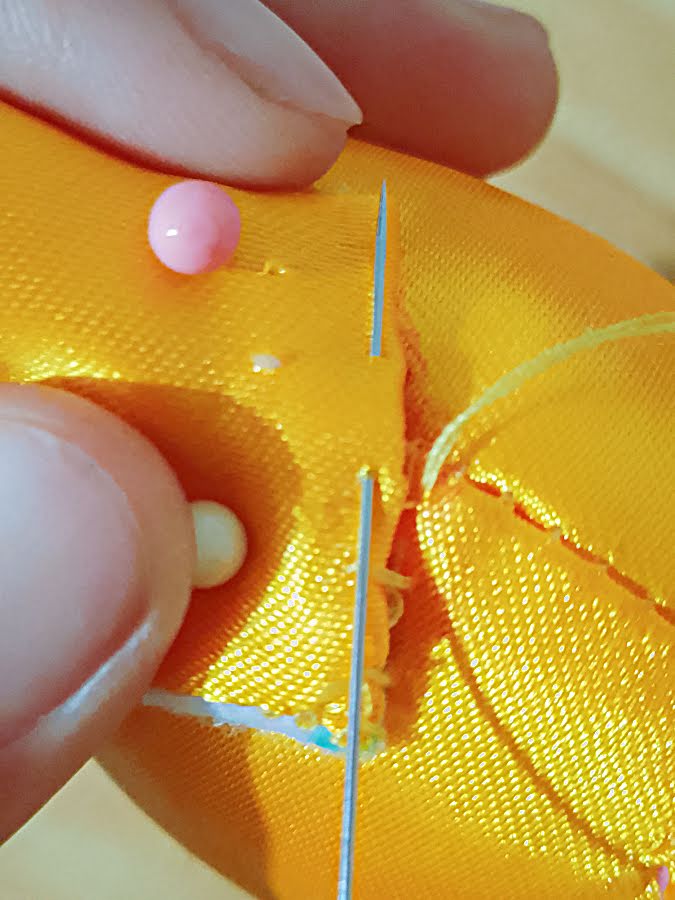
Once you’re happy with the fullness, close the opening using a ladder stitch (it’s also called invisible stitch). This stitch is nearly invisible when done carefully. It creates a seamless join that looks just like the rest of your sewn edges.
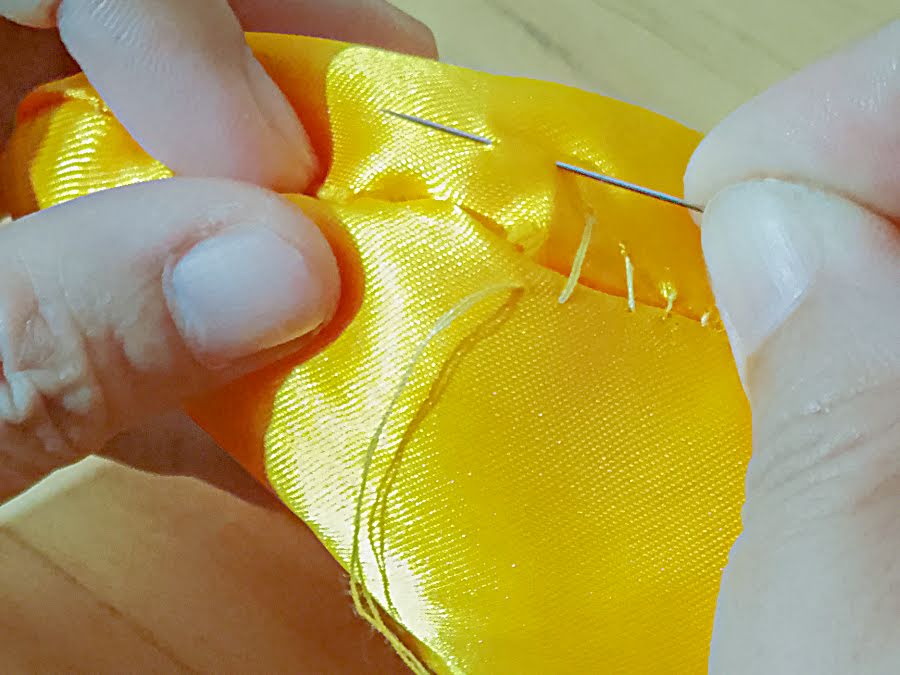
Beginner Note: The ladder stitch works by weaving the thread between the folded edges of the fabric opening. Take your time with it, and the finish will be clean and professional.
Step 7: Mark the Face Features
The face placement is already shown on the stuffed bunny sewing pattern.
However, I did not transfer those markings to the fabric before sewing.
And that was intentional.
For small stuffed animal sewing patterns like this one, I prefer to mark the face after the bunny is turned and stuffed. Here is why.
Once the body is filled, the shape changes slightly. The fabric stretches just a bit. The head becomes rounder. The proportions shift. If you mark the face before stuffing, the placement can end up slightly off once the bunny is full.
So instead, wait until the bunny is stuffed and shaped.
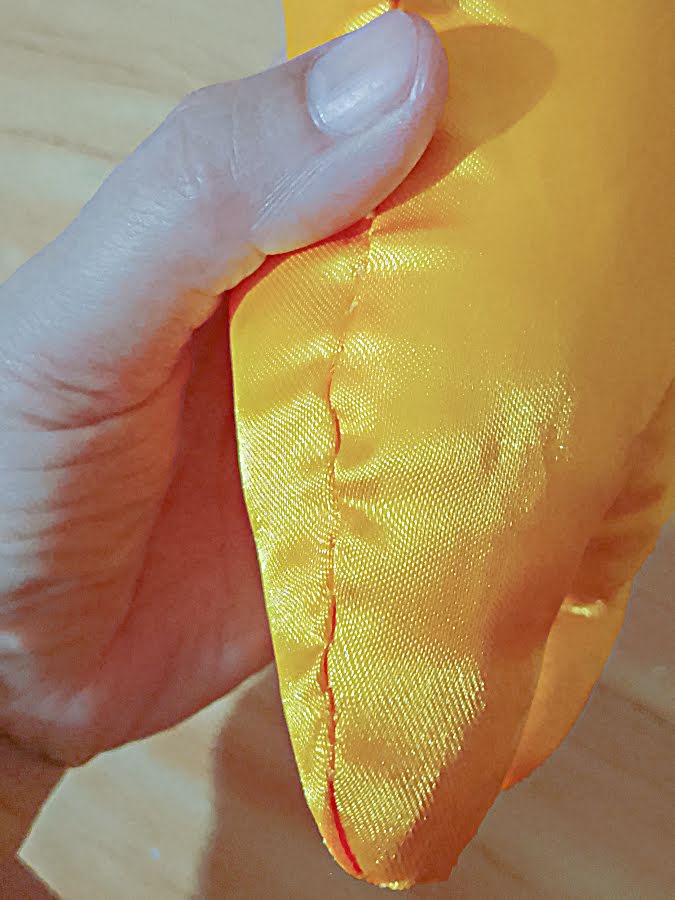
Then gently fold the head vertically to find the center line. This helps you position the nose symmetrically.
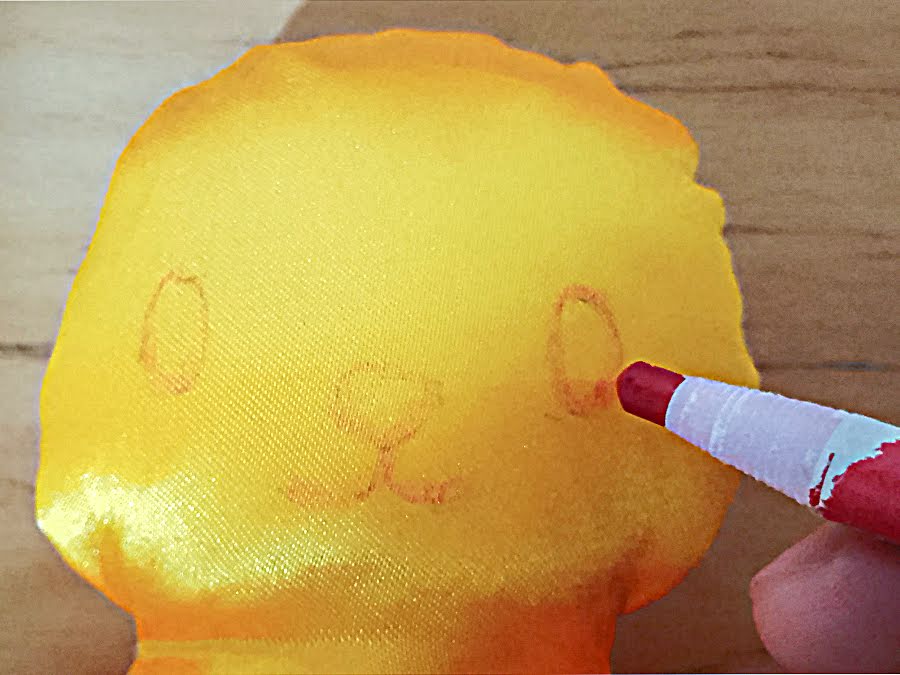
From there, measure or visually balance the eye placement on each side. You can use pins to test the look before committing to stitches. Step back and look at it from a short distance. Small adjustments make a big difference in expression.
Use fabric chalk or a disappearing fabric marker to lightly mark the final positions.
This approach gives you more control over your bunny’s personality. Even a few millimeters can change the expression from sweet to surprised.
This step is worth a few extra minutes. A well-balanced face makes all the difference in the final look.
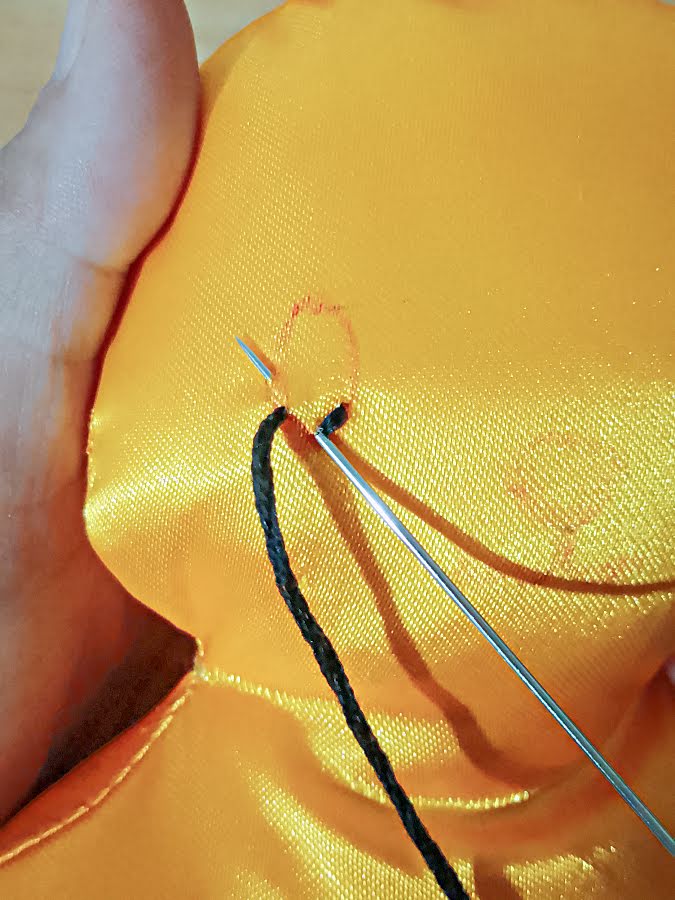
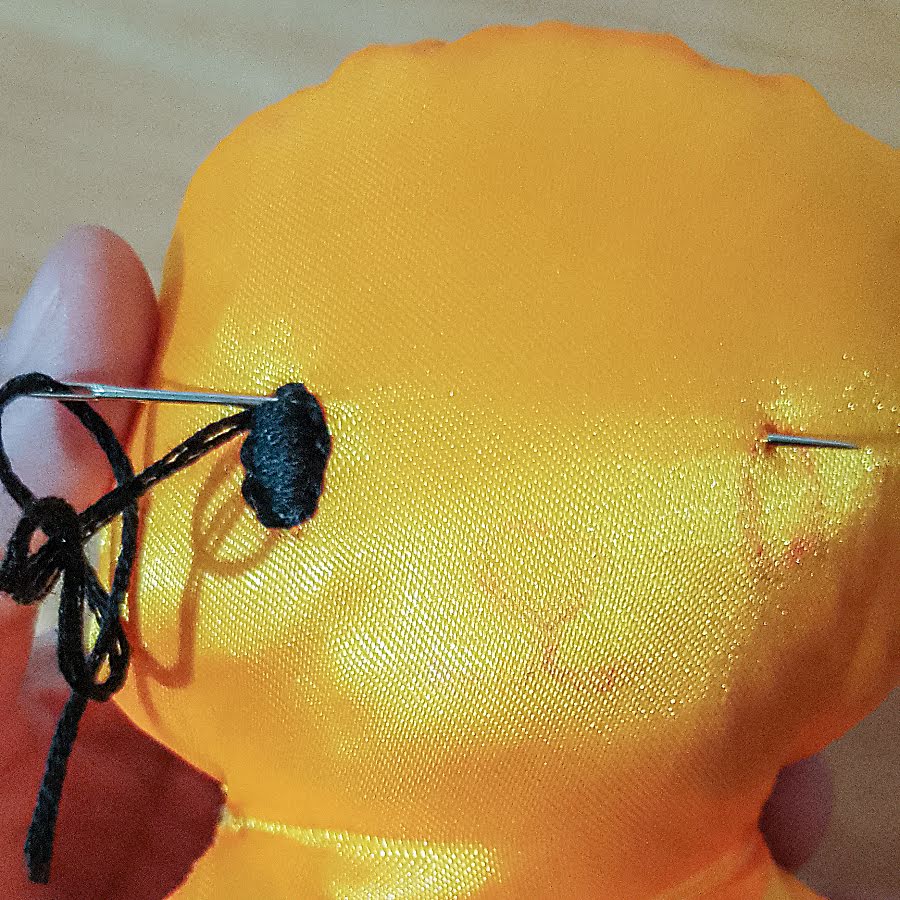
Step 8: Start Embroidering the Eyes
Thread a needle with black embroidery floss. You’ll begin each eye by coming from the cheek area and bringing the needle out at the eye marking. This anchor point on the side allows you to sew without a visible knot.
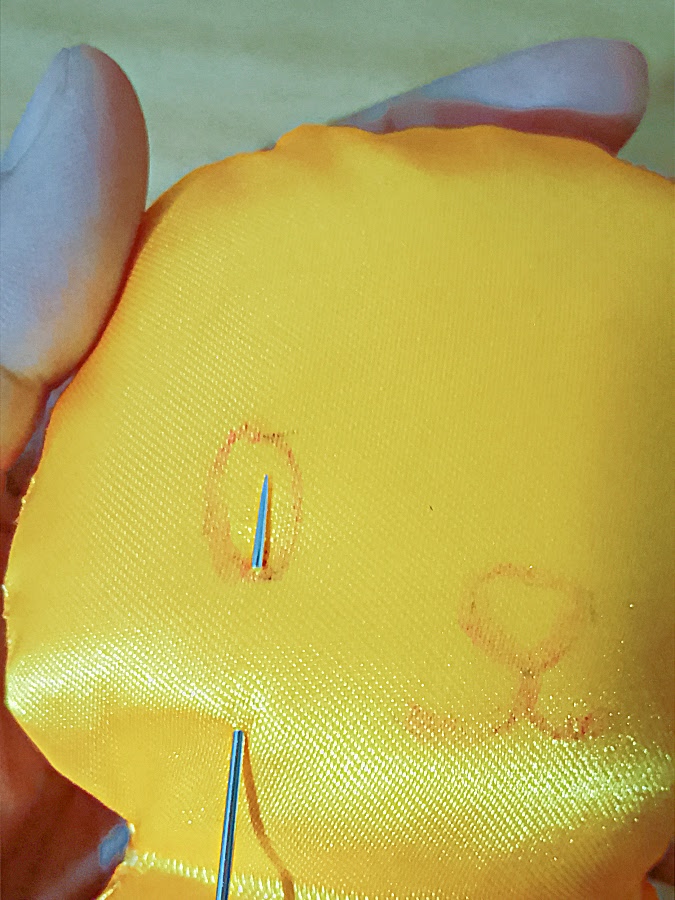
Hold the thread taut but not tight. The goal is a clean, smooth start to the embroidery.
Step 9: Embroider the Eyes with Backstitch
Work a backstitch along the eye outline. A backstitch creates a solid line of thread by overlapping each stitch slightly with the previous one.
Keep your stitches short and close together to follow the curve neatly. Try to make each stitch about the same length for a clean, consistent look.
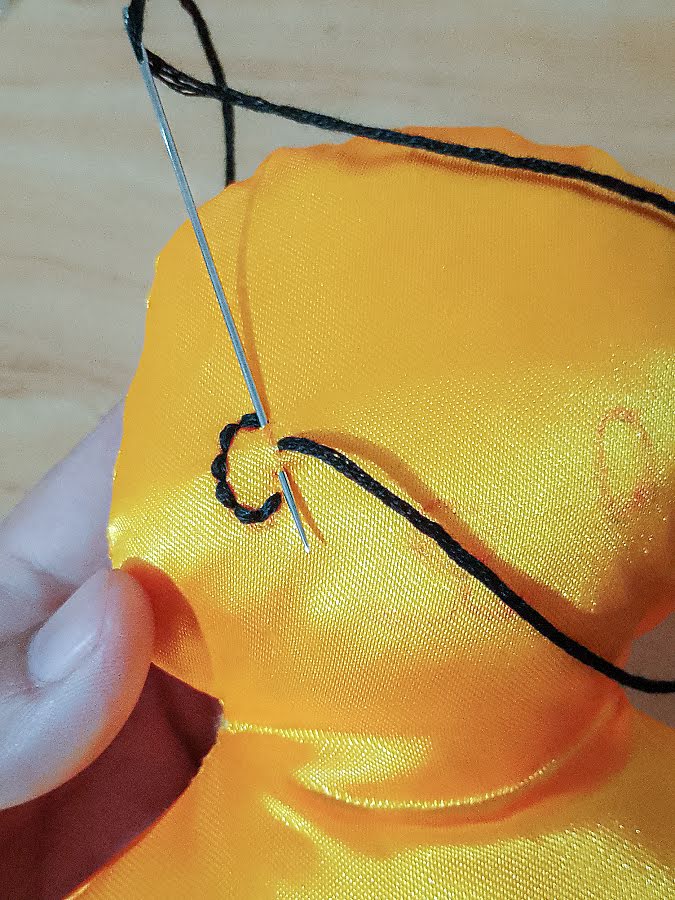
Helpful Note: If you’re new to embroidery, practice the backstitch on a scrap piece first. Once you get the rhythm, it feels quite natural.
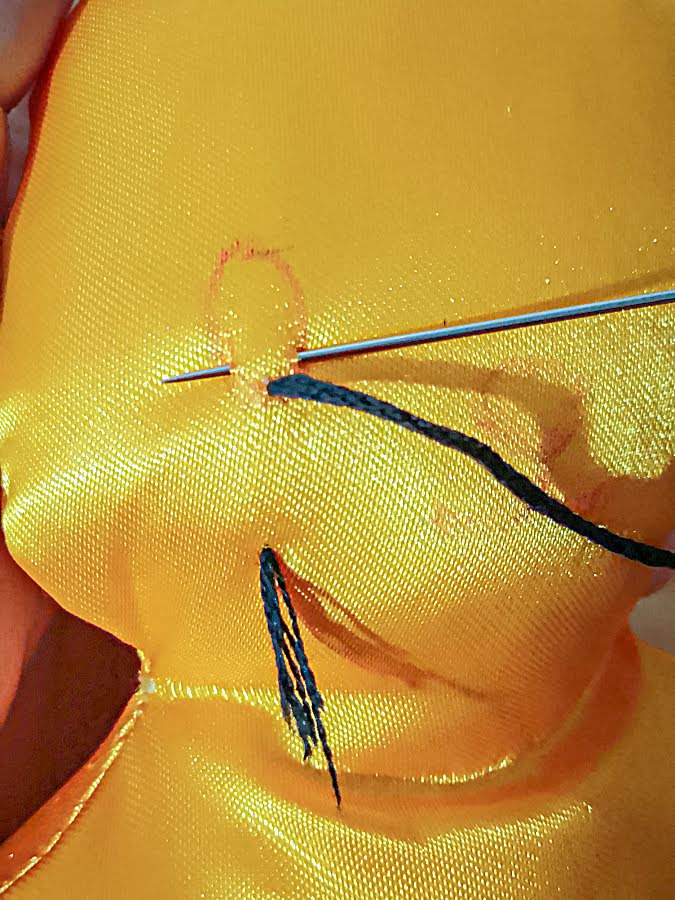
Step 10: Fill the Eyes with Satin Stitch
Once your eye outline is complete with backstitching, it’s time to fill it in. The satin stitch creates a smooth, glossy finish that gives the eyes a clean look.
Start just inside the backstitched outline. Bring the needle up from the back, then down across to the opposite side of the circle. Each stitch should sit snugly next to the last, like tiny floorboards being laid edge to edge.
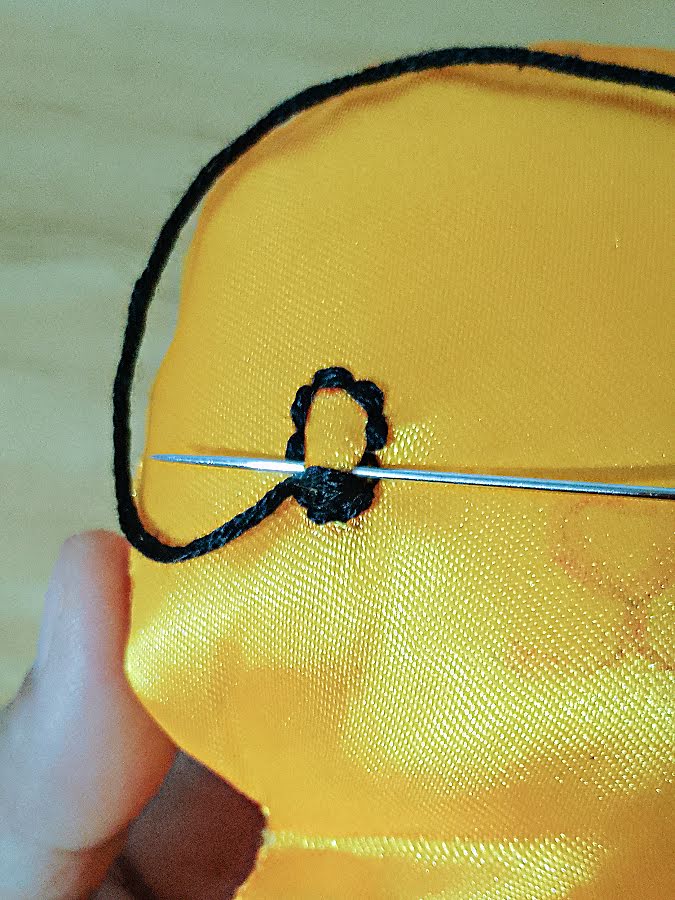
Follow the natural curve of the circle. Continue stitching until the entire eye is filled and no fabric peeks through.
Beginner Tip: Don’t pull the stitches too tight. If the fabric starts to pucker, loosen your tension a bit. You want the stitches to lie flat without stretching the surface.
Step 11: Repeat the Satin Stitch for the Second Eye
Once the first eye is finished, guide the needle through the inside of the body. Aim for the marked point for the second eye. This helps keep your embroidery neat with no stray threads visible on the surface.
Repeat the same satin stitch technique. Try to match the shape and density of your first eye so the face looks balanced.
Extra Help: If your first eye feels a little larger or smaller, adjust your outline slightly on the second side.
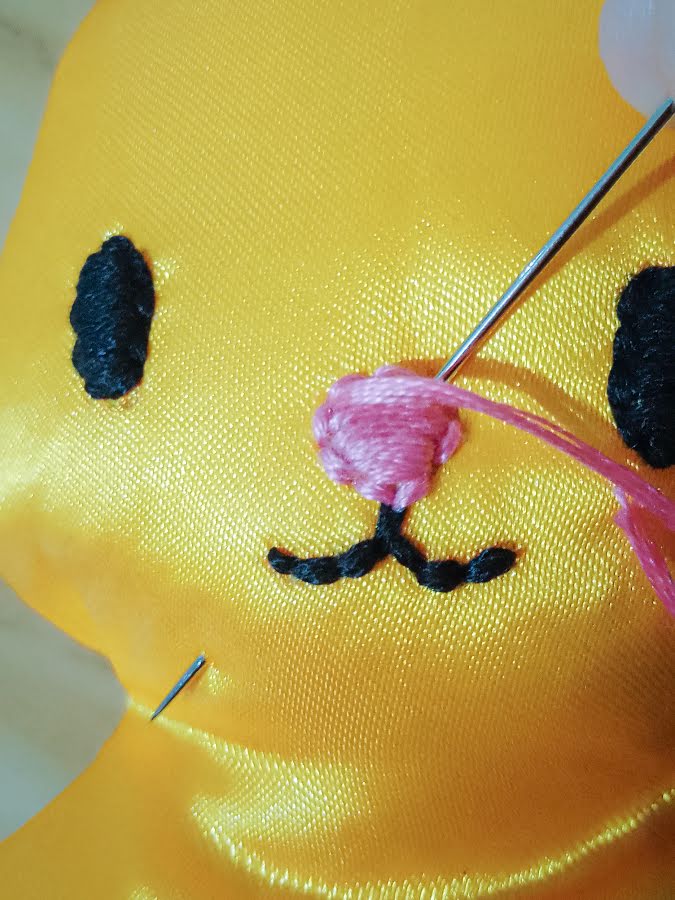
Step 12: Embroider the Mouth with Backstitch
After finishing the second eye, pass your needle through the inside of the stuffed body and bring it out at the point where the mouth begins, just below the nose. This keeps the thread hidden inside the fabric.
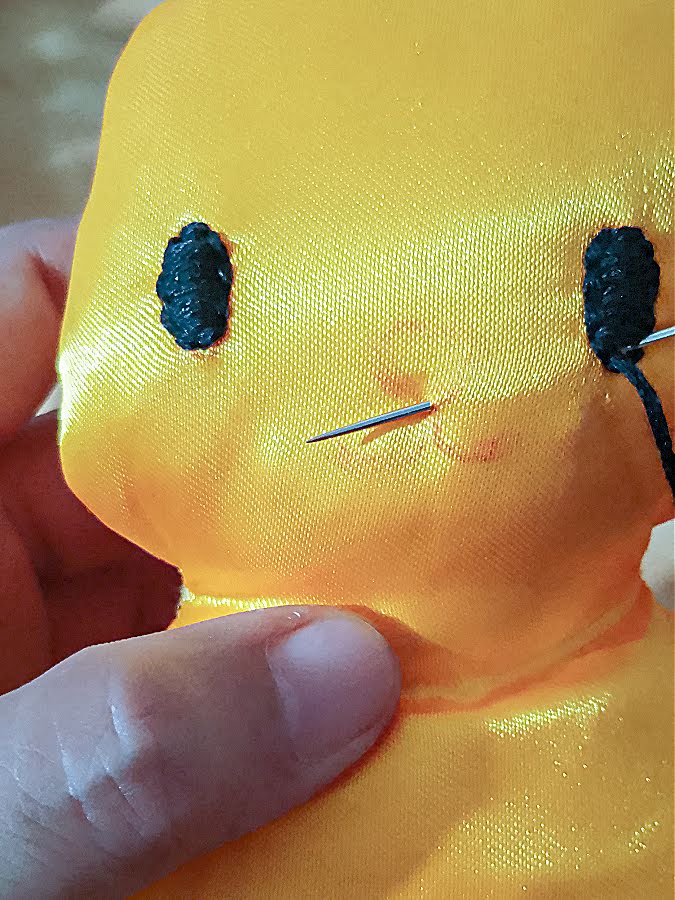
Work a backstitch along the marked mouth line. Follow the marking carefully. Make each stitch short and close together so the line looks smooth and continuous. Keep the spacing even, especially along curves.
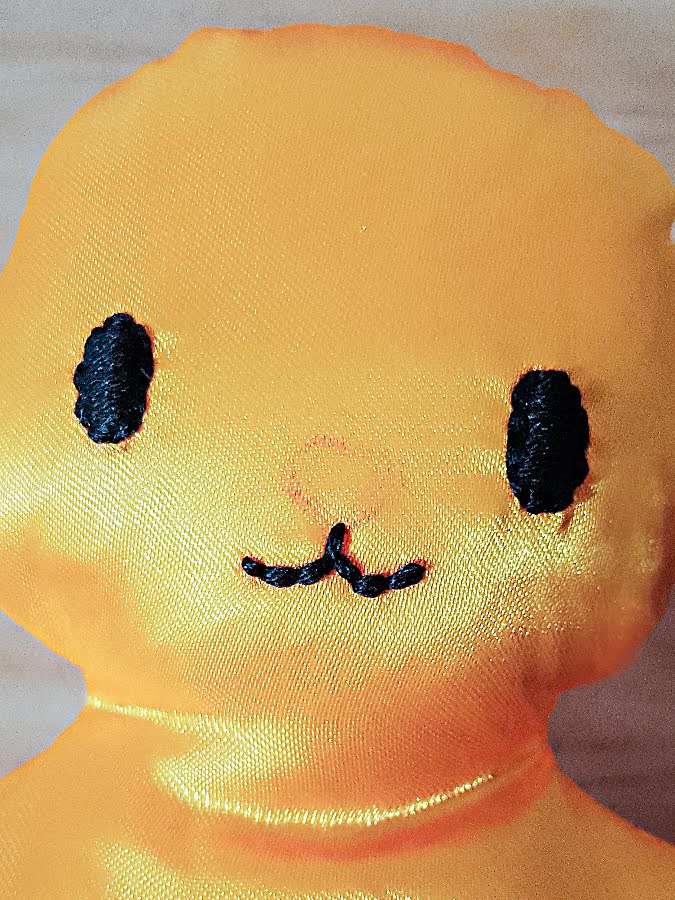
Finish the last stitch neatly, then guide your needle back through the body and out at the center of the marked nose area. This sets you up for the next step without any visible travel stitches.
Step 13: Satin Stitch the Nose
Thread your needle with pink embroidery floss (or your chosen color for the nose). Begin satin stitching directly over the marked nose shape. Start at one edge and work across to the other side, placing each stitch side by side.
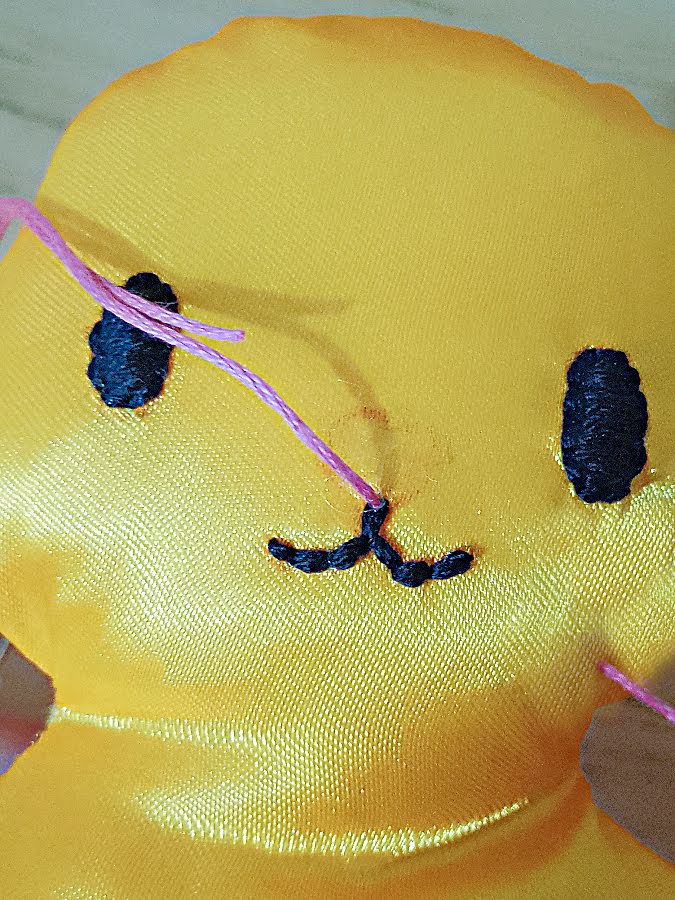

Keep the stitches smooth and even in length. Try not to leave any gaps between them, so the fabric underneath doesn’t show through. Work slowly and adjust the angle of the stitches as needed to follow the curve of the shape.
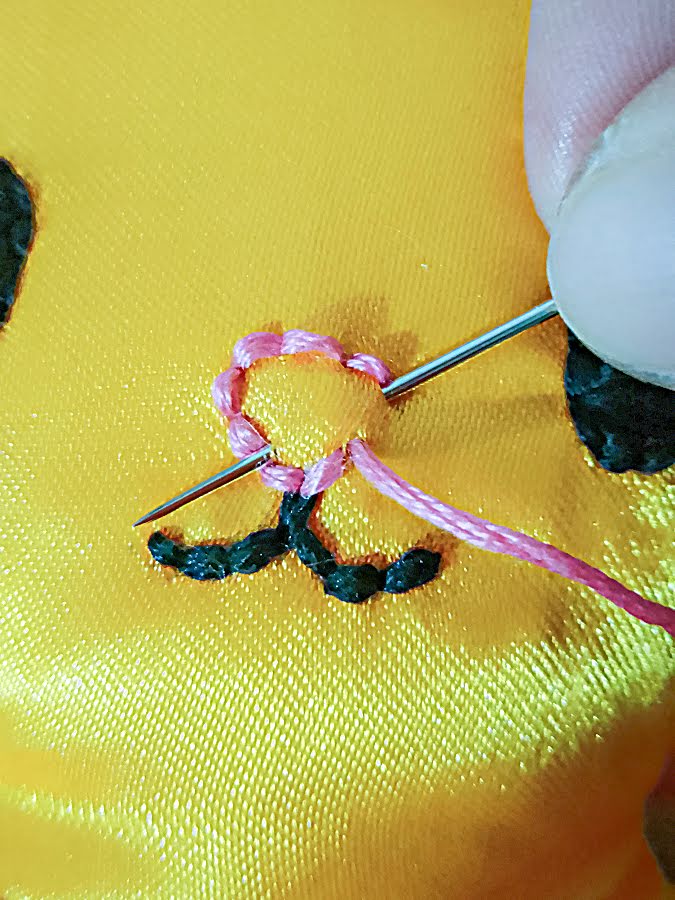
Once the nose is filled completely, make a tiny securing stitch by slipping your needle under one of the satin stitches. Then bring the needle out at a different spot on the face. Gently pull the thread so the knot disappears into the stuffing, and trim the thread close to the fabric.
This leaves the surface smooth and tidy with no visible knots or thread ends.
Step 14: Mark the Ear Placement
Look at the top of the head and find the area where the ears will be attached. Use the placement guides on your pattern to mark these spots. It helps to measure from the center seam or another known reference point to keep both markings even and symmetrical.

Make sure both marks are at the same height and distance from the center. If they’re uneven, the ears may look crooked once attached. Keep your markings visible but light enough that they won’t show after sewing. A disappearing ink pen or chalk pencil works well here.
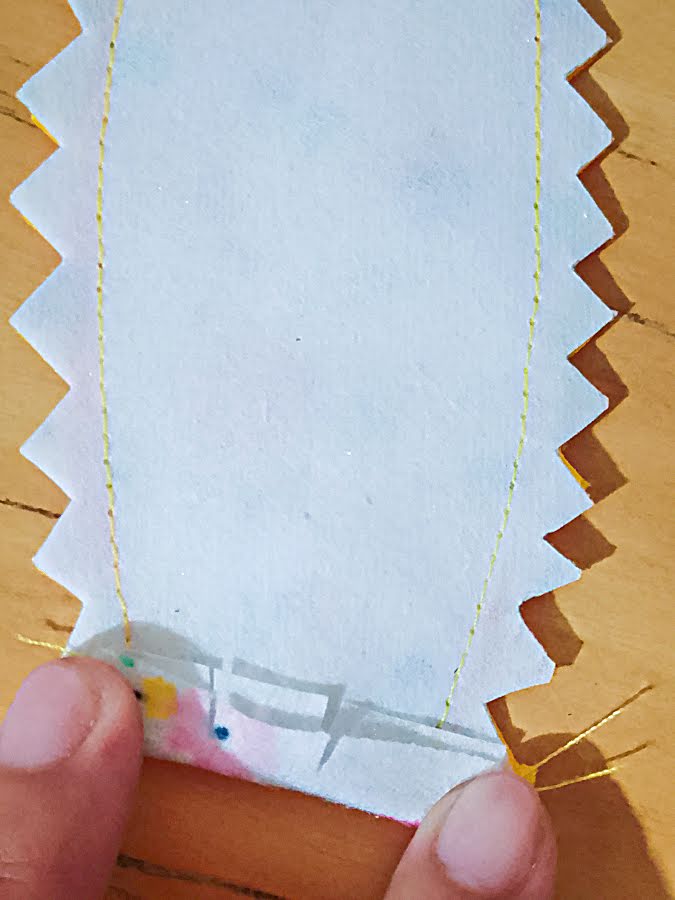
Step 15: Prepare and Sew the Ear Pieces
Take your white floral fabric and apply fusible interfacing to the wrong side of each piece. This will help the ears hold their shape and prevent them from collapsing once attached.
Next, pair up the ear pieces, placing them right sides together. Match up all the edges neatly and pin them in place. Each ear should be made from two layers of fabric — one with interfacing, one without.
Sew around each ear, stitching directly on your marked line.
Start and stop your stitching exactly near the base of the ear. You will notice these points on the pattern. They mark where the curved stitching ends and the opening begins.
Leave the base of each ear open.
This opening is necessary so you can turn the ears right side out later. Backstitch at the beginning and end of your seam to secure the stitching.
As you sew around the curves, go slowly and pivot as needed to keep your seam smooth.
Step 16: Trim and Prep the Seams
Trim the seam allowances using pinking shears to reduce bulk and help the curves lie flat. If you don’t have pinking shears, you can carefully cut small notches or a soft zigzag shape with regular scissors.
Next, look at the unstitched opening at the base of each ear. Clip into the seam allowance just at the curved parts around the opening — this helps the fold lie more smoothly later.
Fold the raw edges of each opening inward, toward the wrong side of the fabric. Hold these folds in place by adding a line of basting stitches by hand. This keeps everything neat and ready for the final step.
Step 17: Turn and Attach the Ears
Carefully turn each ear right side out. Use a blunt tool like a chopstick, pencil, or point turner to push out the curves and tips of the ears from the inside. Be gentle — the fabric may stretch or fray if pushed too forcefully.
Once turned, press the ears flat with an iron to set the shape.
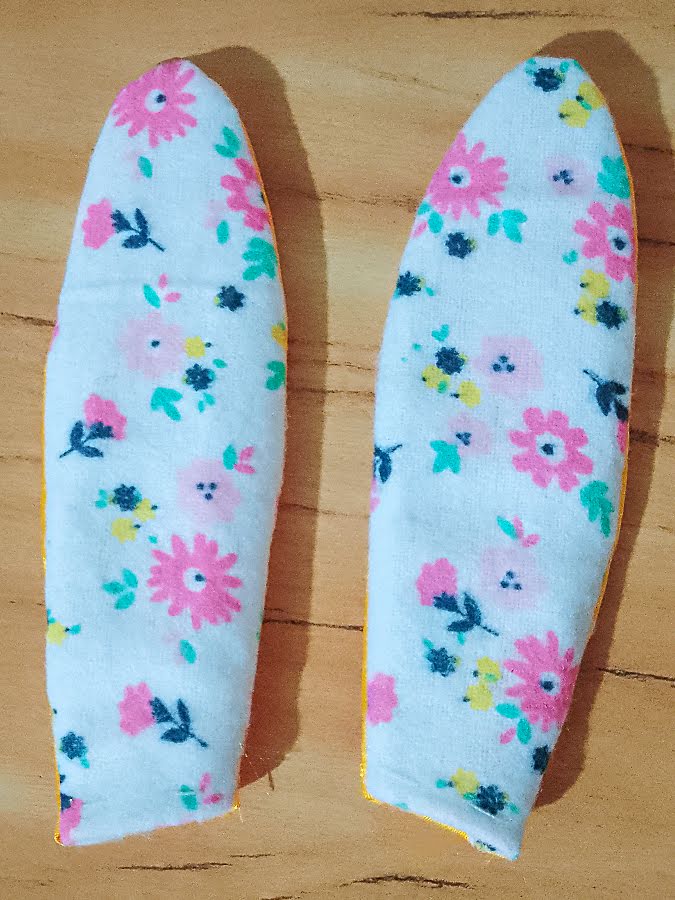
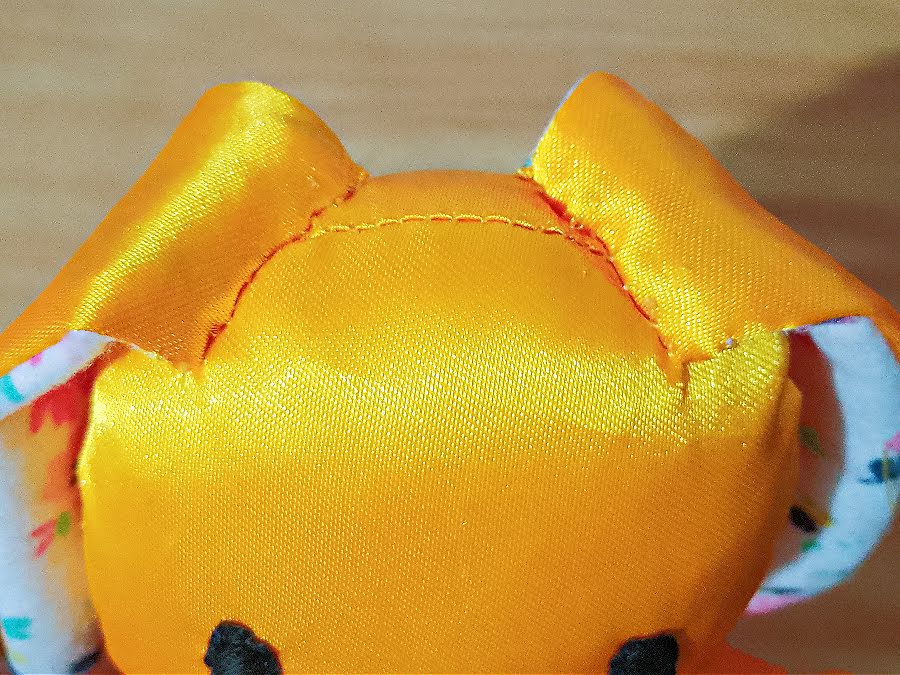
Pin each ear to the head using the marks you made earlier. Make sure the floral inner-ear fabric faces downward, toward the face. This is the visible side once the ears are attached.
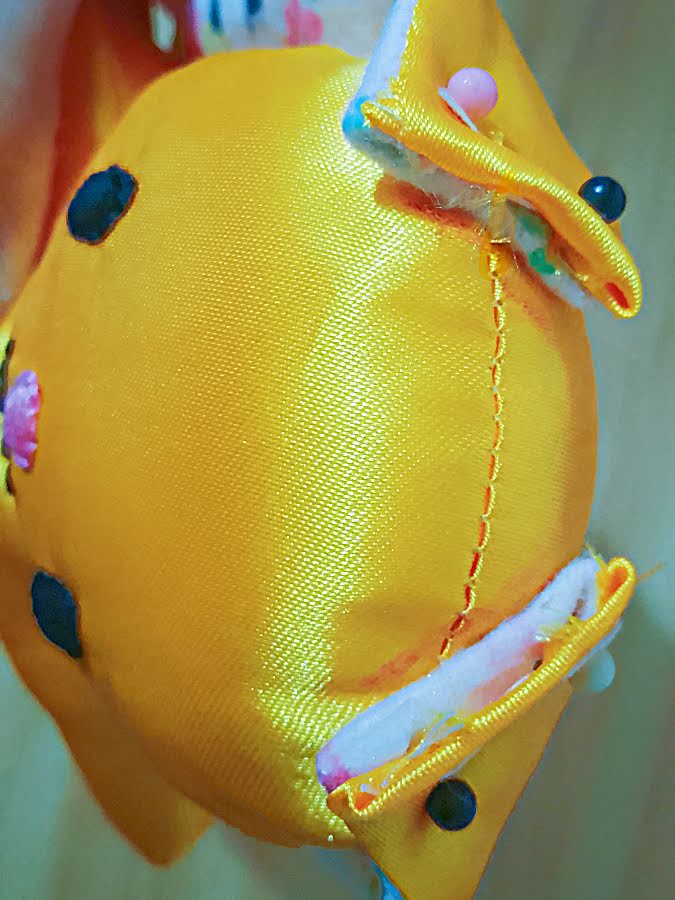
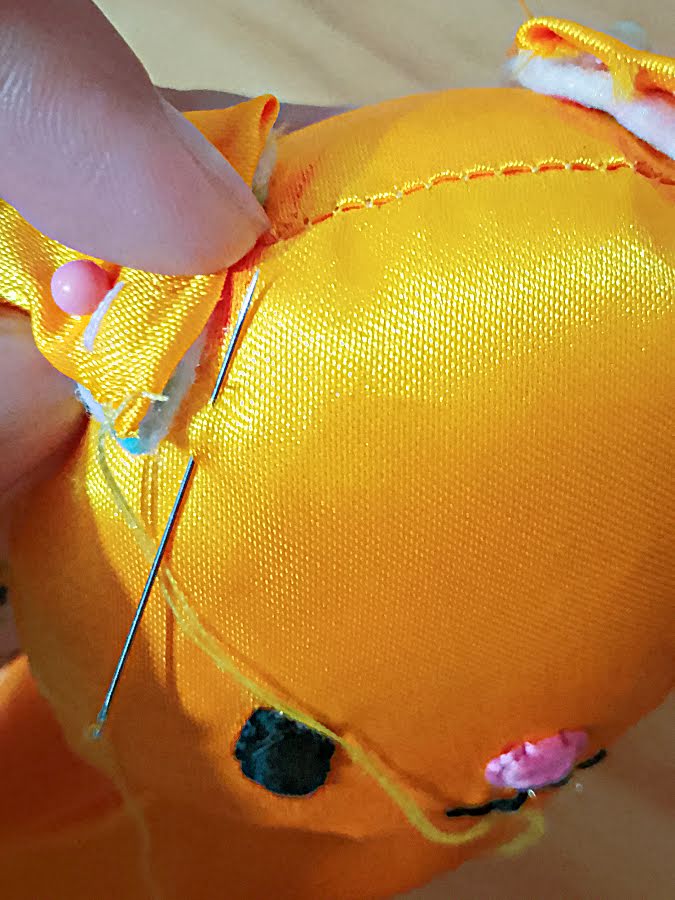
Attach the ears using a ladder stitch, sewing by hand around the base of each ear. Take your time to make the stitches small and even. This will keep the seam nearly invisible.
✅ Related tutorial: Invisible Stitch Tutorial: How To Fix A Tear (+ Sewing “Blind” Hems)
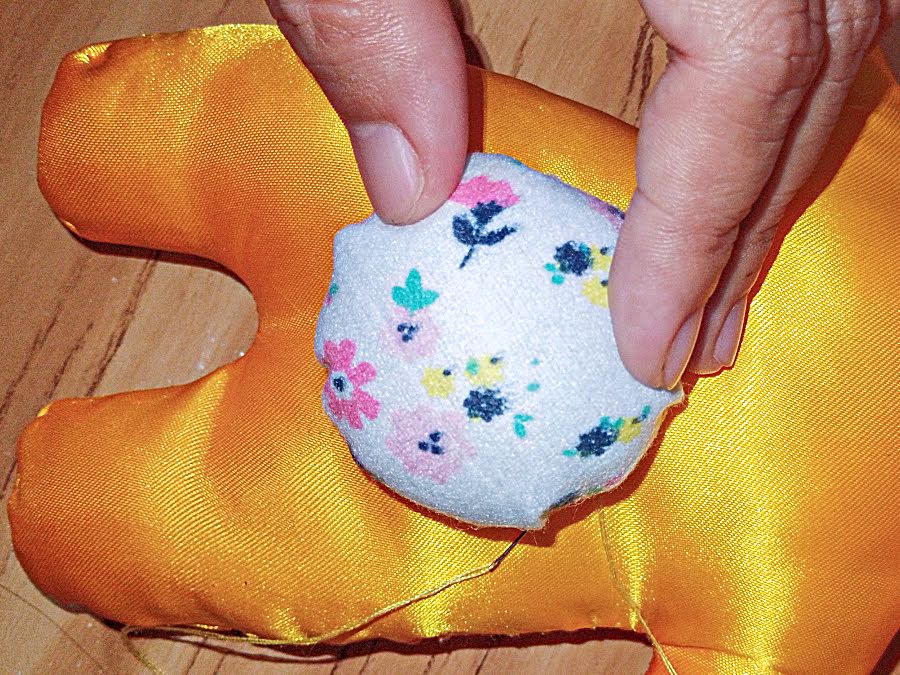
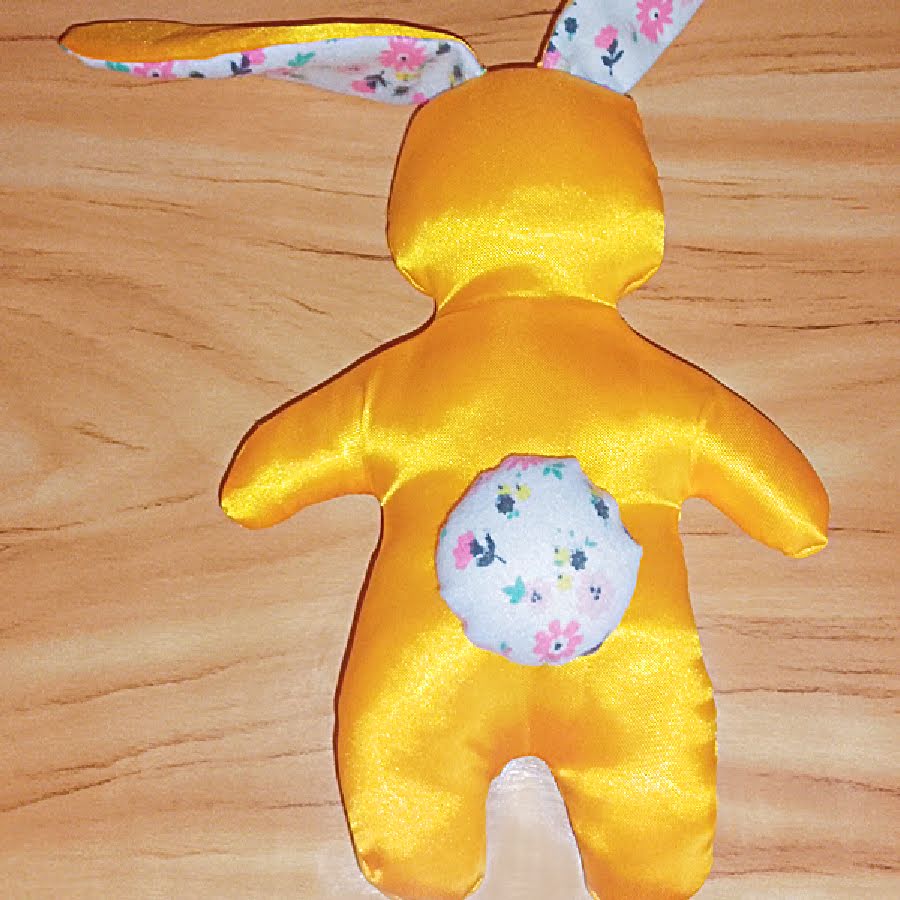
Step 18: Make the Tail
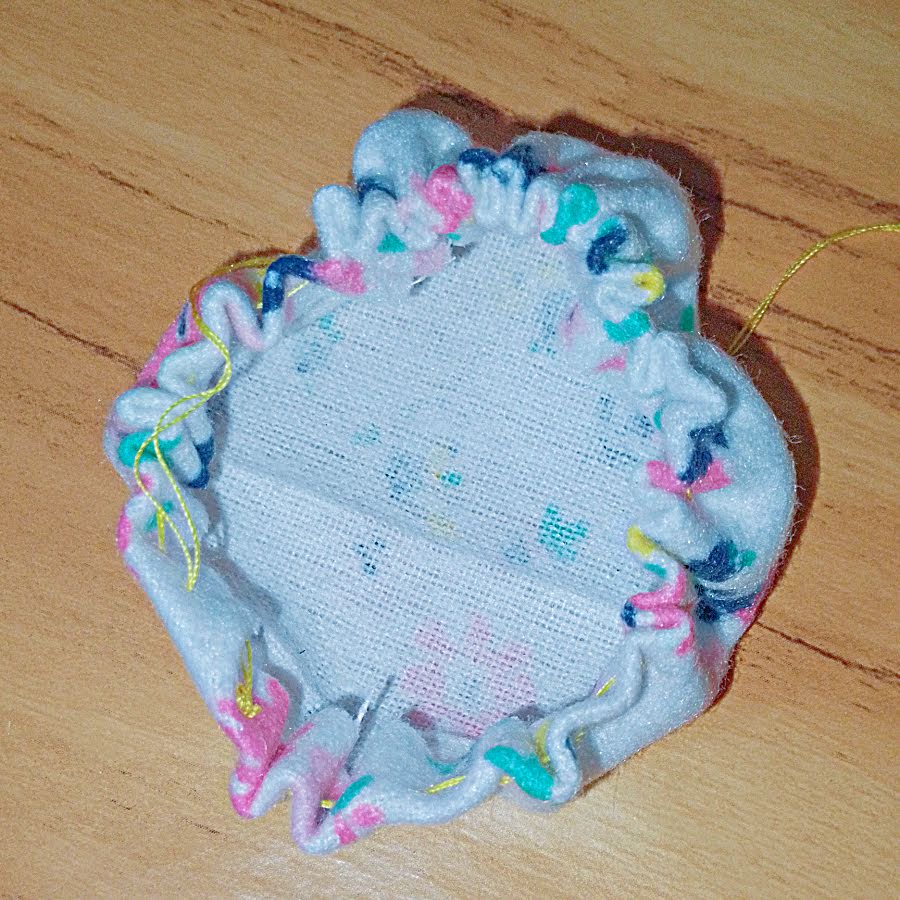
Take your tail fabric piece and fold the raw edge under toward the wrong side. Hand-sew a line of basting stitches along this folded edge, going all the way around the circular shape. Keep your stitches loose and even so you can gather them easily.
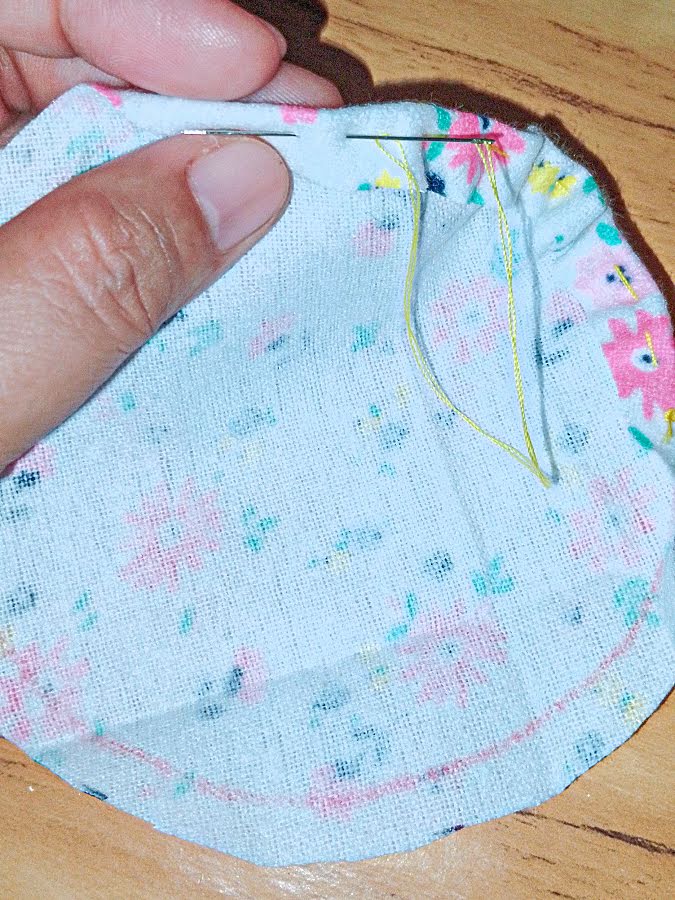
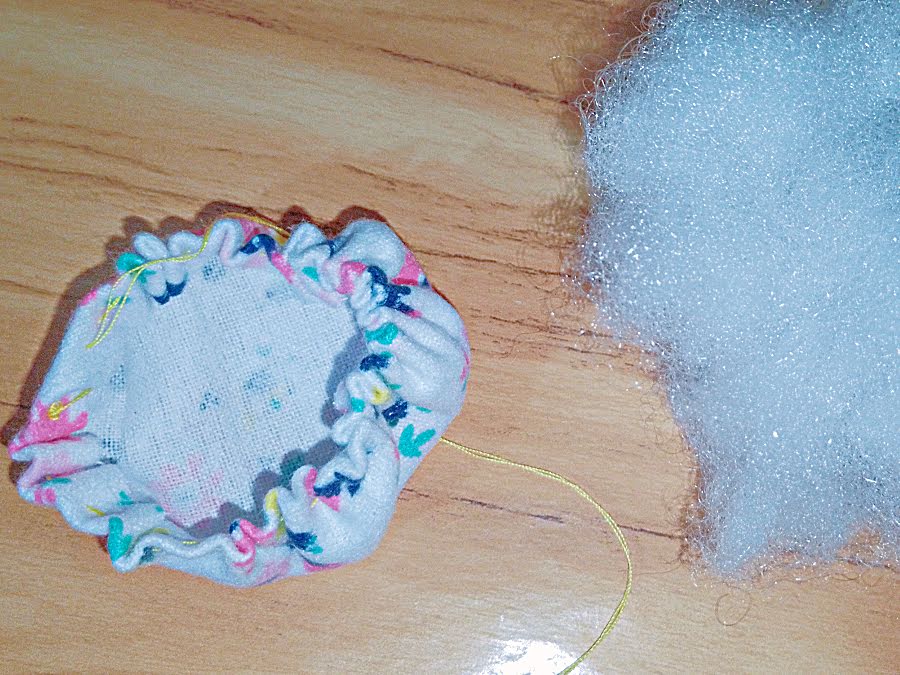
Once you’ve stitched all the way around, gently pull the thread to gather the edges inward. The fabric will begin to close up.
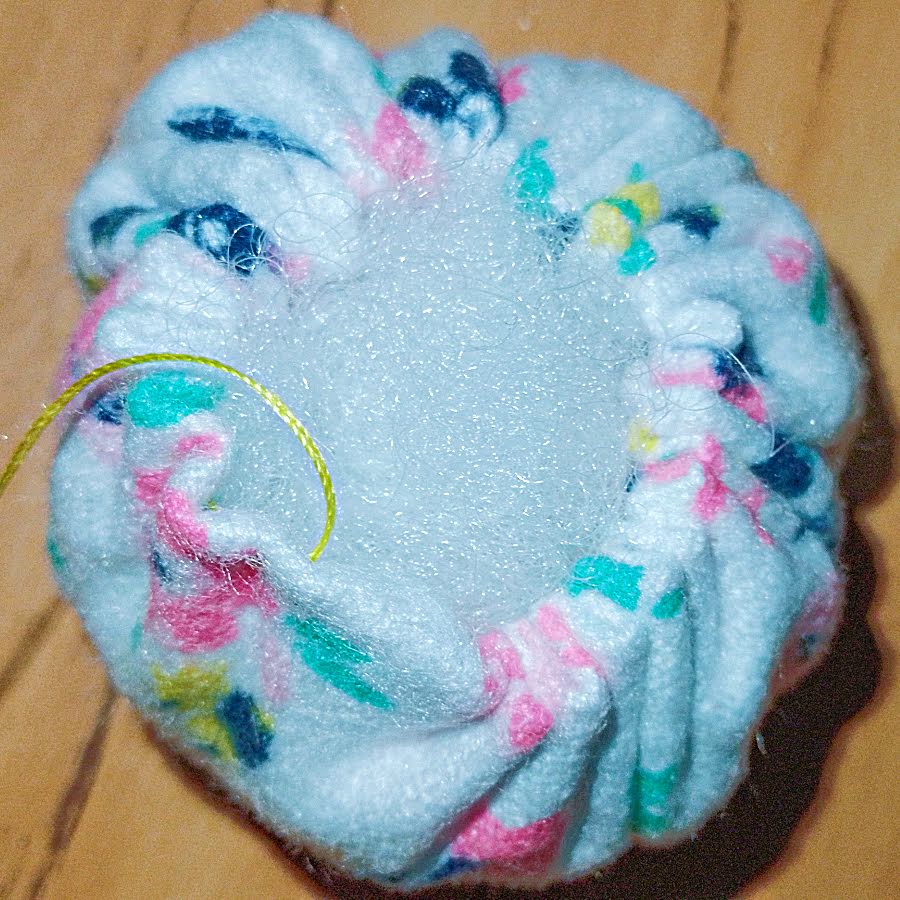
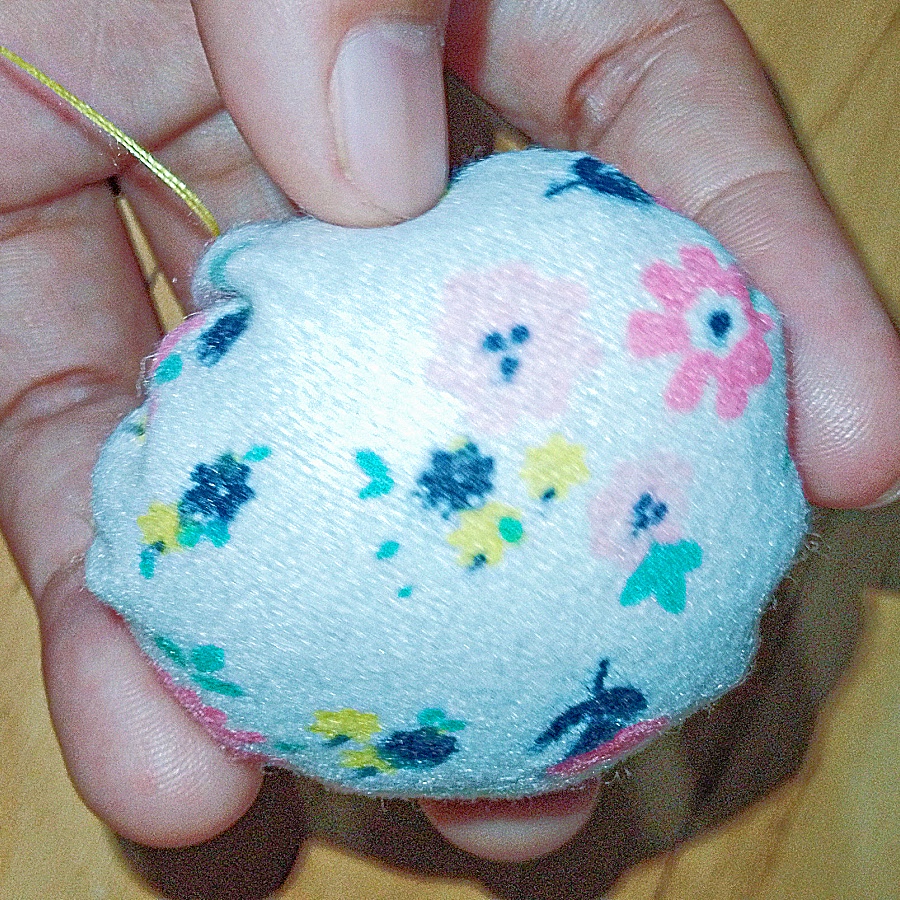
Add stuffing through the opening before it closes entirely. Use small amounts at a time and pack it in firmly so the tail holds a nice rounded shape. The finished tail should feel full and soft, not squishy.
Step 19: Attach the Tail
Position the stuffed tail on the lower back area of the bunny, centered and just above the seam at the base.
Once you’re happy with the placement, stitch it in place using small, tight hand stitches. Sew all the way around the gathered opening to secure it fully.
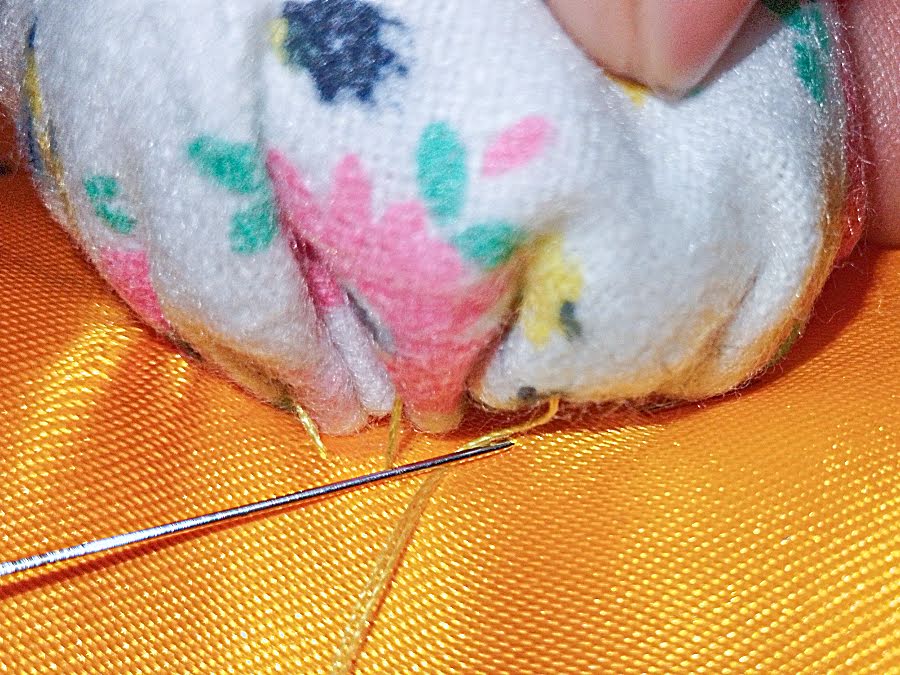
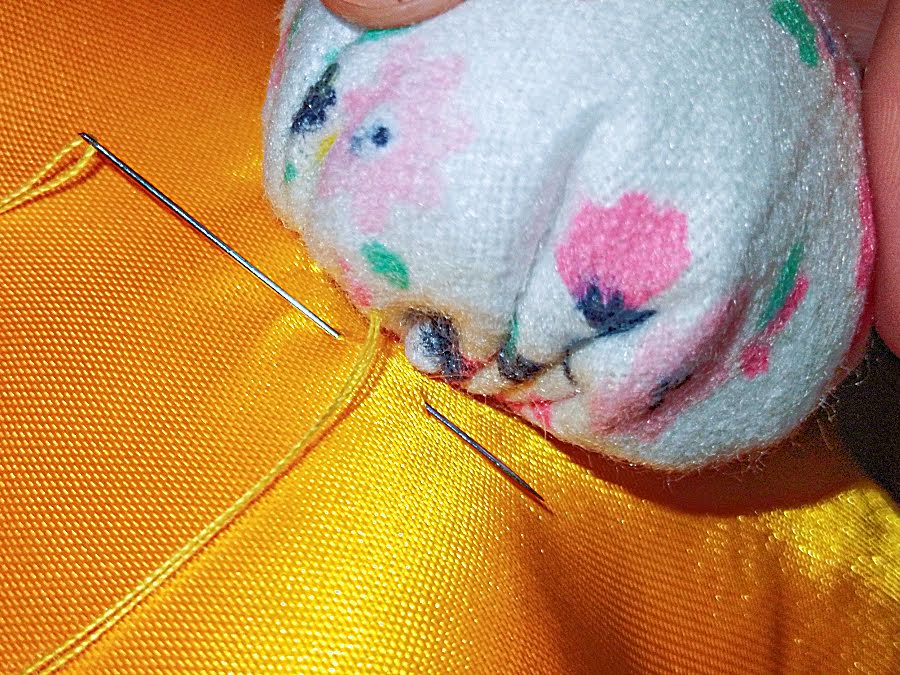
Take care to keep your stitches hidden within the gathers, and check that the tail sits snugly against the body.
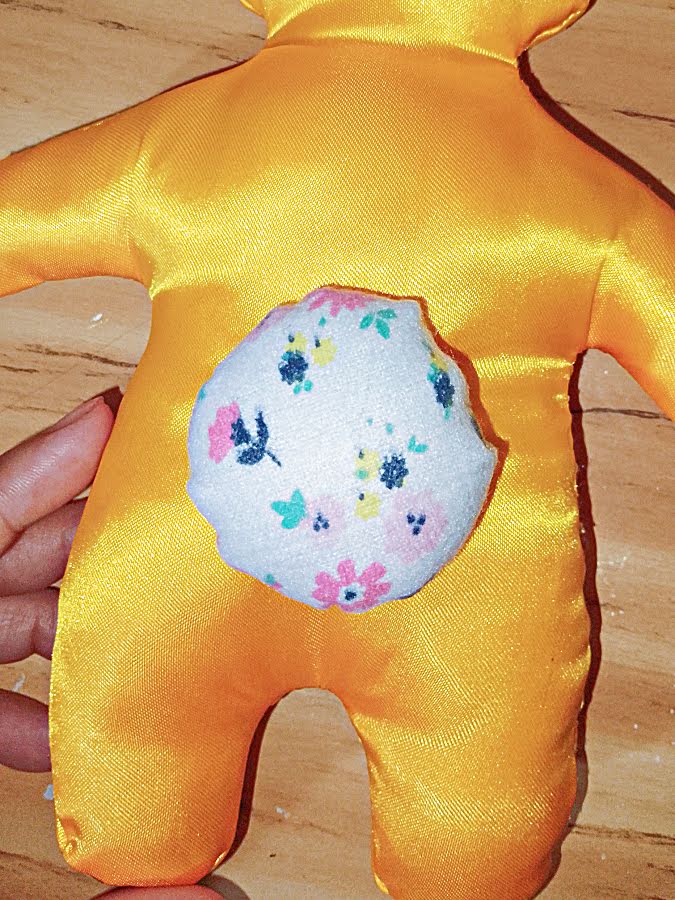
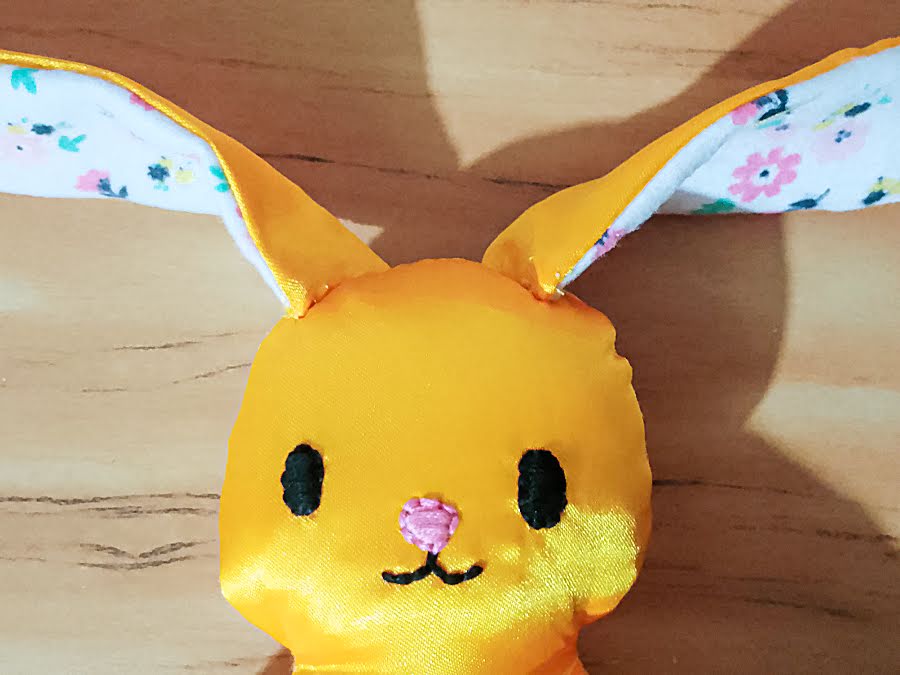
Done!
You’ve now completed your bunny — from stitched eyes and nose to perky ears and a fluffy tail.
Add Simple Embellishments
At this point, your bunny is complete. But you can always add a little extra charm.
The easiest option is to tie a ribbon around the neck. A soft satin ribbon, lace trim, or even twine gives the bunny a finished look in seconds. This small detail changes the entire personality of the toy.
For my bunny, I wanted something a bit more playful.
Instead of a simple ribbon, I made a bow. I am not describing the bow construction here, since it is a simple gathered rectangle, but it makes the bunny look dressed up.
Then I added four soft pink felt circles down the front of the body.
This detail was not in the original plan. But once I placed them temporarily, I liked the look immediately. The felt gives the bunny more character. It also breaks up the shiny surface of the satin and adds a gentle, matte contrast.
I chose felt instead of real buttons for an important reason. Buttons are small, and small parts are not considered safe for toddlers under 3. Little ones can pull, chew, or wiggle them loose, and that creates a choking risk.
If you are sewing this bunny for a young child, felt appliqués or embroidered “buttons” are a much safer choice. Buttons work well on decorative bunnies or gifts meant for older children.
This is where you can experiment.
You can add:
- A ribbon or bow
- Small “buttons”
- A tiny fabric flower
- A felt heart
- Even simple hand embroidery details
Small changes make each stuffed bunny unique. That is the beauty of sewing toys patterns free like this one. The base shape stays the same, but the personality is entirely yours.
If this little bunny made you smile, save this pin to your sewing board so you can come back to it whenever you’re ready to make one of your own. And follow me on Pinterest for more sewing tutorials, free patterns, and creative ideas to try in your sewing room.
latest posts
- What Do You Call a Person Who Sews? I Asked My Readers and Got 1,408 Opinions
- DIY Round Purse: PDF Sewing Pattern and Detailed Instructions
- Mini Wonder Clips By Clover: Useful Sewing Tool Or Just Another Notion?
- Non-Slip Grips For Quilting Rulers: A Small Notion With A Useful Job
- Fabric Eraser for Sewing: What It Removes and When to Use It
- What Is The Best Thread For Sewing Machine Projects? Let’s Find Out!
- Butterfly Quilt Block Tutorial – Foundation Paper Piecing
- How To Sew Quilt Squares So The Corners Match
- Sewing With Fork Pins: How They Help With Pattern Matching, Slippery Fabric, And Seams