
How Not to Sew: A Lighthearted Guide to What Not to Do at Your Sewing Machine
Sewing is one part creativity, one part precision, and about two parts learning things the hard way. Every sewist — no matter how experienced — has a story involving a melted interfacing, a mystery tangle in the bobbin case, or a sleeve attached to the neckline.
This isn’t a guide about doing things perfectly. It’s about the things that trip us up, slow us down, or quietly sabotage our projects — and how to spot them before they do.
It’s a lighthearted look at the common habits, missteps, and little “oops” moments that sneak into every sewing room. Some of them are funny. Some are frustrating. All of them are things we’ve learned from — and now you can too (without having to unpick a whole project).
This might be a lighthearted take on the subject, nevertheless the missteps are real and I did perform myself each and every one at least once.
Here are 21 sewing missteps worth avoiding. Read them, laugh a little, and maybe even recognize a few. It’s all part of getting better at the craft we love.
Note: Some of the links on this page are affiliate links. This means I will receive a commission if you order a product through one of my links. I only recommend products I believe in and use myself.
1. Don’t Sew with Dull Needles
If your fabric sounds like it’s screaming, your needle is overdue for retirement.
A dull needle might look fine, but it’s secretly causing chaos. Stitches get skipped. Threads shred. Your fabric might even pucker or snag like it’s trying to fight back. If your machine suddenly starts acting dramatic, check the needle before you blame the bobbin.
Needles go dull over time — even faster if you’re sewing through thick fabric, batting, or (heaven help us) pins. They can also bend ever so slightly, especially after hours of straight stitching.
Want to know if your needle is past its prime? Here’s your hint: If it’s been in your machine longer than a tube of mascara lasts… it’s probably time.


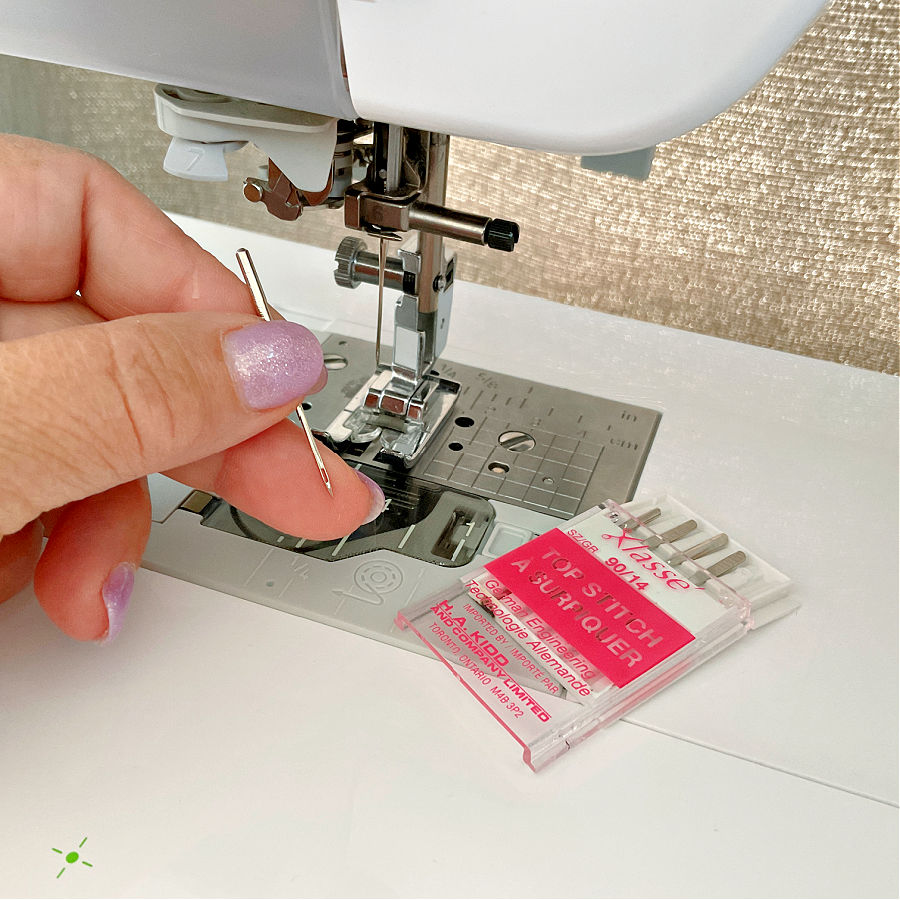
Changing a needle is easy — turn off your machine, loosen the needle screw, and swap in a fresh one that matches your fabric type. Boom. You’re back in business.
And yes, people do forget this. I once asked a friend if she had tried changing her needle after she showed me her messy stitches. Her face went blank. She said, “Wait… I’m supposed to change it?”
So now we all know: yes, you’re supposed to change it.
If this whole needle-changing thing still feels mysterious, don’t worry — I’ve written a full guide that clears it all up. How To Choose The Right Sewing Machine Needle For Your Project. It’s short, helpful, and way less dramatic than a tangled thread mess.
2. Don’t Sew with the Wrong Needle
Your sewing machine is not a mind reader. If you try stitching silk with a denim needle, it’s going to protest. Loudly.
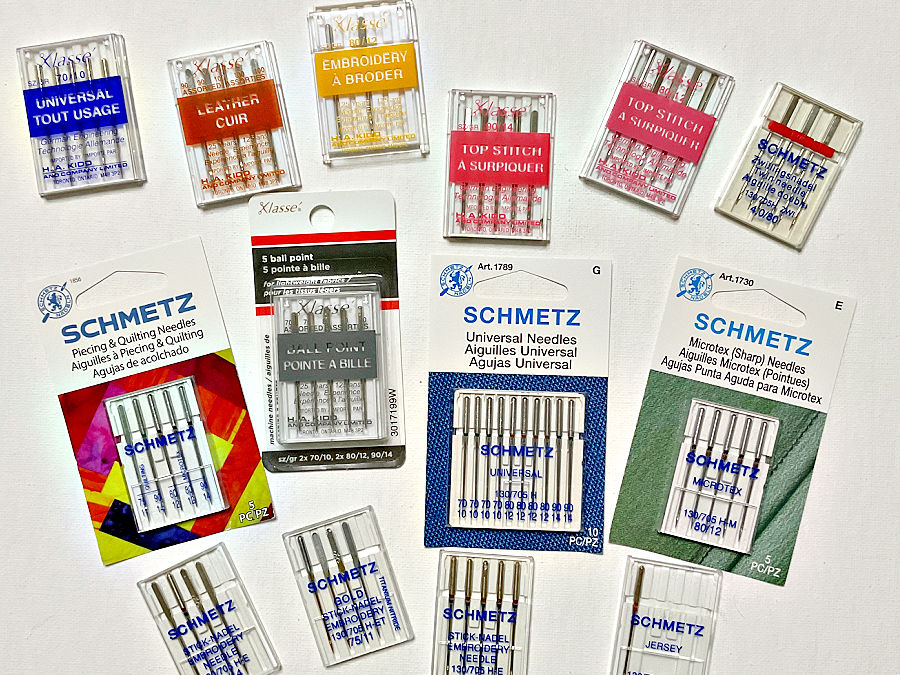
When you walk into a fabric store and see rows upon rows of sewing machine needles — no, it’s not a conspiracy to drain your wallet. They’re actually there for a reason. Different fabrics need different needles. The wrong one can lead to skipped stitches, shredded thread, or holes punched into your delicate fabric.
Here’s the basic idea:
- Sharp or Microtex needles for tightly woven fabrics.
- Ballpoint or stretch needles for knits (they slide between threads instead of breaking them).
- Denim needles for thick fabrics like denim or canvas.
- Universal needles are okay for basic sewing, but they’re still not one-size-fits-all heroes.


And size matters too — small numbers (like 70/10) are for fine fabrics. Bigger numbers (like 100/16) are for heavier stuff.
So next time you’re threading up for that gorgeous new project, check the needle type and size.
Not sure what all those labels mean or when to use which? I’ve broken it all down in this guide: 19 Types of Sewing Machine Needles and What They’re Used For. It’s a quick, practical read that saves you from second-guessing your needle choices halfway through a project.
3. Don’t Ignore Grainlines
Unless of course you want your blouse to hang like a haunted curtain.
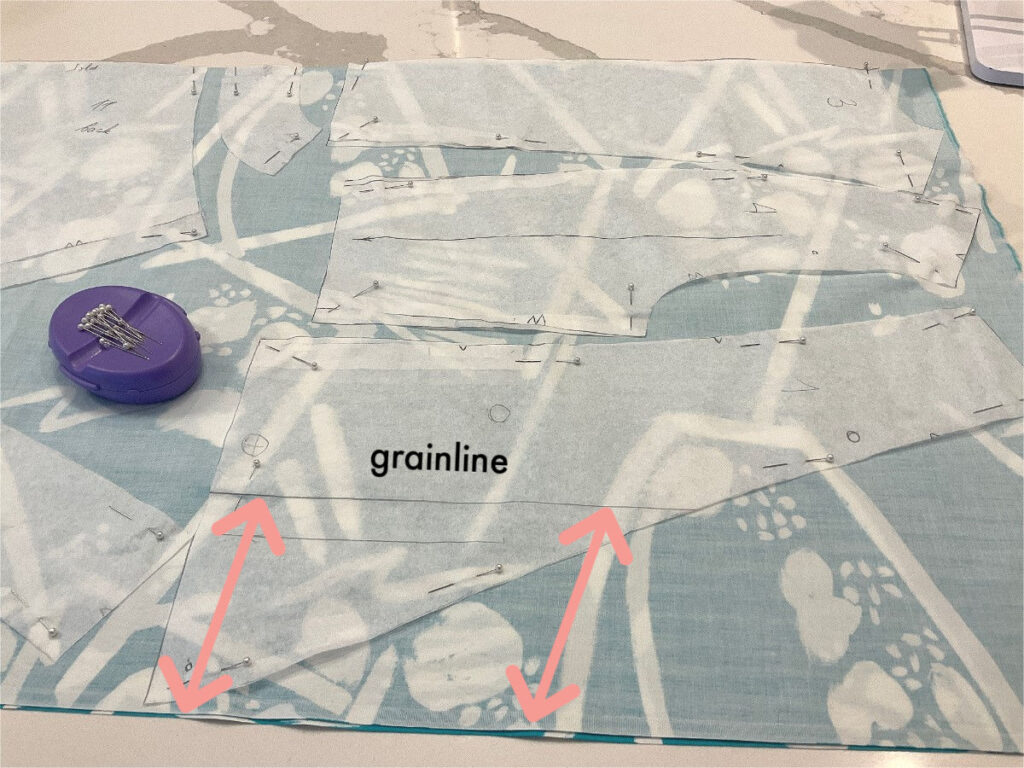
Grainlines are one of those little markings on a pattern that look harmless… until you ignore them. They tell you how to place your pattern piece so the fabric hangs, stretches, and behaves the way it’s supposed to.
When you cut fabric off-grain, things get weird fast. Necklines warp. Hems twist. Pant legs drape like they’ve been cursed. You might not notice the problem right away, but once it’s sewn up, there’s no hiding it.
Always align that grainline arrow with the straight grain of your fabric (the one that runs parallel to the selvage). Even a slight tilt can throw things off, especially in garments.
If you’re wondering why fabric behaves this way — or what this “grain” business even means — you’ll love this deep dive: How to square up fabric. It explains what’s going on behind the seams (literally).
4. Don’t Assume All Fabric Behaves the Same
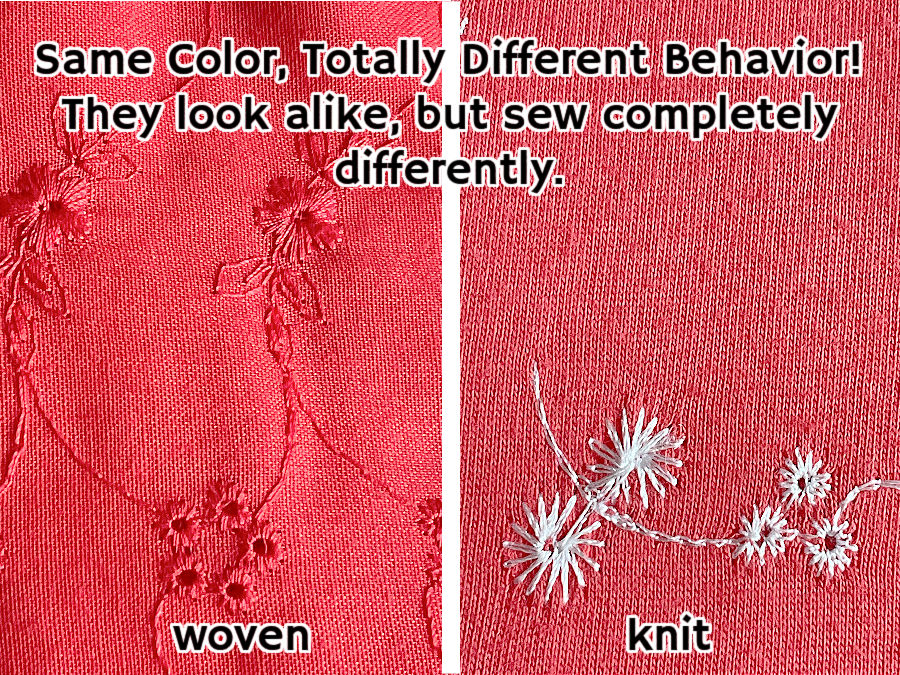
Cotton is not chiffon. Jersey is not denim. You can’t treat them like twins. One stretches. One frays. One swears revenge.
Every fabric has its own personality — and some are downright dramatic. What works for one might cause a full-blown meltdown in another.
That crisp quilting cotton you love? It presses like a dream. Try that on rayon and you’ll end up with a shiny scorch mark.
Understanding how different fabrics move, stretch, fray, shrink, or drape is key to making anything that fits, flatters, or even survives its first wash.
If you want to sew with fewer surprises, it helps to understand what fabric is made of and how. I go into all of that (minus the eye-glazing science talk) here: How Fabrics Are Made – And Why It Matters.
5. Don’t Use Mystery Thread from the Bottom of Your Drawer
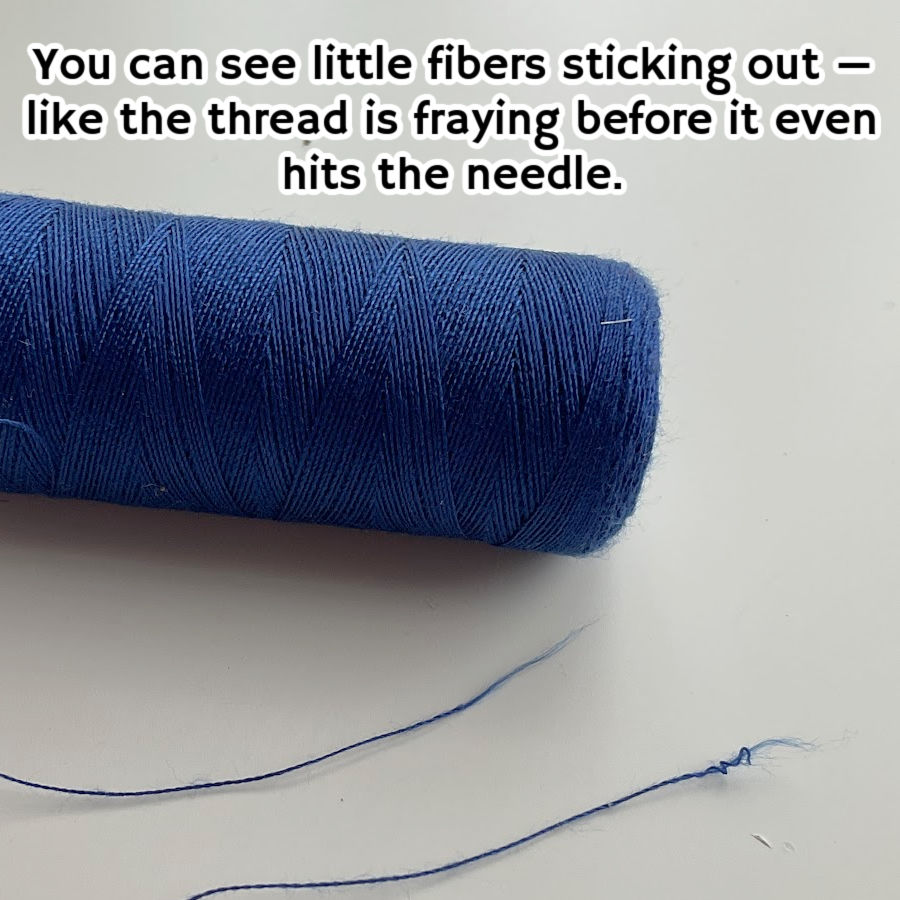
If it breaks in your hand, it’ll break in your machine.
We all have that one spool — maybe it’s vintage, maybe it’s sun-bleached, maybe you don’t even remember buying it. But it’s been lurking in the back of the drawer, waiting for a moment of desperation. Don’t fall for it.
Old or cheap thread can snap mid-stitch, tangle up your bobbin case, or leave behind a trail of lint that gums up your machine’s insides. Worst of all? It can sabotage your seams.

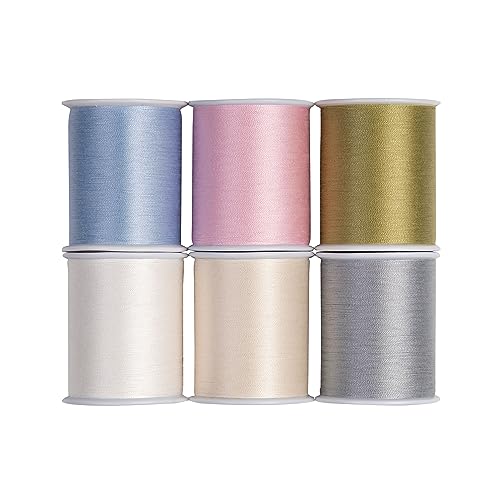
Quality thread matters just as much as fabric. It holds everything together — literally. If you’re not sure what kind to use, or why your machine hates that bargain-bin spool, check out this guide: Sewing thread types and uses. It’ll help you choose thread that plays nice with your fabric.
6. Don’t Sew Over Pins
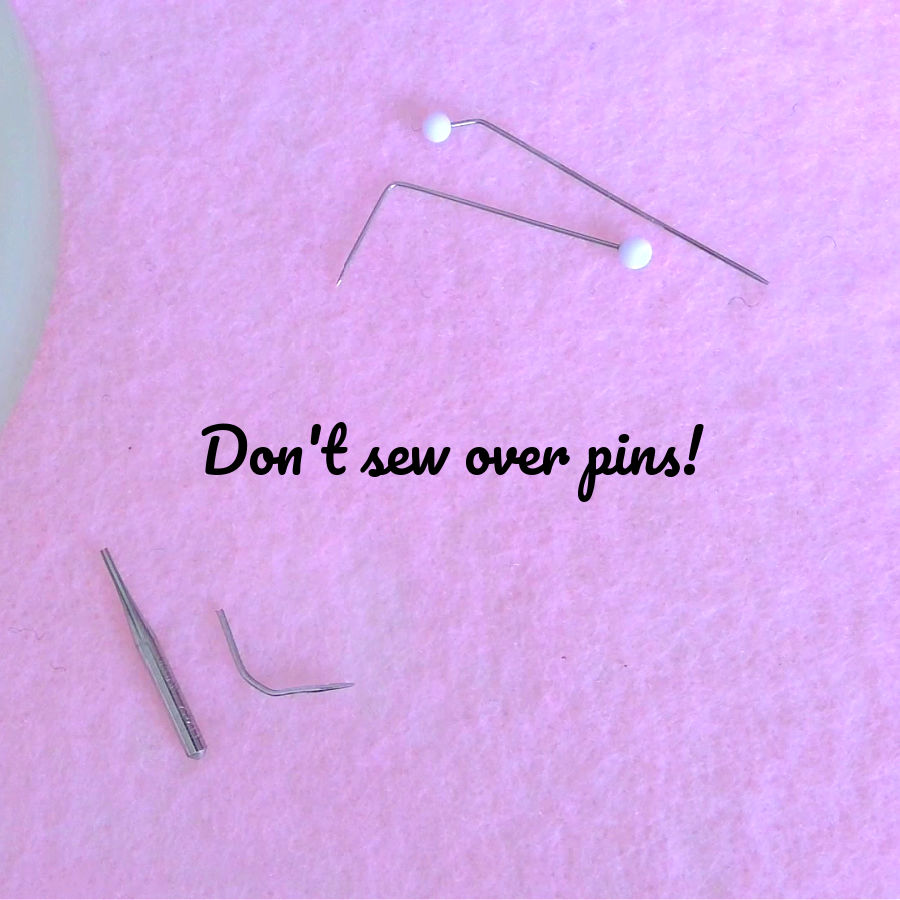
Unless you enjoy broken needles and drama. It’s a sewing machine, not a pin crusher.
Yes, it feels faster to power through your seam without stopping to pull pins. But your needle disagrees — strongly. Hitting a pin can cause it to break, bend, or deflect into your fabric. Best-case scenario? A ruined stitch line. Worst case? You’re fishing needle shards out of your throat plate.
Sewing over pins can also throw off your machine’s timing or damage the bobbin area. And once that’s off, nothing will sew right — not even straight lines on plain cotton.
Want to keep your seams safe and your fingers intact? Learn the right way to pin (and what types to use) in this guide: Types of sewing pins and their uses: all you need to know about straight pins for sewing
7. Don’t Skip Pressing
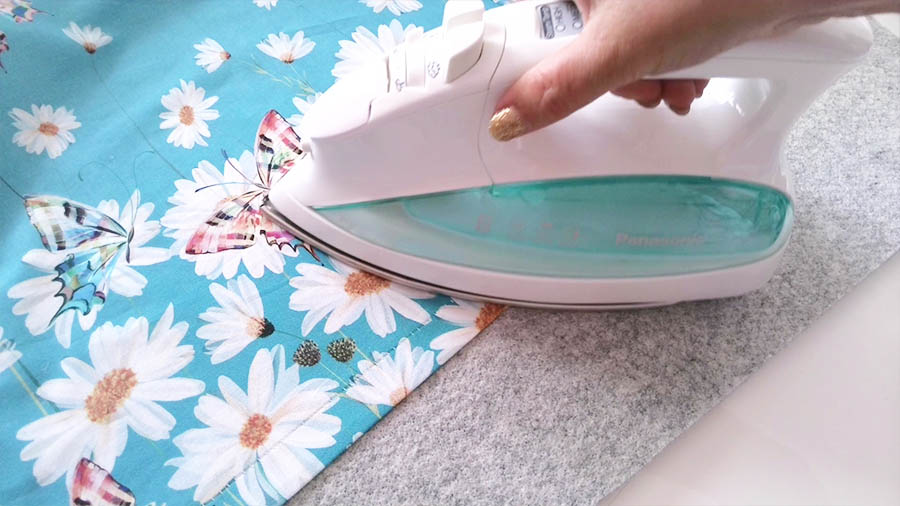
Sewing without pressing is like baking without measuring. Wrinkles lie, and your seams will suffer.
Pressing isn’t optional — it’s essential. It shapes your fabric, sets your stitches, and helps everything lie flat like it actually wants to be sewn. If your seams look bulky, wavy, or slightly drunk, chances are they needed a date with the iron.

You don’t need fancy equipment (of course it helps if you have it 😀)— but you do need to use it often. After every seam. Before topstitching. Anytime you want your project to look more “tailored masterpiece” and less “pillowcase from a 7th grade home ec class.”
If your iron isn’t your favorite sewing tool yet, this will change your mind: Pressing Matters: 15 Common Ironing Mistakes to Avoid. It’s full of tips that can turn pressing from “ugh” into “ohhh, that’s better.”
8. Don’t Forget to Secure the Stitches

Otherwise, your seams might unravel. Backstitch. Tie a knot.
Starting and ending a seam without securing your stitches is like locking only one side of a zipper. It looks okay — until it doesn’t. A few steps, a little tug, and suddenly your beautifully sewn project is falling apart at the seams. Literally.
The classic method is a quick backstitch at the beginning and end. But you can also use your machine’s built-in lock stitch (if it has one), or tie off your thread tails by hand — especially on delicate fabrics where backstitching might add bulk.
However you do it, secure your stitches. It’s like sealing an envelope. You’ll regret it if you don’t.
Need help dealing with short thread tails? I’ve got a guide just for that: Knot a Problem: Easy Ways to Secure Short Thread Ends. It’s a quick trick to keep your seams locked in place.
9. Don’t Cut Fabric Without Checking Your Pattern Layout
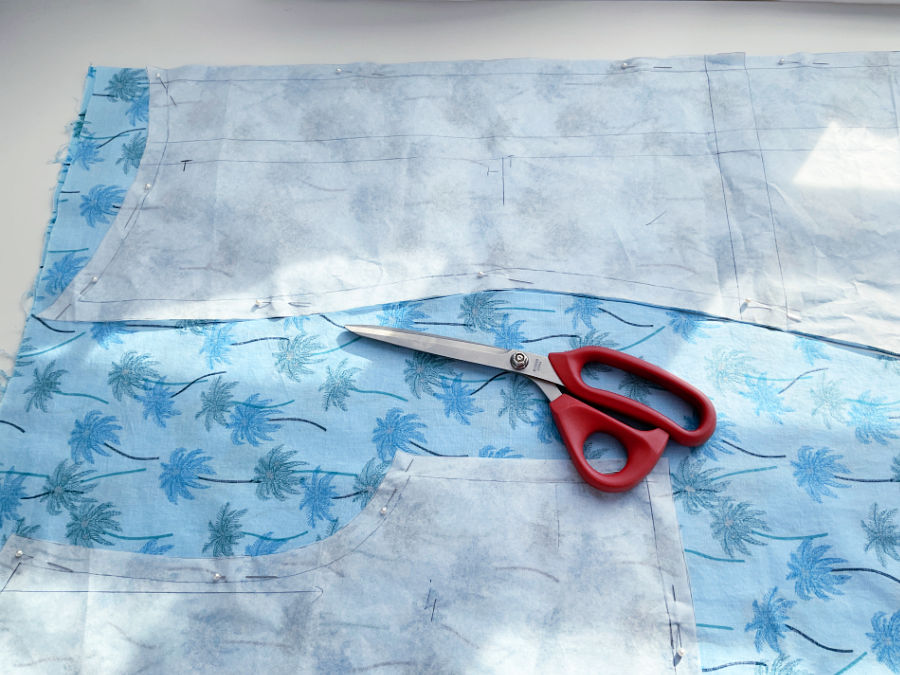
Ask me how I know what happens when you cut two left sleeves.
The answer involves muttering, creative fabric piecing, and a long walk away from the sewing machine.
Before you grab your scissors or rotary cutter, lay out all your pattern pieces, double-check your grainlines, and make sure nothing’s upside-down (especially if you’re working with directional prints). Skipping this step is the fast track to wasted fabric and oddly mirrored garment parts.


If you’re still getting the hang of reading patterns, here’s a guide that walks you through the whole process (without the guesswork): How to Sew a Dress Using a Pattern: A Step-by-Step Guide. Because two left sleeves are one too many.
10. Don’t Forget to Change Stitch Length
Basting or gathering stitches for construction? Recipe for seam-popping chaos.
Stitch length isn’t just a “set it and forget it” kind of setting. It matters — a lot. Long stitches are perfect for basting, gathering, or easing. But if you try to use them to sew a garment seam, don’t be surprised when everything starts falling apart.
Shorter stitches (like 2.0–2.5 mm) are better for permanent seams. Longer ones (4.0 mm and up) are for temporary stitching or gathering. And if you’re working with bulky or delicate fabrics, you’ll want to adjust accordingly.
Not sure when to tweak it or how? Here is my tutorial – What is the stitch length and how to adjust it for different fabrics – a sewing tutorial.
11. Don’t Skip Prewashing
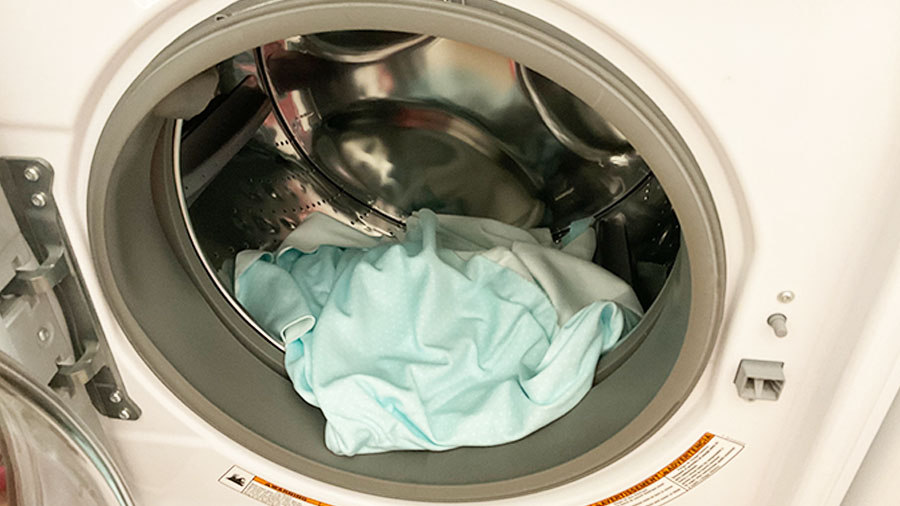
Because shrinkage is real. And cruel. That top you loved? Now a crop.
Most fabrics shrink the first time they’re washed — some just a little, others with wild enthusiasm. If you sew something before prewashing, you’re gambling with the fit, the seams, and sometimes even the color.
Prewashing also removes any chemicals or finishes left from manufacturing. It softens the fabric, shows you how it behaves, and makes sure you’re not in for surprises after your project is finished.
That said, not every fabric should be tossed into the wash. Some, like 100% wool, prefer a gentler approach — think steam pressing instead of a spin cycle. So before you dunk your fabric, it’s worth learning what works and what doesn’t.
Here’s a guide to help: Prewashing Fabric: Is It a Good Idea?. It’ll save you from accidental felting and unexpected shrinking.
12. Don’t Forget to Test on Scrap Fabric
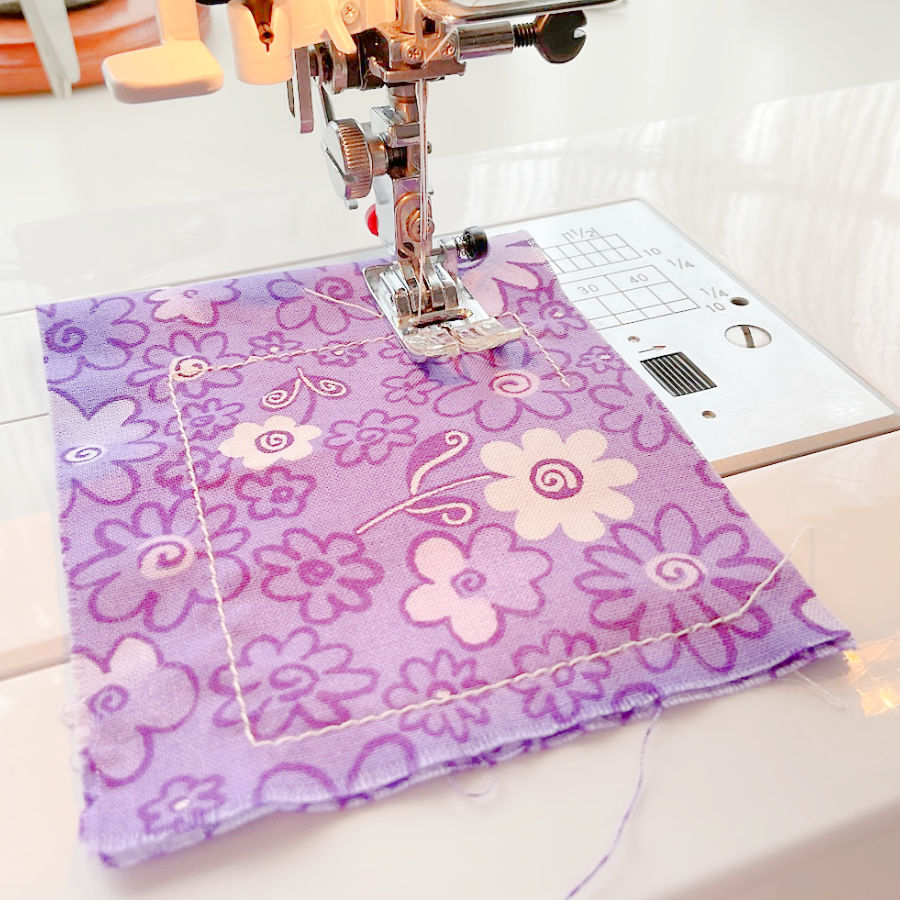
Your settings need a dress rehearsal too.
Before you start stitching your actual project, run a test on a scrap of the same fabric. It’s the best way to check tension, stitch length, needle choice, and thread behavior — without the risk of ruining anything you care about.
Scraps add up quickly, and they’re perfect for these mini test drives. That little 4×4 piece sitting next to your machine? Use it before your fabric pays the price.
And if your scrap pile is turning into a mountain, I’ve got ideas for that too: 21 Scrap Fabric Projects to Transform Your Textile Trash into Treasure. It’s packed with useful, clever ways to turn scraps into something delightful — instead of landfill fodder.
13. Don’t Rely on Memory for Pattern Alterations
Write it down. Future you will forget what past you thought was obvious.
You swore you’d remember — “Oh, I just trimmed ⅜” off the shoulder seam and adjusted the dart.” A few months later, you pull out the same pattern, completely forgetting you made any changes — and then start wondering why this version fits strange when the last one was perfect.
Alterations made in the moment always feel unforgettable… until they’re not. Save yourself the confusion (and the extra fitting session) by jotting down every change. Use sticky notes, write directly on your traced pattern, or keep a small notebook near your cutting table.
And if you’re copying paper patterns instead of cutting into store-bought ones, make sure to write the size, the pattern brand and number (like Simplicity #1234), and even what you made with it. It’ll save you from playing detective six months down the road.
Need help keeping all those patterns organized? Check out this guide: How to Store Sewing Patterns: 13 Clever Sewing Pattern Storage Ideas That Work
14. Don’t Yank Your Fabric Through the Machine
That’s what feed dogs are for.
Your hands should guide the fabric — not drag it. Forcing it through like you’re towing a car does more harm than good. It can bend your needle, throw off your stitch length, or mess with your machine’s timing. Worst of all? It stretches your fabric in weird ways that won’t bounce back.
If the fabric isn’t moving smoothly, stop and check: Is the presser foot down? Are the feed dogs up? Is the stitch length correct? The machine is built to do the heavy lifting — your job is to steer, not shove.
15. Don’t Assume Seam Allowances Are Always the Same
Patterns are sneaky. Read the instructions or risk mismatched everything.
Seam allowances aren’t universal — they vary more than you’d think. One pattern might call for ⅝”, another ¼”, and the next one ½” just to keep things spicy. Even within the same pattern, you might find different seam allowances in different sections.
If you guess wrong, you’ll end up with pieces that don’t line up, garments that don’t fit, or sleeves that mysteriously need “creative adjustments.”
So don’t assume — check the instructions. It takes five seconds and can save you a lot of seam ripping (and sighing).
16. Don’t Press Interfacing Without Thinking First
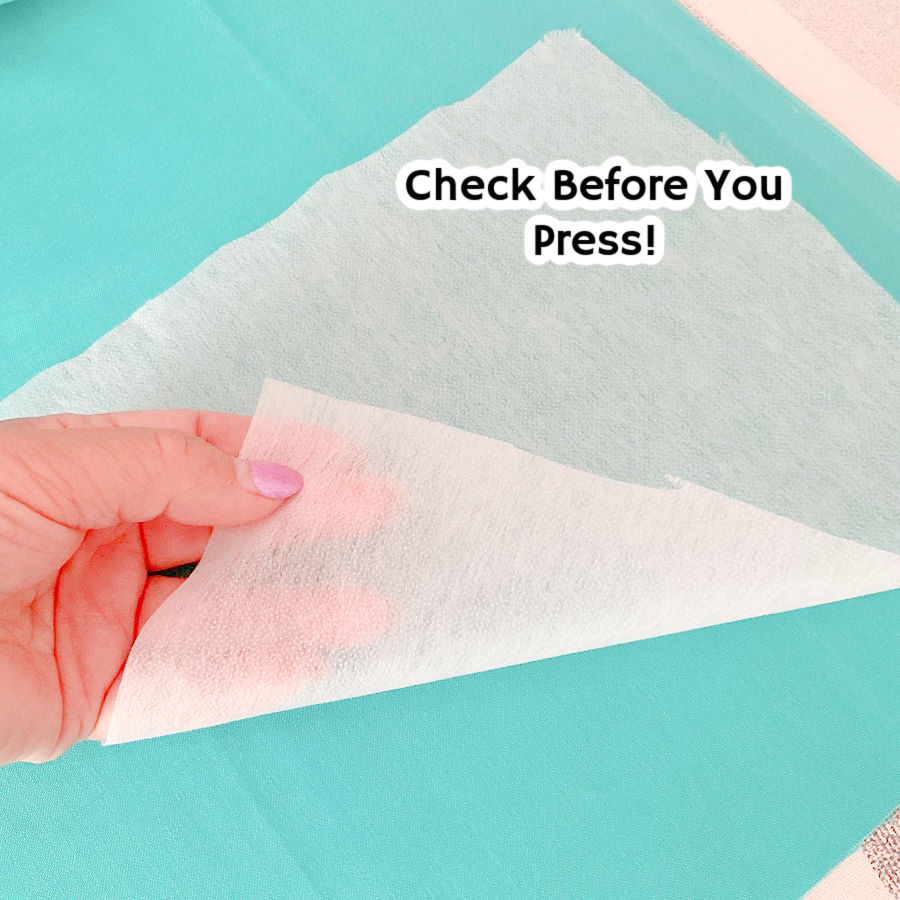
If you press it glue-side up, you’ll end up fusing it to your iron instead of your fabric.
Interfacing is a great stabilizer, but it comes with one very important rule: always double-check which side has the adhesive before you bring in the heat. That gluey side is meant to bond with your fabric — not your iron plate.
Not only does this ruin your interfacing, but it also leaves a sticky mess on your iron.

So take five seconds to feel for the rough, slightly bumpy glue side. Place it against the wrong side of your fabric, then use a pressing cloth on top if you’re unsure.
Need more help? Here’s my full guide: How To Use Fusible Interfacing (Video + Tips And Tricks)
17. Don’t Confuse the Right Side of Fabric with the Wrong Side
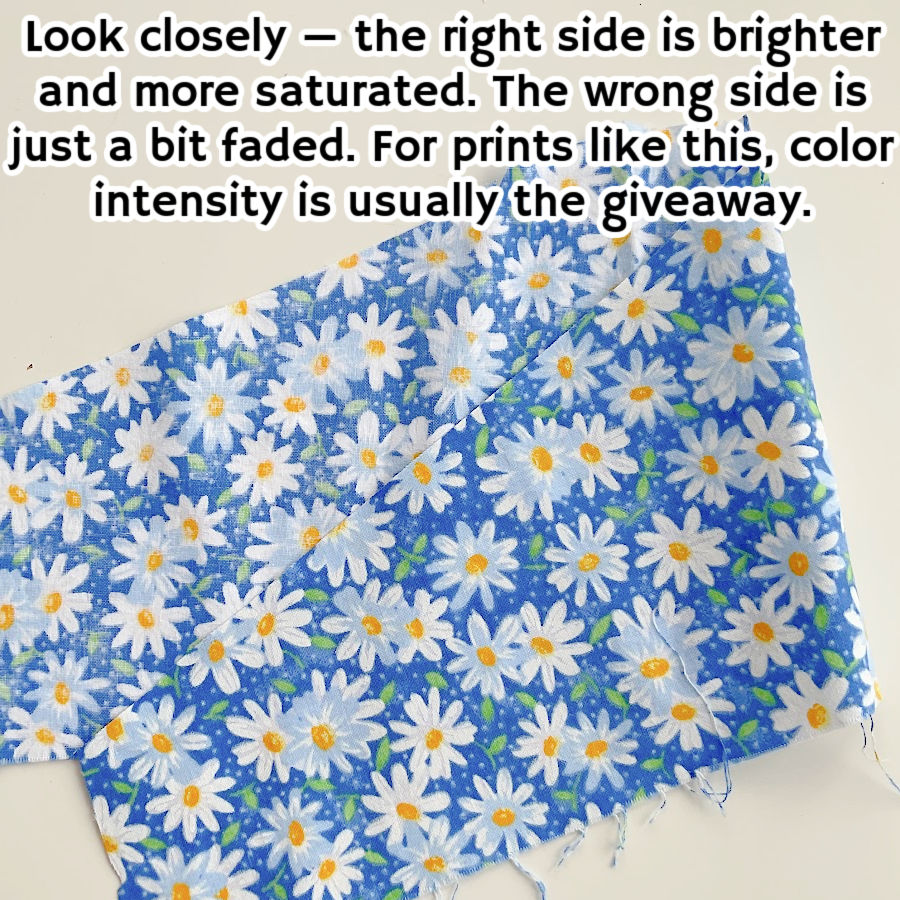
The fabric doesn’t come with a label that says, “This way out.” (Unfortunately.)
Telling the right side from the wrong side isn’t always obvious — especially with solid colors, batiks, or fabrics where both sides look almost identical. But if you mix them up, your seams might end up on display, your topstitching won’t match, and your project might look just a little “off.”
Here are a few clues to help you figure it out:
- On printed fabrics, the colors are usually brighter and more vivid on the right side.
- For woven fabrics, the selvage edge sometimes has little pinholes or fuzz on the wrong side.
- On knits, the right side usually has finer, smoother loops — the wrong side looks bumpier.
- If it’s totally identical? Pick a side and stick with it. Mark it with chalk or a piece of painter’s tape so you don’t forget mid-project.
It may seem small, but keeping your fabric facing the right way can make a big difference in how polished your final piece looks.
18. Don’t Store Fabric Without Labeling It
Is it silk? Rayon? Polyester? Good luck remembering next year.
You think you’ll remember. But when that mystery fabric stares back at you six months later, you’ll be stuck guessing — and guessing wrong can lead to ruined seams, wrong needle choices, or melted fabric under the iron.
Write down the fabric type, and even where you bought it. Pin the label to the fabric or keep a fabric swatch journal.
Need ideas for how to keep it all folded and organized? Check out this guide: How To Store Fabric: Fabric Storage Ideas For A Sewing Room
19. Don’t Skip Staystitching
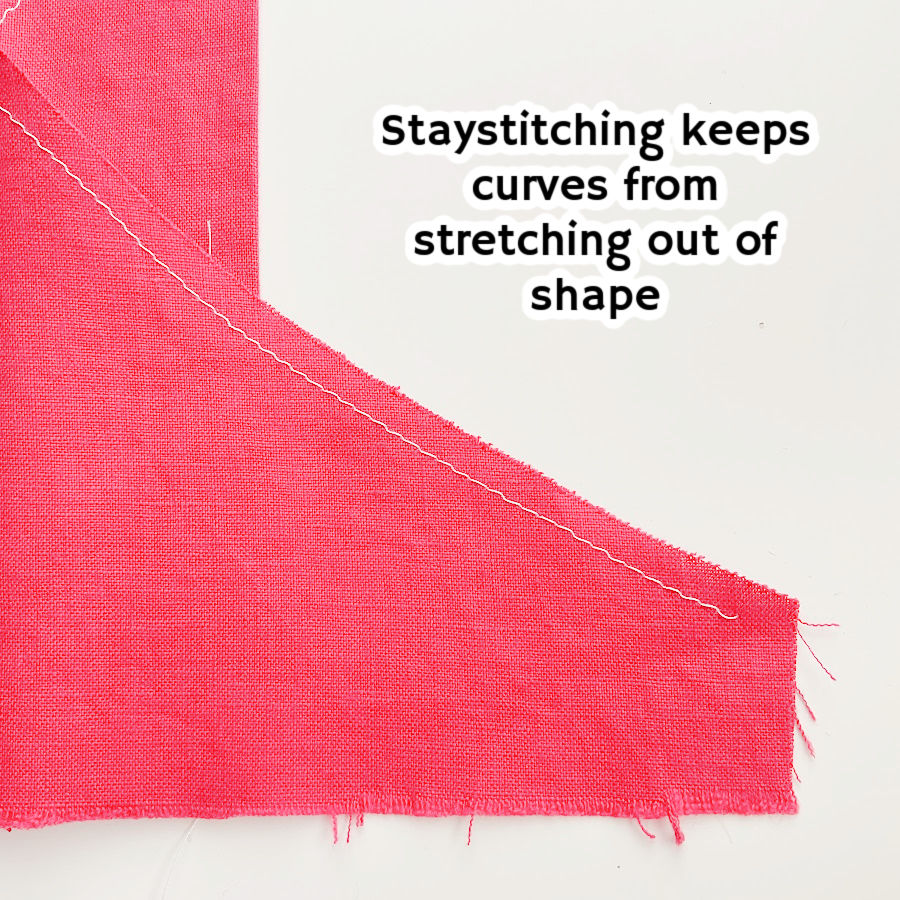
Necklines don’t just accidentally grow longer. They were stretched into rebellion.
Staystitching may feel like an extra step, but it’s one that saves your garment’s shape — especially around curves like necklines and armholes. These areas are cut on the bias, which means they love to stretch when handled, moved, or ironed.
A quick line of staystitching helps prevent distortion before it starts.
Not sure where or how to do it? Here’s a simple guide that breaks it all down: Stay Stitching 101: Essential Techniques for Fabric Stabilization. Less stretching, more stitching that stays put.
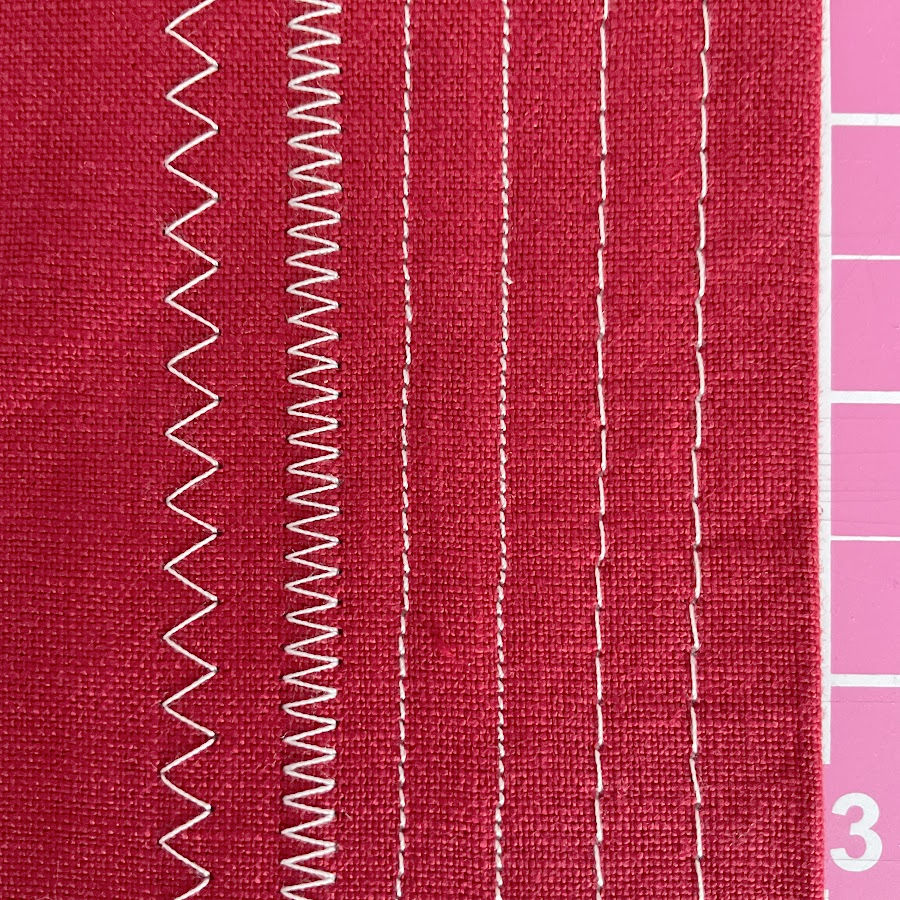
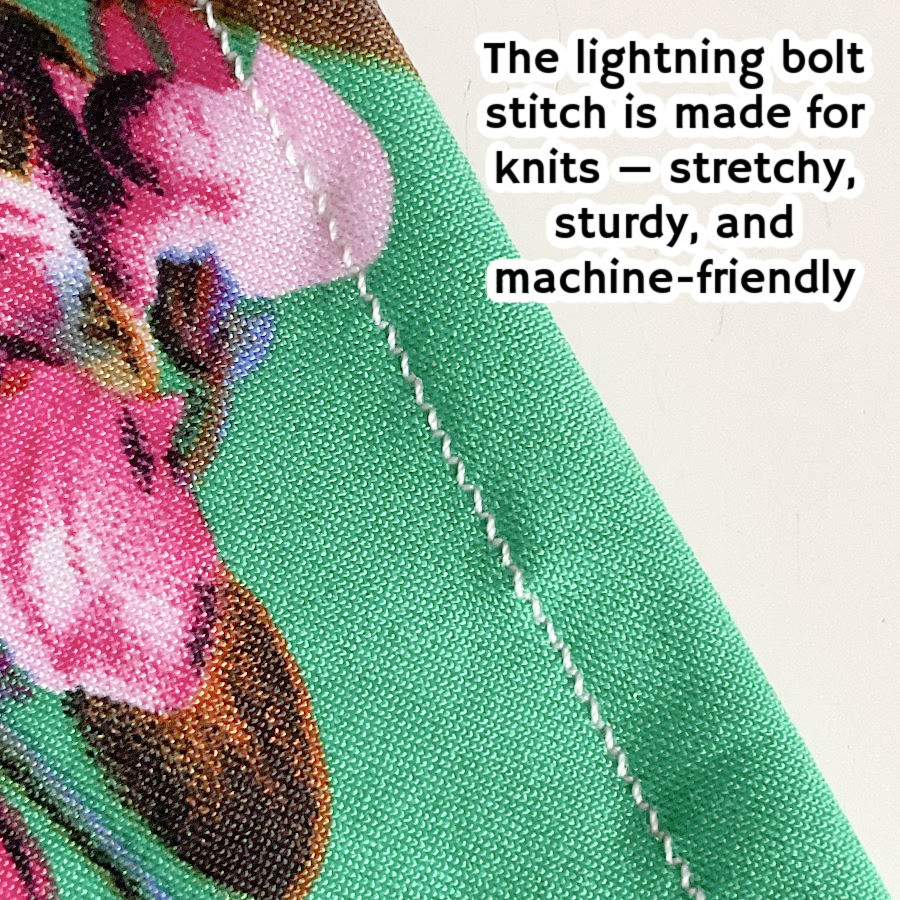
20. Don’t Use a Straight Stitch for Absolutely Everything
It’s strong, it’s neat, it’s classic — but it’s not a one-size-fits-all solution.
If you use a straight stitch on stretchy knit fabric, don’t be surprised when your seam pops the first time you try to move in it. Knits need stretch stitches that can flex with the fabric — like a lightning bolt stitch, a narrow zigzag, or a dedicated stretch stitch if your machine has one.Not sure which stitch to use for your knits? This guide will help: Types Of Stretch Stitches On A Sewing Machine And When To Use Them. No more surprise seam explosions.
And while we’re talking stitches… don’t ignore the fun ones! Your machine probably has decorative stitches beyond straight and zigzag. They’re not just for show — they can finish edges, reinforce seams, or add flair to plain fabric.
And if you’re ready to play with those decorative stitches you’ve been ignoring? Here’s your inspiration board: Decorative Sewing Machine Stitches: Ideas, Projects and Inspiration/
21. Don’t Beat Yourself Up When It All Goes Wrong
Mistakes mean you’re learning. Every good sewist has a pile of oopses — we just call it experience.
Sewing isn’t about perfection. It’s about problem-solving, experimenting, and figuring things out as you go. Sometimes the seam is crooked. Sometimes the needle breaks. Sometimes you sew the sleeve on inside out — twice.
Take a breath. Laugh if you can. Rip it out if you must. And remember, every stitch — even the messed-up ones — is making you better.
If you’ve ever wanted to throw your machine out the window (and who hasn’t?), you’ll appreciate this: Ditch My Sewing Machine? Not in This Lifetime!. It’s a love letter to sewing — flaws, frustration, and all.

Did you like this guide? Don’t let it slip away like that one fabric scrap you swear you saved for binding but can never find when you need it. Pin it now and keep it right where you can find it — on your sewing Pinterest board. And while you’re in a pinning mood, why not follow me on Pinterest? It’s like subscribing to a never-ending show of sewing tips, tutorials, and enough inspiration to make your sewing machine purr with excitement.

latest posts
- What Do You Call a Person Who Sews? I Asked My Readers and Got 1,408 Opinions
- DIY Round Purse: PDF Sewing Pattern and Detailed Instructions
- Mini Wonder Clips By Clover: Useful Sewing Tool Or Just Another Notion?
- Non-Slip Grips For Quilting Rulers: A Small Notion With A Useful Job
- Fabric Eraser for Sewing: What It Removes and When to Use It
- What Is The Best Thread For Sewing Machine Projects? Let’s Find Out!
- Butterfly Quilt Block Tutorial – Foundation Paper Piecing
- How To Sew Quilt Squares So The Corners Match
- Sewing With Fork Pins: How They Help With Pattern Matching, Slippery Fabric, And Seams

This post is absolutely fantastic–thank you very much, I loved it. It was part a trip down memory lane, part “been there, done that” & part”Yes!!! I taught my students the right things.” Especially the not sewing over pins. One of my (many) students told me that her grandmother had sewn over a pin, broke the needle & the needle fragment that flew up damaged her eye & eyesight. : ( I milked that story for over 25 years.
The “dictionary” of sewing tools was hilarious as well.
Thank you, I needed these smiles tonight.
Yes, we’ve all probably “been there, done that”! Sometimes, as in your case, with unfortunate results.