
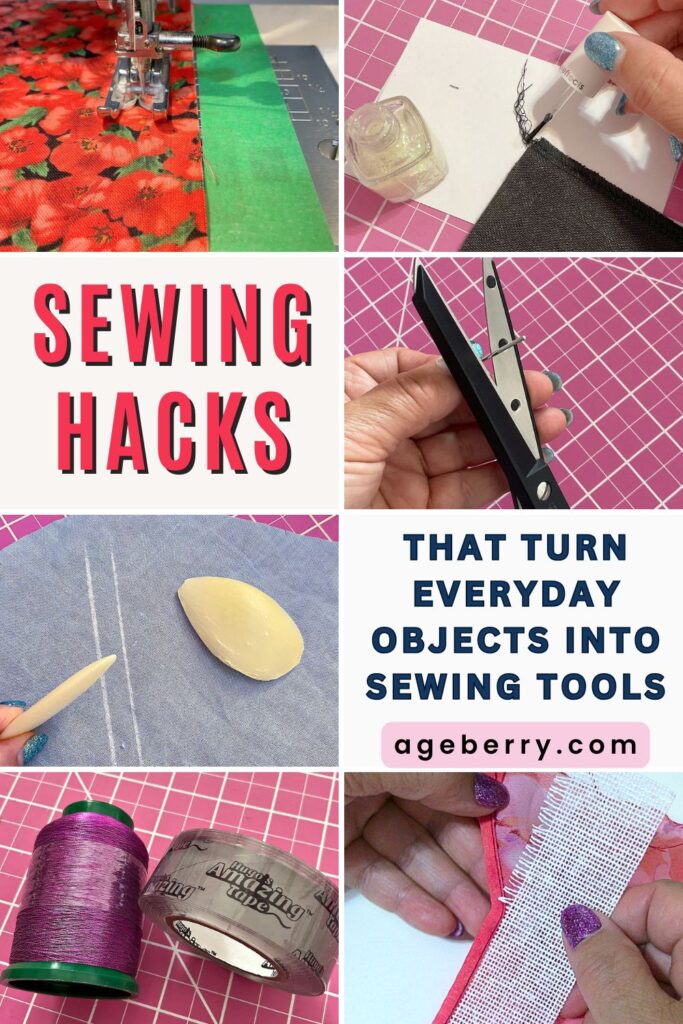
Practical Sewing Hacks That Turn Everyday Objects into Sewing Tools
These sewing hacks are clever solutions to common sewing frustrations we all run into from time to time. Each one uses items you likely already have, and they can help save time, improve accuracy, and keep your workspace organized. These aren’t just fun tricks – they actually work. Just a bit of creative thinking and a fresh look at what’s already around you can make a big difference in how smoothly your sewing goes.
And most of these items weren’t intended to be used in sewing!
1. Use Painter’s Tape
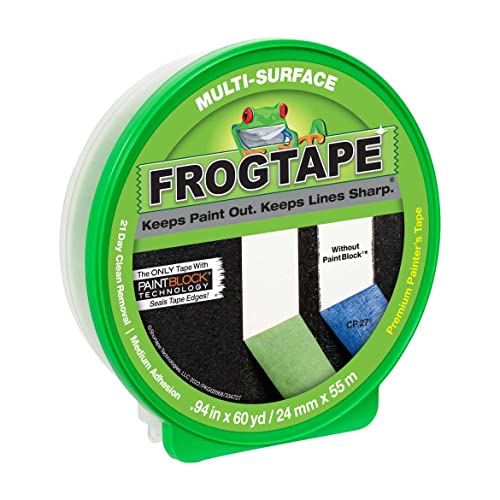
Painter’s tape is a surprisingly helpful tool in the sewing room.
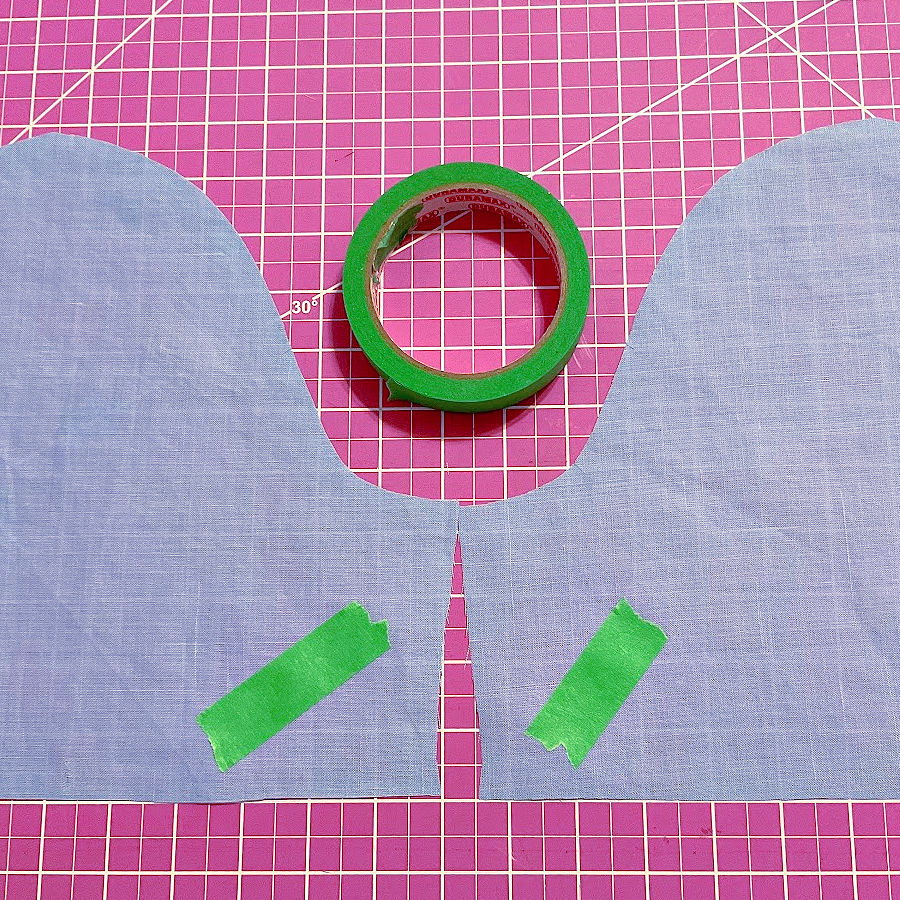
Use it to mark the wrong or right side of fabric pieces—especially when you need two mirrored pattern pieces, like sleeves, pockets, or pant legs. If you’re working with fabric that looks the same on both sides, it’s easy to sew two left sleeves for example, by mistake. A small piece of tape on the wrong side of both pieces helps prevent accidental sewing mistakes.
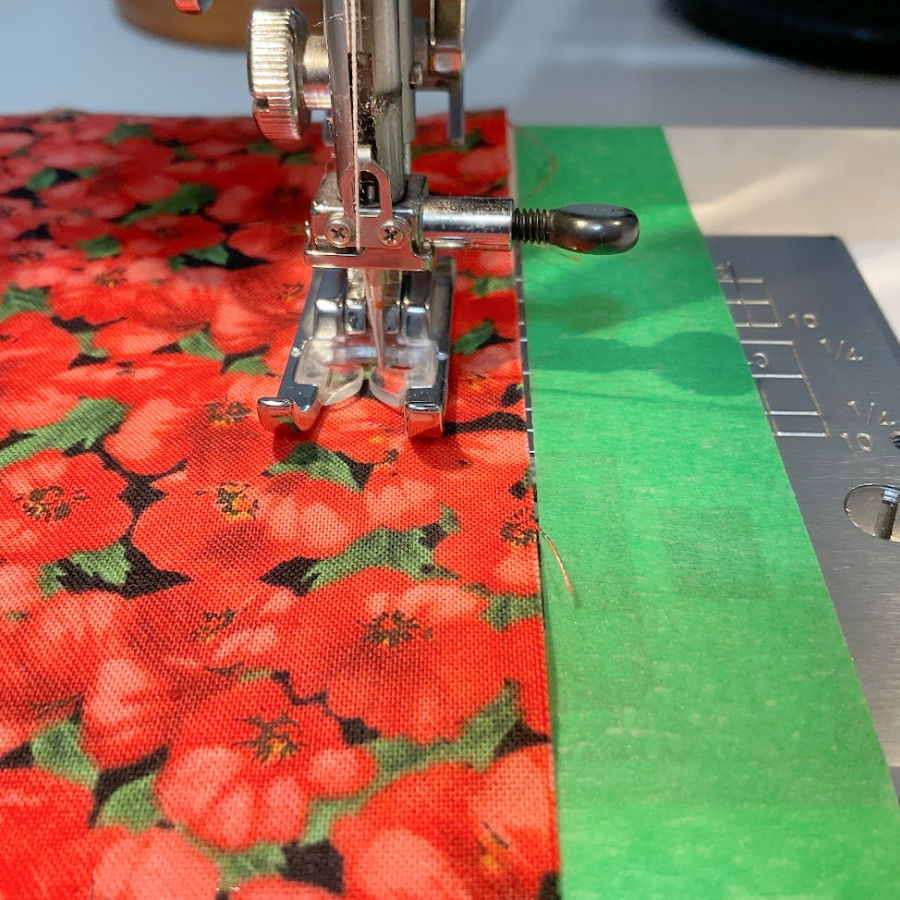
You can also place painter’s tape on the sewing machine bed as a seam guide. It’s especially helpful for beginners or when your machine markings are hard to see.
Another trick is using painter’s tape to hold down slippery fabrics like chiffon when you’re tracing patterns. It keeps the fabric flat without damaging it or leaving any residue.
I have a tutorial for this technique – How to cut chiffon without problems
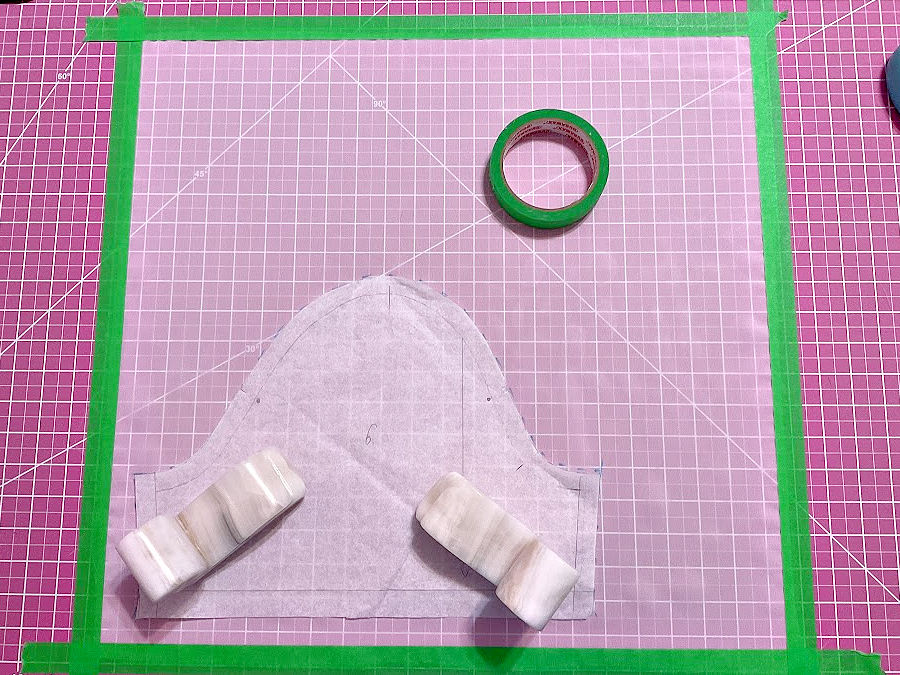
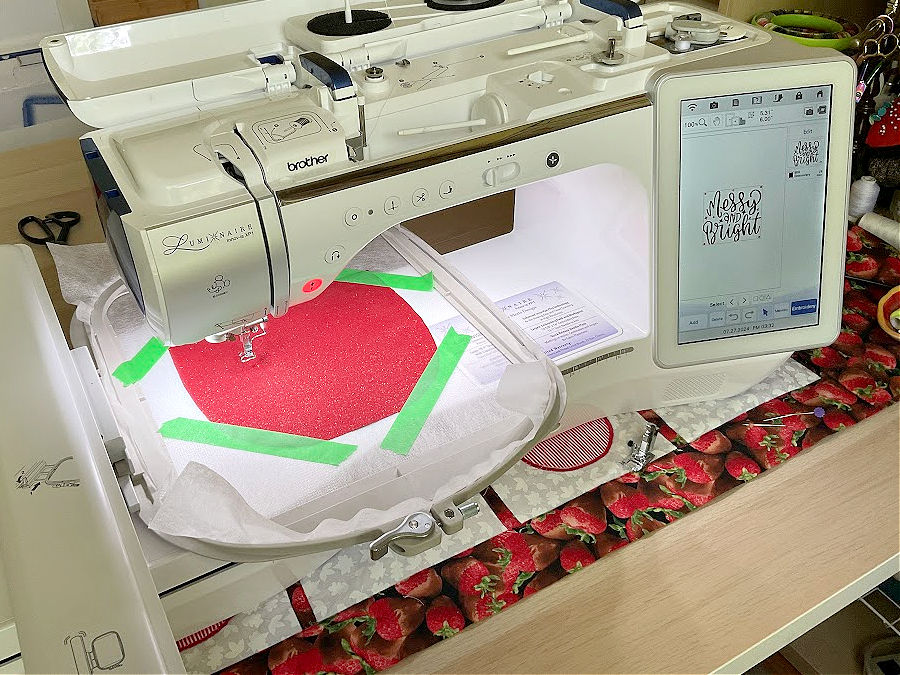
Painter’s tape is also very useful with embroidery machines. When you’re working with fabrics that are hard to hoop—like small pieces, delicate materials, or areas close to seams—you can hoop only the stabilizer. Then, lay your fabric on top and secure it in place with painter’s tape. It holds the fabric steady during stitching without distorting it and peels off easily after the design is complete.
Note: Some of the links on this page are affiliate links. This means I will receive a commission if you order a product through one of my links. I only recommend products I believe in and use myself.

2. Use Nail Polish in Creative Ways
Clear nail polish is more versatile than it seems.
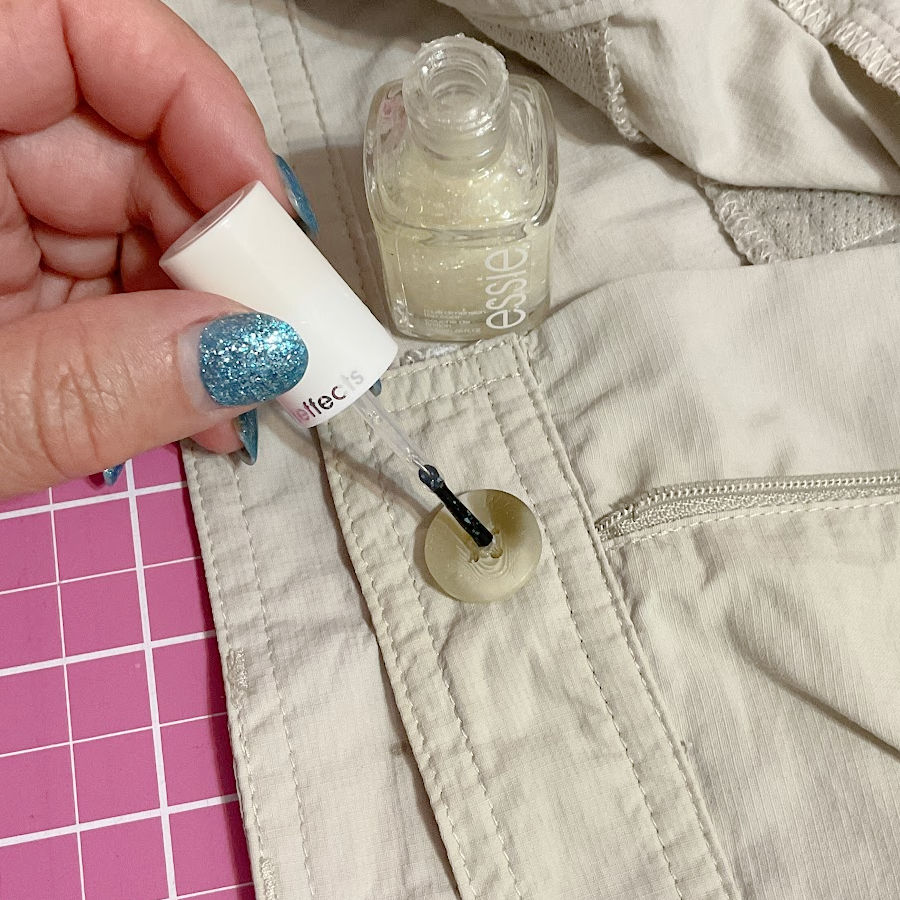
After sewing on a button, apply a tiny dab between the holes to lock the threads in place. This helps prevent unraveling, especially on frequently worn garments.
For serged seams, sealing thread ends with a small amount of nail polish can stop fraying. Just be sure not to use it where the seam will touch the skin, since dried polish can feel scratchy.

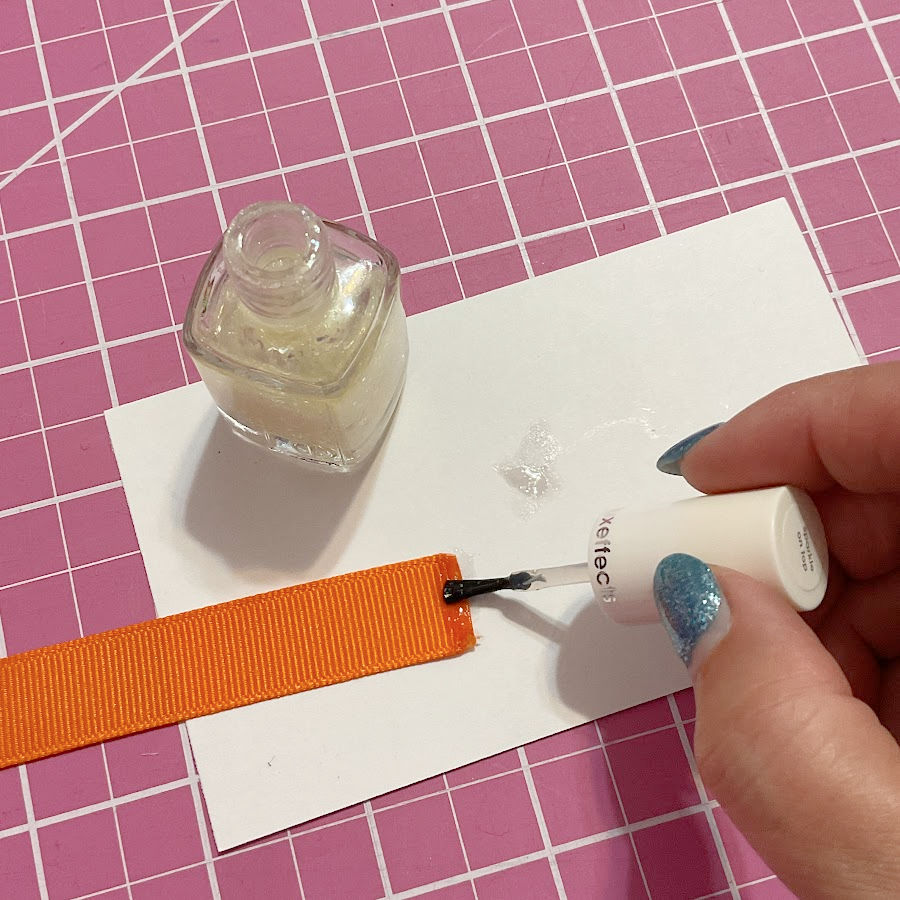
And on synthetic ribbon or elastic, a tiny swipe of nail polish on the cut edge keeps it from fraying, especially if you’re not planning to hem it.
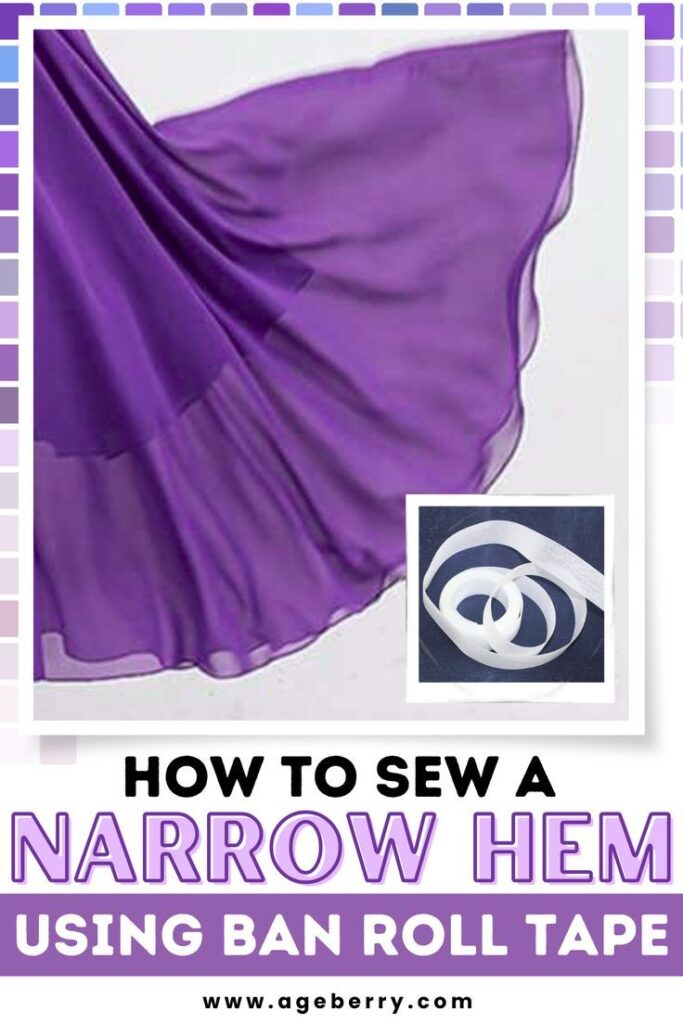
3. Use Ban-Roll Tape for Narrow Hems on Delicate Fabrics
Ban-Roll is a stiff woven interfacing traditionally used to stabilize waistbands in trousers and skirts. But it also works wonderfully as a tool for sewing narrow hems on lightweight or slippery fabrics like chiffon, silk, or organza. The tape has a woven structure with vertical threads that you can pull out to create a fine row of horizontal “ladders.” These tiny gaps allow you to fold and stitch the fabric evenly over the edge of the tape. It acts like a built-in hem guide. This method creates a clean, even hem without distortion or stretching. Once the hem is sewn, the Ban-Roll tape slides out easily, leaving behind a neat finish.
For a full step-by-step tutorial, visit this link How to Sew a Narrow Hem with Ban-Roll.
4. Use Buckram Fabric to Sew Narrow Hems
Buckram, a stiff and loosely woven fabric, can be used in a similar way to Ban-Roll tape for hemming delicate fabrics like chiffon. Its structure provides a stable edge that helps guide the fabric for narrow, even hems. After stitching, the buckram can be removed, leaving behind a clean finish.
For full instructions, see my tutorial From Frustration to Finesse: A Foolproof Method for Hemming Chiffon and Sheer Fabrics


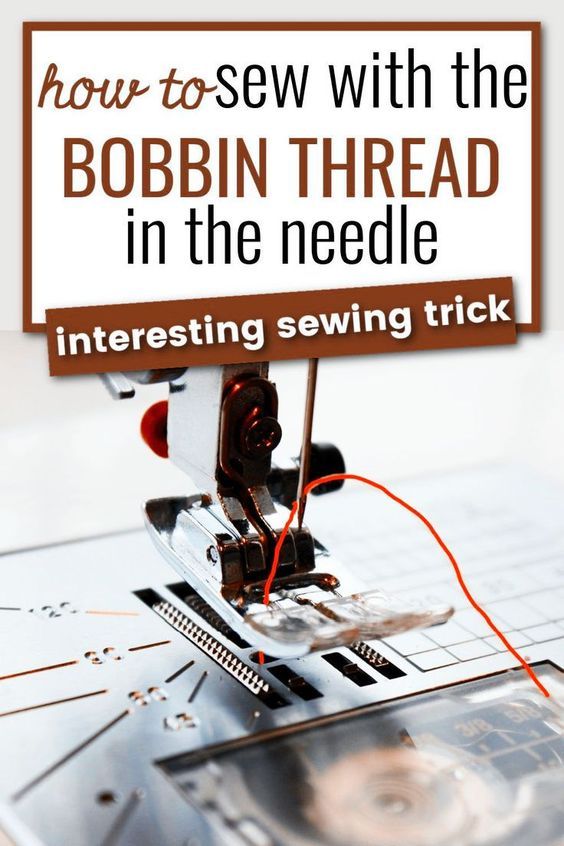
5. Sew with Only Bobbin Thread for Lightweight Fabrics
This trick is especially helpful when sewing sheer fabrics and you want to avoid thread tails at the beginning of a seam. Instead of threading your machine the usual way, you pull the thread directly from the bobbin (which stays in its place under the throat plate) and guide it up through the needle. When you sew, the machine stitches with just the bobbin thread, and the seam looks exactly like a regular straight stitch.
Curious how it works? Check out the full tutorial: How to sew sheer fabric using only the bobbin thread for stitching
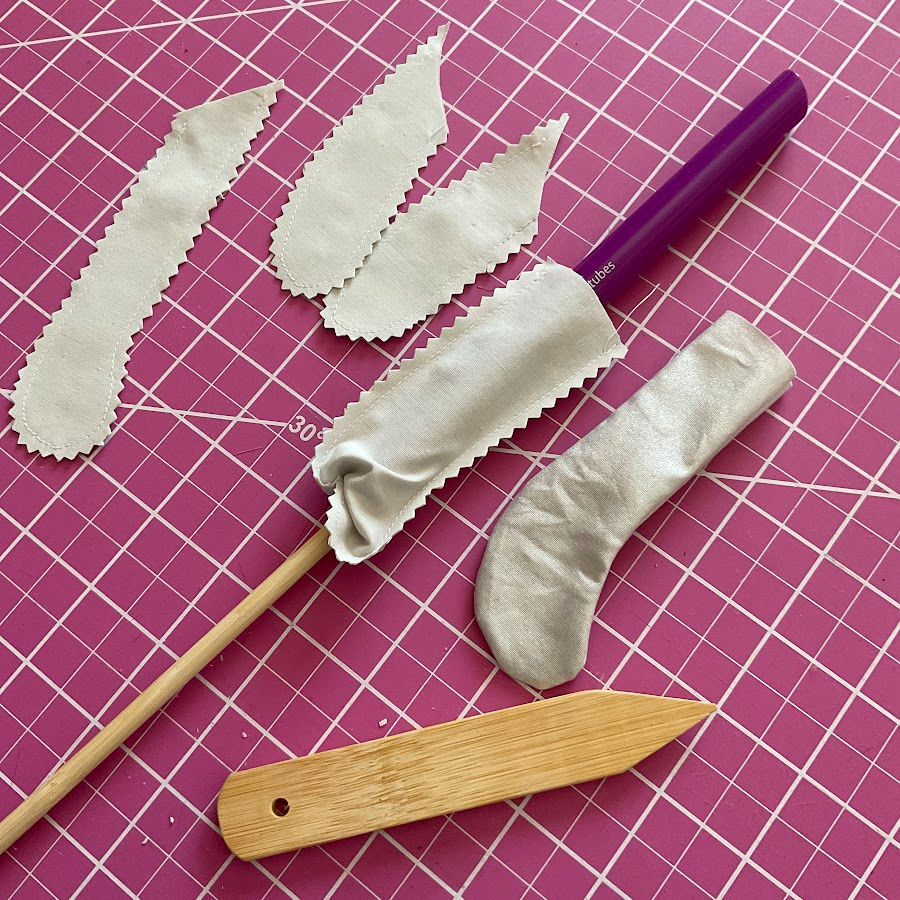
6. Turn Tubes with a Straw and Chopstick
Turning narrow tubes of fabric right side out can be quite frustrating, but a simple straw and chopstick combo solves this problem. Slide the straw onto the fabric tube, then use the chopstick to gently push the fabric through from one end. This method works especially well for spaghetti straps, button loops, or belt loops. It’s much faster and easier than fumbling with safety pins or loop turners, and it puts far less stress on the fabric.
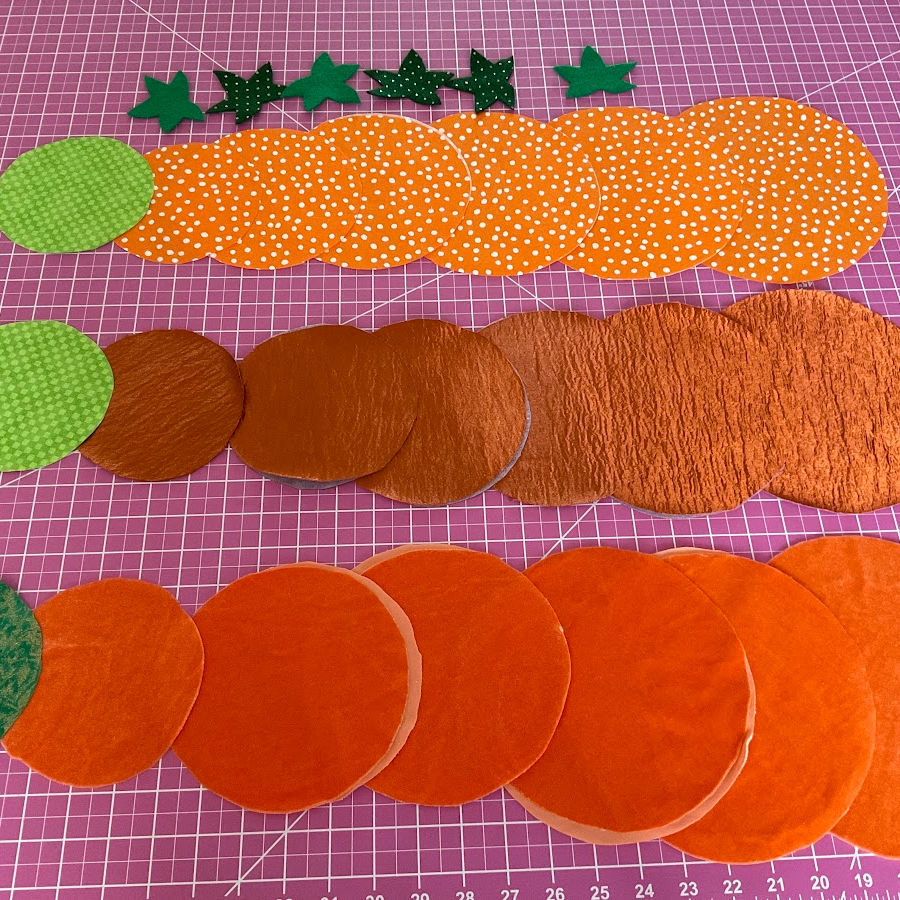
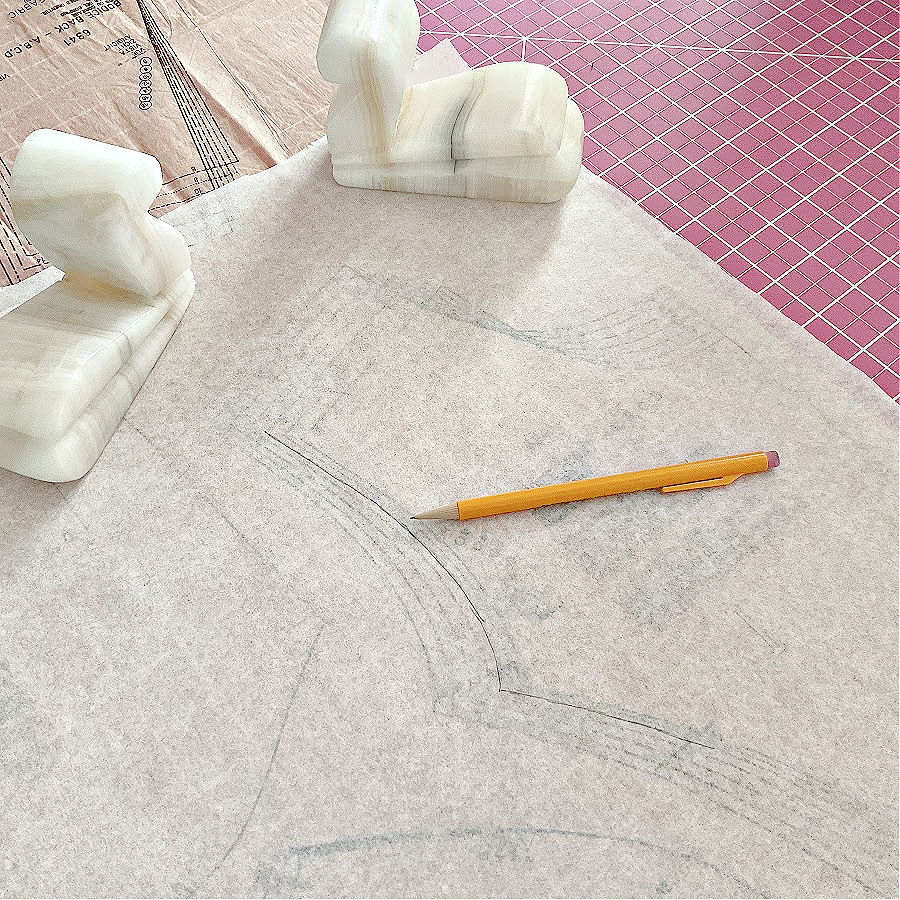
7. Trace Circles with Household Items
There’s no need for a fancy template set when you’re trying to draw circular shapes for patchwork, bag bottoms, or curved corners. Just grab a mug, bowl, lid, or plate from your kitchen. They come in a variety of sizes and have smooth, even edges. Keep a few favorites in your sewing space so you always have the right curve ready. This saves time and gives you perfectly round, repeatable shapes.
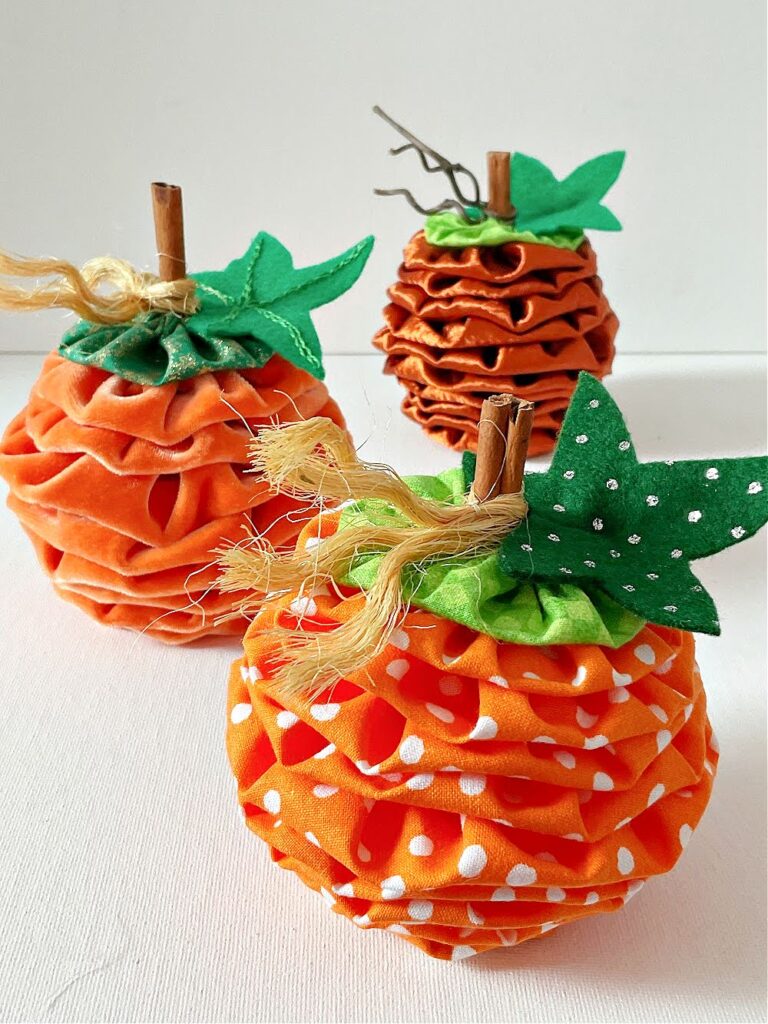
This method is especially handy when you’re making a lot of circles at once. For example, if you’re sewing fabric yo-yos—as I did recently to make decorative pumpkins—you might need dozens of circles in different sizes. I used my Cricut machine to cut them, but plates and mugs would have worked just as well.
This is my detailed tutorial – DIY Fabric Yoyo Pumpkins: Step-by-step Sewing Tutorial
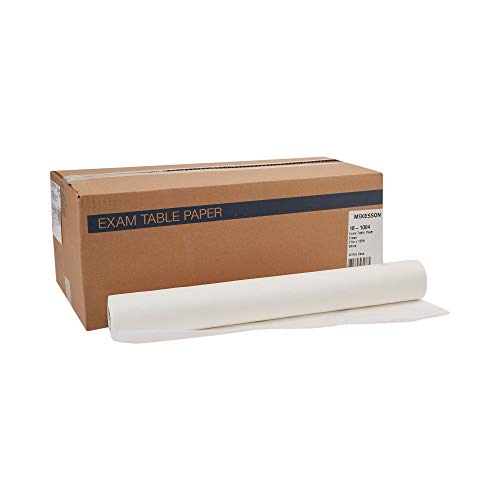
8. Trace Patterns on Medical Exam Paper
Medical exam paper, often found in rolls, makes a fantastic material for tracing sewing patterns. It’s semi-transparent, which means you can easily see through it to trace design lines, grainlines, or notches. It’s also lightweight, easy to fold for storage, and significantly less expensive than traditional pattern paper. This paper is a great alternative if you’re altering commercial patterns.
9. Use Rubber Bands in Multiple Ways
Rubber bands are incredibly handy for several sewing room tasks.
First, you can use them to keep bobbins and matching spools together. Wrap a rubber band around the thread spool and tuck the bobbin into it. This keeps sets organized and tangle-free.
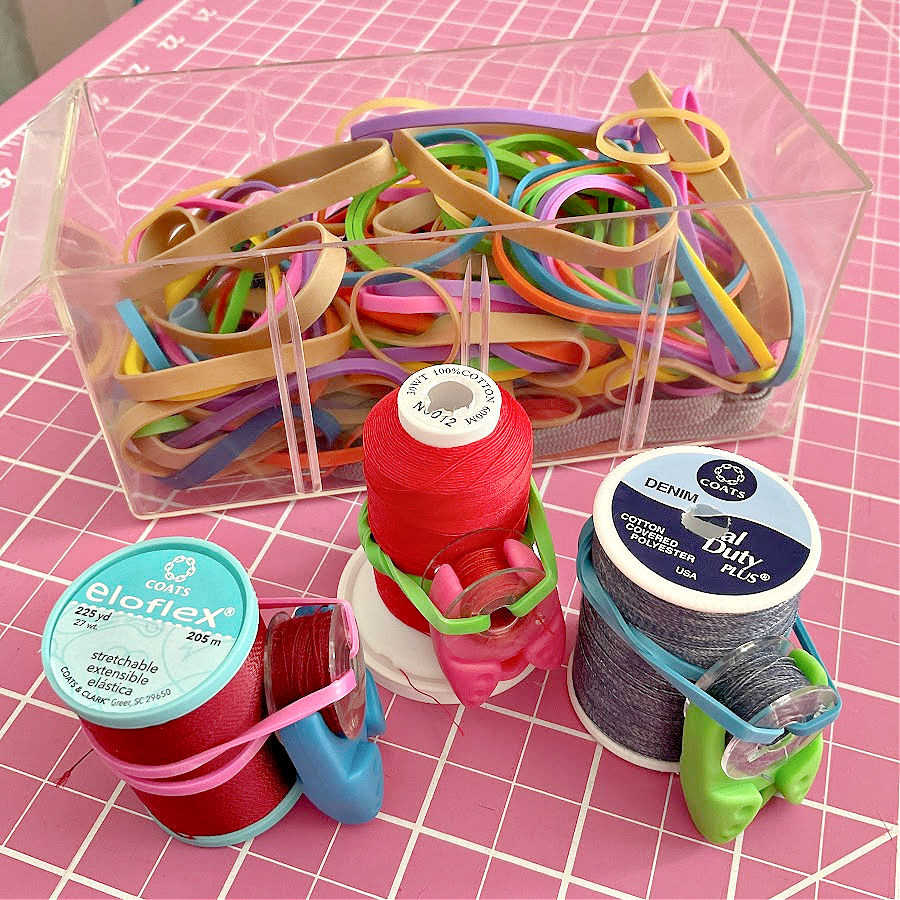
You can also place a thick rubber band around the free arm of your machine, aligning it with your seam allowance. It serves as a visual guide when sewing long, straight seams.


10. Mark Fabric with Frixion Pens
Frixion pens are heat-erasable, which makes them useful for marking fabric during cutting or sewing. You can use them to draw darts, pleats, stitching lines, or button placements. When you’re done, a quick press with a hot iron makes the marks disappear. They write smoothly and show up well on most fabrics.
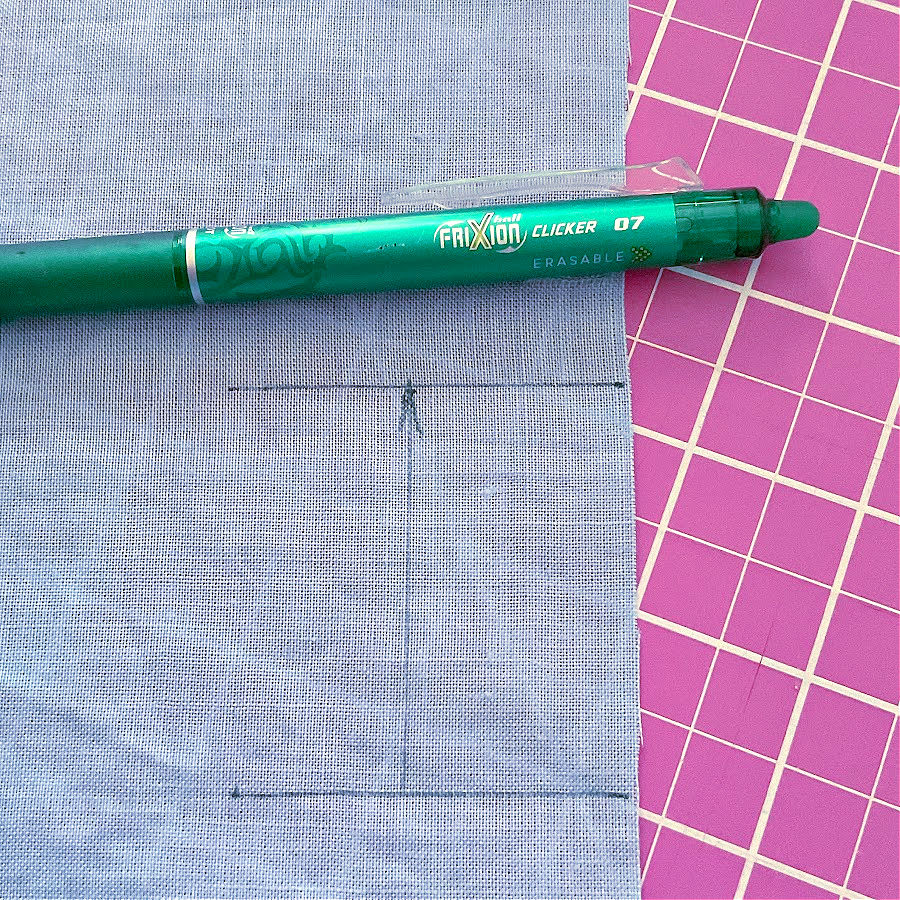

However, some users have noted that marks can return in cold temperatures, so avoid using them on areas that will remain visible on the final garment.
11. Use Leftover Soap Slivers for Marking
When you get to the end of a bar of soap, don’t throw it out. Flat soap pieces can be used to mark fabric, just like tailor’s chalk. The marks go on smoothly, are visible on most fabrics, and wash out easily. They’re especially useful when you need a fine line for precise cutting or stitching. Keep a few in your drawer as an eco-friendly marking tool that costs nothing.
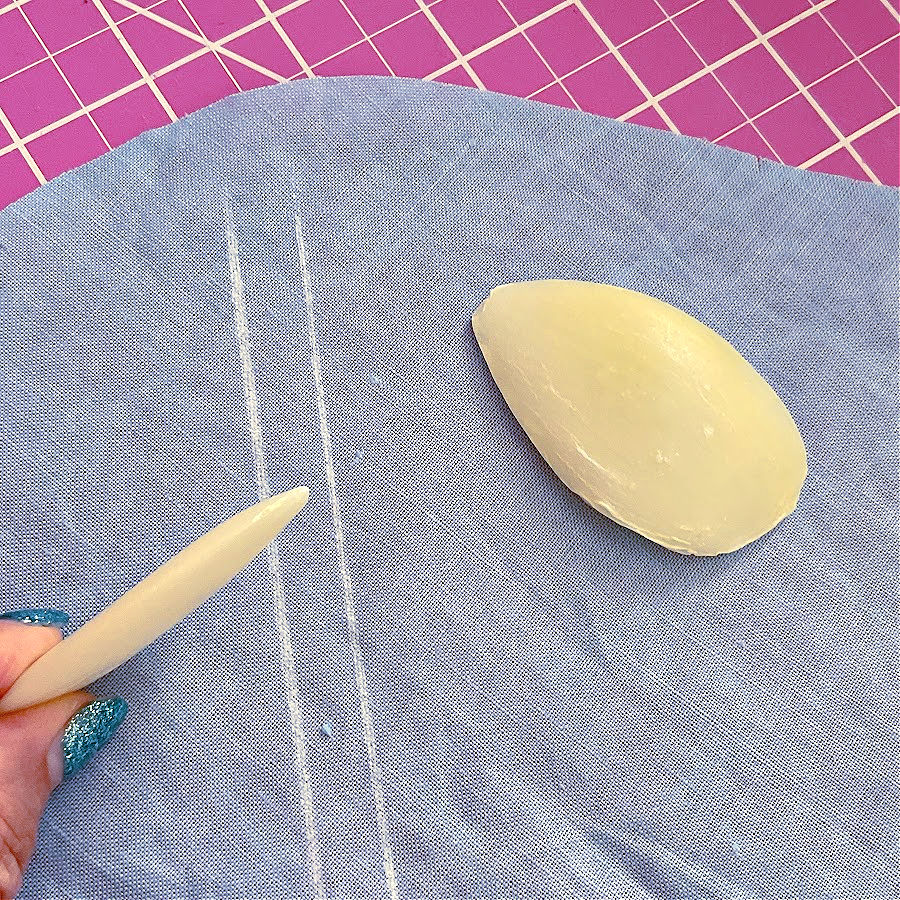
Unfortunately, lately we tend to use more and more liquid soap, for the convenience. THAT cannot be used for marking!
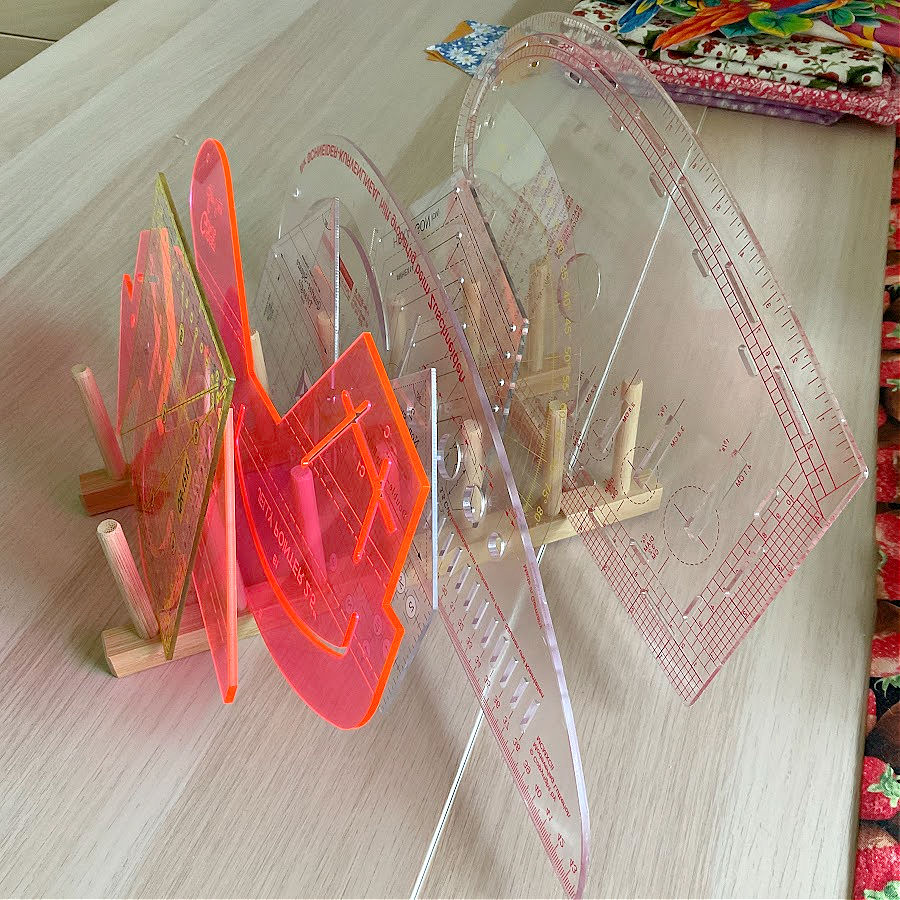
12. Repurpose IKEA Items
Many IKEA items can be repurposed to make your sewing area more efficient.
A pot lid holder makes an excellent vertical organizer for quilting rulers. It keeps them upright and easy to grab.
A three-tier rolling cart can be turned into a mobile ironing station by adding a small pressing surface to the top. It keeps your tools close to your machine and saves space.
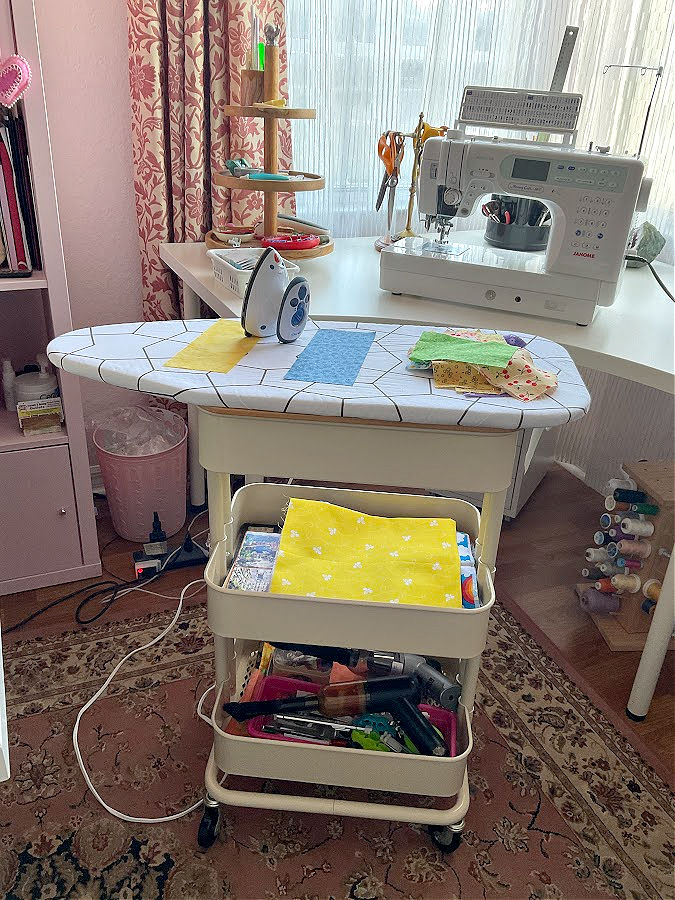
A pegboard with accessories is ideal for organizing scissors, thread spools, rotary cutters, and rulers. It keeps your supplies visible and off the work surface.
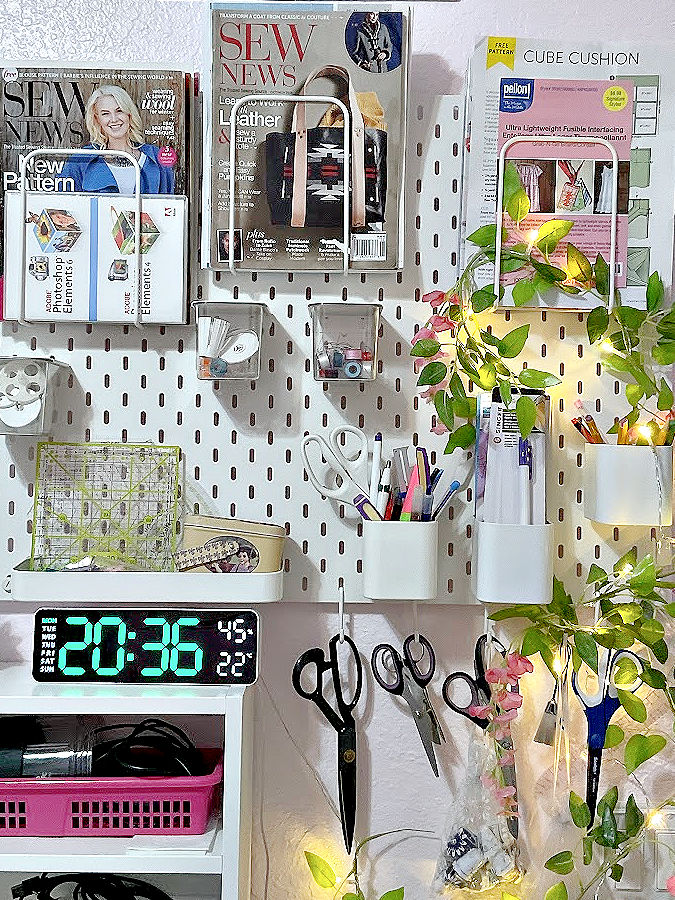
✅ Related tutorial: IKEA Sewing Room Ideas for small spaces
13. Use Ironing Spray on Curling Knits
Some knit fabrics tend to curl at the edges when cut, which makes sewing them frustrating. Spraying the curled edge lightly with ironing spray before pressing helps relax the fabric. It lays flatter, which makes cutting, pinning, and stitching more accurate. This is especially helpful when working with narrow hems or binding on knits.
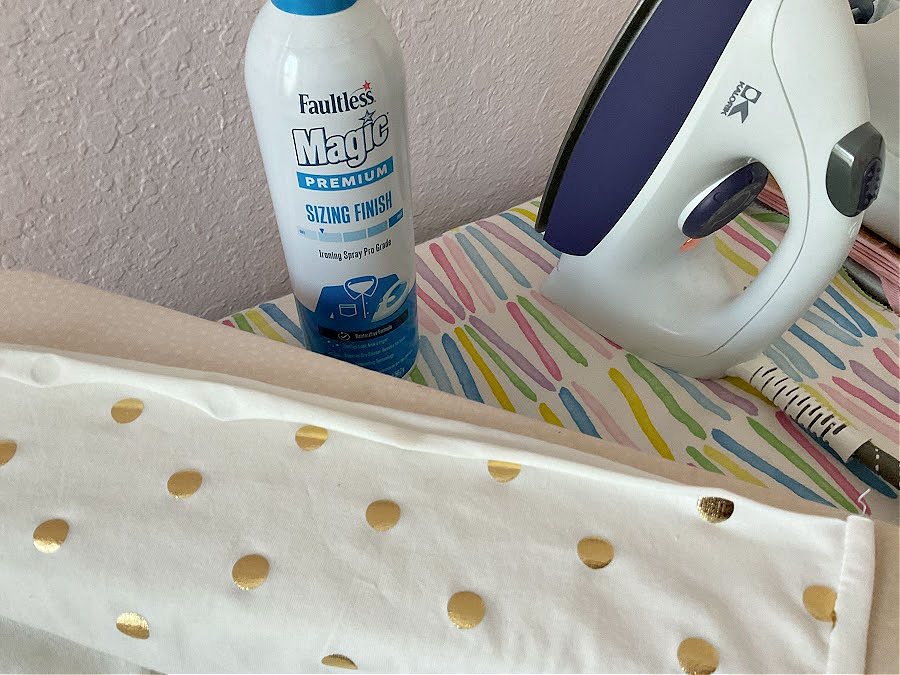
You can read more about this in my tutorial – How To Cut Knit Fabric: Ultimate Guide


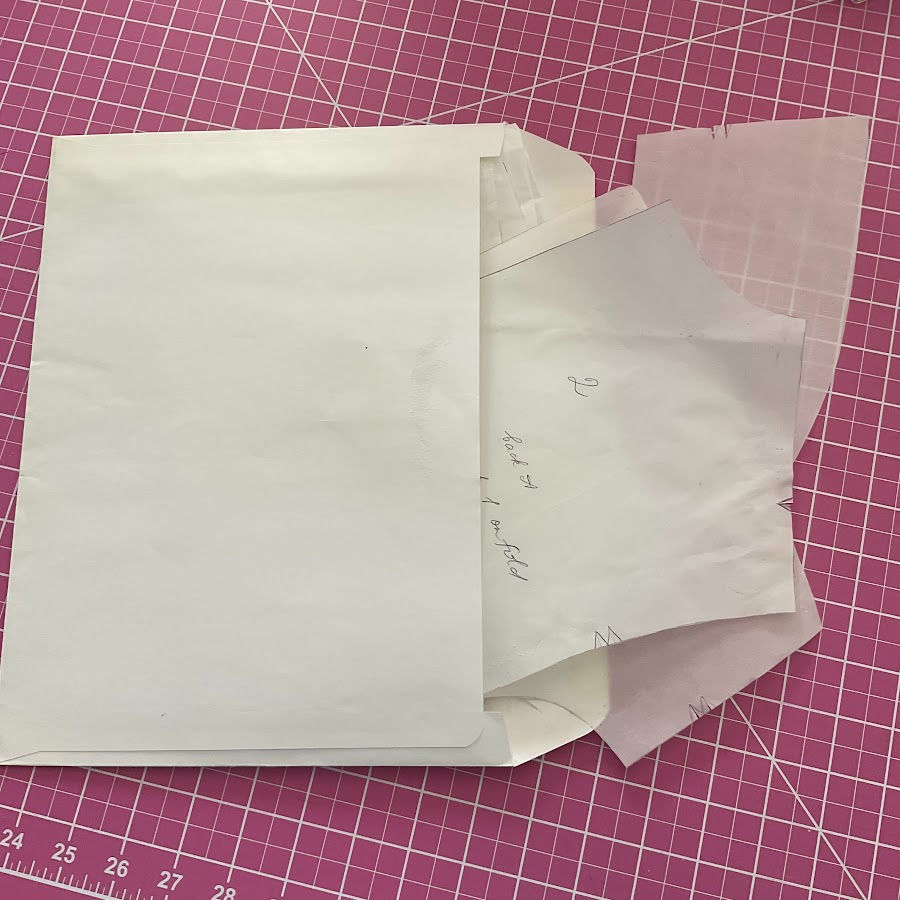
14. Store Patterns in File Envelopes
Printed patterns, especially from PDFs, can become wrinkled, torn, or misplaced if they’re not stored properly. Use large file envelopes to keep all the pieces together, flat, and easy to label. You can write the pattern name, size, notes about fit, or fabric suggestions directly on the envelope. This makes it much easier to find the pattern you want later, and the structure of the envelope prevents folded pieces from getting damaged over time.
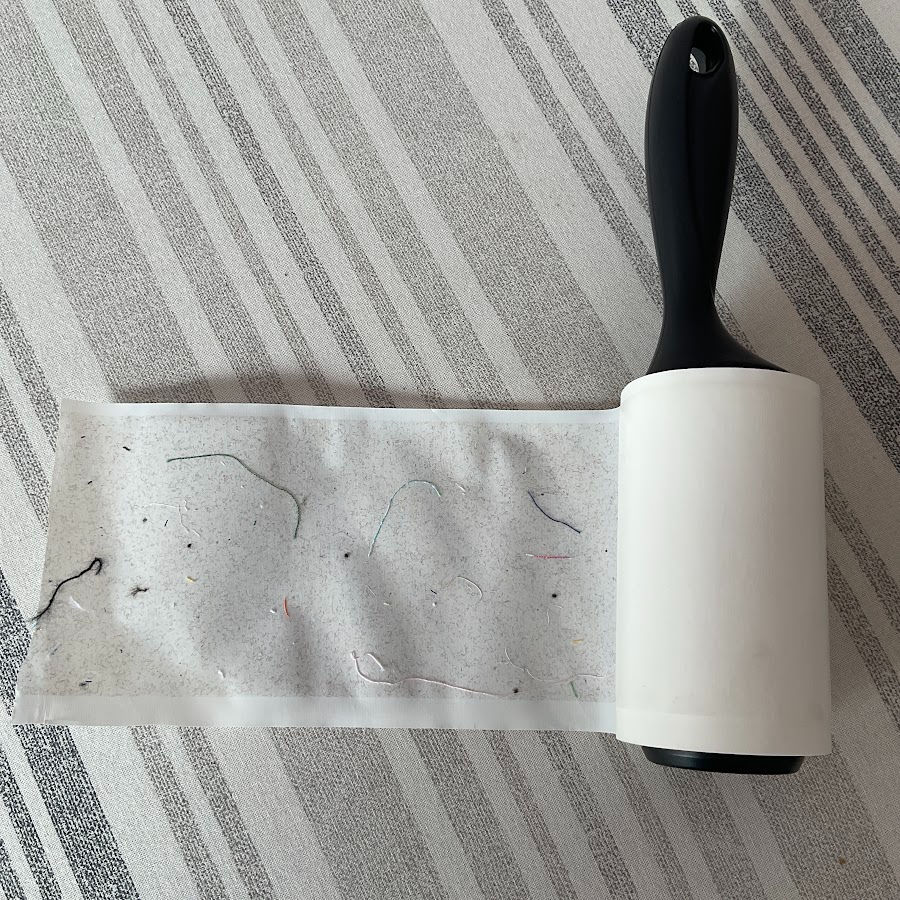
15. Use a Lint Roller to Clean Up Threads
A lint roller isn’t just for clothing. It’s one of the fastest ways to clean up after trimming threads or unpicking seams. Roll it across your fabric, cutting mat, ironing board, or even your clothes to collect stray threads and fuzz. Keep one near your machine so you can tidy up quickly without reaching for a vacuum or brush.
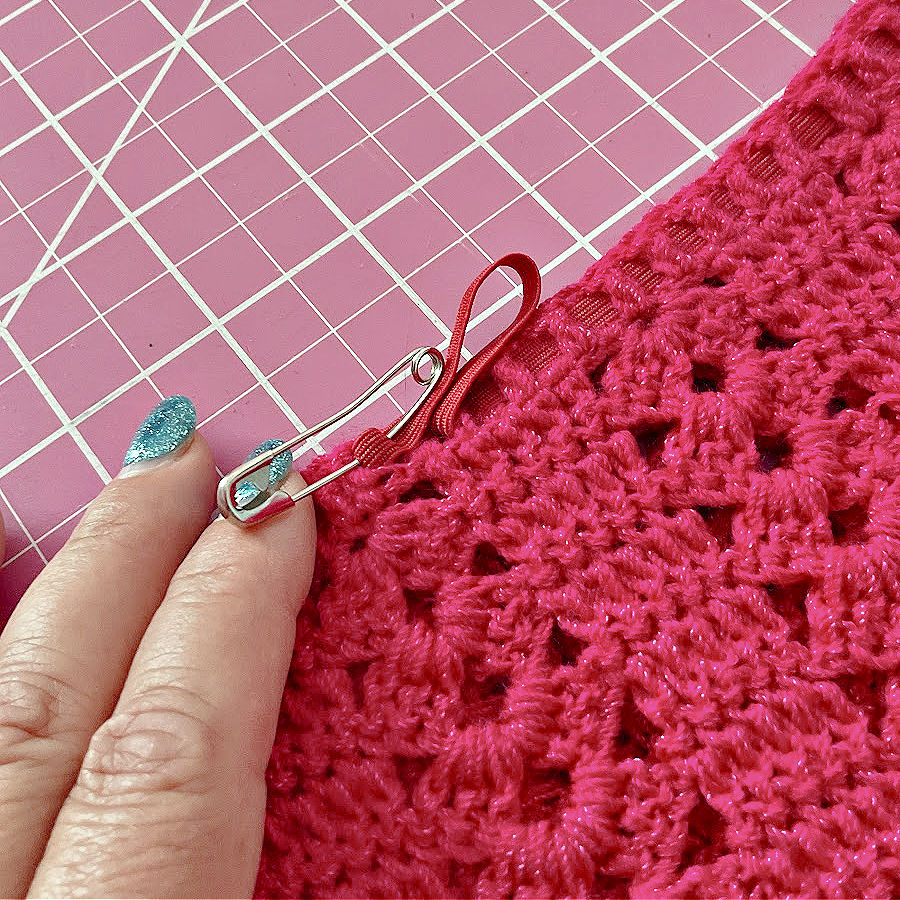
16. Thread Elastic with a Safety Pin
Inserting elastic into a waistband or casing can be a tricky task unless you use a safety pin. Attach a pin to one end of the elastic, close it securely, and feed it through the casing. The safety pin acts as a handle and helps push the elastic forward. It’s easy to grab and control, and it makes this common task much faster.
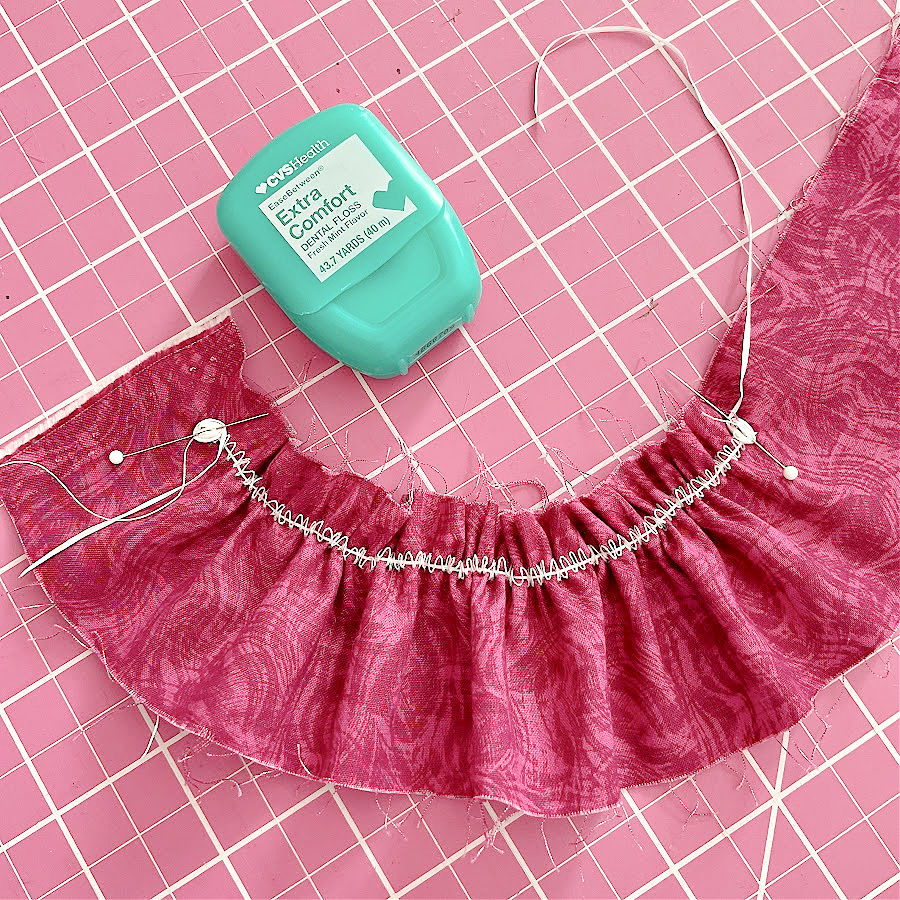
17. Use Dental Floss for Gathering
Dental floss is much stronger than thread and doesn’t snap when pulled. To create gathered fabric, place a length of unwaxed dental floss along the seam line and sew a wide zigzag stitch over it—just make sure not to catch the floss in the stitching. Once your stitching is in place, pull the floss gently to gather the fabric. This method works especially well on heavier fabrics where traditional gathering threads might break.
18. Use Floss Threaders
Floss threaders are small, flexible loops used for dental work, but they are also helpful for sewing. They are rigid at the tip, unlike the thread, and will go through the needle eye much easier. The loop can catch the thread and effortlessly guide it through the eye.
Use them to thread hand sewing needles, especially when working with fine or metallic thread that tends to fray. They also work for threading serger loopers or hard-to-reach spots on your sewing machine. They’re inexpensive, reusable, and easy to keep in a notions box.


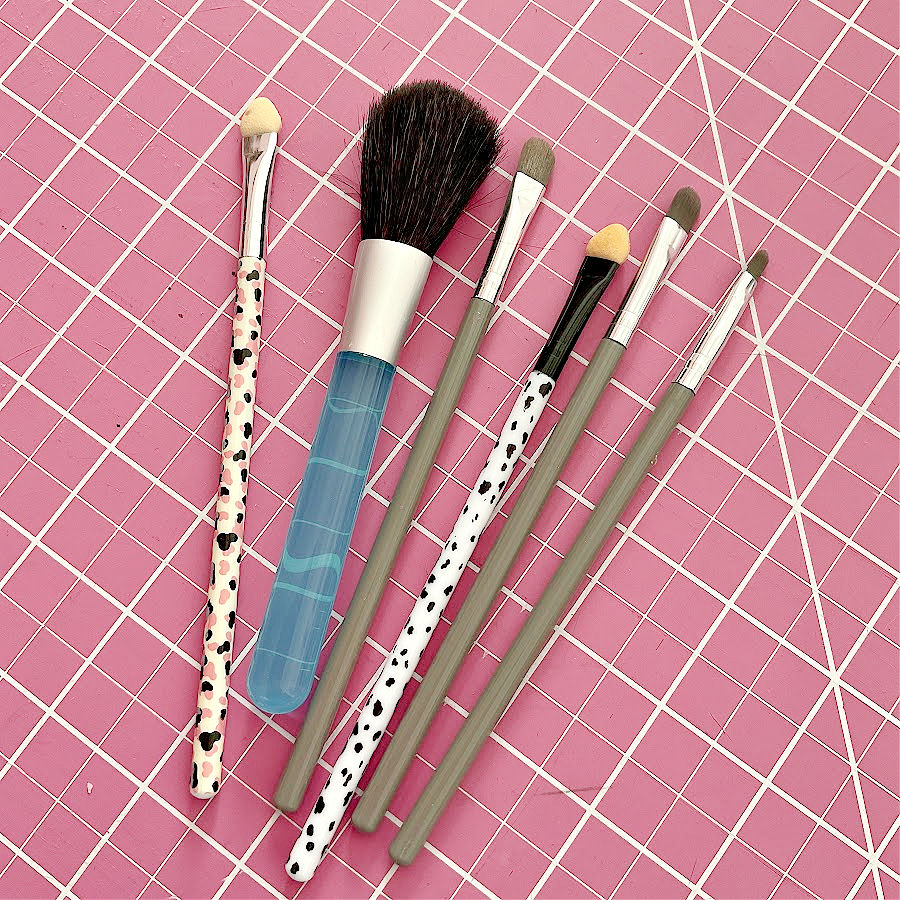
19. Clean Your Machine with a Makeup Brush
Keeping your sewing machine free of lint helps it run smoothly and prevents skipped stitches. A clean makeup brush, such as an eyeshadow or blush brush, is perfect for reaching tight areas like the bobbin case and feed dogs. The soft bristles lift out dust without scratching or pushing it further inside the machine. It’s a gentle and effective way to do regular maintenance between deep cleanings.
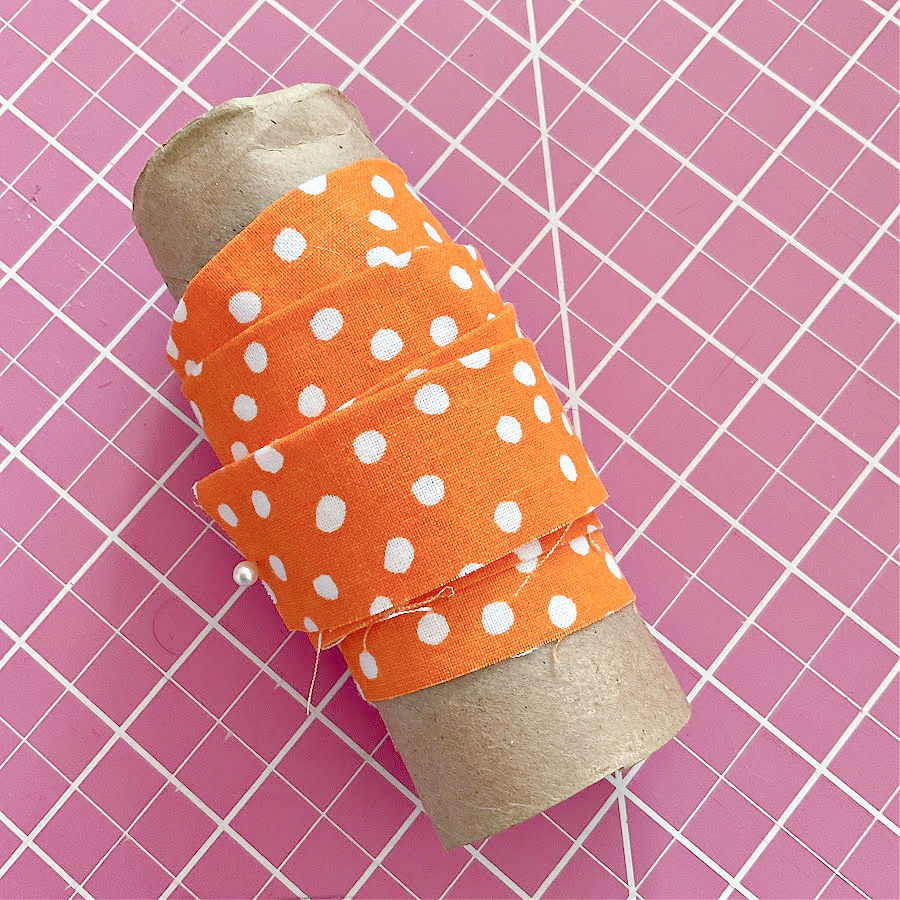
20. Wrap Bias Tape or Ribbon Around a Toilet Paper Tube
Everyone uses bias tape, but it can unravel, crease or even get dirty if left loose in a drawer. One easy way to store it is by wrapping it around an empty toilet paper tube. Just roll it up neatly and secure the end with a pin or clip.
In this image, you can see the bias tape I made for a previous project—there was plenty left, so I saved it for future use. Keeping it stored this way prevents tangles and saves time later. You can also place it in a plastic bag
If you’re interested in making your own bias tape, I have a full tutorial here: Bias tape tutorial: how to use a bias tape maker
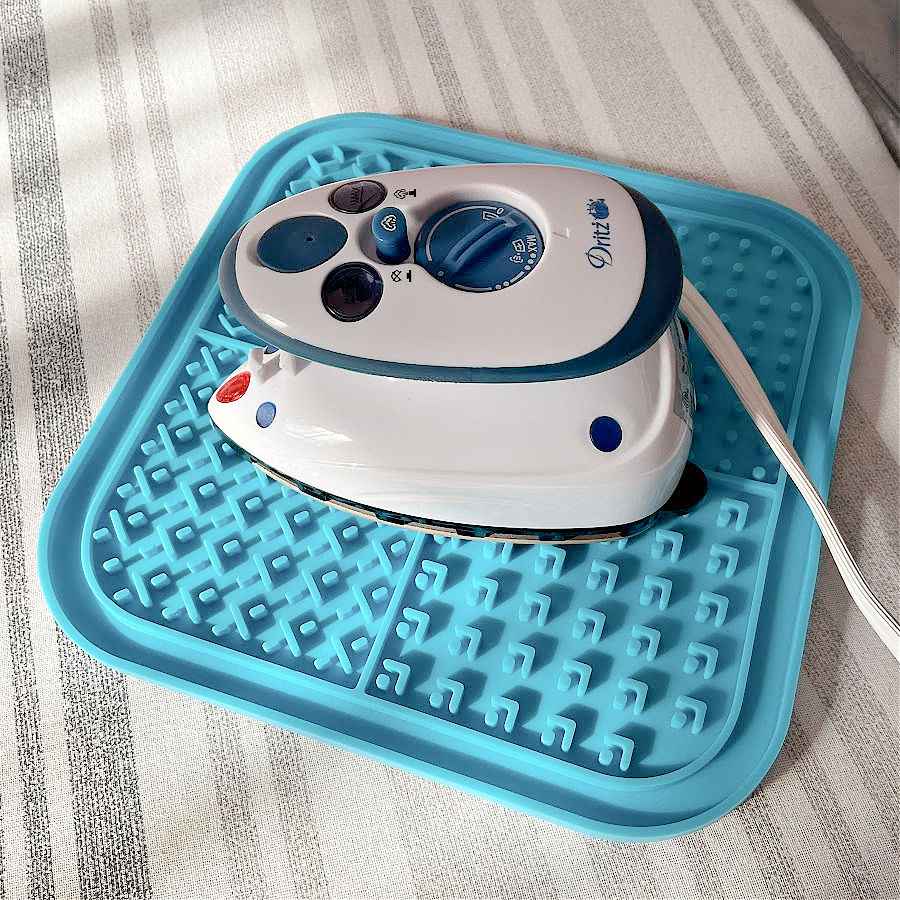
21. Use a Silicone Trivet as a Mini Ironing Mat
A silicone trivet, usually found in the kitchen, can serve as a compact and heat-safe pressing surface. When working with small pieces like quilt blocks, narrow seams, or appliqué, place the trivet next to your sewing machine. This eliminates the need to get up and use your large ironing board for every press. It’s especially helpful during repetitive sewing steps where frequent pressing is required. Silicone trivets are heat-resistant, easy to clean, and grip the table surface to stay in place.
If you’re curious about mini irons, I have an article where I reviewed different options – Mini Irons For Sewing And Quilting
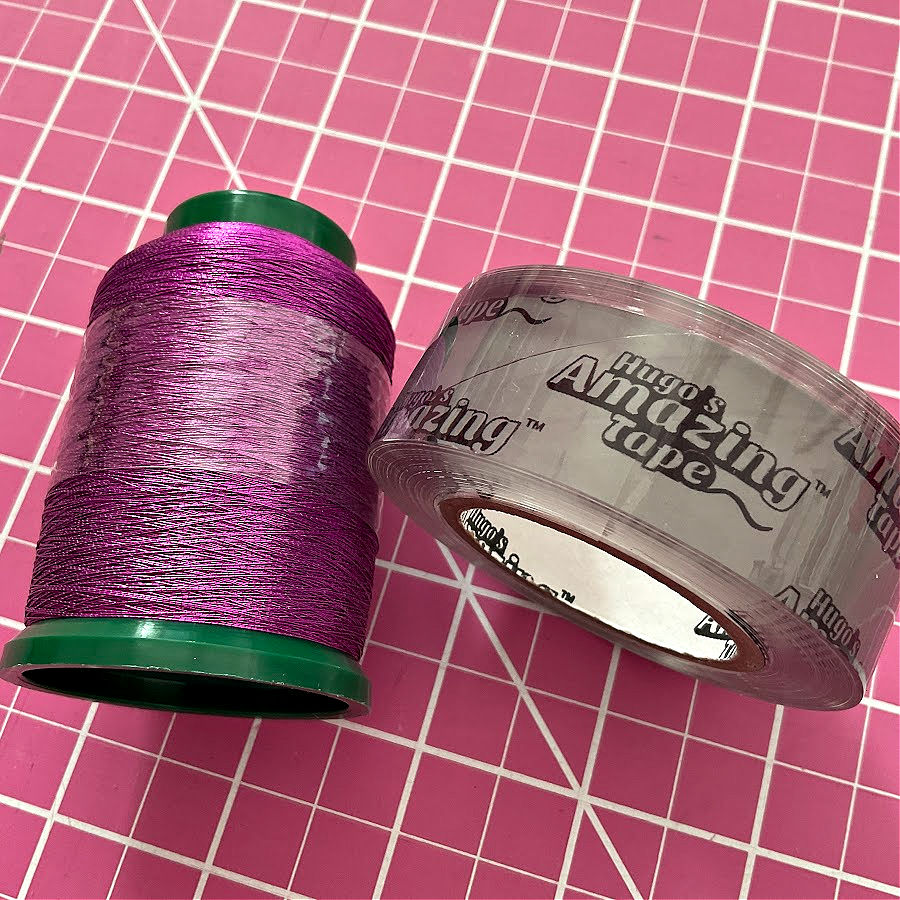
22. Use Hugo’s Amazing Tape to Stop Unraveling
Hugo’s Amazing Tape is a self-clinging, reusable plastic tape that grips tightly without any adhesive. Wrap it around thread spools to keep the ends from unraveling in storage. Because it sticks to itself, not your materials, it doesn’t leave residue or cause damage. This is a good alternative to rubber bands, which can dry out or snap over time. It also works for wrapping bundles of ribbon, cords, or trim that tend to come loose in your drawer.


23. Use a Hair Straightener for Quick Pressing
A hair straightener is a handy substitute for an iron when you need to press small sections or hard-to-reach areas. It’s particularly useful between buttons, along narrow seams, or when working on doll clothes or other miniatures. Choose a straightener with adjustable heat settings so you can use it safely on delicate fabrics. Since it heats up quickly and takes little space, it’s also ideal for sewing in tight workspaces or while traveling.
I don’t have a hair straightener at home, so I don’t have an image but whenever I visit my daughter, I often use hers. The one below sold on Amazon is a newer version of my daughter’s hair straightener:

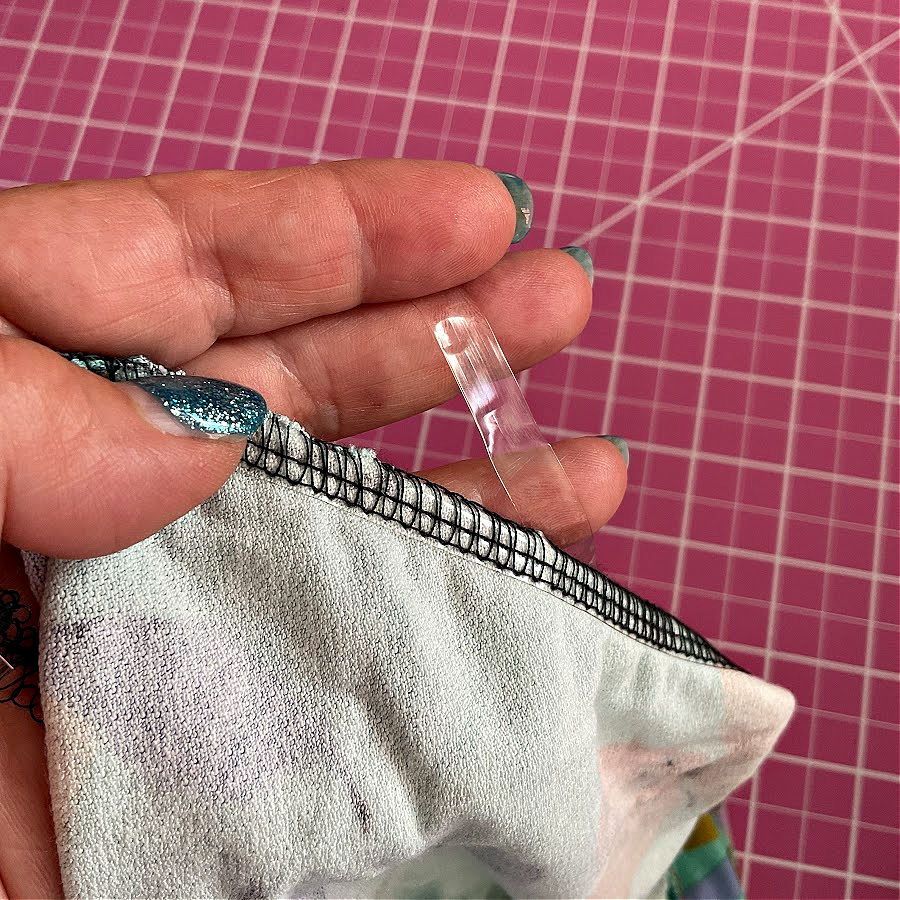
24. Apply Clear Elastic to Shoulder Seams
Clear elastic, often used in swimwear and activewear, can also help stabilize shoulder seams in knit garments. Knits tend to stretch out over time, and shoulder seams can sag with wear. By sewing a narrow strip of clear elastic into the seam, you prevent stretching without adding bulk. This small addition helps your garment maintain its shape and hang properly. It’s easy to apply—just stitch it in place as you sew the seam.

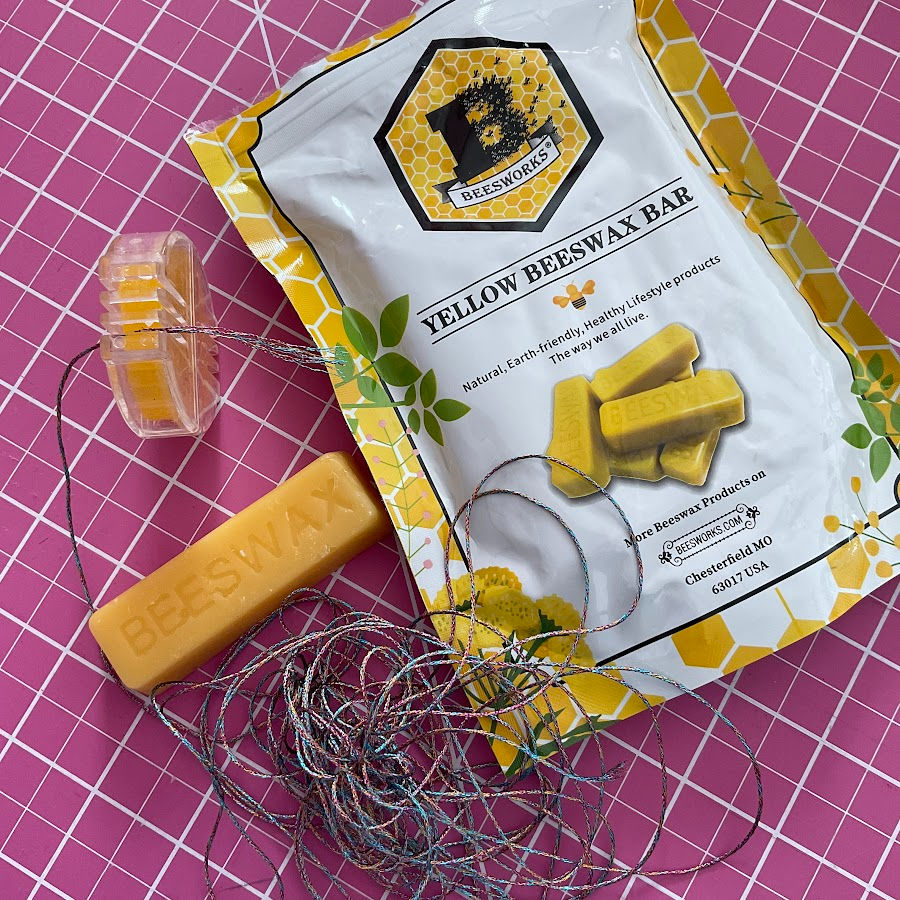
25. Apply Beeswax to Thread
When hand sewing, thread can tangle, twist, or break—especially if it’s long. Running your thread through a block of beeswax coats it lightly, making it stronger and easier to work with. The wax also helps the thread glide through fabric smoothly and reduces knotting. Many sewists use this trick when working with delicate fabrics, embroidery, or beadwork. You can find beeswax specifically for sewing, often shaped into disks with a groove in the center for easy use.
26. Use Lip Balm to Smooth Thread Ends
A natural beeswax-based lip balm, like the kind from Burt’s Bees, can help smooth the frayed ends of thread before threading a needle. Just swipe the thread lightly across the top of the balm. It tames stray fibers, makes the end firmer, and helps it pass through the needle eye more easily. This is especially useful when working with embroidery floss or older threads that have started to fuzz.
Please note that is for a different purpose than when applying the beeswax to the whole thread. This application refers specifically to the tip of the thread, for threading the needle.


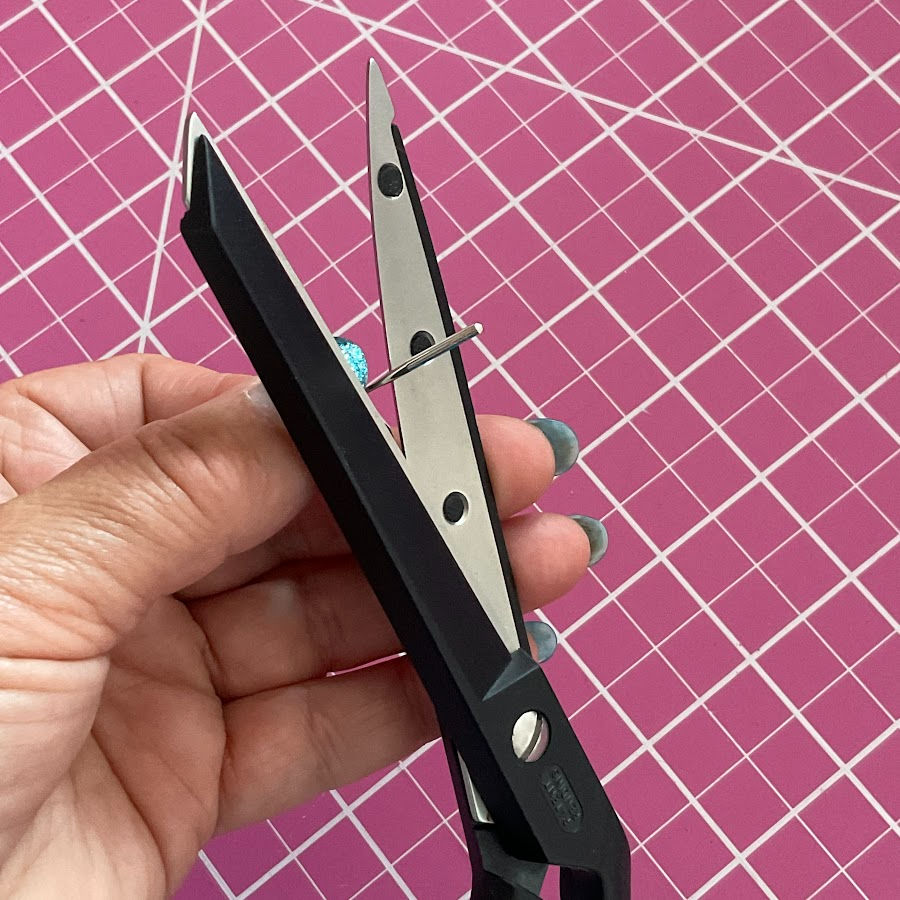
27. Sharpen Scissors with a Used Needle
If your scissors feel a little dull, you can use a worn-out sewing machine needle to give them a quick touch-up. Hold the needle in one hand and open your scissors wide. Then, gently “cut” along the shaft of the needle, running each blade from base to tip several times. This motion creates light friction that helps realign and smooth the blade edges. It won’t fully sharpen dull scissors, but it can improve cutting performance and allow you to postpone professional sharpening.

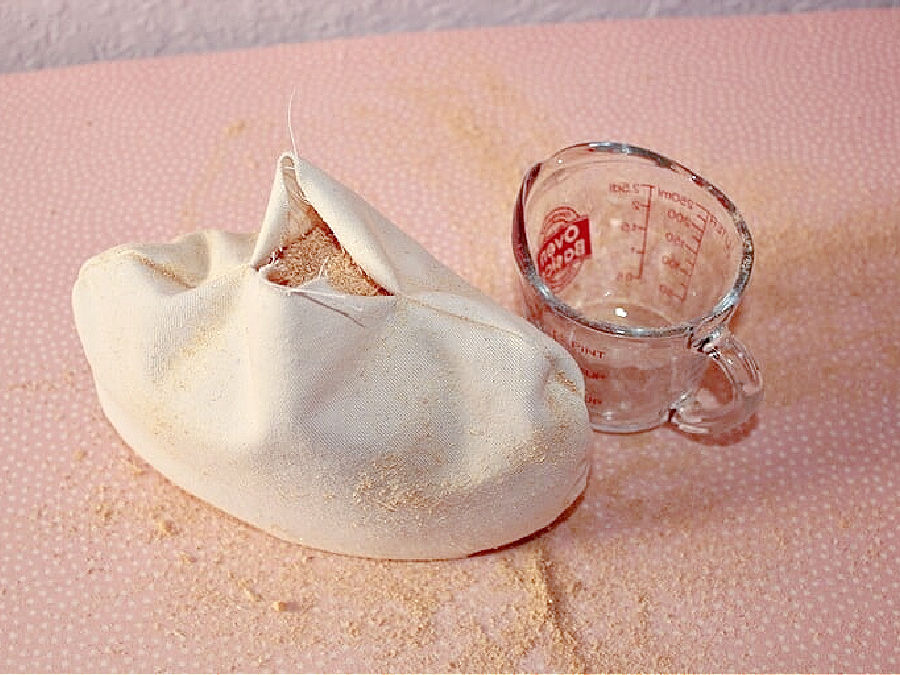
28. Fill Pressing Tools with Sawdust
When making your own tailor’s ham, seam roll, or sleeve board, filling it with sawdust instead of poly stuffing has real benefits. Sawdust is dense and holds its shape well, which makes it perfect for pressing curves and seams. It also retains heat and moisture, helping you create crisp, long-lasting presses when using steam.
You can usually find fine sawdust at woodworking shops or pet stores (marketed as bedding). Just be sure it’s clean and dry before using it for sewing tools. You may need (as I did) to remove larger wood particles and splinters from the sawdust.
Here is my tutorial on making a tailor’s ham – How to make a tailor’s ham
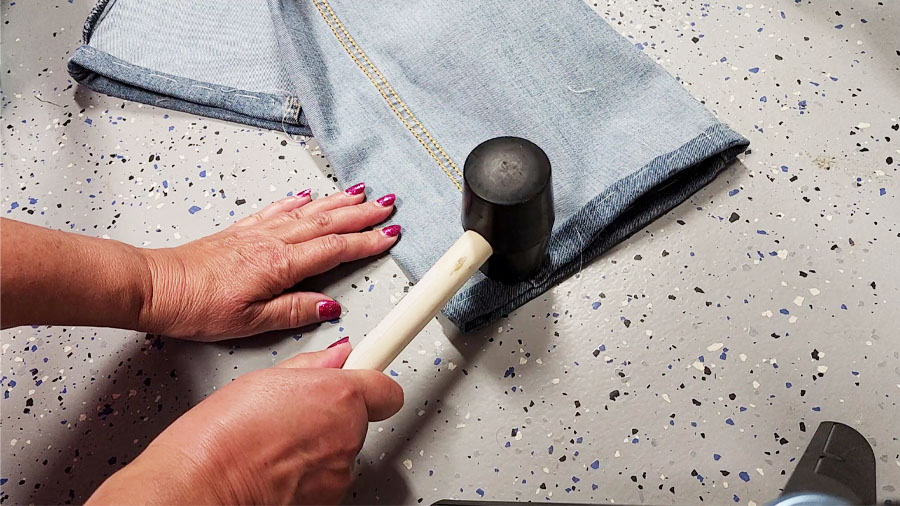
29. Use a Mallet for Thick Seams
When sewing through bulky seams—like jeans hems or layered denim—flattening the fabric first can make a big difference. Use a rubber or wooden mallet to gently pound the thick seam before stitching. This compresses the fibers and reduces the bulk, making it easier for your needle to pass through without skipping stitches or breaking thread. It also helps keep your seam even and prevents your presser foot from getting stuck or tilting. Just be sure to place the fabric on a hard surface, and avoid metal hammers that might damage the fabric.
I use this method when hemming jeans. You can see how I do it in my step-by-step tutorial on shortening jeans—it really makes a difference when working with heavy fabrics – How to Easily Hem Jeans at Home: A Beginner-Friendly Step-by-Step Tutorial
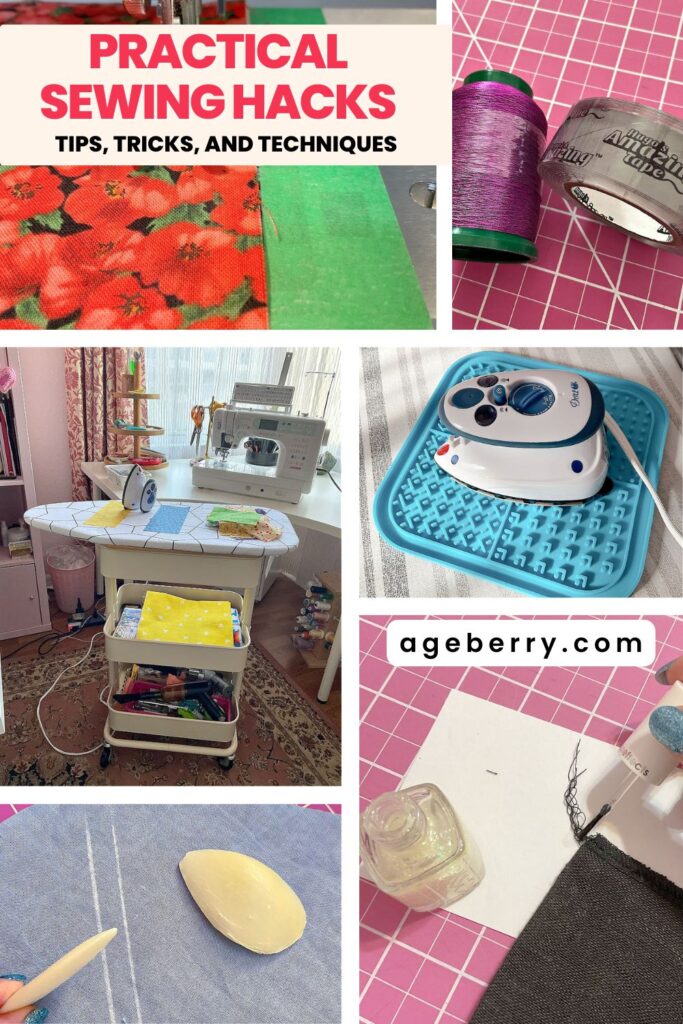
Did you find this tutorial helpful? If so, save this pin (see below) on your sewing board so you can come to this tutorial later when you want this information, and follow me on Pinterest for more tips, tutorials, and inspiration!
latest posts
- What Do You Call a Person Who Sews? I Asked My Readers and Got 1,408 Opinions
- DIY Round Purse: PDF Sewing Pattern and Detailed Instructions
- Mini Wonder Clips By Clover: Useful Sewing Tool Or Just Another Notion?
- Non-Slip Grips For Quilting Rulers: A Small Notion With A Useful Job
- Fabric Eraser for Sewing: What It Removes and When to Use It
- What Is The Best Thread For Sewing Machine Projects? Let’s Find Out!
- Butterfly Quilt Block Tutorial – Foundation Paper Piecing
- How To Sew Quilt Squares So The Corners Match
- Sewing With Fork Pins: How They Help With Pattern Matching, Slippery Fabric, And Seams

Thank you so much for all the wonderful suggestions. You and your site are great. I wish you had been around about 40 years ago when I started sewing. You hints and how to’s are marvelous .
Olga I just love reading your hints and tips. I learn something new, usually more than one something new, every time. Thank you.