Zipper pouch tutorial
This is my first attempt to make a zippered pouch with lining. And I honestly thought that this is the easiest thing ever to sew, it’s such a little thing, right? But I was mistaken. The lined zippered pouch turned out to be quite a complex thing to make. Yes, you can make it in 30 min if you don’t mind the funky dented corners at the top of the pouch.

But I didn’t want them to look like the ones in the images below. I am not saying that they are bad, they are very nice, it’s just that I don’t want corners like these especially since I am making the top of the pouch from leather and it’s quite bulky.
And I didn’t want to let the zipper hang over the edge of the pouch either.
I wanted my corners to look very neat. So what is the secret to making a zippered pouch without dented corners?
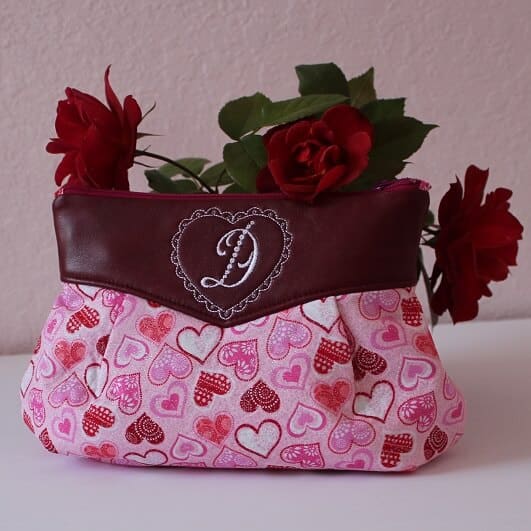
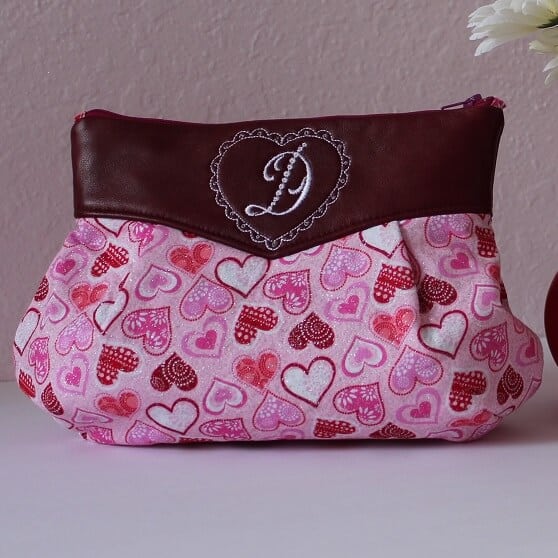
Read the tutorial to find out. I think my pouch turned out good enough and my daughter really likes it (I made the pouch for her). It can also be a great makeup bag with a zipper.
Note: Some of the links on this page are affiliate links. This means I will receive a commission if you order a product through one of my links. I only recommend products I believe in and use myself.
This sewing project is NOT hard at all to sew. So if you are a beginner you can manage it just fine if you follow the instructions. It will take you a few hours to make if you want it to be done really nice and to look professionally made, not homemade. But I don’t advise you to make it your first ever sewing project.
The first step (for me) was to create the design and draw the pattern. Well, that was easy. If you want to make exactly the same pouch you can download the printable PDF pattern from my RESOURCE LIBRARY.
If you are a subscriber you can find the password to enter the Library in my weekly emails. If you are not a subscriber you can sign up in the form below and I will send you the password for the Library right away by email.
What materials you will need to finish the project
- Fabric
- Leather (optional, you can use fabric as well)
- Good strong threads
- Interfacing (I used fusible fleece)
- Walking foot for your sewing machine (to sew bulky seams)
- Zipper
- Pattern (again, you can download it here)
- Regular (or fancy) sewing notions (see what fancy stuff I am using below)
If you prefer a video tutorial here is the link to my YouTube channel.

What fabric is good for the project
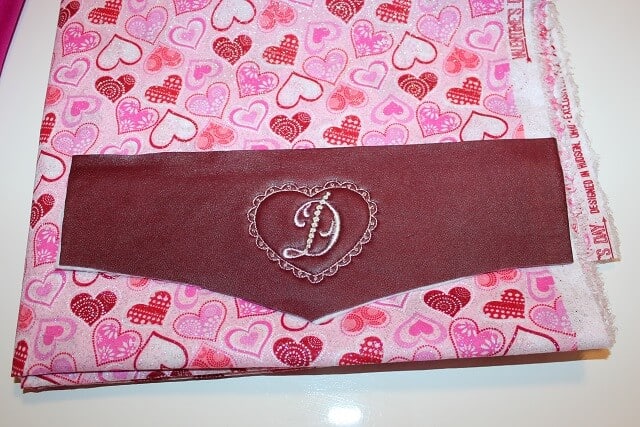
I used this fancy quilting cotton (with some silver specks) for the zipper pouch and I decided to use the same fabric as a lining but you can use a different fabric for the lining. The fabric is 100% cotton, and they say it’s durable. I thought I am going to have glitter everywhere after I use it but it didn’t fall off. It Is pretty and not messy. The only thing is that I have to iron it on the wrong side only, not a big deal.

For the upper section, I have chosen real leather. I had an old leather skirt and cut pieces from it.
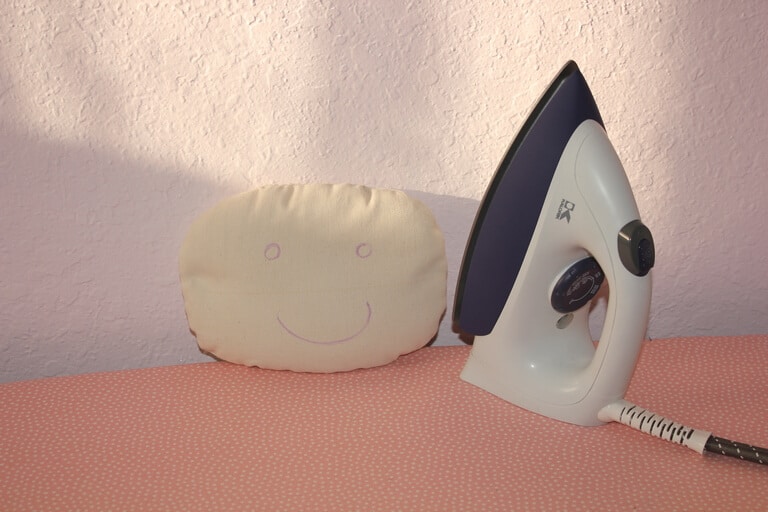
The leather was quite wrinkled so it was necessary to iron it. If you want to iron leather (yes, you CAN do it) use a piece of cotton fabric and iron leather on the wrong side only. As you see in the video below, the piece of old leather looks new after ironing.
✅ Related tutorial: How to sew leather

As for the interfacing, I used fusible fleece for the pouch and the lining but I think the finished bag is a little bit too thick so I advise you to use fusible fleece only for the outside fabric and regular fusible interfacing (medium weight) for the lining.
✅ Related tutorial: How to fuse interfacing

Step 1.
Cut the pattern pieces
- Front and back
- Front and back lining
- upper section – 2 from leather and 2 from lining
- Interfacing – fusible fleece
Seam allowances are included – ⅜ inch (or 1 cm)

Step 2.
Fuse interfacing to the wrong side of each matching fabric and leather section.

Step 3.
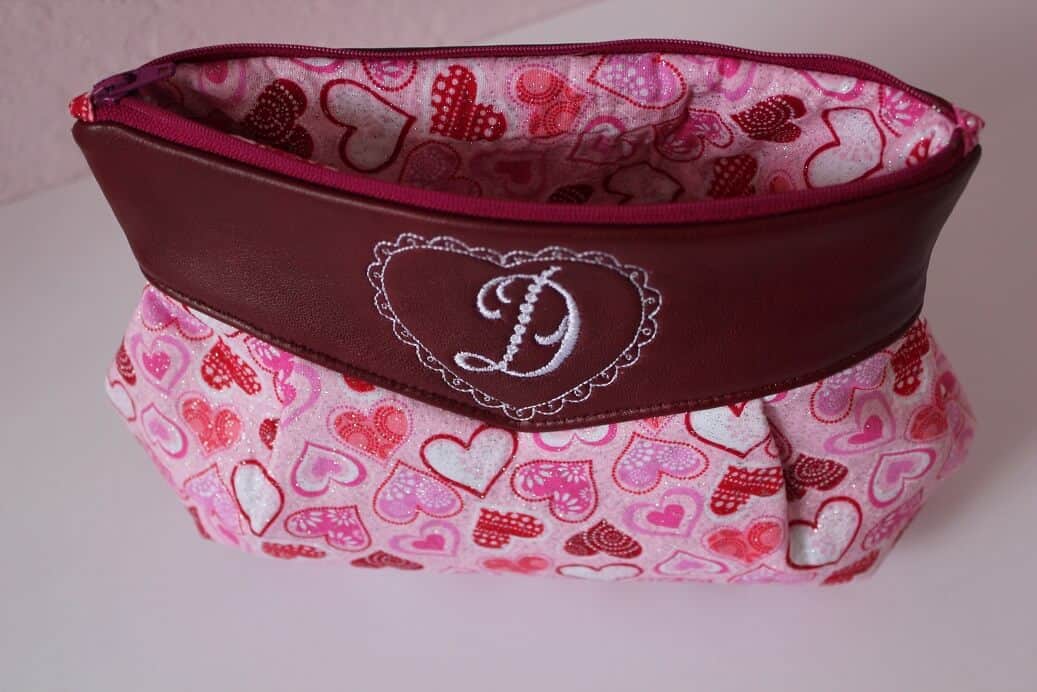
I did some embroidery on one leather piece because the pouch is a personalized gift for my daughter, Daria.
Step 4.
Stitch darts on the outside fabric and on the lining.
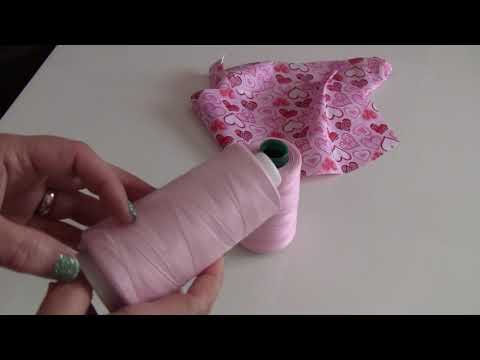
Here I have to tell you that it’s better to use very strong (but thin) threads that don’t break easily. You will want the pouch to be useful for quite a while and not for a few days – the pouch will be pretty useless with a hole in the seams.
Step 5.
Make pleats (only on the outside fabric, the lining pieces don’t have any pleats)
Step 6.
Attach upper sections to the front and back pieces
This can be a bit tricky.
First of all, you can’t use pins for the leather – pins will leave holes in the leather. Use Wonder Clips instead of pins.
Second, it’s not so simple to connect curved sections – they have to be sewn together and the edges have to match up perfectly without any puckers. So check the video clip below to see how it’s done.
It’s good that we have only ⅜ inch seam allowances, it’s easier to sew when they are smaller.
Start with matching centers of each curved piece. Make a small cut in the center of each fabric piece (leave only 1 mm to the seam line). Next, match one of the two ends of the seam and distribute the fabric evenly between these two points. After that do the same on the other side.
Stitch leaving ⅜ inch seam allowances. You can use pins when working with lining pieces.
I use a walking presser foot of my sewing machine. It’s perfect for sewing bulky seams and for sewing leather.
You can make a few small snips or trim seam allowances close to the stitching line to allow the fabric to flatten out once you turn it right side out

Step 7.
Now is the time to sew a zipper.
I like sewing a pouch with zipper tabs. They are really easy to make and the finished pouch looks much better.
The zipper has to be smaller than the top edges of the pouch.
Shorten the zipper and sew tabs on it.
To make zipper tabs, cut a rectangular piece of fabric (I made mine 1 3/8″ or 3.5cm wide but you can make it wider), fold it in half lengthwise, and press. Then open it and fold both edges into the middle and fold it back in half again. Press. Cut it in half – we will need two of them. Then get them sewn onto the ends of the zipper.

You see that the length of the trimmed and the tabbed zipper is smaller than the width of the pouch by ⅜ inch (seams allowances) on each side.
Now line up the zipper edge with the edge of the outer piece, and attach the zipper using Wonder clips (we can’t pin leather, remember?). Make a basting stitch (just a few millimeters from the edges).
Very important – don’t sew past the zipper tabs. Stop stitching right at the edges of zipper tabs on both sides.
After that line up the edge of the lining piece with the edge of the outer piece (right sides together) and stitch. You will notice that the zipper is in the middle between those two pieces of fabric. You can use your zipper foot to sew as close to the zipper teeth as possible. Or you can use just the same walking foot as I did because I don’t mind leaving my zipper tapes visible a bit. I have sewn at a distance of 6 mm from the edges.
But again: don’t sew past the zipper tabs. Stop stitching right at the edges of zipper tabs on both sides.
Fold the pieces wrong sides together so you can see your zipper.
Now you have to sew the next side of the pouch. Just repeat the same process to the other side of the zipper. The only difference is that you have attached one side of the bag to the zipper.
You can topstitch the edges around the zipper but I have chosen not to do it – topstitching leather is not really very easy and I don’t want my topstitching to look amateurish. And if I make a mistake all the sewing I did before that will be for nothing – I can’t repair holes from the needle in leather.
But I was brave enough to topstitch the other leather seams – and it turned out great!

Step 8.
The next step is ironing these pieces so they don’t look bumpy. Steam from the iron will smooth out these seams. But have in mind, if you are using real leather or quilting cotton fabric with silver specks (as I do) iron everything through the piece of cotton and only on the wrong side.

Step 9.
Now we are ready to finish the pouch.
Before you pin the whole pouch together open the zipper (but not all the way, so the zipper pull doesn’t go to the edge) and align all the edges (right sides together).
You have to pin the seam allowances properly. Match very carefully all the darts and other seams.

The most troublesome part is how to pin and stitch around zipper tabs.
The video clip I made with my main project didn’t turn out well for a clear explanation, so I decided to make quite fast a different small, and simple pouch just for you to see how I sew the pouch without dented corners. So in the next video clip, I will use that small pouch to show you the trick.
We didn’t sew past the zipper tabs on purpose.
To me, it doesn’t really matter where you will push the tabs – toward the lining or toward the outer fabric. When sewing past the tabs on both sides sew close to the tab but be careful not to stitch over the tabs.
The main thing is to connect the folded fabric edges in the correct order: the printed fabric to the printed fabric and the lining fabric to the lining fabric. That’s why we left these edges unstitched. Pin them like this in the video below.

Stitch all around leaving a small opening in the lining piece for turning the pouch over. For this small tester, I didn’t stitch all around though.
Trim the seam allowances next to the zipper a bit, to help reduce bulk there.
Turn the pouch right side out.
You will notice that there are very small gaps at the end of the zipper tabs, at each top corner of the pouch. Do you mind the small gaps in those corners? I don’t. I think it looks pretty neat.

So, let’s return now to my main project.
Sew the open seams in the lining.
Put the lining down in the bag.

Did you find this tutorial helpful? If so, save this pin (see below) on your sewing board so you can come to this tutorial later when you are ready to sew the zipper pouch and follow me on Pinterest for more tips, tutorials, and inspiration!

Ready to take the next step in your sewing journey?
Check out more step-by-step tutorials from my blog
and don’t forget to share!


latest posts
- What Do You Call a Person Who Sews? I Asked My Readers and Got 1,408 Opinions
- DIY Round Purse: PDF Sewing Pattern and Detailed Instructions
- Mini Wonder Clips By Clover: Useful Sewing Tool Or Just Another Notion?
- Non-Slip Grips For Quilting Rulers: A Small Notion With A Useful Job
- Fabric Eraser for Sewing: What It Removes and When to Use It
- What Is The Best Thread For Sewing Machine Projects? Let’s Find Out!
- Butterfly Quilt Block Tutorial – Foundation Paper Piecing
- How To Sew Quilt Squares So The Corners Match
- Sewing With Fork Pins: How They Help With Pattern Matching, Slippery Fabric, And Seams