How to make a tailor’s ham
Tailor’s ham is one of the wonderful tools I can’t live without. Ok, maybe I could technically live without it but not well, I absolutely rely on it to get good (and professional) results in my sewing.
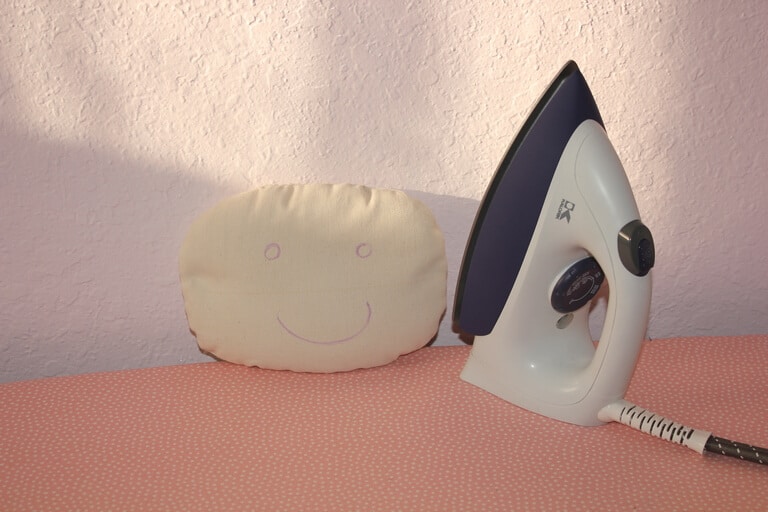
What is it? It’s a kind of small pillow used for pressing seams and hems during garment construction. The tailor’s ham is a very convenient tool for pressing darts, pleats, princess seams, sleeves seams, etc.
I had one for many years and now it is pretty shabby and even has a few small holes in the cover so I decided that it is time to make a new one. And here is a step-by-step tutorial on how you can make one too.
What do we need to make the tailor’s ham?
For the cover I used a dense cotton fabric I took from my old ironing board (I make a new ironing board cover myself quite often, every six months or so). It’s important to use a woven cloth of light colors, to avoid coloring your items when ironing.
And for the filling, I used regular sawdust which is excellent for the task in my opinion. The sawdust absorbs moisture well (and I am always pressing with steam), never compresses, and allows me to change the shape of the ham to the desired shape of the bust, shoulders, and other curves.
I must say that the tailor’s ham can be filled not only with sawdust but also with sand, foam, small pieces of cloth (especially left after serging), etc. But I prefer sawdust because it is not “afraid” of water and steam, it doesn’t rot easily and doesn’t deteriorate ( the cover fabric breaks first ).
If you are wondering where to get the sawdust, I gathered it when my husband made some shelves (regular pine, untreated) but you can always go to the local lumber store; if they have some cutting equipment, then they have sawdust. The finer the better.
The next necessary item is a very strong thread because the tailor’s ham will be used for pressing a lot and the thread must hold it together for a long time, right?
Related post: Sewing thread types and uses
Note: Some of the links on this page are affiliate links. This means I will receive a commission if you order a product through one of my links. I only recommend products I believe in and use myself.
How to make a tailor’s ham step-by-step
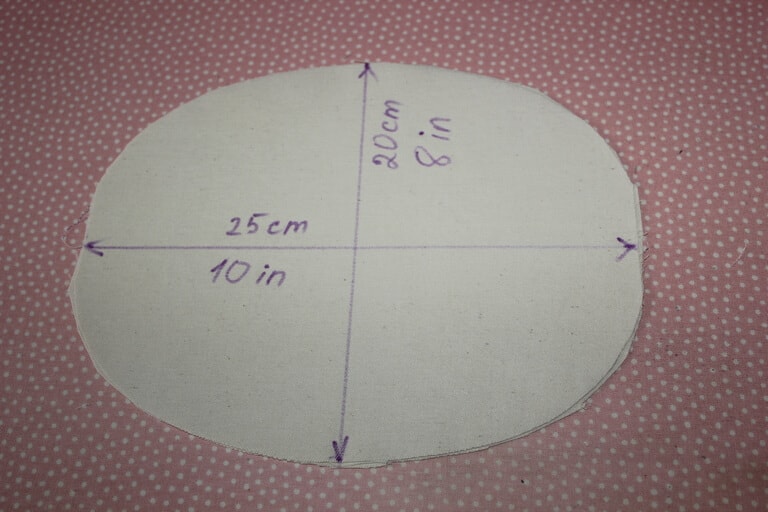
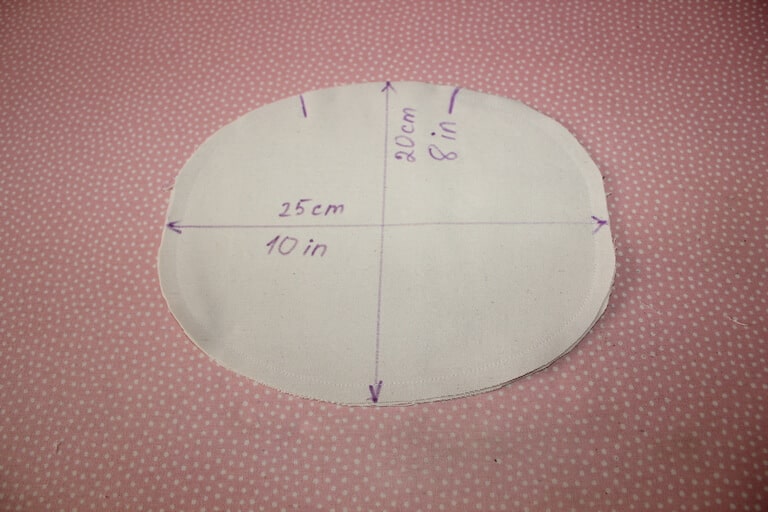
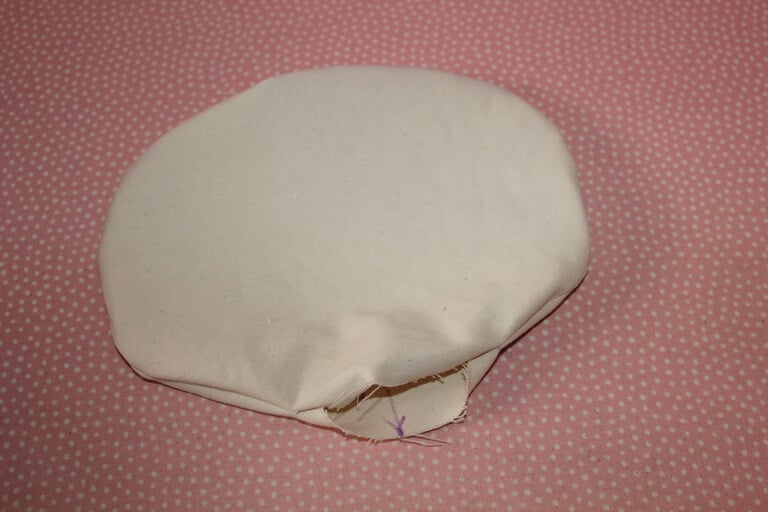
1. Cut two details of an oval shape for the cover approximately 10 in x 8 in ( about 25 cm by 20 cm).
2. Pin them together and stitch 1 cm (3/8 in) from the edge. Make the stitch length smaller, around 1.8-2 mm so the sawdust will not go through the small holes between the stitches. Leave a small opening for stuffing.
✅ Related tutorial: What is the stitch length and how to adjust it for different fabrics
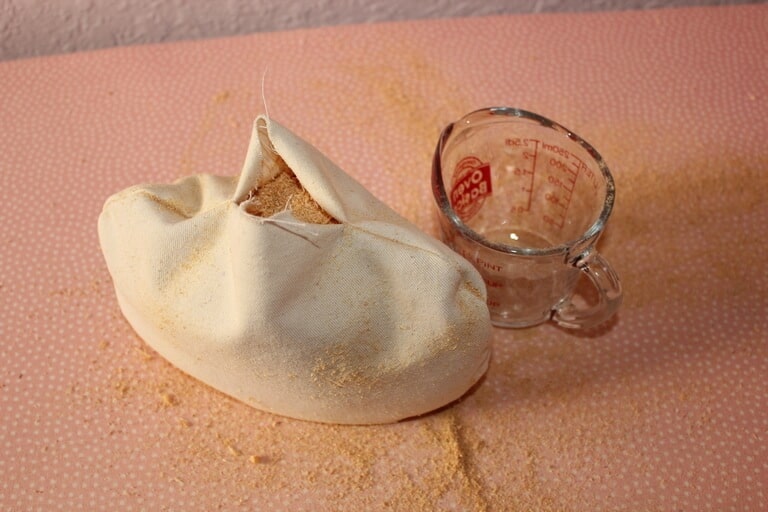
3. Turn it right side out and tightly stuff it with sawdust. Be prepared for the fact that sawdust after a while will settle down and possibly you will have to add some more sawdust later. I see that store-bought tailor’s hams are stuffed very tightly but I prefer to make it a bit less tightly (so I can change its shape slightly for different jobs)
A tip I received after the article was published (thank you Peg) was the following: You should sterilize it before using it as there might be some molds or critters still residing. Just lay it out on a baking tray and place it in the oven at 200 degrees for 90 minutes. Watch carefully and shake the pan to redistribute the sawdust. This also has the benefit of drying it really well. I didn’t do this myself but it kind of makes sense, right? The mention that the degrees are Fahrenheit, which makes the temperature about 93 Celsius.
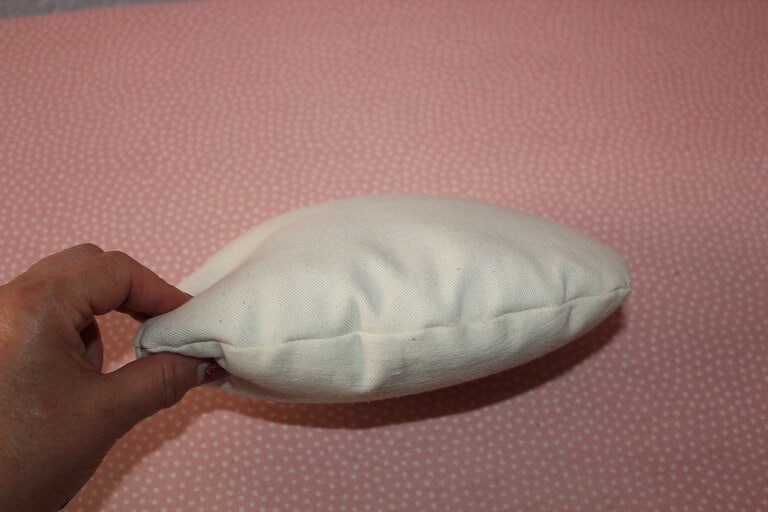
4. Close the opening by hand sewing using invisible stitches.
✅ Related tutorial: How to do an invisible stitch by hand
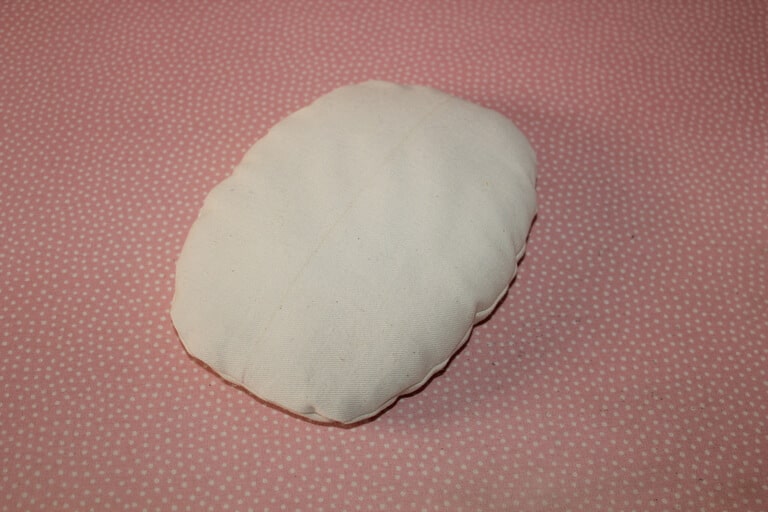
And voila! Your new tailor’s ham is ready!
I also wrote an article about other pressing tools I use for sewing, here is the link https://www.ageberry.com/pressing-tools-for-sewing/
Did you find this tutorial helpful? If so, save this pin (see below) on your sewing board so you can come to this tutorial later when you are ready to make a tailor’s ham, and follow me on Pinterest for more tips, tutorials, and inspiration!

Like sewing tips? I have other popular tutorials on my site that might be interesting for you. Check them out below.


latest posts
- What Do You Call a Person Who Sews? I Asked My Readers and Got 1,408 Opinions
- DIY Round Purse: PDF Sewing Pattern and Detailed Instructions
- Mini Wonder Clips By Clover: Useful Sewing Tool Or Just Another Notion?
- Non-Slip Grips For Quilting Rulers: A Small Notion With A Useful Job
- Fabric Eraser for Sewing: What It Removes and When to Use It
- What Is The Best Thread For Sewing Machine Projects? Let’s Find Out!
- Butterfly Quilt Block Tutorial – Foundation Paper Piecing
- How To Sew Quilt Squares So The Corners Match
- Sewing With Fork Pins: How They Help With Pattern Matching, Slippery Fabric, And Seams