In this guide, I would like to show you how I built my sewing rooms using IKEA products. I want you to look at IKEA products in a whole new light – and get you inspired to perhaps create your own sewing room, functional and without breaking the bank.
If your sewing room is packed with fabrics and sewing supplies, these easy and inexpensive IKEA products will help you to organize everything with a little DIY.
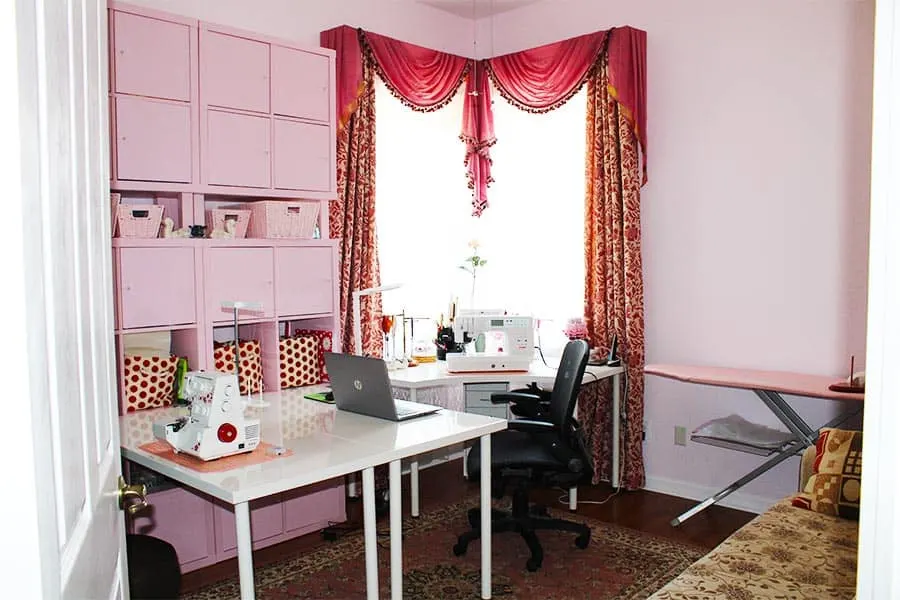
If only life would be like in fairy tales, where nobody is ever in need of anything unless there is a fairy godmother close by to provide it! But since fairy tales are the domain of dreams, I needed to build my sewing room from scratch. Not only this but on a tight budget. Of course, it is not THE sewing room that anyone dreams about, but it is the closest thing to it for me because it offers many if not all of the things I need.
A sewing room organization is quite a demanding task; we need:
- A large cutting table, preferably with enough space around to allow movement
- A sewing machine table, if possible
- Good lighting, both natural and artificial light
- A separate area for an ironing board
- A separate area for a fitting mannequin
- A large mirror
- Storage for a lot of small sewing tools and notions
- Closet space for the temporary storage of the garments and storage for bulk fabric (you can never have enough!)
- Chairs; I prefer swivel chairs which can be stored under the table and allow free movement
Note: Some of the links on this page are affiliate links. This means I will receive a commission if you order a product through one of my links. I only recommend products I believe in and use myself.
Of course, I would have nothing against nice custom-made furniture like the one from Amazon below.

Arrow Sewing Kangaroo Sewing Furniture Outback Sewing Cabinet in Teak Furniture Adjustable Height Hydraulic Sewing and Craft Chair
If I could have afforded that, I would have probably never looked at alternative solutions. But maybe you don’t need this fancy furniture – in fact, you can do it yourself using IKEA products, for a fraction of the price. I believe my whole budget was a little less than the price of that cabinet! Sewing room furniture is not cheap therefore we need to be creative.
So let’s begin to set up the sewing room…
I have decided to use inexpensive IKEA furniture which has the advantage that it can be customized and sized for any available space.
Note: for convenience, at the end of the article I will place links to the items I am using. I am in no way affiliated with IKEA nor do I get any payment from them in any way.
Note 2: the sewing rooms were built with furniture available at IKEA in 2017/2018. Some items might be unavailable or replaced by other similar items. However, the principle remains: it IS possible to build a functional sewing room on a budget!
I did not have a room dedicated to sewing before, so I needed to set up the work area every time I wanted to sew. It is a lot of work: you have to get the machines out, free the table (you need room to cut), bring the ironing board from the storage, and bring the myriad of small items that one needs (needles, pincushions, scissors, etc.) – you can’t leave them on the general use table, right?
So I made myself a first sewing room, in my favorite color (pink), to make it clear who owns the room.
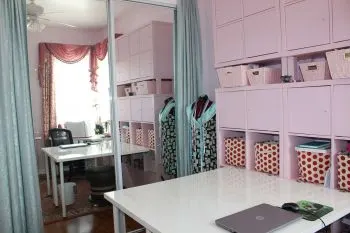
But during the last couple of years, I also found out that sometimes I am forced to tackle two projects at once. In order to save time and effort, and because my children have left the nest, I have transformed a second room ( it was previously an office ) into a permanent sewing room. Here are some images.
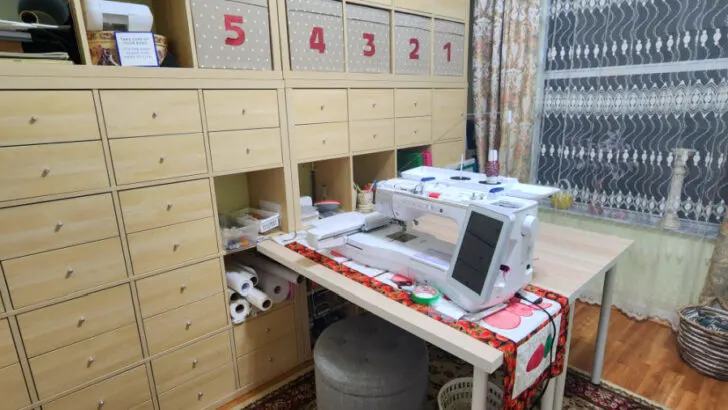
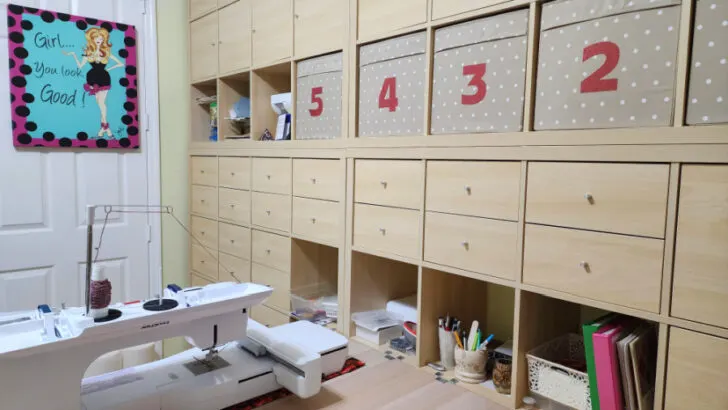
The second room has more beige colors but I used both rooms with pretty much the same ideas.
Let’s address now the requirements one by one.
IKEA Sewing table
1. Cutting table
I had many ideas for a sewing room table and I also searched Pinterest for sewing room storage and tables. In the end, I have decided to use two pieces of LINNMON tabletops which give me a 4 x 4 feet square table. I have exactly the same configuration in both my sewing rooms and it gives me a smooth and uncluttered workspace. Beware that you will need to purchase the legs separately.
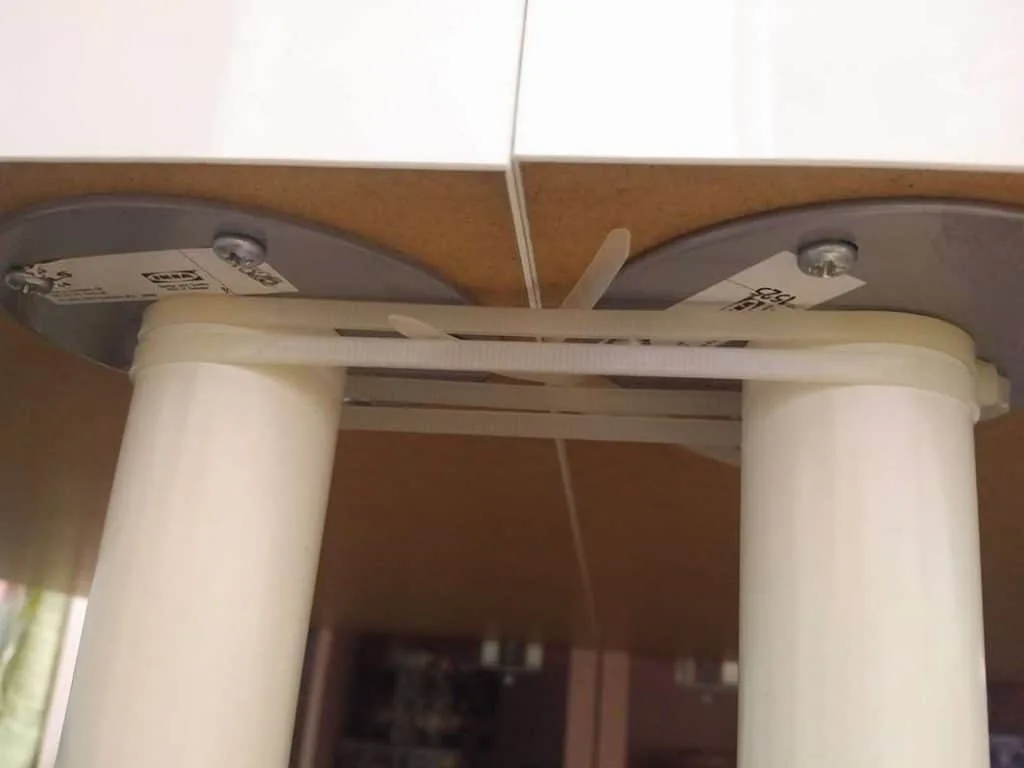
In my case, I have supported one side of the table on the unit that is attached to the wall using the LINNMON connecting hardware and the other side with 4 legs. I secured the two halves of the table together with a simple plastic tie. This is strong enough to keep the tables together, the ties are not visible and I don’t think you can find a cheaper solution.
If you look closely in the background of the second image you can see the LINNMON bracket (two of them, one per table) from behind.
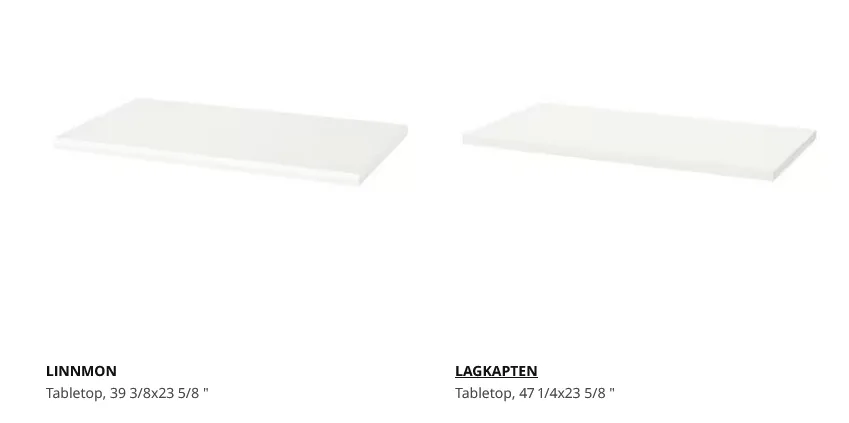
UPDATE: Ikea has changed the LINMON tabletop product. It used to be 4’x2′ (48″x24″), it is now 39 3/8″ x 23 5/8″. Ikea has now a different tabletop with the same dimensions as the old version LINMON. The new one is called LAGKAPTEN and it comes in lengths of 48″, 55″, 65″ and 78″. So you actually have a choice, if you have the space. I did not, my space was 4×4 feet and I could not have fit anything bigger.
So if you are planning to use the same kind of combination to build your table, consider the LAGKAPTEN tabletop too. The image below shows the new, smaller LINMON vs. LAGKAPTEN.
✅ Related tutorial: How to choose the best sewing table
2. Special Table For My Sewing Machine
I have used an off-the-shelf Ikea unit LINMON/ADILS corner table which is inexpensive, proved to be quite solid, and did the job. Under the table in the very corner, I have hidden an IKEA storage unit with 6 drawers that hold some sewing tools I don’t use every day.
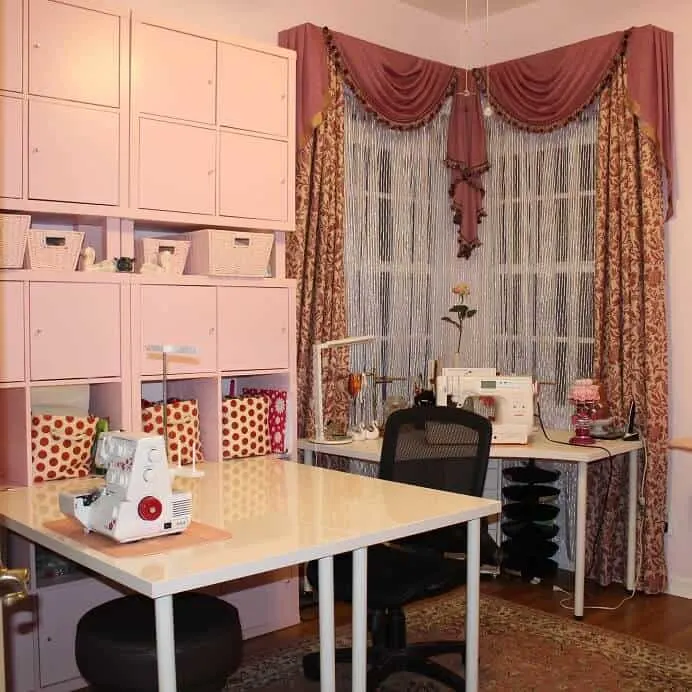
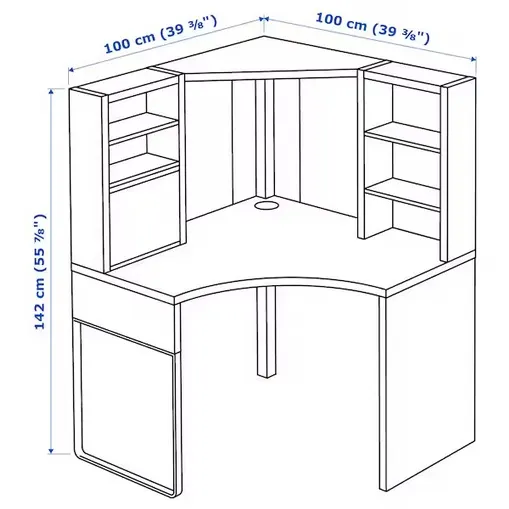
UPDATE: Ikea has changed the LINMON series of products and a similar unit with what I bought at that time is now sold under the name MICKE. It is not identical, the desk has some storage on top. As far as I know the corner desk I have is no longer available from Ikea. An image of MICKE is below but I do not see it as suitable for a sewing machine table because of the lack of workspace.
In the second sewing room, because it is just a spare and not the usual one I use, I do not have a separate table for the sewing machine. I did not place an ironing board there either, in principle one can still use the room as an office or perhaps a spare bedroom. I am so, so magnanimous, see? I actually may allow others to use the room. On the 29th of February, if it falls on a Friday and it snows outside (I live in Florida).
But don’t tell my husband. He still thinks he has a say when it comes to space allocation.
✅ Related tutorials:
- Best Serger Tables: Everything You Need to Know
- IKEA Sewing Table Reviews: Which One is Right for You?
3. TROTTEN Sit/Stand Table From IKEA
I don’t know if I should laugh or cry – I’ve now dedicated yet another room to sewing (well, almost). As if two weren’t enough, my guest bedroom is now filled with some sewing stuff too. Of course, it doesn’t hurt that this “third sewing room” also doubles as a guest bedroom. Do you remember the joke:
“Sewing fills my days. It also fills my living room, dining room, kitchen and bedrooms”?
That’s exactly what’s happening here.
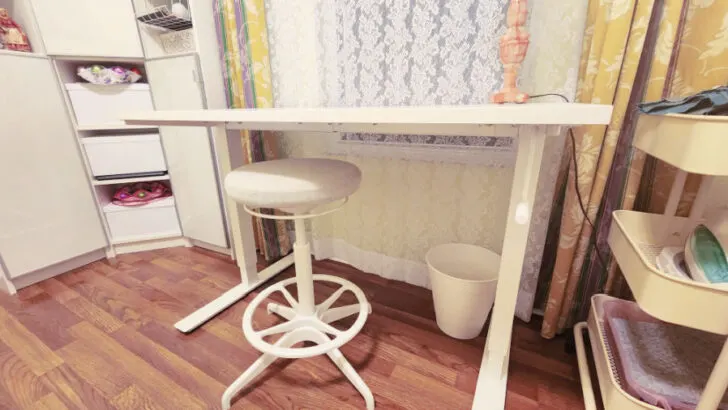
So, I bought yet another sewing table from IKEA. TROTTEN sit/stand table. This height-adjustable table glides up and down manually, and it is cheaper than comparable crank desks from other furniture stores. Plus, its minimalistic design is perfect for those who don’t want a bulky sewing table to take up their space.
The TROTTEN sit/stand table comes with all of the necessary pieces to assemble it yourself. Assembly doesn’t require any special tools or skills either; anyone can do it with a little patience and time. However, because of its weight, assembling the frame does require two people working together. That being said, this is still a much better option than paying assembly fees.
Unlike other height-adjustable desks on the market that require electricity 24/7 in order to operate properly, TROTTEN sit/stand tables don’t waste energy while they are being used. This means that you won’t be stuck with a hefty electric bill every month due to your furniture choice.
Whether you need something low for cutting fabric for example or higher for computer work, you can quickly set your TROTTEN table to just the right height in no time at all.
The table is sturdy. One thing that I have always appreciated is that the table I use for sewing doesn’t move or wobble. I can confidently work on projects knowing that I won’t be interrupted by annoying vibrations as my machine sews.
Sooo…perhaps you should read my other popular guides about sewing room organization
IKEA Sewing Storage
1. KALLAX Wall Units
I have resolved this issue by installing KALLAX wall units that offer cubical storage spaces. One storage area is about 1’1”x1’1”x1’3” and can be left empty or can be closed with a door.
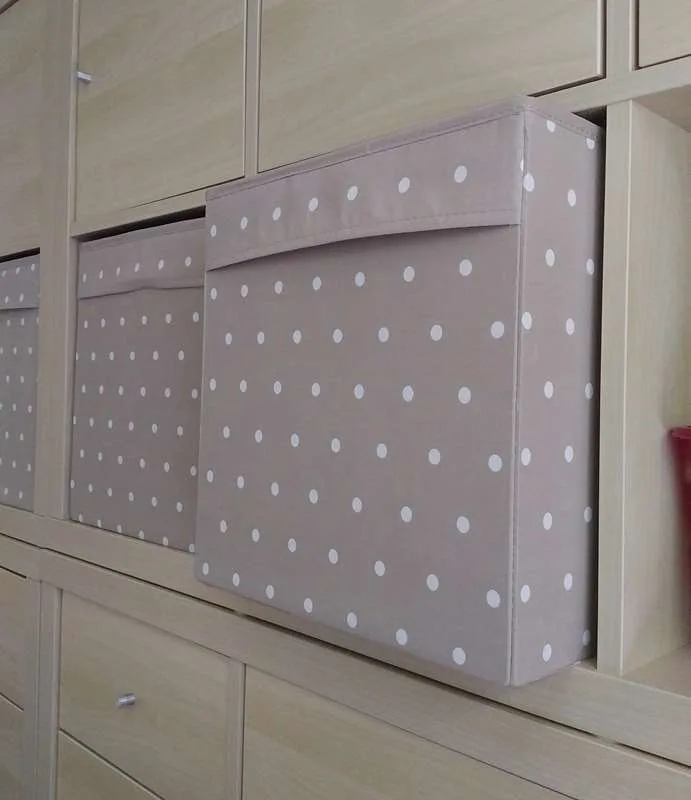
Drawers can also be installed in the space, with two drawers per storage space. One space can be filled with a carton or fabric box. I have used a combination of 2×2 units ( 2 ) and 2×4 units ( 2 ) in one room and a combination of 4 4×4 units in the other room. This gives me a total of 24 and 64 storage spaces in the two rooms.
As can be seen in the images I have configured some spaces with doors, some with drawers, I placed boxes in others and some are left empty. I am very pleased by the abundance of small storage and, to my surprise, it did not take long to fill all places!
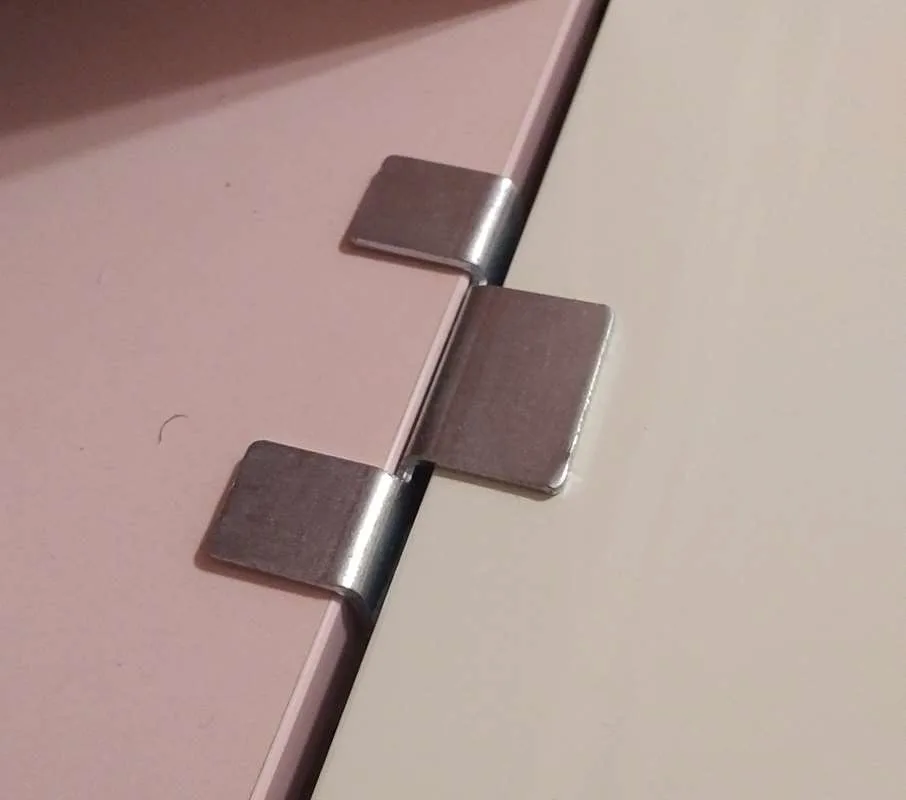
Very important note: it is absolutely essential to properly secure the wall unit to the wall and IKEA documentation does a very good job in reminding us of this. The metallic bracket seen in the image below is used to attach the unit to the wall.
All four upper corners of the units are attached to the wall in a similar manner. The force exercised on the attachment is not great since the weight of the unit and the contents are transferred to the floor but the existence of the bracket prevents the unit from moving and tipping over.
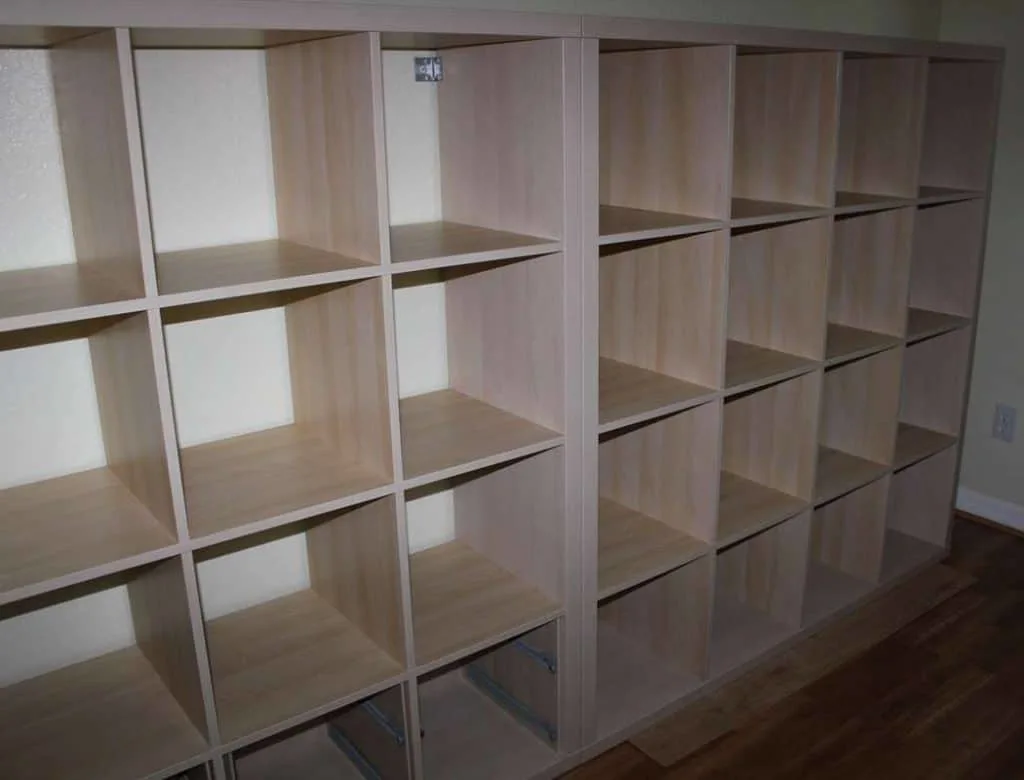
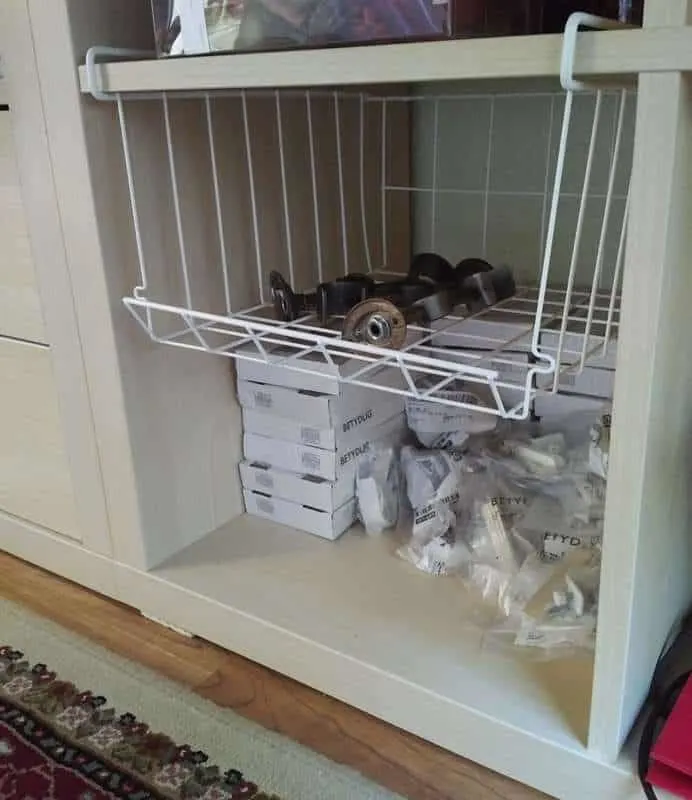
For room one I have in total of 16 door inserts and for the second one, I have 20 door inserts and 17 drawer inserts. In addition for the second room I have 5 fabric boxes and 3 wire shelves:
2. IVAR Storage System
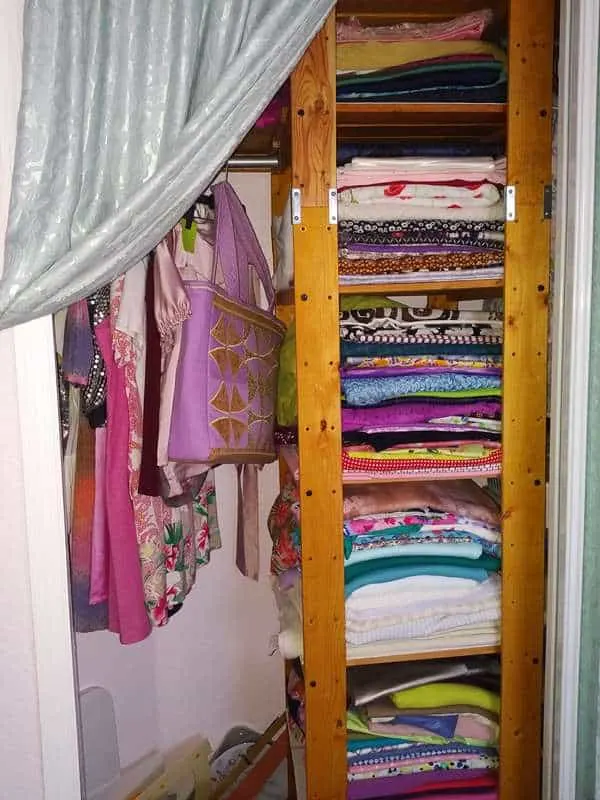
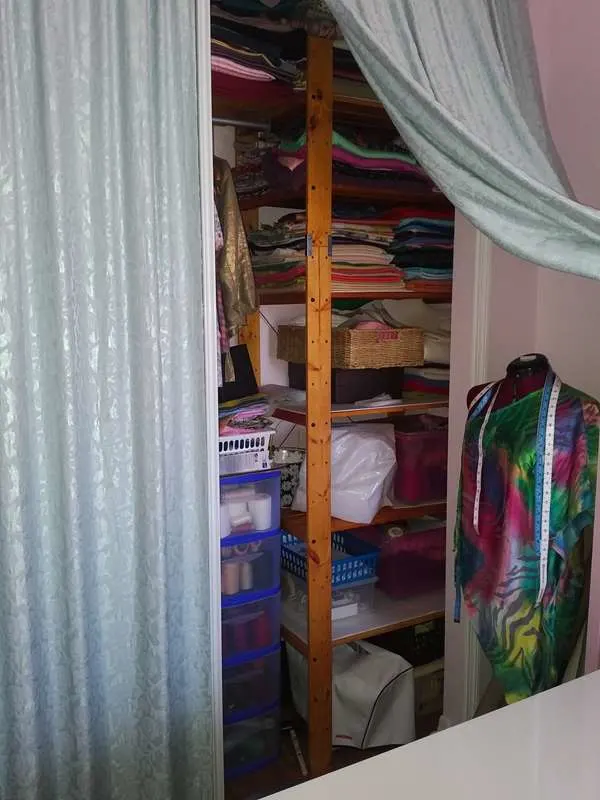
This is an entirely different subject and it fully deserves its own article. Suffice to say that all my closets were custom fitted with an IVAR storage system and different kinds of supports.
I love IVAR shelving units made from untreated solid pine. I really like that I can move shelves and adapt spacing to suit my needs. In all cases, the raw wood was painted with linseed oil and then smoothed with very fine sandpaper which gives it a nice yellowish sheen and prevents splinters.
The closet I have in my first sewing room has a small rod that I use for garments that are in process of being made, and a number of storage shelves for which I used also mostly IKEA plastic storage boxes where I store my most used threads. Because the drawers are transparent it is convenient to see what color is available where.
Without too many details, the images below will give an idea of how the space is organized.
IKEA Pegboard For A Sewing Room
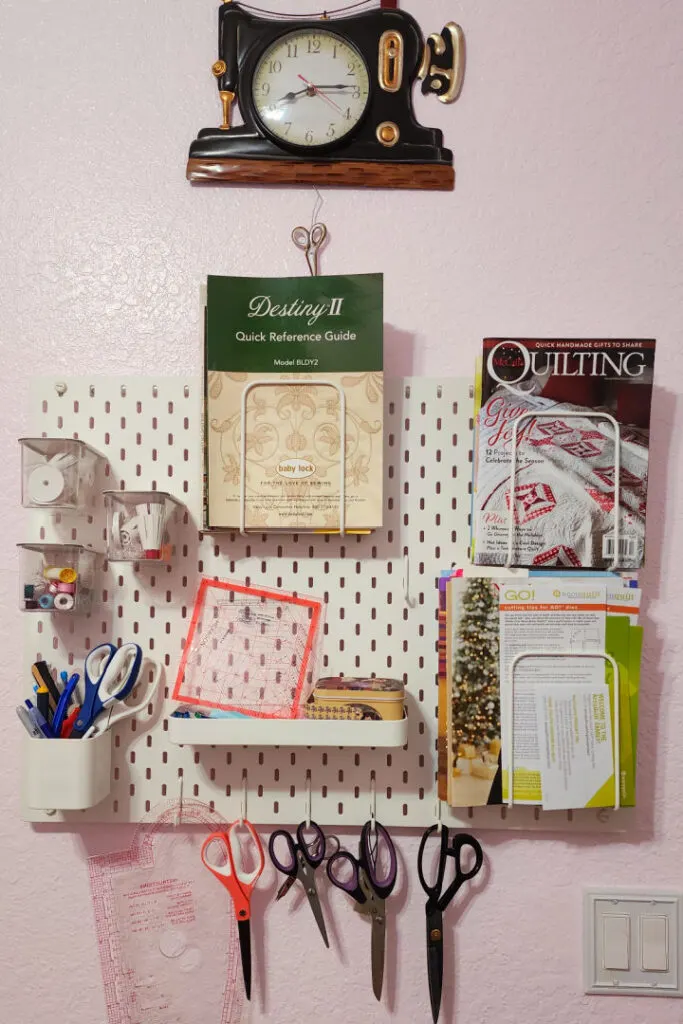
If you want an organized place to store your supplies consider setting up an IKEA pegboard in your sewing room. This simple solution can help you keep things in one place and easy to access.
You’ll want to make sure that you have enough pegboards to mount on the wall, as well as hooks, shelves, and other accessories to hold your materials. If you don’t already have these items on hand, head over to your local IKEA store and buy them. They have a variety of pegboard options available at good prices.
Hang the pegboard on the wall according to your plan and then begin adding hooks and shelves where needed. Make sure everything is secure before adding any materials or accessories so that nothing falls off when you move around the room. Once everything is mounted properly, start filling up the shelves with notions, then hang any additional items such as scissors or measuring tapes from hooks on the pegboard.
Some items in my sewing rooms are not from IKEA though but I need to mention them also because they are really essential for sewing room organization so I can sew more efficiently with less frustration and well – a lot more fun.
Sewing Room Lighting
One of the rooms, the first one I built, has two relatively large windows arranged in a corner configuration. The windows face SW and NW respectively and have direct sun late in the afternoon only. The artificial light is given by a chandelier directly over the table in which I mounted 4 100W equivalents LED lights, plus other dedicated lights. For a better description please see my guide “Sewing room lighting ideas”. The second room has 5 bulbs and also a large window.
Ironing Board
It is visible in the images and it is an 18” wide board; I have in fact spent quite some time looking for the right tools for ironing, my experience is summarized in the guide “Pressing tools I use for sewing”
Mannequin
This is a standard 12-dial adjustable dress form from Amazon. It is not the best available but it has served me well and it is relatively inexpensive; I recommend it. Higher-priced mannequins may be better but this served me well.
Mirror
As any sewing enthusiast, I have many mirrors, small and large. In the first sewing room, I chose to install a mirror closet door ( sliding ) which has the added benefit that reflecting the light and making the room seem brighter. The mirror doors are visible in the images. Because sometimes the reflection in the large mirrors is not wanted I installed a curtain in front of the mirror.
Chair
For my “sedentary” work I am using a standard office chair like this:

Articulate Ergonomic Mesh Office Chair in Black
It is essential to feel comfortable while sitting in one place for a long time and I found out that a mesh-like seat and back support work best for me. I certainly like the look of the soft, comfy leather “manager” chairs but for me, they don’t work well.
✅ Related tutorial: Best Sewing Chairs For Comfort In Your Sewing Room
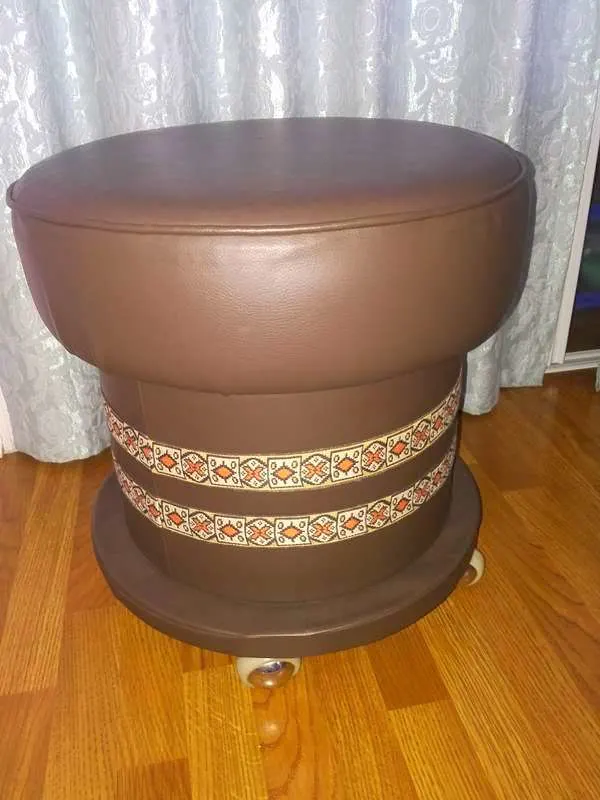
For the cutting tables, I prefer swivel chairs which can be stored under the table and allow free movement. These are in my case refurbished chairs, I am not really sure where I obtained the original but in all cases, I have reupholstered the chair fully. Some images:
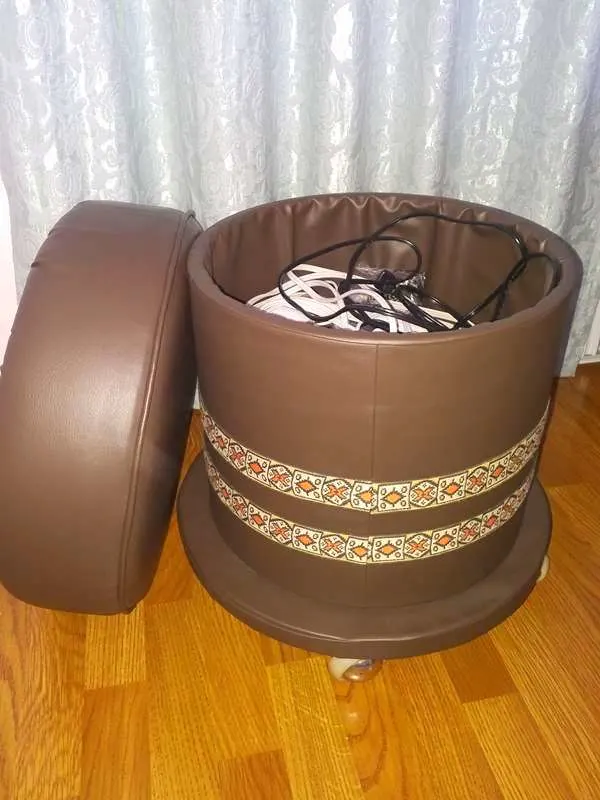
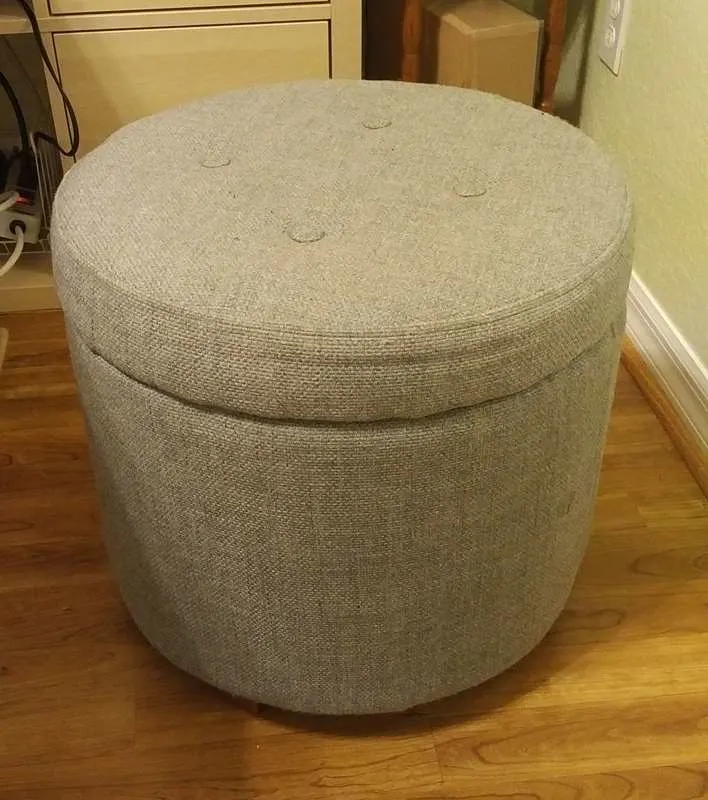
Let’s see how much did this end up costing? I do not count the work, as my husband said: “that does not work – it’s pleasure!” Besides, I like to look at my husband working, and it is good for the heART!
Room 1: (prices as of 2019, when I built the last room)
LINNMON tabletop, ADILS legs, mounting hardware: $80
KALLAX units: $250 ( some of them might be discontinued now )
LINNMON/ADILS corner table: $70
KALLAX doors (16): $272
Chair: $130
Total: $802
Room 2:
LINNMON tabletop, ADILS legs, mounting hardware: $80
KALLAX units: $436
BILLY bookcase plus doors: $215
BILLY extension plus doors: $95
KALLAX doors (20): $340
KALLAX drawers: $374
Miscellaneous ( boxes, wire baskets ): $30
Total: $1570
✅ Related tutorial: Hand strengthening exercises for artists and people who like to sew
For a very long time IKEA products could not be found on Amazon; now there is a limited assortment of them available from third party vendors (if you are curious, follow this link for IKEA stuff on Amazon). However, I do not recommend buying on Amazon, unless you absolutely must buy and IKEA delivery is not available (and a pickup is not possible) because the prices on Amazon are way higher than on the IKEA site.
For example, a 5×5 Kallax unit (which I used) is at this time $250 +$129 on the IKEA site while it costs $560 on Amazon. Moreover, IKEA bundles the items in one delivery. For example, adding a LINMON table (which I also used) to the Kallax unit from before did not add anything to the delivery charge, the delivery was still $129. I recommend buying directly from IKEA, if you decided to go for this kind of furniture.
I found an interesting article here: “These Guys Turned Hacking IKEA Kitchens Into A Full-Time Job”. I did not make it a full-time job, but I think I got a very functional room (two, actually), with plenty of storage, shelf, and workspace for a very reasonable price. About the price of that desk, I have found on Amazon!
Now, if only I could build a sewing room that can clean and organize itself… But more about this in a future post.
If you ever get a bit intimidated by scrolling through page after page of perfectly organized and neat craft rooms… don’t worry, you’re not alone!
Take some advice from this article on organizing a craft room: work with what you have, and give away what you don’t need. We often see the supplies we already have as limiting, but it’s exactly the opposite! The hardest rooms to design are completely empty, so start with the materials that are creating the biggest messes and see how other crafters are keeping them tidy.
If one method doesn’t work, don’t fret, just try the next or improvise.
I made a list of all IKEA products (with article numbers) I used in my sewing room with links to the items in the store. If you are interested you can download the checklist for free, as a PDF. The file is in my RESOURCE LIBRARY, and you need to subscribe to my newsletter to get access.
There are many patterns and printable sheets in my resource library, and all are free for subscribers!
Did you find this tutorial helpful? If so, save this pin (see below) on your sewing board so you can come to this tutorial later when you are ready to use my IKEA sewing room ideas, and follow me on Pinterest for more tips, tutorials, and inspiration!
latest posts
- Knot a Problem: Easy Ways to Secure Short Thread Ends
- Ever Tried This on Your Serger? This Differential Feed Feature Will Amaze You
- Ditch My Sewing Machine? Not in This Lifetime!
- Adorable DIY Needle Book | Easy Tutorial for Beginners
- Master the Seam Ripper: Your Ultimate Guide to Precision Stitch Removal
- Think You Know Zippers? This Installation Guide Might Surprise You
- Why Does Your Seam Ripper Have a Red Ball? Discover Its Purpose!
- Topstitching Troubles? This Simple Trick Will Turn It Around Instantly!
- How to Sew Shirring: A Step-by-Step Guide to Elastic Thread Gathering

