How to draft a pattern for a simple dress with your own measurements
This tutorial will teach you how to draft a pattern for a simple dress without sleeves using your own measurements. I have found it much easier to draft my own patterns for simple garments than go through the process of using a commercial one. Because if I buy a pattern (like Burda, McCalls, Simplicity, Vogue) I want to get a very complicated one, a pattern I can’t draft myself – with lots of darts, pleats, embellishments, etc.
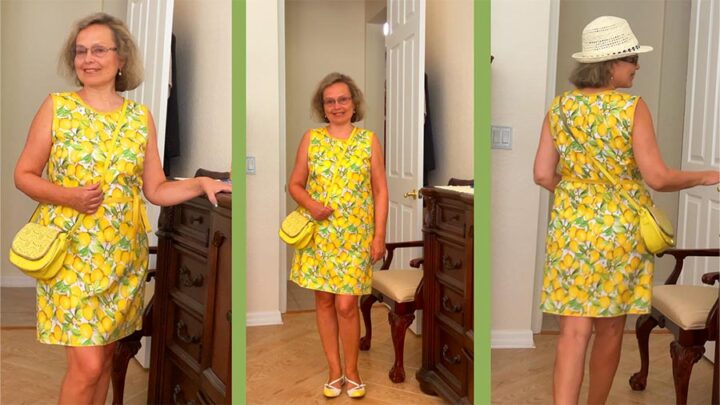
But for a simple dress without sleeves with a few darts and seams, I can easily make a sewing pattern. Let me show you how to do it. This is the dress I am talking about. Check out my step-by-step tutorial on how to sew a summer dress.
If you decided you like the dress but would rather have a printed copy of the article, a printable copy of this article, one is available for a small fee in my shop here: Making the pattern. It is a .pdf file that can be printed on a standard printer.
What you will need to make a pattern for the summer dress
For making this pattern, you will need the following materials.
A big piece of paper
I usually use vellum paper for my patterns. I find that it doesn’t rip, it’s simple to use because I can easily pin the pattern pieces to the fabric. You can also use regular tracing paper but you need to be careful not to tear it too much when cutting.

A pencil
I highly recommend getting these pencils: PaperMate SharpWriter.
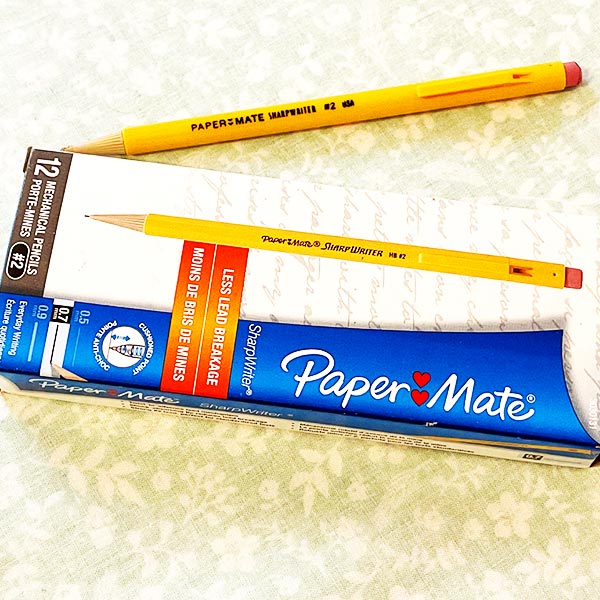
Their extra-fine point means that you can draw sharp lines and curves without breaking them up – perfect for drafting a pattern! PaperMate’s quality eraser won’t leave any smudging marks on your paper as other brands might, it’s soft enough so that it doesn’t damage my paper and at the same time, it erases cleanly and effectively. And don’t worry about having trouble finding these pencils; they’re available in many different stores where office supplies are sold as well as online shops such as Amazon.
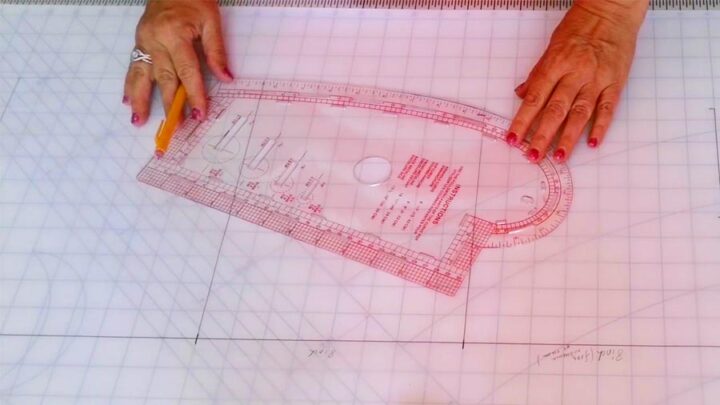
French curve ruler
French curve ruler is used for drawing curved shapes such as necklines and armholes on the paper.
This tool makes it so much easier than freehanding every curved line by hand!
Take your body measurements
To make sure your body shape is reflected in this dress, you need to take your body measurements! You can see how to measure yourself for sewing in my guide: How to take body measurements for sewing.
- Bust
- Hips
- Waist
- Shoulder
- Shoulder to waist (front)
- Shoulder to waist (back)
- High bust (measure at the front above bust from arm to arm)
- Back width (measure from arm to arm)
- Length of the dress from waist to hem
Follow my step-by-step instructions below on how to draft it.
Seam allowances are included and they are 1/4 inch for center back, side and shoulder seams, 3/8 inch for the neckline and armholes, and 1 inch for the hem.
I created a very helpful Printable PDF eBook How To Sew A Simple Shift Dress And Make An Easy Pattern. I have all the information that you need for making the dress in this eBook and you can read it without ads. You can purchase the PDF file for only $5.99. This way you can print it out and it will be available for you to refer to anytime you want.
Drafting a pattern for the back of the summer dress
I will start with drafting a pattern for the back of the dress.
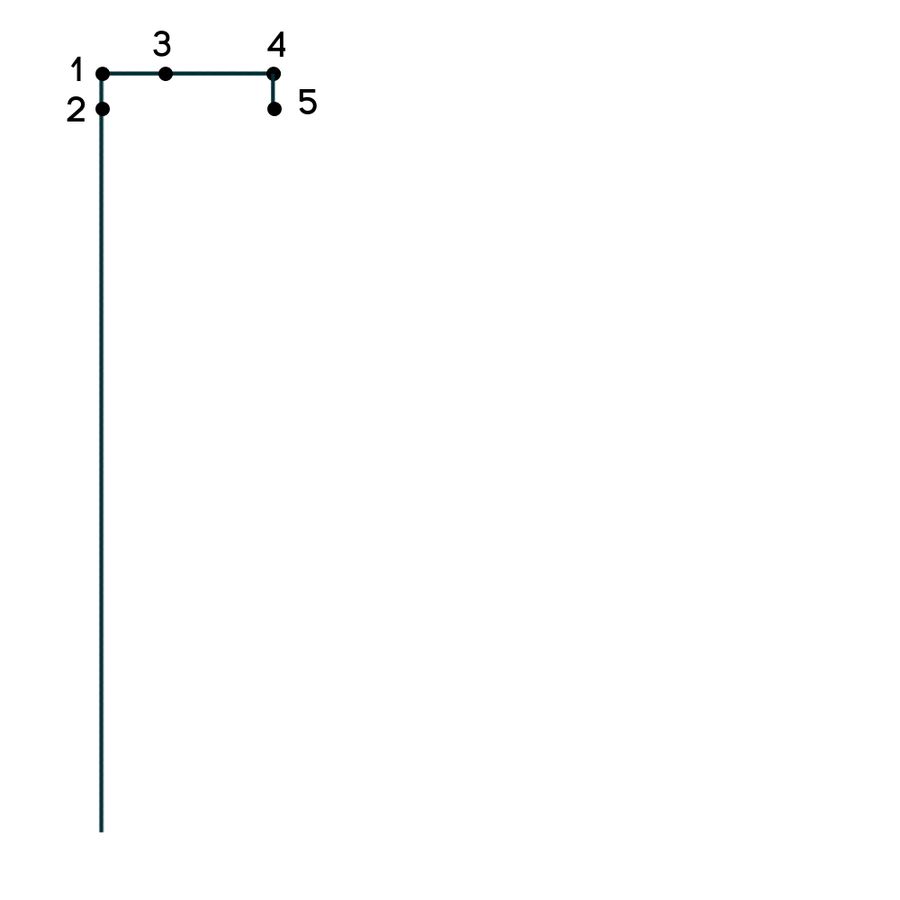
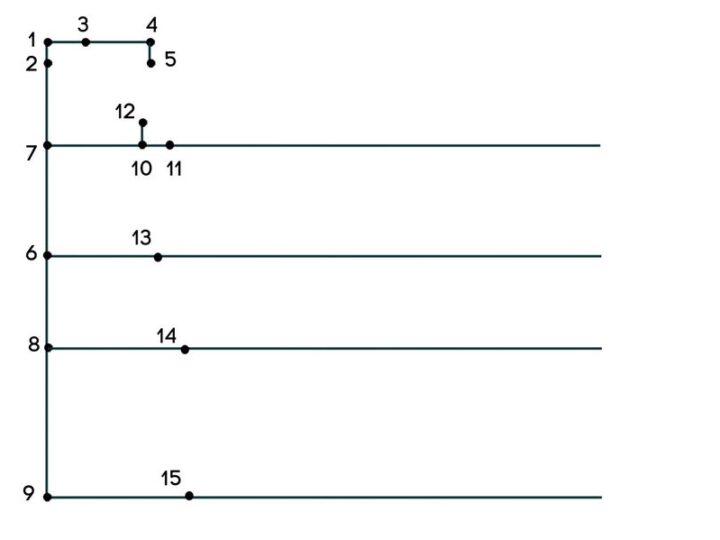
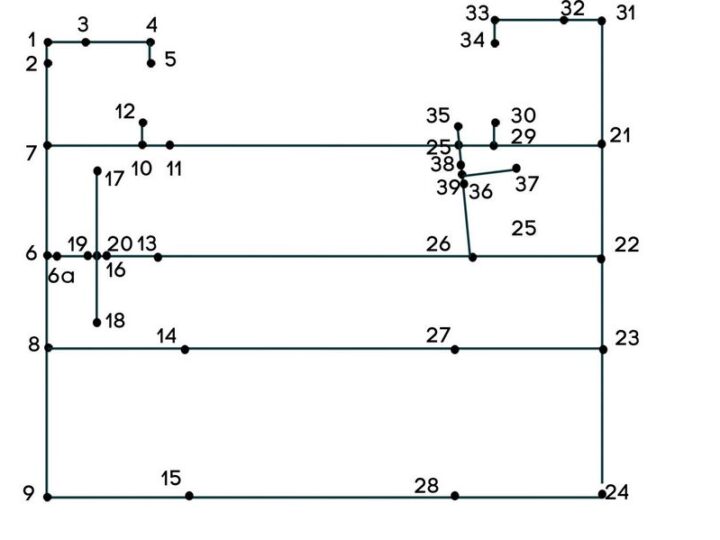
Draw a vertical line on your paper. It will be the center back line. Mark point 1 on this line. Measure 2 inches down on this line and mark point 2. Make a line perpendicular to that vertical line in point 1 and mark point 3. The distance between points 1 and 3 is 3.5 inches.
From point 3 on this horizontal line mark point 4. The distance between point 3 and point 4 is equal to your shoulder measurement. Draw a perpendicular line in point 4. Measure 1 ¼ inch down on this line and mark point 5.
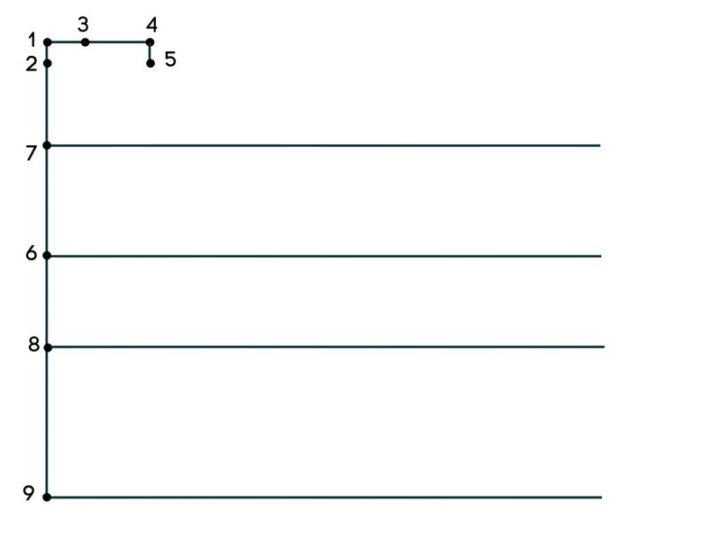
From point 1 go down on the vertical line and mark point 6. The distance between point 1 and point 6 is equal to your shoulder to waist (back) measurement. Draw a perpendicular line in point 6. This is the waistline. Make it long enough for drafting the front of the dress.
Divide the distance between points 1 and 6 in half and mark point 7. Draw a perpendicular line in point 7. This is the bust line. Make it long enough for drafting the front of the dress.
From point 6 go down and put point 8, the distance between 6 and 8 is about 7 – 9 inches for all sizes. If you are tall make it 9 inches. I put 8 inches. Draw a perpendicular line in point 8. This is the hips line.
From point 6 go down and put point 9, the distance between 6 and 9 is about 18-25 inches. It depends on how long you want your wrap dress to be. I put 18 inches. Draw a perpendicular line in point 9. This is the hem line.
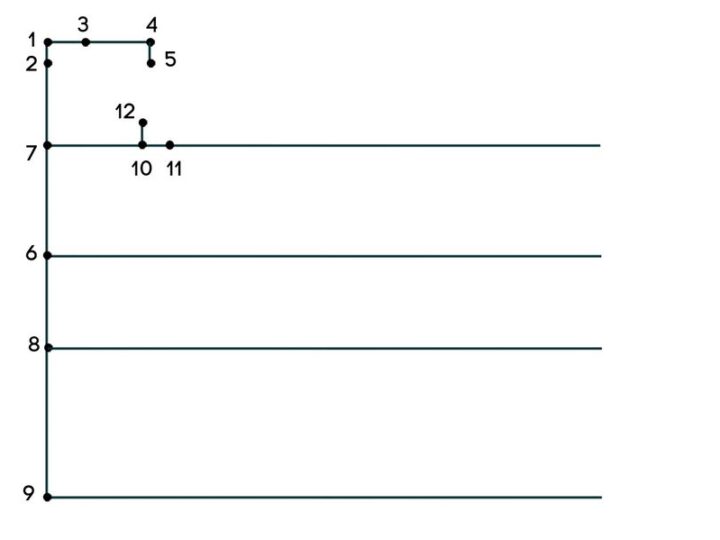
On the bust line mark point 10, the distance between points 7 and 10 is equal half of your back width measurement plus ⅜ inch. For example, my back width is 15 inches so I mark the point 10 at 7 ⅞ inches from point 7.
On the same line (the bust line) mark point 11, the distance between points 7 and 11 is equal to your bust measurement divided by 4 plus 1 inch. For example, my bust is 39; 39/4 is 9 ¾ inch. So I mark the point 11 at 10 ¾ inch from point 7.
Draw a line perpendicular to the bust line in point 10. Mark point 12 on this line. The distance between 10 and 12 is 2 ¾ inch for all sizes.
On the waistline mark point 13 at the distance (from point 6) equal ¼ of your waist measurement plus 1 ¾ inch.
On the hips line mark point 14 at the distance (from point 8) equal ¼ of your hips measurement plus ¾ inch.
On the hem line mark point 15 at the distance (from point 9) equal ¼ of your hips measurement plus ¾ inch.
On the waistline, mark point 6a at ½ inch from point 6.
Next we need to make a waist dart. For this, mark point 16 on the waistline. The distance between points 6 and 16 is equal half of the distance between points 6 and 13 minus ½ inch.
Draw a perpendicular line in point 16 and mark points 17 and 18 on this line. The distance 16 – 17 is equal to the distance 6 – 7 minus 1.5 inches. The distance 16 – 18 is equal to the distance 6 – 8 minus 1.5 inches.
On the waistline mark points 19 and 20. The distance 16 – 19 is equal to the distance 16 – 20 and it’s ⅜ inch.

Now connect points 2 and 3 with a curved line (this is the neck line), 3 and 5. 5, 12, 11 (armhole); 11 and 13; 13, 14 and 15. Make sure the line 11 – 13 – 14 doesn’t have any sharp corners and has a very smooth curved line at the waist. Connect other points as you see in the image below.
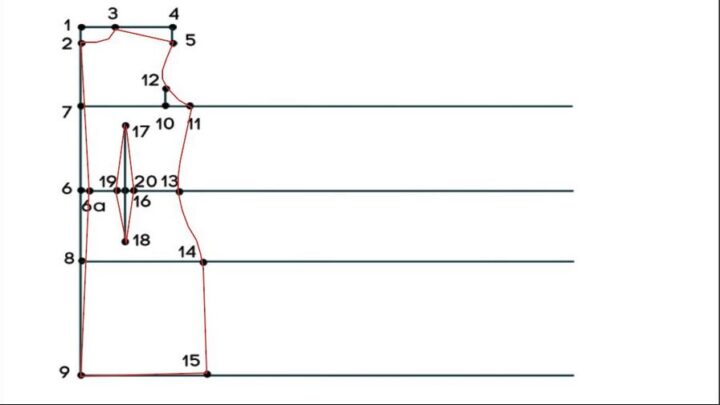
The pattern for the back of the summer dress is done.
How to draft a pattern for the front of the summer dress
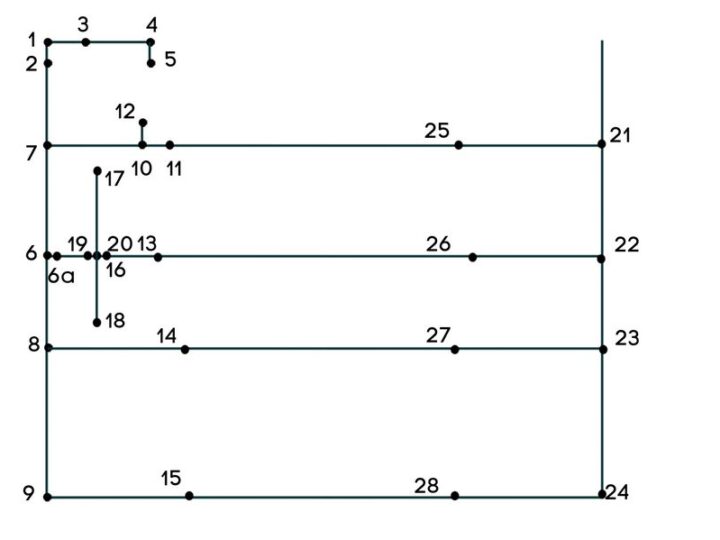
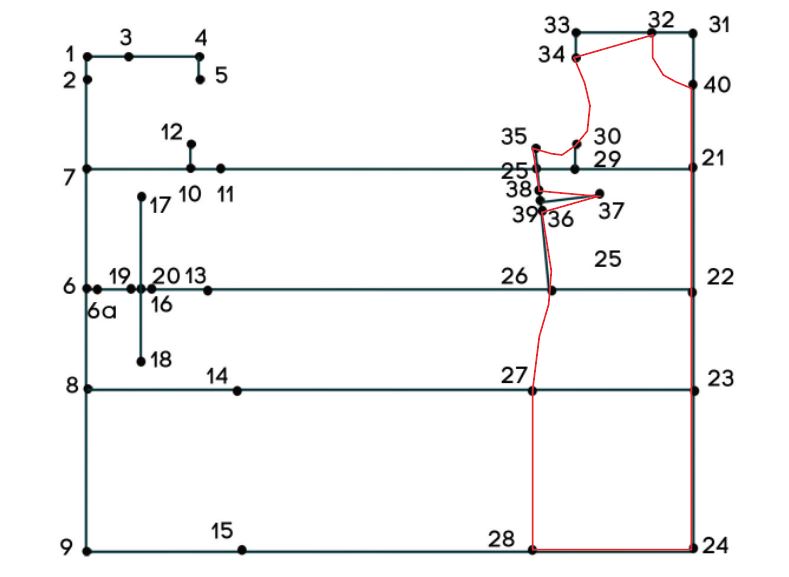
Now make a mirror copy of some part of the dress as you see in the image below:
Distance 21 – 25 is equal to the distance 7 – 11
Distance 22 – 26 is equal to the distance 6 – 13
Distance 23 – 27 is equal to the distance 8 – 14.
Distance 24 – 28 is equal to the distance 9 – 15.
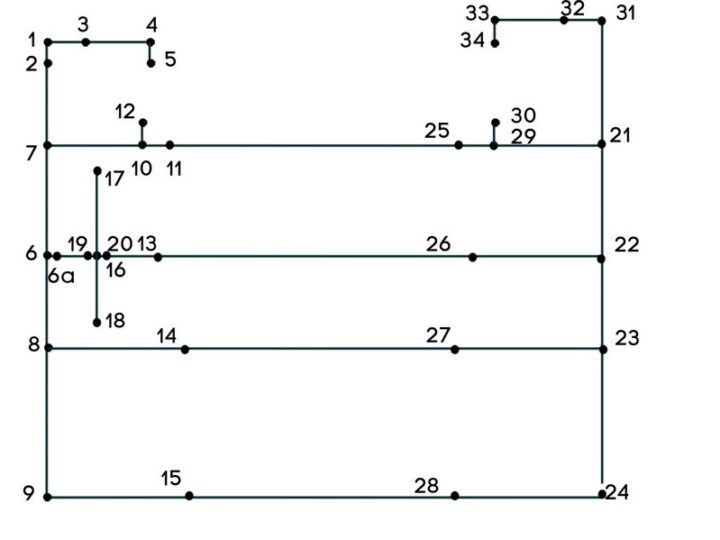
Mark point 29 on the bust line. The distance between points 21 and 29 is equal to the HIGH BUST MEASUREMENT divided by 2 plus ⅜ inch. For example, my measurement is 13.5 inches, so I measure 7 ⅛ inch to point 29.
Draw a line perpendicular to the bust line in point 29. Mark point 30 on this line. The distance between 29 and 30 is 2 ¾ inch for all sizes.
From point 22 go up and mark point 31 at the distance equal to your shoulder to waist measurement (front). My number was 17 inches.
Make a perpendicular line in point 31 and mark 3.5 inches to the left. Mark point 32.
From point 32 go to the left and mark point 33 at the distance equal to your shoulder length.
From point 33 go down and mark point 34 at the distance 1 ¼ inch.
Next, we need to make a bust dart. The width of the bust dart depends on your cup size. For sizes A and B it’s 1.5 – 2 inches, for sizes C and D it’s 2.5 – 3 inches. And for sizes D+ it’s 3.5 inches.
Draw a line through points 26 – 25 and mark point 35 on this line at the distance equal to your dart width (from point 25). For example, for me the distance was 2 inches.
From point 25 go down 2 ⅜ inch on this line and mark point 36. In point 36 draw a line perpendicular to the side line and mark point 37 at 4.5 inches from point 36.
On the side line mark points 38 and 39. The distance 36 – 38 is equal to the distance 36 – 39 and it’s half of your darts width.
And the last point is on the center fold line – mark point 40 at 4.5 inches from point 31.
Connect all points as you see in the image below.
All is done… Voila! Your pattern is ready to use! Now you can check my tutorial on how to sew a summer dress using this pattern.

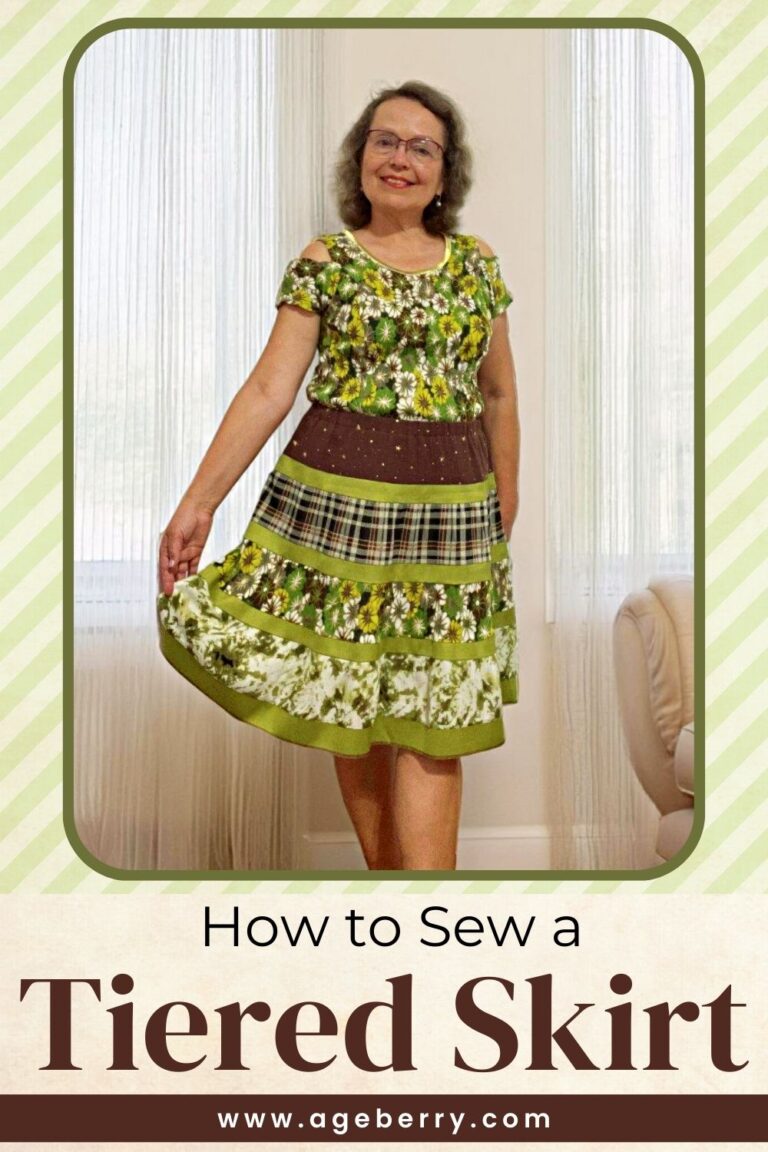
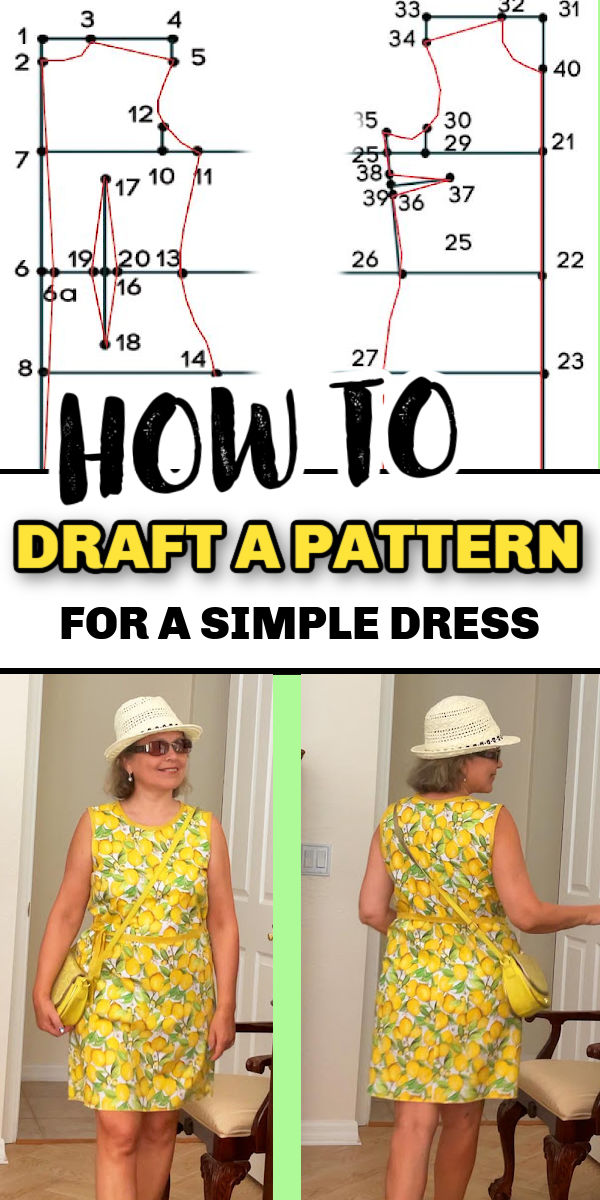
Did you find this tutorial helpful? If so, save this pin (see below) on your sewing board so you can come to this tutorial later when you are ready to draft a pattern for a simple dress, and follow me on Pinterest for more tips, tutorials, and inspiration!
latest posts
- Corset Pressing Board for Sewing: What It Does and How I Use It
- 7 Essential Tools and Settings for Sewing Denim on a Regular Sewing Machine
- That Purple Thang: 10 Smart Ways to Use This Weird Little Tool
- 20+ Reasons Your Sewing Machine Thread Keeps Breaking (+ Solutions)
- Dresden Plate Quilt Block: 4th of July Fireworks
- How To Sew Curves the Easy Way Using a Curve Master Presser Foot
- 30 Sewing Hacks That Turn Ordinary Items into Useful Sewing Tools
- Seam Allowances in Sewing Patterns: What They Are and How to Use Them
- What Do You Call a Person Who Sews? I Asked My Readers and Got 1,408 Opinions