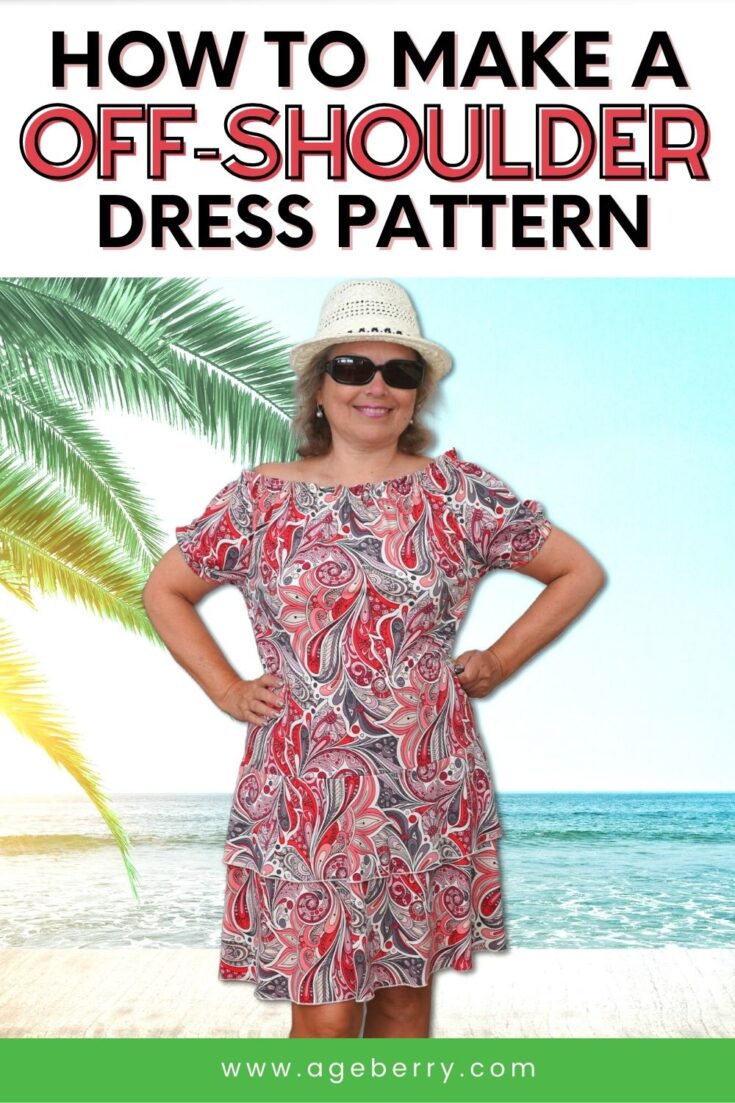
Off the shoulder dress pattern drafting sewing tutorial
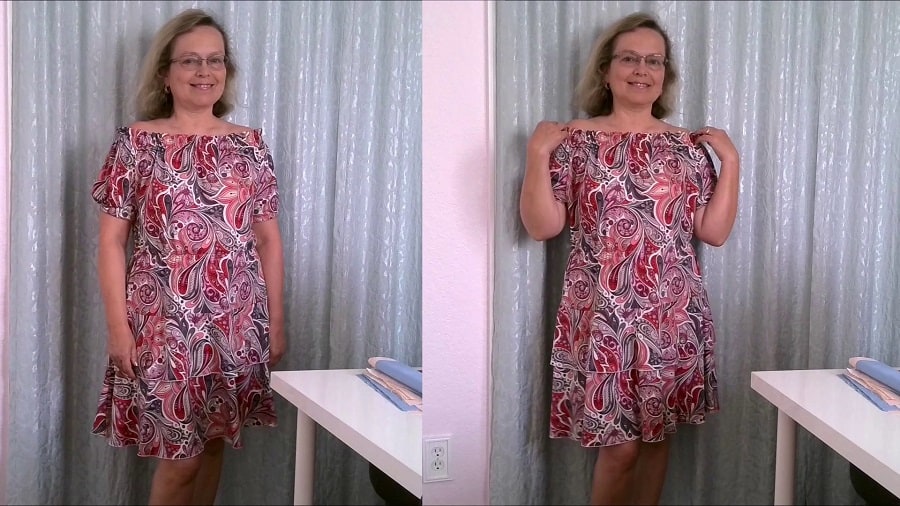
In this sewing tutorial I will show you how to easily make an off-shoulder dress pattern with sleeves. You can draft the pattern using your own measurements. A printable version of this article is available in my Etsy shop or in my site shop. The off-the-shoulder design is extremely popular and can be found not only in dresses but also in tops. It’s very versatile and trendy.
Note: Some of the links on this page are affiliate links. This means I will receive a commission if you order a product through one of my links. I only recommend products I believe in and use myself.
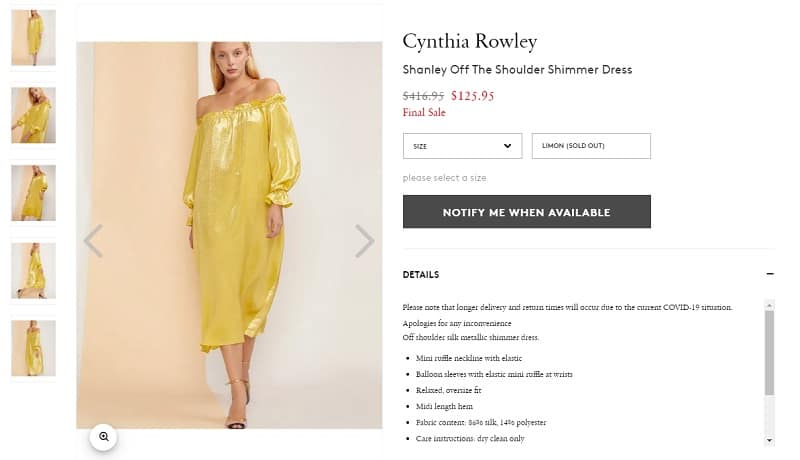
Of course, you can buy an off-shoulder dress but why not make one from the fabric of your choice ( and it can be 100% silk!) especially if I will show you how you can draft a pattern very easily. Some of the dresses are quite expensive. For example, this Cynthia Rowley dress.
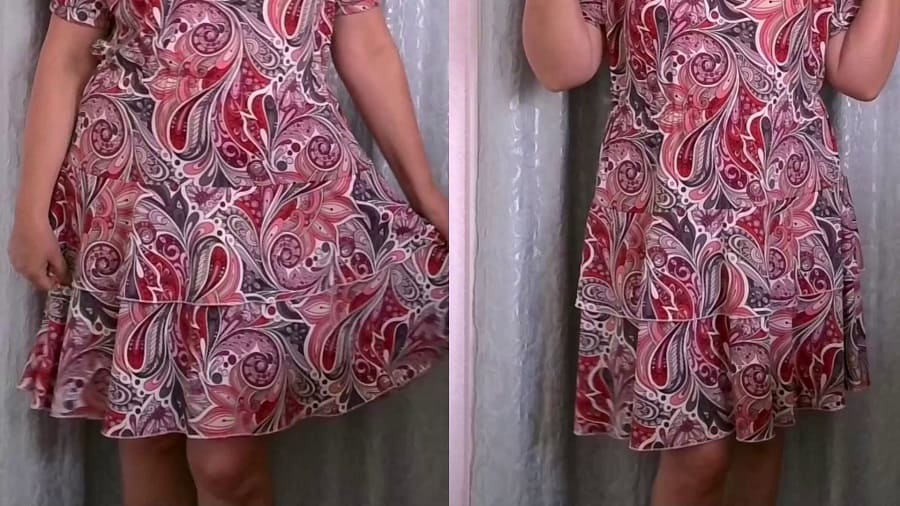
But you can sew the same dress yourself using this off-shoulder dress drafting tutorial. Let’s get started.The off the shoulder dress pattern is made from 2 parts: an off-shoulder top pattern and a flounce skirt pattern. The pattern is good for fluid stretchy knit fabric only. Seam allowances are included and they are about ¼ inch.
Off-shoulder top pattern
The front and back of the dress are the same so we are going to make only one pattern piece which is going to be good for the front and for the back.
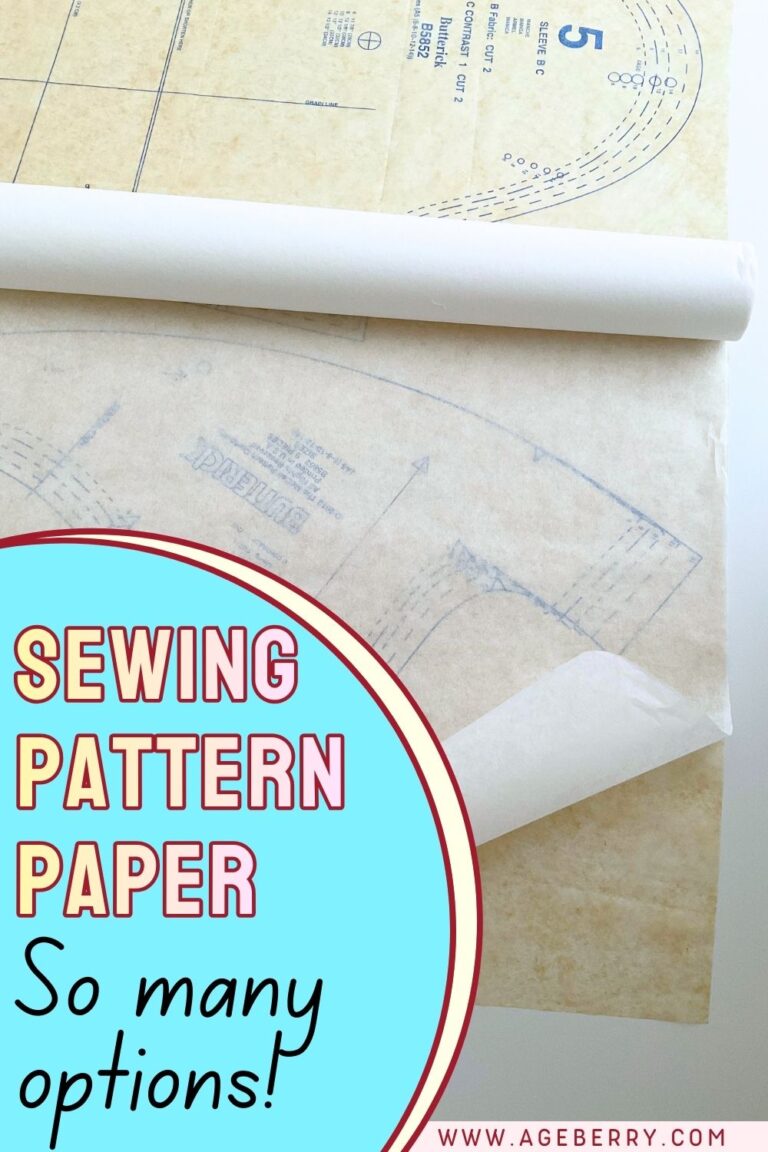
I like to use tracing paper (also called vellum paper) for my patterns. Usually, I buy 30” – 36” wide rolls from Amazon, it is more economical. One roll like this lasts for two to three years for me.

Draw a vertical line and mark 5 points on this line.
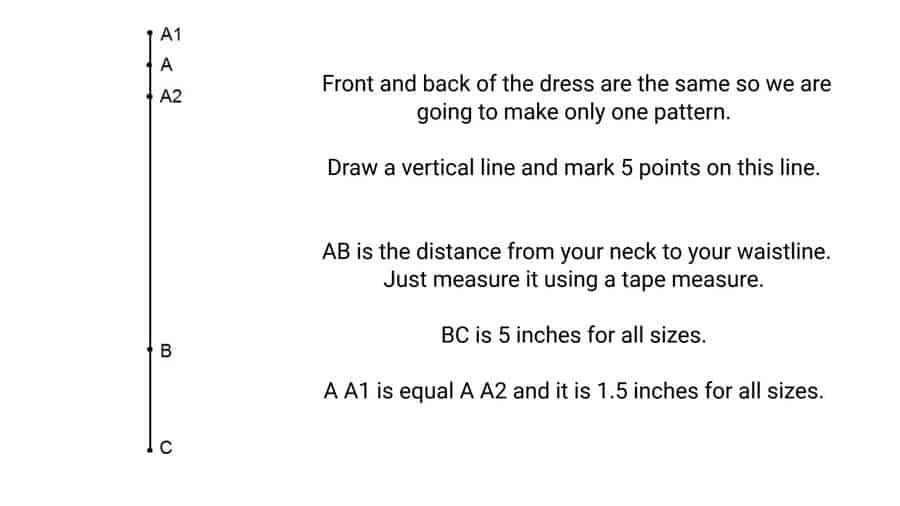
AB is the distance from your neck to your waistline. Just measure it using a tape measure. If you want to know how to take body measurements for sewing check out my tutorial at this link. BC is 5 inches for all sizes.
A A1 is equal A A2 and it is 1.5 inches for all sizes. Line A1C is the center front and center back line. Cut the pattern ON FOLD.
Draw a perpendicular to the line A A1 in point A1 and mark point D. How to figure out the distance A1D? I forgot to mention that I use only these pencils – they are absolutely wonderful for pattern drafting: Paper Mate SharpWriter Mechanical Pencils
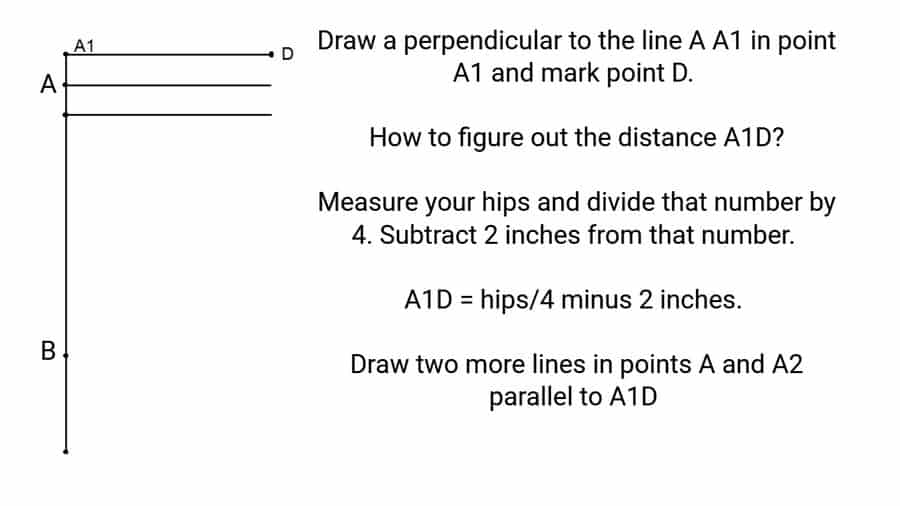
Measure your hips and divide that number by 4. Subtract 2 inches from that number.
A1D = hips/4 minus 2 inches.
Draw two more the same lines in point A and A2.
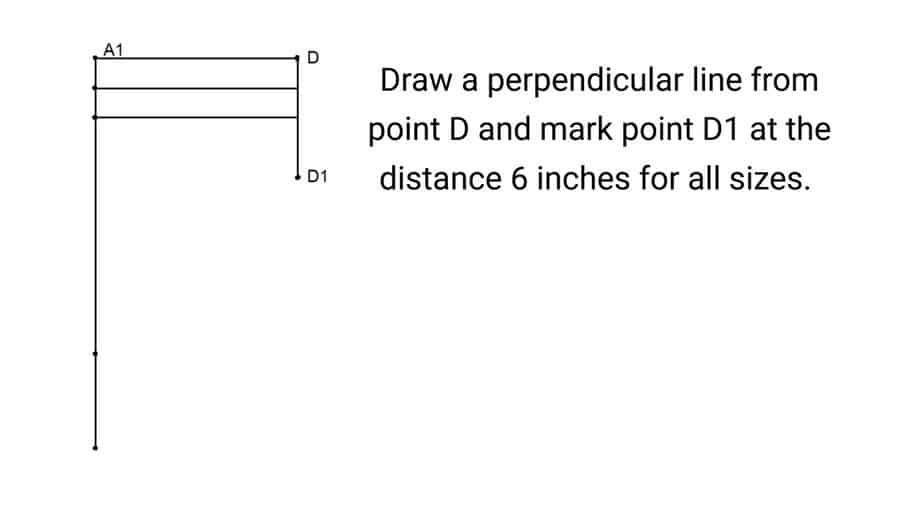
Draw a perpendicular line from point D and mark point D1 at the distance 6 inches for all sizes.
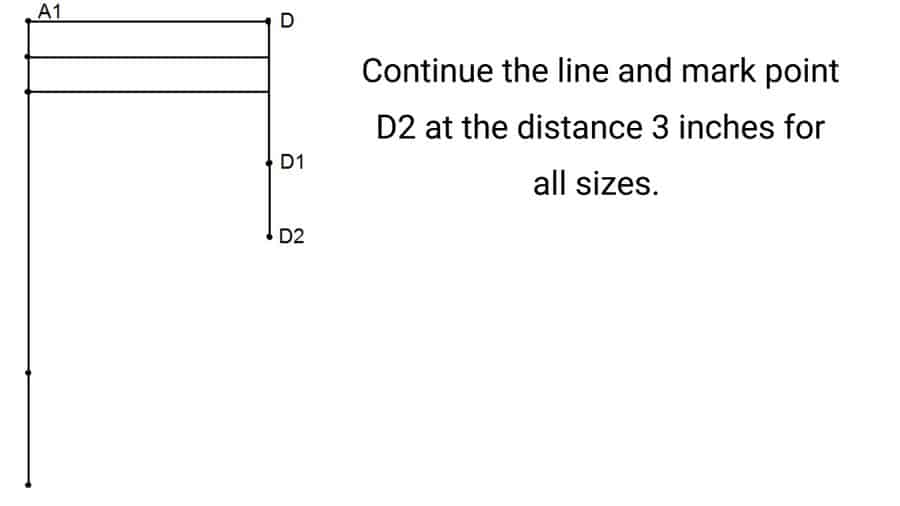
Continue the line and mark point D2 at the distance 3 inches for all sizes.
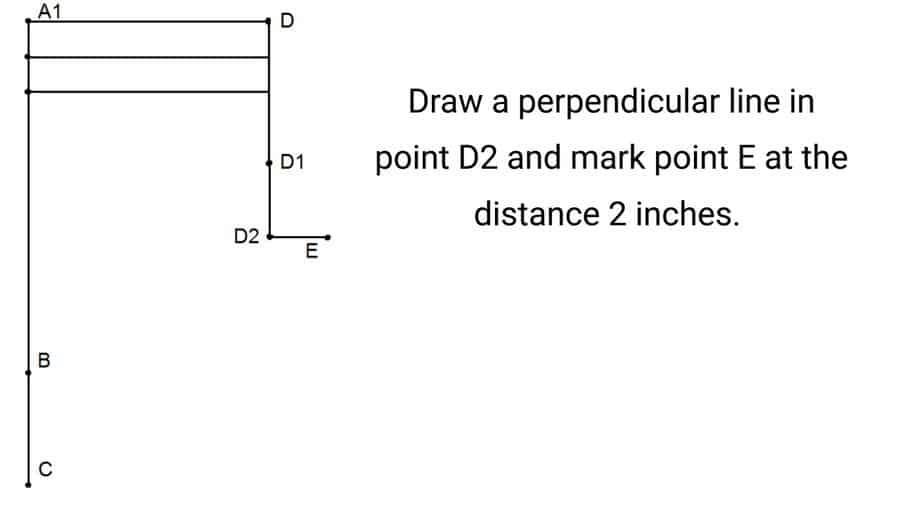
Draw a perpendicular line in point D2 and mark point E at the distance 2 inches.
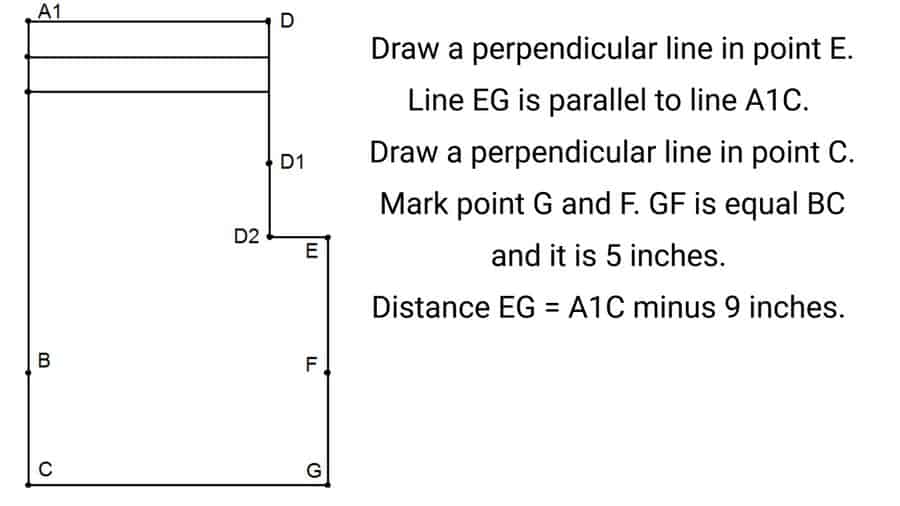
Draw a perpendicular line in point E. Line EG is parallel to line A1C. Draw a perpendicular line in point C. Mark point G and F. GF is equal BC and it is 5 inches. Distance EG = A1C minus 9 inches.
Draw line D2E1 = 1 inch. The line divides the 90 degrees corner in half.

Connect points D1E1E with a curved line.
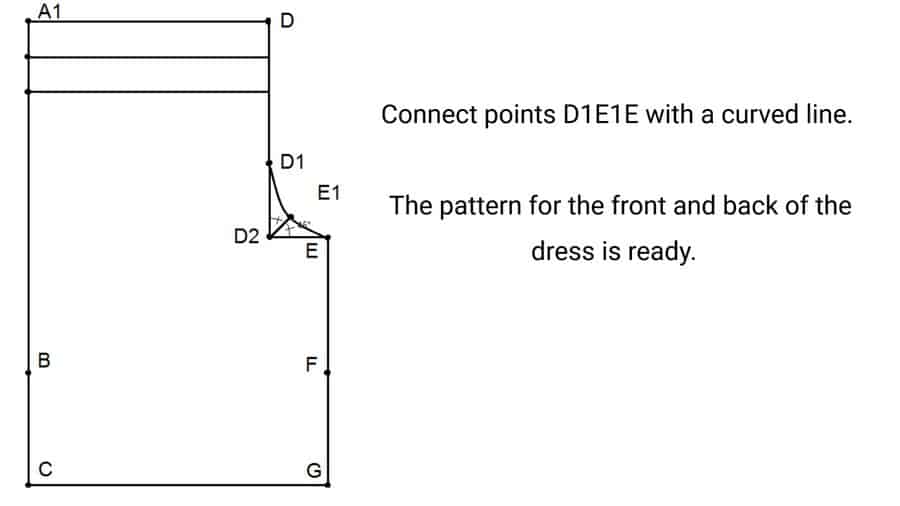
The pattern for the front and back of the dress is ready.
Rememeber that line A1C is the center front and center back line. It’s also a grainline. Cut the pattern ON FOLD.
See how easy it is to make this pattern for a nice and trendy off-shoulder dress. You don’t need to buy any pattern, and you can use your own measurements. But as you may notice this is not the whole pattern. You will need to draft a sleeve pattern for the dress also.

I put the file in my password protected RESOURCE LIBRARY and if you are already a subscriber you got the password in my email newsletter. So, if you want to continue and finish the off-shoulder dress pattern SUBSCRIBE to my blog to get instant access to my free resource library to see step-by-step instructions for drafting the sleeve pattern. The sleeve pattern is even simpler to make. Go ahead and subscribe below so you can get the password for my free resource library.
If you would like to see how to make a pattern for the skirt of the dress go to my YouTube video at this link or see the video below. The instructions for the skirt start from 4.28.

I think you see how easy it is to make off-the-shoulder dress pattern drafting. You can use the pattern not only for this off-shoulder dress but for other dresses also (without the skirt for example).
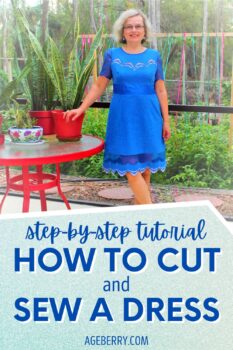
If you want step-by-step instructions on how to cut and sew the off-shoulder dress check out my tutorial at this link.
You can also watch my YouTube video tutorial on how to make the off-the-shoulder dress pattern.
Did you find this tutorial helpful? If so, save this pin (see below) on your sewing board so you can come to this tutorial later when you are ready to make your own off-the-shoulder dress pattern and follow me on Pinterest for more tips, tutorials, and inspiration!
Like sewing tips? I have other popular tutorials on my site that might be interesting for you. Check them out below.

latest posts
- Corset Pressing Board for Sewing: What It Does and How I Use It
- 7 Essential Tools and Settings for Sewing Denim on a Regular Sewing Machine
- That Purple Thang: 10 Smart Ways to Use This Weird Little Tool
- 20+ Reasons Your Sewing Machine Thread Keeps Breaking (+ Solutions)
- Dresden Plate Quilt Block: 4th of July Fireworks
- How To Sew Curves the Easy Way Using a Curve Master Presser Foot
- 30 Sewing Hacks That Turn Ordinary Items into Useful Sewing Tools
- Seam Allowances in Sewing Patterns: What They Are and How to Use Them
- What Do You Call a Person Who Sews? I Asked My Readers and Got 1,408 Opinions