
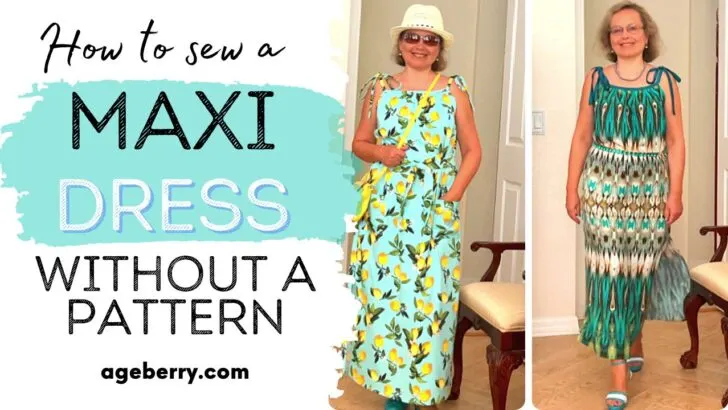
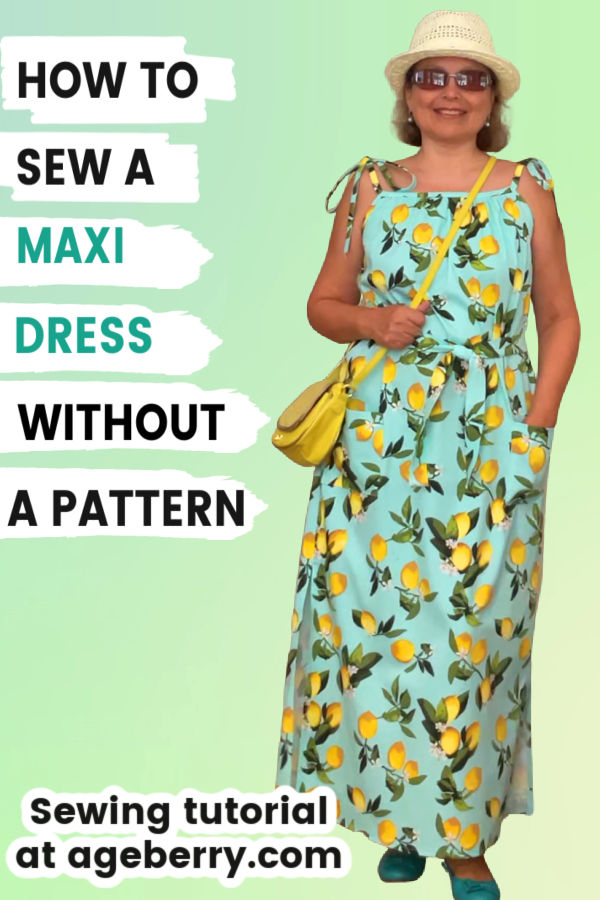
A maxi dress is one of the summer wardrobe staples. With so many different ways to wear maxi dresses, there really is no excuse not to have at least one maxi in your closet! In this sewing tutorial, I will show you how to sew a maxi dress from scratch without using a pattern, as well as provide some tips on sewing techniques that are helpful when sewing clothes of any kind.
We hope this tutorial helps you become more confident in your skills as well as have lots of fun making your own maxi dresses all summer long! Ready? Let’s get started!

What is a maxi dress?
Do you know what a maxi dress is? A maxi dress is a floor or ankle-length dress. If you sew your own maxi dress you can make it lightweight, flowy, airy, super comfortable, and perfect for summer. The best part about this versatile garment is that it fits just about any body type – short, tall, curvy, skinny – because there are so many different ways to style it.
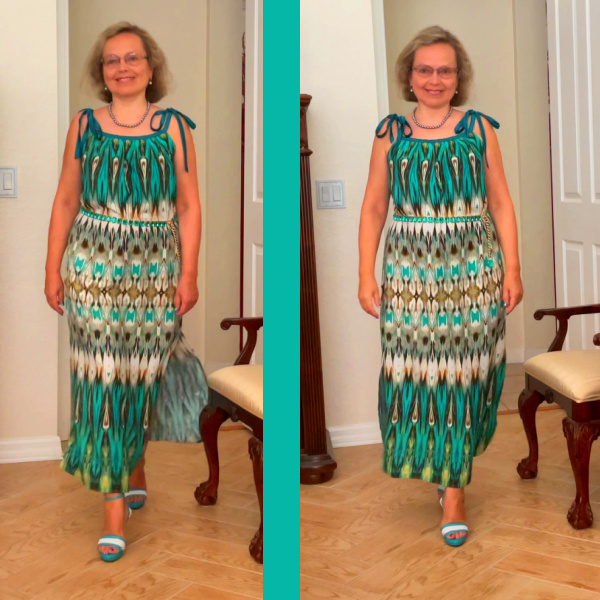
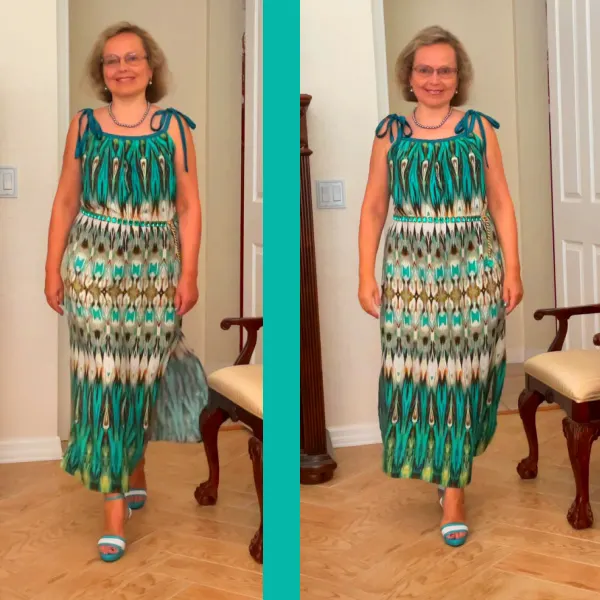
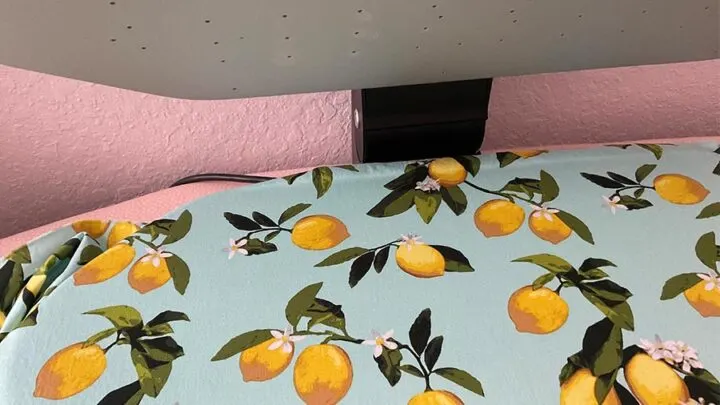
In the image below you can see two different maxis that I made from different fabrics and styled differently. What do you think? Which is looking better on me?


I promise you this design is quick and easy to make even for beginners, while also providing you with plenty of customizable options. The dress is perfect for any occasion from going out with friends to hosting holiday dinner parties at home!
Attention! If you like the video format, at the bottom of this post, look for a YouTube video version where there is a step-by-step tutorial on how to sew a maxi dress without a pattern. For a more complete picture, I recommend exploring both versions.
What you will need for making a maxi dress
The first step is gathering all of the materials that are needed to create this garment:
- Fabric
- Matching thread
- Sewing machine
- Serger (optional)
- Regular sewing tools and notions
What is the best fabric for this maxi dress?
I made 2 dresses: one from lightweight apparel cotton (100% cotton) and another from lightweight woven rayon. And I can tell you the dress from rayon is “behaving” better.
I suggest using very soft lightweight woven fabric (but not see-through obviously) that drapes beautifully and can be easily gathered. Woven rayon is the best fabric for this dress. Don’t use knits.
How much fabric will you need for the project? First, choose the desired length of your dress (see below for how to measure it). You will need 2 lengths of your dress plus a few inches for seam allowances and a hem. For example, the length of my dress is 1 3/8 yards, so I would need 2 3/4 yards of fabric plus 9-10 inches, or 3 yards of fabric.
Want to know how to convert inches to yards? Use my Fabric Conversion Calculator for this.
Also, choose the right thread – polyester sewing thread for your sewing machine and polyester serger thread for your serger.
Read more about choosing the right thread in my tutorial Sewing thread types and uses
How to prepare fabric for the maxi dress DIY
No matter what your sewing skills are, it’s always a good idea to wash, dry, and press your fabric before you begin cutting it. Rayon fabric always shrinks after being washed and it’s better to prewash it so you will not have a surprise later on.
When you are finished washing and drying your fabric, make sure to smooth out all the wrinkles. Be careful not to stretch it while ironing! Just press the fabric with a steam iron – don’t move back and forth on top of the cloth.
Simply hold down the hot iron on top of the wrinkled part for a few seconds and then move onto a different section until all of the fabric has been pressed flat again.
I always use my Singer steam press to make sure that I get rid of all wrinkles quickly. It’s faster and more efficient to use than iron and requires less effort. The pressed fabric looks new.
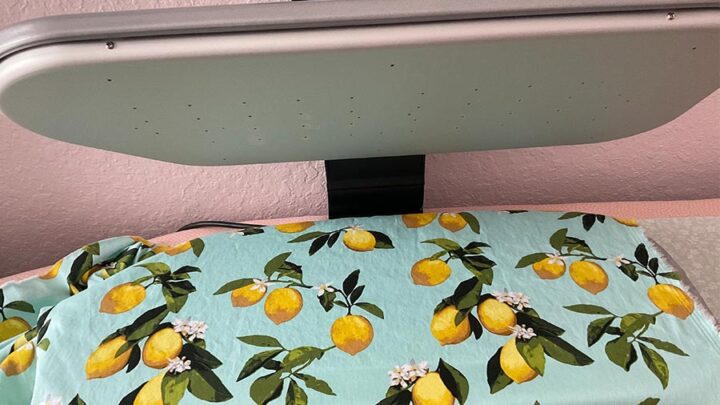


✅ Related tutorial: Review of Singer Intelligent Steam Press model ESP26O
Take your measurements for the DIY maxi dress
You will need to take a few measurements:
Bust
Hips
Desired length of the maxi dress
How to measure the length? Look at the image of my dress above. Do you see where it starts on my body? So, find this point on your body and measure from this point to the floor.
Take your bust and hips measurements without any clothes on, just your underwear (a bra and panties).
✅ Related tutorial: How to take body measurements for sewing
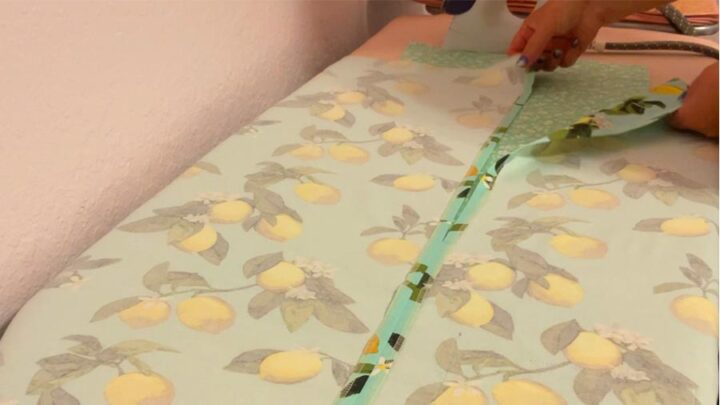
Maxi dress cutting step by step
You don’t need any maxi dress pattern! I will show you how to make a few pattern lines right on the fabric. Isn’t it great!
This dress is very simple, let’s cut the front and back of the dress.
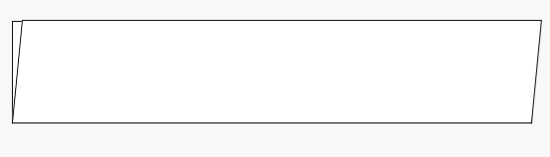
So, first cut two equal rectangles from your fabric.
One piece will be the front and the other will be the back of the maxi dress. The length of each piece of fabric is equal to the desired length of your dress (don’t add anything to this number).
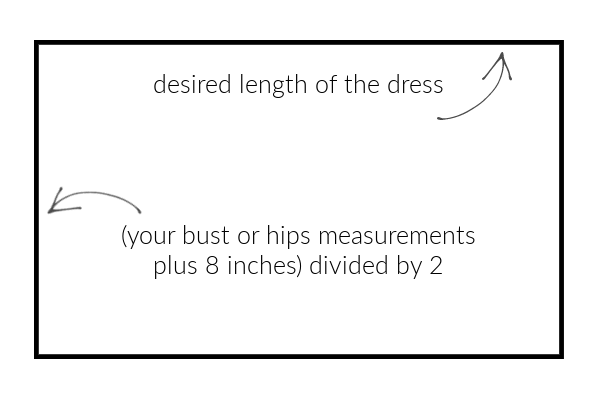
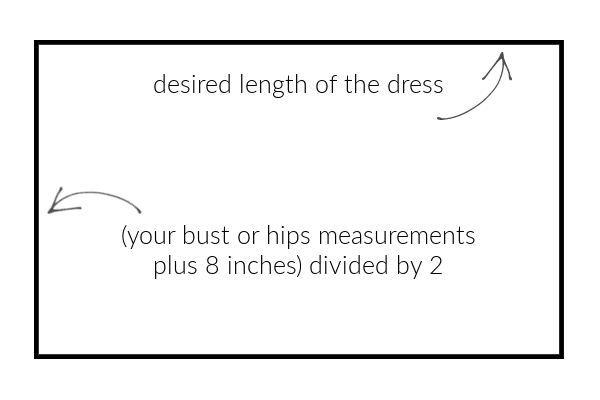
What is the width of these pieces? Compare your bust and hips measurements and choose the one that’s bigger. Add 8 inches to that number and divide by 2 – it will be the width of each rectangle.
For example, my bust measurement is 39” and my hips are 41” – then I take the hips measurements for the dress because it’s bigger. I add 8” to 41”, which’s equal to 49”. I divide 49” by 2 and that’s the width of my rectangles – 24.5”.
You need to cut the fabric straight for your dress. I have a detailed tutorial on How to cut fabric straight, so check it out. For this maxi dress, the best method of cutting the fabric straight is by ‘pulling a thread”.

Don’t forget to cut off the selvages.
Note: Some of the links on this page are affiliate links. This means I will receive a commission if you order a product through one of my links. I only recommend products I believe in and use myself.
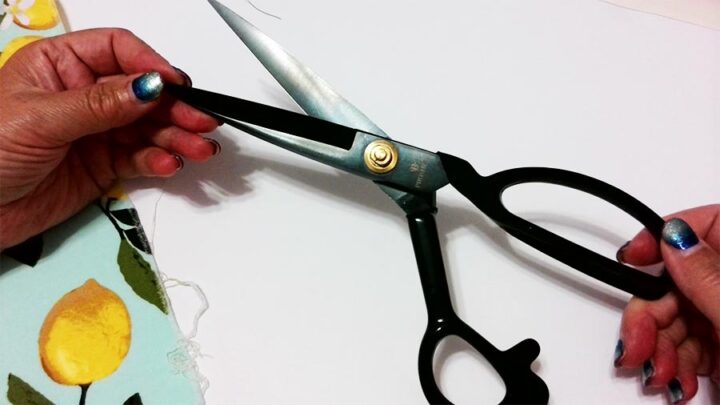
By the way, I bought recently these sewing shears from Amazon called PROSHEARS and I can’t be happier with how they cut. They became my personal favorites right away even if I didn’t hear about this brand before.

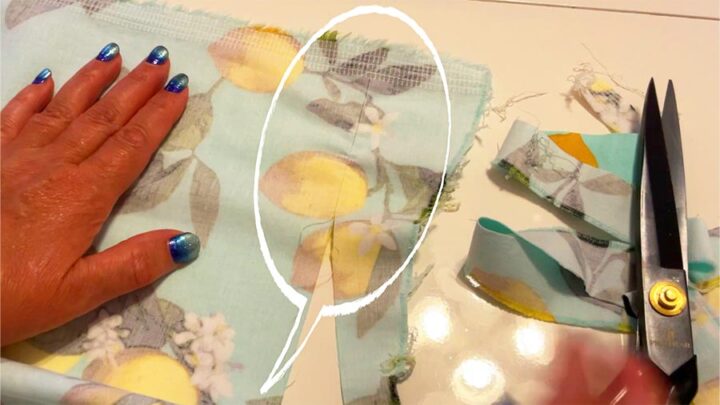
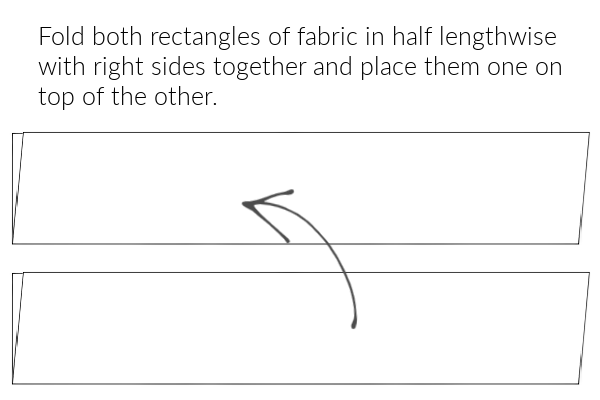
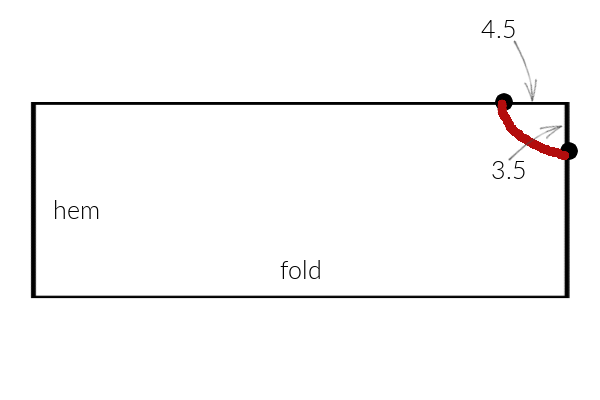
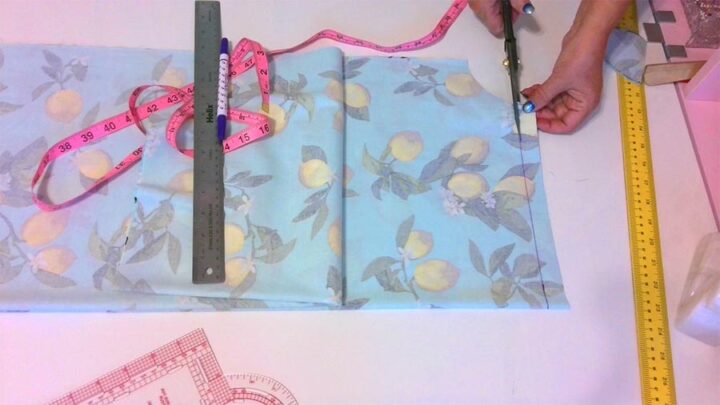
Fold both rectangles of fabric in half lengthwise with right sides together, lay them on a flat surface (preferably your cutting table, of course), smooth out any wrinkles, and place them one on top of the other. Make sure all edges are aligned perfectly (see illustration below). Decide where you will make the top of the dress and which ends will be the hem. It’s especially important if you have directional prints on your fabric.


Now we are going to cut armholes. Measure 3.5 inches to the right and 4.5 inches down. Connect these points with a curved line using a fabric marker. I like to use a special ruler for this called a French Curve ruler. Cut the armholes for the front and back of your dress.


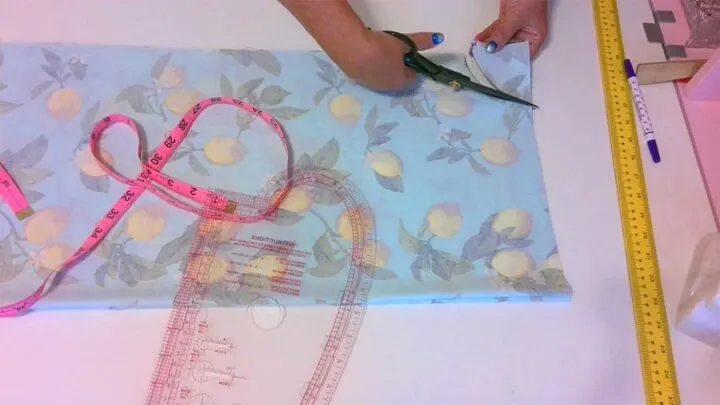
Next – decide which one of these pieces will be the front of the dress and cut exactly 1 inch from that rectangle from the top part (parallel to the top edge).


And that’s all for the maxi dress cutting.
But we also need to cut something else.
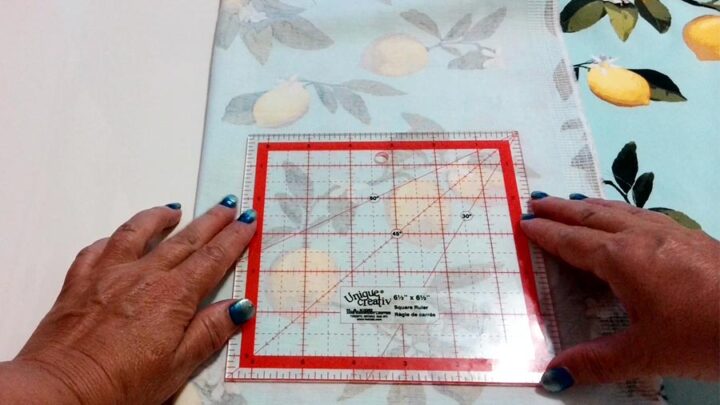
If you want to have pockets you should cut fabric for pockets – cut 2 rectangles 7.5 inches long and 6.5 inches wide. I am using a square ruler to cut pockets.

Cut fabric for 2 ties (on the straight grain) – 2 pieces of fabric 45 inches long and 2 inches wide. You can choose to use the same fabric for the ties as the dress itself. Or you can choose a contrasting fabric for embellishment.
For one of my maxi dresses, I have chosen the same fabric as you can see in the images, and for the other one, I have chosen silk fabric for the ties.
Cut fabric for a belt. I cut my fabric for the belt 60 inches long and 4 inches wide. You can use your waist measurement to determine how long the fabric for the belt should be, or you can choose a full width (or length) of your fabric and then cut it to size later.
How to sew a maxi dress
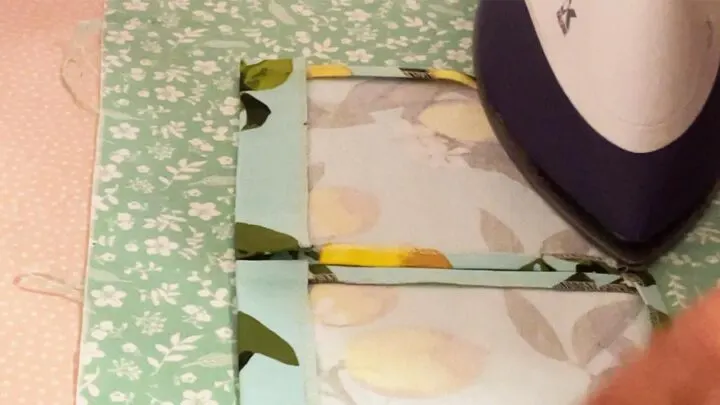
Start sewing the dress by finishing raw fabric edges so you have nice edges with no fraying or lose threads. I use my serger for this. If you don’t have a serger you can use special sewing machine presser feet for this. Finish all edges of the pockets too.
✅ Related tutorial: How to use overcast presser feet for sewing overcasting stitches
Do you make these 15 mistakes with your serger?
Enter your email in the box below to download your free eBook and find out which mistakes you should avoid!
Subscribe to my weekly newsletters with sewing tips and tutorials, free sewing patterns, printable PDFs, and other useful content and you’ll find the eBook in your inbox.
Subscriber exclusive offer.


How to sew patch pockets for the maxi dress
I decided to add patch pockets to one of the dresses. So if you would like to do the same follow the steps below.
First of all, mark your pockets’ placement on the front piece of the dress. Place them where you would normally reach for a pocket. The pockets should be right over the hips. Mark this location with a fabric marker to ensure a perfect placement when sewing on the pockets later. After you’ve determined where you want your pockets, mark 2 spots for both pockets using a ruler. Make sure they are symmetrical.

Fold the edges of each pocket toward the wrong side by 3/8 inch and press in place with an iron. The top edge of each pocket should be folded wider than the rest. Topstitch the top fold of each pocket, and stitch closer to the lower edge of the fold. Do this from the right side of the pocket. The topstitching should be straight!

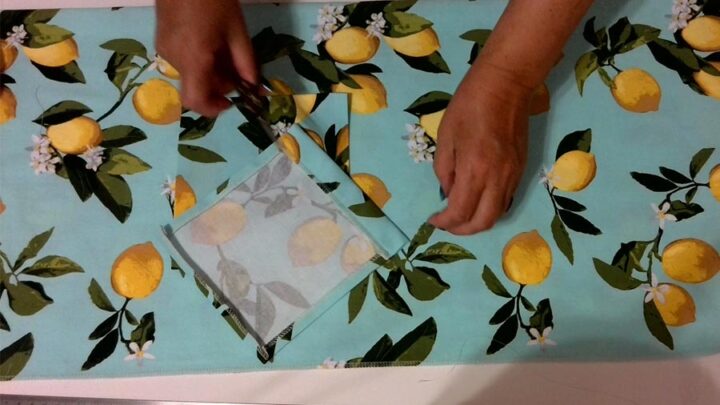
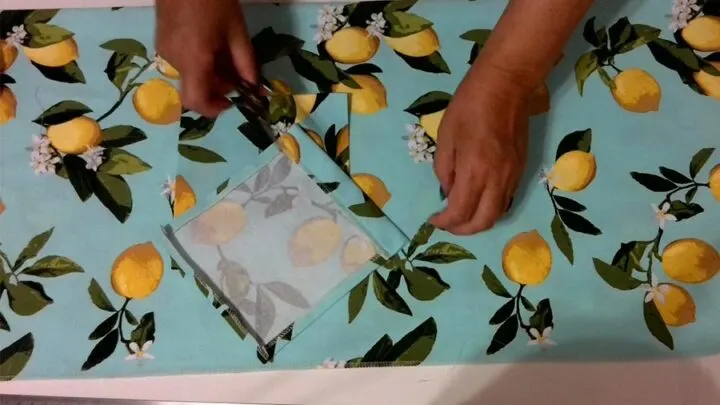
Pin pockets to the dress in places you marked before and stitch.
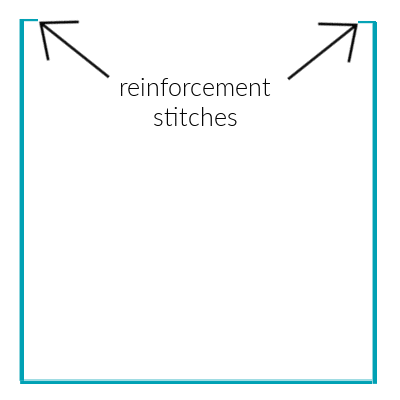
We need to sew a small line of reinforcement stitches on the top corners of each patch pocket. It helps to strengthen the edges. Mark where you want to start with a fabric marker so each side is consistent. I start sewing 1/8″ away from the edge, but you can make yours as close as you like; just be sure they’re both equal distances apart.


Give both pockets a nice press after they’re attached to the dress.
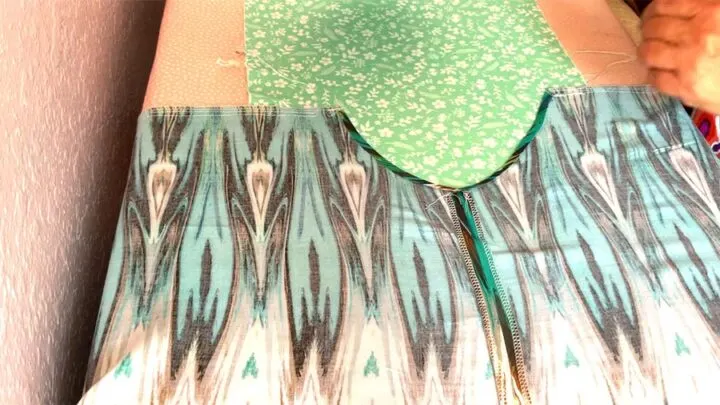
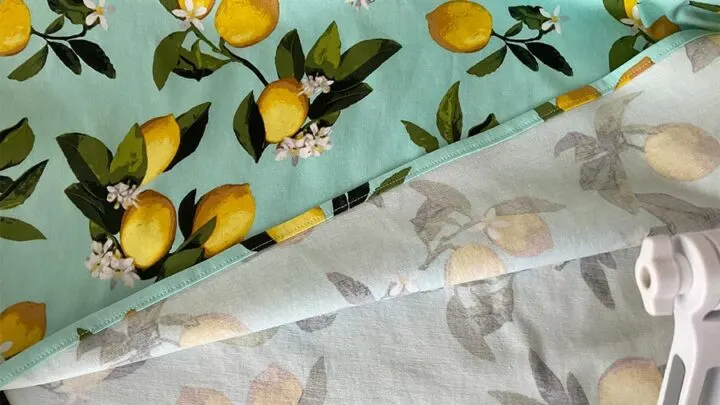
Sewing Side Seams of the maxi dress
The next step is sewing the side seams of the maxi dress. Seam allowances are ⅜ inch in this case. Pin the front and back pieces right sides together and stitch.
I think a maxi dress should have side slits. The side slits are a sexy detail that looks great. But they also keep you cool when the weather is hot!
So decide how long you want the side slits to be (mine are 18”) and don’t stitch the side seams until the ends.
Press seams open after stitching. Press the slits too.

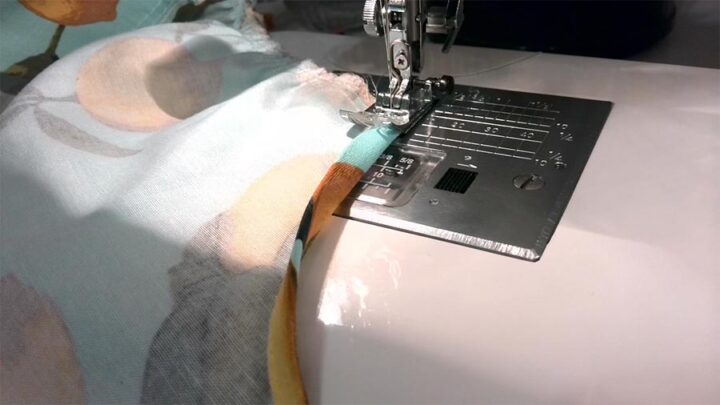
Finishing the armholes of the DIY maxi dress with a double-fold hem
Work on your ironing board. Fold the fabric toward the wrong side by 1/4 inch and press in place with iron to add stability. Make sure the width of the first fold is the same all around, if you are not very experienced try marking the hem with a fabric marker first so everything stays nice and straight. The lightweight fabric usually stretches a little so it’s easy to do.

Fold the fabric again (that’s why it’s called a double fold hem) so that the width of this second fold matches the width of the first fold (¼ inch in this case). Press the fabric again creating a finished edge that looks like it was sewn in place.
Sew the hem so the stitches go close to the inner folded edge of the fabric.

If you are not sure what I am talking about check my YouTube video where I am showing how to do it.
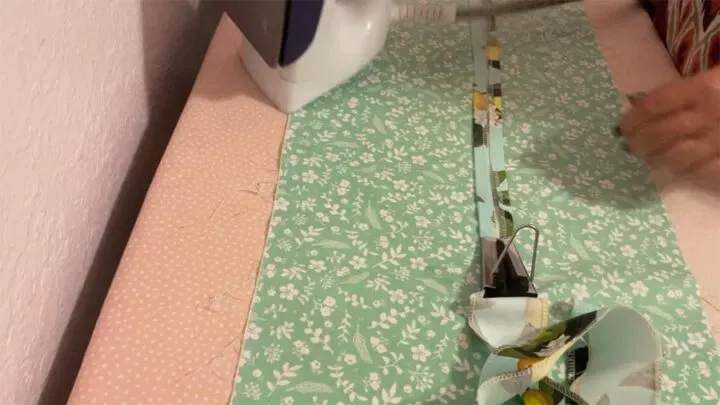
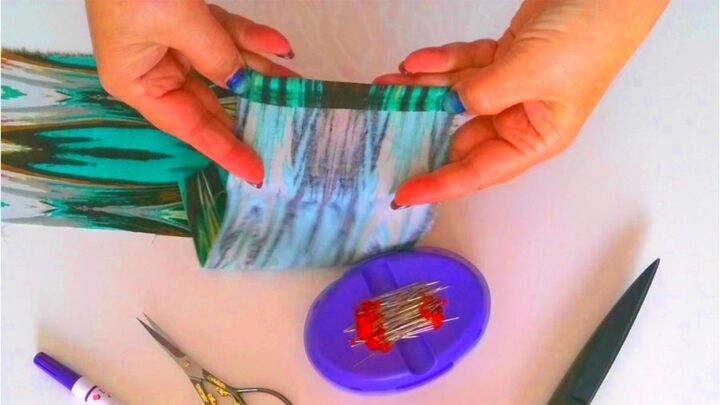
How to make folded fabric strips (for ties) using a tape maker
So, I have decided to embellish my maxi dress with fabric ties. And the question was – how to make these narrow fabric strips so they are folded perfectly with enclosed raw edges and there is no difference between them in size – they should be exactly the same on both sides, right?
To do it manually is quite tedious work but I didn’t want to spend hours just making some straps for my maxi dress. So I used a gadget called a bias tape maker.
But I am not going to make a bias tape. My strips are cut on the straight grain. But this tape maker can actually fold any strips and it doesn’t matter if they are cut on the bias or on the straight grain.
Fabric strips should be cut twice as wide as the size of the finished tape. On these tape makers, you can see some numbers. This metal one has 25 mm on it – that’s the width of the final strips already folded. So I cut the strip 50 mm wide. Do you need to know how much it is in inches? Use my Fabric Conversion Calculator.
Insert the strip into the tape maker. The wrong side of the fabric should be up.
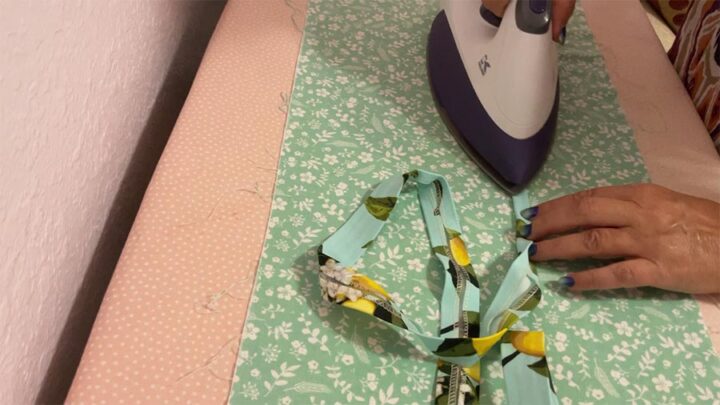
Move the tape maker and you will see that the fabric strip coming from the tool is folded. I mean both edges of the strip are folded toward the center. So press the folded tape while pulling the tape maker but don’t pull too hard, just lightly.

Now fold these strips in half lengthwise and press again.

✅ Related tutorial: Bias tape tutorial: how to use a bias tape maker
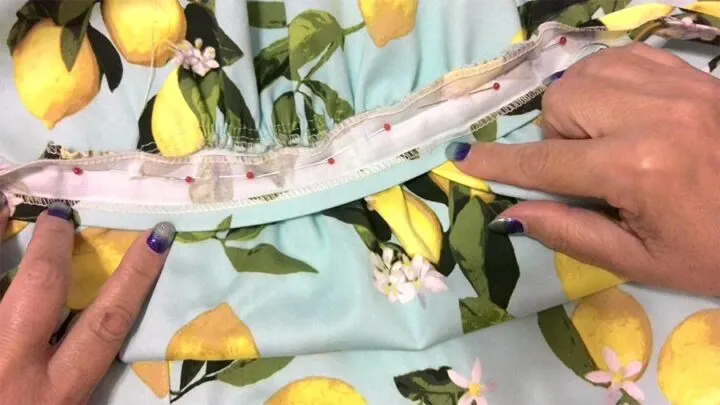
Finishing the upper part of the DIY maxi dress
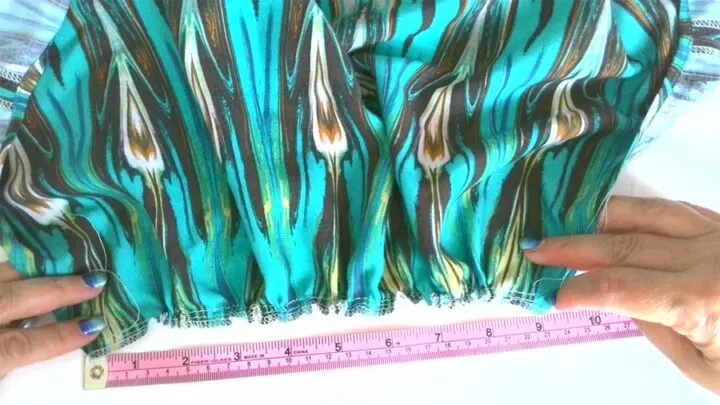
Sew two rows of gathering stitches on the upper parts of the dress (front and back). For this, set your sewing machine tension to 0, and the stitch length to 4.5 or 5.

Gather the front and the back.
Now the question is – how much to gather?
Well, for this put on your bra and measure the distance between the straps in the front and in the back.
For example, my measurements are 9 inches for the front and 10 inches for the back.
So I gather the front to 9 inches and the back to 10 inches.

✅ Related tutorial: All about a tape measure for sewing
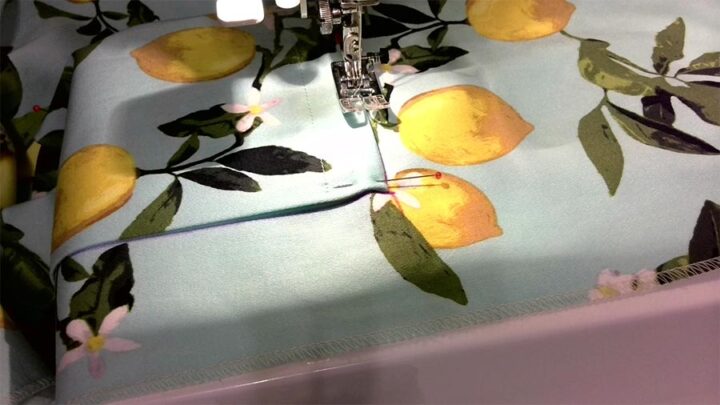
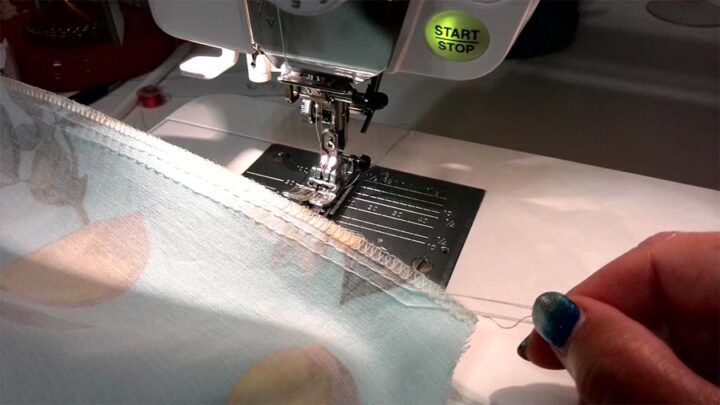
The next step is sewing the ties.
Unfold the double-folded strips and pin the strip to the gathered part of the front exactly in the crease created by a hot iron. Stitch the straps/ties to the dress.

Cut seam allowances close to stitches. Fold the strips again, turn them over and stitch.
Sew a narrow double-fold hem for the DIY maxi dress
Finish your maxi dress with a narrow double-fold hem. Check above how to do it. I have described the steps when I was talking about finishing the armholes of the dress. So do exactly the same.

Sew a belt for the maxi dress.
A belt is necessary for this maxi dress. A belt helps create a more flattering silhouette by giving shape to your curves and accentuating your waist.
If you’re on the shorter side, a belt will create some illusion of height as well.
Decide how long you want the belt to be. To sew the belt, first, fold the fabric toward the wrong side by 3/8 inch on both short ends of the belt and press it in place with an iron.

Next, fold the fabric in half lengthwise and stitch the right sides together around the entire belt.
Turn the fabric inside out using a bodkin or safety pin. Press fabric and topstitch along both sides of the belt. This will create a sturdy belt that can withstand lots of use and wear.
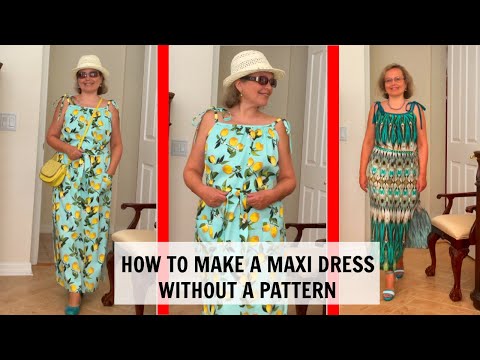
So here is my YouTube video. Check this out if you want to see how to sew a maxi dress without a pattern instead of reading…
Did you find this tutorial helpful? If so, save this pin (see below) on your sewing board so you can come to this tutorial later when you are ready to sew a maxi dress without a pattern, and follow me on Pinterest for more tips, tutorials, and inspiration!

Useful Info – Sewing Machine Troubleshooting
If you own a sewing machine long enough, you’re going to have to figure out how to troubleshoot your sewing machine at some point or another. While some sewing machine problems are preventable, others are inevitable. Learn how to troubleshoot your sewing machine with my printable PDF eBook. Whether you use a traditional sewing machine or a modern computerized one, work through this ebook before thinking about a replacement or going to a service center.

latest posts
- Knot a Problem: Easy Ways to Secure Short Thread Ends
- Ever Tried This on Your Serger? This Differential Feed Feature Will Amaze You
- Ditch My Sewing Machine? Not in This Lifetime!
- Adorable DIY Needle Book | Easy Tutorial for Beginners
- Master the Seam Ripper: Your Ultimate Guide to Precision Stitch Removal
- Think You Know Zippers? This Installation Guide Might Surprise You
- Why Does Your Seam Ripper Have a Red Ball? Discover Its Purpose!
- Topstitching Troubles? This Simple Trick Will Turn It Around Instantly!
- How to Sew Shirring: A Step-by-Step Guide to Elastic Thread Gathering
