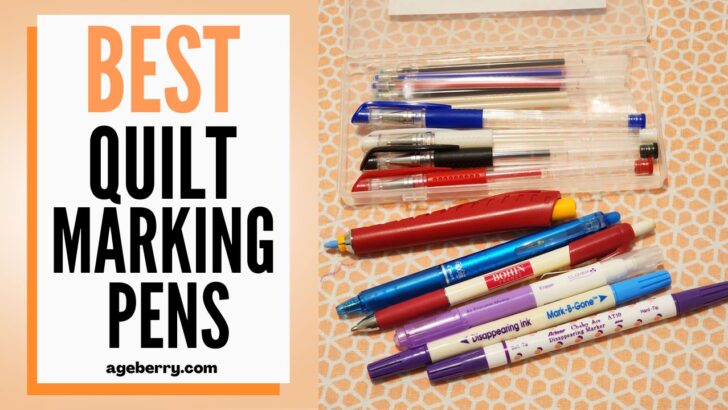
Your Guide For Choosing The Best Quilt Marking Pens For Every Project
When it comes to quilting, having the right tools can make all the difference. While some quilting tools, like sharp scissors and straight needles, are essential, others, like quilt marking pens, are more of a nice-to-have. But make no mistake – a good quilt marking pen can definitely make your projects easier. Today, I want to talk about quilt marking pens, and how to choose the best ones for every project.
With so many options on the market, it is hard to decide which one is the best for you – right? That’s why I have decided to do the work for you and recommend the best options to make sewing easier, faster and more fun for people like me who love to sew.
Quilt marking pens come in all different shapes, sizes and price points, so it is important to find one that suits your needs. Factors to consider include the type of fabric you are working with, the size of your project, your budget, etc.
What Are Quilt Marking Pens?
Quilt marking pens are similar to other fabric markers – chalk, soapstone, etc. – they are used to mark stitching, cutting and placement lines or points on fabric. Pens come in a variety of colors, shapes and sizes. You’ll find them in a wide range of point sizes from very fine-tipped pens to thick chisel-tipped markers. Some create permanent marks, while others make temporary marks that are easily removed with water or heat or disappear on their own in time.
You will need marking pens suitable for:
- Specific project needs
- Fabric types (cotton, silk, wool, organdy, chambray, polyester, etc.)
- Fabric color
- Fabric weight (heavy, lightweight, piled, napped, woven, knit, etc.)
- The time period you expect your markings to remain intact
- How you want or need to remove your marks (heat, water, eraser, brush, swab)
- Your budget
Who Uses Marking Pens?
Who uses marking pens? Everyone from expert quilters with decades of experience who consistently take home the best-in-show ribbon at the county fair or national quilt show to the beginner working on their first project can benefit from using a fabric marking tool.
Professional crafters may use permanent markers to sign their works, while fabric artists may use erasable options to design their freestyle projects. First-time quilters may mark every seam’s beginning and ending points to ensure their seams are perfectly matched and their design is flawless.
5 Reasons That There Isn’t Really One Quilt Marking Pen For Everything
Let’s look at some reasons you might need more than one marking tool in your quilting accessories toolbox.
#1. The fabric you choose will determine what kind of quilt marking pen will work best
When starting a new quilting project, it is important to consider what type of fabric you will be using. For example, if you are working with cotton fabric, you can use a water soluble or heat erasable pen. These pens can be easily removed with either water or heat.
However, if you are working with a mixed textile project or one made entirely of non-washable fabric, such as natural wool or vintage fabrics, you should never use markers that require water or heat to remove the marks.
In addition, markers that work well on quilting cotton may not work as well on thick pile, heavily napped, or high-loft fabrics.
#2. You May Need More Than One Color Marker To Complete Your Quilt Project
As a rule of thumb, markings are placed on the wrong side of your fabric. Lighter colored markers are easier to see on darker fabrics. Darker colors show up better on lighter fabrics. So if your quilt has both light and dark fabrics you might need to use different color markers.
Also, as we age, some colors become harder to distinguish from others. There is a natural progression that changes the way we see blues and yellows along the color spectrum. But, truthfully, even younger adults can see colors differently. It is good to test before you start your project so you can see which markers show up best. Be patient. This is a trial and error process.
#3. The Best Quilt Marking Pens For This Month’s Project May Not Be The Best Quilt Marking Pens For Next Month’s Project
Let’s’ say you are working on a Christmas table runner. You have chosen a simple pattern and quilting cotton with four contrasting Christmas fabrics. You need a pen to free-hand draw quilting lines on your top once the piecing is finished. For this project, a water soluble marking pen, or even a heat erasable pen would do the job.
But, if your next project is going to be a crazy quilt, made from Great Aunt Martha’s Civil War-era wedding dress and silk ties gleaned from Great Uncle Emmett’s armoire you inherited you would not want to toss the finished quilt in the washer or use an iron to get rid of marks. The point I want to make is that your marking pens must reflect your needs while your project is in progress and how you will take care of it once it is completed.
#4. Choose A Marking Pen With A Proper Tip
When choosing a fabric marker, it is important to consider what type of marks you will make with the tool. In sewing and quilting, we usually choose one with a fine tip. These markers are perfect for making thin, precise lines – essential for tasks like tracing patterns, drawing stitching and cutting lines, and outlining templates. They’re also great for embroidery designs and applique templates. On the other hand, if you’re just looking for a way to add some color to your fabric, a marker with a broader tip might be more suitable.
#5. Budgets Often Drive Choices
Historically, quilting was a necessity and not a choice for most women. The history of making quilts goes back to at least the 13th century – to medieval times. And, there is evidence that cultures throughout Europe, the Far East, Asia, Nordic countries and early American settlers used quilts to pass down history and keep their families warm. There are some who say “padded clothing” existed 5000 years ago.
Early quilters combined art and function. Today, many people consider quilting a hobby more than a necessity and some invest heavily in their craft. Others put themselves on a tight budget, whether by choice or by circumstance. So, if your budget means you can’t afford the most expensive quilt marking pen on the market – do not despair.
There are dozens of options out there, many under $5.00. Just use this guide to find the best one for you and your specific needs. Buying the best one for your needs means you get the best value. This means you will replace your markers less frequently. Which saves you money in the long run.
Now that I have given you some general information about comparing quilt marking pens, let’s take a closer look at each type of marking pens.
Heat Erasable Fabric Pens
Heat erasable fabric pens are a key component of my stash of quilt marking pens and markers. These pens come in a variety of colors, which I appreciate.
Now, let’s look at how heat erasable fabric pens work and consider a few pros and cons.
Heat erasable pens create fine, sharp lines. This allows you to mark your fabric, then erase the marks using heat from a hot iron. Some people even use a blow-dryer to remove the marks, though you won’t find that technique in the package instructions!
How can heat erase marks? Well, the marking medium is a combination of gel ink and thermo ink that interacts with heat to make the ink invisible. A rapid temperature change applied with a hot iron will cause a chemical change that renders the mark invisible.
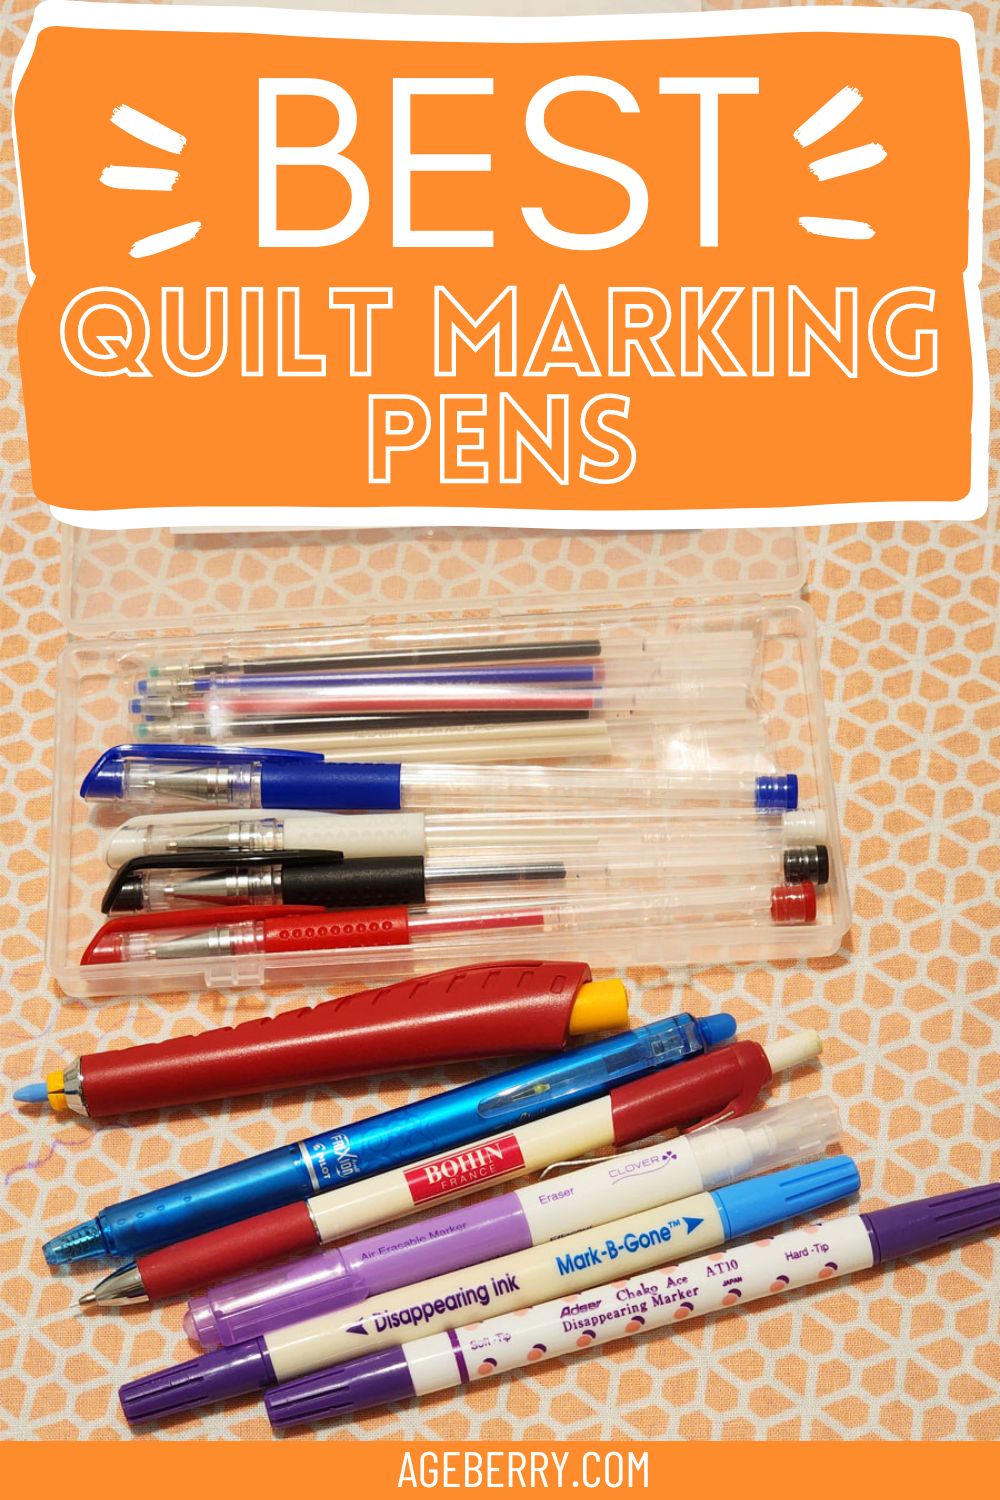
Note: Some of the links on this page are affiliate links. This means I will receive a commission if you order a product through one of my links. I only recommend products I believe in and use myself.
Ibotti Heat Erasable Pens and Madam Sew Gel Pens
First, we’ll take a look at two popular heat erasable pen options: the Ibotti Heat Erase Pens for fabric and the Madam Sew Gel Pens.

Pros:
- Both Ibotti Heat Erase Pens and Madam Sew Gel Pens have great reviews for writing smoothly and easily on a variety of fabrics.
- Both pens easily fit into the slots of precut quilting rulers
- Heat erasable pens are inexpensive, making them an affordable option.
- Easy to use and store
- Madam Sew gel pens offer a 100% no-questions-asked 60-day guarantee. If, for any reason, you don’t like them, get a refund!
Cons:
- Reviews vary in terms of how long these pens last. Some quilters report that the pens last as long as a year if the cap is replaced after each use. Others say they dry out quickly.
- Some people complain the white markers leave a “ghost” line after ironing. I noticed this too.
- These pens have a fairly small barrel, which might make them a bit harder to control for some.
- The white pens in particular don’t show up as well (but giving them a bit of time to set may make them a bit more visible)
- Sometimes getting the ink to flow can be tricky especially if you use a quilting ruler.
Heat Erasable Pilot Frixion Pens
Now, let’s take a look at my favorite heat erasable pens. These are my go-to heat erasable pens for most quilting work. I like the Pilot Frixion Pen even better than the two heat erasable fabric pens I mentioned above. In my experience, they always work, even though they weren’t designed for use on fabric.
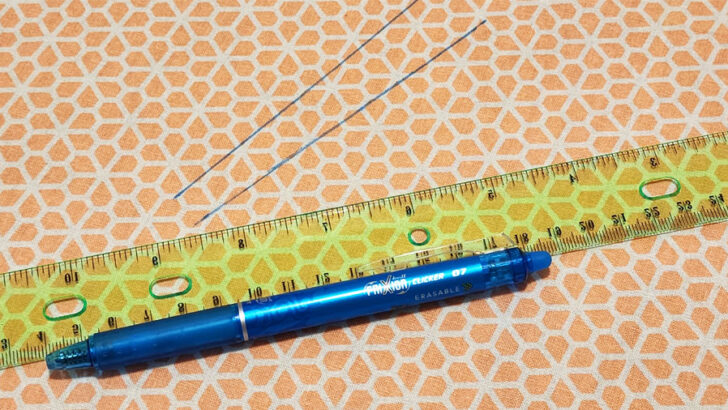
What’s different about this pen? It operates more like a traditional thin-tipped writing instrument than some specialty quilt markers. Plus, it works just like a retractable pencil, so you can write on paper, make notes on cloth or paper, and then erase.
You can also erase the line with a simple swipe of your iron and poof! No more marks.
While I love Frixion pens, there is one big caveat. In cases of dramatic drops in temperature, the marks may reappear. The easy way to remove them permanently is to use Amodex Ink & Stain Remover but do a test swatch first to ensure they won’t damage your fabric.
Erasable Fabric Pens
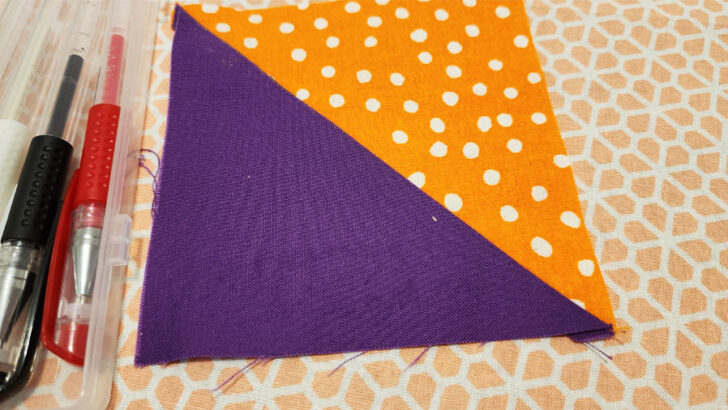
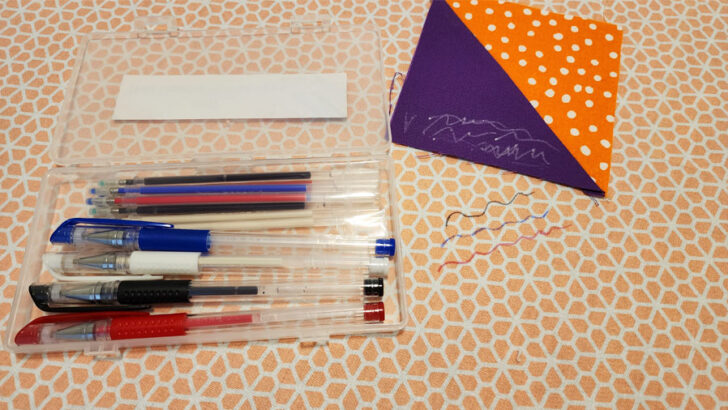
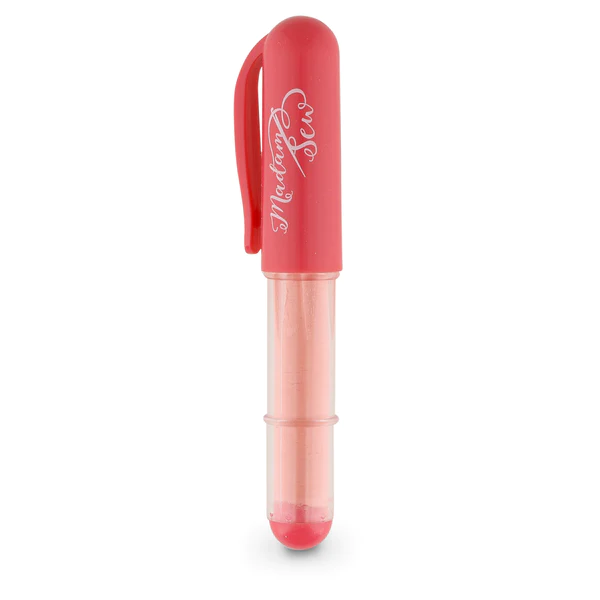
When it comes to marking pens, there’s one type that I love above all others: erasable pens. Erasable fabric pens are new, but they’re a great addition to your quilter’s toolkit! I have the Clover 5032 Purple Fine Point Marker with eraser. It works great for me!
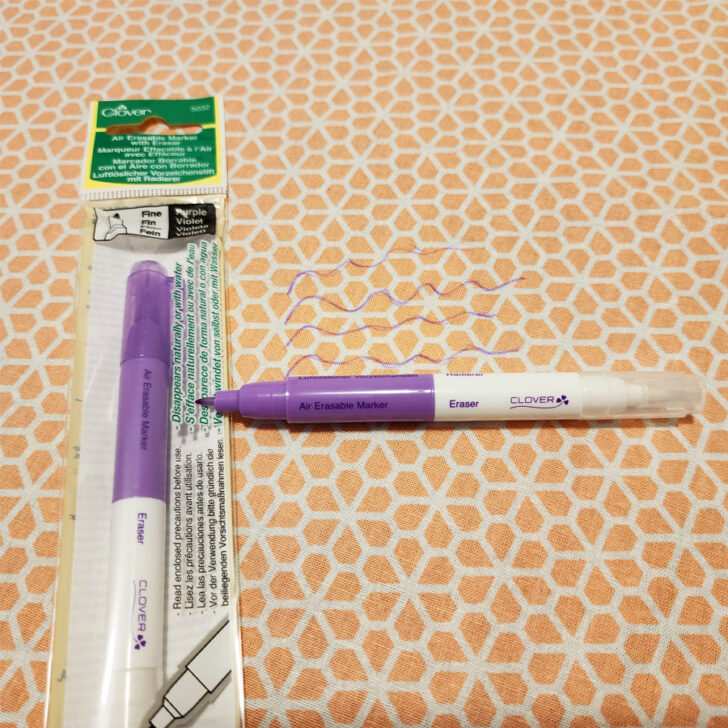
These pens have an attached eraser that you can use to immediately remove marks, or they’ll dissipate on their own over time. The fine point tip makes drawing curved or straight lines easy and smooth, so you can write letters, numbers, and shapes. These are great to guide embroidery or applique stitching.
Why I love this marking pen the most? Let me explain. When you’re marking fabric for stitching, you often need to iron the fabric afterwards to flatten the seams. This can be a problem if your marks are not heat-erasable, as they can get set into the fabric. I’ve had this happen before with air-erasable pens, which can be tricky to remove even with washing if you iron over them. But with an eraser pen, you can simply erase the marks before ironing.
Pros:
- A thicker barrel is easier on your hands than some thin-barrel markers
- Affordable for those on a budget
- Fine point for drawing smooth, thin lines
- Easy to use
- Great for short-term projects
Cons:
- Lines may start disappearing within a couple of hours, especially if you’re working in a very warm space.
- The purple color doesn’t show up well on dark fabrics.
- May not be suitable for use on some textured fabrics with a high loft or heavy nap.
Watch my short video to see how smoothly it writes and completely it erases!
You’ll notice that in the video I wrote on the right side of a smooth, light colored fabric. As versatile as this marker is, I have to admit that it isn’t the best tool for every project. For example, it would not have worked as well on a thick pile, heavy napped, or high-loft fabric.
Air Erasable Marking Pens
The Clover Air Erasable Marker Pen is another quilt marking tool that works well. It works in the same way as the Clover marking pen I described above, with a few subtle differences.
Some users say the marks can start to disappear within one hour. Whew! That means you’d better work fast–or prepare to mark small sections a little at a time. This marker also has an ultra-fine tip.
Pros:
- Perfect for precision marking in tight spaces
- Self-erasing (disappearing)
- Long-lasting point
- Budget-friendly
- Works well with most colors and types of fabric
- Larger size makes it easier to hold for people with arthritis
Cons:
- Some people report that heat sets the marks, while others say heat can temporarily restore the marks. Test on your own fabric.
- The temperature of your working space affects how long your marks stay visible.
- There’s no way to know for sure exactly how long marks will stay visible.
- While I haven’t experienced this, some reviewers say that the Clover Air Erasable Fabric pens dry out too quickly.
Best Disappearing Ink Pens for Quilt Marking
When looking for a disappearing ink pen for fabric, you’ve got lots of options; some of them are already listed above. But here we’re going to look at the best disappearing ink pen for quilt marking that I’ve found, with unique features that might be exactly what you’re looking for.
Dual Purpose Pen by Dritz
Dritz has a quilt marking pen that’s the perfect blend of water and air soluble technologies. The Dual Purpose Pen by Dritz has two unique features. One end has blue ink that wipes off easily with a damp cloth. The other end is loaded with an air and water-soluble purple ink.
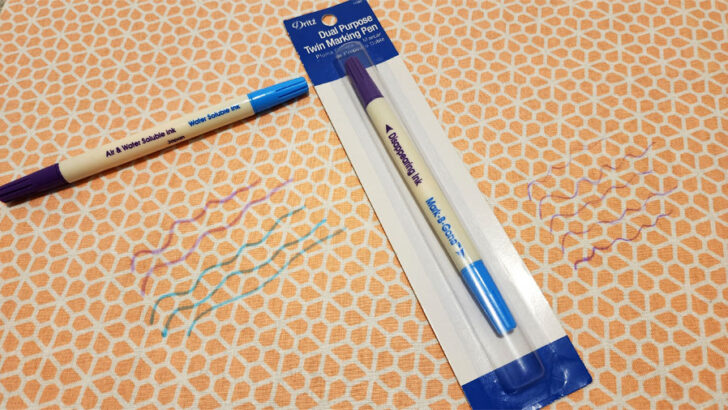
Pros:
- Multipurpose
- Fine lines
- Easy to remove marks
Cons:
- Not best for dark or busy fabrics.
- Not suitable for non-washable fabrics.
- Ironing and high temperatures may reactivate marks.
Water Soluble Fabric Markers for Sewing

One popular and very affordable option is the Wash-Out Fabric Markers by Eatsleepdoodle. These come in a set of 10 double-ended pens. Priced at just under $10, these are great value.
They’re also non-toxic, so they’re child-friendly, as well. These markers offer two felt tip sizes: a thin tip on one end, and a slightly thicker one on the other.
These markers are designed for any fabric that can be washed in warm, soapy water.
Pros:- Easy to use
- No bleeding
- Two point sizes
- Non-toxic
- Multiple colors
- Safe for children and pets
- Budget friendly
- Not suitable for wood, silk, or non-washable fabric.
- Colors may not show up on non-washable fabric.
- Some people report that colors are tougher to wash out if left to dry for more than 12 hours.
- Removing marks may take extra cleaning agents or repeated washings.
- Sometimes a lighter color mark and a darker color mark on the same project will wash out differently, depending on the brand of marker you chose.

There are many water-soluble markers for fabric that do not require a full wash. For example, Leonis offers a water-erasable fabric marking pen that erases with just a sponge or wet rag. This marker only comes in a medium blue, which shows up on most light to medium-colored fabrics.
Pros:- Easy to apply
- Removes with a damp rag or sponge
- Price is right! About $2 per marker
- Small size is harder for some people to use.
- If you don’t use enough water, the marks may return.
- The tip is larger than a standard fine, even though it is marketed as a fine-point marker. May not be the best quilt. marking pen for stitching lines due to the thickness of the point.
- Will not work on dark-colored fabric.
- Using cleaning agents may change the color of a mark and make it permanent.
Quilting Chalk Markers and Chalk Pencils for Fabric
Speaking of chalk, now is a great time to look at quilting chalk markers and chalk pencils for fabric projects! Madam Sew has a nice four-piece set of quilting chalk markers designed to eliminate the challenges of writing with a larger piece of loose chalk.
This could be another great option for the best fabric markers for the black fabric list!
Madam Sew quilting chalk markers distribute the exact amount of chalk needed to draw precise straight and curved lines, without having to stop and sharpen your tip or reload your handle. While the marker is not for silk or nylon fabrics, it does work with most fabrics, including jerseys and knits.
There are three ways to remove chalk marks from fabric: (1) with a damp cloth; (2) with a brush or your hand; or (3) washing in plain water, if your project allows.
The Madam Sew kit includes four color options: red, yellow, blue, and white.

I also like the Sewphee Chalk Marker 2-Pack. It comes with a yellow and white marker (another option to add to your best quilt marking pens for black fabric and busy fabrics wish list!). The Sewphee Chalk holder is fatter than a traditional pencil. It keeps your work space and your hands clean while working on your project.
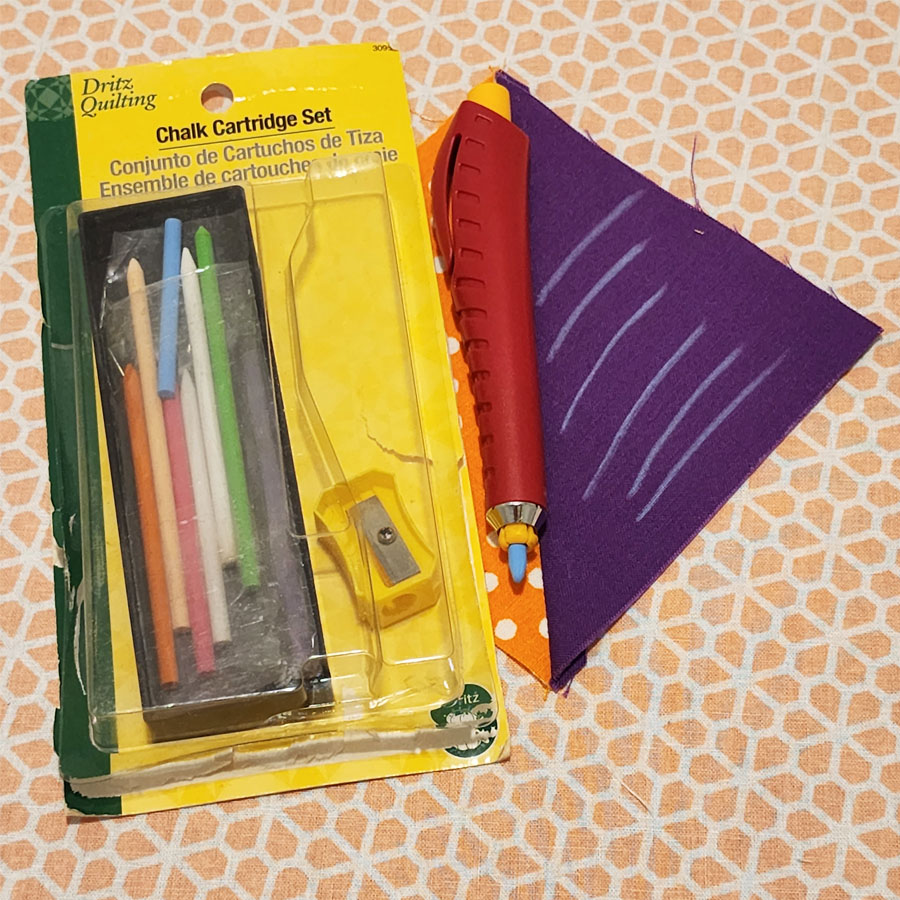
For a more traditional chalk pencil, I’d go with the Bohin Chalk Pencil Refillable Cartridge, 18 Piece Set, which includes a plastic holder, 16 chalk cartridges, and a sharpener.
Expect precision lines, a point that sharpens down quite fine, and excellent washability. For some, the price point might be a bit steep. Refills are available, though, which is a bonus!

The other product I recommend is a water-soluble chalk pencil set by Benecreat. The tailor chalk pencil tracing tool set includes 12 white chalk pencils.
Pros:- Value priced
- No sharpener required
- Works on felt, straw, and most fabrics
- Marks stay put until removed
- Not suitable for ultra-fine details
- Can not be used on very light fabrics
Finding Fabric Markers that Don’t Bleed – And a Few Things You Might Not Know
I recently chatted with a new acquaintance who told me she had a marking pen she really loved because it made a thin line and made precise marking easy. But she said she had a problem with the pen bleeding because her hands sweat when she quilts by hand. She told me that if she was doing any hand-stitching or tailor tacks near the marks, it made an awful mess. Eventually, she gave up using her favorite pen because the cleanup wasted so much time.
Have you ever had this issue? There are some things that might help prevent those ink bleeding issues.
Bleeding issues stem from a poor quality marker, a poor quality fabric, or a poor fabric/marker combination. Bleeding can also be caused by the way you use your fabric marker. For example, hesitating can cause the fabric to absorb more ink than it would if you moved it smoothly and quickly.
Tips:
- Don’t rest your pen on the fabric if you need to pause.
- Wash, dry, and iron fabric before using fabric markers, especially permanent marking pens.
- Test pen choices with fabric choices before starting any project.
- Choose a tip size appropriate for your needs.
The Best Permanent Markers For Quilts & Fabrics Choices
We talked earlier about problems with pens that bleed, and how fabric choices can be the source of the problem. I prefer organic fibers. Some of you may prefer traditional domestic, while others insist on Pima’s long-fiber blends for your quilt backing and labels.
So, after some research, here are three permanent fabric marking pens for quilts and fabric options that others have said work well to reduce bleeding and smears, even after multiple washings.
- Dritz 3087 The Fine Line Permanent Fabric Marker, Black pairs very well with quilting cotton – there was barely any fade after multiple washings and the letters held their shape and bold color.
- The Pentel Arts Roller for Fabric is a black permanent quilt marker that does not bleed and works well with almost every fabric type and texture. But, it has a bold point. So, you trade delicate styling for legacy.
- Tulip Permanent Nontoxic Fabric Markers, 20 Pack, Multicolor
I know this post has been a long one! I hope this guide has given you some helpful tips and guidance as you look for the best quilt marking pens for your own collection. Finding the best markers for your projects is truly a game-changer!
What do you think? Are you ready to go out and try some new quilt marking pens? Do you already have a favorite? Leave me a comment and let me know about your experiences.
Did you find this tutorial helpful? If so, save this pin (see below) on your sewing board so you can come to this tutorial later when you need this information on the best quilt marking pens, and follow me on Pinterest for more tips, tutorials, and inspiration!
latest posts
- What Do You Call a Person Who Sews? I Asked My Readers and Got 1,408 Opinions
- DIY Round Purse: PDF Sewing Pattern and Detailed Instructions
- Mini Wonder Clips By Clover: Useful Sewing Tool Or Just Another Notion?
- Non-Slip Grips For Quilting Rulers: A Small Notion With A Useful Job
- Fabric Eraser for Sewing: What It Removes and When to Use It
- What Is The Best Thread For Sewing Machine Projects? Let’s Find Out!
- Butterfly Quilt Block Tutorial – Foundation Paper Piecing
- How To Sew Quilt Squares So The Corners Match
- Sewing With Fork Pins: How They Help With Pattern Matching, Slippery Fabric, And Seams