DIY curtains ideas {for living room and bedrooms}
In this article, I am presenting some DIY curtains ideas for your home. A nice curtain will make a huge difference in a room, no matter if it is a new or old home. An empty window always gives me the feeling of “transient”, “temporary”, and “unfinished”, so I have always attempted to cover my windows with nice curtains and I gave the idea a lot of thought.
This (curtains sewing) is a subject that I didn’t deal with before on this site but I think it is a very worthy subject.
Do you want or have you ever wanted nice curtains, like the ones in the images below? Certainly, you did, I know I do! And you probably thought as I did in the beginning, that they are out of reach because you need a designer and professional installation. I will make a bold statement here: you can do this, and better, in-house with your sewing machine, and the hardware for installation is really cheap and not very difficult to install.
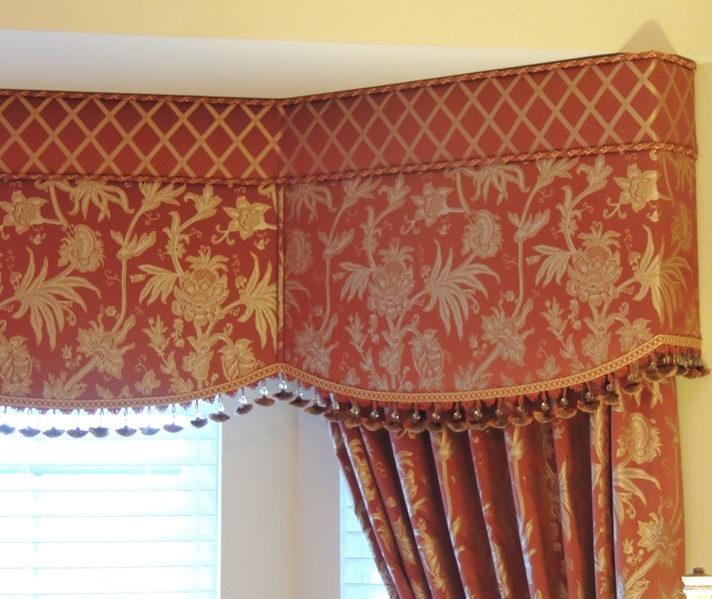
The images below are taken from http://brewerdrapery.com. They are located in St. Louis, MO and I am not affiliated with them, I just liked the curtains!
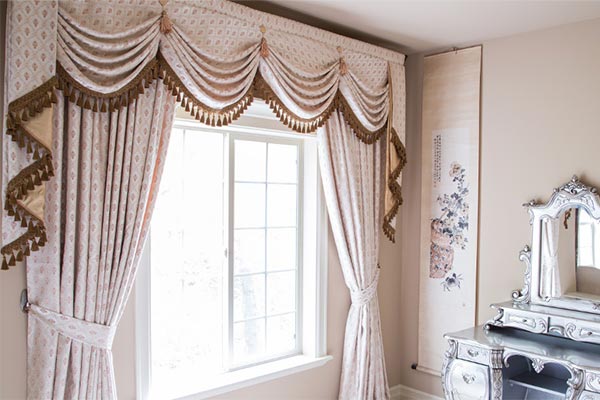
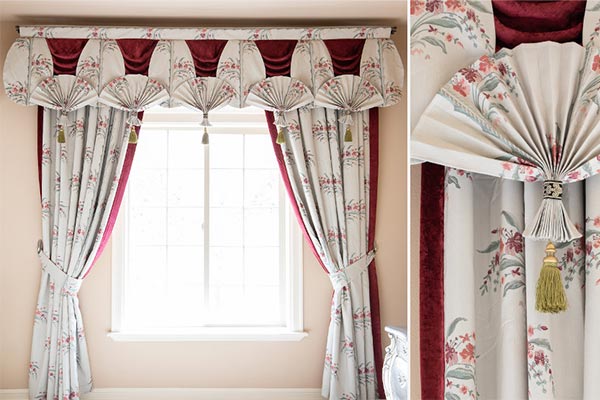
Here are some other very nice designs, from celuce.com (located in Seattle, WA). They sell ready-made curtains. Beautiful! But not cheap!
If you are in the US, by spending a fair amount of money you can order nice curtains. But what if you can’t afford to? I remember when we bought our first house in North America we ended up with some empty rooms, there was very little left even for furniture.
And what are you going to do if you don’t live in a place where drapery shops are readily available? And it doesn’t need to be Nome, AK, where you can only go by plane – I can tell you that in Canada the selection (for online ordering) is very limited. Importing from the US, while possible, is quite expensive so in the end if you can’t afford custom design prices, DIY (do it yourself is the only solution.
But you know what? We have the tools AND the knowledge to do it ourselves! I will present in a series of articles how to design and build such beautiful curtains. Making new curtains has become a challenge and a pleasure for me!
This article is only an introduction to the series showing what can be done with a little effort and without much money. If it will prove to be interesting, please drop me a message or leave a comment, and I will write more on the subject.
If this is of interest, the first article will be about the support system for curtains.
Curtains are heavy and really need good support, or in time they will sag. I personally never liked the rod system, it may be simple but I don’t find it beautiful mostly because the rods are visible. My curtains always have at least two rods, one for the transparent lace and the second for the heavy drapery and valance, and in the images below you will notice the rods are not visible at all!
I have roped my husband to write about the rods and supports for the curtains and their installation. But for the rest of the articles (actual how-to) I am not sure exactly of the schedule for publishing, so please accept my apologies in advance if the wait may be long.
When designing curtains I had the following requirements in mind:
- They have to be beautiful (I will need to look at them every day for many years!)
- They have to be affordable
- I must be able to create them with my existing tools
- The hardware for support must be built without professional help
- The curtains need two layers, one for privacy but transparent (lace) and the other opaque
- The curtains must be able to completely cover the window and block the sun at will
- The curtains must be retractable. Manual action is enough.
I didn’t choose to select an automatic retraction system (be it string, chain, rod, whatever) for two reasons:
- I do not expect to need to move the curtains often
- such systems fail after a while creating more problems than they solve.
I don’t want to replace or work again on a window dressing for many years. I had previously had one such window and unfortunately, no matter what I did, the string I used was breaking constantly requiring attention. Also, it is a LOT more work in designing the rods system.
Below are some of my creations, I hope these will inspire and give you a new perspective on window dressing. Virtually all self-help articles I could find only deal with simple creations but it’s not really much more complicated to create a unique design specific to each window and, more importantly, it’s within the means of someone who has basic sewing skills and patience.
One home I previously had (New Jersey) was a two-story building and the windows were relatively small (less than 60” high, about 32” wide) with the exception of a patio door which was of course the regular 72” wide and 80” high.

There was no corner window and the walls were all drywall over wood frame making the installation relatively easy. Here are some images:
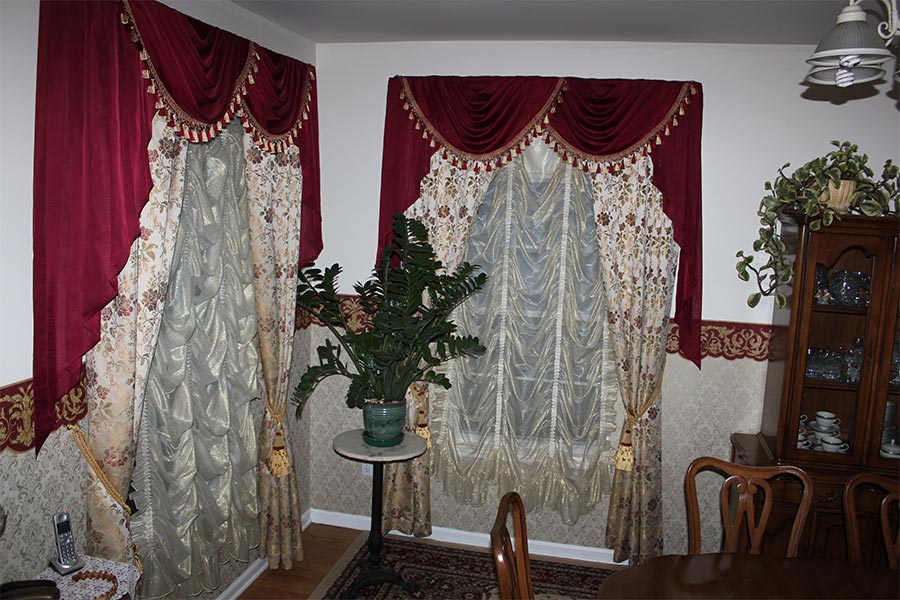
Curtains in my NJ home
Dining room. The red, beige, and gold were a perfect combination for the wallpaper and border.

At night though, in artificial light, the tone of the room and curtains was different. Also, the transparent lace layer can be seen in much better detail:
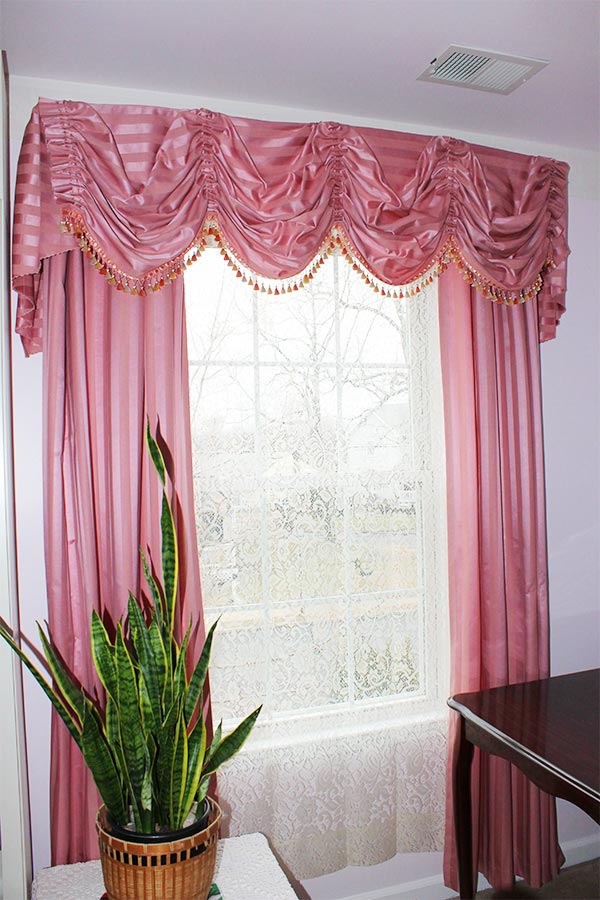
This is my sewing room, where the color theme was – surprise! – pink!

My bedroom. Lacking a formal library like the ones you see in movies, we had to find a place for our books, and the bedroom was it! The curtain here was an absolute must, the windows were facing East and in the summer unless you want to wake up at 5 am, you need the curtains.
I know, I was much younger here!

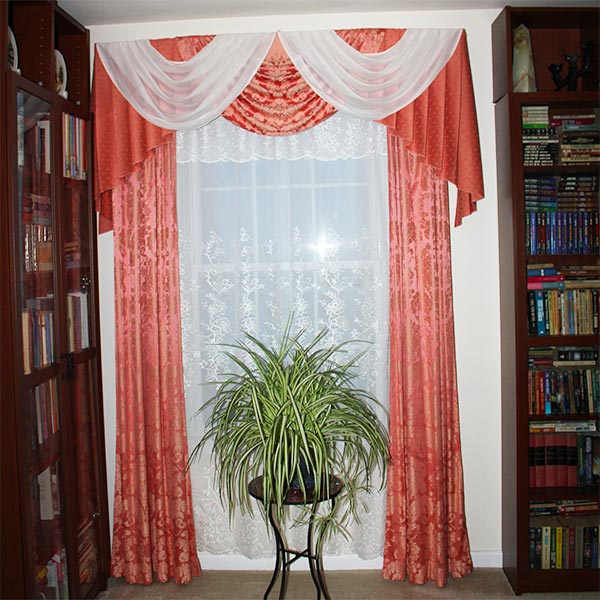
This is the guest bedroom which was also used as an office.

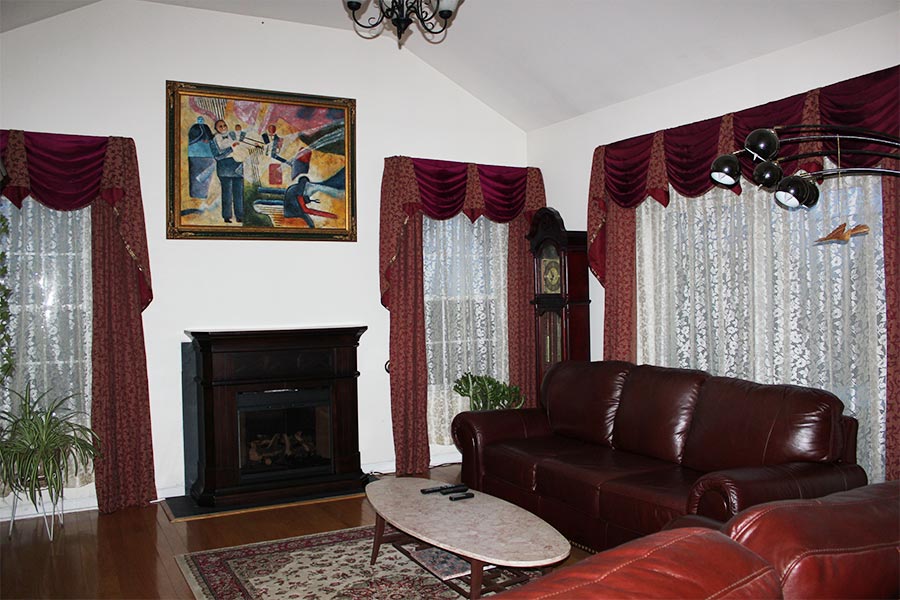
Living room. There are two windows on one wall (with a real fireplace between) and a patio door on the other wall. Unfortunately, the real fireplace proved to be poor construction and cracked after one use so we were afraid to use it again and replaced it with a fake one as you can see in the images.

Curtains in my home in Florida
Recently we moved to Florida, the paradise of all retirees and the home of many tourist attractions (Miami Beach, Disneyland, Florida Keys). Of course, what sold us was not the tourism, but the weather and the calm waters of the Gulf – unlike the Atlantic, there are almost no waves in the Gulf. And also unlike on the Atlantic side, sharks are not really an issue.

Our home is now a different type than the one in NJ: it is a cement block bungalow with high ceilings meaning that the windows are very high (over 70”) and as you can see in the images I have one corner window which needed special attention.
I will only show as an example the curtains in my sewing rooms.
I have decided to take the bull by the horns and I started with the most difficult – in my opinion – window, the corner one, visible in the image above. I also had another reason, that is the window of my first sewing room in the new home and I am spending far more time there than in any other room of the house. The building of my sewing rooms is described in my article IKEA Sewing Room Ideas for small spaces, I suggest giving it a try if you are not familiar with it – you don’t need to spend a fortune on arranging the sewing room.
The result is below. The rods were a challenge, but as you can see it was met successfully.
You will of course notice the pink colors – what can I say, pink is for girls!

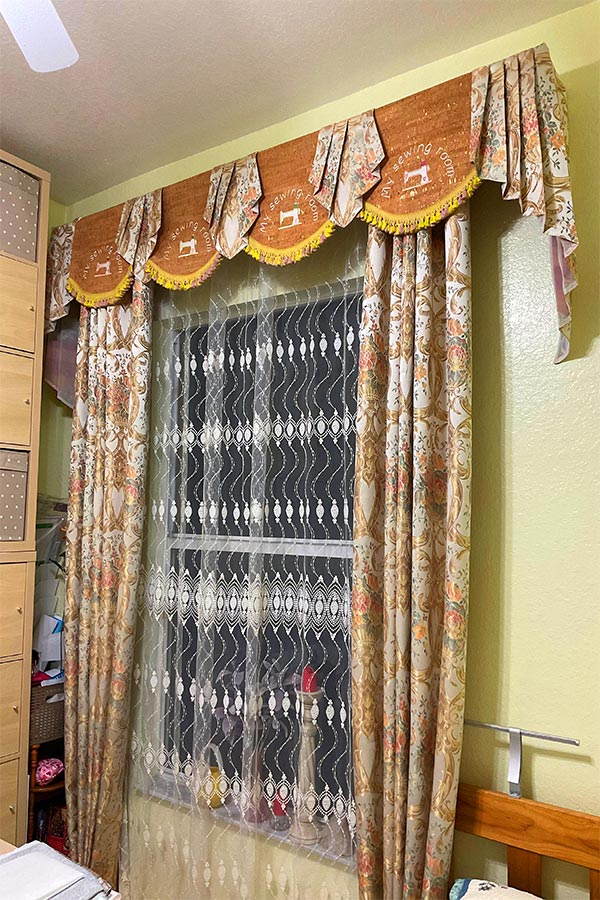
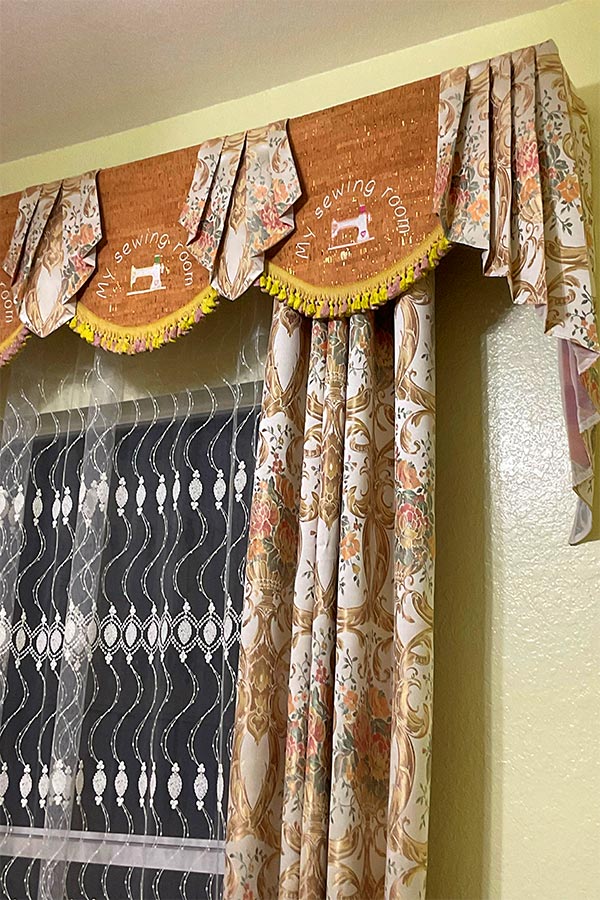
The next window I dealt with was my “other” sewing room; having a home for only me and my husband (kids are visiting only now and then), I finally have the luxury of space! The new window is double in size of the first but it is also very tall. Also, the color palette is now more towards beige rather than pink, so I needed a different arrangement. The result is in the images below.
I used this curtain also as a test for making embroidery on cork fabric, visible in the detailed image. Works like a charm!
So come to my site for the next installments of the curtain-building journey! The next article on this subject will deal with the creation and installation of the hardware to support the curtains which is not really an impossible task given some elbow grease and creativity.
Especially since I don’t have to do this myself. Clever, right?
Did you find this tutorial helpful? If so, save this pin (see below) on your sewing board so you can come to this tutorial later when you are ready to make DIY curtains, and follow me on Pinterest for more tips, tutorials, and inspiration!

latest posts
- What Do You Call a Person Who Sews? I Asked My Readers and Got 1,408 Opinions
- DIY Round Purse: PDF Sewing Pattern and Detailed Instructions
- Mini Wonder Clips By Clover: Useful Sewing Tool Or Just Another Notion?
- Non-Slip Grips For Quilting Rulers: A Small Notion With A Useful Job
- Fabric Eraser for Sewing: What It Removes and When to Use It
- What Is The Best Thread For Sewing Machine Projects? Let’s Find Out!
- Butterfly Quilt Block Tutorial – Foundation Paper Piecing
- How To Sew Quilt Squares So The Corners Match
- Sewing With Fork Pins: How They Help With Pattern Matching, Slippery Fabric, And Seams