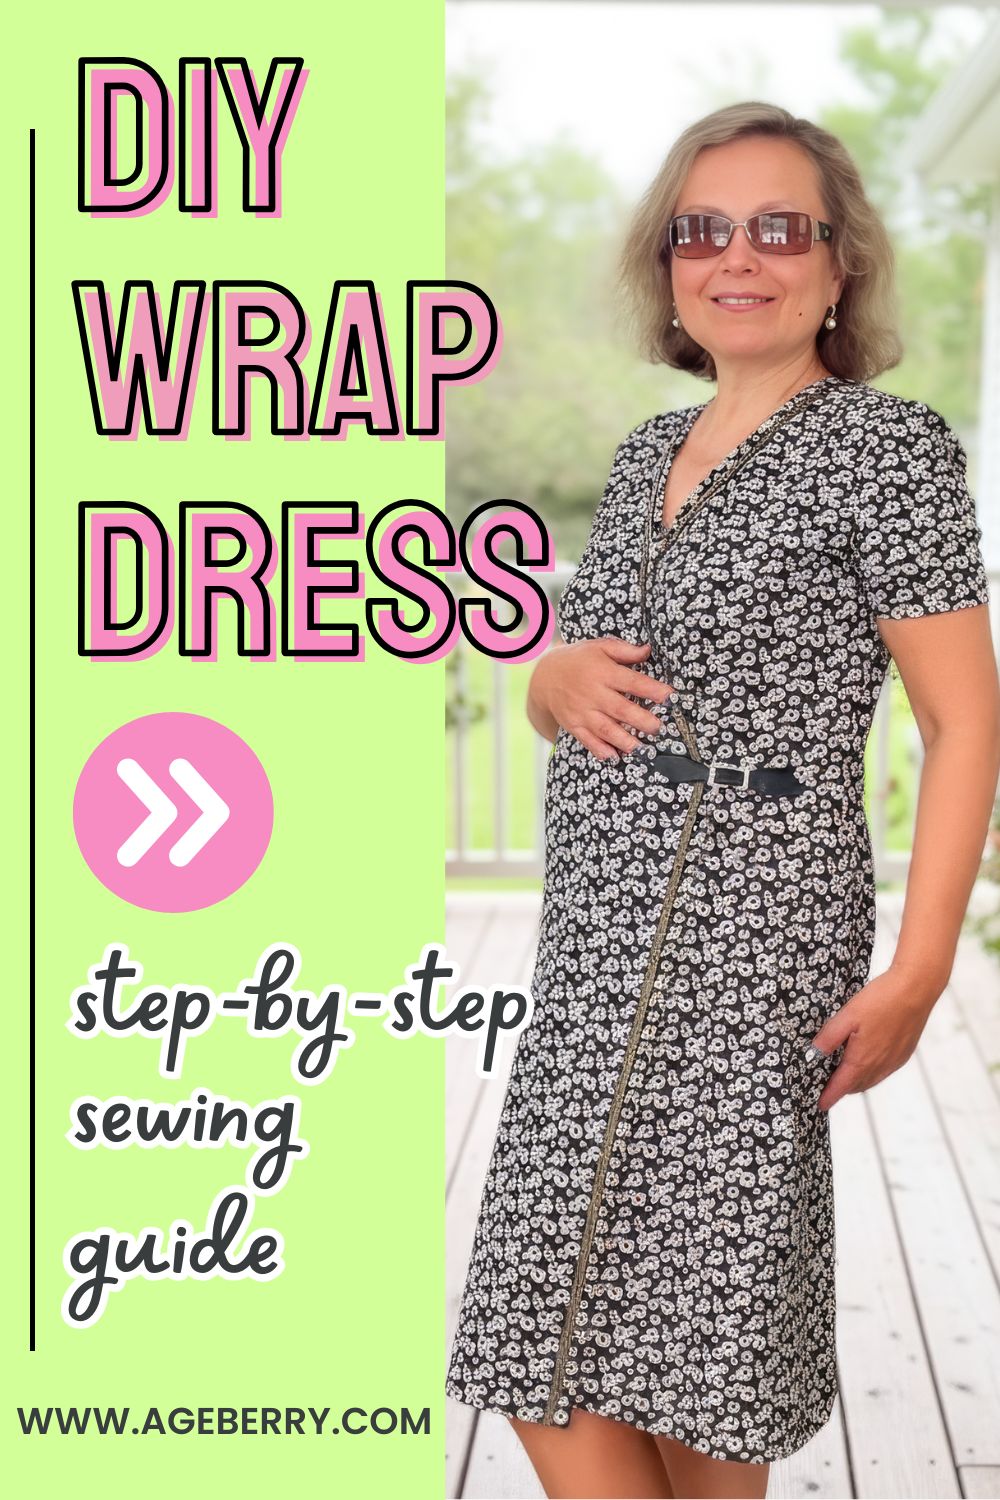
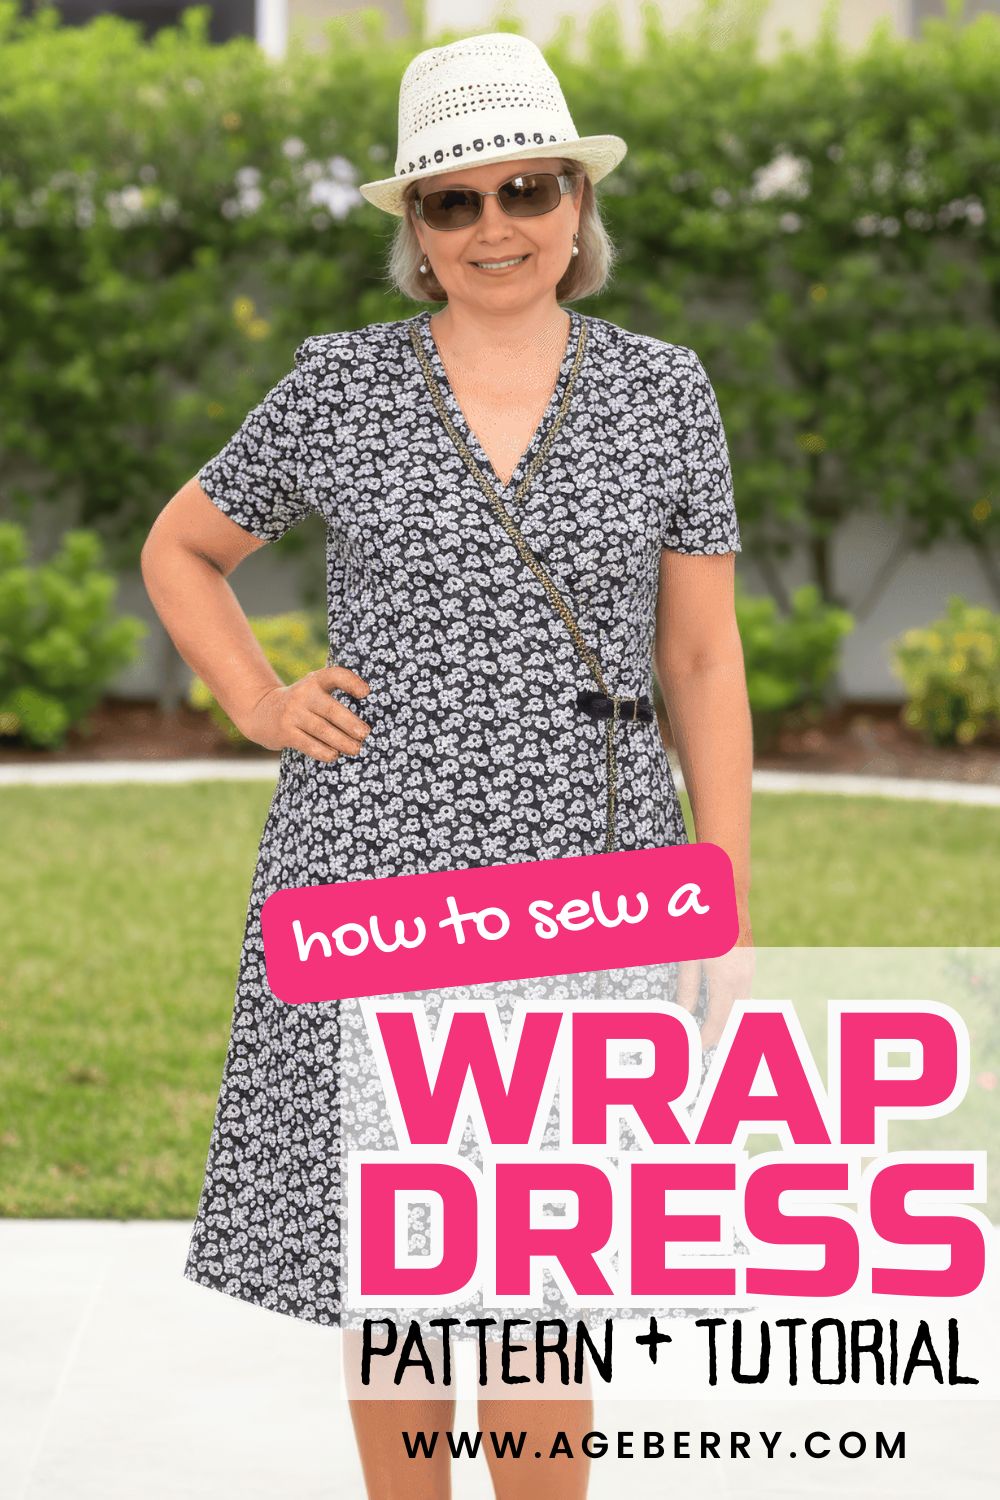
DIY Wrap Dress | Step-by-step Sewing Tutorial
In this sewing tutorial, I will show you how to sew a wrap dress from knit fabric step-by-step. You will not need to buy a pattern for the wrap dress because I will also show you how to draft a pattern for the wrap dress using your own measurements.
So, what is covered in this tutorial?
- What is a wrap dress?
- What you’ll need for sewing the wrap dress
- How to cut fabric for the wrap dress
- How to sew the wrap dress step-by-step
- Step 1 – sewing side and shoulder seams
- Step 2 – sewing the facing to the wrap dress
- Step 3 – attaching the trims to the dress
- Step 4 – setting-in sleeves into the knit wrap dress
- Step 5 – hemming the dress
- Step 6 – finishing the wrap dress
Attention! If you like the video format, at the bottom of this post, look for a YouTube video version where there is a step-by-step tutorial on the DIY wrap dress. For a more complete picture, I recommend exploring both versions.
What is a wrap dress?
Ever notice that the best fitting clothes you have are robes and wrap dressing gowns? This is what fashion designers noticed when they began to create elegant dresses based on such patterns. And now wrap dresses have become firmly established in the wardrobes of fashionistas all over the world.
And the purpose of it depends on the choice of fabric and accessories. Now a wrap dress can be an office or weekend outfit, a beach dress, and even a cocktail dress. Sleek, sexy, and inexpensive, the wrap dress, made with a simple pattern, met all these requirements. Presented on the podium in 70-s, it has not left it to this day.
A free cut of the wrap dress that does not hinder movement, the absence of zippers and buttons (and buttonholes of course), the versatility of the style is loved by women all over the world. Wrap dresses are happily worn in Moscow and London, in New York and Beijing.
The good thing about the wrap dress is that it can be adjusted to any taste and shape: you can make it with short sleeves, long sleeves, three-quarter sleeves, or no sleeves at all. There are also differences in the length and style of the skirt – narrow, straight, flared, circle, short, or long. A wrap dress is a great choice for those who are overweight and can successfully hide the tummy and accentuate the neckline.
So, we love wrap dresses for the following features:
- Easy of use – easy to put on and take off
- Look stylish and elegant
- Don’t cause discomfort when you wear them
- Suitable for all women regardless of body type, height, and age
- Visually emphasize the merits and hide figure flaws
- Versatility – can be used in everyday life, for business meetings, special events
- In most cases, they don’t have uncomfortable buttons or zippers
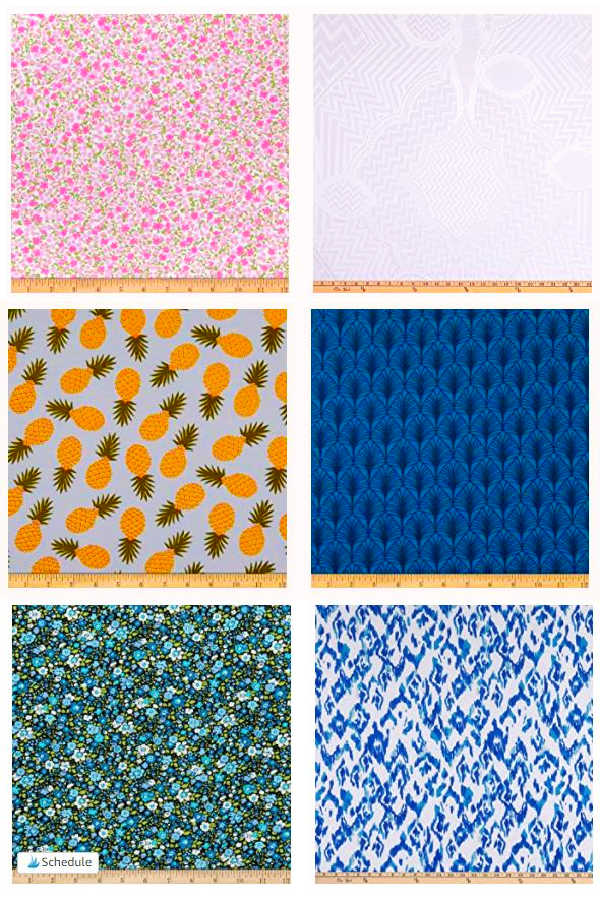
For my wrap dress, I used lightweight KNIT fabric a 100% cotton jersey.
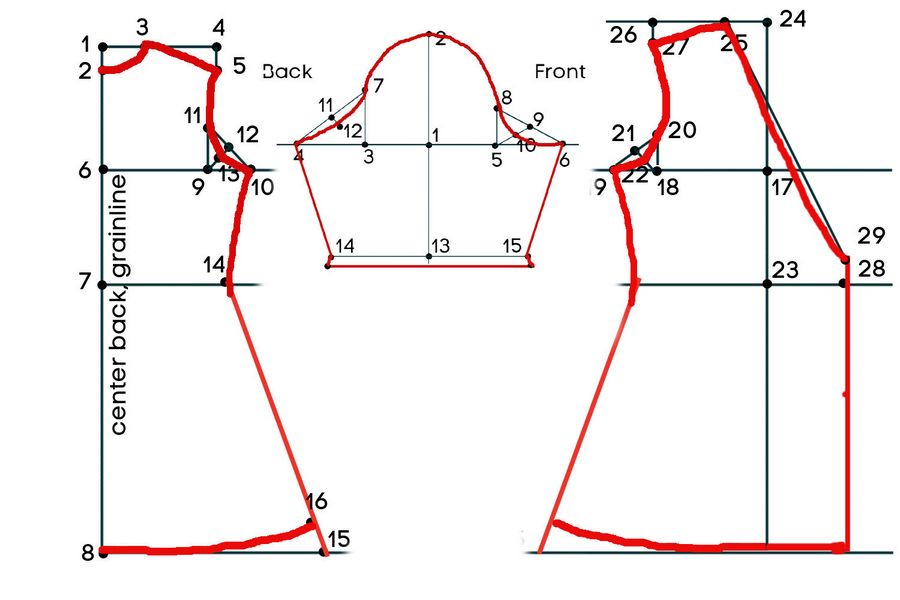
How to make a sewing pattern for the wrap dress
Creating a pattern for the wrap dress is a very important step in making the dress.
This pattern is specifically made for KNIT FABRIC.
You can read detailed step-by-step instructions in a different tutorial – DIY Wrap Dress Pattern | How To Draft A Pattern For A Wrap Dress From Knit Fabric
It might seem complicated but it’s not hard to draft a pattern using your own measurements.
Note: Some of the links on this page are affiliate links. This means I will receive a commission if you order a product through one of my links. I only recommend products I believe in and use myself.
What you’ll need for the wrap dress
Fabric – approximately 3 yards –
lightweight/medium weight knit fabric. A Cotton jersey is what I used. You can’t use woven fabric for this wrap dress.
Choosing the right fabric is another important step in learning how to make a DIY wrap dress. The ideal option is a cotton jersey:
- it’s stretchy, very soft, drapes well,
- don’t pill over time,
- doesn’t require ironing or special washing condition,
- perfectly emphasizes the curves of the figure,
- easy to sew with a serger,
- easy to wear.
✅ Related tutorial: Different Types of Knit Fabrics According To Fiber Content Plus Brands of Knits Manufacturers
I see that cotton jersey fabric is very popular on Amazon. You can easily find something you really like for the wrap dress.
This pattern is designed for knit fabrics only, and other options (other than cotton jersey I mean) are rayon or polyester jersey, ITY knits, and lightweight Ponte.
✅ Related tutorial: All About Modern Types Of Knit Fabric
Interfacing – knit interfacing
It’s important to choose the proper type of interfacing for your knit wrap dress because your interfacing needs to match your fabric: it should add stability to the fabric without changing the quality of the fabric.
I use very lightweight thin fusible knit interfacing which has a certain amount of stretch in it. It does a great job of stabilizing the knit fabric. This tricot interfacing is delicate, semi-transparent, and has a crosswise stretch and lengthwise stability. It doesn’t add any weight or bulk to the knit fabric.
✅ Related tutorial: How To Use Fusible Interfacing (Video + Tips And Tricks)
Serger –
I stitch all seams of the wrap dress by serger.
Don’t have a serger? Are you wondering if a serger would take your sewing to the next level? Here’s your serger buying guide to selecting the best serger to buy for beginners.
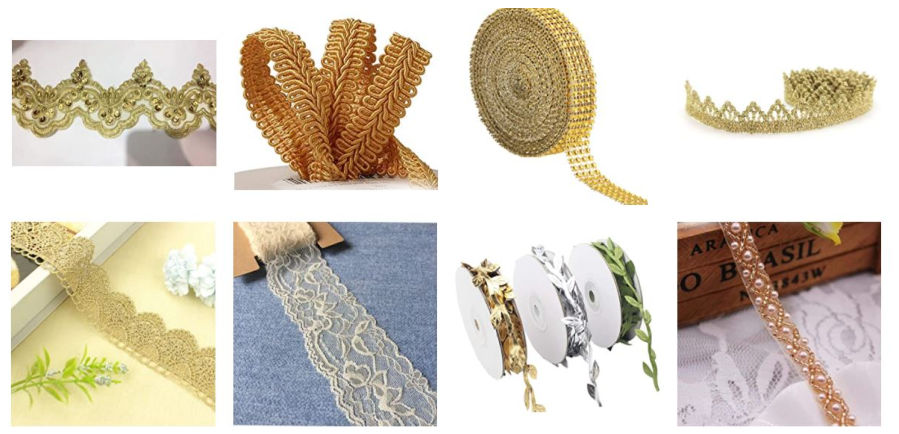
Piece of ribbon for the front of the dress – 3 yards
Regular sewing notions:
you will need a small button, a special stretch or ballpoint needle for your serger, coordinating thread, etc.
✅ Related tutorial: The Ultimate Guide to Stretch Sewing Machine Needles
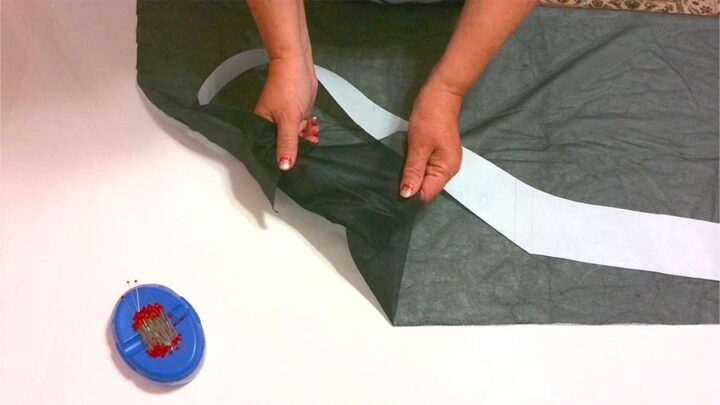
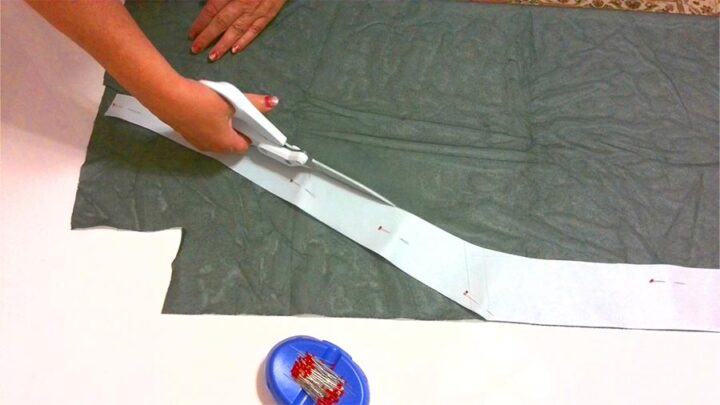
How to cut fabric for the wrap dress
Prewash the fabric of your choice and press. If you want to use trims prewash them too.
Fold the fabric in half, the edges must be correctly aligned and the center back line on the pattern must be aligned with the fabric fold. Pin the back pattern.
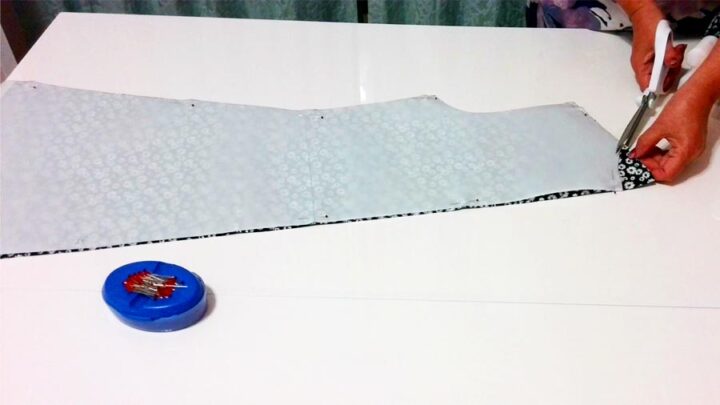
The front pieces of the dress have to be cut on a single layer of fabric without folding. Try to spread them over the fabric so that as little waste as possible remains. Cut also sleeves and facing pieces.
Sometimes I use my rotary cutter for cutting knit fabric but in this case, the pattern pieces are big so I use dressmaker shears.
Don’t forget to clip notches. In my case, it’s the center back at the neckline and the waistline. Make sure you don’t cut too far into your seam allowance – cut only ⅛” or even less.
I also made a notch at the top of the sleeve cap, this notch matches a shoulder seam on the dress.
Cut interfacing for the dress: 2 front facings and a neck facing.
Fuse the pattern pieces cut from interfacing to the wrong side of their corresponding fabric pieces.
If you need to know more about how to use interfacing I have a detailed tutorial on my site, check it out.
How to sew the wrap dress step-by-step
I have broken down the sewing process into a few easy (really easy!) steps.
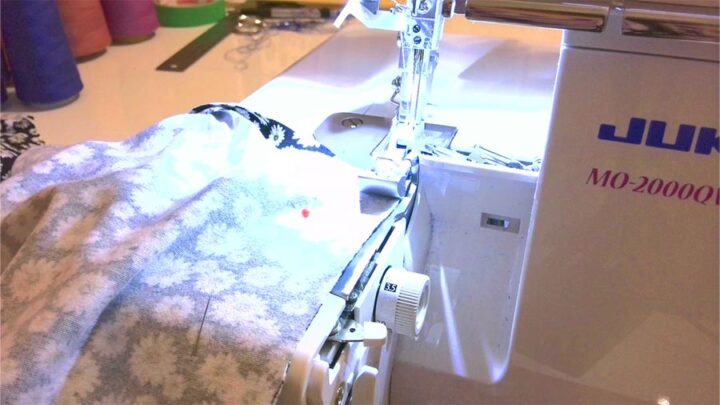
It’s better to sew the dress using a serger.
I am using a 4 thread 2 needle serger stitch.
Step 1
Sewing side and shoulder seams of the wrap dress, sleeve seams
Start with side and shoulder seams. Pin the two front pieces to the back piece at the side seams and shoulders with right sides together, matching the edges and notches.
As I am stitching by serger I insert pins parallel to the edges so that the serger presser foot has space to go.
Pin the side seams of sleeves.
Thread your serger with coordinating threads. Test the stitch on scrap fabric first and make adjustments if necessary.
Next – stitch side and shoulder seams, and sleeve seams.
When sewing sleeve seams start from the hem towards the underarm, so if you have any discrepancies they will go to the underarm edge and you can correct them later when sewing the sleeve onto the dress.
When I use 4 thread 2 needle stitch I don’t trim the edge as I stitch it.
If you would like to know more about using a serger I have a very popular ebook Serger Success Kit.
Now you can try the dress on and check the fit. At this point, you can adjust the center back and make the back seam if necessary (check my pattern-making instructions for this).
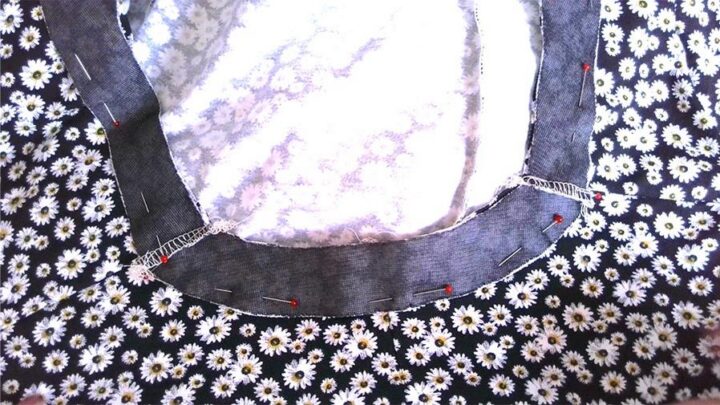
Step 2
Sewing the facing to the wrap dress
The facing is a very important component of the wrap dress. The facing is used for stabilizing and shaping the edges, giving it a finished appearance to what would otherwise look like raw fabric edges. The facing helps maintain the desired design of your wrap dress, but only if you know how to sew facings correctly!
Stitch interfaced front-facing pieces with the back-facing together. Finish the outer edge of the wrap dress facing by serger.
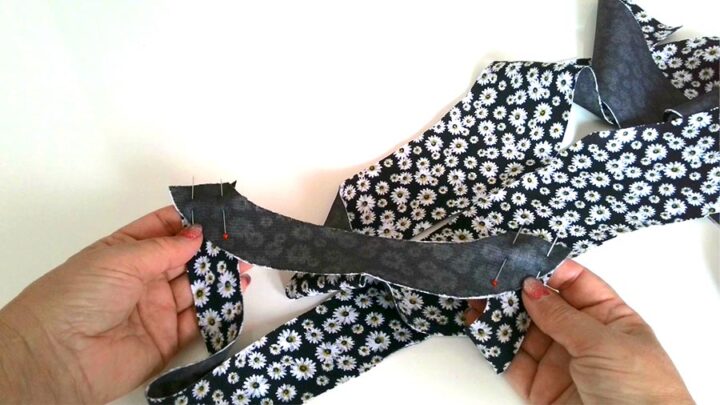
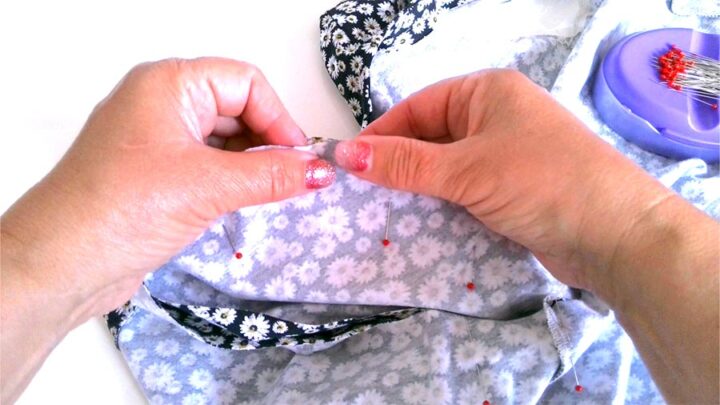
Pin the unfinished edge of the facing to the front and neck edges of the dress with the right sides together, matching the edges and shoulder seams. Make sure you don’t stretch the edges. Stitch the facing to the dress.
Turn the entire facing to the inside of the wrap dress and press the seam slightly to the wrong side so it won’t show on the right side of the dress.
✅ Related tutorial: Shaped facing: a detailed tutorial on how to sew facing to a curved neckline
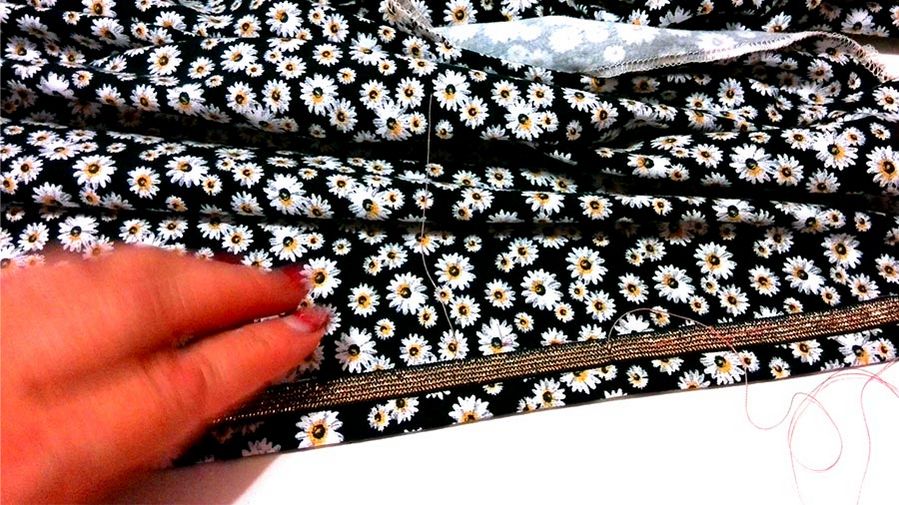
Step 3
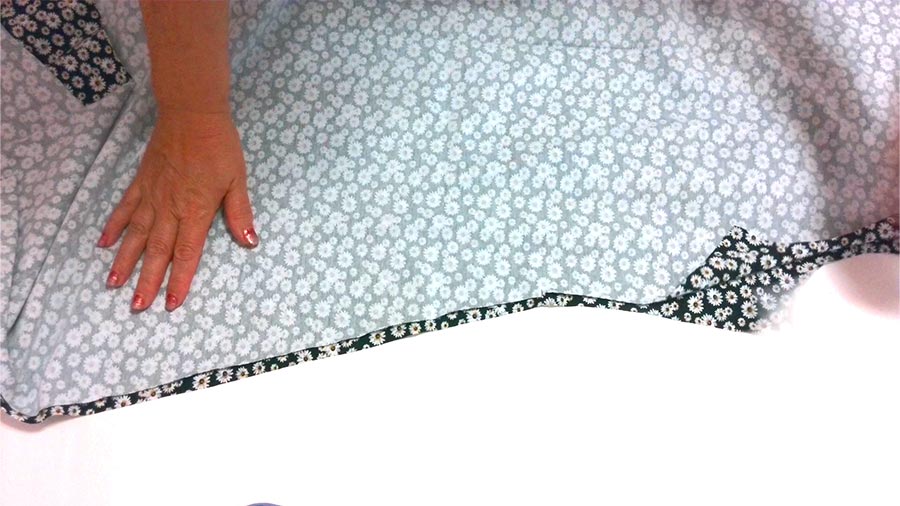
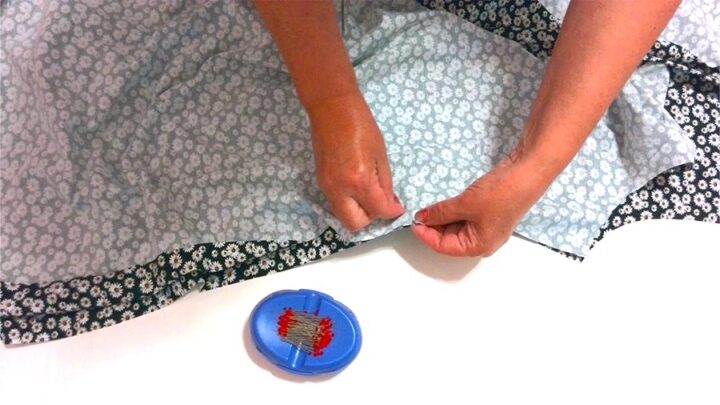
Attaching the trims to the wrap dress (optional)
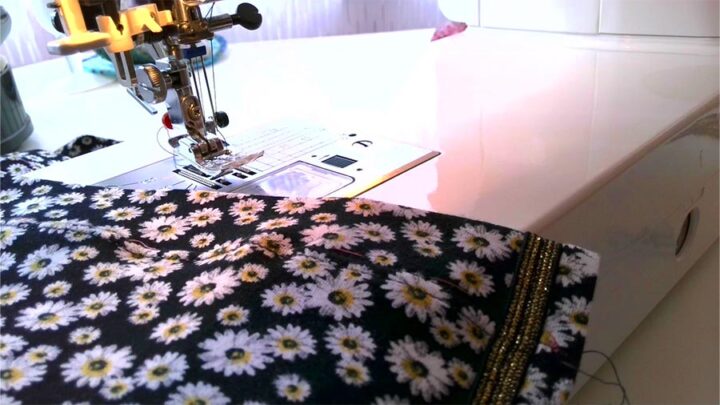
The best way to make the wrap dress look more unique is with trims. I love this technique because it’s so simple, but also has such a big impact on the look of your dress!
Turn the dress to the right side and baste the ribbon to the front. Topstitch the dress over the ribbon.
Step 4
Setting in sleeves into the knit wrap dress
The next step is setting in the sleeves into the knit wrap dress.
So, here I have a one-piece sleeve. The sleeve seam has been sewn together.

For this wrap dress, I didn’t draft the sleeves larger than the armholes of the dress because I am making the dress from 4-way stretch knit fabric. And because of this, I don’t need to gather the sleeve to fit the size of the armhole (as we normally do when inserting sleeves in woven garments).
First, I place the dress and sleeve RIGHT side facing out. I need to make sure that I am setting in the sleeve into the correct armhole: the right sleeve into the right armhole and the left sleeve into the left armhole. How will we know this? The sleeve is cut more on the front side.
Start pinning the sleeve by matching the underarm seams in the dress and sleeve. Work with the armhole facing you. Check out the corresponding YouTube tutorial for a detailed view of the process.
Next match the notch at the top of the sleeve cap with the shoulder seam and pin.
Pin continuously until the whole sleeve is pinned to the dress. Make sure you are matching the edges of the fabric from the armhole and the sleeve together.
✅ Related tutorial: Types of sewing pins and their uses: all you need to know about straight pins for sewing
I prefer to baste the sleeve into the dress before stitching it by serger. Use a running stitch about 1/4″ in length and baste very close to the stitching line. Seam allowances are ¼” for the sleeves too.
Do the same with another sleeve.
Stitch the sleeves and lightly press the seam allowances towards the sleeves.
Step 5
Hemming the wrap dress
There are many ways to hem a knit wrap dress: you can sew a machine blind hem on the sleeve and dress hems, you can use a coverstitch machine to hem, you can use a twin needle to sew the hem, etc.
✅ Related tutorial: Coverstitch vs. serger
I am going to use a twin needle for this wrap dress.
I have a detailed tutorial on my site on how to sew with a twin needle. Check it out if you want to make sure you can sew with a twin needle without tunneling.
✅ Related tutorial: How To Hem Knit Fabric
Step 6
Finishing the wrap dress
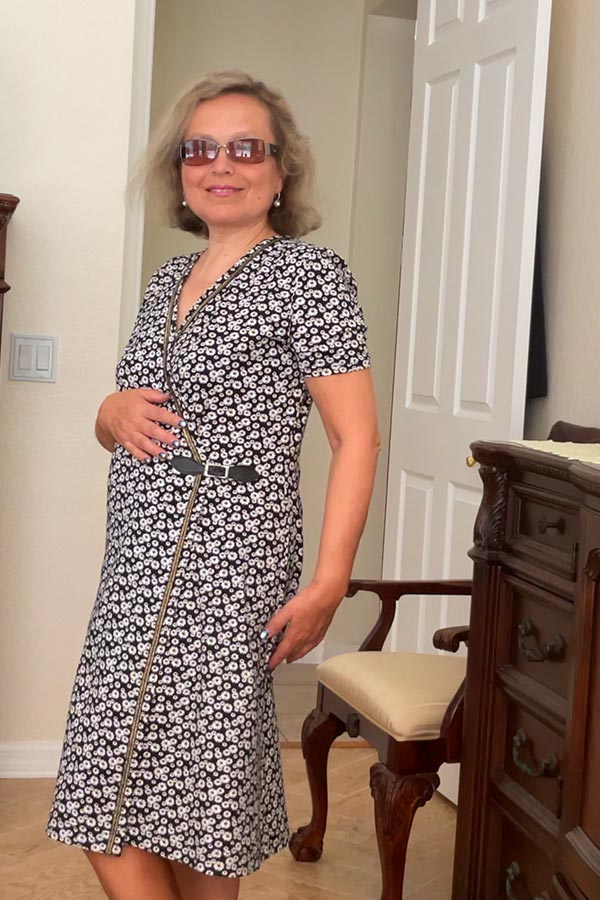
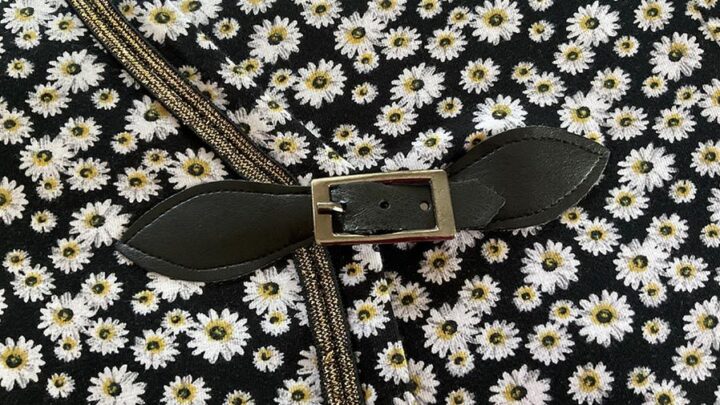
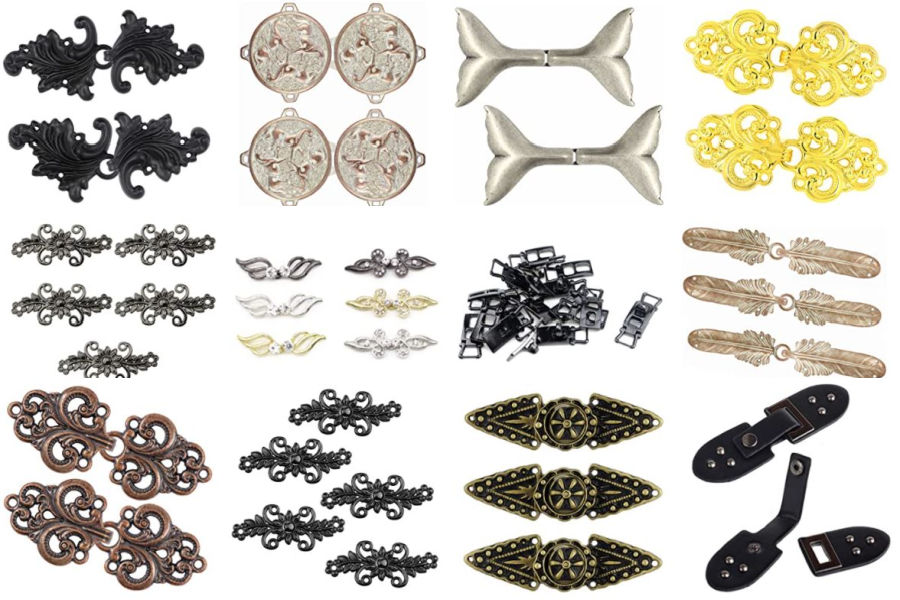
At this point, the wrap dress is practically ready. But we need to make a closure for the dress. There are numerous ways to do it. I have chosen this stylish Clasp Fastener made of real leather.
I heard that it’s a hot vogue element in fashion shows. You need to sew it to the wrap dress and line it up properly.
I found many similar types on Amazon.
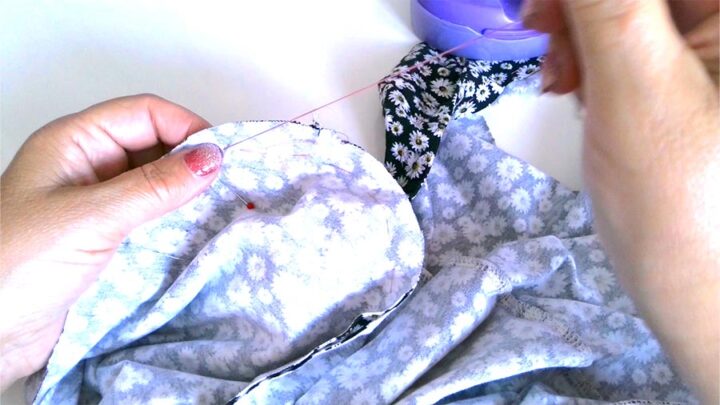
I also put a small button on the inside of the right side of the dress and the coordinating buttonhole on the left side. For the button placement, you will need to try on the dress to mark the place where it suits you. It’s better to fuse a small piece of interfacing behind the button to reinforce it.

Now the wrap dress is finished. I love wearing wrap dresses because they are easy to wear and look great on my body type (and on any body type in fact ). I also like that you can dress them up or down depending on your mood and the occasion you are dressing for. When I am feeling a little more dressy, I will pair my wrap dress with wedges or heels to make it fancier. If I am just doing errands around town, then sandals are a perfect choice. All in all, these dresses make me feel feminine and confident which is why they are one of my favorite things to wear.
So here is my YouTube video. Check this out if you like to see how to sew a wrap dress instead of reading.

Did you find this tutorial helpful? If so, save this pin (see below) on your sewing board so you can come to this tutorial later when you are ready to make a DIY wrap dress, and follow me on Pinterest for more tips, tutorials, and inspiration!
latest posts
- Butterfly Quilt Block Tutorial – Foundation Paper Piecing
- How To Sew Quilt Squares So The Corners Match
- Sewing With Fork Pins: How They Help With Pattern Matching, Slippery Fabric, And Seams
- How Much Fabric Do I Need? 21 Helpful Tips For Calculating Fabric Yardage
- Easy Simple Sewing Project: Fabric Jar Opener
- DIY Oven Mitts: Step-by-Step Sewing Tutorial
- Easy DIY Potholder: New Design
- Tailor’s Clapper: What It Does, Why It Works, And How To Use It Right
- Heat Resistant Batting for Sewing: What It Is, How It Works, and What Makes a Difference