
HOW TO MAKE A BAG PATTERN
In the beginning, at the age of 12, I wanted to make a dress to wear to school the next day. Mom took me to the store where I saw a beautiful empire-waisted dress somebody made for display. I raced to the pattern drawer and yanked out the pattern.
“Mom,” I whined, “it doesn’t look like the same dress.” She said that’s because the lady made design changes.
“Ooh, show me how! Show me how!” She informed me that she would show me how with something simpler. Uh-oh, that was not good news. “But, Mom – “
She gave me that “Mom look”. I knew then that the dress was not going to be worn the next day. Or even a week from then.
She showed me how all right. A degree in engineering would have been helpful. She was a perfectionist when it came to sewing. At that age, I certainly wasn’t. I just wanted a pretty dress, not a lesson in engineering. But she insisted I take the time to learn it right. Moms can be very frustrating.
Time dragged on. I felt like a sloth in a world full of cheetahs. But she proved her point. It was one of the most important sewing lessons she taught me. It was a skill that has endured through the decades.
Thankfully, the 1960s ways are gone. It is now easier to learn the process of creating your own designs without a degree in engineering, and a simple flat bag is a perfect, non-confusing illustration to use. It all starts with a rectangle.
In the world of sewing, measurements are listed as WIDTH by LENGTH by DEPTH. You must know the WIDTH of the fabric before you can determine the LENGTH to buy. The words LENGTH and HEIGHT can be interchangeable, so “height” will be used.
The following instructions are the basics of pattern making. Since it is a flat bag, you can do the steps in your head as you read. Handles will not be discussed as there are just too many different types. The placement of the handles will be marked.
Note: Some of the links on this page are affiliate links. This means I will receive a commission if you order a product through one of my links. I only recommend products I believe in and use myself.
HOW TO MAKE YOUR OWN PATTERNS
Tools Needed
- Medical exam tissue paper. To see what I use, click here.

- Scratch paper and pen
- Sharp pencil and rubber eraser (available at craft stores)
- 1/4-inch scale gridded paper
STEP 1: DOODLING WITH A PURPOSE
For purposes here, you will be designing a flat bag that is arbitrarily chosen to be a finished size of 16” wide by 12” high. You will be designing only the FRONT of the bag. Once the finished size of the pattern is drawn full-sized on tissue paper and labeled, they will be cut apart and seam allowances (SAs) will be added.
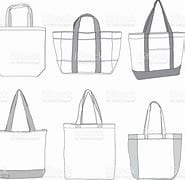
What design do you ask? On the scratch paper, draw rectangles, wider than taller, in PEN. Don’t worry about the exact measurements of the rectangle for now. You are just experimenting with ideas.
Why Pen? Because you are brainstorming ideas. Or doodling. Criticizing and judging your ideas is counter-productive. Not all ideas are going to be good. Be thankful for that. Don’t like what you have drawn? Leave that one alone and move to another rectangle. No erasures or cross-outs are allowed.
To develop ideas, your brain needs all the information you can give it. I call all these ideas, good or bad, brain candy. A bad idea might be fantastic when paired with a future idea. But you’ll never know if you discard that bad idea from the get-go. Fight the urge to judge or criticize. Shut that logical brain down. Being silly help.
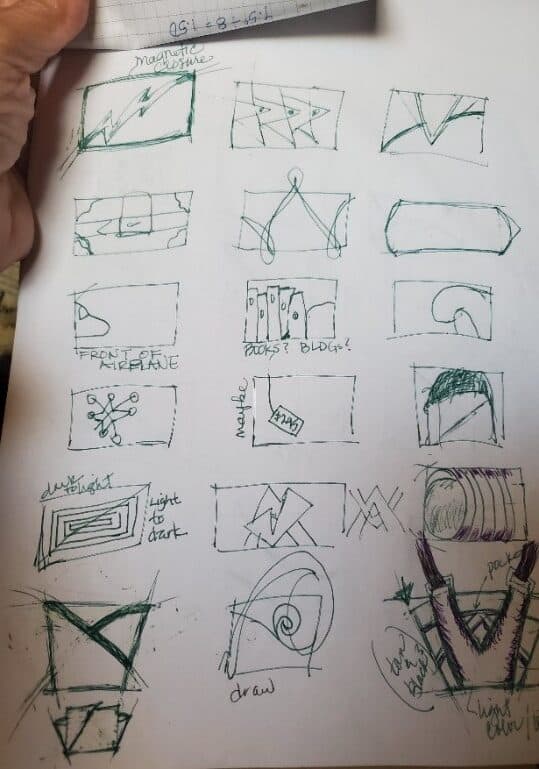
Some messy general-idea doodlings with some notes of mine while watching TV. Back of the envelope ideas. Not all are good. Most of them are not. Husband even crossed one out saying it looked angry and will probably scare the grandkids. He’s right. A couple of these doodles have potential. Maybe.
Look for ideas on clothing. Pockets, trim around collars and cuffs, and the lines of the clothing can be inspirational.
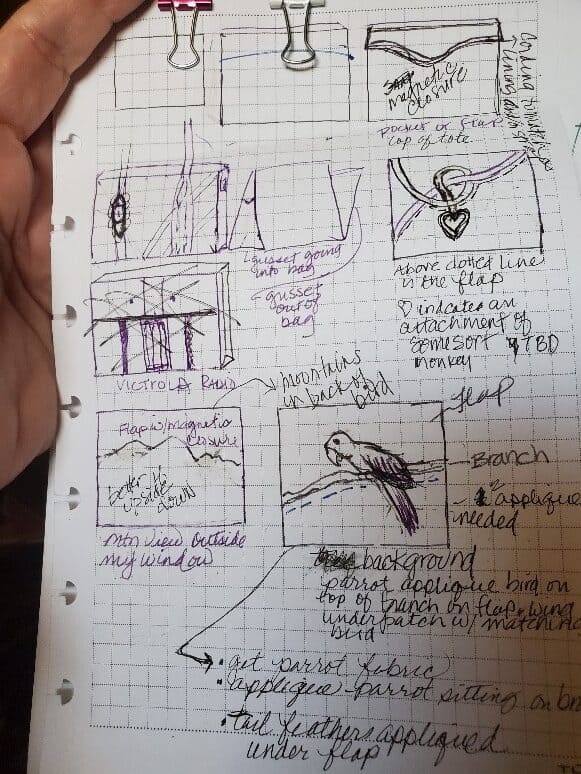
Don’t be disappointed if you don’t like any of the ideas. It’s not unusual. Remember, you’re making brain-candy connections and an idea can pop into your head anywhere, anytime. Keep looking for ideas and doodling.
STEP 2: HOW TO MAKE A 1/4 SCALE
Remember, you are learning a process. When the pattern is more complicated and has more pieces, it’s a good idea to make the 1/4 scale version. Further down, you will see why this is important.
Seam allowances are never used while designing a pattern. You want to see what the finished size would look like no matter what size scale you are working with. It is the same for clothing patterns. Seam allowances are added later.
To determine the 1/4 scale size, divide the width and the height each by 4. (“/” means divided by.) Finished size: 16” wide by 12” high.
Width: 16”/4 = 4”
Height: 12”/4 = 3”
1/4 Scale size: 4” w by 3” h
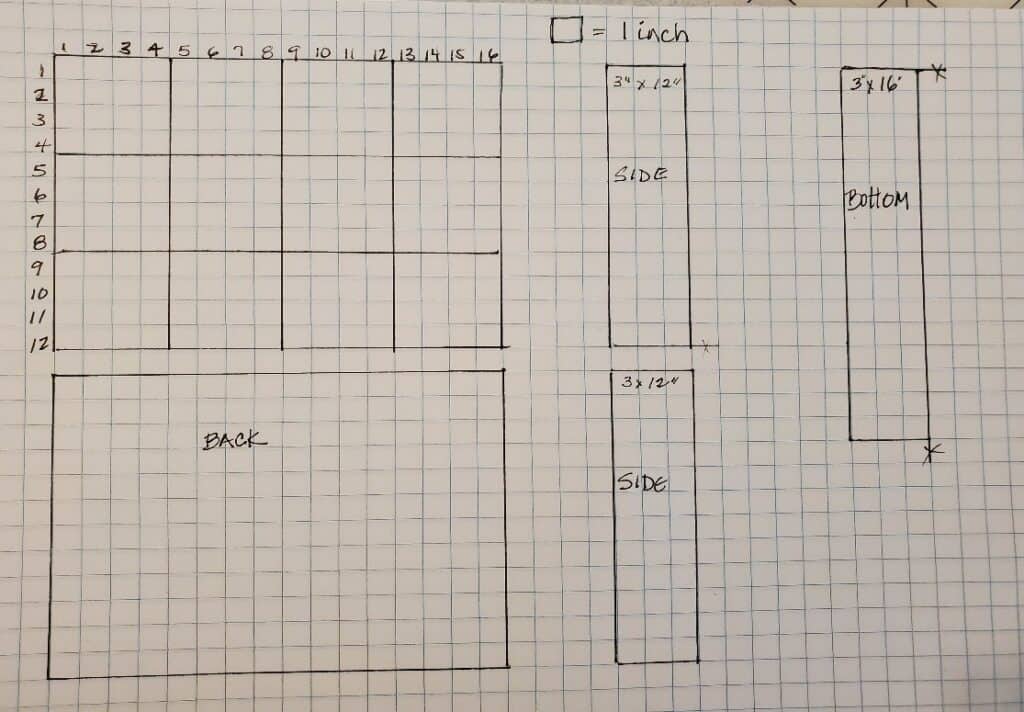
Each square on the gridded paper equals 1”. Use a ruler to draw a line 4” across. Measure 3” down to mark the side. Draw in lines for the bottom and the other side. Draw a blank second rectangle.
This is the easy design we will be using for learning a process. Draw it on your scaled version.
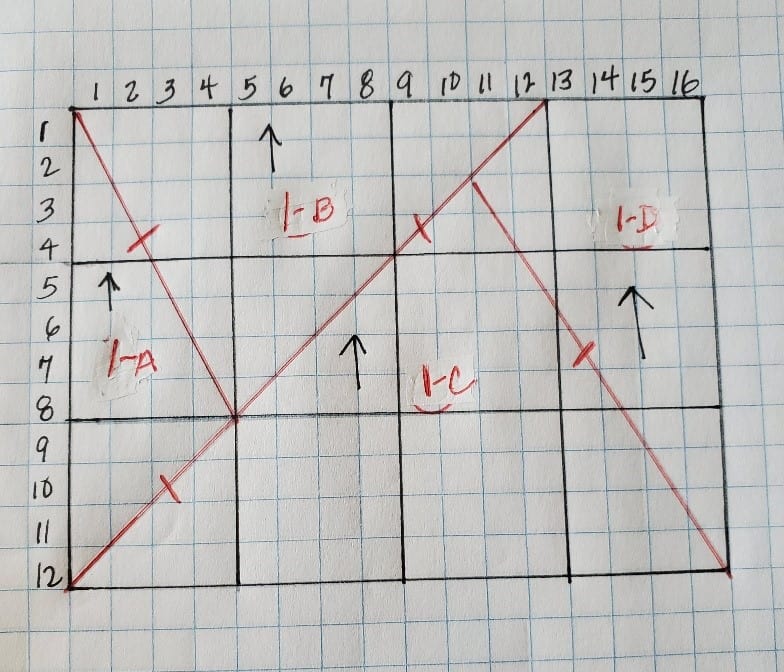
- The pattern will be cut apart on the long RED lines.
- The short red lines are where matching notches will be.
- Label the individual pattern pieces with 1-A to 1-D. Add an arrow to show which way is up.
STEP 3: ADDING DEPTH
There are lots of reasons to use a flat bag, but I need depth to carry all the things I might need but never seem to use. How about 3” deep? How does one add design components to the pattern? With the gridded paper!
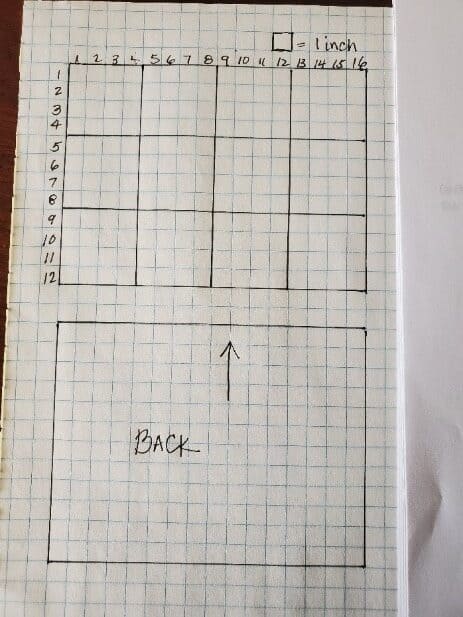
The width must be the same (3”) for the bottom and the sides. The height must be the same: 12” for the sides and 16” for the bottom.
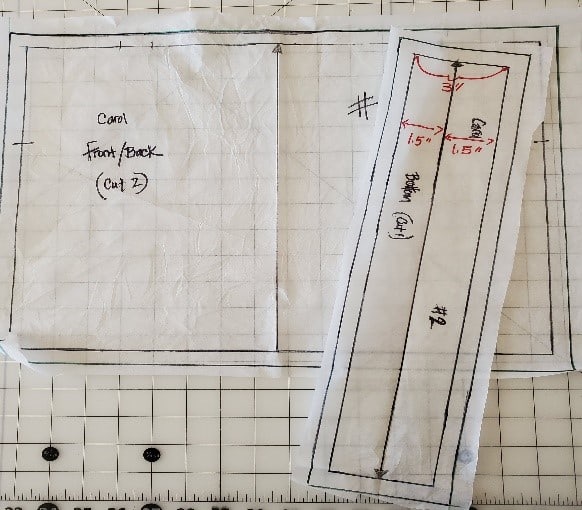
- Draw 2 rectangles 3” wide by 12” high, label SIDE, and
- 1 rectangle 3” by 16” high, label BOTTOM as shown below.
(Picture below was taken before the design was chosen. Add the design above to the top rectangle.)
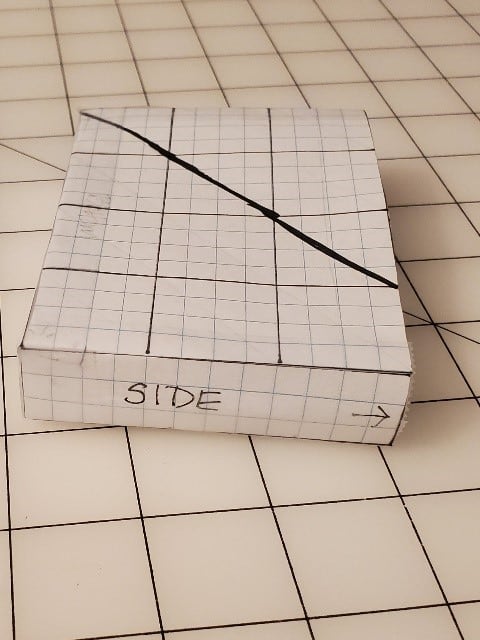
STEP 4: MAKE A PAPER PROTOTYPE
HINT: If you skip this step in a more complicated pattern, your final pattern may not be accurate. Better to tape and find out now than after the fabric is cut.
- Cut the pieces out, except DO NOT cut the FRONT design pieces apart yet. Cut the whole rectangle out as one piece.
- Tape them together.
If there are any mistakes, just draw a new pattern on the gridded paper, cut it out, then check with the prototype for accuracy.
I thought it would be fun to show how the prototype fits into the squares on the cutting mat by matching the diagonal gridlines. It didn’t work. Although I have never claimed to be even a good amateur photographer, this one turned out decent enough. Everything matches.
STEP 5: ENLARGING AND ADDING MARKINGS TO FULL-SIZE PATTERN
We first divided to get the 1/4 scale. So now we multiply to get the full-sized pattern pieces. Multiply the width and length each by 4. Do this for all pattern pieces.
FRONT/BACK: width: 4” x 4 = 16” height: 3” x 4 = 12”
SIDES: (3”/4 = .75”) width: .75” x 4” = 3” height: 3” x 4 = 12”
BOTTOM: width: 4” x 4 = 16” height: 3” x 4 = 12”
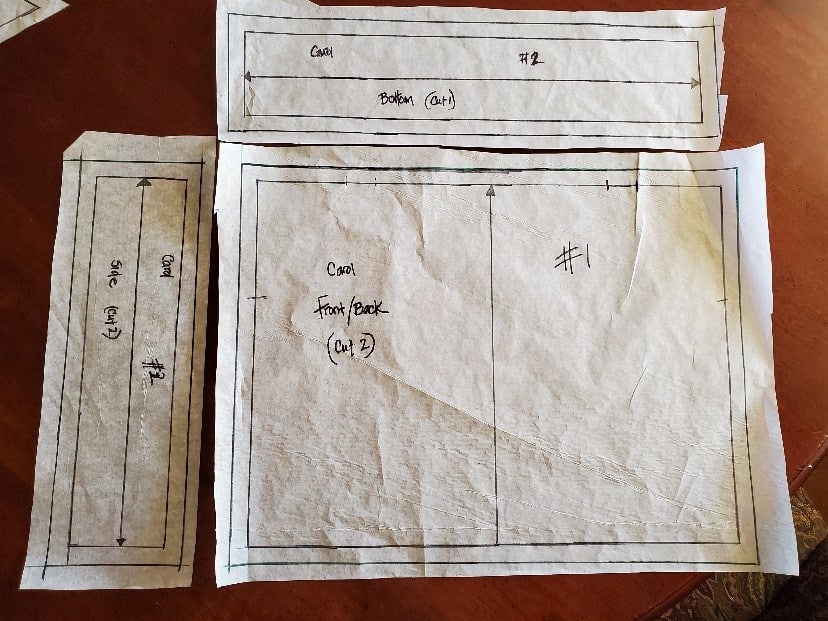
- Draw these on tissue paper, leaving enough room to add seam allowances, including 2 tissue patterns of the FRONT/BACK, one for the back and one to cut the design patterns apart.
- In pencil lightly label each piece with “TOP” so you know the correct direction.
- Add seam allowances around only the BACK, SIDE, and BOTTOM pieces.
- Write TOP in light pencil to show which is the top and label with FRONT/BACK, SIDE, and BOTTOM.
- Add 1/2-inch seam allowance around all the pieces, except the FRONT. That is handled differently.
Don’t worry about labeling at this point except for the word “TOP” and pattern piece number. More labeling information is below.
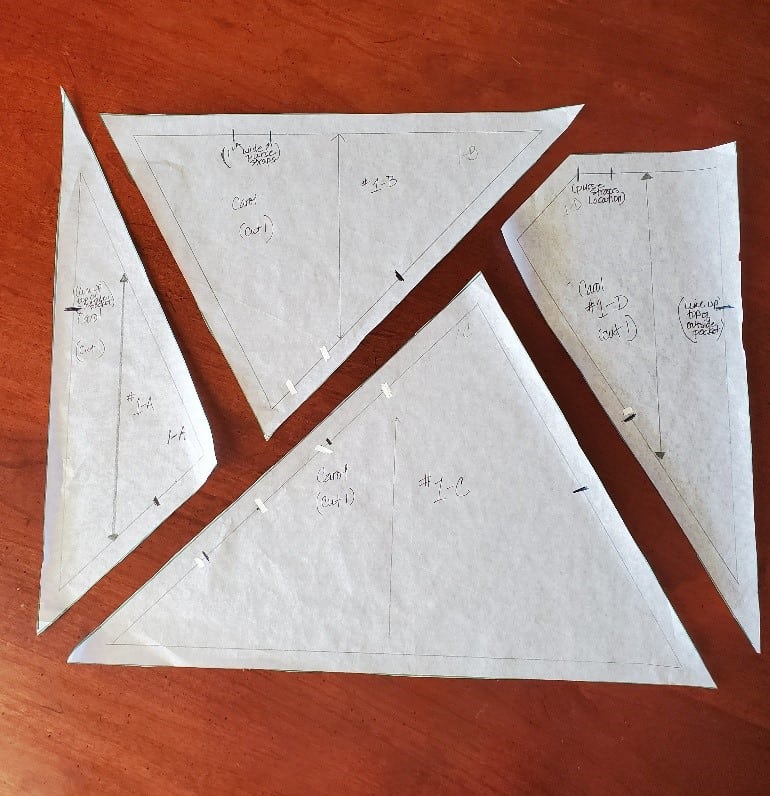
FOR THE FRONT DESIGN:
You don’t need to draw grid lines on the tissue pattern. Draw the design using the scaled version for placement. One square = 1 inch.
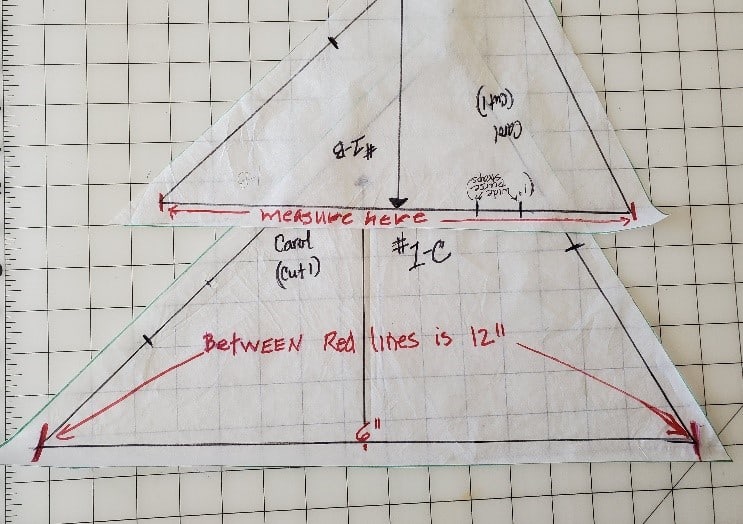
- For the longest diagonal line, measure 12” across from the left, and mark it with a dot. With a ruler draw a line from the dot to the bottom lower left-hand corner.
- For pieces 1-A and 1-B, measure 8” down and 4” over from the left, and mark it with a dot. With a ruler, connect the dot to the upper left-hand corner.
- For pattern pieces, 1-C and 1-D, measure over 10” from the left and down 2” mark dot. With a ruler, connect the dot to the lower right-hand corner. Label each with “TOP”.
- Before cutting the pieces apart, in pencil lightly label each piece 1-A, 1-B, 1-C, 1-D, and write TOP at the top. With seam allowances, it can get confusing which part is which. Keep the scaled version of FRONT for reference.
- Cut the FRONT design pattern pieces apart and trace it on the tissue paper with room for seam allowances.
- Add 1/2” seam allowance around each piece.
(Only two pieces are shown)

For each pattern piece as shown below:
- Find the center width of each pattern piece, either by measuring or gently folding the paper in half. With a ruler draw a straight line on the fold line. This is your grainline. The tip of the arrow should point to the top of the pattern.
- Measure from top to bottom or from bottom to top.
- Either fold the BACK, SIDE and BOTTOM pieces in half from side seam to side seam
- …or…
- measure from side seam to side seam and divide that measurement by 2.
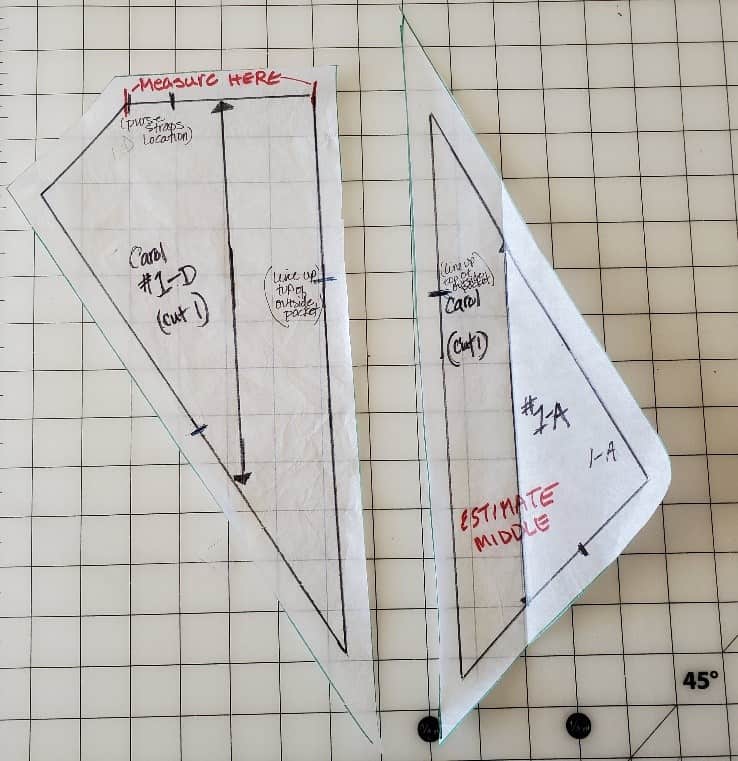
- The top where the strap marks are on #1-D is the top of the bag’s seam line. Measure there.
- The left line on #1-A is the seam line. Estimate where the center is to use as a grainline.
- Label each pattern with a pattern name (use your name for now.)
- Label each pattern piece accordingly with:
FRONT/BACK #1 (Cut 2) (Label every FRONT design pattern pieces 1-A through 1-D.)
BOTTOM #2 (Cut 1)
SIDE #3 (Cut 2)
From the top corner of the FRONT/BACK piece, make a mark with a small line at the 3” and 4” points from the edge on the right and left sides of the pattern for 1” handle placement.
HINT: When using a complicated design, draw it freehand using the grid as a guide, or draw it on tissue paper on a gridded cutting board using the scaled version for reference.
CONGRATULATIONS! You learned how to go from a rough idea to make a 1/4 scale to making a paper prototype to making full-sized tissue patterns. This is the first step to opening the doors to your imagination. With pen and paper, anything is possible.
Always remember: From one rectangle come…
UNLIMITED POSSIBILITIES
More bag ideas. The Rule of 3 would look better for the front pocket of image A as compared to the top right image in B.
By using a rectangle as a start, there are endless ideas for designing.
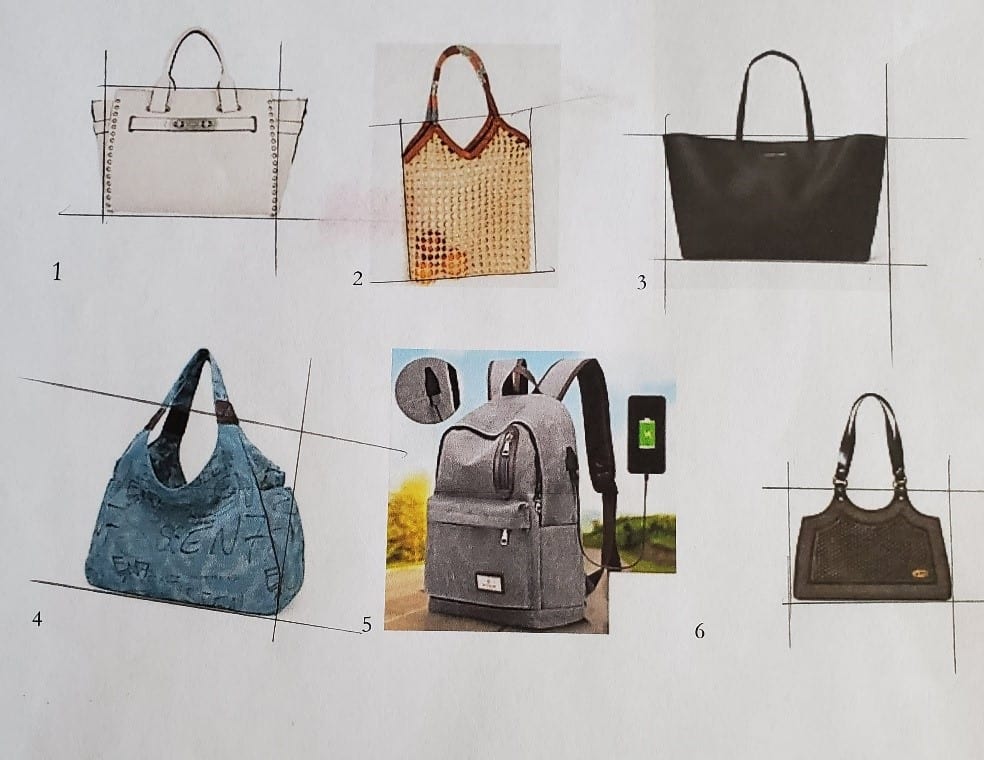
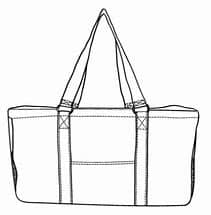
Can you see the rectangles below? Even the brown rounded sides were once flat pieces of fabric and tissue.
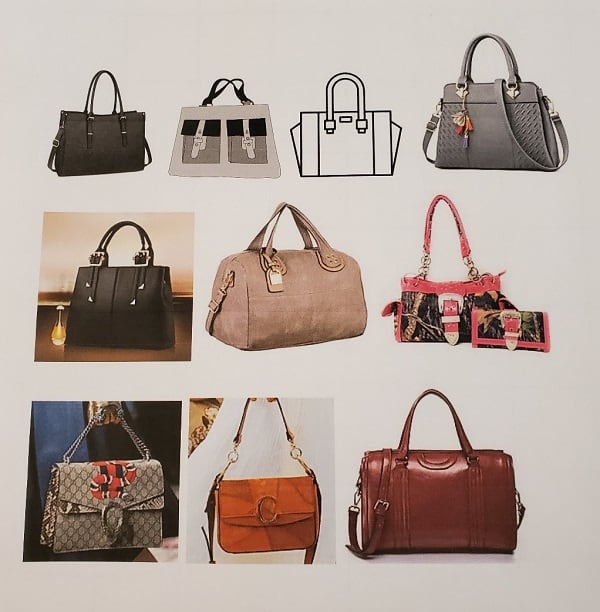
Remember, it all starts with a rectangle.
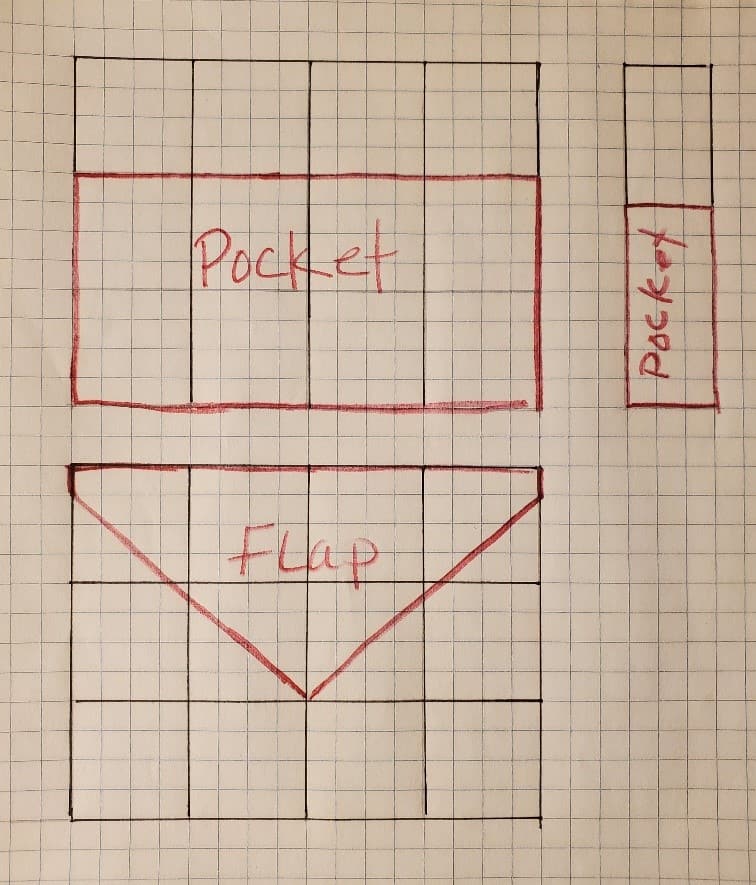
EXTRA: PROCESS FOR ADDING DESIGN ELEMENTS
Following is an FYI example of how to design pattern pieces should you want a front and/or back pocket instead of a design, a flap, or a side pocket. The process is the same if you want to add designer-style handle attachments or inside pockets. Drawing them on gridded paper will give you the exact measurements for the full-sized pattern.
FOR OUTER FRONT POCKET: (pictures below)
Using the Rule of 3, the finished outer front pocket will be 2/3 the height of the bag. The width won’t change. (“/” means divided by.)
- The bag is 12” high. 12”/3 = 4”. The remaining 2/3 is the height of the pocket.
- Draw a 16” wide by 8” high rectangle on the gridded paper.
FOR A FLAP:
- Draw a line as wide as you want the flap.
- Draw the flap design.
FOR A SIDE POCKET:
The SIDE is a 3” by 12” rectangle. Draw that on the gridded paper. Determine the height of the pocket and its placement of it on the SIDE.
No engineering degree is needed!
FROM MY LIBRARY
I highly recommend this book. Perfect for the beginner to the confident sewist. Everything you need to know about building your knowledge and skills, including, tools, fabric, sewing techniques, and pattern manipulation. There are patterns and instructions to help guide you through the tutorials.
As I have said since the 1990s, designing bags start with a rectangle. Making amazing bags start with a good foundation and structure.

If you liked this post, please check out other posts by Carol Diane:

latest posts
- What Do You Call a Person Who Sews? I Asked My Readers and Got 1,408 Opinions
- DIY Round Purse: PDF Sewing Pattern and Detailed Instructions
- Mini Wonder Clips By Clover: Useful Sewing Tool Or Just Another Notion?
- Non-Slip Grips For Quilting Rulers: A Small Notion With A Useful Job
- Fabric Eraser for Sewing: What It Removes and When to Use It
- What Is The Best Thread For Sewing Machine Projects? Let’s Find Out!
- Butterfly Quilt Block Tutorial – Foundation Paper Piecing
- How To Sew Quilt Squares So The Corners Match
- Sewing With Fork Pins: How They Help With Pattern Matching, Slippery Fabric, And Seams

Dankie
I have really learnt a lot on how to make a bag pattern using scale drawing.
@Juliet Musonda, It’s a good day when you learn a new technique! This was Have fun with your knowledge and play to expand your talents to knew levels.