All About Serger Needles
In this article, I want to talk about serger needles. There are so many questions people ask about serger/overlock needles and it’s understandable – sergers/overlockers can be pretty intimidating. So let me try to explain in detail everything you need to know about serger/overlock needles.
Just to make it clear, we are talking here about the home sergers or overlock machines, not industrial ones. Industrial machines are a class apart and usually, they use different accessories than the machines made for home use.
Let’s first remember what a sewing machine needle looks like and what its parts are. Wikipedia has a very nice image that shows all that for any sewing machine needle:

Both regular and serger needles look basically the same. Since they look the same, there are a number of valid questions about the needles and I am going to address them one by one.
I created a very helpful Printable PDF eBook Serger/overlock needles: Helpful tips for making perfect stitches. I have all the information that you need in this eBook. You can purchase the PDF file for a very low price. This way you can print it out and it will be available for you to refer to anytime you want.
Click on the book below to purchase
Are sergers using the same needle as regular sewing machines?
Can I use home sewing machine needles on my serger?
Most modern models of sergers indeed take the same kind of needles as your home sewing machine. But some do not. For example, my Juki MO-2000 takes regular needles. My Janome 990 also uses regular needles. But my older Singer serger needs special serger needles, and most modern Singer sergers (if not all) will need these overlock needles. Combo serger / coverstitch machines also use special overlock needles.
So the answer here is simple: READ THE MANUAL. Your machine may, or may not need special needles.
There are two types of needle systems for modern sewing machines (remember, we are talking home devices): regular and overlock. Both regular and overlock systems come in a variety of sizes and shapes: ballpoint, sharp, for thick or thin fabric.
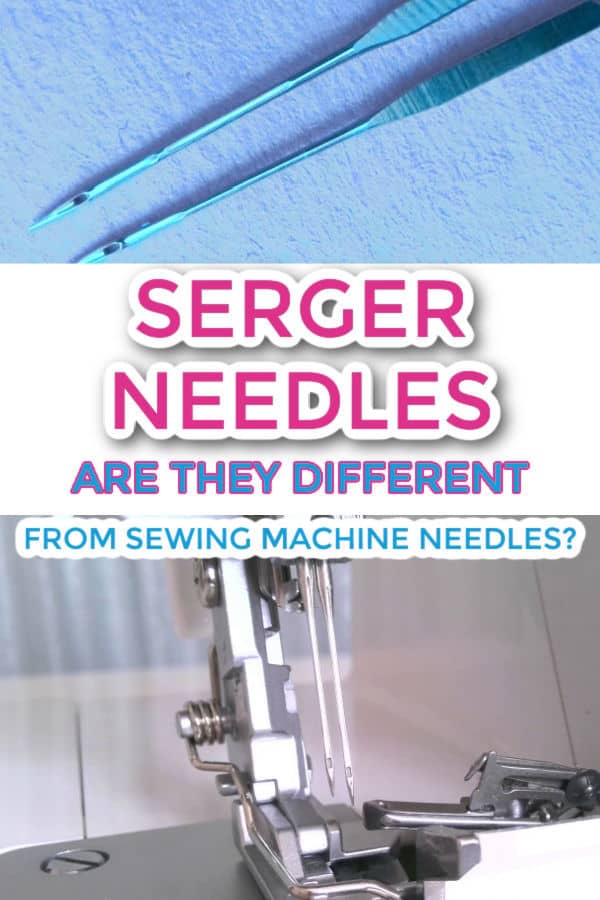
But the basic difference in shape is a second groove on the back of the serger needle:
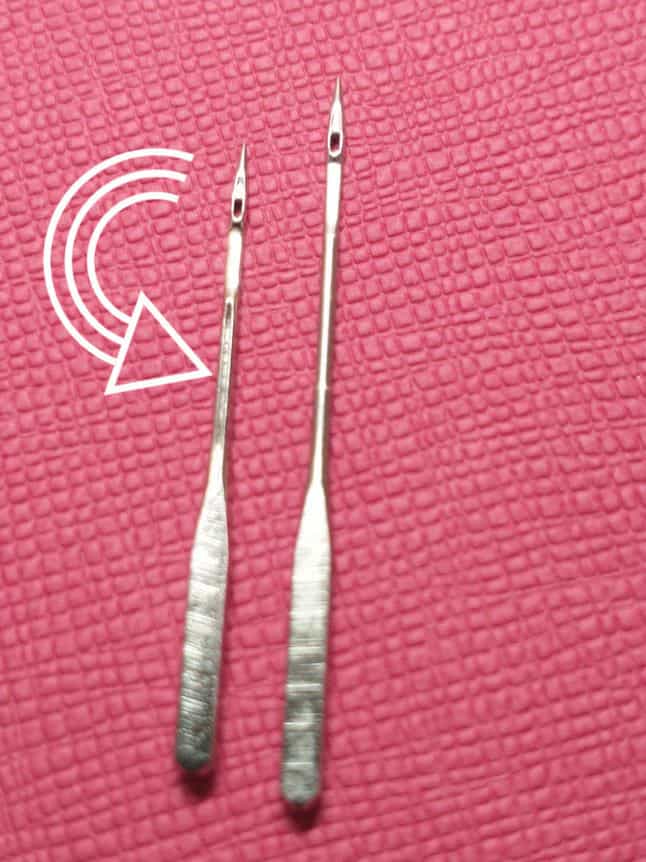
The needle in the image to the left is an overlock needle, Singer type 2022. The needle on the right is a regular sewing machine needle, an Organ HAx1.
The special serger needles are marked with different designations depending on the manufacturer: ELx705, SY2922, 2022, 2054, etc. All these designations refer to the same type of needle, a serger/overlock needle.
But there are other types of serger needles, for example, the BLx1 system, or BLx4. These needles are used in many models of sergers and have a round shank (no flat part). I do not have such a needle but I feel I need to mention it, in case you encounter the name (BLx1).
Regular sewing machine needles are also marked differently, for example, HAx1, 15×1, 2020, 130/705H.
Remember, all these come in different sizes, like 10, 11, 12, 14, 16 (or 75/11, 80/12, 90/14, 100/16), etc. This is true for both systems (overlock and regular).
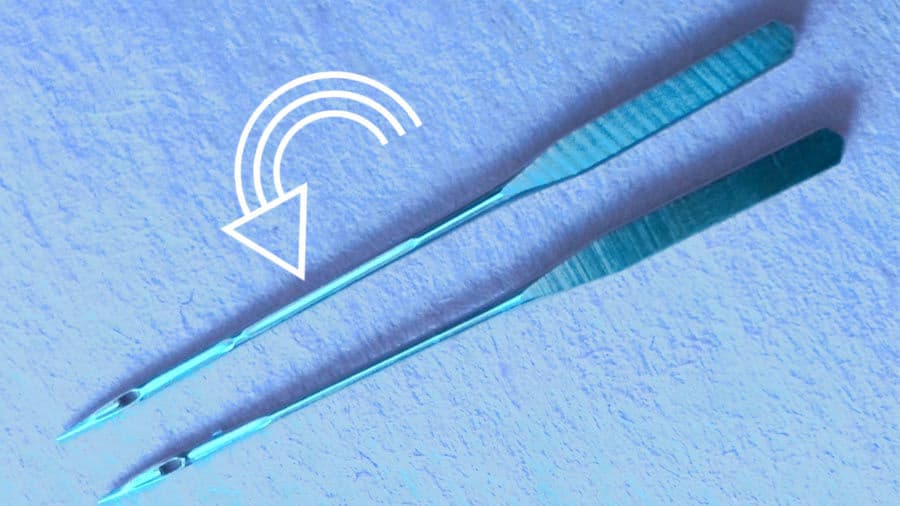
In the image above the needle in the upper part is a Schmetz ELX705 serger needle (observe the groove) and the one in the lower part is an Organ 15x1SP. This is a special version of the 15×1 embroidery needle for stretch or elastic materials and tightly woven knits with a chrome plated finish but it is still a regular sewing machine type. Observe the lack of groove.
My advice: use in your serger what the manufacturer recommends.
Are serger needles different?
Yes, special serger needles are slightly different. Serger (overlock) needles have a second groove on the back side (the same side as the flat side of the shank).
Also, some overlock needles (not all) have a shorter shaft than the regular needles, I am not sure if this is important or not.
While you may be able to force a regular needle in a serger that requires special overlock needles (because the differences in sizes are small), I recommend do not do that.
How Many Needles Does a Serger Have?
Sergers (overlock machines) for home use have one or two needles. Most common are the two-needle version and I recommend if you consider buying a serger, buy one with two needles.
✅ Related tutorial: Best serger for beginners – Serger buying guide
There are machines that have three needles ( like the SINGER Professional 14T968DC) but they are combinations of serger / coverstitch machines. A coverstitch machine may look like an overlock machine but it is basically different and is designed to do different things (for an in-detail explanation please see my article Coverstitch vs. Serger: How are They Different? )
How to change serger needles
The basic procedure is the same as for a regular sewing machine.
- Turn off the power switch. Raise the needle to its highest position.
2. Loosen the left or right needle clamp screw for the needle you are going to remove.
3. Pull the old needle out
4. Insert a new needle into the needle clamp with the flat side to the back until the top of the needle touches the edge of the needle bar, then tighten the needle clamp screw. Do not over-tighten!
✅ Related tutorial: 10 ways to easily thread a sewing machine needle without frustration
Some machines have one needle but most sergers have two needles. If the machine has two, they will not be at the same height, the left needle is usually a little higher than the right. This is by design, do not try to align them.
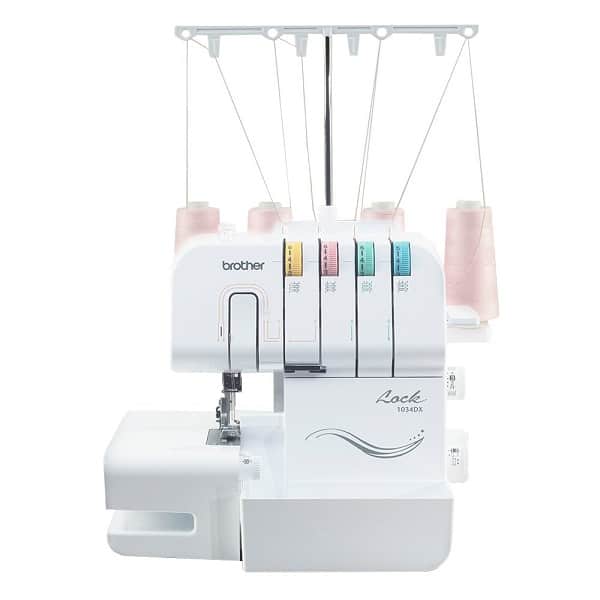
Some machines have one screw per needle, others have one screw for both needles so you must take out and put in both needles at once (Brother 1034 is one of these machines). Also, some machines use a screwdriver for loosening/tightening the screw, others use a small hex key – of course, you have to use the tool the manufacturer provided.
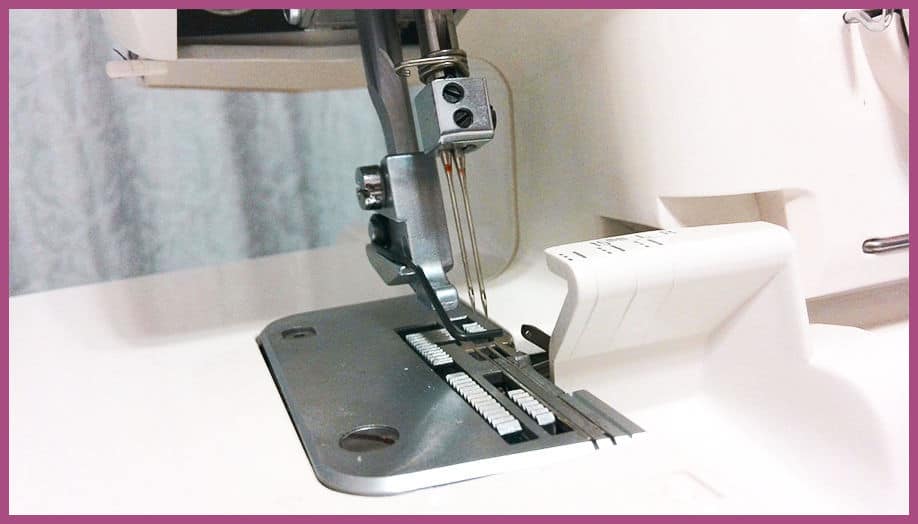
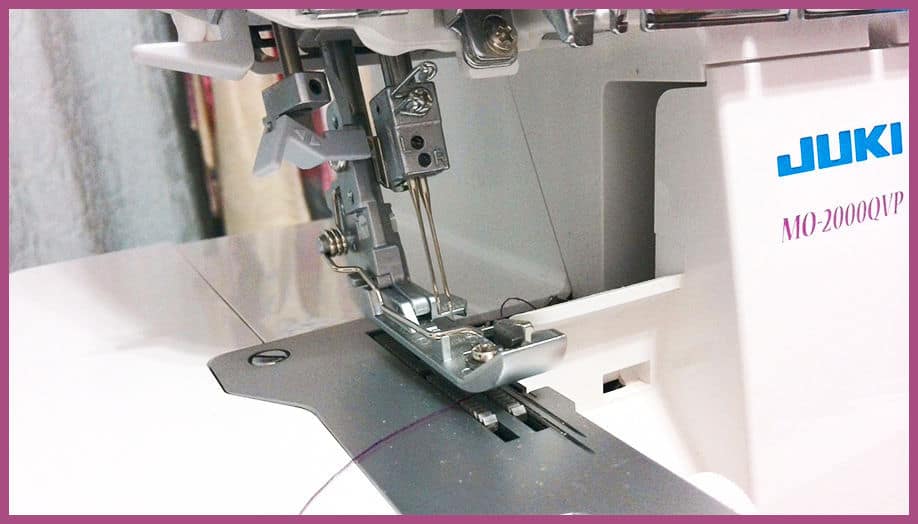
In the images below you can see the needle change area for my sergers Janome 990 and Juki MO-2000. Notice the different heights of the needles for both, the left needle is always higher than the right one.
Notice the two screws used to secure the needles.
What are the brands of serger needles?
Every manufacturer makes special serger/overlock needles. Here is a table with the most common types
- Singer: type 2022 (equivalent with ELX705, SY2922), type 2054 (equivalent with SY2054, 16×75)
- Organ: ELX705, BLX1, SLX75, SY2054, 16X75
- Schmetz: ELX705, BLX1
Other manufacturers will probably also use the same designations.
Note 1: industrial needles have other designations, like DCx1, DCx27, 81×1, B27.
Note 2: do not confuse the name ELX705 (which is an overlock needle) with the designation 130/705H which is a regular sewing machine needle. These manufacturers should all come to the 21st century, sit down and STANDARDIZE!
What are the serger needle sizes?
Serger needle sizes are pretty much the same as the ones for regular needles. However the most used are sizes 75/11, 80/12, and 90/14. The others are infrequent and in fact, I don’t recommend using other sizes. Smaller size needles ( which are 65/9 and 60/8) break easily with high-speed serging and larger needles (100/16, 110/18, 120/19) have too tight tolerance between the loopers and you will have a hard time adjusting your tensions.
Serger needles also come in ballpoint and regular or sharp, different manufacturers add various suffixes to their products. For example, here is one for Organ with the manufacturer’s description:
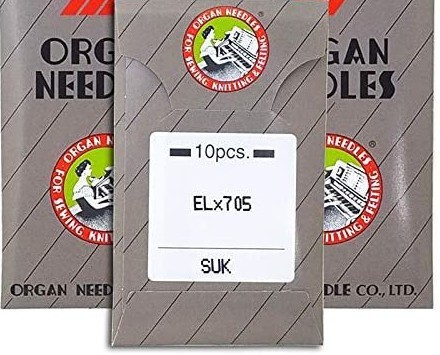
Organ ELX705-SUK Ball Point Portable Serger & Coverstitch Machine Needles. Sizes 11 (metric 75), 12 (metric 80), and 14 (metric 90): One side of the shank on these needles is flat and the other is round. Lower size numbers are narrower or thinner needles used for lighter materials. Higher size numbers indicate a needle of thicker diameter, used for heavier materials.
Note the “SUK” suffix and the 75/11, 80/12and 90/14 sizes.
And another from Schmetz:
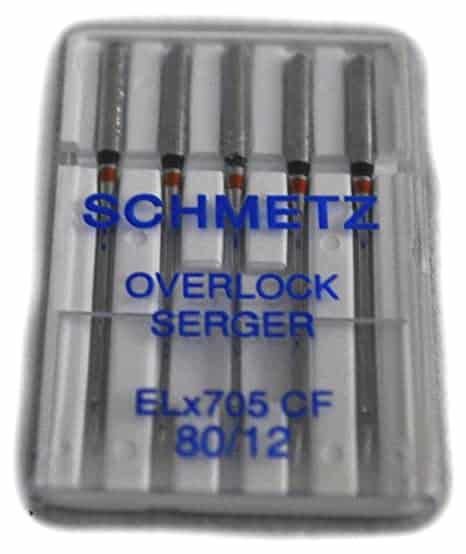
Schmetz Sewing Machine Chrome Finish Needle ELX705CF-80.
Schmetz does not say it clearly but the needles are metric 80 (size 12, or 12/80) and “CF” stands for “Chrome finish” which is supposed to reduce heat and wear (chromium is a hard, corrosion-resistant metal, used in alloys).
Where to buy serger needles?
I usually buy in bulk on Amazon, in packs of 30 or bigger. But since all my current sergers use now regular sewing machine needles, I didn’t buy this for quite some time. They are more expensive than regular sewing machine needles, probably because of the extra processing involved.
Note: Some of the links on this page are affiliate links. This means I will receive a commission if you order a product through one of my links. I only recommend products I believe in and use myself.


And just in case your serger uses regular sewing machine needles, as mine do, here are some links:


Remember, the ones in the second list are REGULAR needles (130/705H 15x1H HAx1).
Best tips for using serger needles
- Always use sharp needles. Replace needles after every project even if you do not see any problems yet. Sergers are faster than sewing machines and the needle works harder. Sergers routinely have 1300/1500 stitches per minute whereas the regular sewing machine like my Janome works at around 600 stitches per minute.
2. If one needle breaks, or bends, or for any reason, you replace it, replace the second needle at the same time.
3. Be careful with the small screw that fixes the needle. Do not unscrew it fully, just enough to loosen the needle. If you do not replace the needle immediately, tighten the screw back a little. It is a very small part, but if you lose it your machine is going to be idle because, without it, nothing works.
4. If you have uneven stitches or missed stitches or simply your serger does not work as well as it should, the first attempt to fix should be to change the needles. Both.
5. Never use 2 needles of different sizes in a serger.
6. If your stitch requires only one needle, take the second one away. Otherwise, serger stitches will not form correctly.
7. Keep your serger clean. Remove the lint. Sergers work at high speed and use a lot of thread, some of it will fray and generate a lot of lint. Much more than a regular sewing machine. Clean it!
8. A very simple needle holder tool is a great helper for changing serger needles. If you just use your fingers for changing the needle it may accidentally fall through the needle plate and you will have a hard time removing it from there.
9. Organize your serger needle storage. Use a special pincushion or a needle book for serger needles.
Once again, I want to remind you that you can purchase this very helpful printable PDF eBook for a couple of dollars.
And when we talk about needles, we need to talk also about the needle book. This is a very useful tool and will allow you to organize your needles, both new and used, in a single place from where they are easy to take for use, and where you can return them for safe storage until needed again. Such a book is a very simple project and in my article DIY Needle Book, I am showing how to make one from pieces of scrap fabric.
Did you find this tutorial helpful? If so, save this pin (see below) on your sewing board so you can come to this tutorial later when you are ready to use serger needles, and follow me on Pinterest for more tips, tutorials, and inspiration!
latest posts
- Corset Pressing Board for Sewing: What It Does and How I Use It
- 7 Essential Tools and Settings for Sewing Denim on a Regular Sewing Machine
- That Purple Thang: 10 Smart Ways to Use This Weird Little Tool
- 20+ Reasons Your Sewing Machine Thread Keeps Breaking (+ Solutions)
- Dresden Plate Quilt Block: 4th of July Fireworks
- How To Sew Curves the Easy Way Using a Curve Master Presser Foot
- 30 Sewing Hacks That Turn Ordinary Items into Useful Sewing Tools
- Seam Allowances in Sewing Patterns: What They Are and How to Use Them
- What Do You Call a Person Who Sews? I Asked My Readers and Got 1,408 Opinions