20 Sewing Tips You Didn’t Know 5 Minutes Ago
Small sewing habits can fix big sewing problems before they turn into a seam ripper session.
My favorite sewing tips are the small ones. The ones that take two seconds, look almost too simple, and then make you wonder why nobody mentioned them before your third crooked seam, bulky corner, or mystery thread nest.
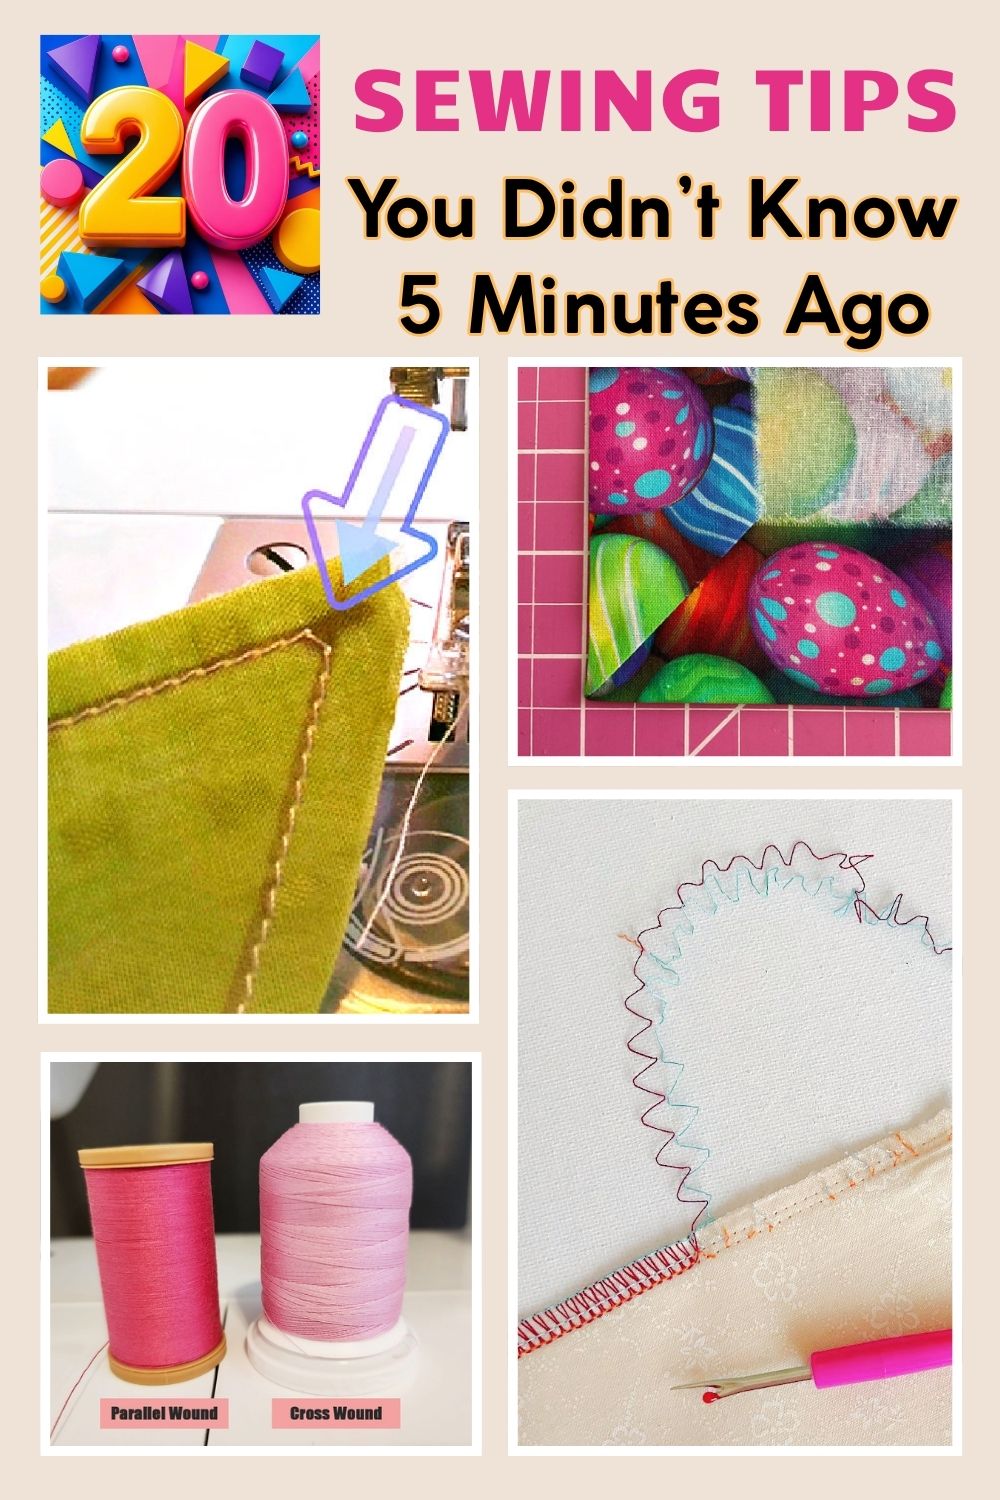
I do many of these things without thinking now. They have become part of my normal sewing rhythm. Then I get questions in emails, on my Facebook page, or in my sewing group, and I realize these little tricks are worth sharing in one place.
Here are 20 quick sewing tips worth keeping near your machine. Some help with stitches. Some help with fabric. Some help prevent the little machine issues that waste thread, eat up time, and cause frustration.
Prefer a printable version? A PDF edition of 20 Sewing Tips You Didn’t Know 5 Minutes Ago is available for a small fee in my shop. You can download it to your favorite device and keep it handy for future reference. It’s completely ad-free, and you can read it whenever you have a few minutes in your sewing room.
1. Shorten the stitch length at the end of a dart
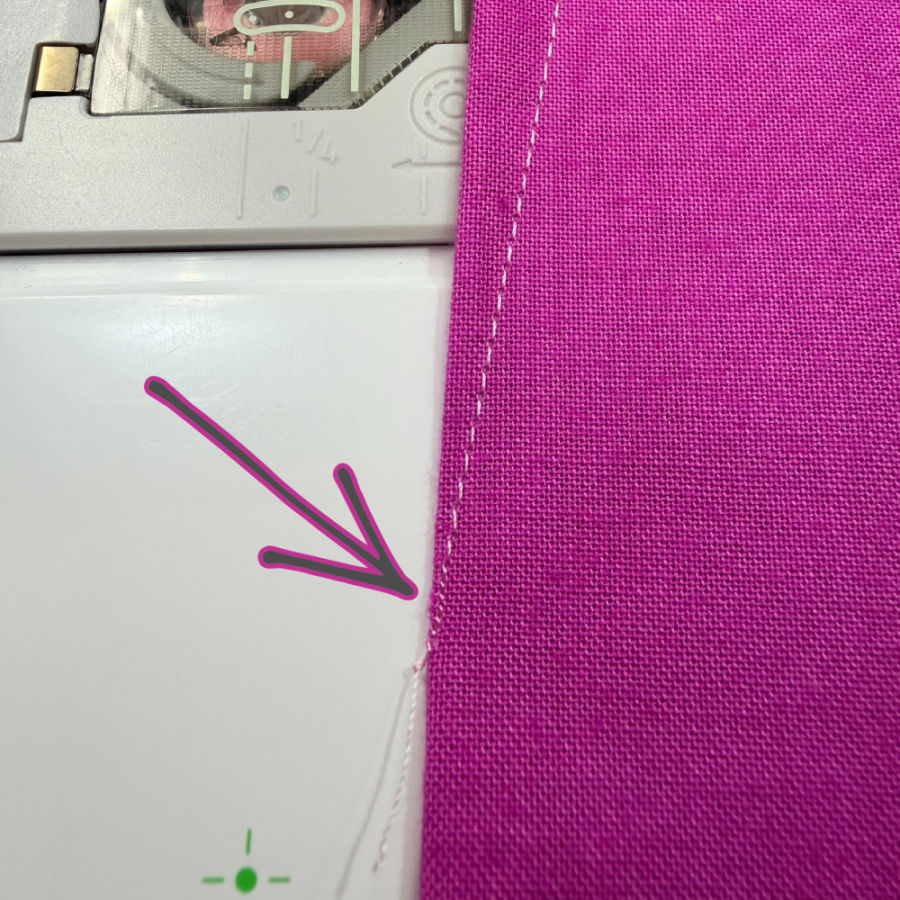
Right before you reach the tip of a dart, shorten your stitch length dramatically (to 1 or even smaller) for the last few stitches. This locks the stitches in place at the point, so you can skip knotting or backstitching entirely — and you get a sharper, flatter dart tip.
More on sewing darts → How To Sew Darts
2. Chain sew small matching pieces
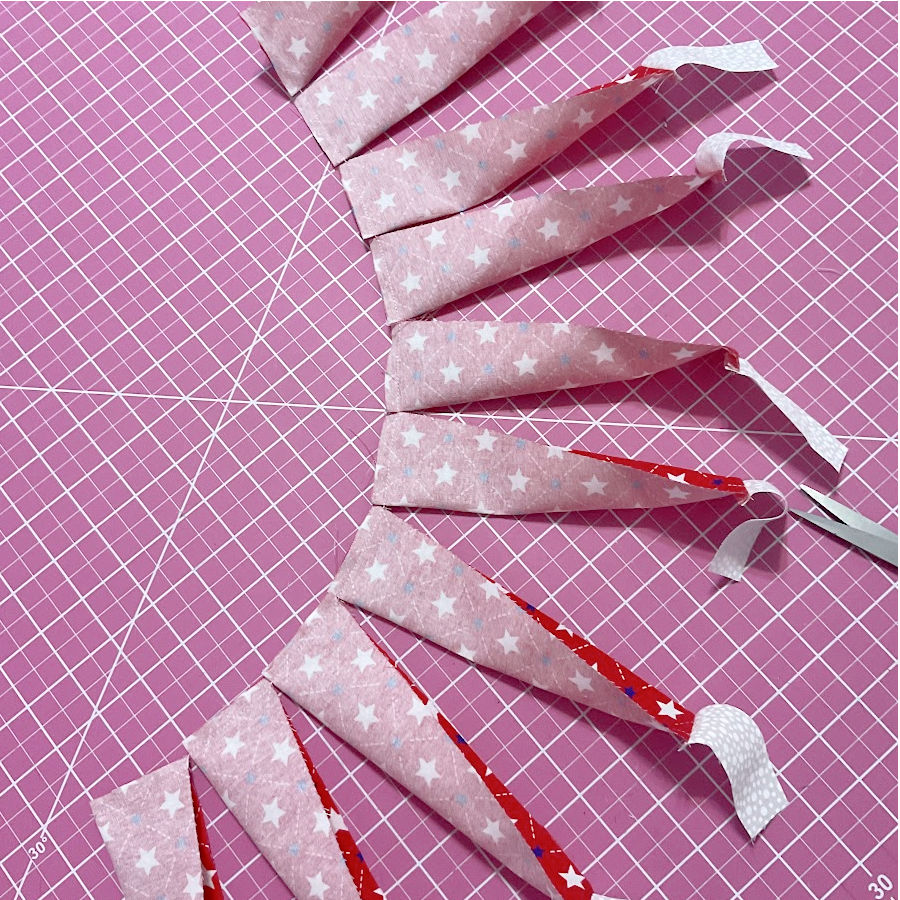
When you have several small shapes to sew, don’t sew one, stop, cut threads, and start again. Feed the next piece right after the first one. This is chain sewing, and it saves thread, time, and patience.
It also keeps tiny pieces from wandering off the table, which happens easily when you work with small fabric shapes. Once a few pieces slide under the pattern, cling to your sleeve, or blend into the cutting mat, the whole layout can turn into a treasure hunt for missing pieces. Chain sewing keeps them connected until you are ready to press and trim.
Note: Some of the links on this page are affiliate links. This means I will receive a commission if you order a product through one of my links. I only recommend products I believe in and use myself.
3. Clear tension disks with Hugo’s Amazing tape
Lint builds up between the tension discs and messes with your stitch quality — even when the discs look clean.
Raise the presser foot first. This opens the tension disks.
Then run a piece of Hugo’s tape through the thread path. Move it gently back and forth to pull out lint or tiny thread bits.
Don’t force anything. Tension disks are delicate, and a gentle pass is enough to remove trapped lint or thread bits.

I used to do this with unwaxed dental floss, but it has become hard to find (the unwaxed type). Now I use Hugo’s Amazing Tape instead. It slides through the thread path easily and helps pull out lint and tiny thread bits from the tension disks.
✅ Related tutorial: Are These ‘Magic’ and ‘Wonder’ Tools the Secret to Sewing Perfection?
4. Remove lint from feed dogs
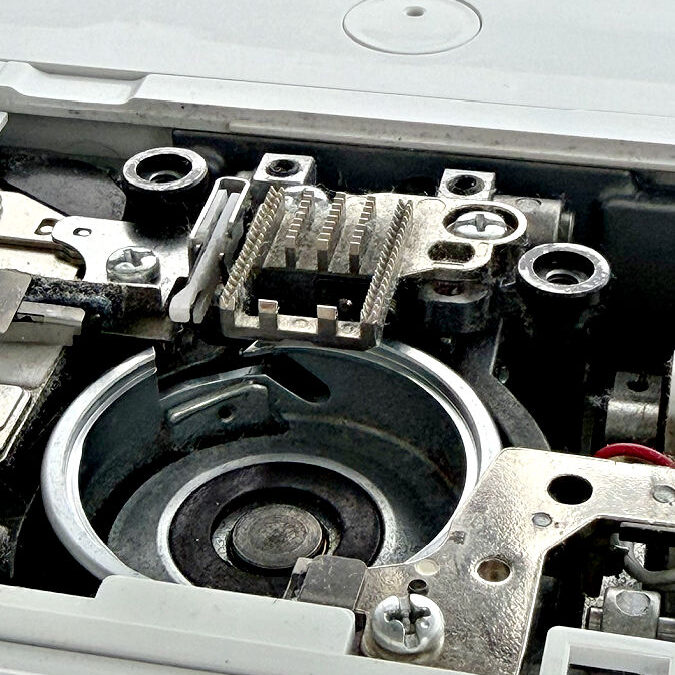
Lint and thread bits pack in around the feed dogs and quietly wreck your fabric feeding, causing skipped stitches or uneven feeding.
Turn off the machine, remove the needle plate, and brush lint out from between the feed dog teeth. A small stiff brush works relatively well. A mini vacuum attachment can also help.
But for tight spaces, micro swabs (micro applicator brushes) are especially useful. The tiny tips can reach between the feed dog teeth and into narrow areas where a regular brush can’t reach well. They pick up lint really well..
Do not blow lint deeper into the machine with canned air. Brush lint out where you can see it.

✅ Related tutorial: Sewing Machine Maintenance: Essential Tips For Optimal Performance
5. Make sharp corners by stopping at the exact point
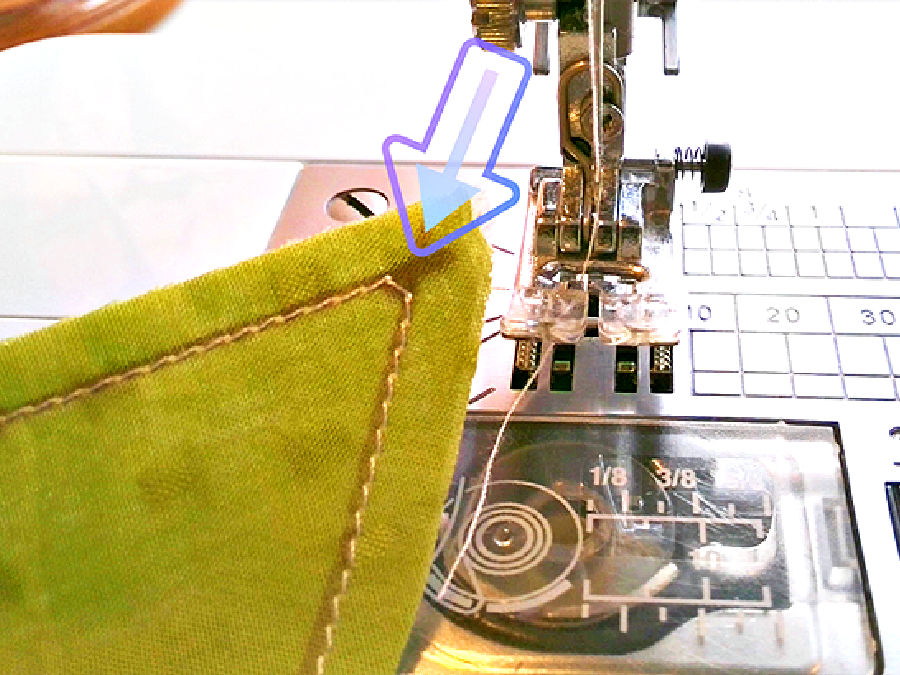
When you sew into a corner, stop one stitch short of the exact point, then take one diagonal stitch across the corner tip before pivoting. That single angled stitch is what gives you a clean, sharp point instead of a slightly rounded or bulky one when you turn it right-side out.
And don’t forget to trim the seam allowances before you turn the piece. Cut close to the corner, but not through the stitches. That little trim removes extra bulk so the corner can form a crisp point.
✅ Related tutorial: Basic sewing techniques: How to sew corners and curved seams
6. Mark the turning point for correct seam allowances
Skip the eyeballing. The turning point is always where your seam allowance line intersects the next seam line.
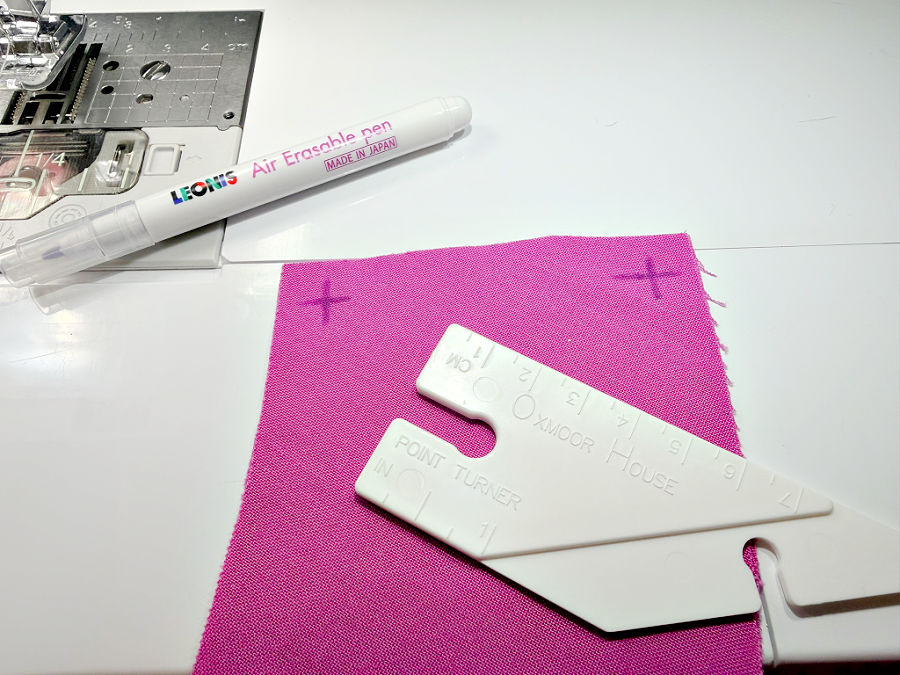
Measure from the corner along each raw edge by the width of your seam allowance, and mark a small dot. Use ¼”, ⅜”, ⅝”, or whatever seam allowance your project uses.
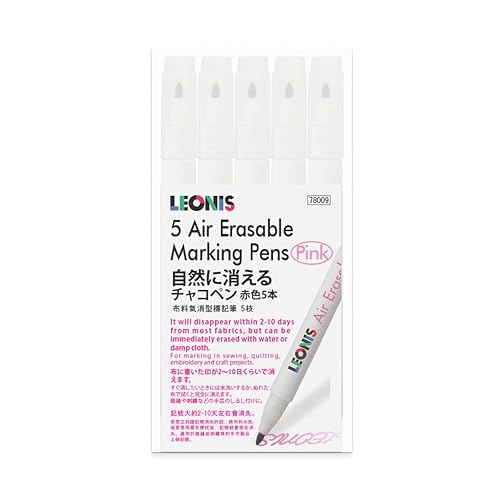
Sew toward the dot. Slow down for the last few stitches and use the handwheel if needed. Stop when the needle goes into the dot, not when the dot reaches the front of the presser foot.
Then keep the needle down, lift the presser foot, turn the fabric, lower the foot, and continue along the next edge.
If your presser foot blocks the view, use an open-toe foot or a clear presser foot. You can also draw a tiny cross instead of a dot. The crossing lines are easier to see as they move toward the needle.
✅ Related tutorial: Seam Allowances in Sewing Patterns: What They Are and How to Use Them
7. Stop the needle from coming unthreaded
Before you start sewing, make sure the needle is at its highest point and the take-up lever is also at the top. If the needle starts from a low position, the upper thread can slip out of the needle before the first stitch forms.
Pull both thread tails under the presser foot and toward the back. Leave at least 4 inches if you can. Hold the tails for the first few stitches.
On modern machines with an automatic thread cutter, the thread tails are often short after the machine cuts them. If the needle keeps coming unthreaded at the next seam, try one of these fixes: pull the needle thread a little longer before you start, don’t use the automatic thread cutter for short seams, or start on a small “leader” scrap first. Sew a few stitches on the scrap, then feed your project right after it.
Also, before you pull the fabric away from the machine, bring the needle and take-up lever to their highest position. This keeps the thread path settled and prevents a lot of rethreading.
✅ Related tutorial: How to thread a needle on a sewing machine
8. Remove serger stitches without picking out every loop
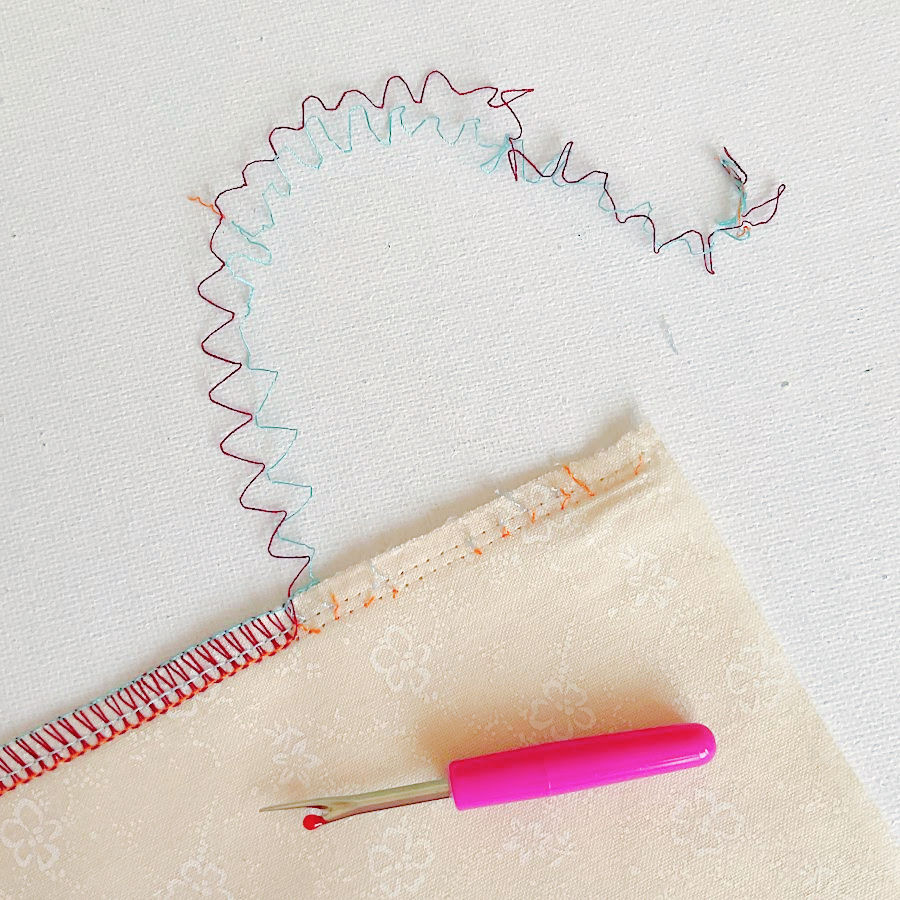
There’s a trick that lets you pull a serged seam apart in one motion once you know which thread to grab.
Find the needle threads first. Pull those out, and the looper threads usually release much faster. The seam may look like a complicated thread maze, but the needle threads are the key.
Full method here → How To Remove Serger Stitches Easily.
9. Remove fold marks from fabric
Fabric that’s been folded for months holds stubborn crease lines.
For fold marks, my first choice is Mary Ellen’s Best Press Clear Starch Alternative. I tried it, and I like how it helps fabric press smoother without the stiff, crunchy feel that regular starch can leave behind.
Spray the fold mark lightly, let the fabric absorb the spray for a few seconds, then press with an iron. For stubborn fold lines, spray again and press from both sides of the fabric.


Wrinkle release sprays can also help with fold marks. Spray the area until it is slightly damp, smooth the fabric with your hands, then let it dry or press it with an iron if the fabric allows heat.
Always test first on a scrap or hidden area, especially with silk, rayon, dark fabric, or fabric with an unknown fiber content.
10. Fix a bobbin that winds unevenly
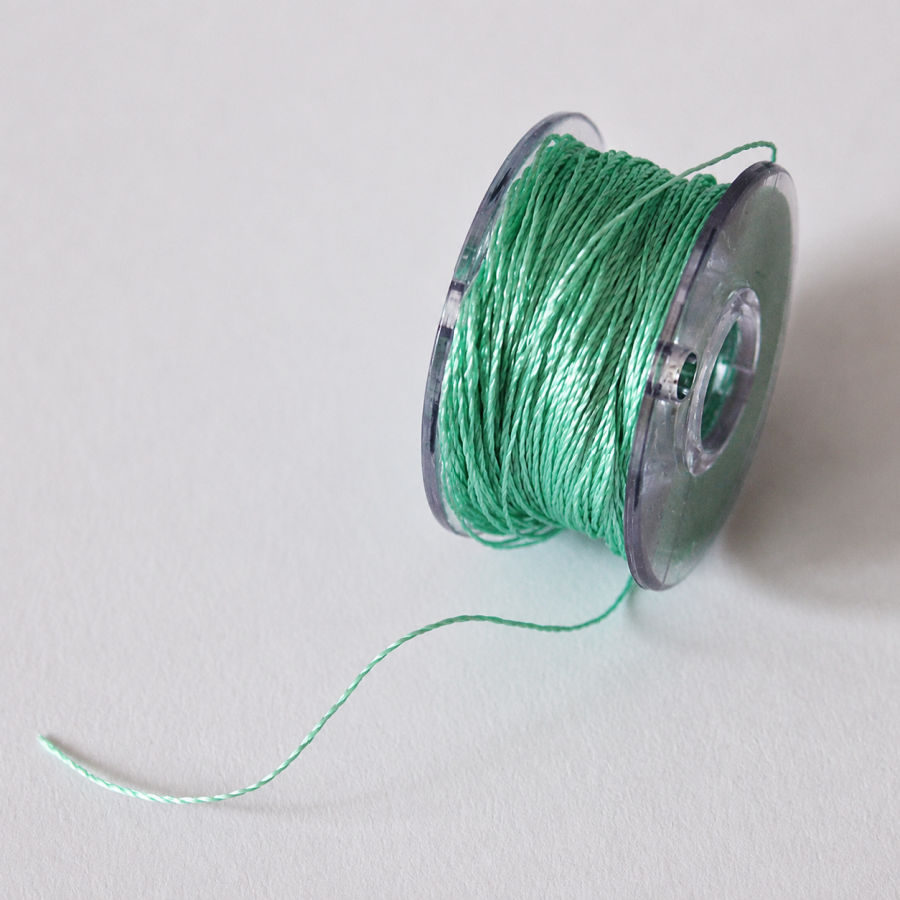
An uneven bobbin often means the thread missed the bobbin-winder tension guide. Rethread the bobbin path and make sure the thread snaps into that small guide before you start.
If your bobbin thread piles up on one side instead of winding flat, your spool of thread isn’t feeding straight into the winder — usually because the spool itself is sitting crooked on the pin. Rethread through every winding guide in order and make sure the spool spins freely without wobbling.
Also check the bobbin itself. Use the correct bobbin for your machine, start with an empty bobbin, and wind at a moderate speed. A damaged bobbin can wobble and wind unevenly.
11. Find the right side when both sides look the same
Some fabrics don’t make the right side obvious. Solid linen, wool, twill, rayon, some knits, and white quilting cotton can look almost the same on both sides. That is where you need a system, not guesswork.
I noticed this while I was making a quilt and showing an interfacing trick for matching quilt square corners neatly. Later, I looked at one of my photos and saw the problem right away. Some of my white squares were right side up, and some were wrong side up. In the image, you can see that some white squares show the tiny white design clearly, and others look flatter and more plain.
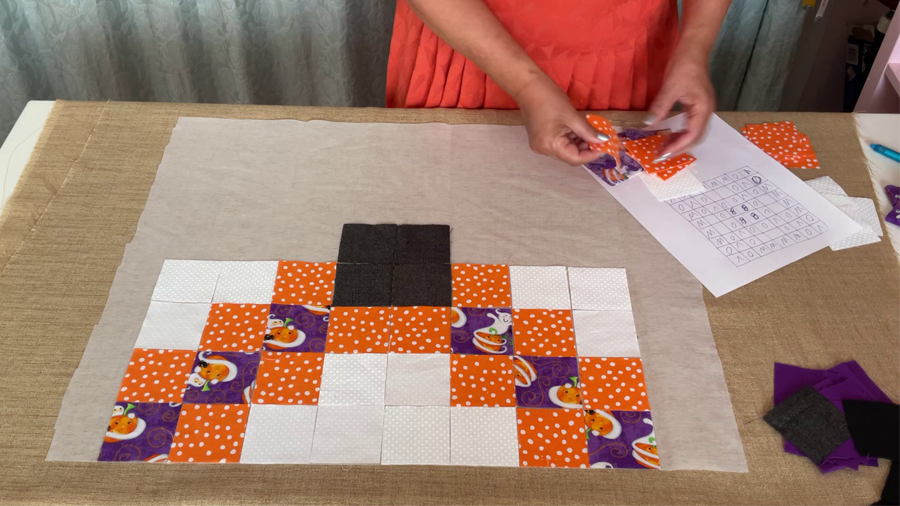
This happens often with white-on-white quilting cotton. The design is usually printed on the right side with white pigment or ink. It sits more on the surface of the fabric. The right side may look brighter, shinier, or slightly raised where the design is printed. The wrong side may look duller or almost plain.
But the same idea applies to many fabrics. Before you cut, check both sides in good light. Tilt the fabric toward a window or lamp. One side may have a slightly richer color, sharper weave, smoother surface, or softer sheen.
Also check the selvage. Printed words, color dots, or a more finished-looking edge often appear on the right side.
✅ Related tutorial: Understanding Selvage Edge of Fabric and Its Role in Your Projects
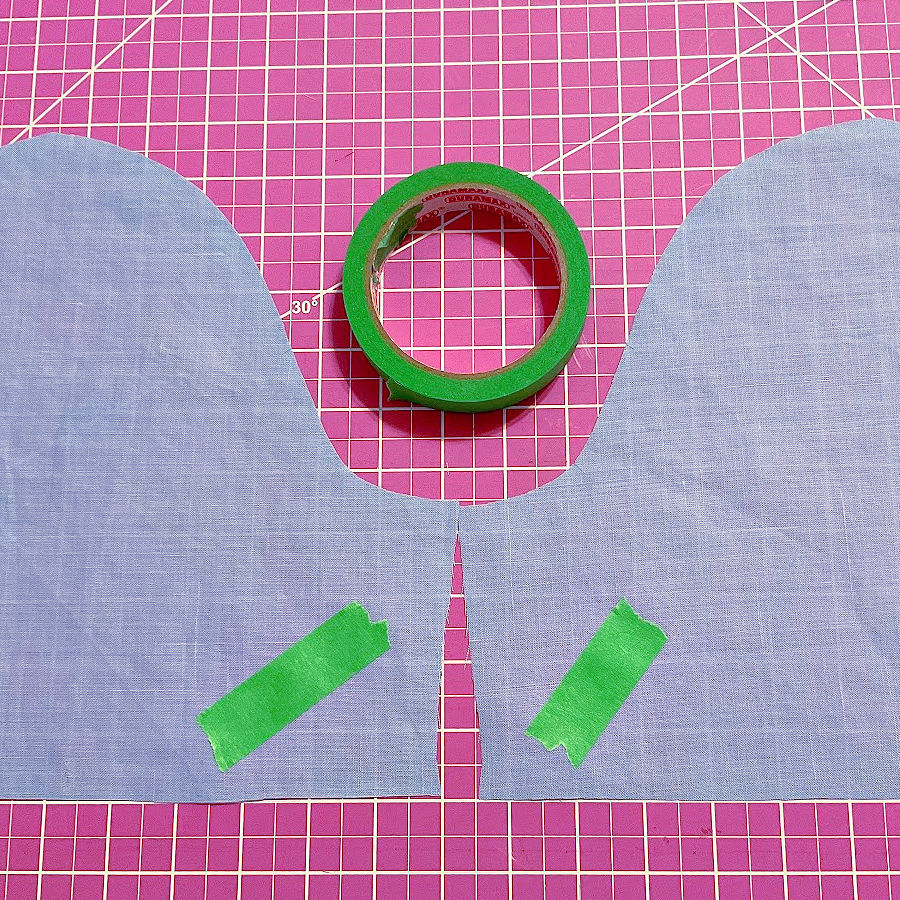
If both sides still look the same, choose the side you prefer and stay consistent. Mark the wrong side right away with chalk, painter’s tape, or small removable stickers. Do this before the pieces turn into a pile of identical shapes.
This matters most with small quilt squares, garment pieces from solid fabric, and projects where the light hits the fabric from different angles. One flipped piece may not seem important on the table, but it can stand out after everything is sewn.
12. Know when to change the needle
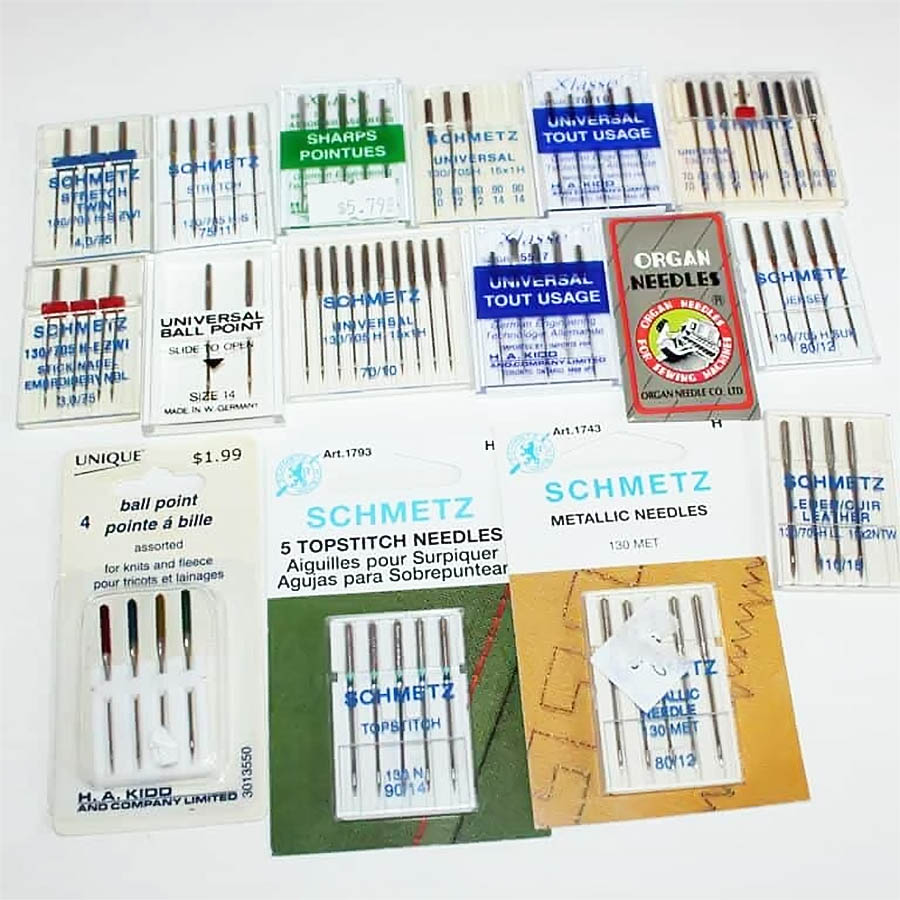
A sewing machine needle can look fine and still be dull, bent, burred, or needed changing. You don’t always see the problem with your eyes.
A common rule (recommended by Schmetz) is to change the needle after about 8-10 hours of stitching time.
But the “change your needle after 8 hours” rule is hard to use at home. Most home sewists don’t sit there with a stopwatch. A better habit is to change the needle when the project, fabric, or stitch quality gives you a reason.
First, change the needle when you change fabric type or fabric weight. The needle that worked well on quilting cotton is not right for denim. A needle for lightweight silk is not the needle for thick canvas. Knits need a ballpoint, stretch, or jersey needle because a sharp universal needle can cut fibers or cause skipped stitches.
✅ Related tutorial: 19 Types of Sewing Machine Needles and What They’re Used For
Put in the right needle for the project before the fabric gives you trouble. Use a finer needle for lightweight fabric, a stronger needle for denim or heavy fabric, and a knit-friendly needle for stretch fabric.
Also put in a new needle when you start an important project, especially before visible topstitching, buttonholes, quilting lines, or any seam that will be hard to redo.
Change the needle right away if it hits a pin, zipper, presser foot, or needle plate. Even a tiny bend or rough spot can damage fabric or cause stitch problems.
Watch for these signs:
- thread starts shredding near the needle
- the machine makes a popping or punching sound as the needle enters the fabric
- fabric gets tiny snags, pulls, or holes
- stitches look uneven after you rethread the machine
- skipped stitches continue after you check the threading and bobbin
- the needle point catches on a piece of fine fabric, cotton ball, or microfiber cloth
Skipped stitches can mean many things, so don’t blame the needle first and stop there. Rethread the machine, check the bobbin, check that the needle is inserted the correct way, and make sure the needle type matches the fabric. But if the needle is old, damaged, or questionable, replace it. It is the fastest and cheapest test.
Needles cost very little compared with ruined fabric.


For a deeper guide to needle types and sizes, see my full article How To Choose The Right Sewing Machine Needle For Your Project.
13. Use color catcher sheets when washing fabric and finished projects
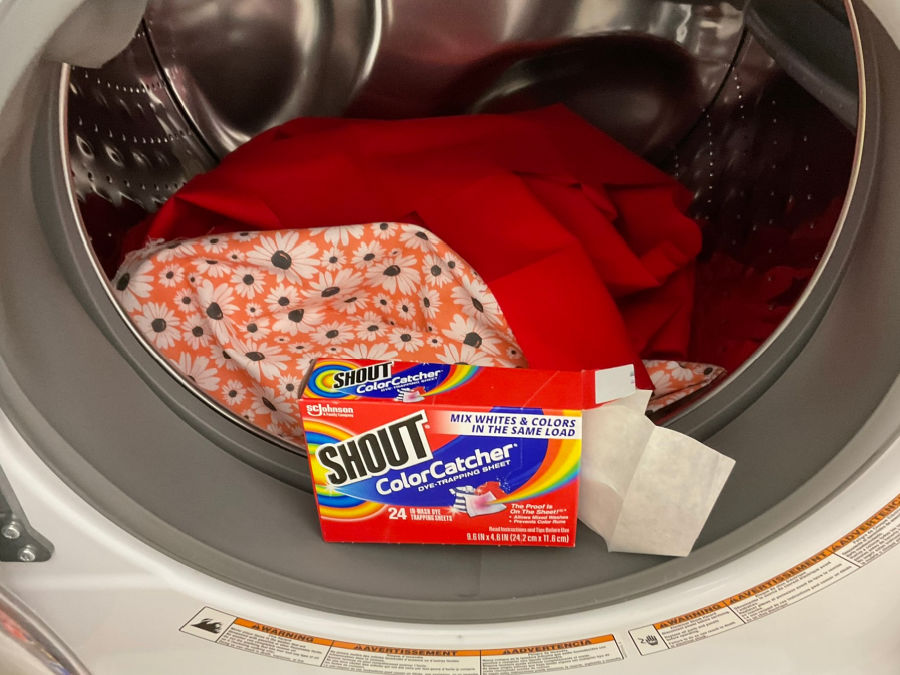
Color catcher sheets are useful when you prewash fabric, especially reds, dark blues, bright prints, batiks, and any fabric that looks like it might bleed.
But they are not only for prewashing. Use them when you wash a finished item too – a handmade garment, quilt, table runner, tote bag, apron, or pillow cover. This matters when one project has light and dark fabrics together. A red-and-white quilt is beautiful until the white blocks turn pink in the wash.


Place one or two color catcher sheets in the washing machine with the item. They help trap loose dye in the water before it settles onto lighter fabric.
They are not a guarantee, but they are a helpful safety net.
✅ Related tutorial: Prewashing Fabric: Is It A Good Idea?
14. Keep small screwdrivers beside the machine
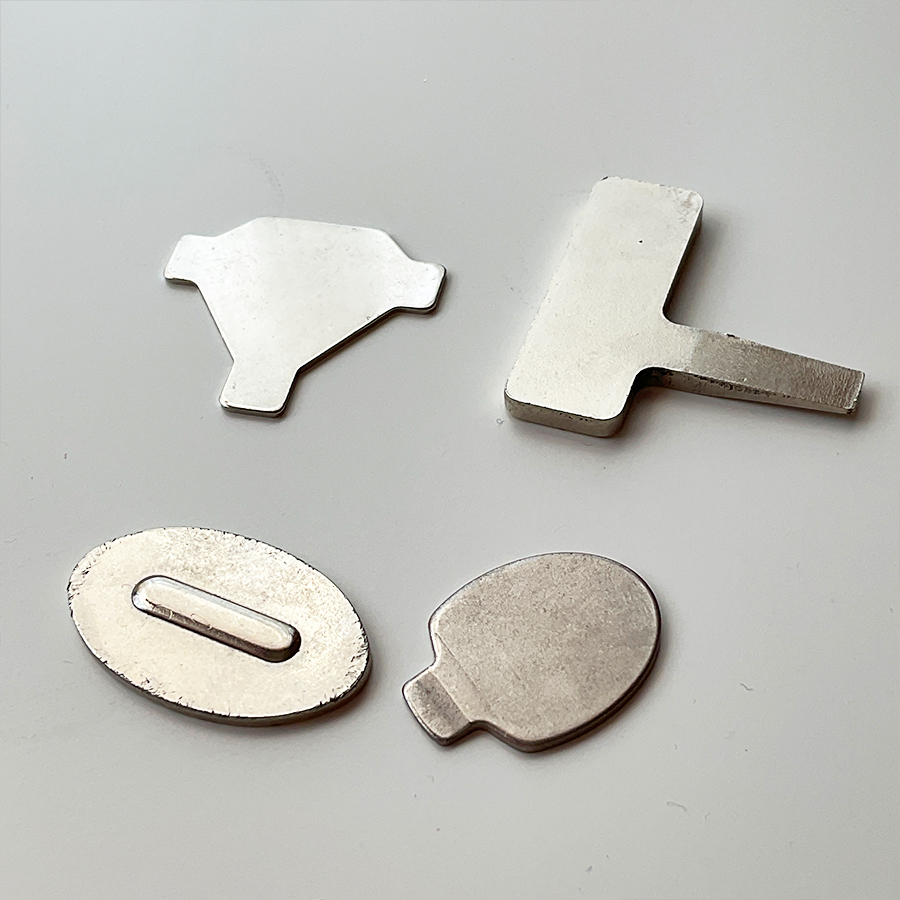
A sewing machine has several tight spots that regular screwdrivers don’t reach well. The needle plate is the one. You may need to unscrew it to remove lint, rescue thread nests, change a plate, or get to a jammed thread.
Tiny screwdrivers make this much easier. A short screwdriver, mini screwdriver set, or right-angle screwdriver can fit into those awkward spaces near the needle, presser foot, and throat plate.
Keep one near your machine if you can. It saves time, and it also saves you from using scissors as a screwdriver, which never ends well for the scissors.
15. Stop the machine from eating fabric
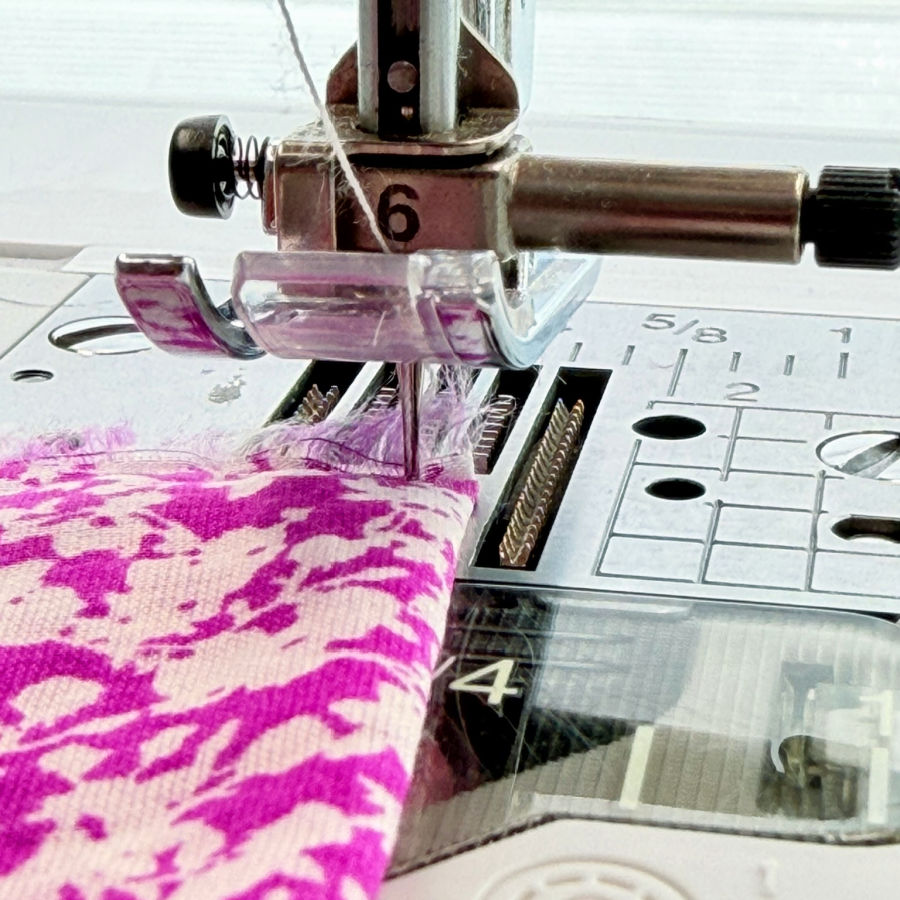
Use a “leader” scrap. Place a small scrap of fabric under the presser foot first, sew a few stitches, then feed your project right after it.
This helps at corners, points, and thin fabrics.
A straight-stitch needle plate also helps because the smaller hole gives delicate fabric more support.
✅ Related tutorial: Why Is My Sewing Machine Pulling Fabric Into The Machine? (Causes + Solutions)
16. Match thread style to the spool pin
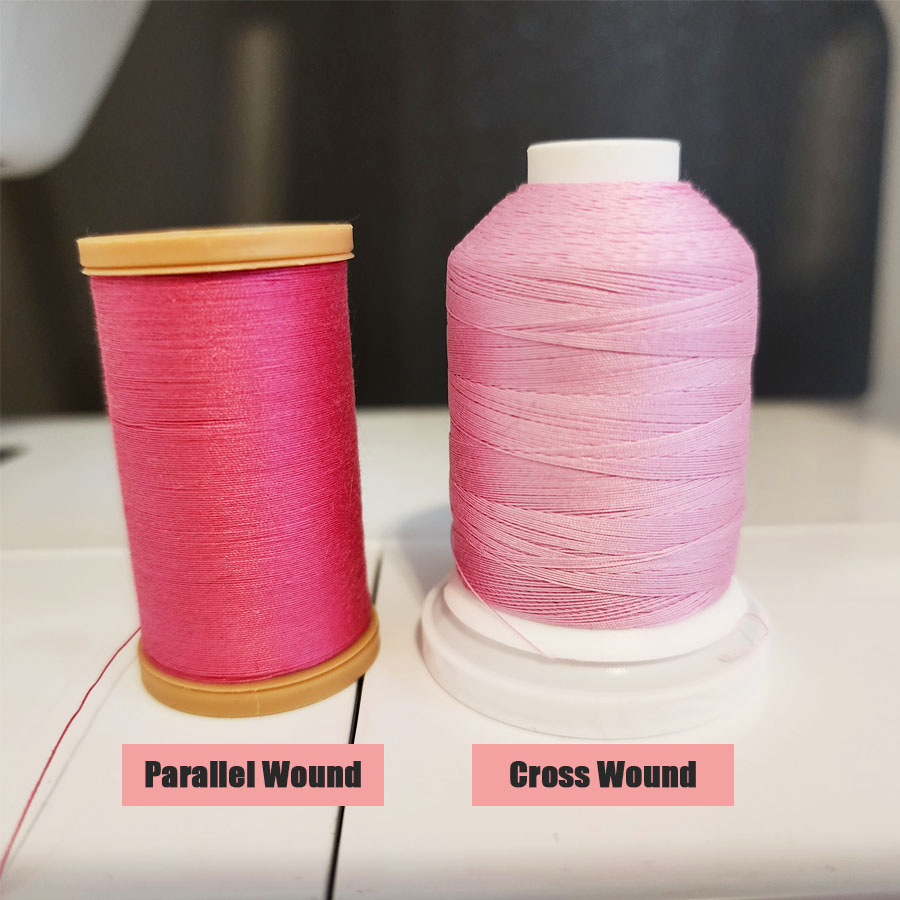
Thread is wound onto the spool two different ways, and using the wrong one for your spool pin orientation causes drag, uneven feeding, and sudden breaks — especially with specialty threads.
Cross-wound thread should usually feed from the top of the spool while the spool stays still. Parallel-wound thread works better when it feeds from the side as the spool rotates.
The wrong setup can cause twisting, snags, uneven tension, and broken thread. I explains this difference in more detail here: Thread Spool Pin Adapter.
17. Perfectly mitered corners, the easy way

Mitering doesn’t need to involve fiddly math or a dozen pins. There’s a folding sequence that gets you a clean 45° corner every time. The basic idea is simple: fold the corner, mark the stitching line, sew across the corner, trim the extra fabric, and press the seam open before you turn it.
This method works well for napkins, table runners, placemats, quilt bindings, hems, and other projects where the corner needs to look neat on both sides.
See the full step-by-step tutorial here: Sewing hacks: how to sew mitered corners.
18. Stop fabric layers from shifting
Fabric layers shift because the feed dogs move the bottom layer while the presser foot presses on the top layer. The result can be a top layer that creeps ahead, seams that don’t match, or edges that no longer line up by the end of the seam.
A few tricks help right away.
First, use a walking foot for long seams, quilting, plaid matching, slippery fabric, bulky layers, and anything with batting. A walking foot helps move the top and bottom layers more evenly, which reduces creeping and misaligned layers.
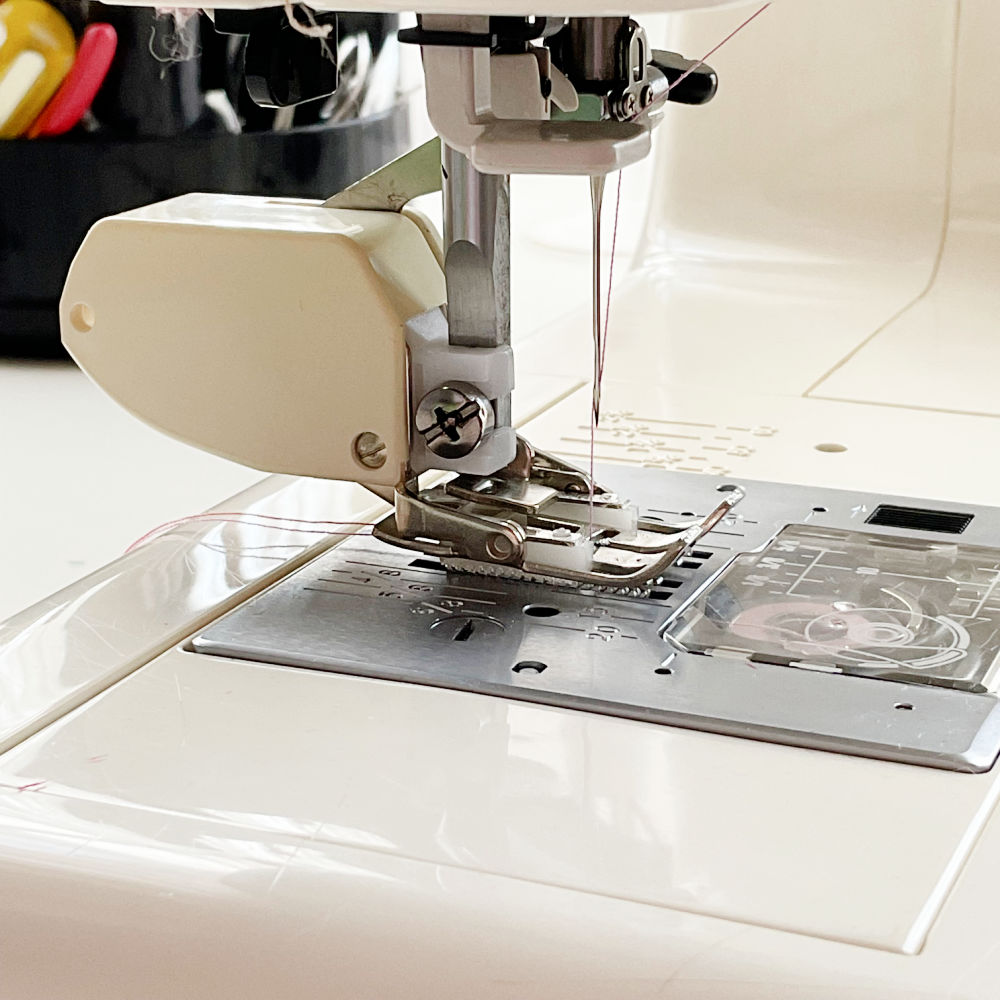
✅ Related tutorial: Walking Foot Attachment
Pin perpendicular to your seam line (not parallel).
For really tricky seams, hand baste first. Pins help, but hand basting holds the layers more evenly from beginning to end. This is especially useful for silk, rayon, velvet, corduroy, knits, quilt layers, and curved seams.
If your machine allows it, reduce the presser foot pressure. Too much pressure can push the top layer ahead of the bottom layer, especially on stretchy, napped, or slippery fabric. Test on scraps and adjust until the layers feed smoothly.
For very slippery fabric, place tissue paper under the fabric and stitch through it. Tear it away after sewing. This gives the feed dogs something stable to grip and helps stop the fabric from sliding.
You can also use a little temporary fabric adhesive inside the seam allowance. Keep it away from the needle path if the product feels sticky. This works well for bias seams, slippery fabric, and small pieces that shift before you can get them under the presser foot.
One more simple tip: sew a few inches, stop with the needle down, lift the presser foot, smooth the layers, lower the foot, and continue. This releases built-up drag before it turns into a crooked seam.
19. Prevent tunneling with a zigzag stitch
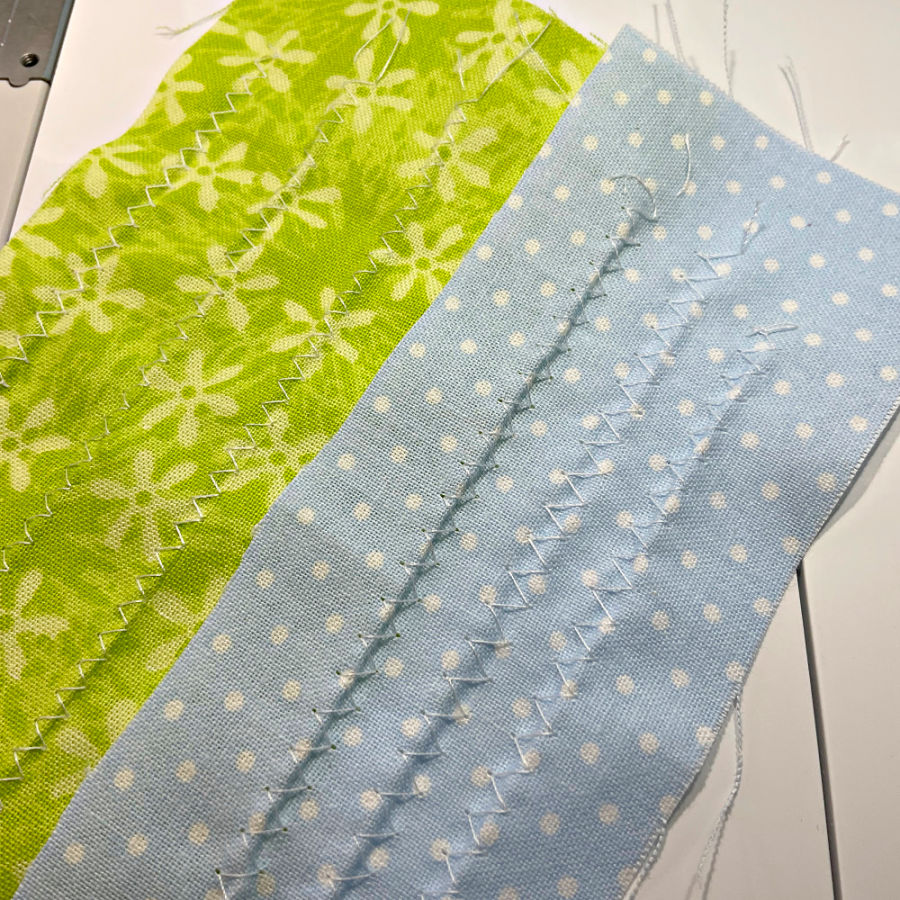
Tunneling happens when the fabric puckers into a raised ridge between zigzag stitches.
Tunneling usually means your top tension is too tight for the stitch width and fabric weight. Loosen the top tension slightly. Try a narrower stitch width and a slightly longer stitch length.
For lightweight or stretchy fabric, add stabilizer under the seam.
A strip of tissue paper can help too, and you can tear it away after sewing.
✅ Related tutorial: Mastering the Zigzag Stitch on a Sewing Machine
20. Notch curves with pinking shears

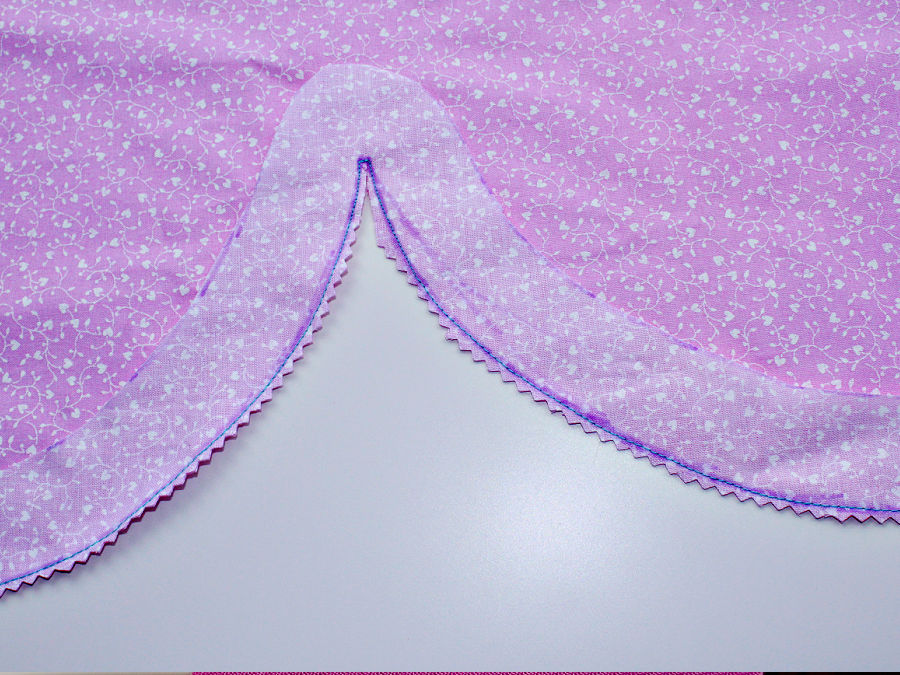
Skip snipping dozens of individual notches into curved seams. Run pinking shears along the seam allowance instead — the zigzag blade removes little wedges of fabric all at once, letting curves lay flat without all the clip-clip-clip.
Keep the cuts away from the stitching line.
Found a tip you want to remember? Save the pin below to your sewing board so this article is easy to find later. You can also follow me on Pinterest for more sewing tips, tutorials, and helpful project ideas.

latest posts
- 10 Easy-to-Miss Features on Sewing Supplies You Should Be Using
- Twin Needle Sewing: My First Try Was a Mess, But Here’s What Worked
- 10 Rules That Made Me a Better Sewist
- How to Make a Lightweight Summer Neck Scarf with a Lettuce Hem
- What Sewists Hate About Sewing: Common Complaints and Practical Fixes
- Knit Presser Foot: How It Works, How to Use It, and My Sewing Tests
- How to Sew Neat Mitered Corners at Acute Angles
- Sewing Machine Needle Organization: A Clever System I Tried
- DIY Car Armrest Organizer: Sewing Tutorial