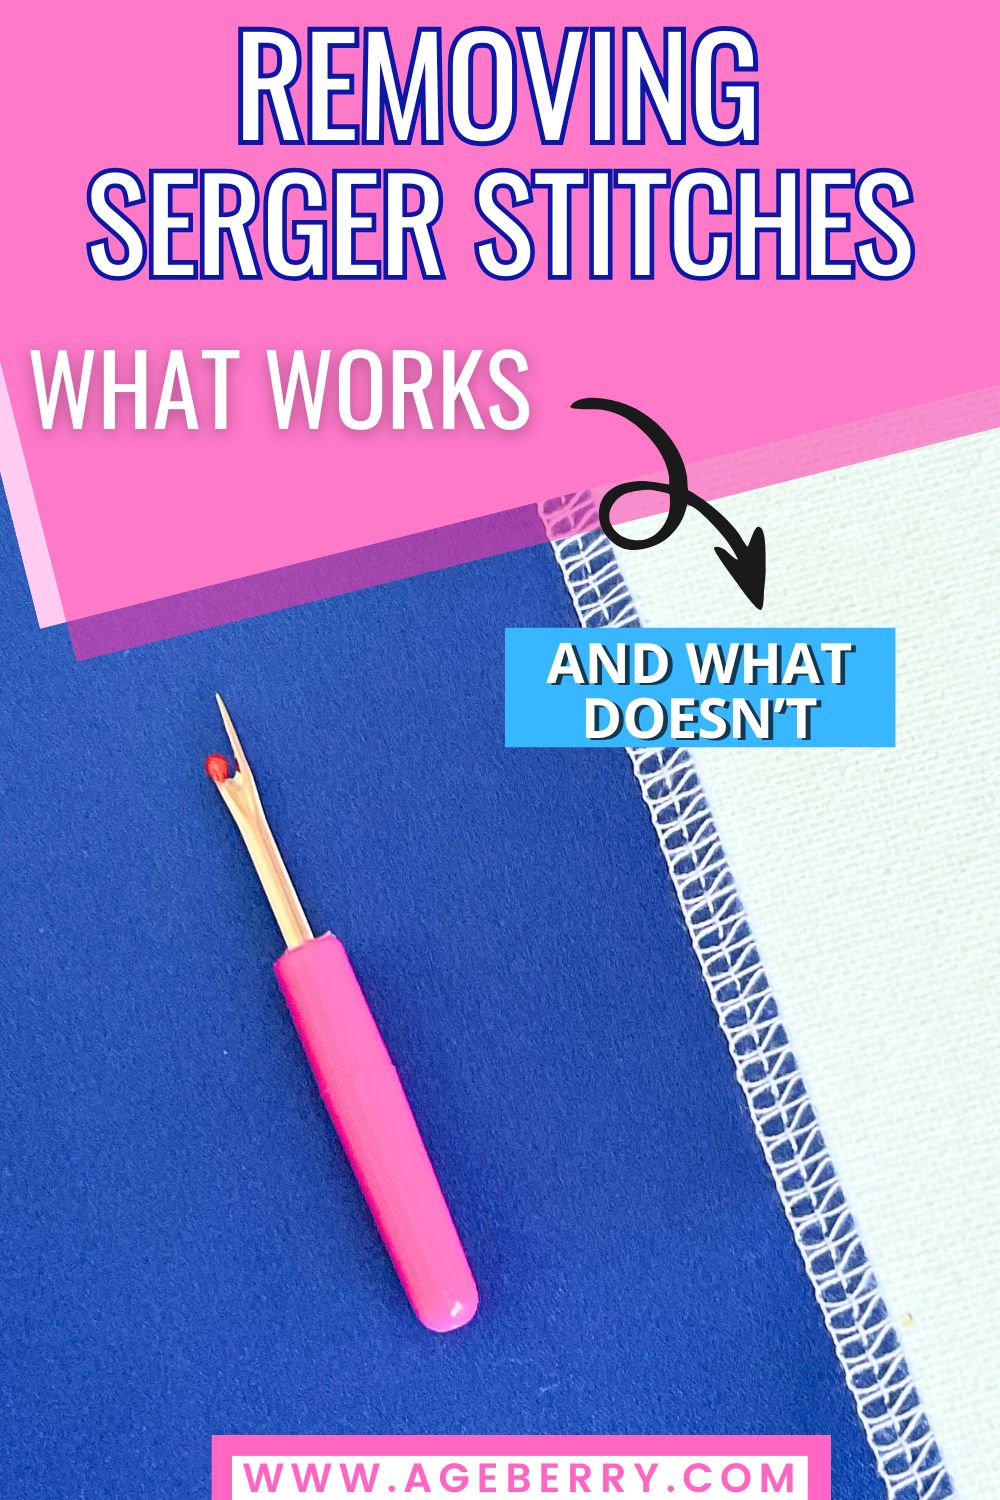
How to Remove Serger Stitches: What Works and What Doesn’t
Few sewing moments test your patience like spotting a crooked serged seam staring back at you. You’ve stitched it, trimmed it, admired your progress—and then you see it. The seam has wandered. Worse, it’s bunched a little. And just like that, you’re thinking about removing serger stitches—something no one really wants to do, but every sewist eventually has to.
Serger stitches may look complex, but once you understand how they’re built, removing them becomes a much more manageable task. In this tutorial, I’ll show you how to remove serger seams with methods that protect your fabric and keep your edge intact.
Let’s take the mystery out of this. You’ll be ready for it the next time it happens.
Why Serger Stitches Feel Impossible to Remove
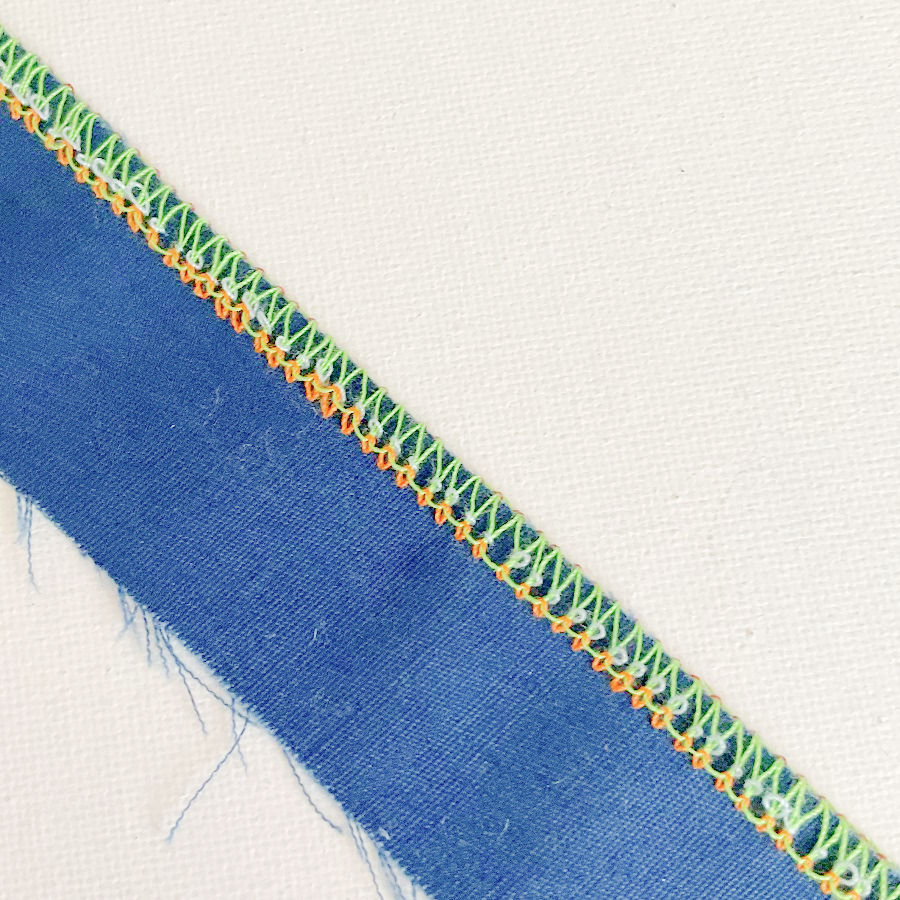
At first glance, a serger seam looks like a tangle of threads that wrap around the fabric and loop over the edge. No wonder it doesn’t pull apart as easily as a standard straight stitch.
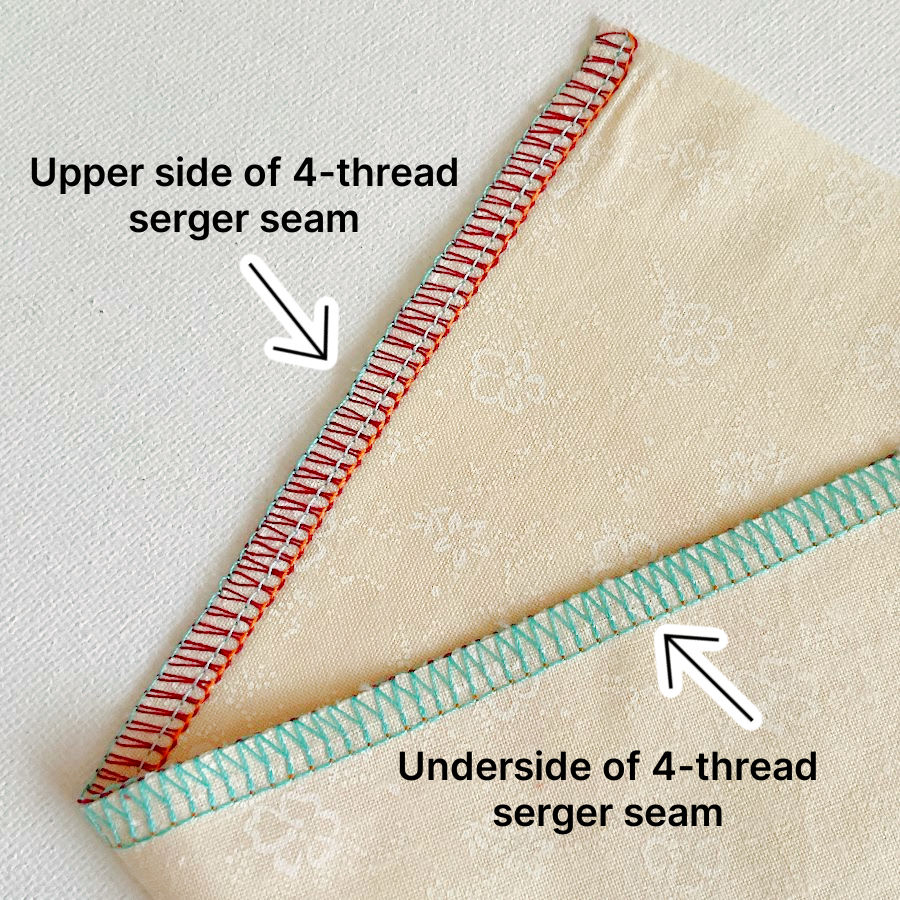
What makes a serger seam different from a regular sewing machine stitch is the way the threads interact. Instead of two threads (a top and a bobbin), a serger uses at least three—sometimes four or more—and they all have different jobs.
Here’s the basic breakdown:
- The needle thread runs in a straight line, just like a regular stitch. This is the one that holds the seam together.
- The upper looper thread wraps over the top edge of the fabric.
- The lower looper thread wraps from the underside.
- Together, the loopers lock the edges while the needle does the anchoring.
But the looper threads don’t just sit on top – they intertwine. That’s why tugging at one end rarely unzips the whole seam. But if you know which thread to break first, the others loosen up with much less effort.
And once you’ve seen it come undone cleanly a few times, it stops being a mystery.
Method 1: How to Remove a 4-Thread Serger Stitch
A 4-thread overlock seam is sturdy and reliable—right up until it needs to come out.
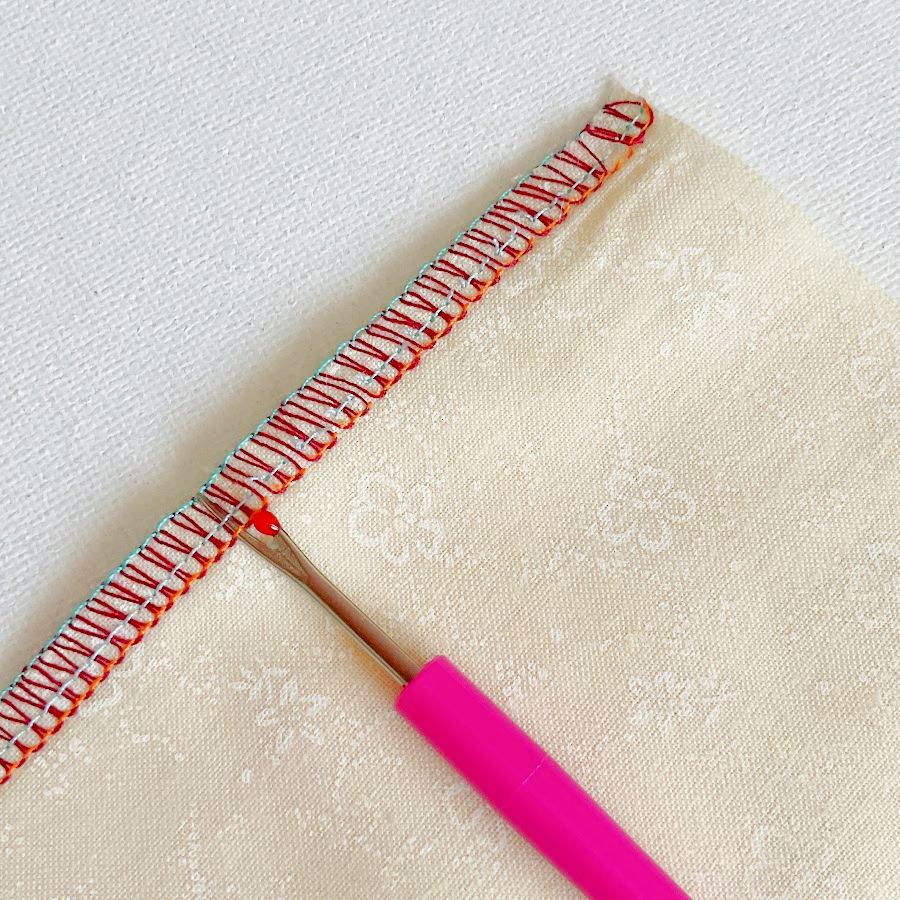
Step 1. Locate both needle threads
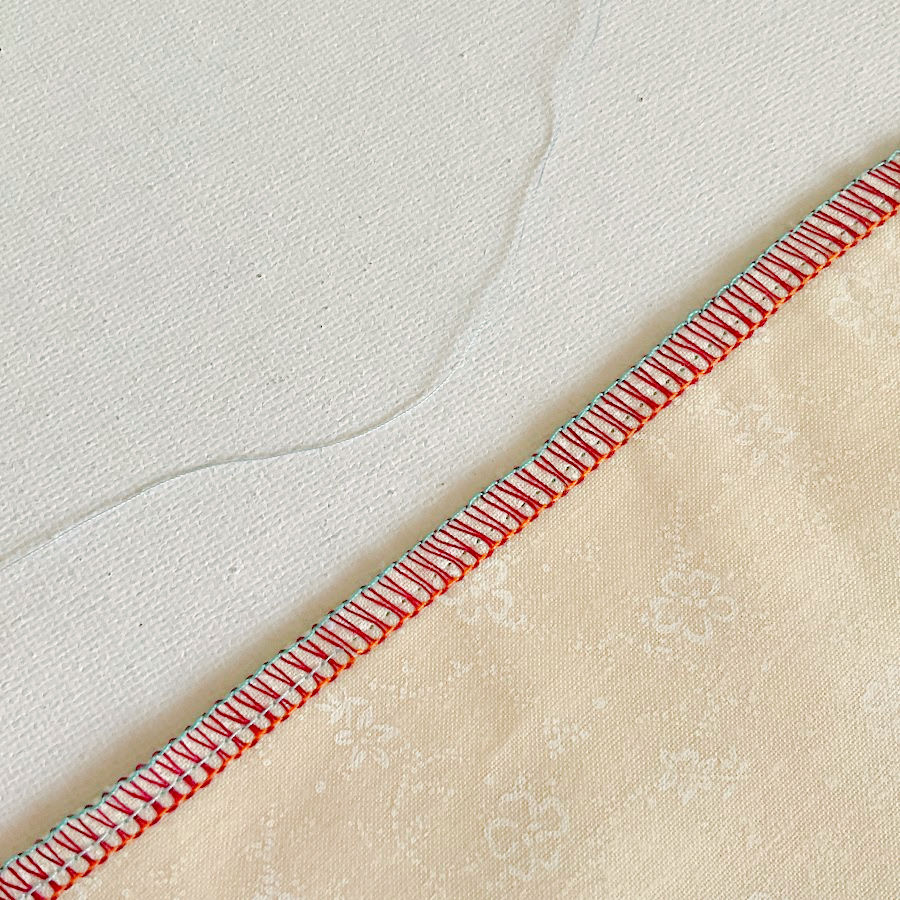
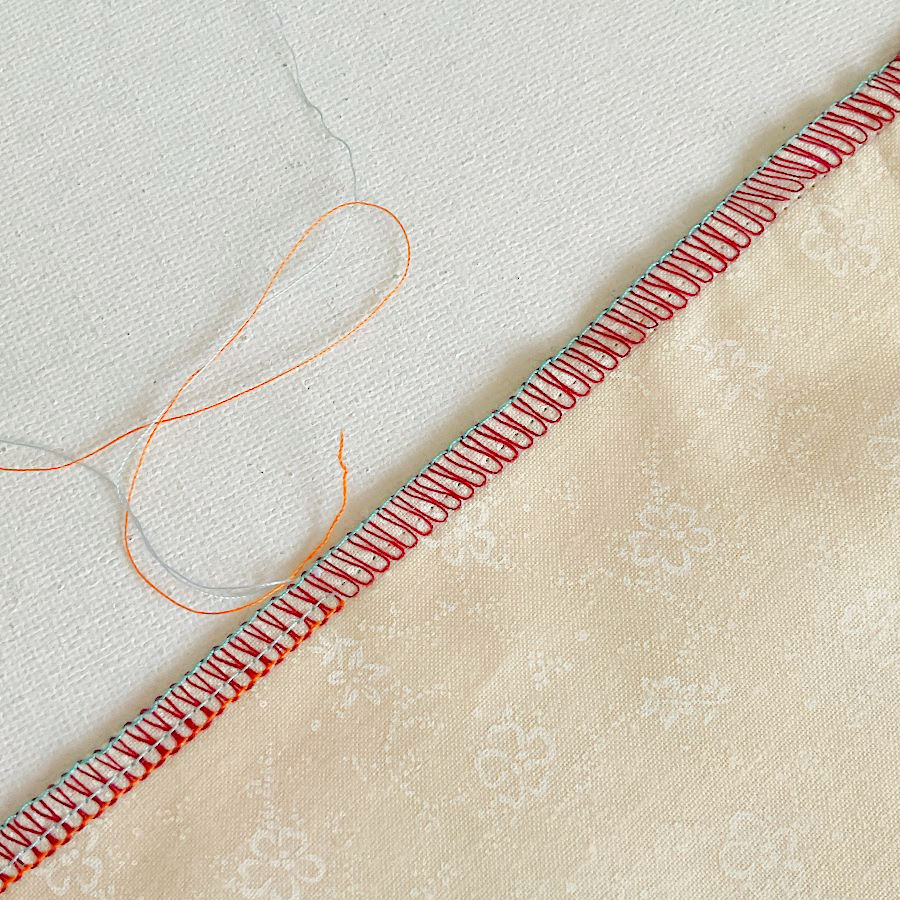
Start with the upper side of the serger seam facing up. This is the side where the upper looper thread forms neat loops wrapping over the fabric edge. It’s usually the more “finished-looking” side of the seam.
Look just inside those loops. You’ll see two straight rows of stitching running parallel to the fabric edge. These are the needle threads—they’re the threads that actually hold the seam together.
Use the tip of your seam ripper to gently separate them from the looper threads. Once you’ve found both, you’re ready to start snipping.
Step 2. Snip both needle threads in one cut
Use the sharp tip of your seam ripper to slice through both needle threads at once. This first snip sets the seam loose, so aim for a clean cut across both strands. Be careful not to pierce or cut the fabric while you work.
Step 3. Repeat the snip every 2–3 stitches
Work in short intervals. Keep cutting both needle threads together every few stitches. You’ll notice that the seam starts to relax and shift slightly as the lock breaks.
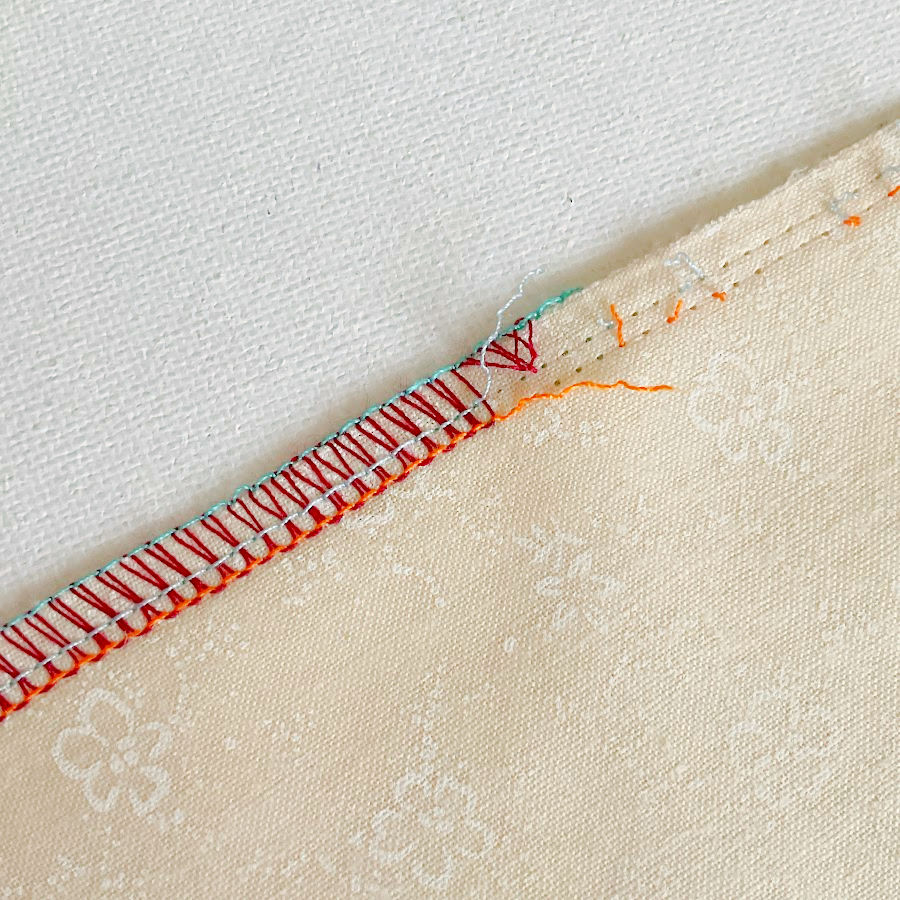
Step 4. Slide the looper threads away
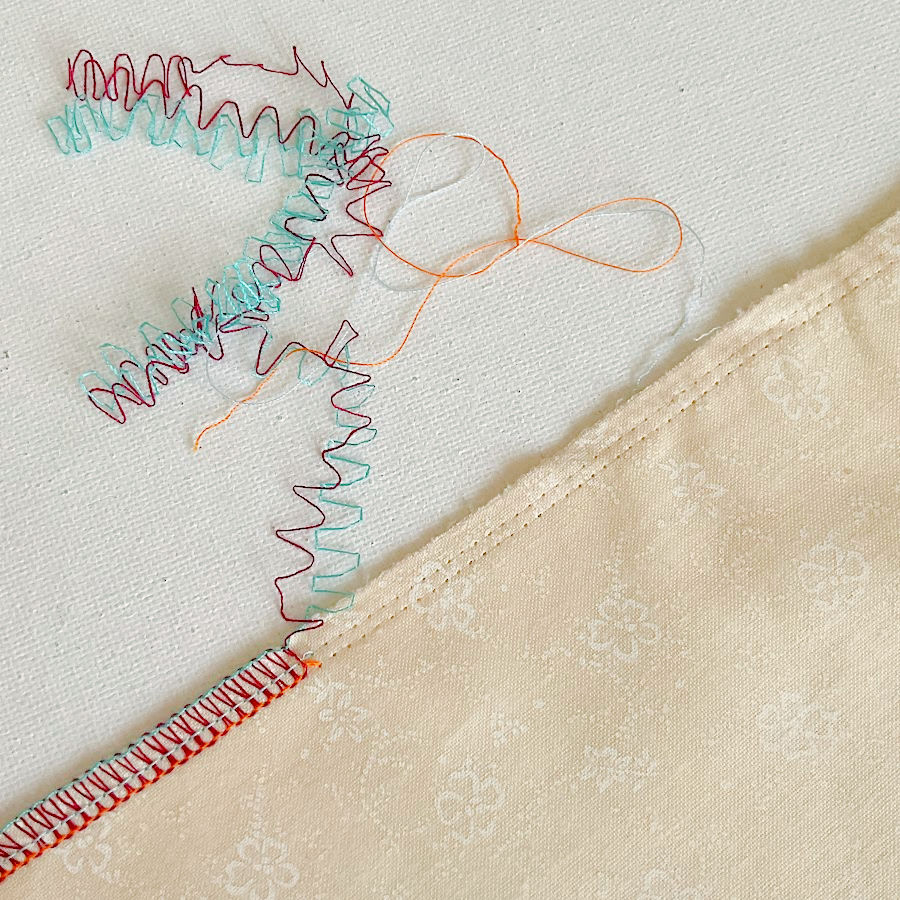
Now comes the satisfying part. Grab the upper looper thread—this one usually curves over the fabric edge—and gently pull it away. Once it lifts, the lower looper thread underneath should follow without much resistance.
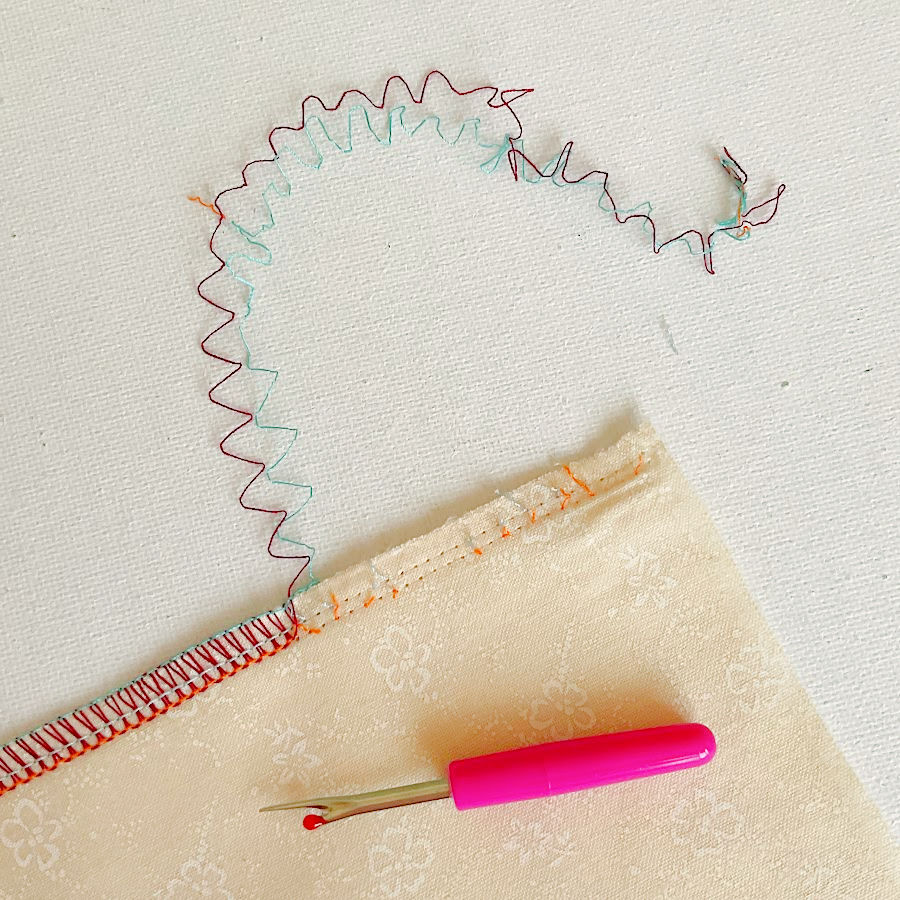
If a section feels stuck, check that both needle threads in that area were clipped. Once they’re released, the looper threads should slide off easily.
The whole seam comes apart cleanly when you follow the thread order. It’s just a matter of snip, snip, slide.
✅ Related tutorial: Best Serger Thread | What To Use | Brands
Method 2: How to Remove Serger Stitches by Pulling the Needle Threads
This method works best when the seam hasn’t been stretched, snagged, or stitched through heavy layers. And if it works, it’s easier and faster than the first one – but it does not always work.
Step 1. Place your fabric right side up
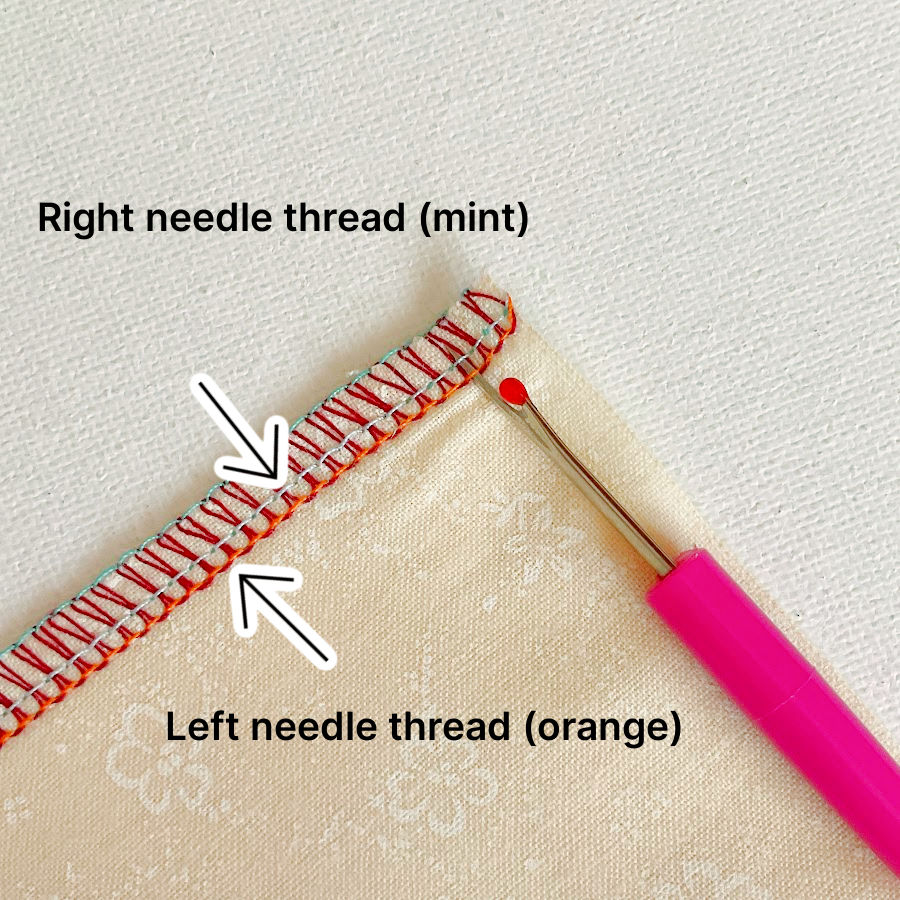
Start with the upper side of the serger seam facing up—the side where the upper looper thread wraps over the edge. This will help you easily see the needle threads.
Step 2. Locate the right needle thread
Look for the row of straight stitches closest to the fabric’s edge. That’s the right needle thread.
Place the tip of your seam ripper under one of those stitches near the beginning of the seam and snip it.
Step 3. Free a few stitches
Loosen several more stitches so you can grab a tail of the thread. If the other end of the thread is not free (it usually is not, but occasionally it is) cut it at some distance from the beginning. Pull the thread gently, keeping it close to the fabric as you slide it out of the seam. Repeat the operation until the end of the seam.
Step 4. Locate the left needle thread
Now find the second row of straight stitches—the left needle thread, which sits just inside the first.
Snip a stitch near the beginning, loosen a few more, and pull the thread out just like you did with the right one.
Step 5. Remove the looper stitches
With both needle threads gone, the looper threads are no longer anchored. You’ll be able to lift or pull them off easily, without resistance. They often come off in long pieces, almost like peeling thread from the edge.
This method is quick and clean—when it works.
But here’s the catch:
- If your thread is too weak, it might snap before you pull it all the way through.
- If your needle tension was set too tight, the thread may resist and bunch or break instead of sliding out.
- And if the seam was sewn through bulky or uneven layers, the pull method may stop halfway.
When it works, it’s a very easy method. When it doesn’t, you’re better off switching to the first method—snipping in short intervals instead of trying to pull.
✅ Related tutorial: 30 Essential Sewing Tips for Beginners Learning to Use a Serger

Reading the steps is helpful, but seeing the process makes it even clearer. I recorded a short reel that walks through how I remove serger stitches from start to finish.
How to Remove a 3-Thread Overlock Seam
A 3-thread overlock seam is commonly used for finishing raw edges or sewing lightweight knits. It uses one needle thread and two looper threads, which means there’s one less line of stitching to remove compared to a 4-thread seam.
This stitch rarely needs to be undone, since it’s mostly used for finishing, but when it does go wrong, the removal methods are simple.
Both Removing Methods Work Here
Since there’s only one needle thread, you can use either of the two methods:
- Method 1: Snip the needle thread every half inch or so, then lift the looper threads.
- Method 2: Find the needle thread near the start of the seam, loosen a few stitches, and try to pull the entire thread out in one continuous piece.
No matter which approach you use, the 3-thread seam usually comes apart faster than its 4-thread cousin. Once the needle thread is out of the way, the loopers have nothing to hang onto.
✅ Related tutorial: Serger Panic? Nah! Here Are 17 Serger Tips Every Sewist Needs to Know
Note: Some of the links on this page are affiliate links. This means I will receive a commission if you order a product through one of my links. I only recommend products I believe in and use myself.
Tools That Make the Process Easier
You don’t need a full toolbox to unpick serger seams, but a few well-chosen helpers can make the job smoother—and much less annoying.
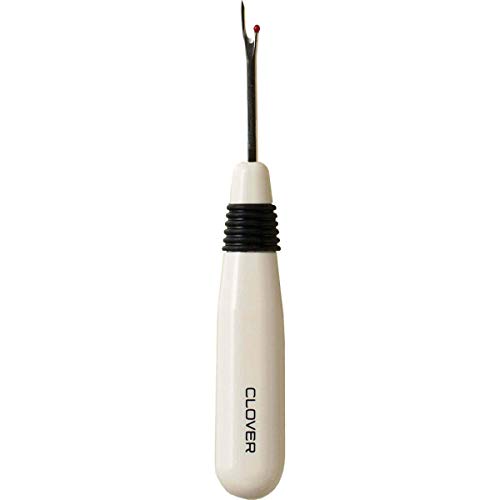
Seam ripper with a sharp point
A fine, sharp tip helps you get under tight needle stitches without snagging the fabric. If yours is dull, treat yourself to a new one. It makes a big difference.

✅ Related tutorial: Why Does Your Seam Ripper Have a Red Ball? Discover Its Purpose!
Tweezers
Sometimes your fingers refuse to cooperate. Tweezers are perfect for pulling loose threads, especially in tight areas or near curves. Think of them as precision fingers on their best behavior.

A magnifier with a light
Dark thread on dark fabric? Good luck spotting the right stitch without help. A magnifier with built-in light takes the guesswork out and saves your eyes.


Lint roller
After unpicking, the fabric edge often looks like it’s been through a thread storm. A quick roll lifts all the fuzz and loose bits, leaving a clean surface ready for resewing.

Can You Remove a Rolled Hem? Technically Yes… But Don’t Bother
Rolled hems look beautiful when they turn out right. But when something’s off—maybe the edge ripples, the tension’s wrong, or the color is all wrong—it’s tempting to think you can just remove the stitching and redo it.
In theory, yes. You can unpick a rolled hem. But in practice? There’s almost no point.
My opinion is that removing rolled hems is not worth the effort.
- The seam is extremely narrow, often only 2–3 millimeters wide.
- The stitch length is tiny, so the needle thread forms hundreds of stitches in a small space.
- The seam is usually tight and dense, with the looper threads locking everything in tightly.
- There’s no extra seam allowance left—rolled hems trim the fabric right to the edge.
- Trying to isolate just the needle thread is nearly impossible without cutting into the fabric.
- The fabric edge often starts to fray immediately as you work, especially on fine or open-weave materials.
✅ Related tutorial: ✅How to Make a Rolled Hem with a Serger: Get Professional Results
I tested this just to be sure. I managed to remove about an inch of this rolled hem, and that was enough to confirm how difficult the process really is. It took time, the stitches fought back, and the fabric started to fray almost immediately. This is a good example of why unpicking a rolled hem rarely makes sense—especially on delicate fabrics like this.

So yes, you could unpick it. But what do you gain? At most, a few millimeters of extra fabric—and a good chance of damaging the edge in the process.
A cleaner, safer option? Just trim it off.
If the rolled hem didn’t turn out the way you wanted, cut along the hemline to remove it completely. Then re-hem with fresh settings, a new finish, or a different thread. This gives you a clean edge to work with, and it’s far faster than trying to dig out a dense line of thread from the edge of your fabric.
✅ Related tutorial: Cutting Tools For Sewing: The Ultimate Guide
Cleaning Up After Removing
Once the last thread is out, the fabric might look a little “tired”—and that’s completely normal. Removing serger stitches often leaves behind a bit of fuzz, maybe a few waves in the fabric, and sometimes stretched edges if the seam fought you along the way.
So, let’s get the fabric back into shape!
1. Remove thread fuzz
Check the seam line for leftover bits of thread. Use tweezers or a lint roller to lift away anything that didn’t come off with the seam. A soft brush works well for textured fabrics or knits.
2. Press the seam lightly with steam
Give the area a gentle press to help the fabric relax. Use steam if your fabric can handle it, and avoid dragging the iron—just press and lift. This helps smooth out any stretching or distortion caused during unpicking.
✅ Related tutorial: Pressing Matters: 15 Common Ironing Mistakes to Avoid
3. Reshape knits carefully
If you’re working with knits, take a moment to reshape the seam by hand before pressing. Pulling on the stitches may have warped the fabric slightly, so ease it back into place.
✅ Related tutorial: How To Sew Knit Fabric | 23 Expert Tips For Beginners
4. Re-serge with a slightly longer stitch length if needed
If the edge looks fragile or stressed, lengthen your stitch slightly on the next pass. This reduces pressure on the fabric and prevents further distortion.
Resetting the fabric after unpicking gives you the best chance at a clean second go. A little prep now helps the next seam land exactly where you want it.
When We End Up Removing a Serger Seam (and Why It Happens)
I placed this section at the end on purpose. When a seam needs to come out, most of us want to know how—not read about why it happened. That’s why I walked you through the unpicking methods first.
But this part matters, too.
There are lots of reasons serger seams go wrong. Some are technical. Others are about fit, fabric, or just one of those sewing-room moments that sneak up on you. Knowing what causes these issues won’t prevent a seam from needing a redo, but it can help you avoid a few of the usual traps—and troubleshoot faster when something’s off.
Let’s walk through the most common reasons serged seams end up getting ripped out.
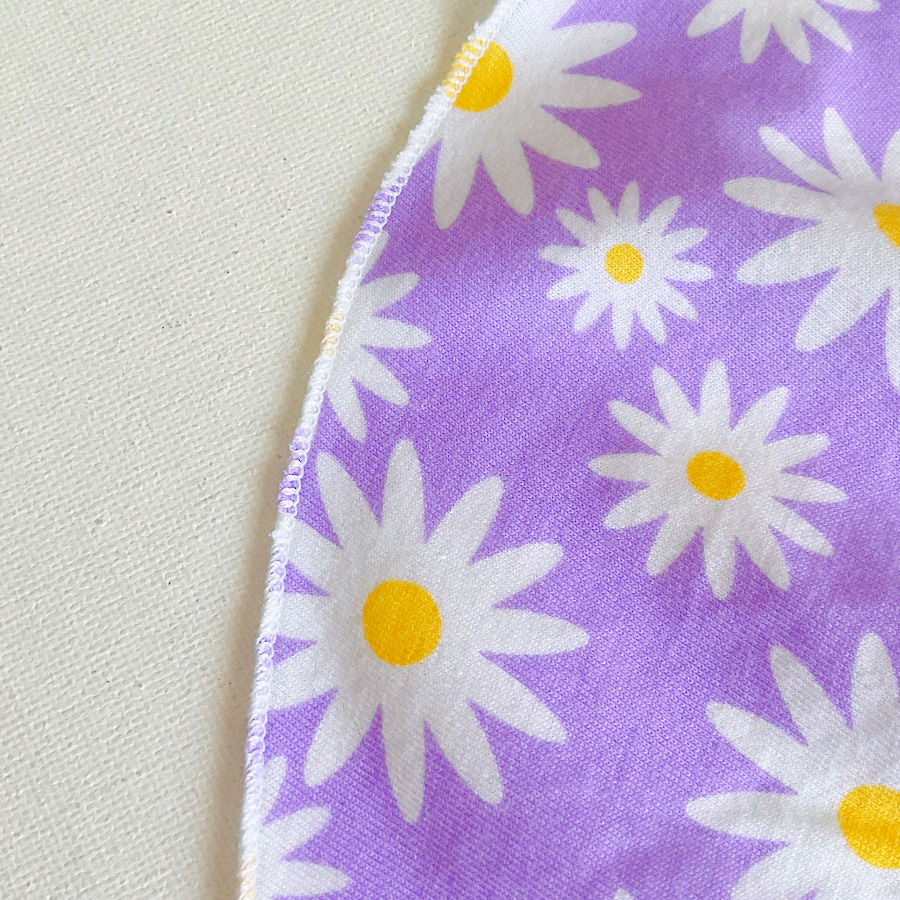
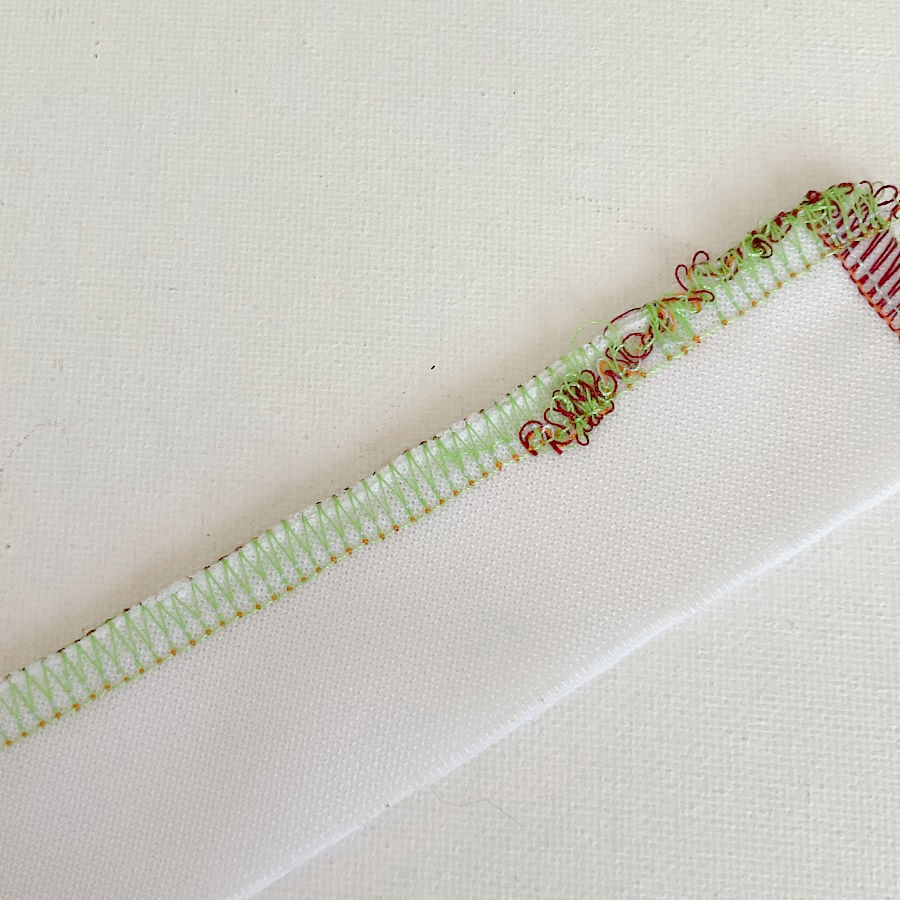
1. The seam ended up bunched, wavy, or stretched along the edge.
A narrow stitch width or tight looper tension can pull the fabric into the seam instead of wrapping around it smoothly. This usually shows up as bunching or ripples along the edge, just like in the image.
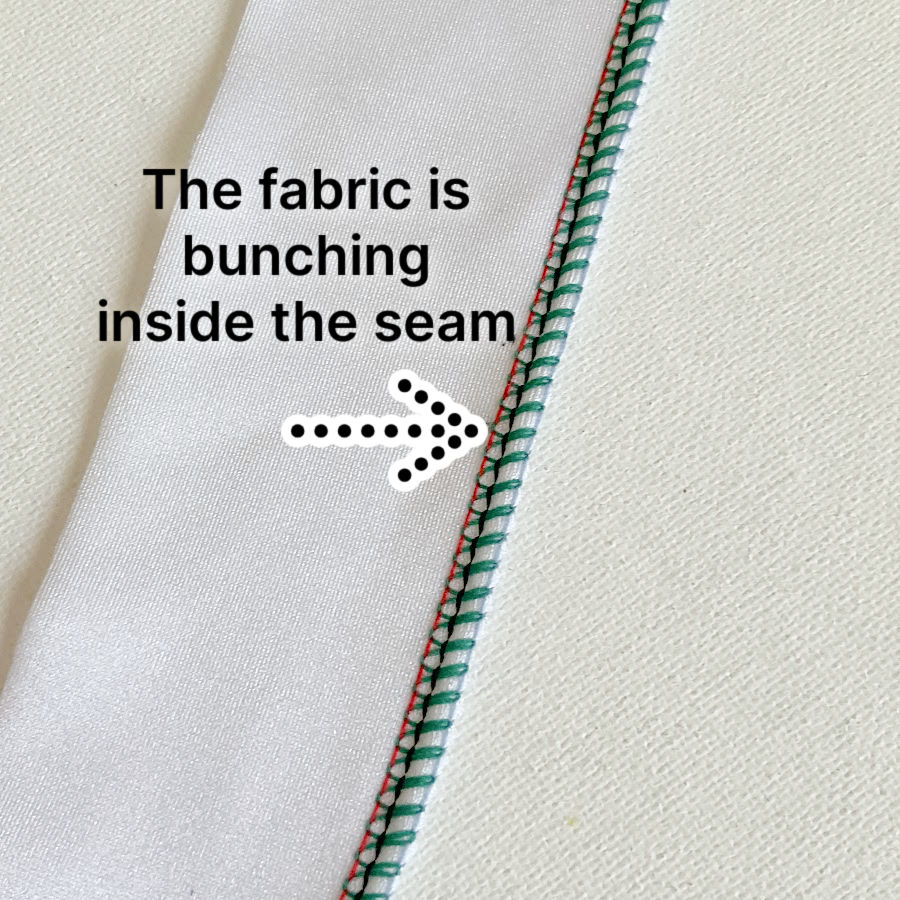
Knits love to stretch when they feel dramatic. If the edge waves or ripples, the finish looks messy.
2. The seam wandered off the intended seam allowance
A serger trims as it sews. So when the seam drifts off-course and eats more fabric than you wanted, the only fix is to unpick and try to fix it.
3. The fit needs adjusting after trying the garment on
Maybe the side seam feels too loose. Maybe the shoulder drops. A serged seam is strong, so the only path to a better fit is removing that seam and reshaping the garment.
4. The knife trimmed too much
One little slip, and the knife removes more fabric than planned. Sometimes you can work around it. Other times, you unpick the seam to rework the construction.
5. The seam twists or shifts layers out of alignment
Multi-layer seams love to shift, especially with slippery fabrics. A twisted waistband or mismatched hem edge usually means taking the seam out.
6. The seam caught something it shouldn’t
Raw edge tucks. A corner folds under. A pocket gets swallowed. Sergers love to “help” by grabbing extra fabric. Removing the seam lets you free what the machine trapped.
7. A pattern change becomes necessary mid-project
Maybe you decided to raise a neckline, shorten a sleeve, or swap out a hem finish. If the seams are serged, they need to come out before you can adjust the pattern.
8. The tension was off
Looper loops might dangle off the edge or pull too tight. If the seam feels uneven or looks messy, unpicking allows you to reset tension and redo the finish.
9. The seam needs opening for repairs or alterations
A serged seam locks the fabric securely, but that also means you must remove it to fix something. Hem repairs, seam fixes, or replacing elastic often require opening that seam first.
10. The wrong pieces were sewn together
A classic sewing-room moment. Two identical-looking pieces line up perfectly until you realize they are not the pieces you meant to sew. Out comes the seam ripper.
11. You need to reclaim fabric
If you miscut or want to reuse fabric for another project, removing the serger seam can give you back precious millimeters of material.
I hope you never have to remove a serger seam! But just in case you do need to do it, save this pin to your sewing board on Pinterest so you can return to these steps on removing serger seams whenever you need them. And follow me on Pinterest for more sewing tips, detailed tutorials, and useful techniques for everyday sewing projects.
latest posts
- What Do You Call a Person Who Sews? I Asked My Readers and Got 1,408 Opinions
- DIY Round Purse: PDF Sewing Pattern and Detailed Instructions
- Mini Wonder Clips By Clover: Useful Sewing Tool Or Just Another Notion?
- Non-Slip Grips For Quilting Rulers: A Small Notion With A Useful Job
- Fabric Eraser for Sewing: What It Removes and When to Use It
- What Is The Best Thread For Sewing Machine Projects? Let’s Find Out!
- Butterfly Quilt Block Tutorial – Foundation Paper Piecing
- How To Sew Quilt Squares So The Corners Match
- Sewing With Fork Pins: How They Help With Pattern Matching, Slippery Fabric, And Seams