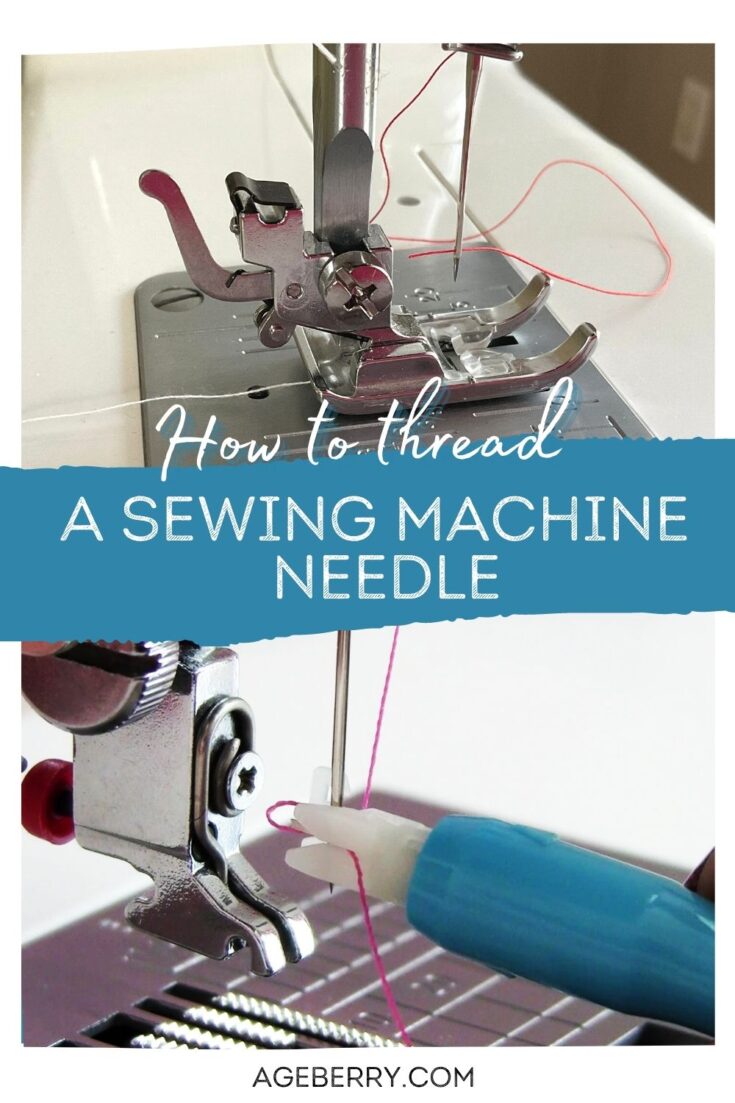
How to thread a needle on a sewing machine
In this post, I want to show you how to thread a sewing machine needle easily.
Threading a needle is kind of routine for me – I do it every day and don’t even think about it, it seems so simple. I can compare it with brushing teeth – we know it’s important but we don’t publish tutorials telling people how to do it because we consider everybody already knows it, right?
So I was really surprised to see that the phrase “How to thread a needle” gets thousands of searches per month on Google! It means that people simply find it tricky and need tips to avoid frustration or improve their sewing experience.
Here we go – learn easy ways to thread a needle on a sewing machine and serger.
Attention! If you like the video format, at the bottom of this post, look for a YouTube video version where there is a step-by-step tutorial on how to thread a sewing machine needle. For a more complete picture, I recommend exploring both versions.
1. First, let’s talk about some general rules to follow.
Don’t turn on your sewing machine while threading a needle if you are just learning to use your sewing machine because you can accidentally start sewing and get injured. Have other sources of light around your sewing machine so you won’t need the light build-in the machine. Read my article “Sewing room lighting idea” to get a summary of what we really need to know about lighting in a sewing room.
But if you already know how to sew with a sewing machine then turn it on and keep it on while threading. Actually, some high-end sewing machines require you to turn it on for threading – Brother Luminaire and Babylock Destiny are some of them.
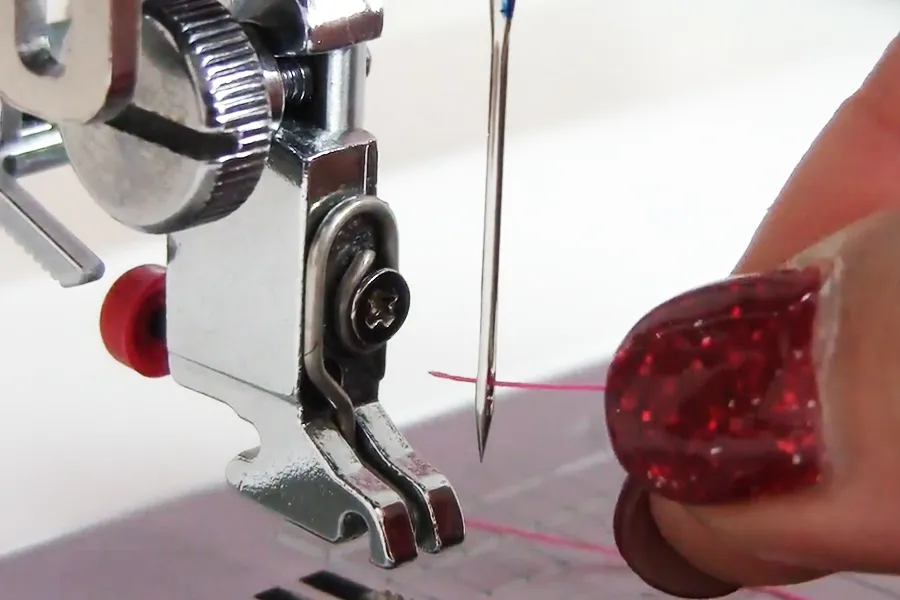
The thread should go from front to back through the needle and shouldn’t be twisted.
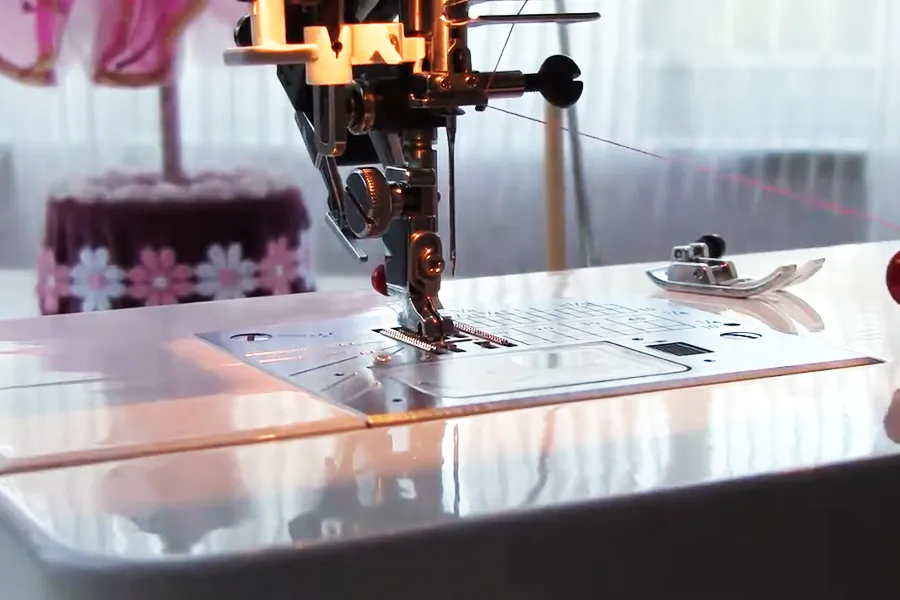
Raise the needle to the proper position – it’s better if the needle is in the most “up” position. You can manually do it with a handwheel. Of course, on modern computerized sewing machines, you can just press the up/down button to raise the needle, but for this, your machine has to be turned on.
Note: Some of the links on this page are affiliate links. This means I will receive a commission if you order a product through one of my links. I only recommend products I believe in and use myself.
Lower the presser foot (manually, of course) or take it away completely – this way you will have more space to move around the needle. Lowering the presser foot bar will also engage the tension disks to keep the thread from pulling freely in your hands.
2. If your vision is good and you have a vintage sewing machine or just a very simple one you can thread a needle the regular way as our grandmothers did.
Just make sure you cut the thread end with sharp scissors (so the cut is clean and nice without any fibers coming apart). Licking the thread also helps. Hold the thread as close to the end as you can.
Sometimes it takes me many tries to thread the needle this way. I need not only good eyesight but also steady hands!

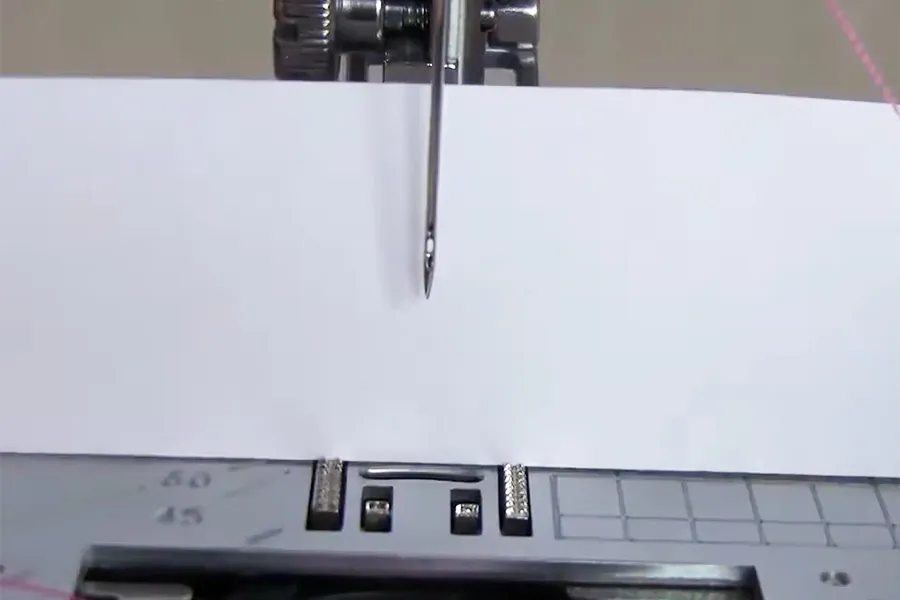
You can use a small piece of white paper like in the image below – then you can see the needle eye clearly.
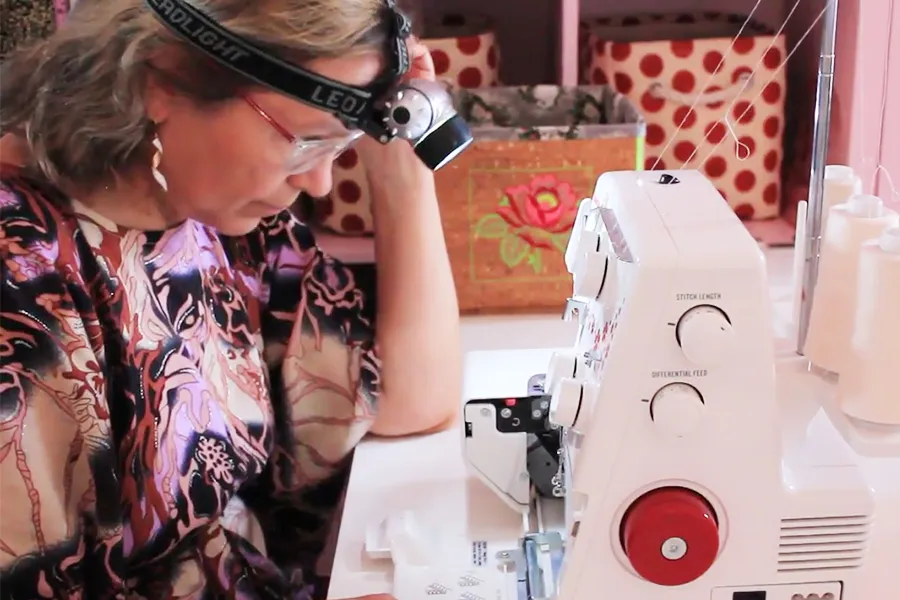
Or use a headlamp to get some extra light and avoid shadows.
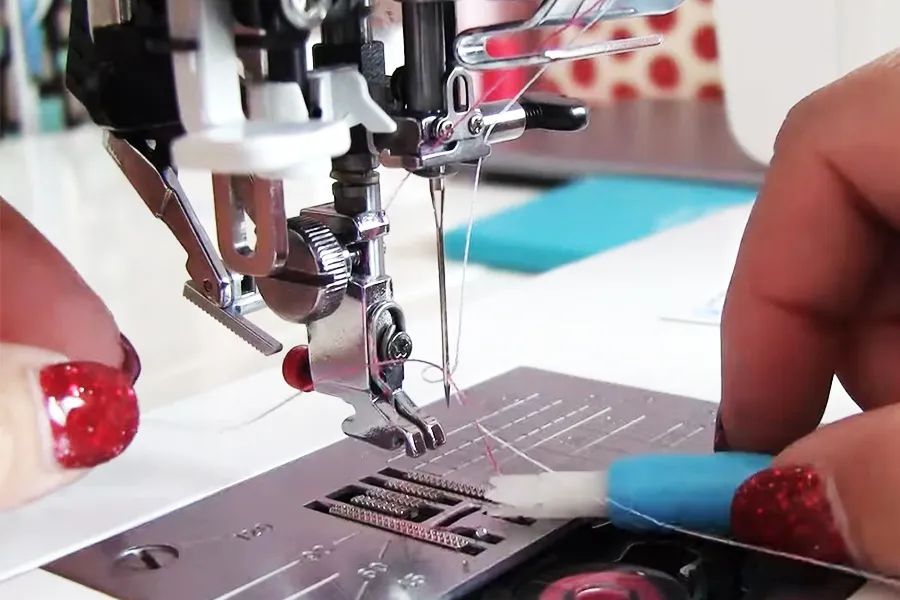
Tweezers are a very useful tool to pick up the thread end that comes through the needle.
In some cases, it can be useful to unscrew the needle and thread it while it’s not in the machine. It’s actually quite easy to take the needle out and put it back already threaded.
✅ Related tutorial: End the hassle of threading a hand sewing needle
3. The modern world is full of helpful gadgets and the sewing world is not an exception.
So there are special needle threaders for sewing machines which you can buy separately. Let me show you how to use one.
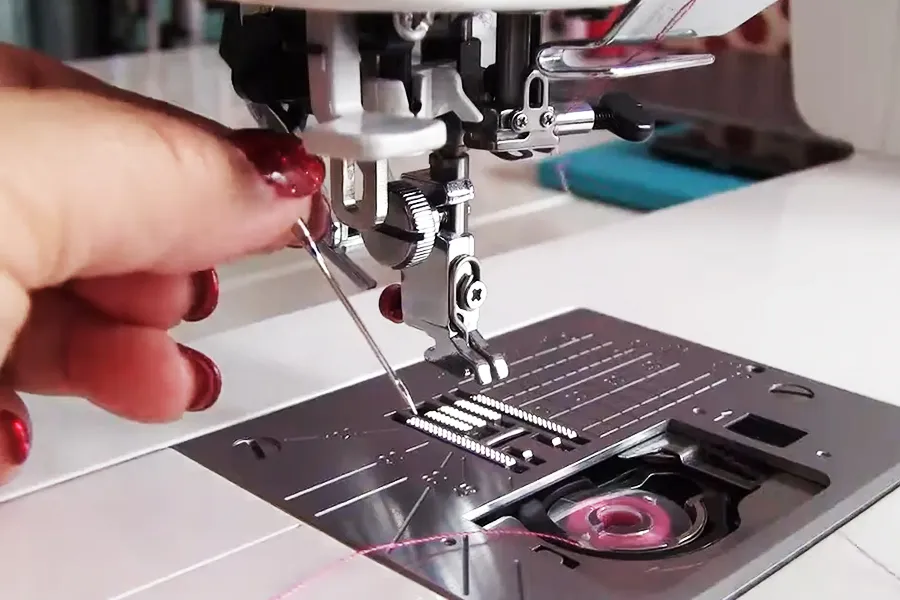
There are two small arrows on it. So hold the threader horizontally with either arrow facing up. Bring thread across the “fork” from side to side.
Gently press the threader across the needle, let go of the thread freely (don’t hold it anymore with your fingers), and pull the threader down on the needle until you hear (or feel) a click. Push the threader – the small metal tongue will push the thread through the eye of the needle as it passes. You will see some loop behind the needle eye.
Bring the rest of the thread with your hand or with tweezers.
Some people complain that the threader breaks easily. I am not sure why it happens. To me the threader works just fine, I have had it for 3 years already. Of course, you have to be very careful with it – it has really small parts. Or maybe it’s the brand that matters – mine is from Dritz and I know this company makes awesome sewing tools.
I save myself a lot of frustration by having one of these threaders near my serger because serger needles are awkward to thread. This inexpensive tool makes my life easier.
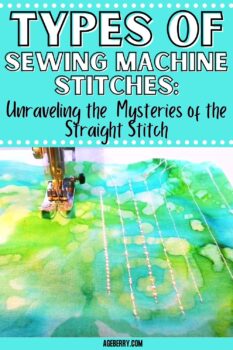
✅ Related tutorial: Types of Sewing Machine Stitches: Unraveling the Mysteries of the Straight Stitch
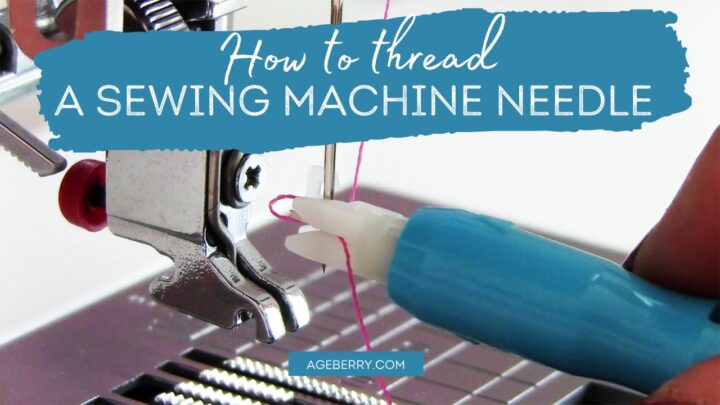
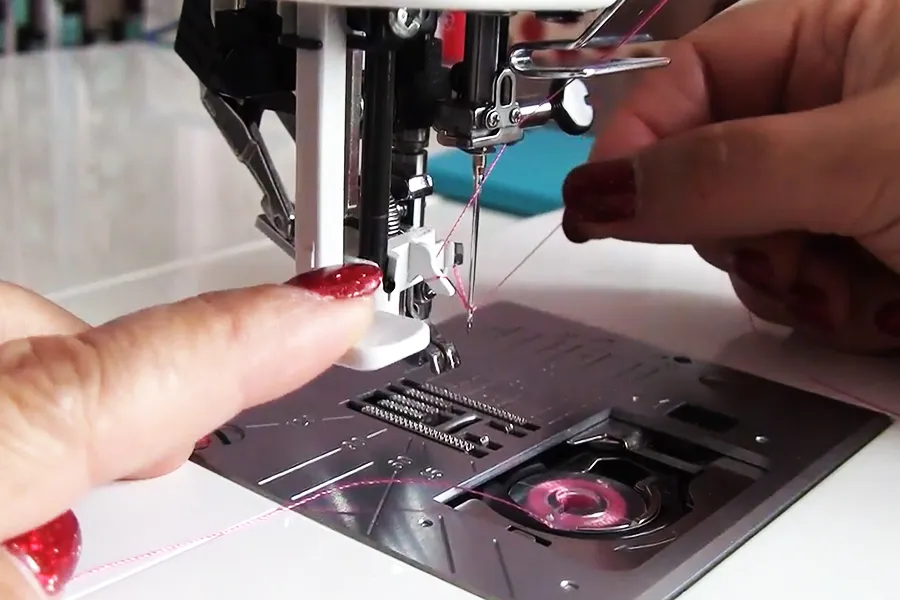
4. Modern computerized sewing machines have built-in threaders. Check if your machine has one. So a small thing but so helpful! Let’s see how to use this threader.
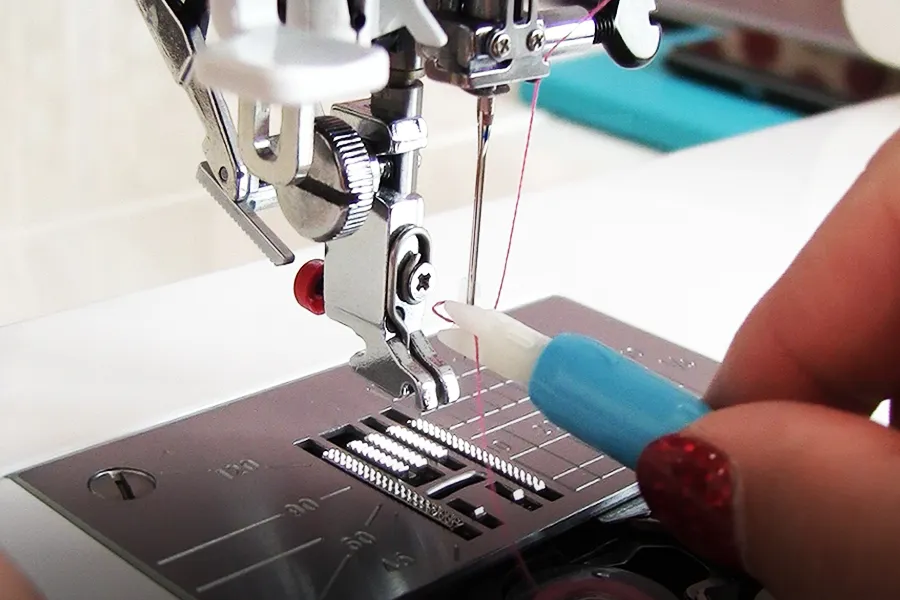
First of all, make sure your needle is in its highest position because the threader has to line up with the eye of the needle. You can do it manually with the handwheel or push the needle up/down button (sometimes twice) if your machine has it.
Hold the thread to the left of the needle. Draw the thread down around the threader guide (or prong) with some tension and bring it from left to right in front of the needle. Depress the threader knob down as far as it will go.
You will see that a very small hook will come out through the needle eye from the back towards the front.
Place the thread under the hook keeping the thread parallel to the table.
Release the threader knob slowly while holding the thread end with your hand. A loop of the thread will be pulled through the needle’s eye.
Remove the loop from the threader and pull out the thread end through the needle eye.
This built-in needle threader is a wonderful invention indeed but you have to be gentle with it because it breaks quite easily. For example, if the small hook that goes through the needle’s eye is bent for some reason it will go to the side of the needle rather than through the eye. In this case, you will have to center it again to realign it with the needle eye – you can gently push it back to the center position with your fingernail or a small screwdriver.
Sometimes the hook fails to pull a loop of the thread – something can be wrong, then check the needle and its setting.
Unfortunately, built-in needle threaders don’t work well with thick threads (like size ##10-30 weight), very thin needles (size 65/9 and smaller), twin needles, etc. In this case, you will need to thread the needle the regular way.
5. There are automatic needle threaders on modern sewing machines. You practically just press the correct button for automatic threading. This feature is especially nice for machine embroidery when you need to change the thread color many times.
And now I want to show you something unusual – I bet you didn’t see it before. What am I talking about?
There are double-eye needles now. They can be used to sew with 2 threads of different colors at once. They are for decorative use mostly of course.
Let’s see how to thread this double-eye needle.
You can do it the regular way. But you can also use needle threaders – the one that comes with a sewing machine goes to the eye which is down, and the threader you buy separately goes to the upper eye.
So here is my YouTube video. Check this out if you like to see how to thread a needle on a sewing machine instead of reading…

Did you find this tutorial helpful? If so, save this pin (see below) on your sewing board so you can come to this tutorial later when you need the information on how to thread a needle on a sewing machine, and follow me on Pinterest for more tips, tutorials, and inspiration!
Like sewing tips? I have other popular tutorials on my site that might be interesting for you. Check them out below.

latest posts
- Butterfly Quilt Block Tutorial – Foundation Paper Piecing
- How To Sew Quilt Squares So The Corners Match
- Sewing With Fork Pins: How They Help With Pattern Matching, Slippery Fabric, And Seams
- How Much Fabric Do I Need? 21 Helpful Tips For Calculating Fabric Yardage
- Easy Simple Sewing Project: Fabric Jar Opener
- DIY Oven Mitts: Step-by-Step Sewing Tutorial
- Easy DIY Potholder: New Design
- Tailor’s Clapper: What It Does, Why It Works, And How To Use It Right
- Heat Resistant Batting for Sewing: What It Is, How It Works, and What Makes a Difference