25 More Smart Sewing Shortcuts for Better Results With Less Effort
This is the second part of my list of sewing shortcuts, tips, and small habits that can make sewing easier, faster and more enjoyable. If you missed the first part, you can find it here: 25 Sewing Shortcuts That Make Sewing Easier and More Efficient. You do not have to read them in order, but the first article has plenty of useful ideas too.
The shortcuts in this article are meant to help you get better results with less effort.
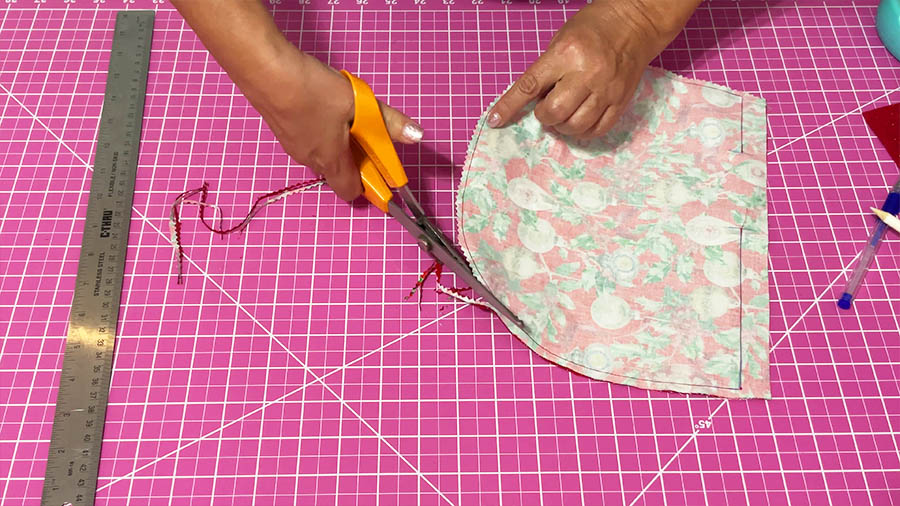
#26. Use pinking shears on curved seams instead of clipping tiny notches one by one
On the right fabric, pinking shears can make curved seam allowances behave without the slow process of clipping individual notches. It is not the answer for every fabric or every curve, but when it works, it saves time and still gives a clean turn.
My pinking shears are 8″ Fiskars. They stay sharp for a long time and their high-grade, stainless-steel blades offer a lasting sharp edge that cuts all the way to the tip. Amazon has a large selection of such shears.
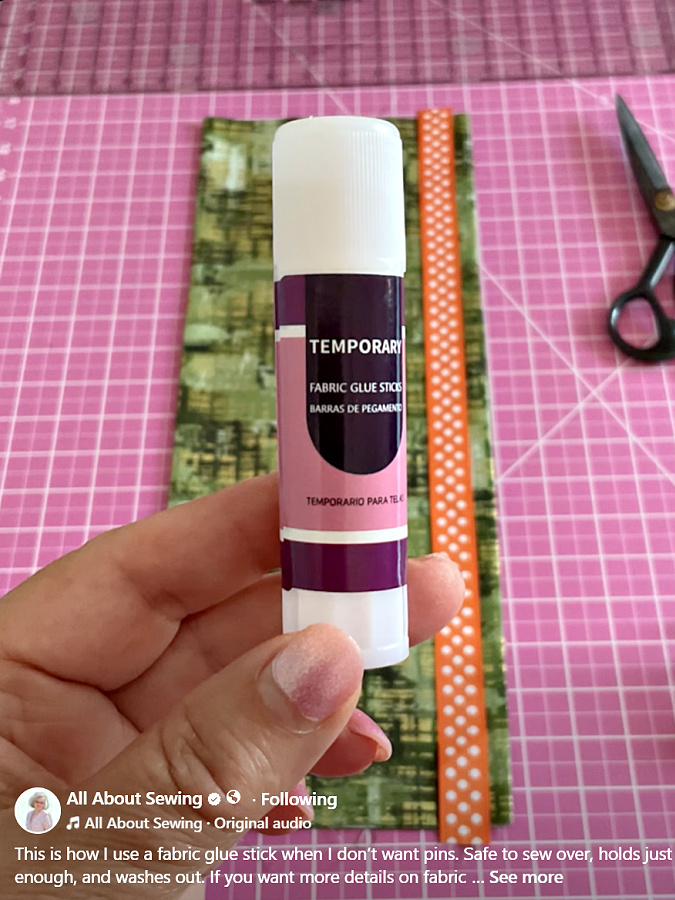
#27. Swap hand basting for washable glue, tape, or clips when appropriate
Some jobs really do not need thread. Wonder Tape can make zipper insertion much easier. A washable glue stick can hold layers in place without a forest of pins. Clips are very useful for vinyl, cork, leather, thick seams, and bag making. The only catch is knowing when not to use adhesives, especially if heat, needle buildup, or residue could become a problem.
Here’s a quick video of how I use a glue stick for basting instead of pins. It’s simple, fast, and keeps everything in place while you sew.
#28. Machine baste instead of hand basting when you just need temporary control
Hand basting is useful, but a long machine basting stitch is usually quicker to sew and easier to remove. It is especially helpful for fit checks, zipper insertion, and other construction steps where you want control and accuracy without making the stitching permanent.
For a closer look at machine basting and when it makes sense to use it, see my article Basting Stitch: Why, When And How To Baste In Sewing.
#29. Test on scraps before sewing the real thing
This is one of the smartest shortcuts because it saves rework. Test the stitch length, needle, tension, interfacing, and hem treatment on scraps first. Five minutes here can save half an hour of seam ripping and blaming the fabric for things that were not entirely the fabric’s fault.
#30. Sew pattern pieces flat as much as possible
Whenever the construction order allows it, sewing flat pieces is usually easier than wrestling fabric tubes under the machine. Sleeves, side seams, facings, bindings, and similar pieces often go together more smoothly while they are still flat.
Once a piece turns into a tube, the project becomes more awkward to handle, harder to see, and easier to sew slightly wrong while pretending everything is fine. This shortcut saves time because flat sewing usually means less shifting, less twisting, and less fabric acrobatics.
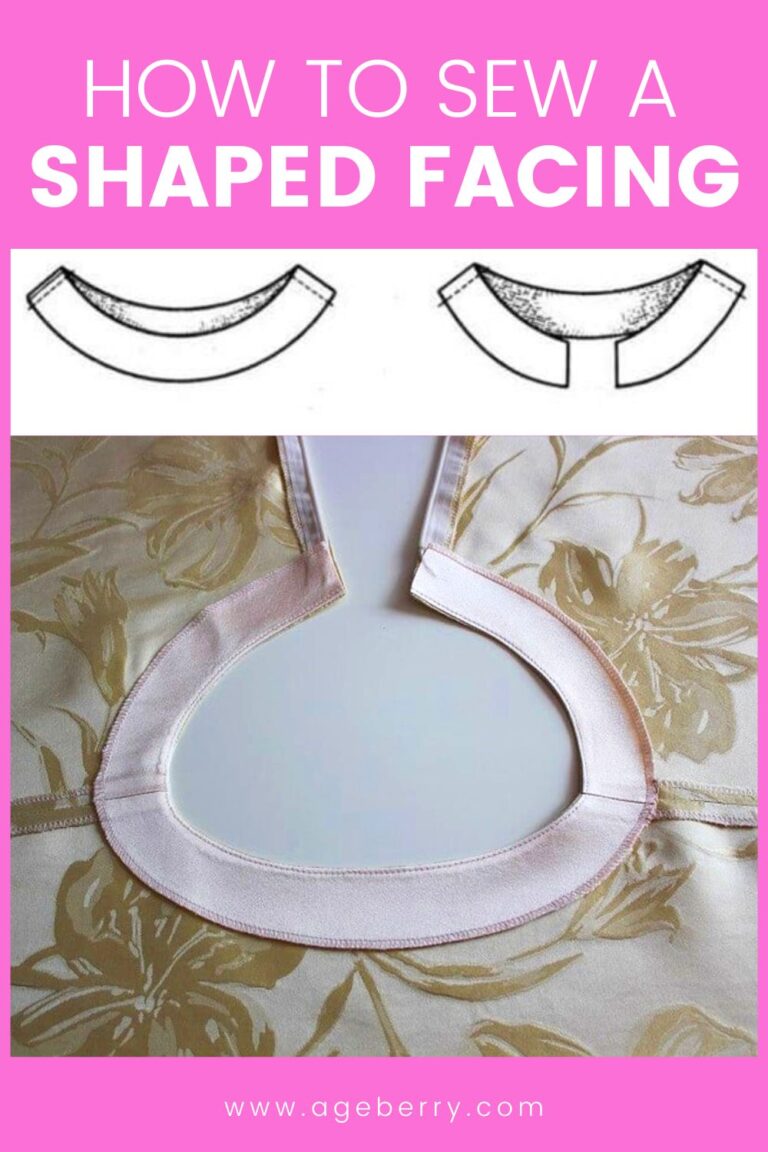
#31. Understitch facings instead of hand-tacking them later
One quick machine step now can save extra work later. Understitching helps facings stay inside where they belong, reduces rolling, and often removes the need for hand tacking later. It is one of those shortcuts that improves the finish and saves time at the same time. If you want to learn more about this technique, see my article Mastering Understitching: Tools, Techniques, and Troubleshooting.
Note: Some of the links on this page are affiliate links. This means I will receive a commission if you order a product through one of my links. I only recommend products I believe in and use myself.
#32. Use pre-made notions when they make sense
Bias tape, elastic, trims, and similar notions do not always need to be made from scratch. Sometimes a ready-made version is the most sensible choice. Sometimes a custom version is worth it because the fabric match matters or the detail is highly visible. The shortcut is not “always buy it.” The shortcut is knowing when making it yourself is adding value and when it is just adding time.


#33. Gather with the fastest reliable method for that fabric
For this one, I would keep it focused: the gathering foot and the serger. A gathering foot can be a tidy, efficient option for lightweight to medium fabrics when you want quick gathers without much setup. A serger can be even faster on longer edges or when the project is already set up there.
The trick is not forcing one method onto every fabric. The best shortcut is the one that gives you even gathers without creating extra work later. If you want more gathering ideas, see my article How to Gather Fabric: 21 Tips for Even, Beautiful Gathers.
#34. Skip seam finishing on fabrics that do not fray
Some fabrics simply do not need an extra seam-finishing step. If the fabric will not fray and the project does not demand an enclosed finish, you may be able to move on without zigzagging, serging, or overcasting.
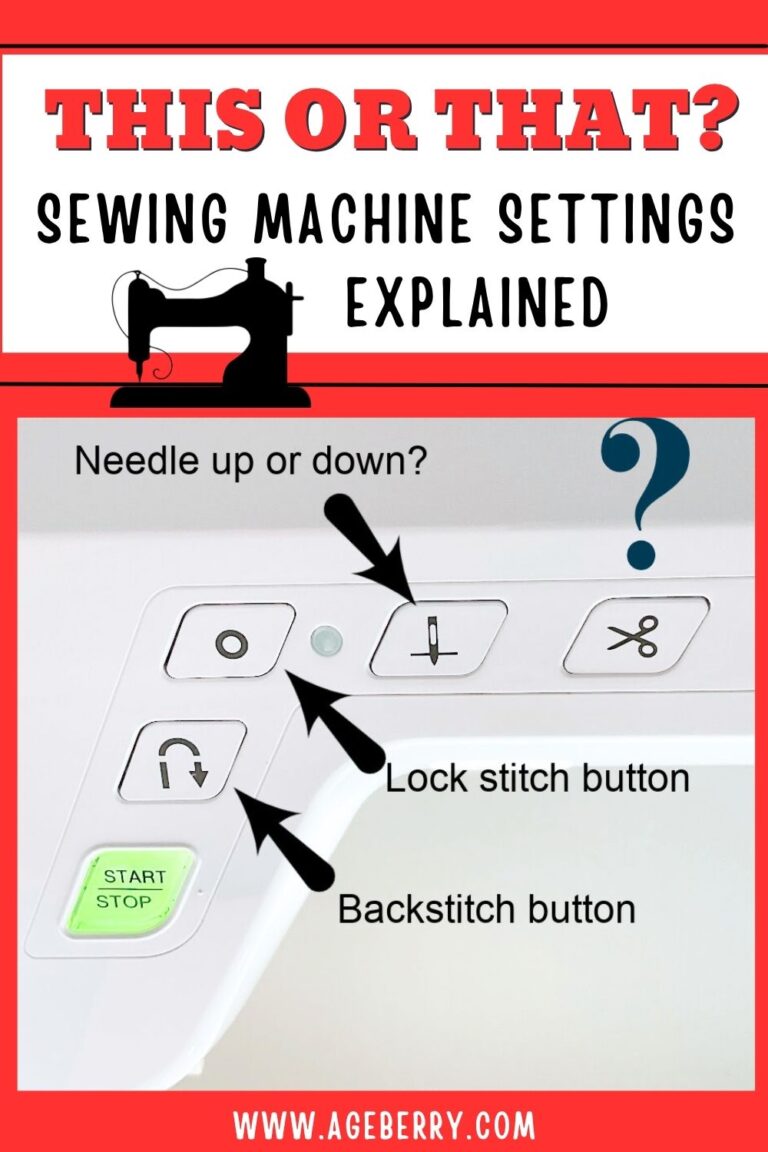
#35. Let your machine do the work with the right settings
Modern machines come with time-saving features for a reason. Needle up/down, speed control, automatic thread cutting, and presser foot pressure adjustments can remove a lot of small annoyances. A tiny setting change can be the difference between a smooth project and one that feels like it is arguing with you.
If you want a closer look at some of these features, see my article This or That? Sewing Machine Settings Explained: Needle Up/Down, Lock Stitch/Backstitch, etc.
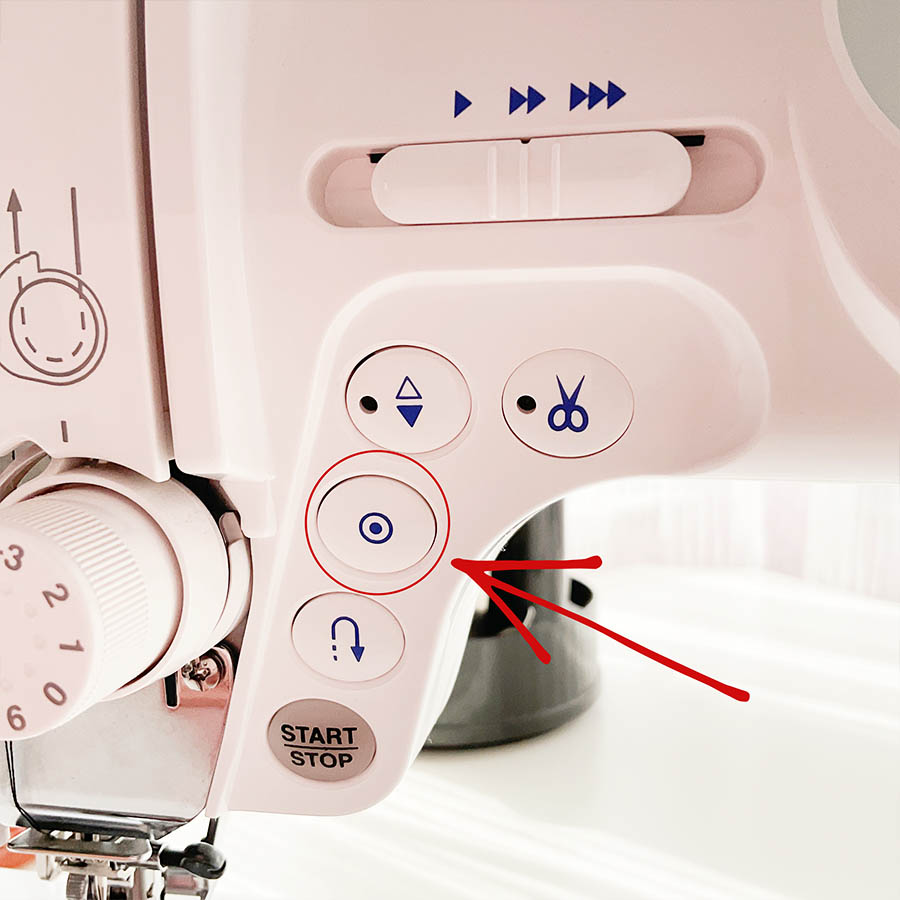
#36. Use the start/end lock button instead of backstitching when you want a neat finish
When the machine has a locking stitch function, it can give you a cleaner start and finish than reversing. It is especially nice on delicate fabrics and visible stitching. Backstitching is still fine when needed, but this is a neat shortcut worth using when the machine offers it.
#37. Use seam guides for straight stitching and topstitching
A seam guide is a simple shortcut that can save more time than it looks like it should. Instead of checking the seam allowance over and over, you set the guide once and let it help you keep the fabric in the right position as you sew. That means fewer pauses, less correcting, and a better chance of getting a straight seam on the first try.
A seam guide is especially helpful for long seams, topstitching, and any project where keeping an even distance from the edge matters. Straighter stitching is not just prettier. It also saves time because you are not stopping to fix a seam that wandered off course. If you want to learn more about using these tools, see my article Seam Guide Tutorial – all you need to know about how to sew a straight line and keep seam allowances equal.
#38. Chain piece where it makes sense
Quilt units are the obvious example, but the idea works anywhere you have repeated small seams. Instead of stopping after every seam, feed one piece after another. Less thread waste. Less stopping. Better rhythm. It is one of those sewing hacks that makes the whole process feel strangely efficient.
#39. Use needle threaders and similar helpers when threading starts slowing you down
Threading can take far more time than it should, especially with fine needles, stubborn thread, tired eyes, or serger loopers that seem determined to stay mysterious. This is where needle threaders and other small threading helpers can save time.
A simple hand-needle threader can make quick work of threading tiny needle eyes, and special sewing machine needle threaders can help when doing it by hand starts to feel awkward. Some tools are also designed for sergers, which can be especially helpful when threading loopers. These little helpers can turn an annoying stop-and-start moment into a quick step and keep the project moving.
If you want a step-by-step guide, see my article How to thread a needle on a sewing machine.
#40. Sew hems with the method that matches the project, not the fanciest one
Not every hem needs couture-level attention. A double-fold hem is often perfect for simple sewing projects. A serged-and-turned hem can be practical and neat. Hem tape has its moments. Narrow hems are wonderful when the fabric calls for them, but not every skirt needs a heroic performance. Choosing the right hem is faster than forcing the fanciest one into places it does not belong.
If you want to compare hem options in more detail, see my article How to Sew a Hem: The Best Techniques for Any Project.
#41. Use Ban-Roll tape or buckram as a guide for narrow hems
Slippery fabrics like chiffon, silk, and organza often behave better when the hem has a built-in guide. Ban-Roll tape or buckram can help stabilize the fold and make the stitching stage much smoother. This is not just a neat trick. It can be the difference between a clean narrow hem and a wavy little protest line.
To see exactly how this works, take a look at my article Narrow hem tutorial: how to make a narrow hem using a Ban Roll tape.
#42. Use Hugo’s Amazing Tape to keep thread spools under control
Organization is a shortcut too. If thread spools turn into tiny thread nests every time you open the drawer, you waste time before you even start. Keeping those supplies tidy means less mess before you begin and faster setup for future projects.

#43. Set up your sewing space so your body does not pay for your speed
A shortcut is not smart if it buys you a faster hem and a sore back. Good chair height, supportive seating, decent lighting, proper foot support, and tools within easy reach make a real difference. Physical comfort is not extra. It is part of good sewing.
Comfort starts with where you sit, and my article Best Sewing Chairs For Comfort In Your Sewing Room looks at chairs that are better suited for sewing than the usual kitchen-chair compromise.
#44. Take movement breaks before your body starts complaining
A few shoulder rolls and a quick stretch are much faster than losing the rest of the day to neck pain. Stand up between stages. Move your wrists. Give your back a chance to remember it belongs to a human and not just a person leaning over a sewing table.
The most important “tool” in your sewing room is not on the table, and I explain why in my article Are You Neglecting the Most Valuable Tool in Your Sewing Room? Discover 10 reasons self-care matters for sewists.
#45. Use quick exercises to protect your back, hands, and feet
Hand stretches, ankle movement, posture resets, and a few lower-back exercises may not sound like classic sewing inspiration, but they belong here. Sewing skills improve when your body is not tired, stiff, or irritated. Pain slows everything down. Prevention is a real shortcut.
I talk more about simple habits that support your body and make sewing more enjoyable in my ebook Self-Care for Sewists: Daily Habits that Support Your Body & Creativity.
#46. Use a surge protector for your sewing equipment
This is one of the least glamorous sewing ideas in the whole article and one of the smartest. A surge protector can help protect your sewing machine, serger or expensive embroidery machine from a very costly surprise. Sometimes the best shortcut is avoiding disaster in the first place.
You can use a basic surge protector which is offered by all UPS devices or, for more expensive units, you can use a more elaborate, dedicated surge protector. The UPS has the advantage of being able to keep alive for a while your machine(s) even when the power is off but the dedicated surge protector can protect against much bigger surges, like the ones created by a lightning strike very close to your place.


#47. Keep safety tools close instead of hunting for them later
Tweezers, a small screwdriver, extra needles, a seam ripper, a lint brush, and a few first-aid basics should be easy to reach. Good extension cord management matters too. When something goes wrong, the fastest fix is the one you do not have to search the room for.
#48. Do not use “fast” as an excuse for risky habits
Unsafe shortcuts are not shortcuts. Sewing over pins carelessly, plugging too much into one outlet, working in poor light, ignoring maintenance, or sewing when you are too tired to focus usually creates more trouble, not less. Speed is useful. Accidents are not.
A few simple safety habits can save you a lot of trouble, and I share them in my article 31 Sewing Safety Rules That’ll Keep You in Stitches.
#49. Join a sewing community when you are stuck
Sometimes the fastest shortcut is not doing more guessing by yourself. If you hit a confusing step in a sewing pattern, are unsure about fabric choice, or cannot decide how to fix a problem, asking other sewists can save a lot of trial and error. A good sewing community can help you avoid mistakes, solve fitting issues faster, and learn what is worth doing and what is just wasted effort. There is no prize for spending three hours inventing a solution that somebody in a sewing group could explain in three sentences.
If you’d like a place to ask questions and see how others solve similar problems, you’re welcome to join my Facebook group, Sewing Tips and Tutorials. Just make sure you agree to the group rules, which are basic decency rules: be polite, no advertising, etc.
#50. Follow sewing blogs and YouTube channels to learn new shortcuts before you need them
One of the best long-term shortcuts is learning from other sewists on a regular basis. Blogs, tutorials, and YouTube videos can introduce new sewing hacks, new tools, easier construction methods, and smarter ways to handle tricky fabrics before you run into those problems yourself. Then, when the moment comes, you already know a faster way to do it. It is a bit like building a personal library of sewing lessons in your head — and that can save a lot of time when a project suddenly decides to become “educational”.
For more step-by-step sewing help, you can follow my YouTube channel, Sewing Tutorials by Ageberry.
This was a long list! But since you reached this point, I hope you found the article helpful! If so, save this pin (see below) on your sewing board so you can come to this tutorial later when you need this information, and follow me on Pinterest for more tips, tutorials, and inspiration!
latest posts
- Corset Pressing Board for Sewing: What It Does and How I Use It
- 7 Essential Tools and Settings for Sewing Denim on a Regular Sewing Machine
- That Purple Thang: 10 Smart Ways to Use This Weird Little Tool
- 20+ Reasons Your Sewing Machine Thread Keeps Breaking (+ Solutions)
- Dresden Plate Quilt Block: 4th of July Fireworks
- How To Sew Curves the Easy Way Using a Curve Master Presser Foot
- 30 Sewing Hacks That Turn Ordinary Items into Useful Sewing Tools
- Seam Allowances in Sewing Patterns: What They Are and How to Use Them
- What Do You Call a Person Who Sews? I Asked My Readers and Got 1,408 Opinions