
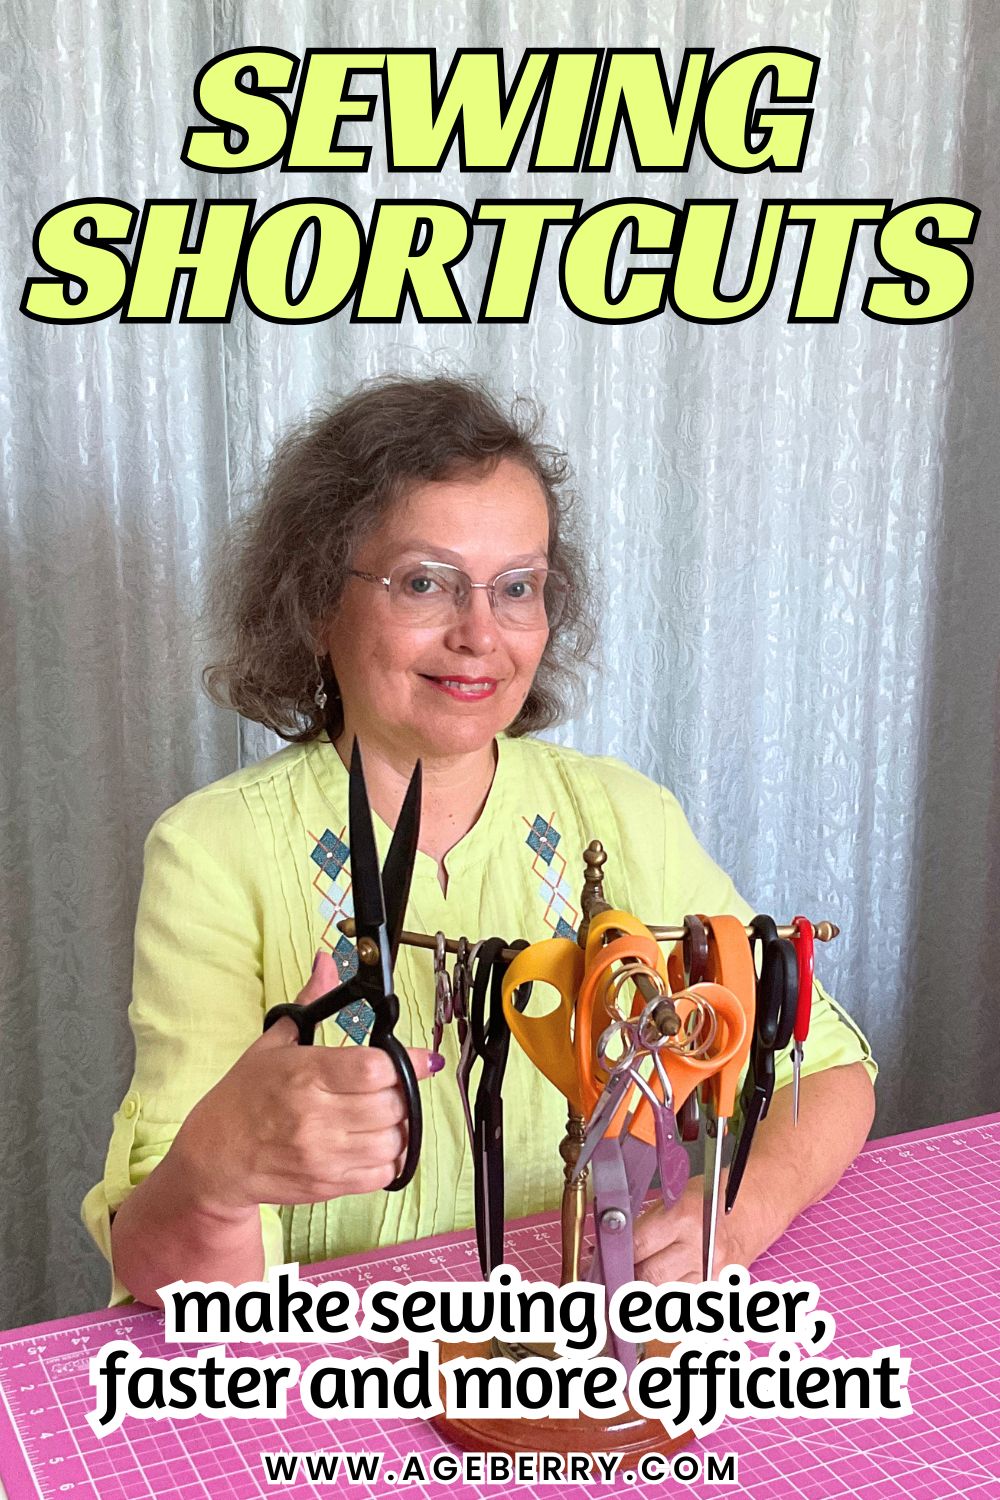
25 Sewing Shortcuts That Make Sewing Easier and More Efficient
We all know sewing takes time. But that does not mean every step has to be slow, complicated, or harder than it needs to be. Most of us want to save time, save effort, have a little fun, and still make something that looks beautifully finished.
These are practical sewing tips, sewing hacks, and small sewing lessons that help you work smarter, not just faster.
Some shortcuts are genuinely helpful. Others only seem helpful at first, then come back later as puckered seams, sloppy hems, fitting problems, or a date with the seam ripper. This article is about the good kind of shortcuts — the ones that make sewing easier without making the finished project look rushed.
#1. Read through all the pattern instructions from start to finish
A few quiet minutes with the sewing pattern can save a lot of loud seam ripping later. Read ahead before you cut anything. Look for steps that can be rearranged, places where fitting should happen earlier, and pieces that need interfacing, special feet, or extra marking. This is one of those sewing tips that sounds boring until it saves you from the classic moment of realizing you already stitched something that should have stayed open.
#2. Batch similar steps instead of following the pattern in strict order
Some sewing patterns are written like you should finish one tiny area completely before moving on. Real life sewing is often faster when you group similar jobs together. Sew all the darts, then all the seams, then do a pressing round. Fewer machine changes, fewer tool changes, less stop-start thinking. It feels more like a smooth assembly line and less like a scavenger hunt with thread.
I use this approach all the time. For example, when I was sewing a dress, I grouped similar steps together instead of finishing each section one by one. You can see how I did that in my tutorial, How to Sew a Dress Using a Pattern: A Step-by-Step Guide.
#3. Get organized before the project starts
A messy sewing room can turn a simple project into a treasure hunt. If your scissors are in one place, your good pins are somewhere else, the matching thread has vanished, and the measuring tape is apparently traveling, you lose time before you even sew the first seam.
Keeping your sewing tools, threads, presser feet, rulers, patterns, and notions organized is a real shortcut because it cuts down on searching, re-buying, and those “I know I have it somewhere” moments. It also helps to keep fabric, thread, and notions for each project together, so you are not rebuilding the whole setup every time you sit down to sew.
When your sewing space starts working against you instead of helping you, my post How To Declutter Your Sewing Space Step-by-Step: A Simple Guide To Organized Crafting has practical ideas to make it more organized and easier to use.
#4. Clean your sewing machine before it asks for attention the hard way
Five minutes of cleaning can save hours of frustration later. A machine full of lint, dust, and mystery fuzz does not usually send a polite warning letter. It just starts skipping stitches, sounding grumpy, or refusing to behave when you are in the middle of something important.
Brushing out lint, changing needles on time, and doing simple maintenance is one of the smartest shortcuts around because it helps you avoid problems instead of stopping to solve them. It is much nicer to spend five minutes cleaning than to spend an afternoon wondering why the machine suddenly sounds like it is sewing through gravel.
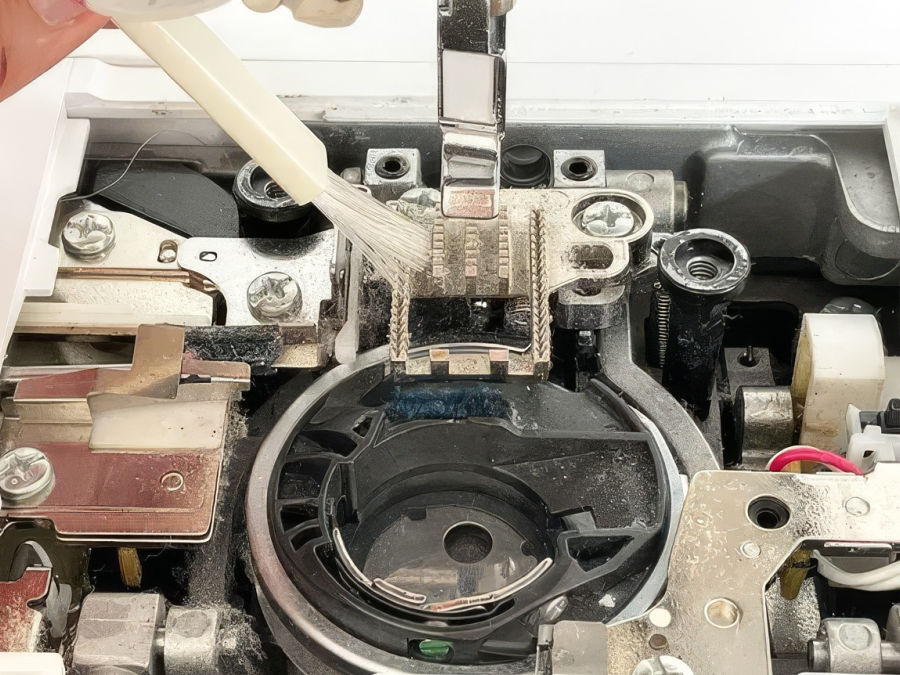
Before your machine starts expressing its feelings through skipped stitches and strange noises, take a look at my article Sewing Machine Maintenance: Essential Tips For Optimal Performance for simple ways to keep it running well.
#5. Make several items from the same fabric
If you have enough fabric, sewing more than one item from it can be a surprisingly smart shortcut. You already have the thread chosen, the needle in place, the machine settings figured out, and the fabric behavior fresh in your mind. That means less switching, less testing, and less starting over.
This works especially well for simple sewing projects, gifts, small accessories, or matching items. Cutting and sewing several pieces while everything is already set up often takes only a little longer than making one, which feels almost suspiciously efficient.
I like to do this whenever I have leftover fabric from a larger project. For example, I made this coat and then used the remaining fabric to sew a matching beret. It did not take much extra time since everything was already set up, and now I have a coordinated set instead of unused fabric sitting on a shelf.

#6. Use patternless sewing for simple projects
For some simple sewing projects, you can skip the paper pattern and draw the cutting lines directly on the fabric instead. This works best for easy shapes like rectangles, squares, gentle curves, and uncomplicated elastic-waist styles. It saves time because you remove an entire prep stage: no tracing, no cutting paper pieces, and no extra setup before you start sewing.
Patternless sewing is especially handy for tote bags, pillow covers, simple aprons, and other basic projects where the fit does not need to be exact. Sometimes I even sew dresses this way. Well, technically, I am still making a pattern, but I am drawing it right on the fabric instead of tracing or cutting paper pieces first.
I have used this approach in several dress tutorials, including easy no-pattern dresses where the shape is marked right on the fabric before cutting.
This maxi dress is a good example of patternless sewing. I did not use a paper pattern at all—just marked the shape right on the fabric and started sewing. It’s simple, comfortable, and I have a full tutorial showing exactly how to make it.

- How to sew a maxi dress without a pattern
- DIY beach dress sewing tutorial plus how to make a beach cover-up pattern
- How to sew a dress without a pattern {make this stylish, flattering, and fun dress in 30 minutes}
But it is not a smart shortcut for fitted garments, sleeves, collars, facings, complicated shapes, or expensive fabric. The best time to use it is when the pattern would only add paperwork, not accuracy.
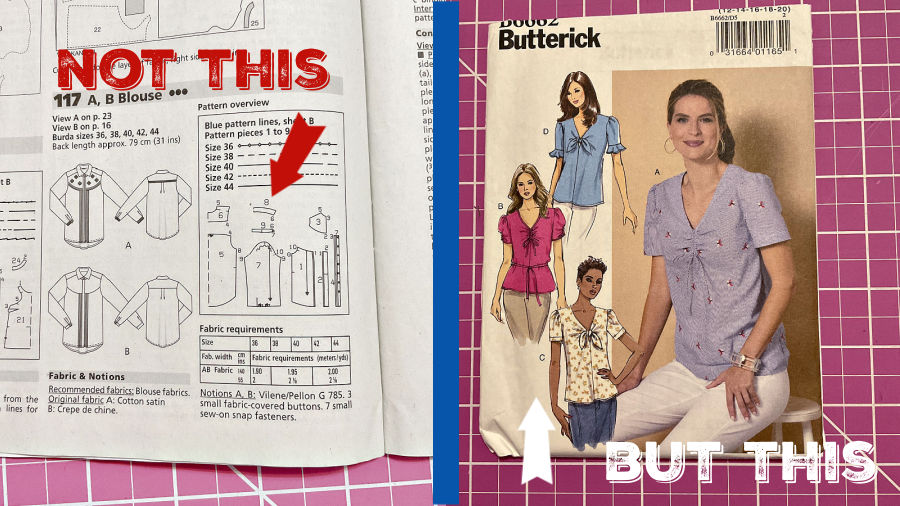
#7. Choose simple styles that let you skip fussy details
One of the smartest sewing shortcuts happens before you even cut the fabric: choose a style that leaves out time-consuming details you do not really need.
Some blouse patterns, for example, seem determined to include every possible extra—collars with a button closure right at the neck, cuffs, plackets, lining, all the usual drama. But in real life, how often do people fasten that top button? Very rarely. And cuffs are not exactly the quickest technique either.
So if I have a beautiful fabric for a blouse, I often look for a pattern that skips those details altogether. And if I like the rest of the design, I may simply modify the pattern.
A clean neckline, no cuffs, no unnecessary closures, and suddenly the project is simpler, smoother, and much more enjoyable to sew. This kind of shortcut saves time not by rushing the sewing, but by choosing a design that does not ask for extra work with very little payoff.
#8. Keep the whole project in one basket, tray, or bag
Projects waste time when the zipper is on one table, the pattern piece is under a magazine, and the interfacing is living a separate life across the room. Keeping everything together is not glamorous, but it is one of the most useful sewing hacks around. Put the fabric, notions, thread, interfacing, and pattern pieces in one container so the whole project moves as one unit.
Note: Some of the links on this page are affiliate links. This means I will receive a commission if you order a product through one of my links. I only recommend products I believe in and use myself.
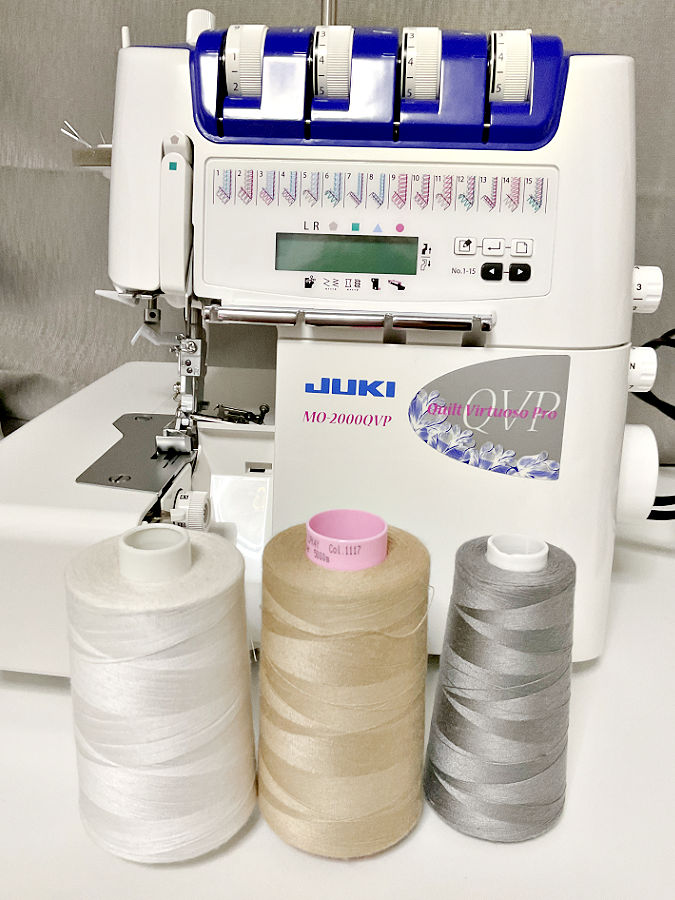
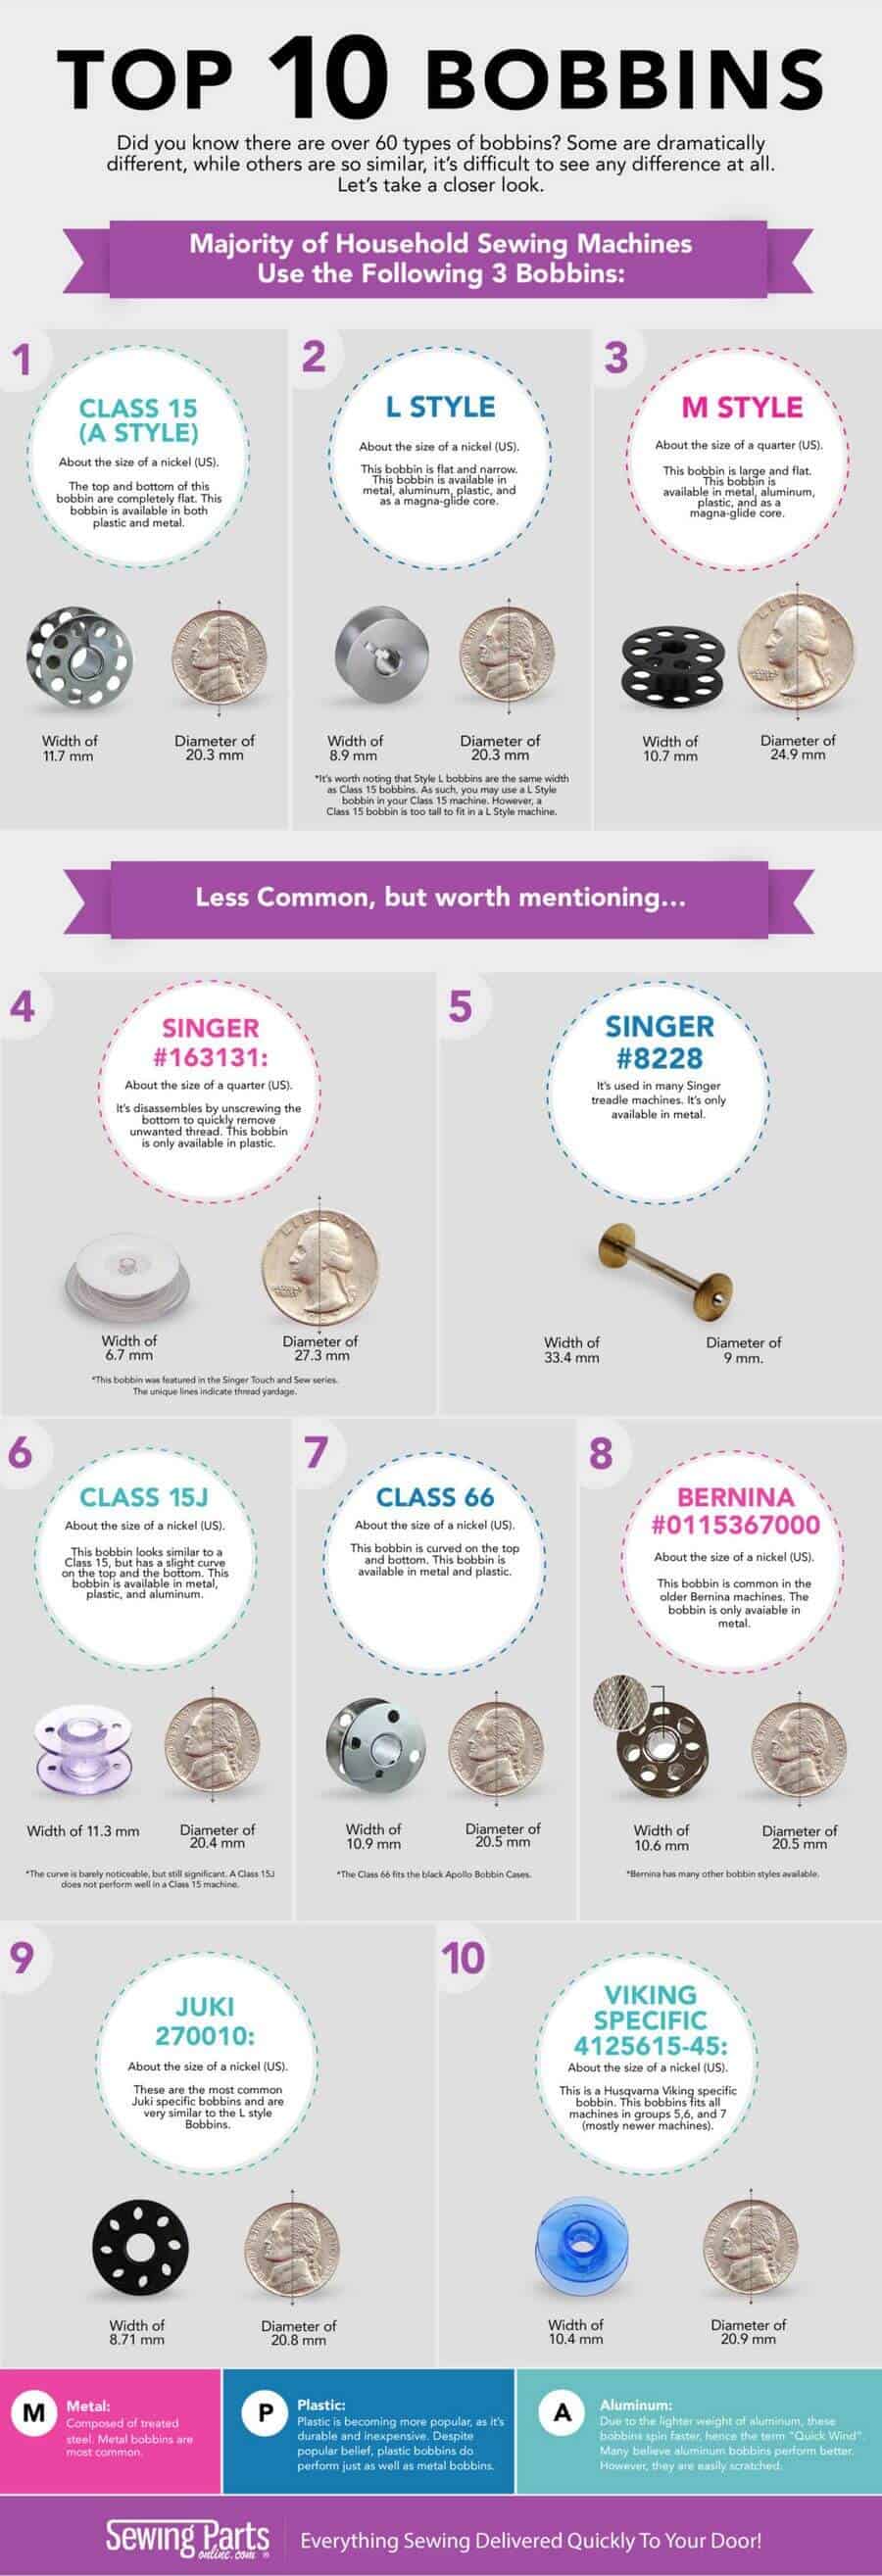
#9. Prepare extra bobbins before you start
Nothing kills momentum like running out of bobbin thread in the middle of a long hem. Wind extra bobbins before you begin, especially if the project has topstitching, gathering, or a lot of construction seams. This shortcut does not look exciting, but it quietly keeps sewing projects moving.
And prewound bobbins can make this even easier. They are especially handy for embroidery machine projects, where you may go through bobbins quickly and want consistent tension without stopping to wind your own.
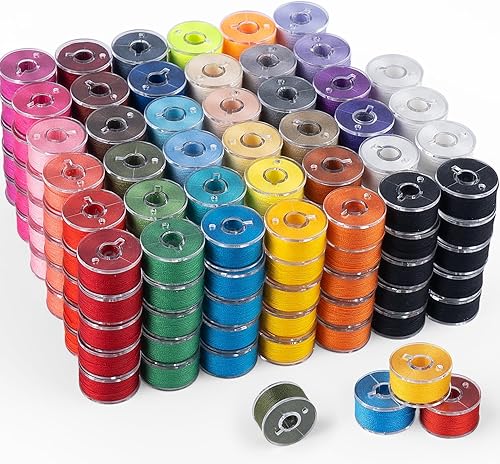

Prewound bobbins are available in all colors but you have to be careful and order the proper size for your machine. My article How to thread a bobbin has a very interesting bobbin size chart, you need to identify which style of bobbin your machine uses.
#10. Group projects by thread color when possible
If you are planning several simple projects, it can be faster to sew the black-thread projects together and the white-thread projects together instead of changing thread for every single item. The same idea works for sergers too. It is not a rule for every project, but for gifts and small accessories it saves more time than most people expect.
#11. Use a few neutral thread colors for inside seams
Not every hidden seam needs a perfect color match. If the stitching will never show, a neutral thread can spare you a lot of rethreading. Save the exact color matching for visible topstitching, hems, and places where thread truly matters. This is one of those sewing tips that feels almost suspiciously simple, but it works.
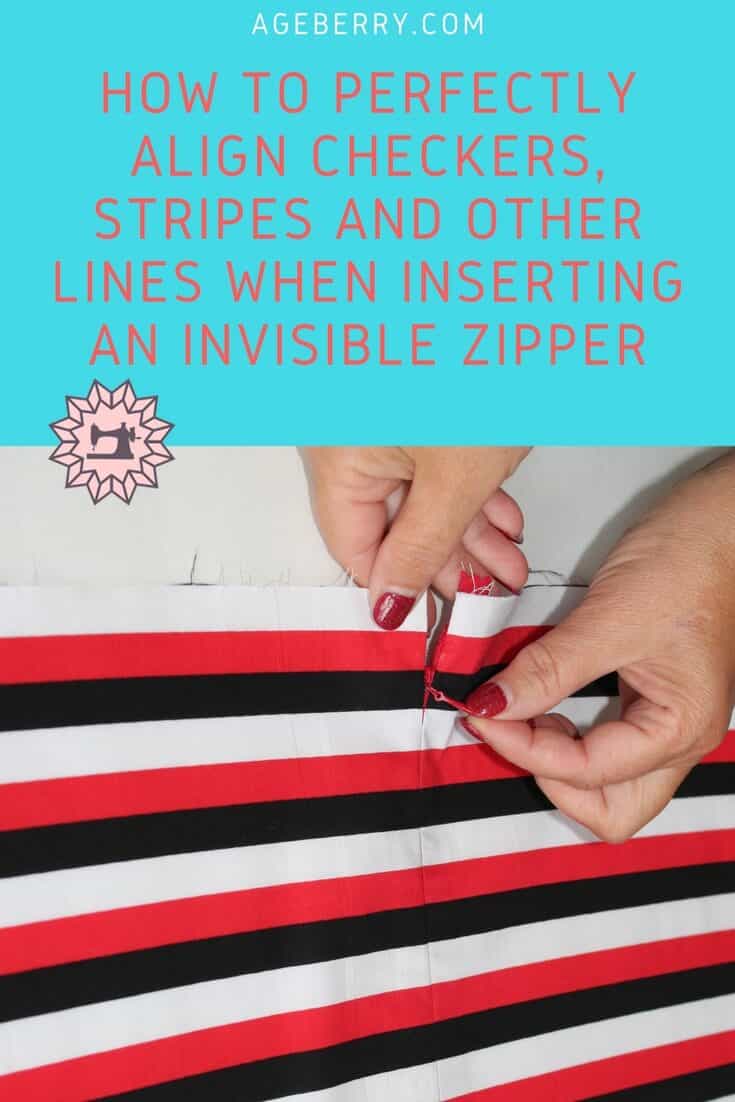
#12. Avoid stripes, checks, and repetitive prints when the goal is speed
Some fabrics are beautiful. Some fabrics are beautiful and clearly have no respect for your schedule. Stripes, checks, plaids, and strong repeated prints usually need more careful cutting, more matching, and more attention during construction. If the goal is a quicker, smoother project, a fabric without demanding pattern matching is often the smarter choice. You are not sewing faster by rushing. You are sewing faster by not inviting extra alignment drama into the room.
#13. Choose project-friendly fabrics when you want a faster sew
Some fabrics glide nicely through sewing projects. Some fight from the first cut to the final press. Stable cottons, cotton lawn, ponte, stable knits, and friendly linen blends usually move faster. Slippery satin, chiffon, velvet, and thick coatings tend to demand more patience. Picking a cooperative fabric is not cheating. It is choosing a better day.
#14. Reuse TNT patterns instead of refitting the same style every time
A tried-and-true pattern (TNT) is already halfway to being a shortcut. Once you have adjusted a sewing pattern and know it fits, keep a clean copy and save notes. Reusing that work is not laziness. It is wisdom with a folder.
#15. Save tested machine settings in a notebook or phone note
When you finally figure out the right setup for chiffon, denim, knits, buttonholes, topstitching, twin needles, or fusible interfacing, write it down. Stitch length, needle type, tension, foot pressure, anything that helped. Future you do not need another mysterious fabric experiment at 10:30 at night.
#16. Use a rotary cutter and mat when the fabric and project allow it
For straight lines, repeated shapes, and stable fabrics, a rotary cutter is often faster and cleaner than scissors. Less lifting. Less shifting. Less wrestling with fabric. Scissors still have their place, but for many sewing ideas, a rotary cutter speeds the whole cutting stage.
For more help with this, see my article How To Accurately Cut Fabric For Quilting With A Rotary Cutter. Even though the title is about quilting, the same rotary cutting tips are helpful for many other sewing projects too.
#17. Choose patterns with seam allowances already included
If the seam allowances are already built into the sewing pattern, that is one less thing to measure, mark, and second-guess. It is not a dramatic shortcut, but it trims a surprising amount of preparation time, especially on garments with many pieces.
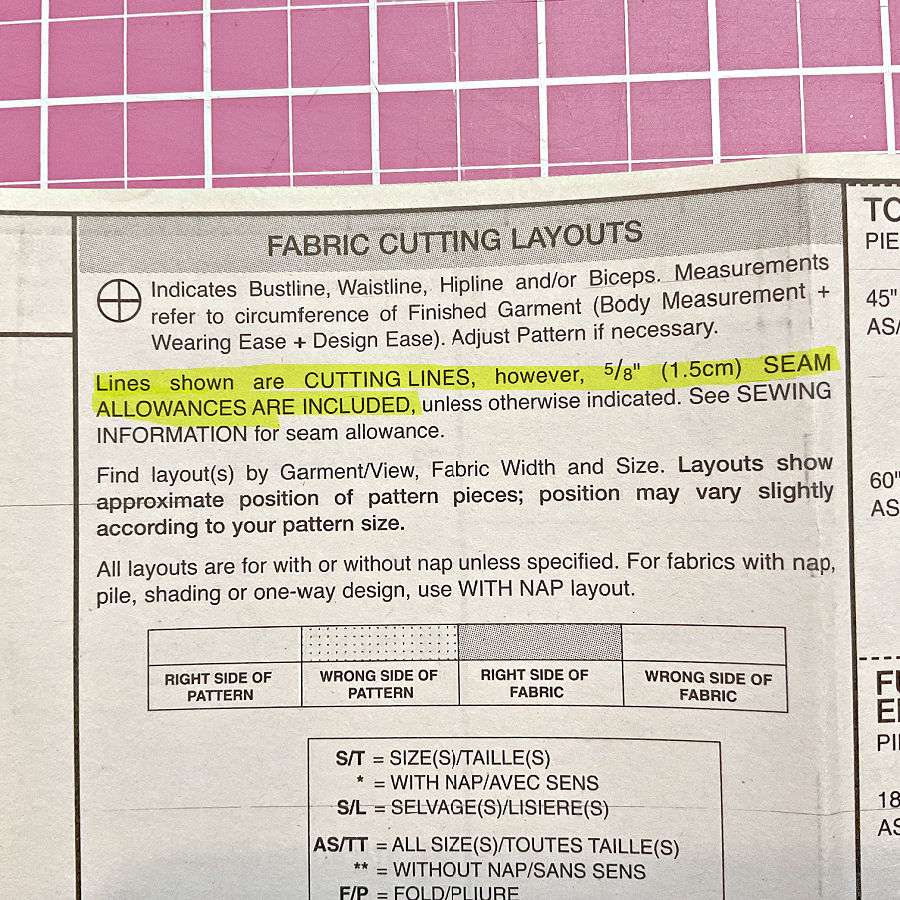
I love Burda Style magazine and have been a subscriber since 1988, but one thing that definitely makes those projects slower is that the magazine patterns do not include seam allowances. You have to add them yourself to every piece before cutting. That extra step adds quite a bit of time to the process and opens the door to measuring mistakes. Patterns with seam allowances already included make the whole process feel much smoother.
#18. Block fuse first, then cut
When working with smaller pieces like facings, collars, cuffs, waistbands, and pockets, fuse the interfacing to the fabric first and cut both layers together. This keeps the shapes matched and saves you from cutting nearly identical pieces separately while hoping they stay nearly identical.
If you want to see this method explained in more detail, my article The Interfacing Cutting Guide: Methods, Folds, and Seam Lines walks through block fusing and other ways to cut interfacing, along with when each method makes the most sense.
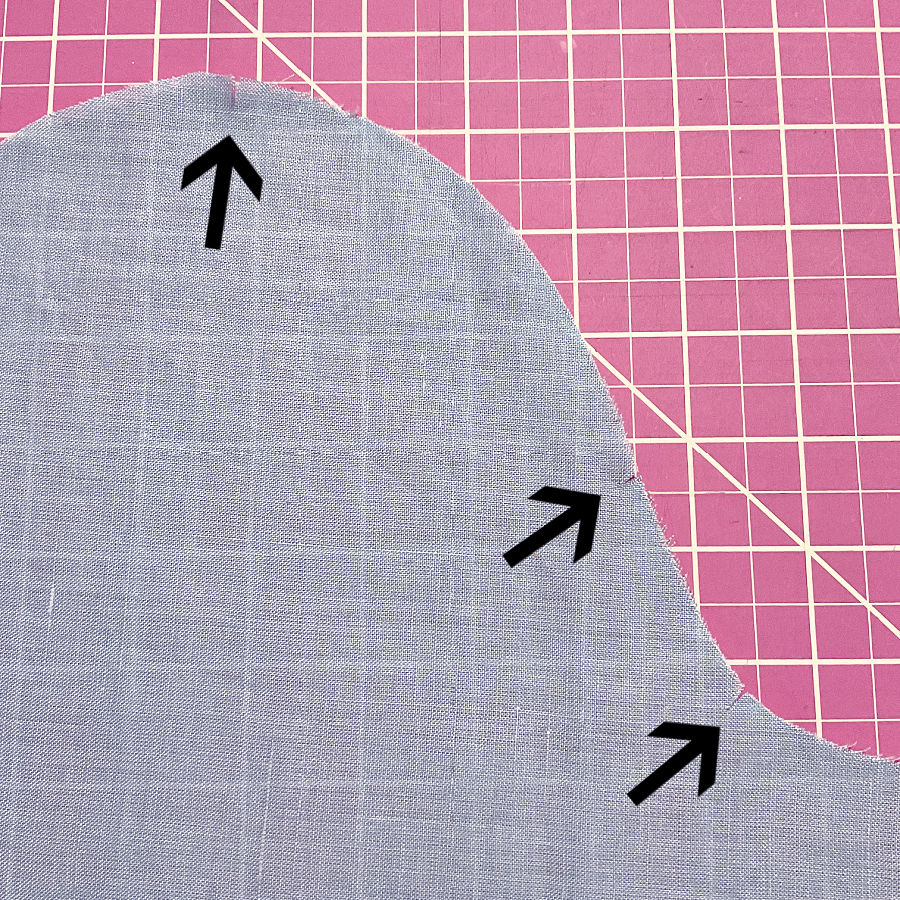
#19. Cut outward notches/clips instead of marking every match point with chalk
A notch cut into the seam allowance can do the job of a separate chalk mark. It is faster during cutting and easier to read during assembly. The cut edge becomes the marker, which is exactly the kind of efficient little trick that belongs in a sewing shortcuts article.
#20. Sew continuous bias strips instead of cutting short ones one by one
If a project needs a lot of binding, cutting short strips over and over is a very good way to feel annoyed. Continuous bias strips reduce repetitive cutting and joining and give you one long piece to work with. The project feels smoother almost immediately.
#21. Use modern fabric cutting machines when you want to skip a lot of manual cutting
Cutting fabric by hand takes time, especially when a project has many repeated shapes or precise quilt pieces. Modern cutting machines can be a real shortcut here. AccuQuilt machines are especially useful for quilting because they cut fabric shapes quickly and accurately with dies, which saves a lot of measuring and rotary cutting. Cricut machines can also cut fabric and are helpful when you want more design flexibility or need custom shapes.
These machines are not for every project, and they do not replace basic cutting skills, but for the right kind of sewing or quilting, they can remove a big chunk of repetitive prep work. If you want a closer look at both options, see my article How to cut fabric for quilting with modern fabric cutting machines: AccuQuilt and Cricut


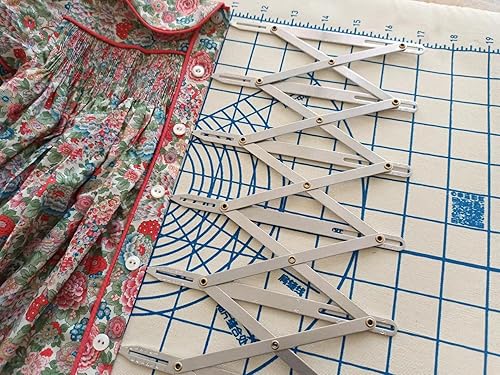
#22. Use guides instead of measuring the same thing over and over
Repeated measuring can quietly slow down a project, especially when you are hemming, spacing buttons, or folding the same width again and again. This is where measuring guides can save time. A small measuring gauge is useful for quick, repeatable measurements when you need to check seam allowances, mark a hem depth, or fold fabric evenly without pulling out a full ruler every few minutes.

And for button or pleats placement, an expanding sewing gauge is a very handy shortcut. Instead of measuring every buttonhole or button position separately, you expand the gauge to create equal spacing across the whole area at once. That makes it much easier to place buttons evenly and avoid the kind of small spacing mistakes that somehow become very obvious later.
#23. Fold and press hems with a hem ruler
A hem ruler can speed up hemming beautifully. Instead of measuring, folding, measuring, folding, and slowly losing the will to continue, you set the fold consistently and keep moving.

#24. Keep an iron close to the sewing machine
Pressing is easier to do when the iron is close enough that you do not need a travel plan. A cordless iron or a compact setup near the machine makes it far more likely that you will press as you go. That saves time later because unpressed seams have a talent for turning into crooked topstitching and bulky corners.I use a Panasonic cordless iron for this, which makes it much easier to press quickly without dealing with a cord, and I share my experience in my article Panasonic Cordless Irons: Review and Insights from Daily Use.
")


#25. Batch your pressing, trimming, and clipping jobs
Switching constantly between sewing, trimming, clipping, pressing, and returning to the machine can slow the rhythm of the project. Sometimes it is faster to sew several seams first, then trim them in one round, clip the curves in one round, and press similar areas together. This works especially well when the garment has repeated steps.
I’ll stop here for now, but I’m definitely not done with this topic yet. There are plenty more sewing shortcuts worth talking about. If this list gave you a few useful ideas, save this pin to your sewing board so you can find the tutorial later, and follow me on Pinterest for more tips, tutorials, and inspiration!
latest posts
- Butterfly Quilt Block Tutorial – Foundation Paper Piecing
- How To Sew Quilt Squares So The Corners Match
- Sewing With Fork Pins: How They Help With Pattern Matching, Slippery Fabric, And Seams
- How Much Fabric Do I Need? 21 Helpful Tips For Calculating Fabric Yardage
- Easy Simple Sewing Project: Fabric Jar Opener
- DIY Oven Mitts: Step-by-Step Sewing Tutorial
- Easy DIY Potholder: New Design
- Tailor’s Clapper: What It Does, Why It Works, And How To Use It Right
- Heat Resistant Batting for Sewing: What It Is, How It Works, and What Makes a Difference

