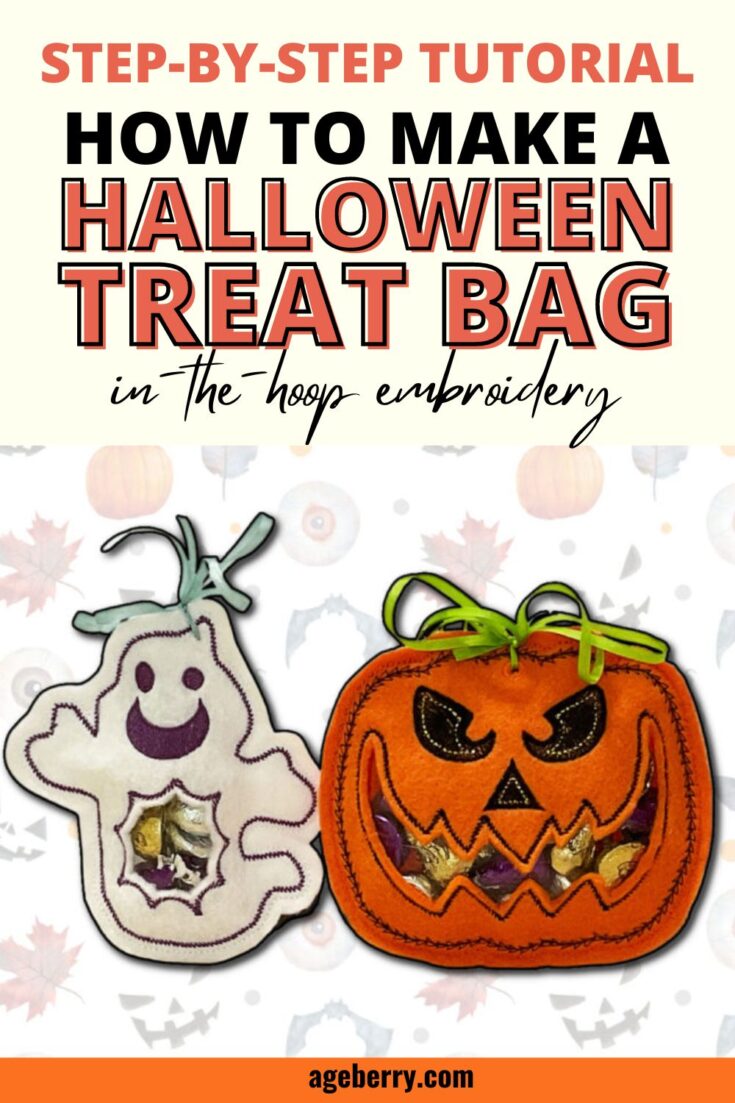
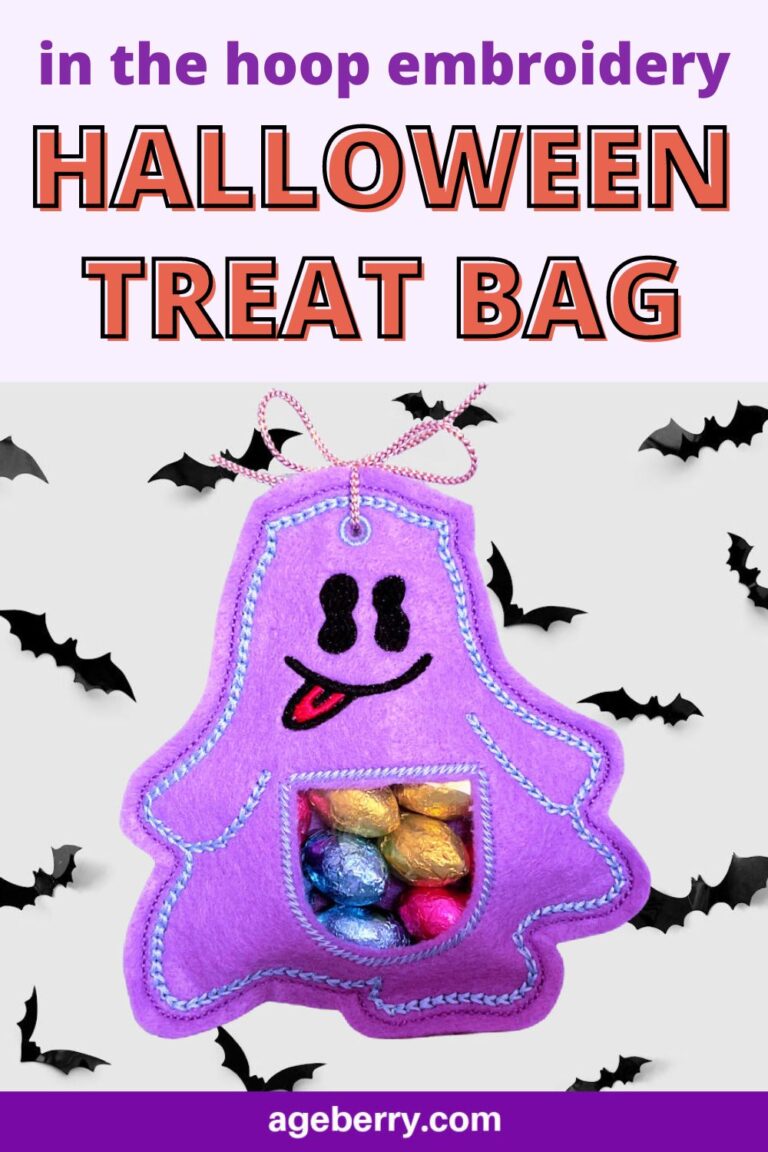
In The Hoop Embroidery Designs: Halloween Treat Bags
Do you want to make something fun for Halloween?
So, maybe you can try these In the Hoop Embroidery designs if you have an embroidery machine with a 5″ x 7″ hoop. This new way of making things right on your embroidery machine will allow you to create three-dimensional objects without using a sewing machine. I will show you how in this tutorial.
You can make Halloween treat bags with ease using this method and they are super cute too! These would be perfect for handing out candy or other treats during the trick-or-treat season. You could even use them as gift bags if you wanted to give someone a small present instead of candy! They’re also great for Halloween parties where people need goodie bags. The possibilities are endless with these little cuties!
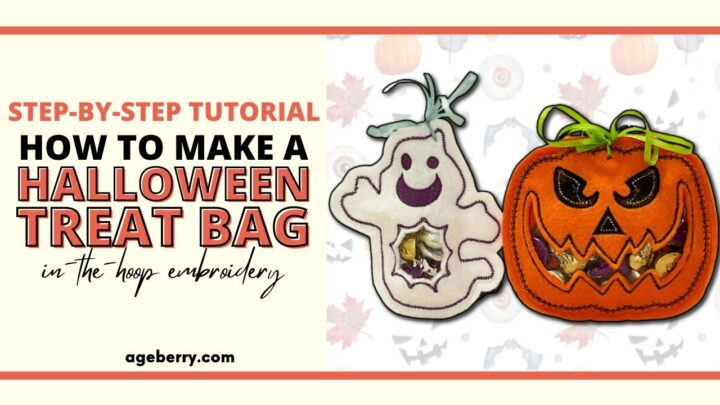
Attention! If you like the video format, at the bottom of this post, look for a YouTube video version where there is a step-by-step tutorial on how to make in-the-hoop embroidery projects. For a more complete picture, I recommend exploring both versions.
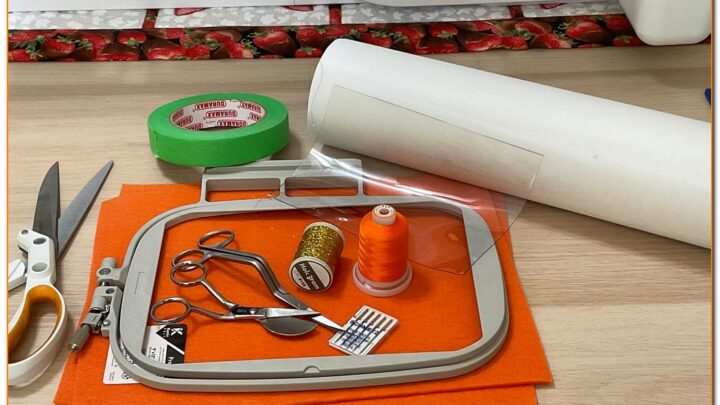
What you’ll need to make in the hoop treat bags
In-the-hoop embroidery designs for the pumpkin and the ghost – you can buy them in my shop together with printable PDF instructions, they are inexpensive.
- Embroidery machine with a hoop size 5″ x 7″ or bigger
- Felt pieces: orange for the pumpkin and white for the ghost
- Small piece of clear vinyl
- Tear-away embroidery stabilizer
- Machine embroidery threads
- Embroidery scissors
- Machine embroidery needle 90/14
- Sticky tape
Note: Some of the links on this page are affiliate links. This means I will receive a commission if you order a product through one of my links. I only recommend products I believe in and use myself.
Let’s talk about the products above.
What is a TEAR AWAY embroidery stabilizer?
Tear Away stabilizer is a type of stabilizer that’s easy to tear away when you have finished stitching your embroidery design. You can choose it in a light, medium, or heavy weight version so there’s something great for any project. It comes with instructions on how to use this material.
For these projects I recommend 4 – 8 gauge clear vinyl (the higher the gauge the thicker the vinyl). Vinyl is a flexible but durable material, it’s easy to sew and easy to clean. You use it to make a “window” in the treat bag so kids can see what’s inside.
I used felt sheets 9″ x 12″ – soft, dense nonwoven material made from 100% recycled plastic bottles! Felt sheets can have different thicknesses. I used thicker ones for the treat bags.
Also, use a thicker machine embroidery needle (size 90/14) so your embroidery machine can go over vinyl without any problems (like breaking threads or needles). You can also check my detailed tutorial on machine embroidery needles.
Curved embroidery scissors are very helpful for these projects. Check out my guide Cutting Tools For Sewing: Ultimate Guide.
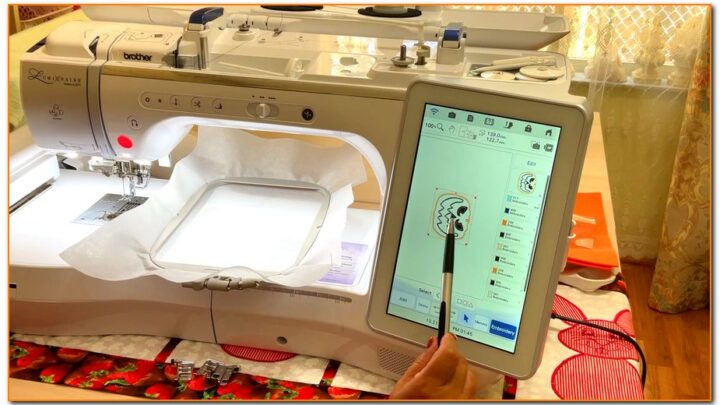
Step 1
Load the ITH embroidery design onto your machine and prepare all necessary materials
Don’t change the order of steps in the design. I need to mention this because many modern embroidery machines can reorder the designs. You must stitch these designs in the correct order to ensure that the treat bags are stitched correctly.
Also, I used different thread colors when digitizing the design to indicate that the embroidery machine should stop at certain points in order for the embroidery to go in the correct order.
These are not colors recommended for the project; they’re simply for the machine stops. Pick your own colors for your projects.
Fill in enough bobbins for your projects.
Step 2
Hoop tear-away stabilizer for these in the hoop embroidery projects
To begin, cut a piece of tear-away stabilizer that fits your 5″ x 7″ embroidery hoop, place it in the hoop, make some small adjustments if necessary and tighten the hoop.
It’s very important to hoop the stabilizer correctly in order for it to have the proper tension and not shift within the hoop.
The stabilizer should be very taught in your hoop at all times. If the stabilizer gets stretched with too much hoop handling during embroidery, alignment issues may develop, resulting in gaps or bubbles between stitches.
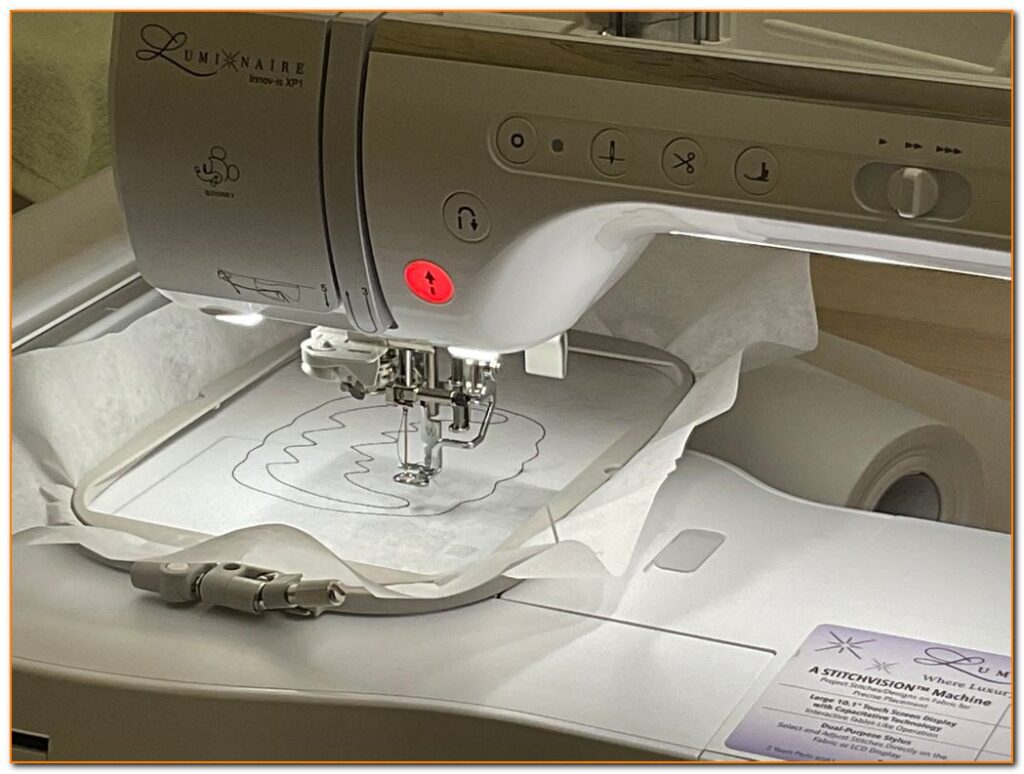
Run the first step of the design (color 1) which is the placement stitch for a piece of clear vinyl as well as the outline of the treat bag on the stabilizer. Just push a button and the machine will do it automatically.
Choose a different color thread than I have in the design. As for me, I used a black thread so I don’t need to change threads for the next steps.
Step 3
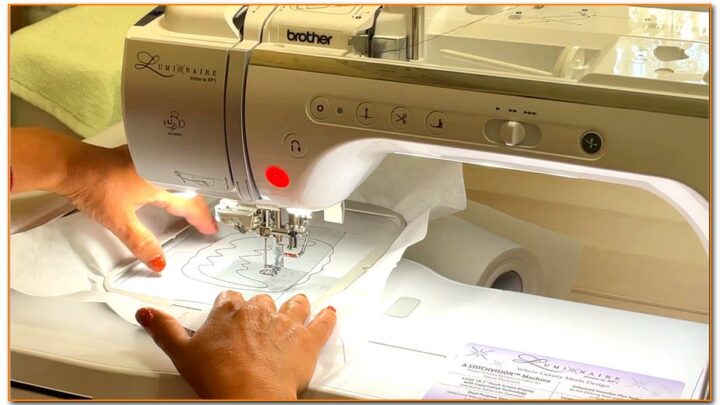
Stitch the piece of clear vinyl to the stabilizer
Place the piece of clear vinyl on top of the placement stitch and run the next step of the in-the-hoop embroidery design (color 2). I used the black thread again. The machine will tack down the vinyl in place on the stabilizer. Use tape to secure the vinyl.
Step 4
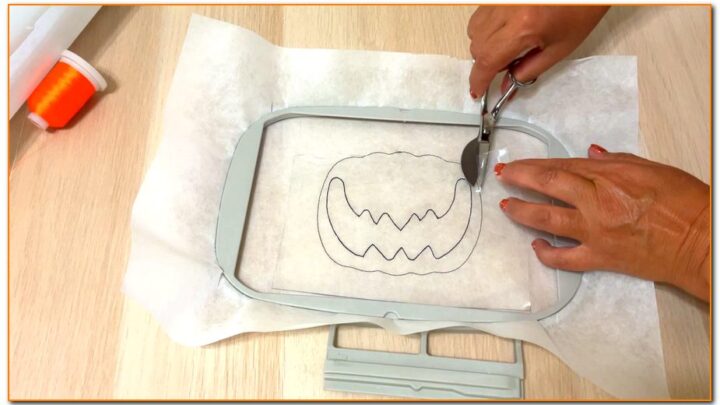
Cut away the vinyl around the tack-down stitches
Remove the hoop from the machine but don’t unhoop. Use scissors to trim the excess vinyl from around the tacking stitch. Don’t cut too close to stitches, just cut around to trim the vinyl. The cut edges will stay on the wrong side of the project and won’t be seen.
✅ Related tutorial: Duckbill Scissors: What They Are And How To Use Them
Step 5
Stitch the next steps of the designs
Return the hoop to the machine.
Place a piece of felt over the placement stitch. It should completely cover the placement stitch we made in step 2. Use tape to secure the felt in the hoop in a few places. This will ensure that everything lines up correctly and that the felt isn’t distorted during stitching.
Run the next steps of the ITH embroidery design.
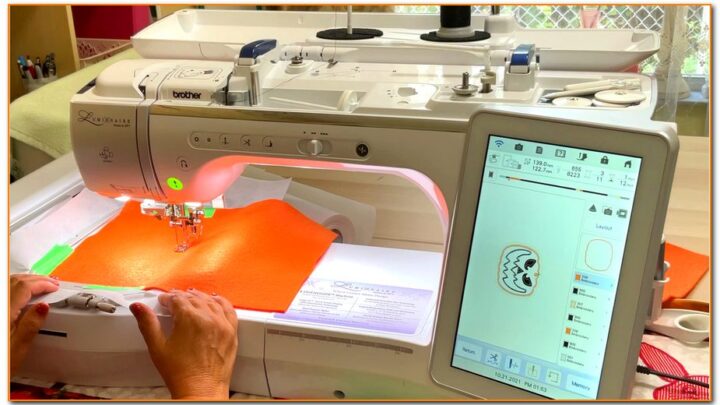
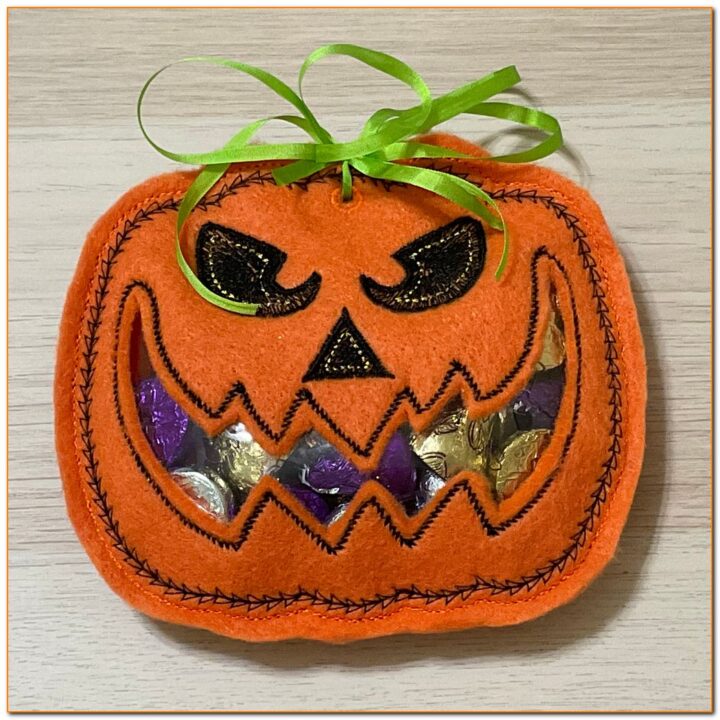
Stitch out color 3 (I used black thread) which is the pumpkin outline, color 4 (I used black thread again) which is the eyes, nose, and mouth (the outline of the vinyl window), color 5 (I used gold holographic thread) which is the outline of the nose and eyes and color 6 (I used orange color thread) which is the eyelet and final outline of the pumpkin. You can choose your own colors.
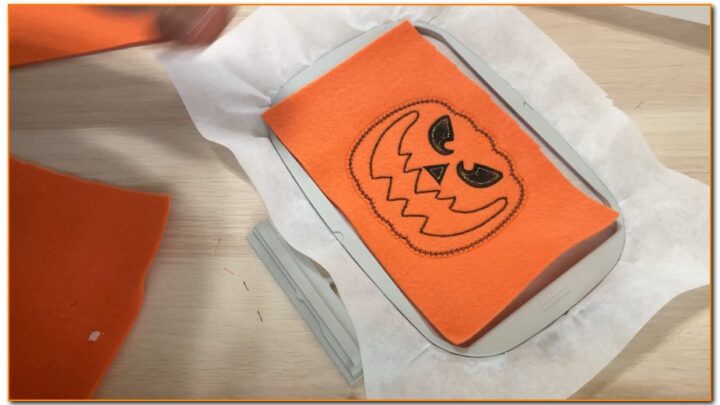
All these colors should be stitched before you attach the felt to the back of the project, otherwise, you won’t have an opening at the top where the treats can go.
For the eyelet and project outline, I suggest using a thread color that is very similar to the felt color. I used orange color.
Step 6
Cut away the stabilizer from the clear vinyl window
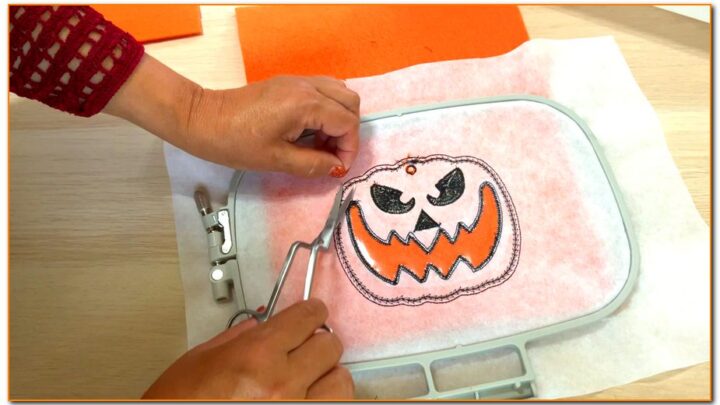
Take the hoop from the machine and remove the tear-away stabilizer from within the vinyl window on the back of the hoop.
Make sure that all remnants of the stabilizer are removed from around the edges so that after you cut the felt from the front no pieces of stabilizer are visible.
As well, be sure to cut all thread tails on the back of the design, especially around the window’s perimeter to prevent them from being seen through the transparent vinyl.
Step 7
Finish the design in the hoop
Place another piece of felt over the placement stitches on the back of the hoop and tape it in place to secure.
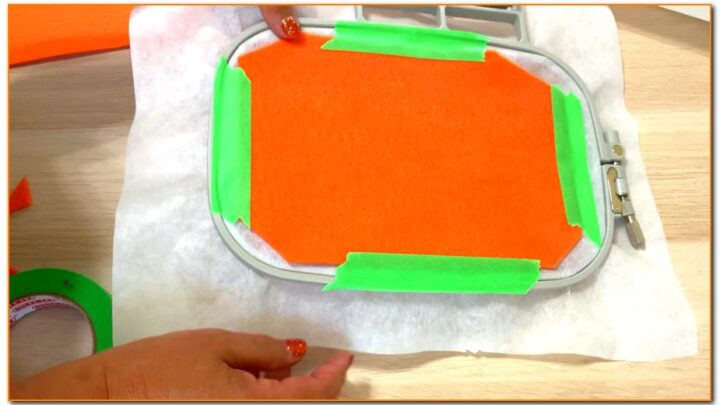
Return the hoop to the machine and stitch colors 7 and 8 (I used orange color thread) to finish off the lower outline using the same color thread as in the previous step (color 6).
The color 7 outline is a CUTTING LINE for the designs.
Step 8
Finish the treat bags
Remove the hoop from the machine and unhoop the project. Trim the design, keeping the opening’s edges together while you cut.
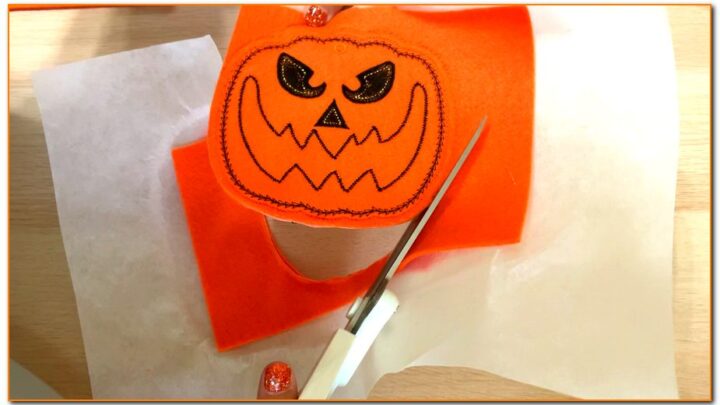
Using curved embroidery scissors, trim the felt from the inner side of the vinyl window. Be careful not to cut the vinyl underneath or the threads, take your time doing so. Trimming the felt while folding it back might assist in achieving a nice tidy finish.

Remove the stabilizer from the design as much as you can, especially from between the felt pieces.
Make a small hole in the eyelet using an awl and some other tools which can enlarge the hole.

Feel the bags with candies and chocolates.
Starting at the front, thread the ribbon through the eyelet from the front to the back. Tie the ends together in a bow at the front.
This is what your Halloween treat bag should look like.
So here is my YouTube video. Check this out if you like to see how to make these in the hoop embroidery projects instead of reading.

✅ Related tutorial: In The Hoop Embroidery Project: Fabric Christmas Tree Baby Bib
Did you find this tutorial helpful? If so, save this pin (see below) on your sewing board so you can come to this tutorial later when you are ready for this in-the-hoop embroidery project, and follow me on Pinterest for more tips, tutorials, and inspiration!
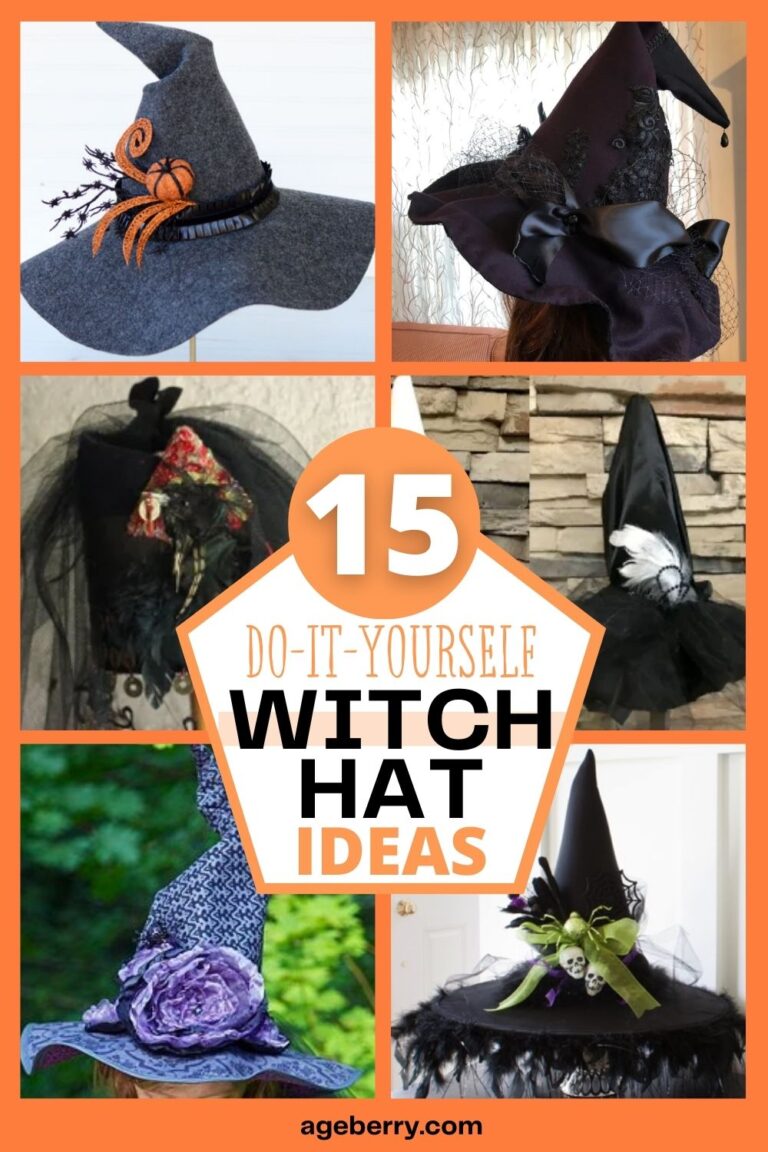
You might also like these Halloween posts:
latest posts
- What Do You Call a Person Who Sews? I Asked My Readers and Got 1,408 Opinions
- DIY Round Purse: PDF Sewing Pattern and Detailed Instructions
- Mini Wonder Clips By Clover: Useful Sewing Tool Or Just Another Notion?
- Non-Slip Grips For Quilting Rulers: A Small Notion With A Useful Job
- Fabric Eraser for Sewing: What It Removes and When to Use It
- What Is The Best Thread For Sewing Machine Projects? Let’s Find Out!
- Butterfly Quilt Block Tutorial – Foundation Paper Piecing
- How To Sew Quilt Squares So The Corners Match
- Sewing With Fork Pins: How They Help With Pattern Matching, Slippery Fabric, And Seams