
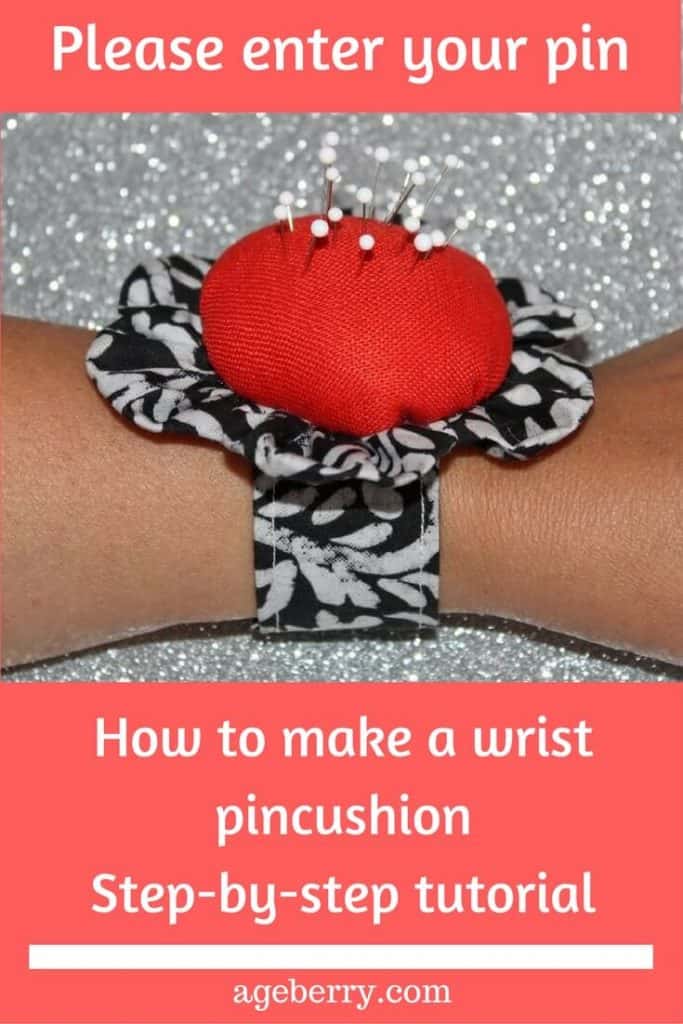
How to make a cute and very useful wrist pin cushion {step-by-step sewing tutorial}
In this sewing tutorial, I will show you how to sew a wrist pin cushion bracelet/wristlet and make an easy sewing pattern.
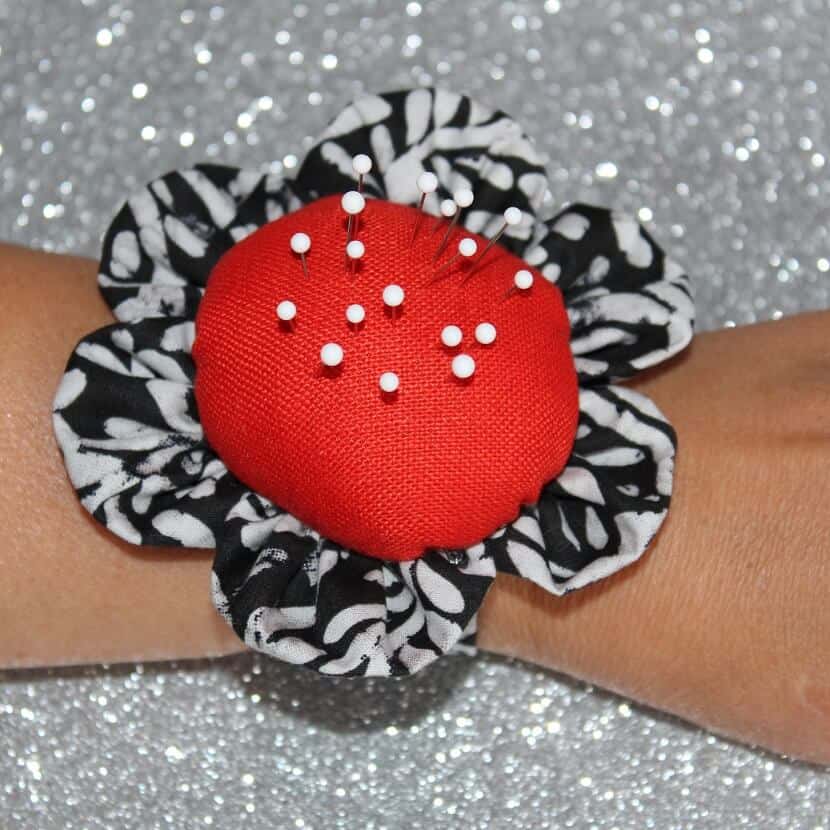
This wrist pin cushion bracelet is not very common, but I really like to use it all the time in my sewing. It is so comfortable when I pin paper pattern pieces to the fabric, or when I take pins out of the cloth. I am so used to it that when I forgot to put it on my wrist, I still try to stick the pins to my bare arm; luckily I almost never complete the operation.
Sewing this pin cushion will not be difficult even for a beginner.
Materials
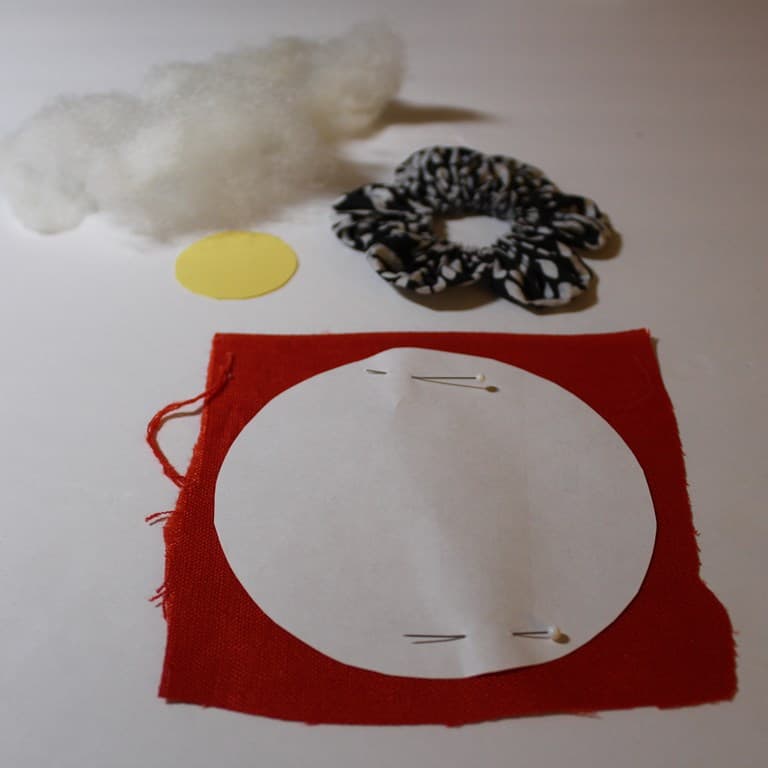
You will need:
- a small piece of yellow or red linen or cotton for the middle of the flower
- a bigger piece of printed cotton for 6 petals and the wristband
- threads in tone
- 1 plastic plate (not foam)
- stuffing material
- Velcro tape
- fabric glue, scissors
Pin Cushion Bracelet Pattern
The pattern can be easily drawn or, if you prefer, you can download a printable pdf pattern from my Resource Library page. You will need to be a subscriber to my free newsletter for this; if you already are a subscriber, the download link and password are already in the past newsletters. If not, please use the form below to subscribe.
Let me show you how to draw the pattern; it is very easy. For this just use regular paper.
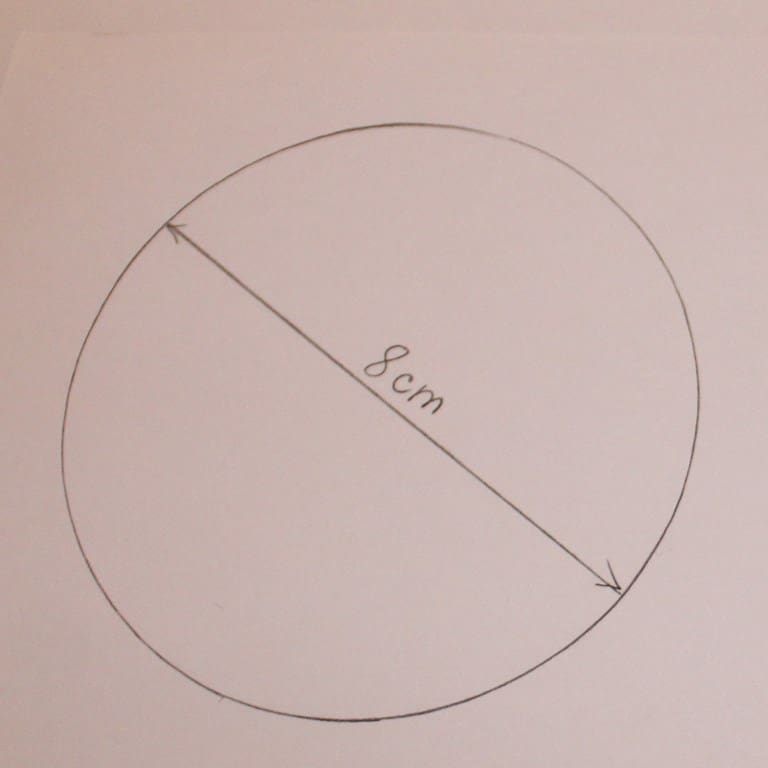
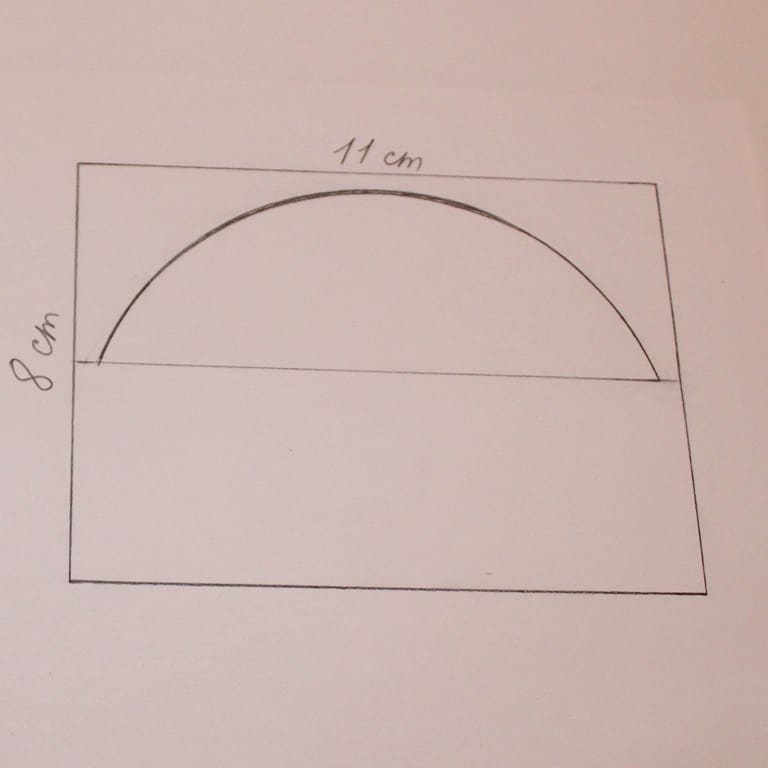
- Draw a circle with a diameter of 8 cm (or 3 ⅛ in), and cut it with scissors for paper (not with your sewing scissors). This will be the top (red fabric in my case)
- For the petal pattern draw a rectangle 8 x11 cm ( or 3 ⅛ x 4 ¼ in), cut it, fold it in half along the long side and draw a line as shown in this image. This is in fact a half ellipse, but we are not concerned with geometry now. You don’t even have to be very precise, after all, flower petals are not always perfectly symmetric. Cut the petal.
Construction
The sewing will be done mostly by hand. Check out my tutorial for beginners Sewing Basics # 2: Learn How to Sew by Hand.
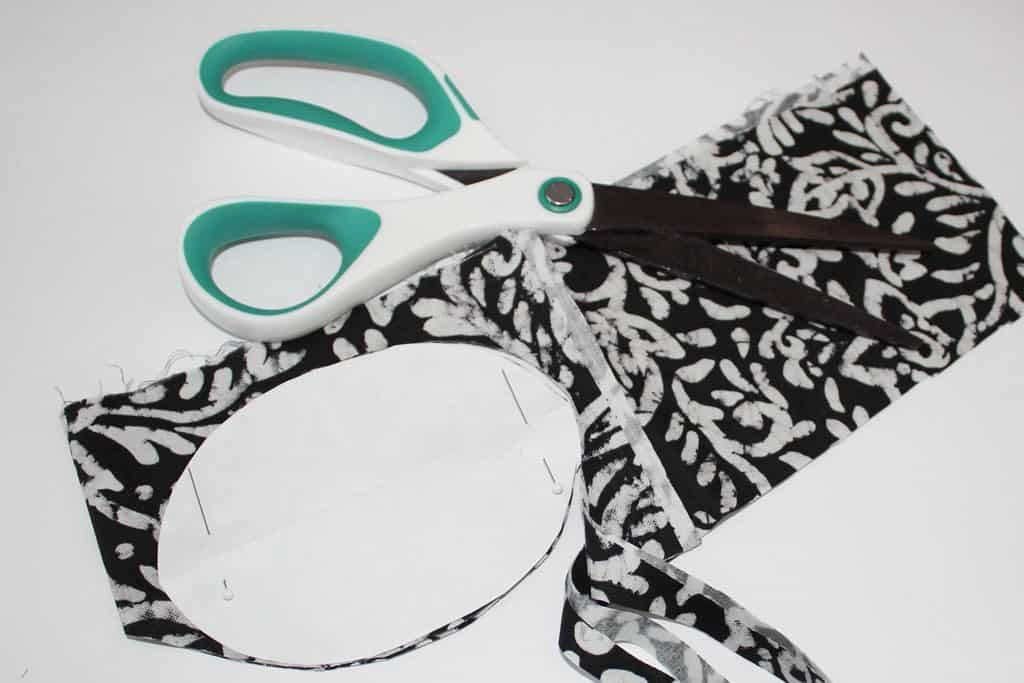
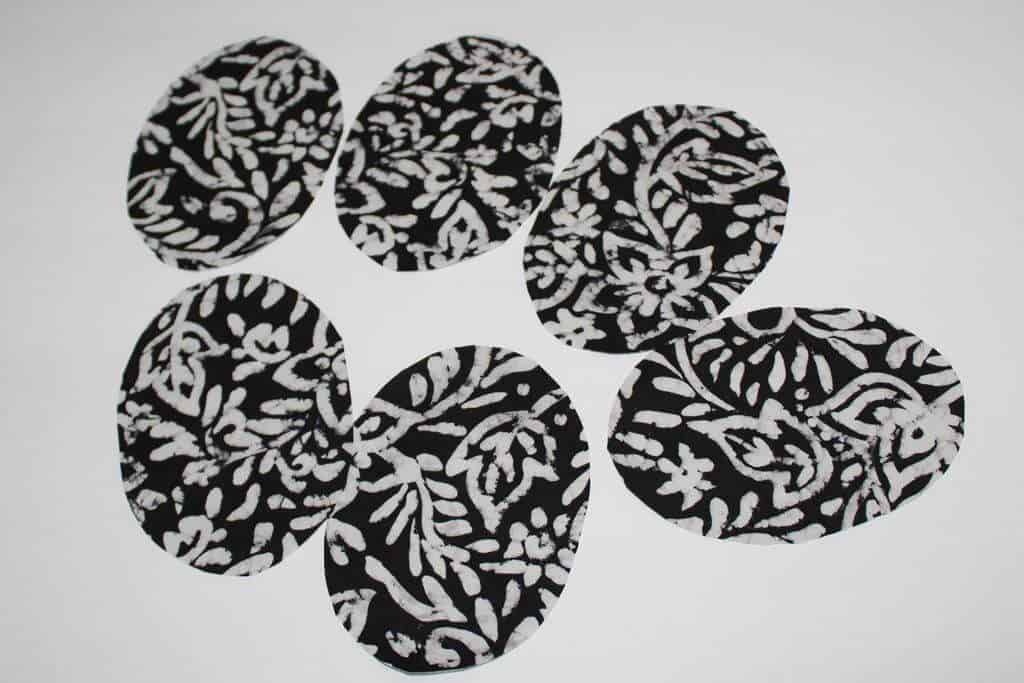
You will need to cut 6 pieces for petals. I used printed quilting cotton for this.
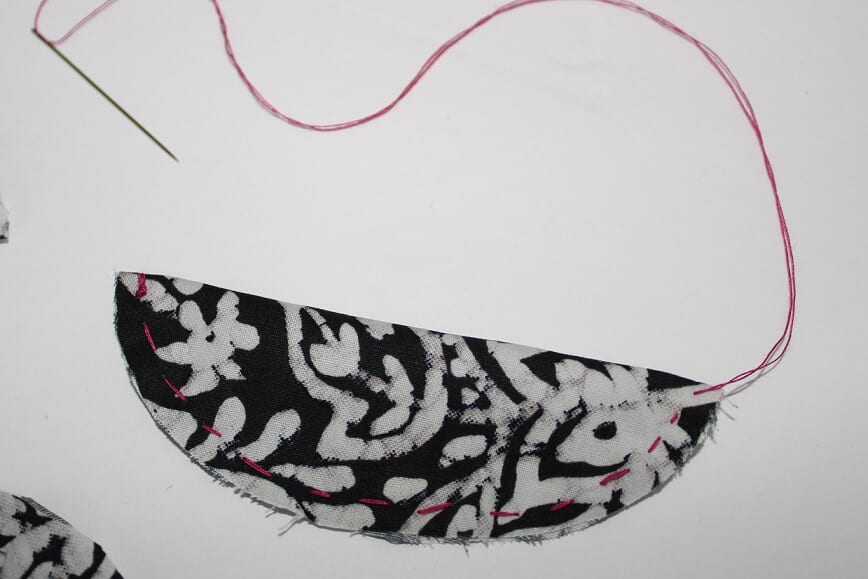
- Fold each piece in half right side of the fabric up.
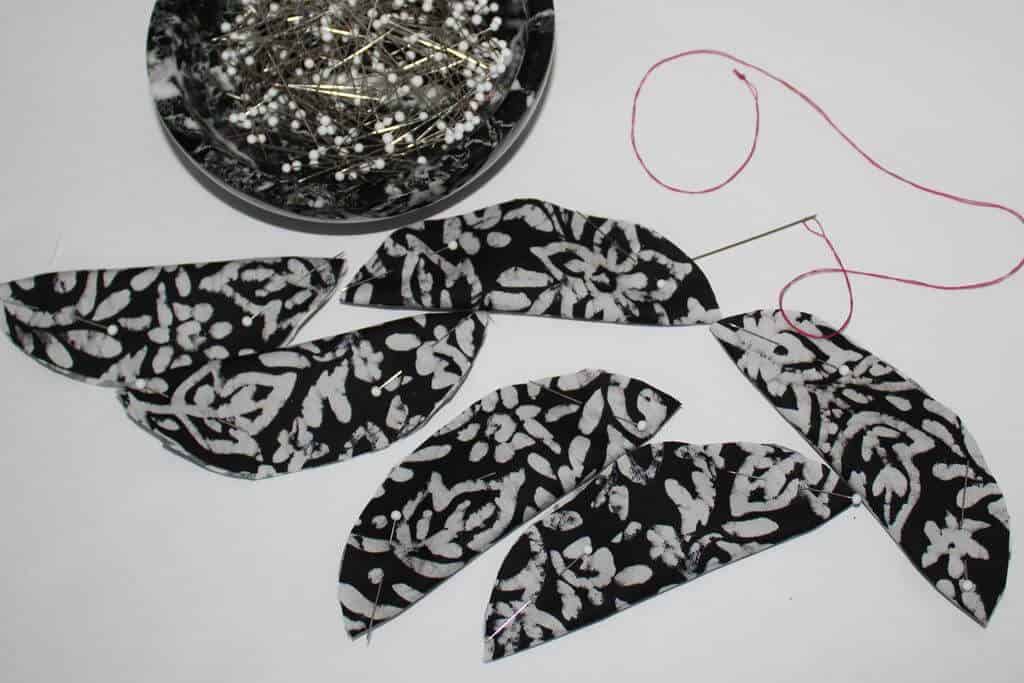
- Thread your needle with a double thread, and cut the thread a little longer than usual. Sew by hand small running stitches along the cutting line.
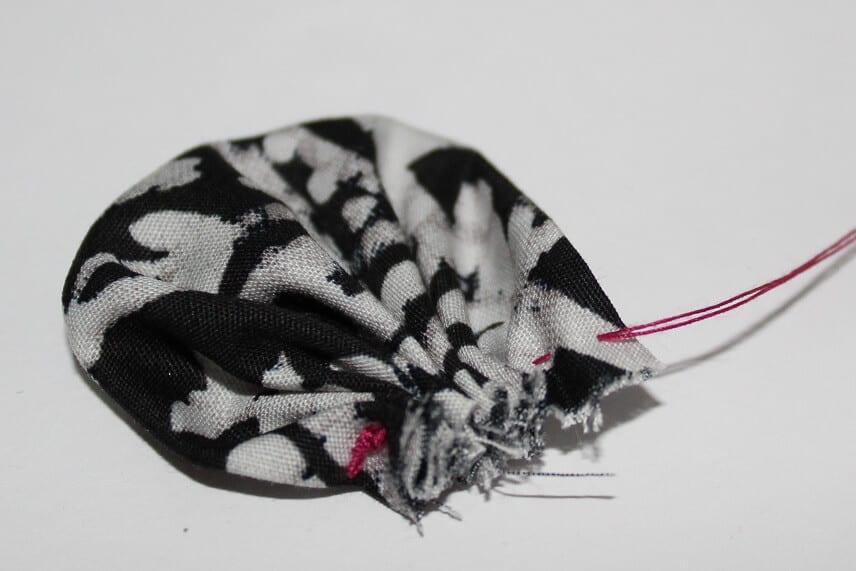
- Pull the thread, gather the fabric and make a petal. Don’t cut the thread yet.
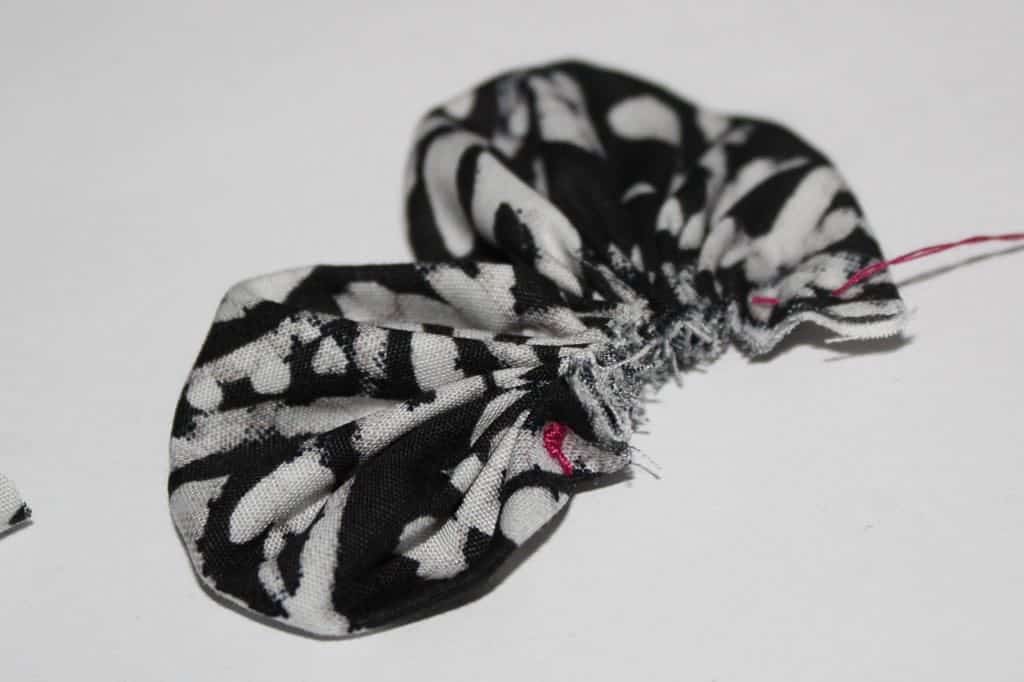
- Do the same with the second piece, and with the third, etc. Put all the petals one after another on the same thread.
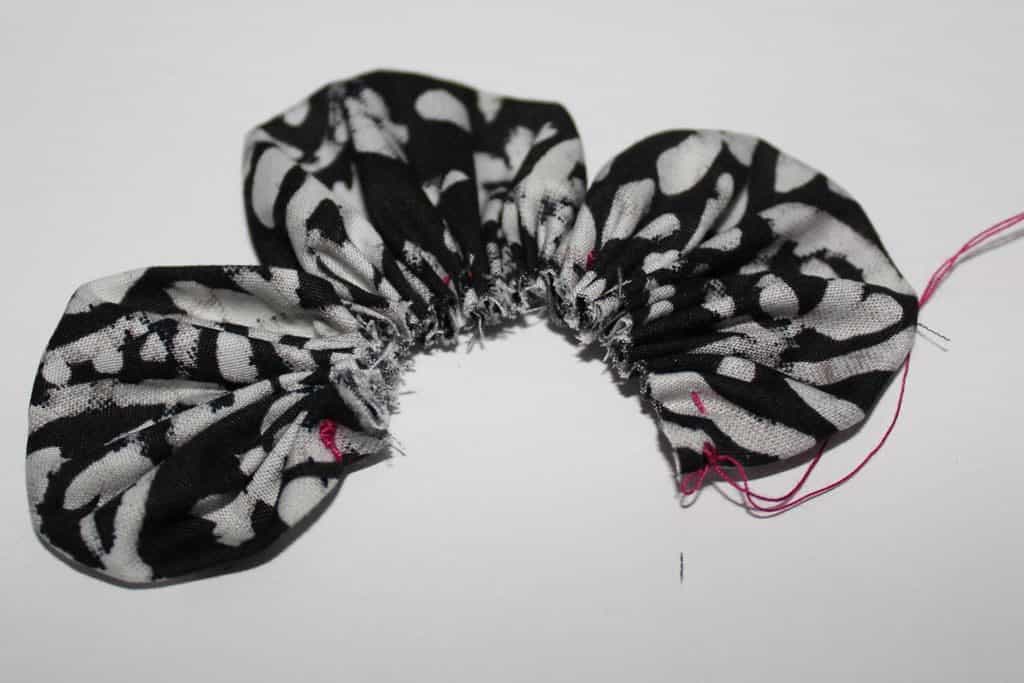
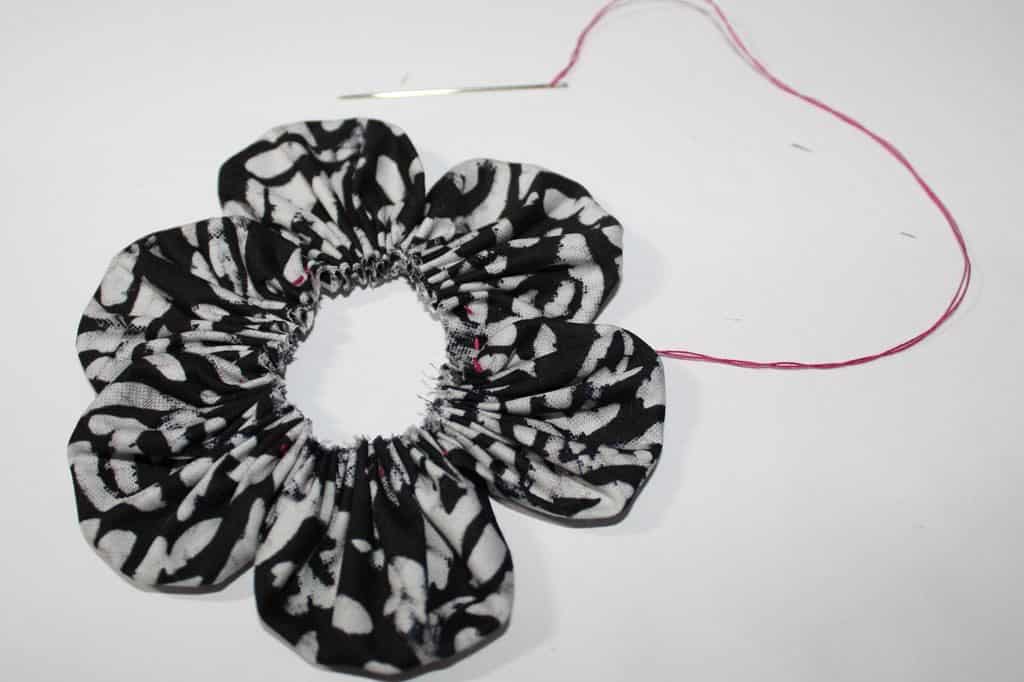
- So, we got the flower. Fix the first and the last petal with small basting stitches so that the structure does not fall apart.
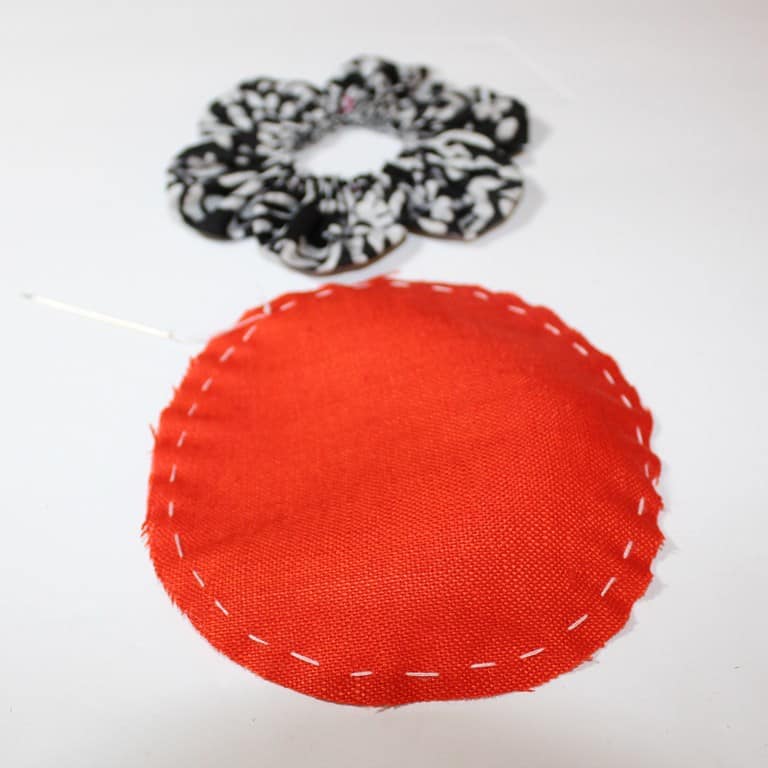
- Now cut the circle from the red or yellow fabric. Make a running stitch at the very edge of the circle, leaving the thread with the needle.
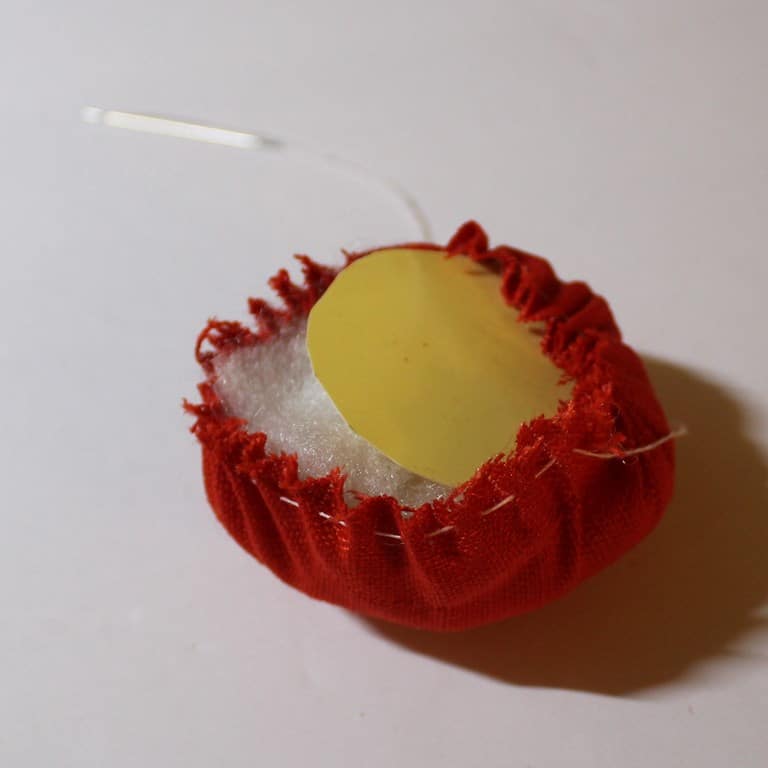
- Cut a smaller circle (around 4.5 – 5 cm, just under 2″) from plastic. This is absolutely necessary to protect your arm from pricking with pins while using the pincushion. I used the bottom of a spool of thread to mark the circle. DO NOT use foam material, that is easily penetrated by sharp pins.

- Slightly pull the thread, tightly filling the pocket with filler. In the end, insert the small plastic circle you made from a plastic plate, and tighten the thread to the end as much as possible. Secure the thread, but don’t cut it yet. With the same thread, sew the resulting part into the middle of the flower.
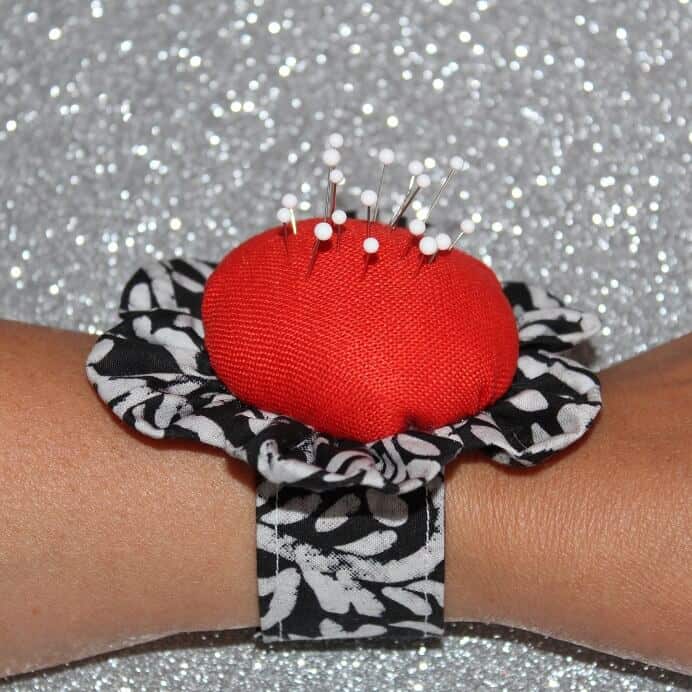
How to Make a Wrist Band for the Pin Cushion Bracelet
- Cut a rectangle piece of printed cotton about 9 x 24 cm (3 ½ x 9 ½”, the calculation of the length of the band was made for my hand; this part may have a different length if your wrist is narrower or wider than mine).
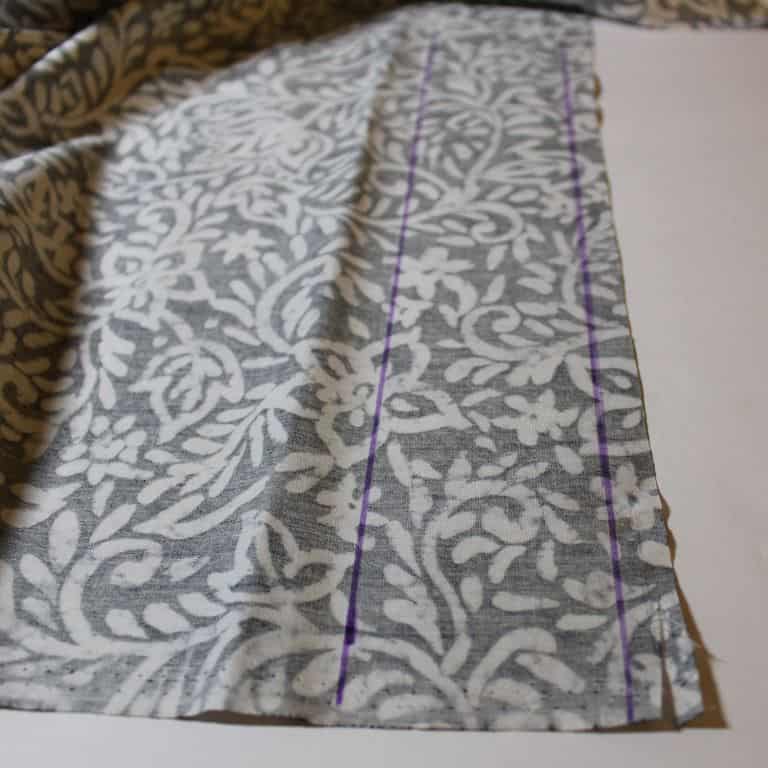
- Fold both short ends in about 2 cm (¾”) and press.
- Fold the rectangle with the right sides together, baste and stitch with the seam allowances 1 cm (⅜”).
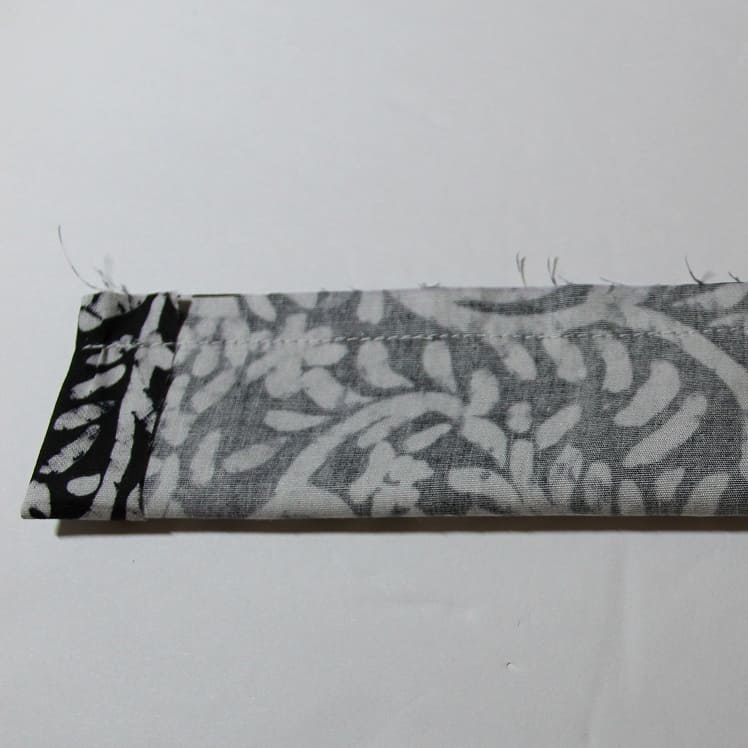
- Turn it right side out, baste and press.


- Topstitch the band.
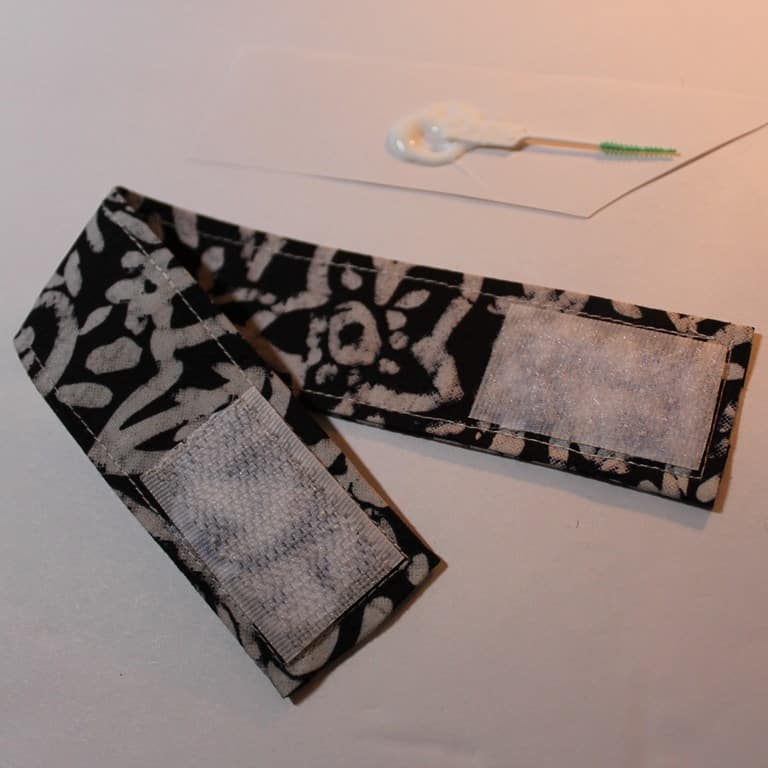
- Secure small pieces of Velcro tape to each end of the band (so it would overlap for fastening) with fabric glue and stitch them around the edges with your machine.
- Attach the flower to the band with the fabric glue and some hand stitches – and you are done.
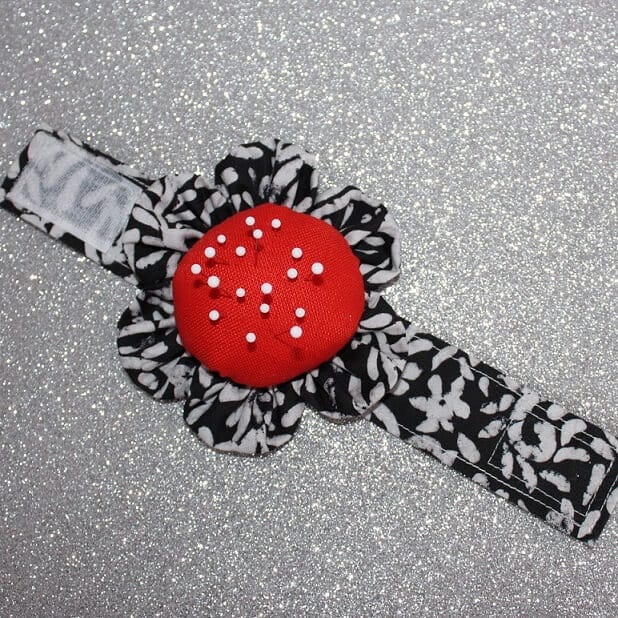
So, this wrist pincushion is ready for pins. Please, enter your pin! 🙂🙂🙂
I hope you have found some helpful information in this sewing tutorial on how to make a pin cushion bracelet. Want to remember this tutorial? Post this pin to your favorite Pinterest board so that you can find the instructions later.

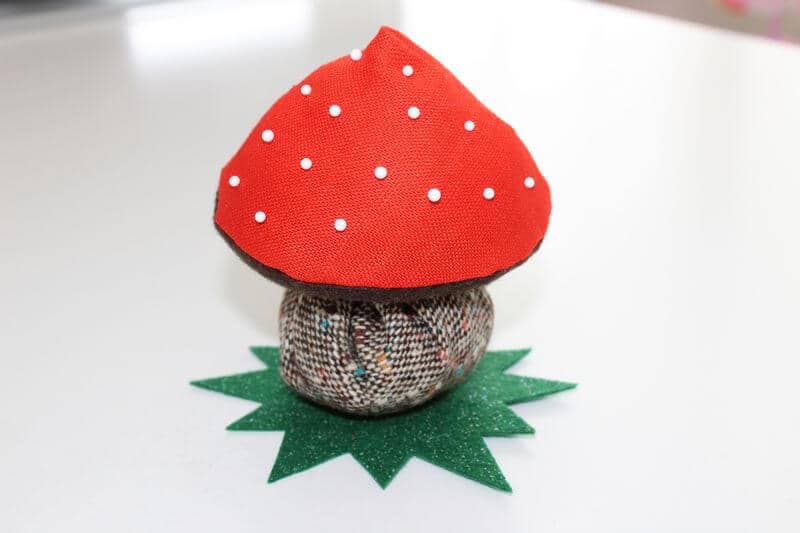
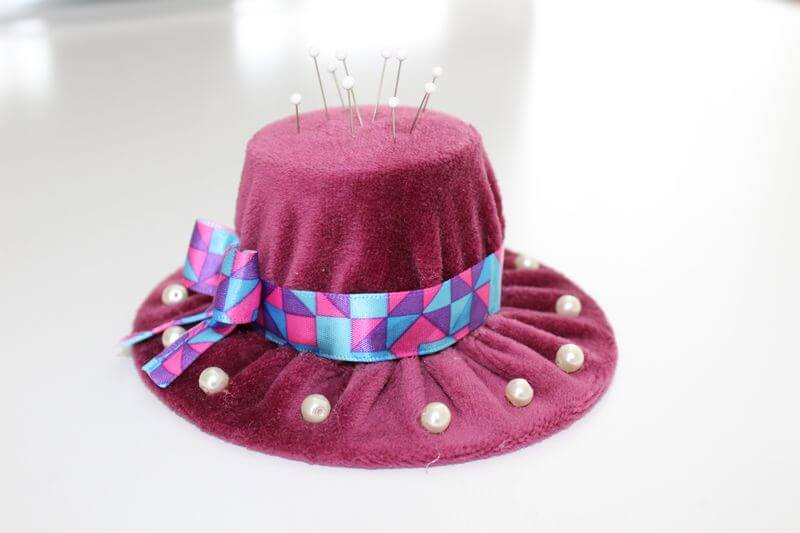
“Please enter your pin” – a phrase you hear more and more often, on your phone, at the ATM, when you pay with a pin-enabled credit card. But in sewing? Of course! We use pins, and lots of them, for almost every operation. We need many pins, we need them stored safely before use, and when we need them, and when we need them, we need them NOW! Therefore every sewing enthusiast needs a number of pin cushions. Below are some of my pincushion ideas.
These pincushions are just two of the ones I have on my desk: a cute mushroom and a fashion hat.
Do you like my wrist pin cushion? Did you make one for yourself? Or are you still using a regular mass-produced tomato pincushion? Please leave your comments below. And if you consider my tutorials useful, please support my efforts!
Ready to take the next step in your sewing journey? Check out more step-by-step tutorials from my site and don’t forget to share!


latest posts
- Butterfly Quilt Block Tutorial – Foundation Paper Piecing
- How To Sew Quilt Squares So The Corners Match
- Sewing With Fork Pins: How They Help With Pattern Matching, Slippery Fabric, And Seams
- How Much Fabric Do I Need? 21 Helpful Tips For Calculating Fabric Yardage
- Easy Simple Sewing Project: Fabric Jar Opener
- DIY Oven Mitts: Step-by-Step Sewing Tutorial
- Easy DIY Potholder: New Design
- Tailor’s Clapper: What It Does, Why It Works, And How To Use It Right
- Heat Resistant Batting for Sewing: What It Is, How It Works, and What Makes a Difference
I am excited to have come across your blog there is so much I will learn thank you.
Thank you! I am happy that my blog is useful. And I would be even happier if you share your experience with me.
Thanku very much for this video
Thank you! I am glad you liked it!
Hi, just came across your blog today as I was checking out something on Pintrest I love your articles, they are funny and inspiring. I am a budding sewing enthusiast (not a sewer) and I know I will benefit a lot from your posts.
Thank you, Lilian! Happy to hear that! I love what I am doing and I hope my articles are useful for sewing enthusiasts.
hola, gracias por compartir tu sabiduria, es justo lo que necesitaba, lo voy a hacer, gracias.
Very helpful blog thank you
Thank you very much!
Thanks so very, very much for this neat wrist pin cushion. I’ve been wanting to make one & now you’ve showed me how. I have just one question. How do you attach the pin cushion to the wrist band? Thanks again for this super idea & helpful instructions.
Thank you! I attached the pincushion to the wrist band with fabric glue. It holds really well and I don’t think I will ever do laundry with my pincushion so the glue is not going to be washed out.
Tank you,i am from indonesia
Great instructions. Just finished my wrist pin cushion.
Thank you, Debbie! Can you send me an image of your pincushion? I would like to show it on this page.
Great instructions – I’ll try doing one very soon. Thank you.
Thank you! Send me an image of your pincushion by email, please.
Just finished my wrist pincushion. Thanks Olga for a great pattern. Will send a picture to your email. Very happy.
Thank you!!
Thank you for this lovely tutorial. Ive always wanted to make one of these for my friends and myself. Thank you again very much xx
Thank you. Indeed it is cute and very, very useful.