
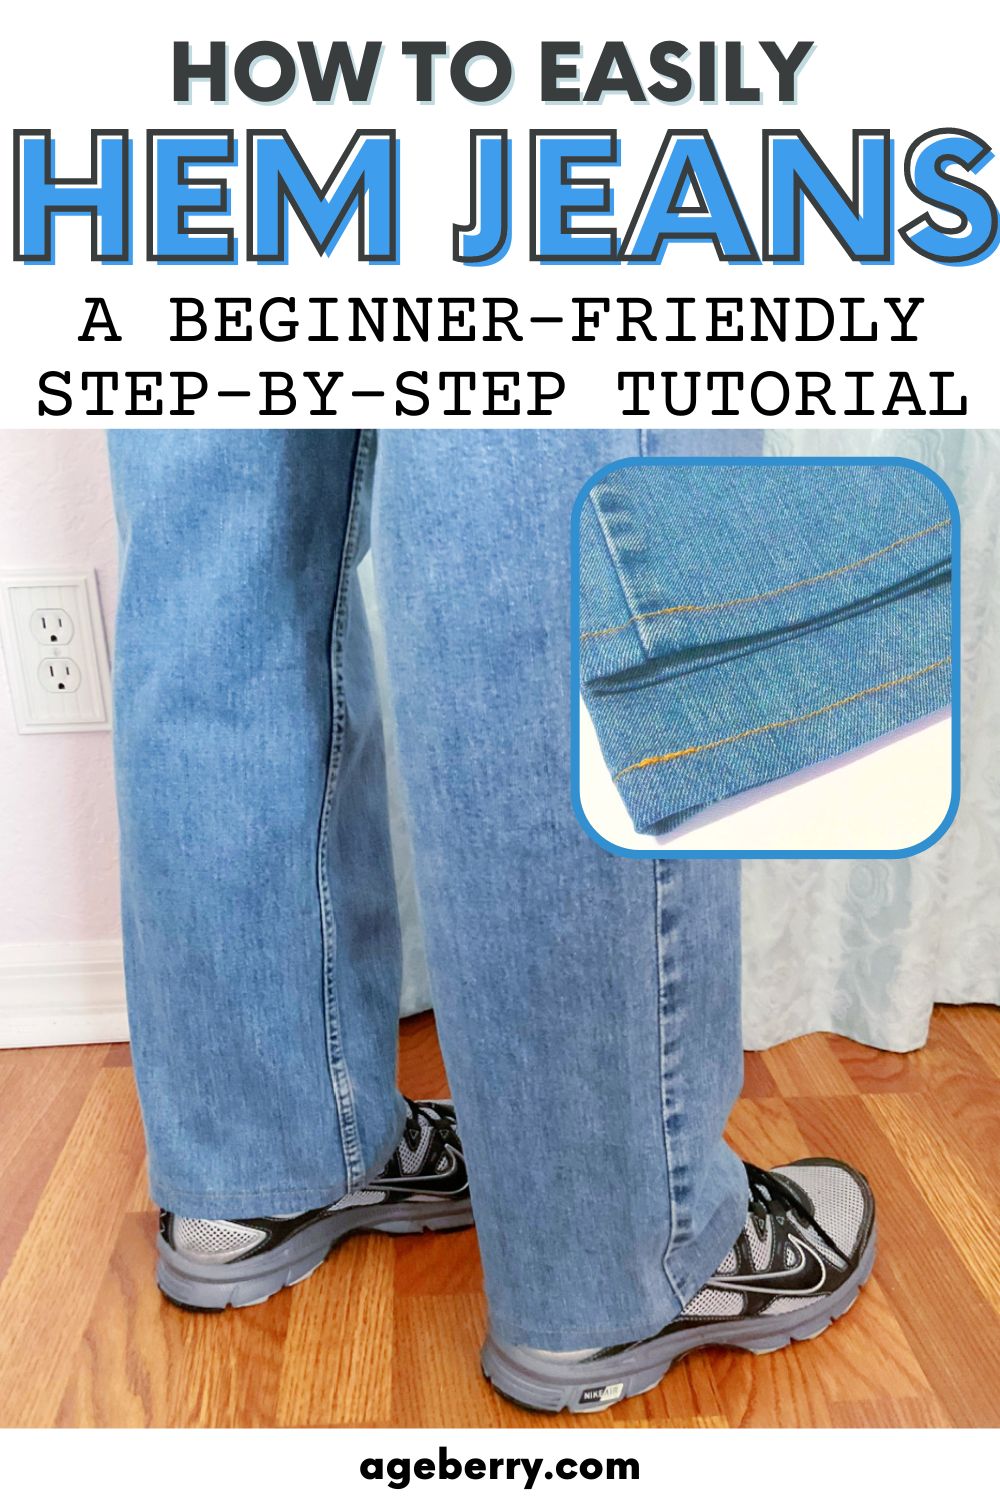
How to Easily Hem Jeans at Home: A Step-by-Step Tutorial
Are your jeans too long? Are you tired of struggling to find jeans that fit just right? Do you dread the thought of going to an alteration store and spending a fortune? Well, here is the perfect solution for you. Take matters into your own hands and try out to hem your jeans yourself. You’ll be amazed at the results and feel empowered knowing you can achieve the perfect fit at home. Not only is this cost-effective, but it’s also easy to learn. With just a few simple steps and a sewing machine, you can hem your jeans to your exact preference.
- Two Most Common Ways To Hem Jeans
- What You Will Need To Hem Jeans
- Decide On The New Length Of The Jeans
- Choose The Right Type Of Hem For Your Jeans
- Step 1. Measuring, Marking, and Cutting the Jeans
- Step 2. Folding And Basting The Hem Of The Jeans
- Step 3. Minimize Bulk To Achieve An Even Hem When Hemming Jeans
- Step 4. Sewing The Hem With A Sewing Machine
- Step 5. Using A Tool To Sew The Hem Over Bulky Seams
- Step 6. Final Press
- Finishing Touches
Two Most Common Ways To Hem Jeans
There are two popular methods for hemming jeans – the regular double-folded hem and keeping the original hem. Both methods have advantages and disadvantages, and the choice depends on the type of jeans and personal preference.
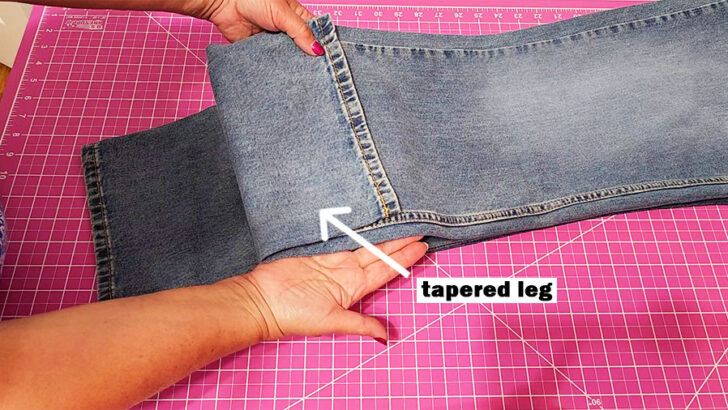
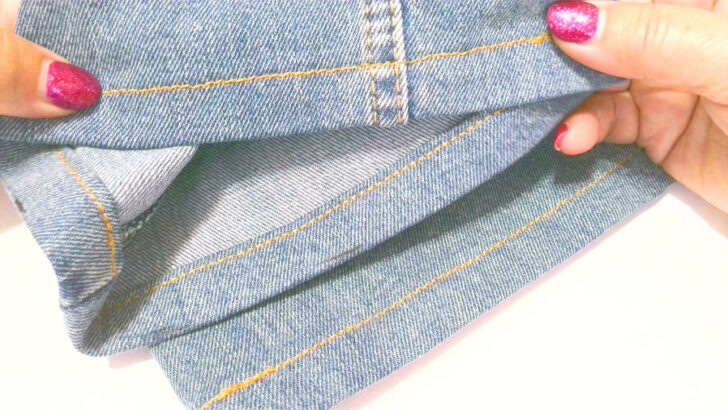
The traditional double-folded hem is the most common method of hemming jeans. It involves folding the bottom of the jeans twice and sewing it to secure the hem. This method is suitable for jeans with straight legs, flared legs or tapered legs that are characterized by a gradual decrease in width from the thigh to the ankle, resulting in a narrower leg opening at the bottom, as you see in the image below.
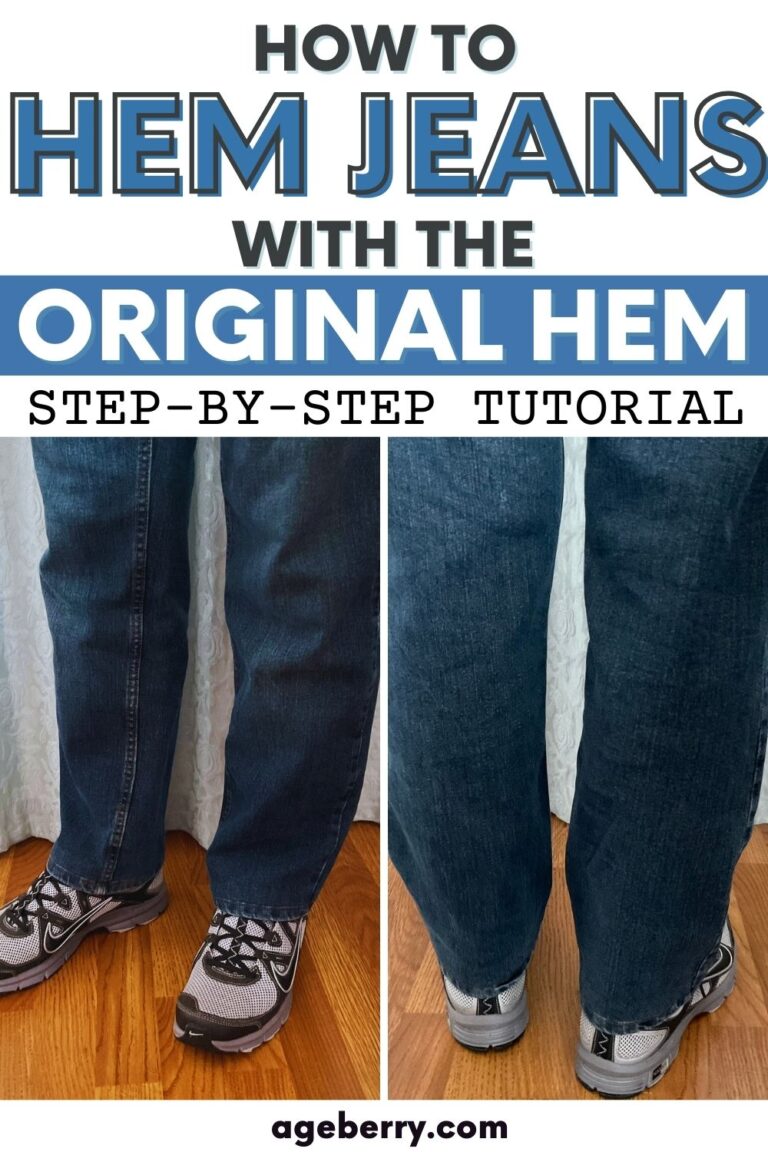
The other method involves preserving the original hem of the jeans. It is mostly suitable for jeans that have straight legs, as it can be challenging to keep the original hem intact on flared or tapered legs. The advantage of this method is that it maintains the authentic look and style of the jeans, and it can be a great option for those who want to keep the jeans as close to their original state as possible.
If you need to shorten straight-legged jeans, keeping the original hem can be a great option. This is because the original hem of the jeans is often distressed and faded, which gives it a unique and stylish look. By preserving the hem, you can maintain this look and add to the overall aesthetic of the jeans.
Whatever method you choose, make sure to take your time and follow the proper steps for a professional-looking hem.
Note: Some of the links on this page are affiliate links. This means I will receive a commission if you order a product through one of my links. I only recommend products I believe in and use myself.
What You Will Need To Hem Jeans
- Marking tool (chalk works well, I recommend the chalk wheel)
- Fabric scissors. I recommend this one, it is excellent and not expensive
- Sewing Pins
- Sewing machine
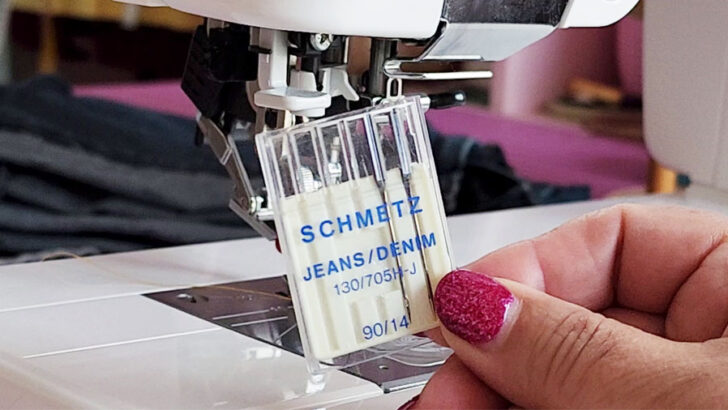
- Denim needle. I used size 90/14
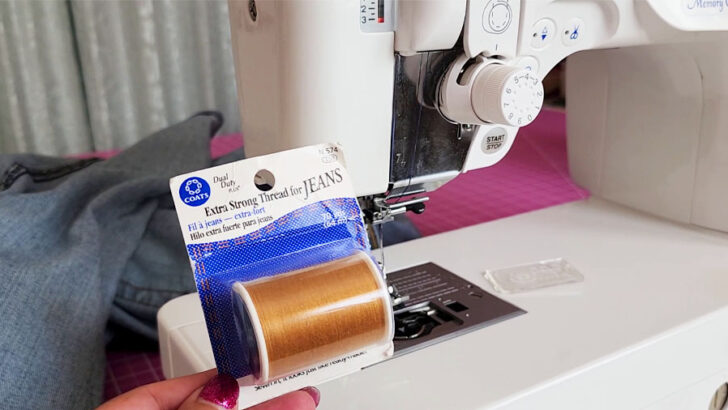
- Special denim thread (yellowish color or blue denim color). I used Coats & Clark but Gutermann is also a good choice
- Measuring tape
- Ruler. Any ruler will do
- Hand sewing needle (for basting)
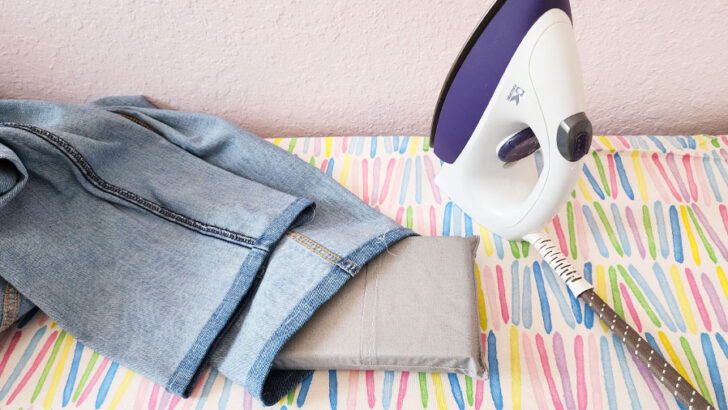
- Iron
My iron is an older Kalorik model which is no longer available (I am talking about it here Basic sewing tools: iron buying guide) but similar models steam stations are available on Amazon.
There are also some optional tools that you can use:
- Walking presser foot. I am talking about this here: How to use a walking foot
- Mallet
- Seam jumper
A marking tool is used to mark the length of the jeans that you want to shorten. This can be a chalk or a fabric marker that can be easily removed after hemming.
Good fabric scissors are a must-have tool for any sewing project, including hemming jeans. They are sharp and precise, making it easy to cut through denim fabric.
Pins are used to hold the fabric in place while sewing. They come in different sizes and can be easily removed after hemming. Use long strong straight pins.
A sewing machine – use a machine that is capable of sewing through thick denim fabric.
A jeans/denim needle is a specialized needle that is designed to sew through denim fabric. It is thicker and stronger than a regular needle, making it easier to sew through thick layers of fabric.
Special jeans thread is a must-have for hemming jeans. It is a thick and durable thread that is designed to withstand the wear and tear of denim fabric. It comes in a yellowish or blue jean color that matches the color of the jeans.
A measuring tape and ruler are used to measure the length of the jeans you want to shorten. It is important to measure carefully to ensure that the hem is even and the jeans fit properly.
A hand sewing needle is used for basting, which is a temporary stitch that holds the fabric in place while sewing. This is useful for ensuring that the fabric stays in place while using the sewing machine.
Finally, keep your iron handy. And if you wonder why I need a mallet, read below Step 3 – it really helps!
Decide On The New Length Of The Jeans
To begin, put on the jeans you want to hem and wear the shoes you will usually pair with them. Stand in front of a mirror to get a better idea of the length you desire. It will help you determine how much fabric you need to fold up and pin.
Have in mind that different shoes may require different jeans lengths. For example, boots and sneakers may need a slightly longer length than flats. When you get your jeans hemmed, always wear the shoes you will wear with these jeans.
The length of your jeans should reflect your personal style and make you feel confident and comfortable. If your jeans are too short, they can make your legs appear shorter and throw off the proportions of your outfit. On the other hand, if your jeans are too long, they can bunch up at the ankle and create an unflattering silhouette.
Once you have decided on the length, it’s time to pin the new hem. To do this, fold the excess fabric up to the desired length and hold it in place with your fingers. Then, ask your friend to help you pin the fabric in place using pins. Make sure the hem is even and the jeans fit properly.
✅ Related tutorial: How Long Should Pants Be? A Comprehensive Guide To Hemming Pants
Choose The Right Type Of Hem For Your Jeans
There are many different types of hems. You can read about them in my article Hemming 101: A Guide To Different Types Of Hems.
One of the most common types of hems for jeans is the double-folded hem. This type of hem involves folding the fabric up twice and securing it in place with stitching.
It provides a clean and professional-looking finish to the hemline. The double fold creates a neat edge that is less likely to fray or unravel over time. This is especially important when it comes to jeans, as they tend to experience a lot of wear and tear.
Another benefit of the double folded hem is that it creates a more durable hemline. The two layers of fabric provide extra thickness and strength to the hem, making it less likely to rip or tear. This is important for jeans that are worn frequently or for extended periods of time.
For this tutorial, I’ll be shortening my husband’s jeans. The jeans have a tapered leg, which means I can’t use the method of hemming with the original hem. So, I’ll be using the double-folded hem for this tutorial. This method involves folding the excess fabric up twice and securing it in place with stitching.
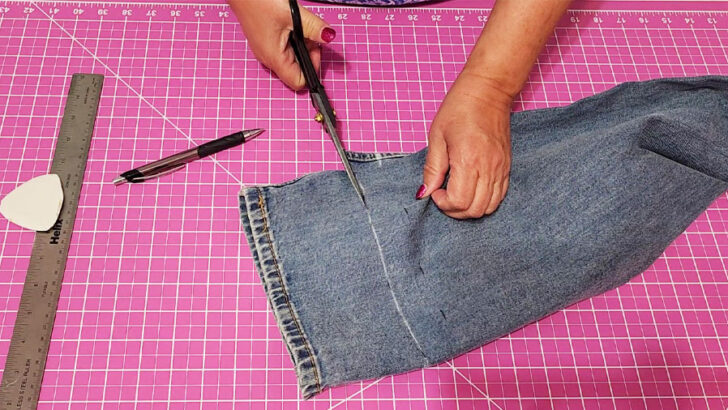
Step 1. Measuring, Marking, and Cutting the Jeans
Lay jeans flat on a clean, flat surface, like a table or ironing board.
Measure the distance between the bottom of the jeans and the fold line that you marked while wearing the jeans.
Repeat this measuring process at various points across the leg of the jeans and make marks using your fabric marker. This ensures that your measurements are consistent and accurate all around the hem.
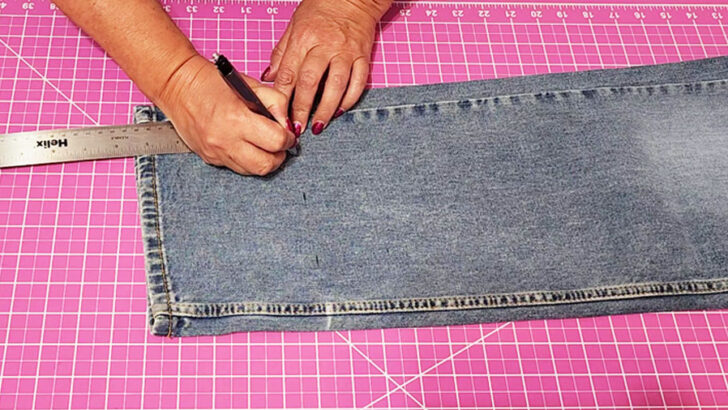
Next, draw a straight line across the hem using your marks. This will be a new fold line for the hem.
But you can’t cut the jeans on this line. You need to create a new line 1 1/4 inch below the line you just drew. This will be the cutting line that indicates where you will trim off the excess fabric before folding the hem.
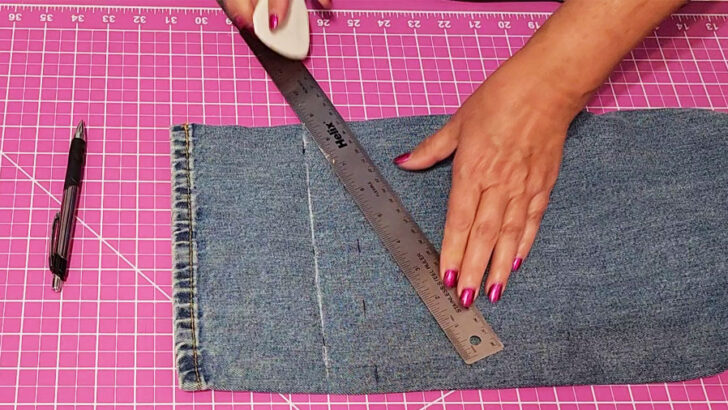
Before proceeding to any cutting, Double-check measurements to avoid any mistakes. Use your ruler or measuring tape to check that the fold lines are consistent and match your desired hem length.
After you confirmed your measurements, carefully cut off all the extra fabric below the marked line for both legs. Use sharp sewing scissors for a clean cut. Take your time to ensure the cut is straight and even.
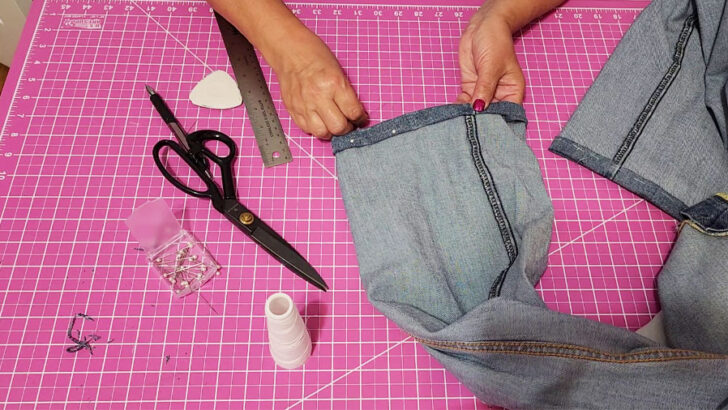
Step 2. Folding And Basting The Hem Of The Jeans
Fold the hem along the new fold line, pin in a few places to hold the fold.
Make sure you have exactly the same width of the hem around the jeans leg.
You can use a steam iron to make the crease. This will help set the fold and make it easier to work with when you are sewing.
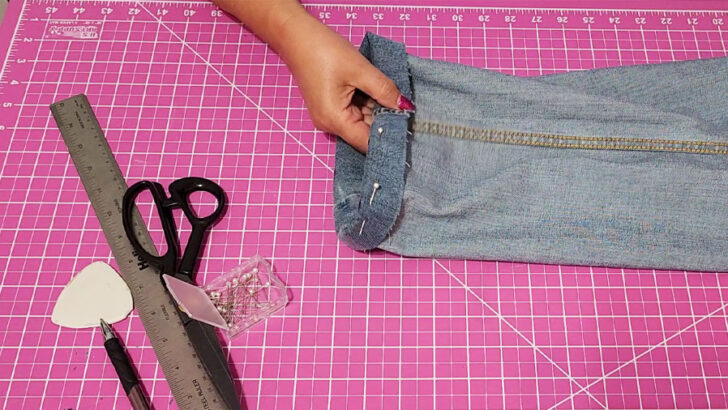
Open the crease just enough to fold the raw edge again so that it meets the crease you just ironed, and roll it over so that the raw edge is folded under and out of sight. Pin or baste again.
Use pins or opt for basting to hold the double-folded hem securely in place. I prefer to baste the hem. Basting, done through hand sewing, offers an extra layer of stability.
If you prefer pins use plenty of pins to make sure the fabric doesn’t shift while you’re sewing. Also, have in mind that you will need to remove the pins as you sew.
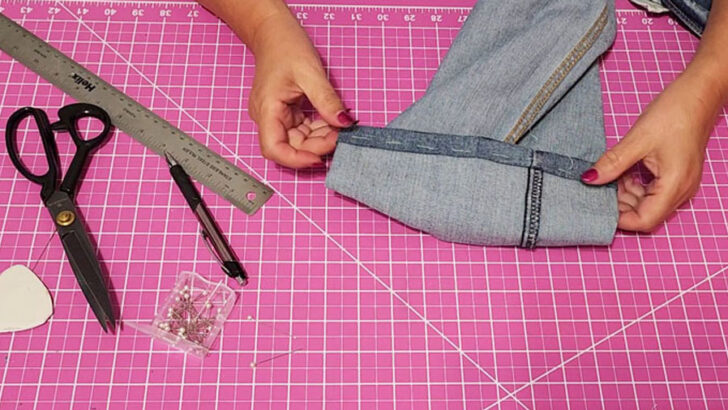
Check if the fabric is smooth without any folds and the hem is even all the way around.
Press the hem with your iron to finalize the folds.
Try on the jeans again to make sure the length is correct. Make any necessary adjustments before sewing the hem permanently.
Step 3. Minimize Bulk To Achieve An Even Hem When Hemming Jeans
When hemming jeans, it’s common to encounter thick seams that can make the hem bulky and uneven.
Fortunately, there are a few techniques you can use to minimize bulk and achieve a smooth, even hem.
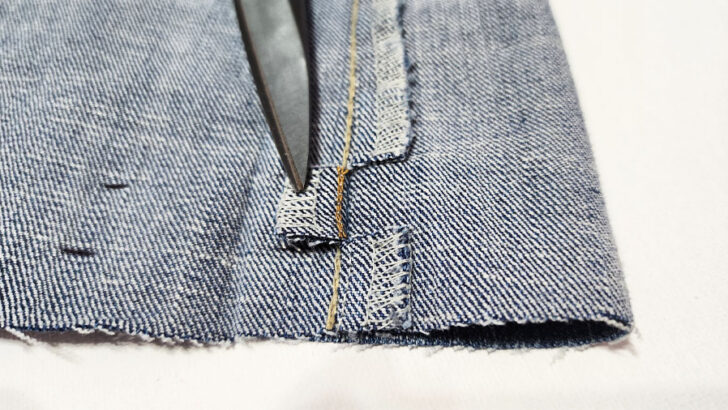
One effective method is to cut the seam allowance before hemming (see the image below). To do this, cut the seam allowances in 2 places – at the levels of the first and the second folds very close to the stitching line. Move the trimmed seam allowances in opposing directions prior to creating the double-folded hem. This action helps distribute the fabric evenly, reducing any accumulated bulk.
You can also trim the seam allowance to a narrower width, leaving just enough fabric to hold the seam together. This will reduce the bulk of the seam and make it easier to hem the jeans.
I also like using a mallet (or a hammer) to flatten the seam in one particular area of the hem where the flat felled seam is.
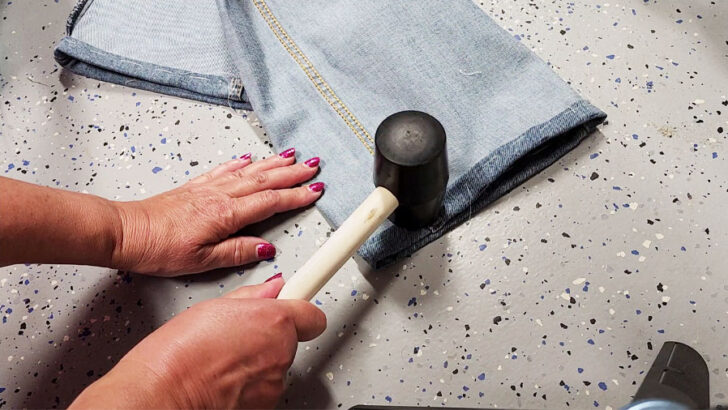
Select an appropriate location for this step. Find a safe and sturdy surface where you can comfortably use the mallet without breaking your table or floor. A garage floor is a good choice due to its durability.
Lay the jeans down with the seam that requires attention facing upward.
Tap it with a mallet to compress the fabric and reduce bulk. Focus your efforts on the portion of the hem where the flat-felled seam is located.
Exercise caution and maintain controlled force during this process. The goal is to gradually reduce the bulk, not to forcefully break the fabric.
It’s also important to choose the right needle and thread for hemming jeans. A special heavy-duty denim needle and strong, durable jean thread will help to sew over bulky seams.
I also use a walking foot to sew bulky seams.
Step 4. Sewing The Hem With A Sewing Machine
Now, it’s time to set up your sewing machine. Thread the machine with the appropriate jean thread. Wind a bobbin with the same thread.
✅ Related tutorial: How to thread a bobbin
Insert a new sewing machine needle, ideally the Schmetz denim needle 90/14 (or in a size suited to your fabric weight).
✅ Related tutorial: Everything You Ever Wanted to Know About Schmetz Needles
I also use a walking foot for sewing the hem. This specialized foot helps evenly feed layers of fabric, particularly useful when working with thicker materials like denim.

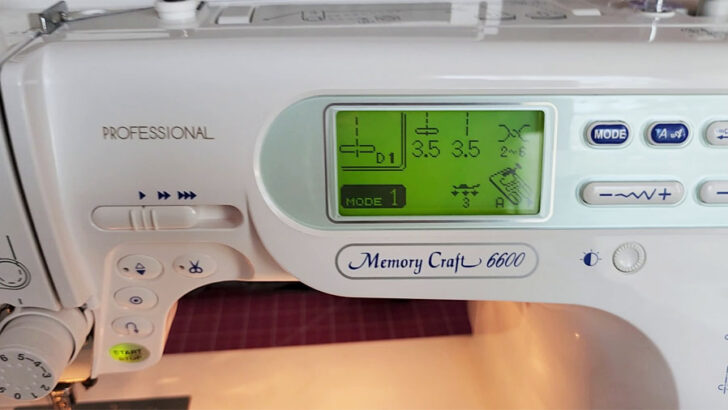
Select the straight stitch on your sewing machine and adjust the stitch length to 3 – 3.5mm.
Try the settings on scrap and adjust the settings if necessary. You might need to adjust the sewing machine tension. Use my tutorial if you are not sure how to do it – Sewing Machine Tension Adjustment.
Place the hem under the sewing machine’s presser foot.
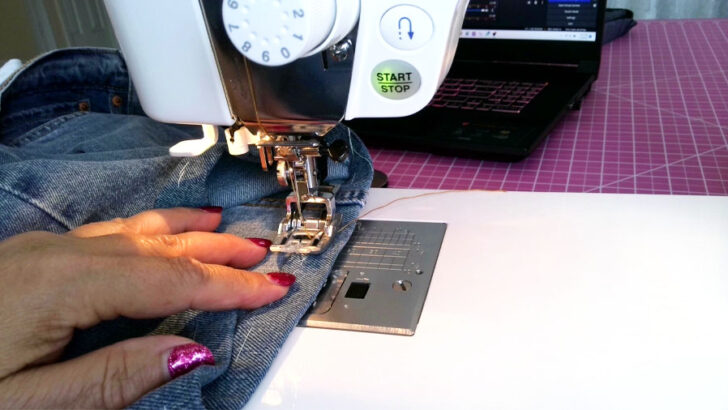
Sew all the way around the hem, removing pins as you go (if you used pins to hold the hem). Overlap a few stitches at the starting point to secure the seam. Backstitch at the end of the seam to secure the stitches.
Maintain a steady sewing motion as you guide the fabric through the machine. Ensure the fabric is evenly fed to prevent bunching or uneven stitches.
If somehow you have problems with your sewing machine like thread bunching, thread breaking, needle breaking, seam puckering, etc, use my tutorial Troubleshooting Common Sewing Machine Problems (+ Solutions)
Step 5. Using A Tool To Sew The Hem Over Bulky Seams
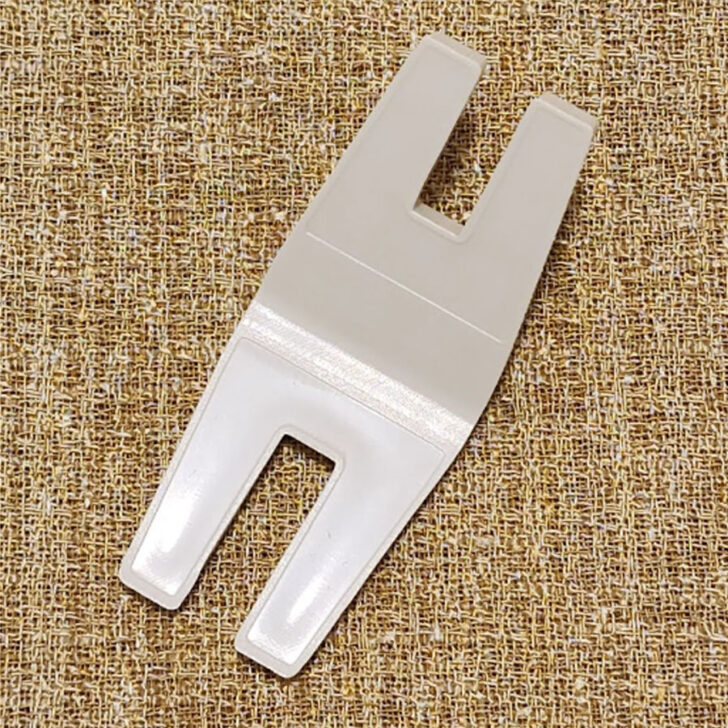
I want to tell you about a tool called a “Hump Jumper” or “Seam Jumper.” This is a sewing tool made of plastic, and it’s used to help sew over bulky seams or layers of fabric without the presser foot getting stuck or causing uneven stitching. So, how to use it?
When you’re about to sew over a bulky seam, stop your sewing machine just before reaching it. This is where you will use the Hump Jumper to ease the process.
Insert the Hump Jumper behind the presser foot, positioning it just before the thick seam. The Hump Jumper thickness should be aligned with the thickness of the seam.
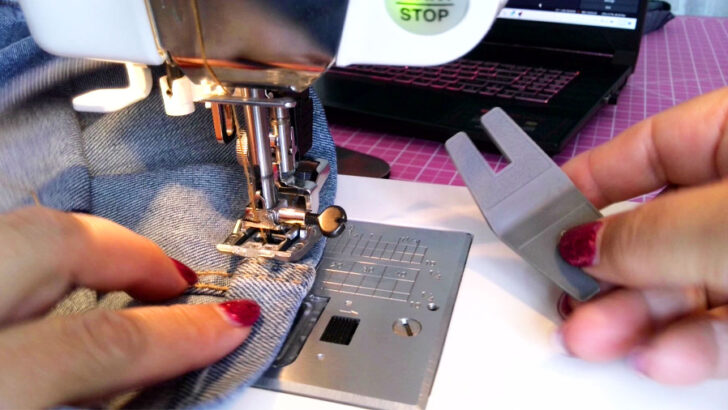
The Hump Jumper will raise the presser foot slightly. This action creates space under the presser foot, preventing it from getting stuck or causing uneven stitching as you sew over the thick seam.
With the presser foot lifted by the Hump Jumper, continue sewing forward over the thick seam. The Hump Jumper serves as a bridge, helping the presser foot glide smoothly over the bulkier fabric.
Once you’ve sewn over the thick seam, remove the Hump Jumper.
This tool is particularly helpful when dealing with thicker fabrics like denim.
I have a YouTube Short to show you how to use this tool. So check it out below.

Step 6. Final Press
Once you have hemmed your jeans, it’s time to give them a final press. Pressing your jeans will ensure that the hem lays flat and looks neat.
Start by turning your jeans inside out.
Set your iron to the appropriate temperature for your fabric. If you’re not sure what temperature to use, check the care label on your jeans.
Press the hem with the iron. Be sure to press firmly, but not so hard that you create unnecessary creases.
Move the iron along the hem, pressing as you go. Take care not to stretch the fabric as you press.
Once you’ve pressed the entire hem, turn your jeans right side out and give them a final press. This will help to smooth out any remaining wrinkles.
Finishing Touches
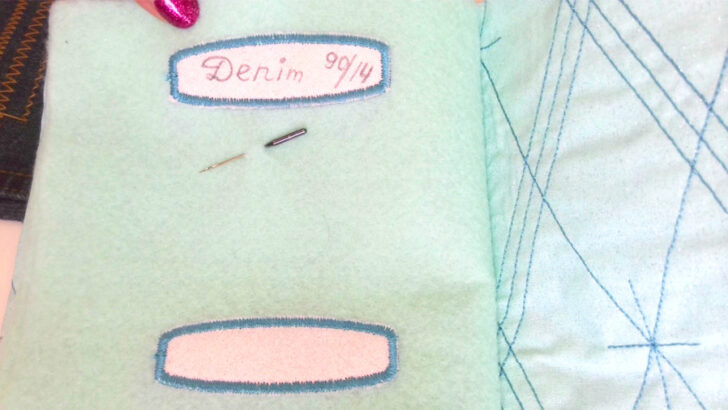
Ok, now you hemmed your jeans. What are you going to do with the denim needle you used to sew the hem? You are not going to throw it away after only sewing the hem once, right?
I have a great solution for you (and for me too of course). I use my needle book. It has a special “page” for denim needle size 90/14. You can crate your own needle book following my step-by-step tutorial Adorable DIY Needle Book | Easy Tutorial for Beginners.
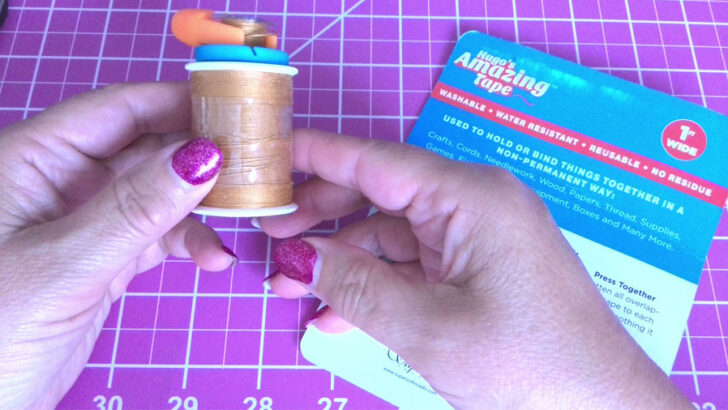
The same goes for the denim thread. How do you store your threads? Did you hear about Hugo’s Amazing Tape? I have an article that can help – Sewing Thread Organizers: Top Picks for Spool Racks, Spool Boxes, and Holders.
And how do you store your bobbins? Check out this article Top Bobbin Thread Holders and Organizers (2023).
Did you find this tutorial helpful? If so, save this pin (see below) on your sewing board so you can come to the article later when you need this information on how to hem jeans at home with a sewing machine, and follow me on Pinterest for more tips, tutorials, and inspiration!
You May Also Like

latest posts
- What Do You Call a Person Who Sews? I Asked My Readers and Got 1,408 Opinions
- DIY Round Purse: PDF Sewing Pattern and Detailed Instructions
- Mini Wonder Clips By Clover: Useful Sewing Tool Or Just Another Notion?
- Non-Slip Grips For Quilting Rulers: A Small Notion With A Useful Job
- Fabric Eraser for Sewing: What It Removes and When to Use It
- What Is The Best Thread For Sewing Machine Projects? Let’s Find Out!
- Butterfly Quilt Block Tutorial – Foundation Paper Piecing
- How To Sew Quilt Squares So The Corners Match
- Sewing With Fork Pins: How They Help With Pattern Matching, Slippery Fabric, And Seams


Thank you very much for this very informative tutorial. I always wondered why my sewing of jeans legs never looked professional. I am just about to do a new pair of jeans for my husband so I am looking forward to them looking great this time.
I appreciate when I am taught and shown a better way to complete sewing project that is used on a regular basis…
Thank you!
Thank you!