
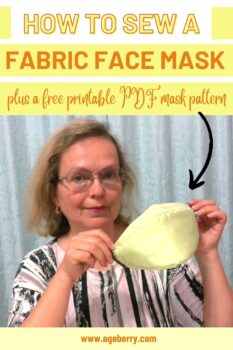
How to sew a fabric face mask plus a free face mask pattern
In this sewing tutorial, I want to show you how to sew a 3 layer face mask from fabric. I usually wear this mask in my organic garden when I need to spray some plants against bugs. But with this new virus I thought I will share with my readers how to make a face mask from fabric. The mask is made from 100% organic cotton outside and inside, it has a nose insert, elastic loops for ears and it covers nose, mouth and chin.
You can find the link to download the PDF free fabric mask pattern below (the pattern is offered free to all subscribers to my newsletter). However, please read the full tutorial and important instructions before proceeding.
A printable version of this article which includes the pattern is available in my Etsy shop and also in my site shop. Remember, as a subscriber to my newsletter, you can download the pattern for free.
By now masks are sold everywhere in both the USA and Canada. I found a US manufacturer (Patriot Medical Devices) who sells a 3-ply face mask, made in the USA from – they say, I did not test – superior quality materials for about 60 cents apiece. They also share on their site some insight on why to wear a mask (How do face masks work and Disposable Face Masks vs. Cloth Face Masks).
Why would you need to MAKE one, which would obviously require more work than the 60 cents? For a number of reasons.
- Not all masks sold over the counter fit well. This custom-made mask (and the others I created) are fitted.
- Not all masks have an inner layer of non-woven fabric as a filter. This one does.
- Not all masks are looking good; I would rather venture to say that most are quite ugly. This mask you can make from the fabric of your choice, and using techniques described in my DIY kids mask article, you can embellish it as you wish.
And the final question, since as I write this (December 2023) the COVID scare is over. Why would anyone even need a mask in this day and age? The answer to this is simple: I built this mask to use in my garden to begin with! When I was spreading fertilizer or other things than need spraying (for example, a soap solution against aphids and other pests) I needed a mask that would allow mew to breathe while effectively guarding against the spray. This mask works very well for this purpose too.
Note: Some of the links on this page are affiliate links. This means I will receive a commission if you order a product through one of my links. I only recommend products I believe in and use myself.
Have in mind, this mask is not a surgical mask, nor a medical mask but still it might help to prevent infection by viruses and bacteria, which are transmitted from a sick person to a healthy person by airborne droplets. And DIY fabric masks may be the only option available during an epidemic. However not being designed for medical purposes, its usefulness might be limited and is not proven; you should not rely only on wearing such a mask, or any mask for that matter, to protect yourself and the ones around you, it is important to follow all recommended steps (see below).
However if you’re tired of the COVID and reading about it, you can skip directly to the “how to” part of the article.
By now overwhelming evidence shows us that masks are one of (if not THE) most effective protection measure against spreading the Covid-19 virus. And others, too. The US Centre for Disease Control says: “CDC recommends all people 2 years of age and older wear a mask in public settings and when around people who don’t live in your household, especially when other social distancing measures are difficult to maintain.” (read the full article here COVID-19: Considerations for Wearing Masks).
The Canadian federal health officials also have issued similar guidelines, moreover, in the latest developments a 3 layer mask is recommended (two dense cloth layers and one non-woven filter layer): Non-medical masks and face coverings (this is an official Government of Canada site).
And I am sure if we look further, we will find similar guidance or mandatory rules all over the world. After all, surgeons and nurses have been using a mask for as long as I can remember, does anyone think they do it for fun? No. They do it for two reasons:
- To avoid spreading their own germs around
- To protect themselves from accidental spills and fluids that are around an operating theatre.
You should know you can get only a limited protection from these fabric masks, and the masks are better at protecting OTHERS (by limiting the particle emission from your mouth and nose), so it is very important that everyone wear a mask in a public setting.
Even outside, when you meet someone on a trail, in the park. Did you ever feel the faint smell of a perfume, for example? I bet you did; I know I did. Well, guess what. The perfume particles have traveled from the person you met to you, and probably in a similar manner the air the person breathes can do so. That is why is important that in addition to masks we keep our distance. Not pleasant, but necessary.
Remember that the use of a face mask is not the only method of prevention, and numerous studies have confirmed that the most effective protection against diseases transmitted by airborne droplets is possible only if all necessary measures are observed.
The following are the directions given by the CDC for prevention; here is a link to the CDC site. The summary is below:
- Wash your hands often with soap and water for at least 20 seconds. If soap and water are not available, use an alcohol-based hand sanitizer.
- Avoid touching your eyes, nose, and mouth with unwashed hands.
- Avoid close contact with people who are sick.
- Stay home when you are sick; keep your children at home if they are sick.
- Cover your cough or sneeze with a tissue, and then throw the tissue in the trash.
- Clean and disinfect frequently touched objects and surfaces.
In a recent post (Strategies for Optimizing the Supply of Facemasks) CDC has acknowledged the possible usefulness of home made masks when nothing nothing certified to use for medical purposes is available but has also warned that home made masks or other non-certified methods of protection are not tested nor guaranteed.
Along with these methods, the use of a face mask for several hours, especially if you need to visit crowded places, helps to reduce the risk of infection to some degree.
You can also use a fabric face mask in paintwork and other repair work, landscape, gardening, spraying, working with chemicals at home, etc.
How to use a fabric face mask
Like any personal protective equipment and device, a face mask must be applied according to certain rules. Compliance with them will help to increase efficiency.
A protective mask should be worn for a maximum of 2 hours, after which it is saturated with moist exhaled air and filters microorganisms worse, and also creates a favorable environment for the multiplication of bacteria and viruses.
Some people have noted that bacteria and viruses are unlikely to reproduce on fabric. On clean fabric it is very likely neither viruses nor bacteria would reproduce WELL; I would not bet they would not reproduce at all, unless the fabric was sterilized. But a mask is not clean. It has skin cells just rubbed from your face, fat cells coming from your skin or nose, stuff from your own nose, spit (you speak, right?) and other organic matter which may very well contain living cells (perhaps you bit your tongue? blood cells there); you have it in you, it will get on the mask. Not counting pollen and other pollutants that are coming from the outside. Common sense tells me that you add water and body temperature and this is a good medium for microorganisms, given time. My unprofessional opinion.
However, if the mask becomes wet from coughing, sneezing, or breathing, it should be replaced immediately.
After use, it should be removed and washed with soap or detergent and then ironed with a hot iron, or soaked in a special antiseptic solution. After changing the mask, hands should be thoroughly washed with soap or treated with an alcohol-based antiseptic gel.
It’s recommended to wear face masks indoors, in places with a large crowd of people, or when you are in a room with a sick person. CDC guidance for wearing a mask can be found at this link.
Also, you can’t eat, drink or smoke moving the mask to the side: this will reduce all attempts to defend yourself to nothing and since you will use your hands to handle the mask, the simple act of moving it will negate its purpose.
What rules to apply when making a fabric face mask at home
But fabric masks (if done properly) have also some additional benefits. As a rule, medical three-layer disposable masks are sold in the same size, which may not always be good, given that the size of the head is different for everyone, and the mask should fit snugly to the face to increase its effectiveness. But if you sew the fabric mask yourself you can always make it the size you need.
The effectiveness of the mask is higher, the denser it fits on the face. If the mask doesn’t fit tightly to the face contaminated air gets inside when inhaling, bypassing the filter material.
So the main requirement to the fabric mask is to fit as close as possible to the face. If you make the mask and see that there is a large free volume of air between the inner surface of the mask and the face which quickly becomes warm and moist you should remake it because this is an ideal environment for the reproduction of bacteria and viruses. From a remedy, it will turn into a potential health hazard.
It should also be hypoallergenic if you suffer from allergic reactions to various chemicals and materials.
The mask must satisfy reliable filtration of the inhaled and exhaled air. It should not allow microorganisms (viruses, bacteria, fungi) to pass through and at the same time not impede breathing, because sometimes you have to wear a mask for a long time.
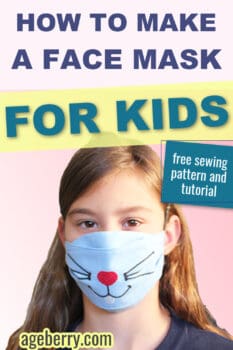
For kids, you can make a fun mask from cotton fabric with animal prints or cartoon characters and turn the process of putting it on into a fun game which is often the key to success.
If you prefer to watch the tutorial go to my YouTube channel to see the video.

What you’ll need
Organic 100% cotton woven fabric. Read more about choosing the fabric below.
Sewing machine
Interfacing (non-woven, fusible, or non-fusible)
A piece of ribbon
Regular sewing supplies
Step-by-step instruction – how to sew a face mask
I started to sew my mask by making a pattern. I wanted to make a mask that protects the mouth, and nose and closes the chin also.
You can find a PDF of the mask in 2 sizes – adult and child in my RESOURCE LIBRARY.
The pattern includes 2 pieces – one for the mask’s front and second for the lining of the mask (which is 1/8″ or 3-4 mm smaller than the main piece). Seam allowances are included and they are ⅜” (or 1 cm). Print 2 copies and cut one for the main part (THE FRONT PIECEs) and one for the lining piece (inside parts).
I made the pattern for my face (by trial and error) so if you want to make a mask for your face, you might need to adjust the pattern for a proper fit.
Adjusting the pattern is EASY! Just cut 2 pattern pieces, baste them together and TRY IT ON. You MUST see how it fits before continuing (see steps below).
Proper mask shape and ability to mold to the face boost its effectiveness. You need to sew a snug-fitting mask for better performance.
Make necessary changes to the pattern if you adjusted it for your face.
But have in mind the lining pieces should be about ⅛” (3-4 mm) smaller than the main piece for proper fit.
Note: this is not a pattern, the image scale might be wrong; the pattern can be downloaded from my “resource library” page.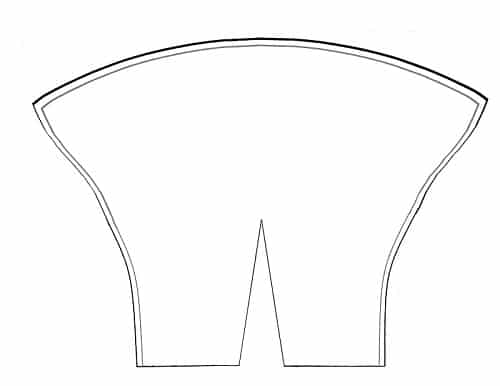
I got lots of positive comments on this post and I am glad that this tutorial is helpful. I decided to publish another tutorial on how to make a cloth face mask, this one has no darts and the face is flat. I also have a third version, somewhat easier to sew here: How to sew a face mask using my free printable face mask template. All patterns are free in my RESOURCE LIBRARY for all subscribers to my newsletter. Check them all and decide which one you like better.
I have another useful sewing project – how to sew a bucket hat with a face shield. Check it out and make one today!
Step 1
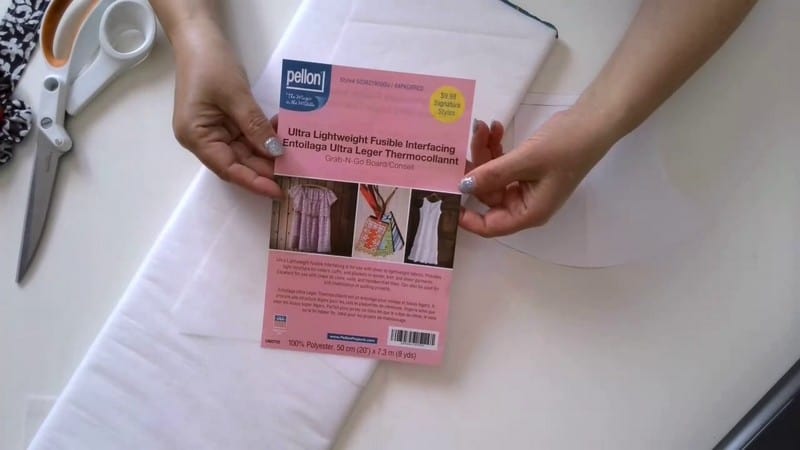
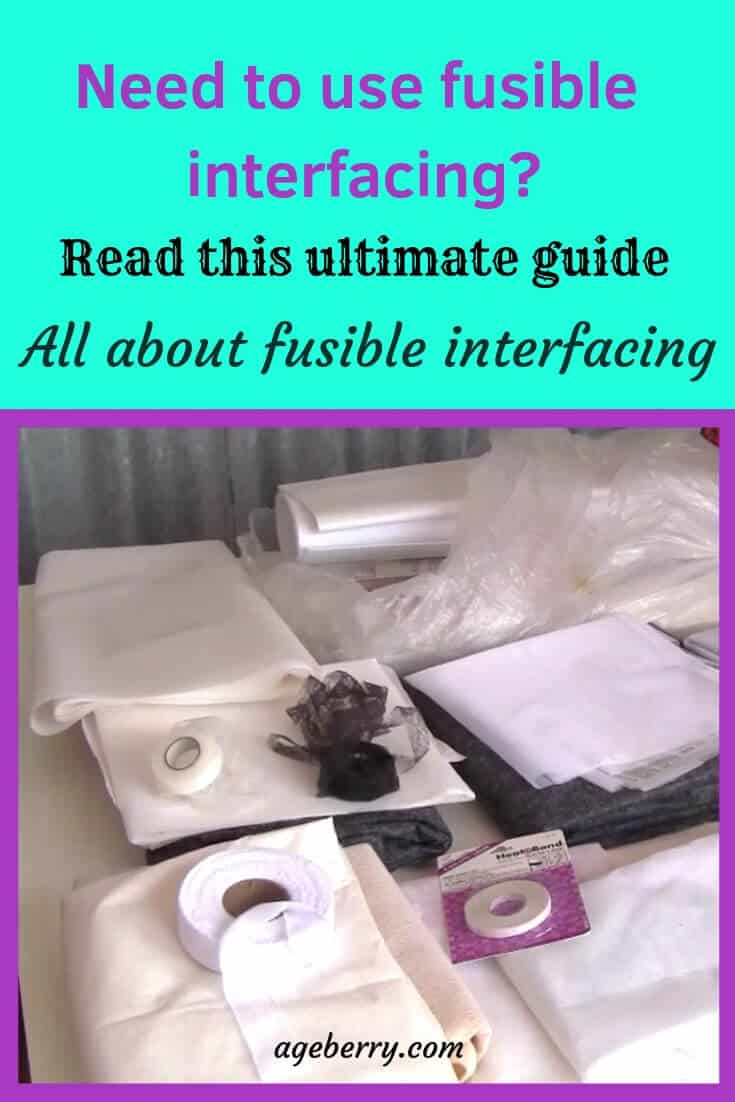
They say that face masks have NON-WOVEN layers and masks with interfacing are better, so I decided to use Pellon non woven fusible interfacing for my fabric mask. At the time I made the masks I did not know of any study that shows it to be unacceptable for such use (and I still don’t), I was concerned only that it may cause allergies. However later a number of readers have drawn my attention to the fact that the glue in the fusible interfacing may introduce chemicals that a non-fusible interfacing does not, therefore it might be better to use non-fusible interfacing for the third filtering layer. A non-fusible interfacing will probably be as effective as the one I used but without the glue an extra chemical would be eliminated so yes, it makes sense.
I used this one – Ultra lightweight fusible interfacing by Pellon for my face mask.
If you are not sure how to use fusible interfacing properly check out my tutorial How to fuse interfacing – tips, and tricks.
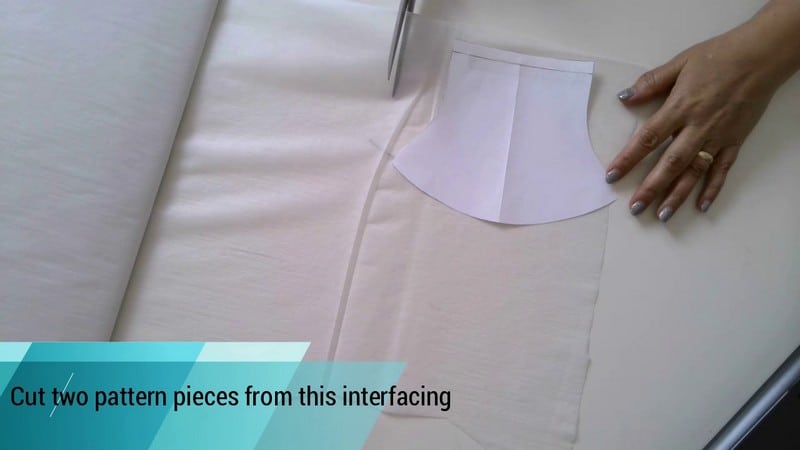
Cut two pattern pieces from this interfacing.
BUT IF YOU ARE MAKING THE MASK FOR A PERSON WITH ALLERGIES OR FOR A CHILD – DON’T USE FUSIBLE INTERFACING. USE JUST A REGULAR NON FUSIBLE NON-WOVEN INTERFACING. Who knows if it’s good to breathe through the glue on the interfacing. The amount is very small of course and I never had any problems with it so I made my mask with fusible interfacing. But if you have any doubts USE NON FUSIBLE.
On the other hand, non woven material they use in medical masks is another chemical (it’s not natural, it’s polymer material) so I guess you can’t win everything, there is always a compromise.


Step 2
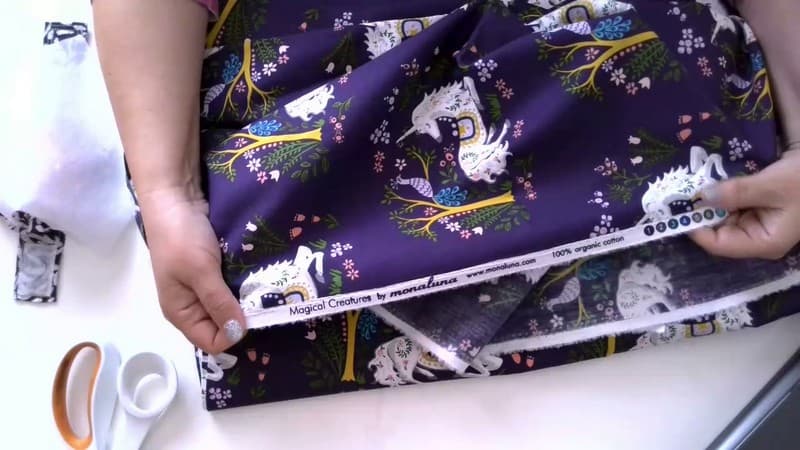
Now let me tell you about the fabric. I used ORGANIC 100% COTTON fabric. I think it’s better for the face. Now we can buy organic cotton very easily. Read my article on the benefits of organic fabric at this link.
My cotton fabric is medium weight and dense (without any holes) which is great for the mask.
Prewash the fabric in hot water (if you don’t want the mask to shrink after the first wash) and iron it to smooth all wrinkles.


Step 3
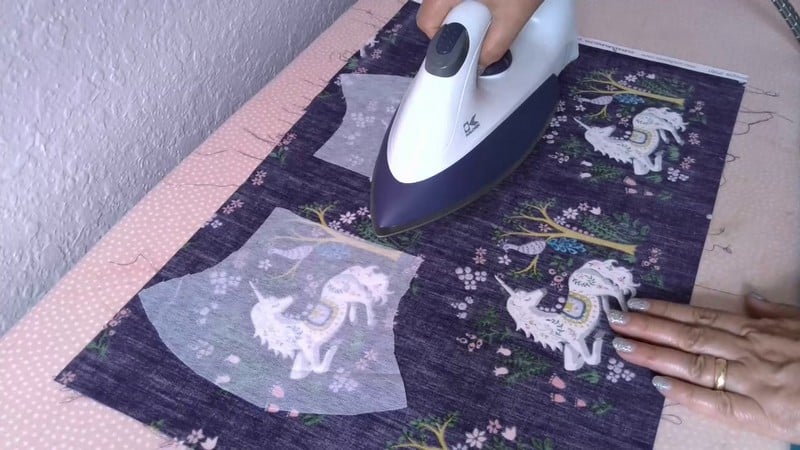
Attach the fusible interfacing with a hot iron (without steam). If you want to know how to use fusible interfacing correctly I have a tutorial at this link.
I have an unusual pattern on my fabric so I had to be creative with placing my pattern pieces. I don’t want to cut these cute Unicorns.
But don’t cut the pieces on the bias. Try to place them with the straight edges parallel (or perpendicular) to the grainline of the fabric.
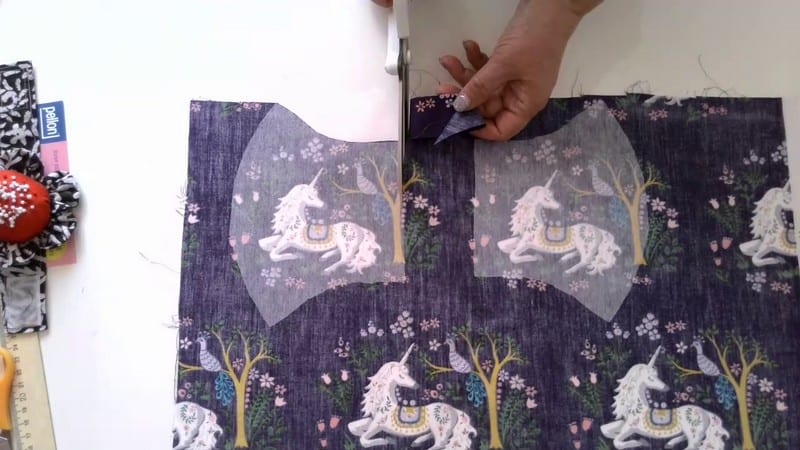
Step 4
Cut 2 front pieces of the mask with good fabric scissors.
Cut also 2 pieces of lining. (Remember, lining pieces should be a bit smaller than the main pieces).
You have to cut out 2 mirrored pieces, left and right. Their shape is exactly the same but they are not identical. They are cut in opposite directions because they are symmetrical mirror images of each other.
Step 5
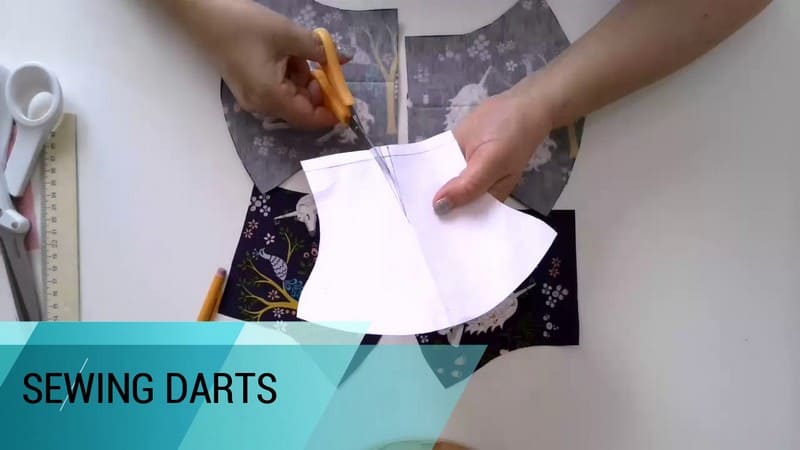
Now we are going to sew darts.
Cut the darts on the paper pattern pieces. Don’t cut them on fabric pieces of course.
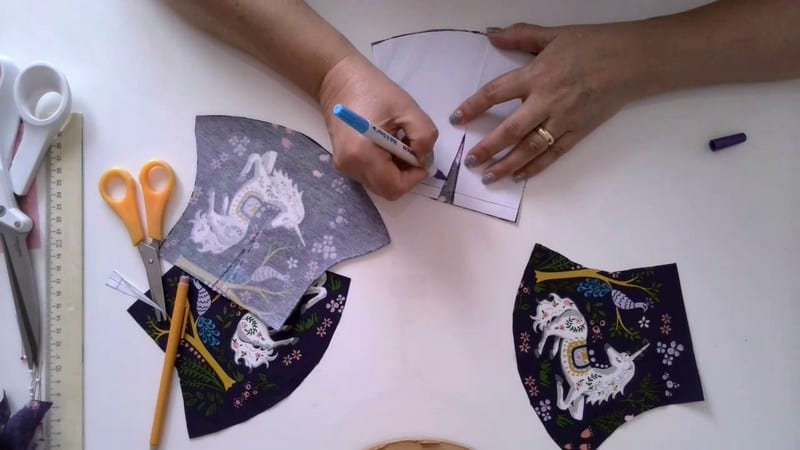
Draw darts on fabric pieces using a fabric marker. We have 2 front pieces of the mask and 2 lining pieces. All of them have darts.
Fold each piece in half and pin preparing the darts for stitching.
Sew all the darts. Start sewing a dart from the edge of the pattern to the center. Backstitch in the beginning but don’t backstitch in the end. Tie the threads at the end of the dart and cut them. Cut also the other thread tails.
Press all the darts, making sure they are pressed in different directions on the main pieces and on the lining pieces.
Step 6
Baste 2 main pieces of the mask right sides together (by hand sewing), seam allowances are ⅜” (or 1 cm), and check how it fits around the nose. It’s very easy to do. After that make necessary adjustments to the pattern. The mask shouldn’t be loose around the nose.
I noticed that for the correct fit the side seams should be a bit smaller than your ears. If the sides (in the finished mask) are bigger than the ears the mask will not sit close to your face at the sides.
If you need to make the mask smaller for a child remember that the pattern has ⅜” seam allowances up and down and at the sides, so cut accordingly.
After you are done with fitting pin 2 front pieces and 2 lining pieces right sides together as you see in the image below.
Stitch the middle seams and press seam allowances open on the front piece and on the lining.
It may be difficult to press the seams which are curved. I use a tailor’s ham for this – check out how you can make one yourself.
Step 7
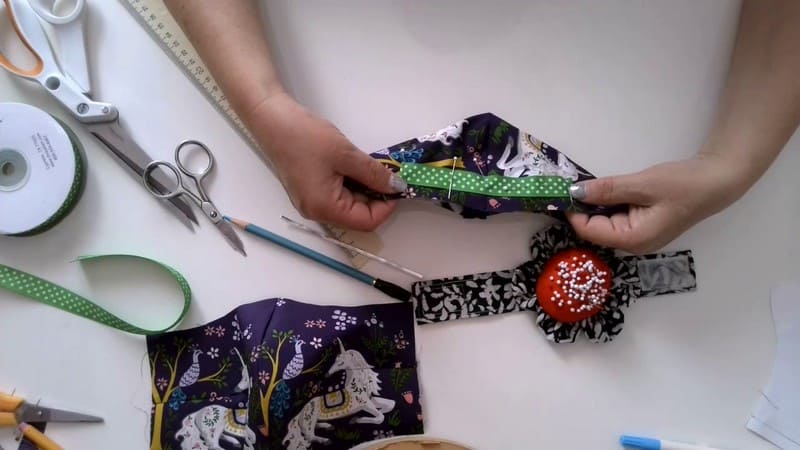
I see that the surgical masks have a thin metal insert for better fitting around the nose which increases its effectiveness in protecting against the penetration of microorganisms. So I took one from a store-bought mask. You can do the same. It provides a snug fit to the nose and you can change the area of contact depending on the size of the nose. In fact, any piece of wire, not very soft, not very stiff, will do. Some readers suggested pipe cleaners (two twisted together and trimmed), stems from artificial flowers, or even garbage bag ties.
Make a small casing for the metal nose insert. I used a piece of ribbon for this.
Nancy sent me via email the following and I think it is useful: “Another option for the metal nose piece. A piece of 26 gauge cut to 12 inches long. Fold into thirds, making sure the ends are within the folded portion. Twist. The loops can easily be flattened to fit a small casing. A small finger stitch will keep it in place if you don’t close the ends of your metal casing”.
Pin it to the lining piece at the distance a little bit more than ⅜” (1cm) from the fabric edge and stitch. Make two seams to form a casing for inserting the metal piece.
You have to attach the ribbon to the right side of the lining piece which will cover your nose.
If you have problems understanding this step you can see it in detail in my video tutorial on Youtube.
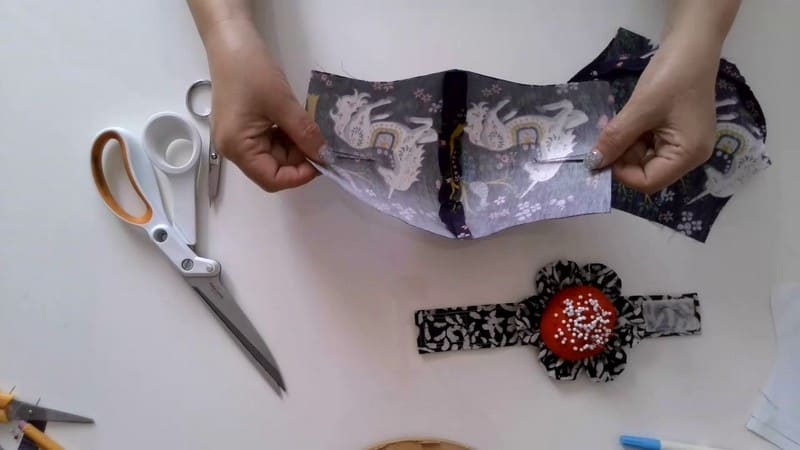
Step 8
Pin the front piece and the lining right sides together. Make sure the ribbon insert for the nose is placed up if you have a special pattern on your fabric. For example, I didn’t want my Unicorns upside down on my mask.
Make only 2 seams: one up and one down the mask. LEAVE ABOUT 1 INCH (or 2 – 2.5 CM) WITHOUT STITCHES ON ALL SIDES. You will see later why.
ALSO, LEAVE OPEN around 2 INCHES (or 5 CM) IN THE BOTTOM SEAM FOR TURNING THE MASK RIGHT SIDE OUT.
If you have problems understanding this step you can see it in detail in my video tutorial on Youtube.

Step 9
Ok, I made 2 seams up and down and I have 1 inch not stitched on all sides and I also have the opening for turning the mask right side out.
These seams are not straight, they are curved so I have to make small cuts close to the seams so when I turn the mask right side out there will be no pulling in the seams.
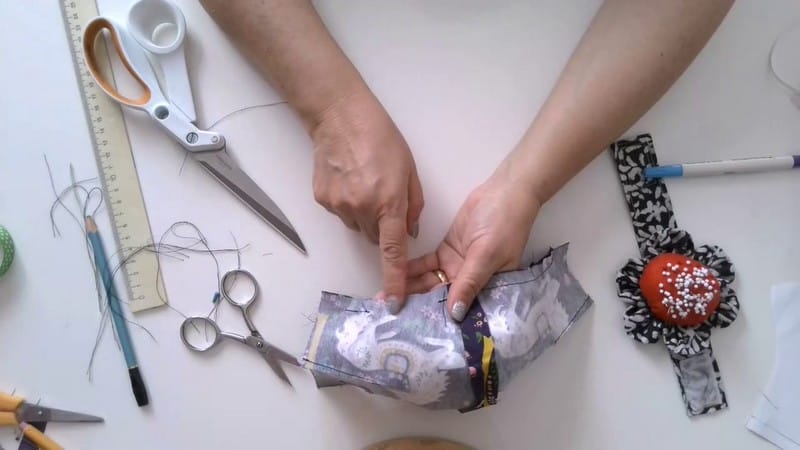
Now we need to stitch the sides. But I want to make casings for elastic loops on both sides.
So for this fold the seam allowances as in the image below and make the side seams.
If you have problems understanding this step you can see it in detail in my video tutorial on Youtube.
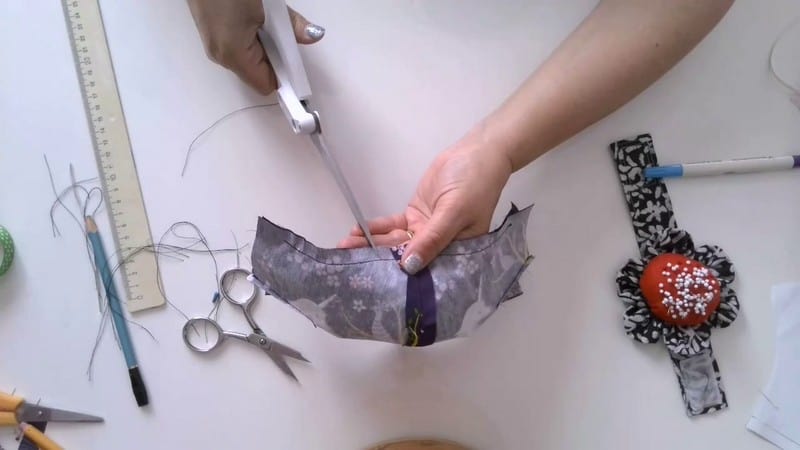
Step 10
Cut the seam allowances at the side seams close to stitches.
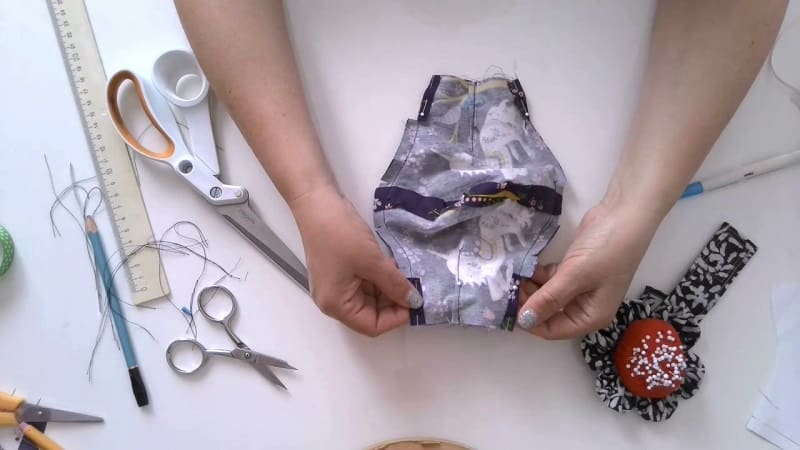
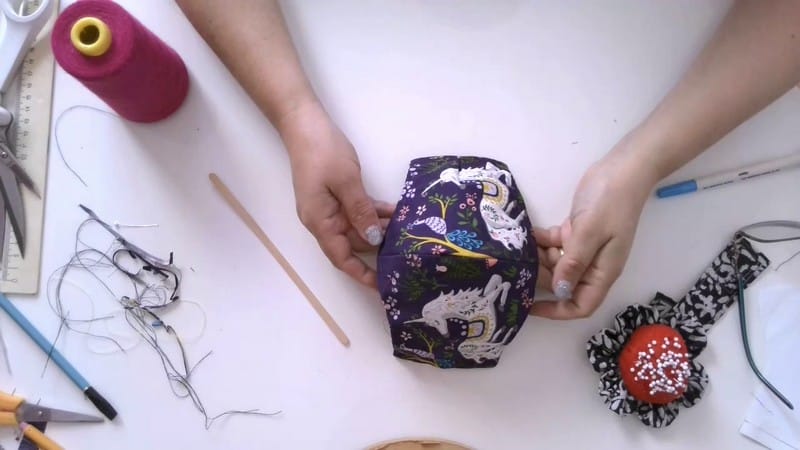
Turn the mask right side out. Smooth every corner. Baste the mask around all edges and press with an iron.
Topstitch the bottom edge only (you will need to close the opening). I didn’t want to topstitch the upper edge because there is the ribbon insert.
Remove the basting thread.
Step 11
So, we made casings for the elastic loops.
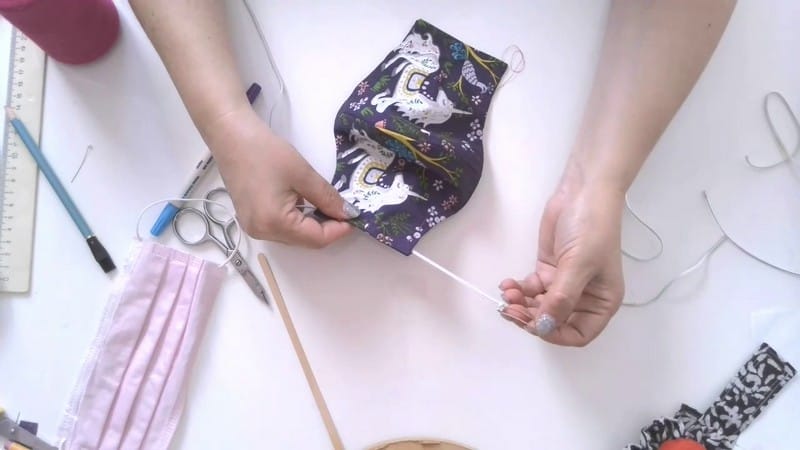
Now we need to insert elastic for the mask. Elastic loops make the process of putting the mask on as simple as possible.
Elastic has to be very thin and soft so it doesn’t make any discomfort to the ears.
I have this very nice elastic, it’s silver and would look great with this fabric. But I see it’s a little bit too hard so I decided to go with less fancy regular elastic which is softer.
Insert the elastic using a safety pin. Measure the elastic around your ears so the mask sits comfortably – not very tight, so it doesn’t pull your ears, but not very loose also. Make a knot when you are done and pull the knot inside the mask so it’s not visible.
Step 12
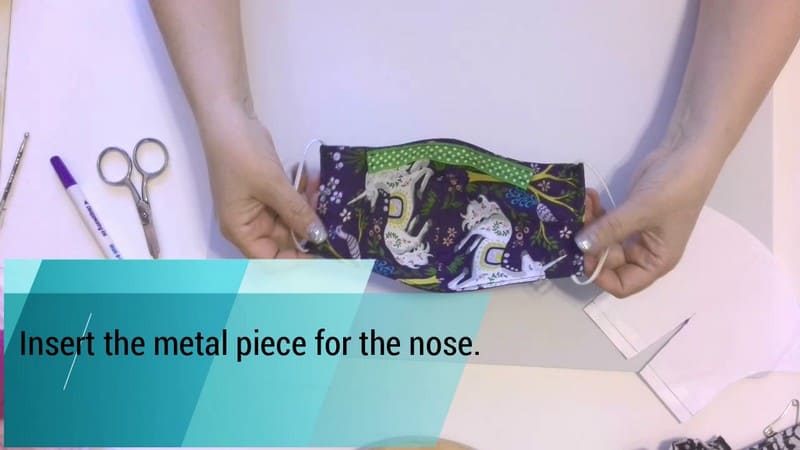
The last step is fixing the elastic inside the mask so the sides stay flat around the face. I just made big zigzag stitches at the sides.
After you are done insert the metal piece for the nose.
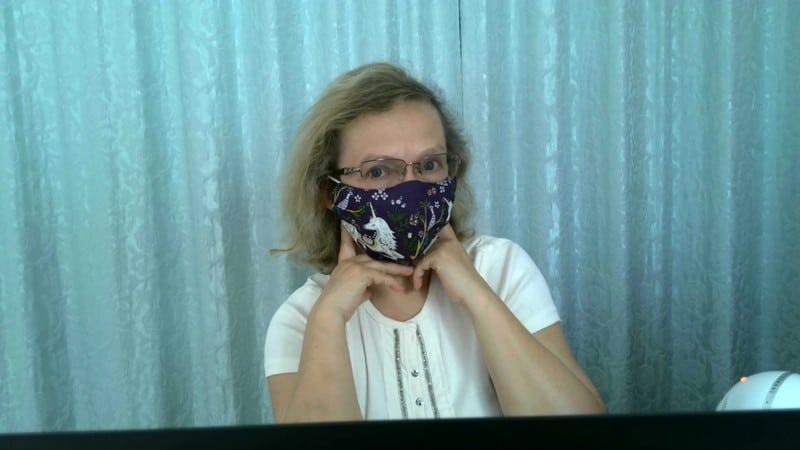
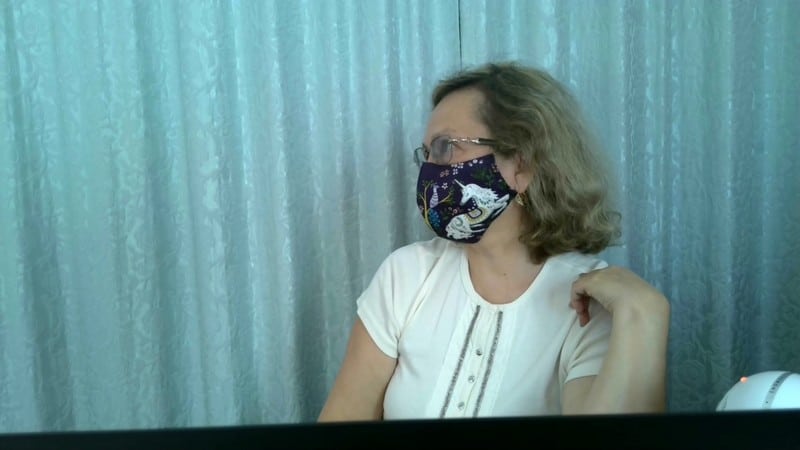
Now let me show you a few images of me wearing the mask.
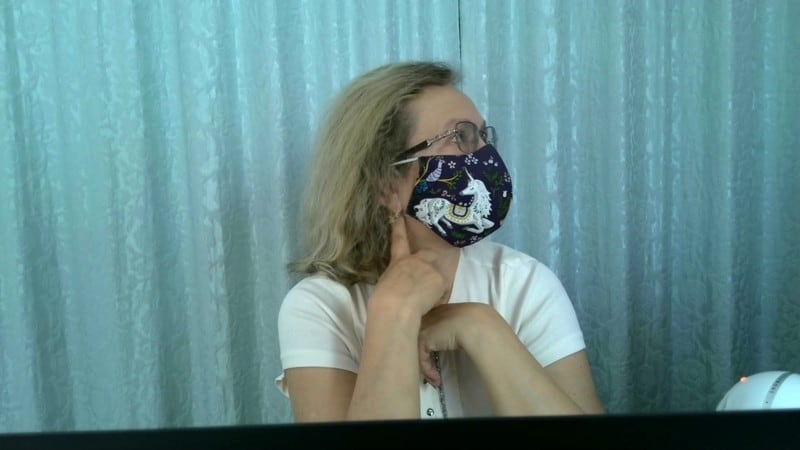
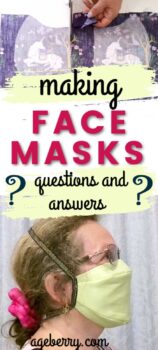
I have other popular tutorials about face masks on my site that might be interesting for you. Check them out below. All of them have free patterns (you will need to subscribe to my newsletter for that) and most also have a how-to video. All these masks are 3 or 4 layers and fit well on the face.
Did you find this tutorial helpful? If so, save this pin (see below) on your sewing board so you can come to this tutorial later when you want to sew a face mask from fabric and follow me on Pinterest for more tips, tutorials, and inspiration!

Ready to take the next step in your sewing journey? Check out more step-by-step tutorials from my site and don’t forget to share!


latest posts
- 7 Essential Tools and Settings for Sewing Denim on a Regular Sewing Machine
- That Purple Thang: 10 Smart Ways to Use This Weird Little Tool
- 20+ Reasons Your Sewing Machine Thread Keeps Breaking (+ Solutions)
- Dresden Plate Quilt Block: 4th of July Fireworks
- How To Sew Curves the Easy Way Using a Curve Master Presser Foot
- 30 Sewing Hacks That Turn Ordinary Items into Useful Sewing Tools
- Seam Allowances in Sewing Patterns: What They Are and How to Use Them
- What Do You Call a Person Who Sews? I Asked My Readers and Got 1,408 Opinions
- DIY Round Purse: PDF Sewing Pattern and Detailed Instructions


there was nothing on the face mask webpage – I sent an email – but it bounced back
An you email me the pattern? Please
[email protected]
I cannot down load the pattern. Please email me at [email protected]. Making much needed masks for family and friends. Thank you and God bless
Can you email me the pattern please.
Please email the face mask pattern
I cannot download your pattern.
Could you please email me the pattern, I have to make masks for everyone at work and I think your pattern is the best
Was not able to down load pattern, can you send pattern to email. (This is one of the few mask patterns that offers a snug fit). Thank you in advance!!
PLEASE EMAIL ME YOUR FREE PATTERNS.
i CANNOT DOWNLOAD IT.
Thanks
Can you email me the face mask pattern please
I work at Walmart I have made the mask. The pattern was super easy to make. I have been making mask for a lot of my co workers. I have shared your Pinterest and website with a lot of the customers. Thank you so much for the mask God bless. You’re awesome
ca you please send it to me it will not down load off hear thank you
Please email the patterns. Could not download. Thank you for putting this together.
Please send me adult pattern
Will you please email me the pattern? I am unable to print it. Thank you so very much for your help with the mask. Stay safe and well.
Candy Rooks
If you would email the pattern my way as well I would be very appreciative. I was unable to get it from the site and my hospital is running so low! We are actually reusing paper masks now until they fall apart! The pellon is a great idea. I have another pellon mask that I wear in the halls and outside patient rooms. It works well for lower-level filtering and I think it probably works fine for droplets. I have to change to a different mask with more filtering power if I go inside the rooms.
I was not able to download pattern. Please email please.
Thank you
Can you email me the pattern please can’t download it. Thank you for this tutorial
I was unable to print pattern:(
Can you pls email the pattern
Thank you very much!
Another reason for the small metal strip is to keep your glasses from fogging up if you wear glasses. If you need your glasses to see, this is pretty important. Thank you for your pattern.
You are right, did not think about this
Could you please email me the pattern…I never have good results downloading. Very tech challenged ? thank you so much!
[email protected]
Has anyone had success in contacting and receiving this pattern? Otherwise I’ll have to move on and try creating one myself.?
The pattern has been downloaded probably over 100000 times (100k), so I would say yes :-). The pattern can be downloaded from here:
https://www.ageberry.com/resource-library/
There is a second pattern there, a second design. If anyone is unable to download from this page, please contact me by email [email protected]
Could you please send a PDF of the 2 masks as I’m unable to download these. Thanks
It’s there – click on her words, “resource library” and you get the page with all the patterns.
For your convenience, here is that link:
https://www.ageberry.com/resource-library/
Can you please send me the pattern thank you.
Can you email me the pattern please? I am unable to download and print it form this site. Thank you!
I’ve just sent you the pattern. Check your email, please. Also, check the spam folder. I hope it works.
Could you please email the pattern to me as well
Hello,
Can you please email me the pattern? I am a beginner but I have so many people in my life that could really use some of these.
Could you please email me the pattern. I’m having trouble downloading it. I am anxious to use this pattern. I have made several others from a different pattern. This looks like it would fit better. I used new garbage bag twist ties for the nose and vacuum cleaner filters for inside. I read that they were 97% effective. The N95 mask is 98% effective.
Can you email me the patern please
Can you please email me the pattern ( in English) please.
Please email the pattern to me thank you
Can you please email me the pattern.
No pattern 🤔
I have answered by email separately.
Can you email me the pattern as well? I can’t seem to locate it …
Can u email me the pattern please [email protected]
Please email me a pattern
[email protected]
Thank you
Can you email me the pattern.
[email protected]
Could you send me a pattern please? [email protected]
Good evening, will you please send me the pattern?
Could you Kindly email this pattern to me.
Thank you
[email protected]
Please email me your pattern
I am Not Able to download- Can you please email the pattern?
Thank you so much for sharing!
Please email the pattern. Thanks so much!
Please send me the pattern for the face mask. I like the way yours fit around the chin thank you. [email protected]
Can you please email the face mask pattern . I am unable to download.
can you email me the pattern please? i am unable to print or download it from this site. Thank you!
could you pleas send me the pattern please!
Could you please send me the pattern and measurements on my email.
Can you please send me the free face mask pattern. I’m unable to download.
Thank you
Could you email free pattern for face masks thanks email to [email protected]
Can you please send me free face mask pattern? I’ am unable to download. Thanks.
Hi, can you please send me the pattern and also, where did you get the metal for the nose or what is it called?
What type of “metal piece” did you use for the nose?
Initially I used the piece from an old mask, but any piece of metallic wire, not too stiff, not too soft, will do. Someone suggested on the YouTube channel the stem from the artificial flowers, seems that worked for her very well. Beware that the metal in time might rust, or perhaps it is better to take it out before washing.
I used children’s pipe cleaners. I used 2 lightly twisted together. Across the top you will sew a “casing” 1/2” works well. Turn your mask to the right side, you can thread your pipe cleaner through. Then finish the side with the elastic rings to go around your ears.
I used 2 bread twists like you did the pipe cleaners.
they are not flat but it works.
Please email me the pattern for the mask you are showing us.
Can you send me the pattern or the measurements on all sides. My email address is [email protected] . Thank you so much. Lyn
Please send me the pattern at my email address. I could not download it. Thank you.
Hi! I’m a nurse and this would be very helpful, can you please send me the pattern.
Can you please send me a free face mask pattern? I’ am unable to download it. Thank you
Subscribe to her website, she emails you the password instantly. The PW is ageberry. Subscribe to support her site!
Can you email the pattern please?
[email protected]
Please send me the pattern. I want to make facemarks for my daughter-in-law who is a nurse in a hospital in Boston.
Thanks so much!
I have made several masks now, in both sizes, and it works VERY well. (I am not a very good seamstress, but your tutorial was so easy to follow.) Thank you SO much for providing this pattern to the public. I feel it’s one more barrier to all the germs out there in the public spaces, whether or not it’s 100% effective as a medical mask. I used pretty fabric for myself, and some happy, colorful fabrics for my grandchildren. I’m a fan of your site now.
would you please send me the pattern as well I can’t download the pattern from your site I have cancer and can’t find facemasks for when I have to go out and this would help a lot. thanks a lot.
would you please send the pdf pattern for the mask. I can’t seem to find it on your sight. thank you
Pattern please 🙂
When you subscribe to my newsletter you will receive a mail with all the necessary data to download the pattern; if you have difficulties or simply do not wish to subscribe please contact me directly by email at [email protected] and I will send directly by email. I have also another face mask model which in my opinion may be slightly better and easier to sew at https://www.ageberry.com/sewing-tutorial-face-mask-fabric-free-pattern/ , you might want to check that out too
Hello. My pattern was downloaded and I have printed it successfully. You may want to add a note somewhere that the dart is a sewing line, not a cutting line (Am I right?)
Thank you for the pattern!
Yes you are absolutely right, that is not a cutting line.
Thank you for this. When I print the child’s pattern, AND when I print the adult’s pattern, they are exactly the same. Could you please email them to me? Thank you.
I have one suggestion: When sewing the center front seam, I think it would give slightly more protection from germs if, instead of pressing the front and lining seams open, they were pressed to opposite sides. (If desired, each could be topstitched to hold it in place.) My thinking is that pressing the seams open could allow more germs to get in through the mask right at the nose and mouth area.
Thank you for this pattern. I’m anxious to try it.
You are absolutely right. However when I made the mask germs were not in my thinking, dust and fertilizer spray was what I was guarding against! Have you checked out the second version of my mask https://www.ageberry.com/sewing-tutorial-face-mask-fabric-free-pattern/ this one does not show its seams on the outside at all.
Please send me the pattern
Hello, I would like an adult partten and a child one too. I loved the video.
Can you please send me this pattern. I am not seeing it.
Thanks for the tutorial! (Especially the safety hints of wearing a mask.)
Despite using a 7″ craft sewing machine , I’ve been able to make 25 mask so far.
For those like me who couldn’t find elastic, two suggestions:
I just happened to break an under-wire in a bra and hadn’t thrown it out, the washed elastic shoulder straps worked well for several mask for myself. I was also able to harvest some other elastic from this particular bra. (Get innovative to stay and keep others safe.)
Another option (credit to my “necessary working son) is @ 3 1/2′ ribbon or shoestring. Thread it through the “strap loops” place the bottom loop of ribbon over your head and then tie the top “loose” ends behind your head. (Over ears)
For the nose fitting, check your coffee bag, pack of cookies or other roll up close packages, the plastic coated metal “tie” is just the right length and a great strength. Triple fold pipe cleaners and florest wire were my following options. I also stitched 1/2″ hem tape in the bridge of the nose for this fitting.
(LOL all this stuff I never throw away is finally being put to good use.)
I submitted my name and email address in order to get the face mask pattern but have not received it. Please send me the pattern and tutorial as well, if possible. I’m ready to sew. Thank you
I cannot download the pattern for this mask. Would you please email me a copy?
Thank you
Please email pattern
Do you think quilting fabric for the lining would make it too thick.
I guess it is a case of test-and-see. The thicker/denser the fabric, the better the filtration. But at the same time you need to be able to breathe of course.
I too would like to have a pattern emailed to me at [email protected]
Thanks
Florists wire or paperclips can be used for the metal nosepieces.
Thank you. Other people have suggested the stems from artificial flowers, pipe cleaners (perhaps two of them twisted together), even garbage bags ties. Any wire tjhat is not too soft / not too stiff can be used.
I quite like this mask but the tutorial and video were difficult to follow because you were using a black thread on a black fabric so trying to see exactly where you has sewn was not easy. Particularly for the elastic casing once turned right side out.
You are right, the thread is probably not easy to see. Thank you, I will keep this in mind for the future.
Thank you!!
Can’t seem to get pattern to print it……could you send it to me, please
could not get the pdf for the tutorial. please send it to me tutorial 1
Hello!
I thought I would give alternative ideas for anyone who might be struggling to find elastic like I have been.
I scoured Joann fabrics’ website and couldn’t find any elastic that would do the job quite right, so I got creative and found some thin hair ties/ponytail holders/whatever you call them, and I tried it out. WOW! They are the perfect size, and are gentle enough around the ears and are probably in-stock most places 😉 Let me be clear: I used THIN hair ties designed for finer hair, not the regular ones.
Here’s a link to some on amazon! (Or just search “thin hair elastics”)
https://www.amazon.com/Goody-Womens-Ouchless-Elastics-Black/dp/B001T8W4BK/ref=sr_1_9?dchild=1&keywords=thin+hair+elastics&qid=1585693403&sr=8-9
Can you please email the pattern to me? I cannot get it to download. Thank you
[email protected]
I see the mask for child. But not adult. I even did the “subscribed” and there is no place on your website that I can find your adult pattern. Please don’t mislead people on your website that there is “free” adult AND child masks. Trying to sew masks for my colleagues in a nursing home. I am inclined to go with another pattern as it seems as this has been an issue for two weeks. Thanks.
Pattern sent by email. The links should have been in the message received after subscription, something must have gone wrong. The link to the page where all patterns are is this: https://www.ageberry.com/resource-library/
please send or e-mail free mask pattern. I can not download.
I cannot download patter for free mask. Please send to [email protected] or text to 714-225-6296. Thank you
Can you please send me the pattern??
Looks like I’m not the only one having download problems. Can you please email the pattern to me as well? You are performing a great service for us. I hope I can receive and print the pattern. Thank you so much. bjcanerday
Thank you Olga! Hope you are staying safe and healthy! I LOVE LOVE LOOOOOVE that fabric with the unicorns. May I ask where you got it?
Also for people having problems getting the pattern, you can save web pages to pdf, and instead of printing a lot of pages, you can print just the cutout pattern pages then refer to the pattern on your device. ?❤️ Be blessed!
Please send the pattern. Thank you.
The fabric with unicorns I have bought last year (perhaps it is not available anymore?) from the organic fabric store reviewed here: https://www.ageberry.com/gots-certified-organic-cotton-benefits/ ( I see now it is only on Etsy). You can perhaps contact the store owner directly.
Will you please email me this pattern? [email protected]
Thank you very much
Please email me your face mask pattern. Thank you so much!
can I please have this pattern? Thank you so much!
Olga, am enjoying your tutorials, I too need you to email the face mask pattern. Thanks a lot
Can someone email me the pattern pliz
Could you please share the pattern with me also. I greatly appreciate it.
Thank you and thank you for sharing. You did a great job explaining.
Good morning I wasn’t able to download will you please send to [email protected]. Yours has seen the best I seen. Thanks
May I have an email of the pattern? Thank you for a great tutorial! I signed up for your weekly email, twice so you may have to remove one. Thank you again!
Thank you Olga for a wonderful web site that you have. With lots of wonderful items to sew and lots of interest tips!! I just absolutely love it. I have just made the face mask the one that you have with the unicorns on it. It is a good fit and very comfortable. However the straps I found worked better for me going around the back of the head from ear to ear. That way it gave me better support and fit. Thanks again. Look forward to your emails. Take Care.
I can’t access the pattern
Please email me the pattern
Thank you
I had no trouble reaching the patterns via the resource page, however both patterns (adult and child) are coming up as “child adjusted”. I’m not sure if they’re the same pattern or not?
I was able to print the child pattern but the adult size is showing up as the same as the child. Can you fix this please??
Pattern pls
Please email me the Face Mask Pattern.
Yes! Thank you for this and it it TRULY helpful right now.. But, same request as everyone else..please make this pattern a savable file.. In the meantime for those who are looking to get the pattern quickly.. I took a screenshot and was able to adjust sizing in other apps. I hope this helps.
I loved this mask-making idea.
Please email me the pattern. Thanks
can you please em mail me the pattern or make it so we can down load it.
ASAP
I will email the pattern. However the pattern can be obtained when subscribing to my newsletter, all the necessary links will arrive in a separate email.
I have made 25 masks with this pattern and just got an order for 10 more. The wire at the nose gives such a good fit. I use floral wire and bend the ends up with needle nose pliers. Instead of ribbon, I use bias tape but that has been harder to find this past week. I have been able to locate some wide elastic and I split and fringe it so the remaining elastic threads won’t come out. The hair elastics work well too and may resort to that when I go through my elastic.
Thank you, glad I could help a little.
Hi do you have the pattern for this mask it won’t down load so I can not print it thank u Evelyn
Morning, your pattern looks great and a good fit.
Please send me the pattern.
Thank.
Angie
Could you please email the pattern. I subscribed to the newsletter but I am not able to download and print the pattern.
Thanks
I subscribed but I am not able to download and print the pattern. Could you please email It to me.
Thanks
Please email the patter — could not download. Thank you so much!
Hello, I’m not sure if you mentioned this or not, but did you use the fusible interfacing on only the first 2 pieces or on all 4 pieces? Also, how much smaller should the lining pieces be from the pattern?
Thank you!
Interfacing only for the face of the mask (outside face), not for the lining. So only the first two pieces.
Thanks so much!
Could you please email me the pattern. I can’t get it to download.
Please email me the pattern. Thank you for such great information
Can you please email me a pattern for the face mask? Thanks so much!!
Hey, can’t You please mail the pattern. This is a great mask.
Thank you so much!
Please send me the pattern to my email
[email protected]
CAN YOU SEND ME THE PATTERN ITS NOT LETTING ME DOWNLOAD!
THANK YOU.
I created a pocket for a removable filter from the 3 piece pattern. It’s simply cut from 5 inches of the center of the middle portion of the mask. Healthcare friends have found it helpful to hold the pm 2.5 filters from Amazon.
Are there instructions you can print out for the face mask?
can you please email the pattern
[email protected]
Please email me the pattern, Thanks!
Please email me your patter. It would not download
Hello! Would you please email me the pattern as well! Thank you for the tutorial!
Please email me the psttern
Sorry I was unable to print or download your PDF for the pattern. Could you please email me the PDF or pattern? Thanks so much. I like the fit of your mask and very comfortable to wear.
Joanne sorry but your email bounces as “invalid” when I send you mail.
Please send me free mask pattern
Thank you
I love this this style of mask. Easy to follow and do. Can you please email me the pattern I would really appreciate it.
Just one correction:
Bacteria and viruses cannot multiply on fabrics. Fungi can grow on them a bit, but not bacteria or viruses. Ever. They can LINGER there and survive, but never multiply.
Thank you. I believe in principle you are correct, bacteria and viruses may have a hard time multiplying on CLEAN fabric, unfortunately the mask that touches the skin is no longer clean. It rubs off particles of skin, face cream, lipstick, whatever substances are in your exhaled air, it may have particles coming from the outside – pollen, for example – so a dirty mask, slightly wet after being on for two hours or so is really no longer clean and may be a good medium for bacteria. Or not. This is my common sense talking, I did not see any studies or research on the subject, so take it as my personal opinion.
Can the pattren to me you please email
Can you please send me the pattren to my email
Just press and hold the pattern image and select the share option, then email it to yourselves. Believe me, it’s that easy.
The pattern can be also downloaded from my resource library https://www.ageberry.com/resource-library/
Please e-mail the mask instructions. Thanks! Marty Gebers
Marty, the instructions (all steps, 1 to 12) are right here in the article. I have also made available in my Etsy shop https://www.etsy.com/shop/AgeberryCrafts
a printable version of the article
This is fantastic! Thank you for offering this great pattern. Can you please email your pattern to me. I tried to get to your resource library but it is just a blank page.
I have answered separately by email. Thanks
there is no pattern!
The pattern is free to all subscribers to my newsletter, if you subscribe you will receive an email with all the information necessary to download. If however you have no interest in subscribing (beyond downloading the pattern) please send me an email at [email protected], make sure the return email is correct and I will send you the pattern as attachment. Please specify which mask you would like, I have three distinct designs.
I can’t load the free face mask.
The pattern should be a .pdf file on the resource library page, contact me please directly at [email protected] (or use the contact form at the bottom) if you have difficulties.