How to Make a Lightweight Summer Neck Scarf with a Lettuce Hem

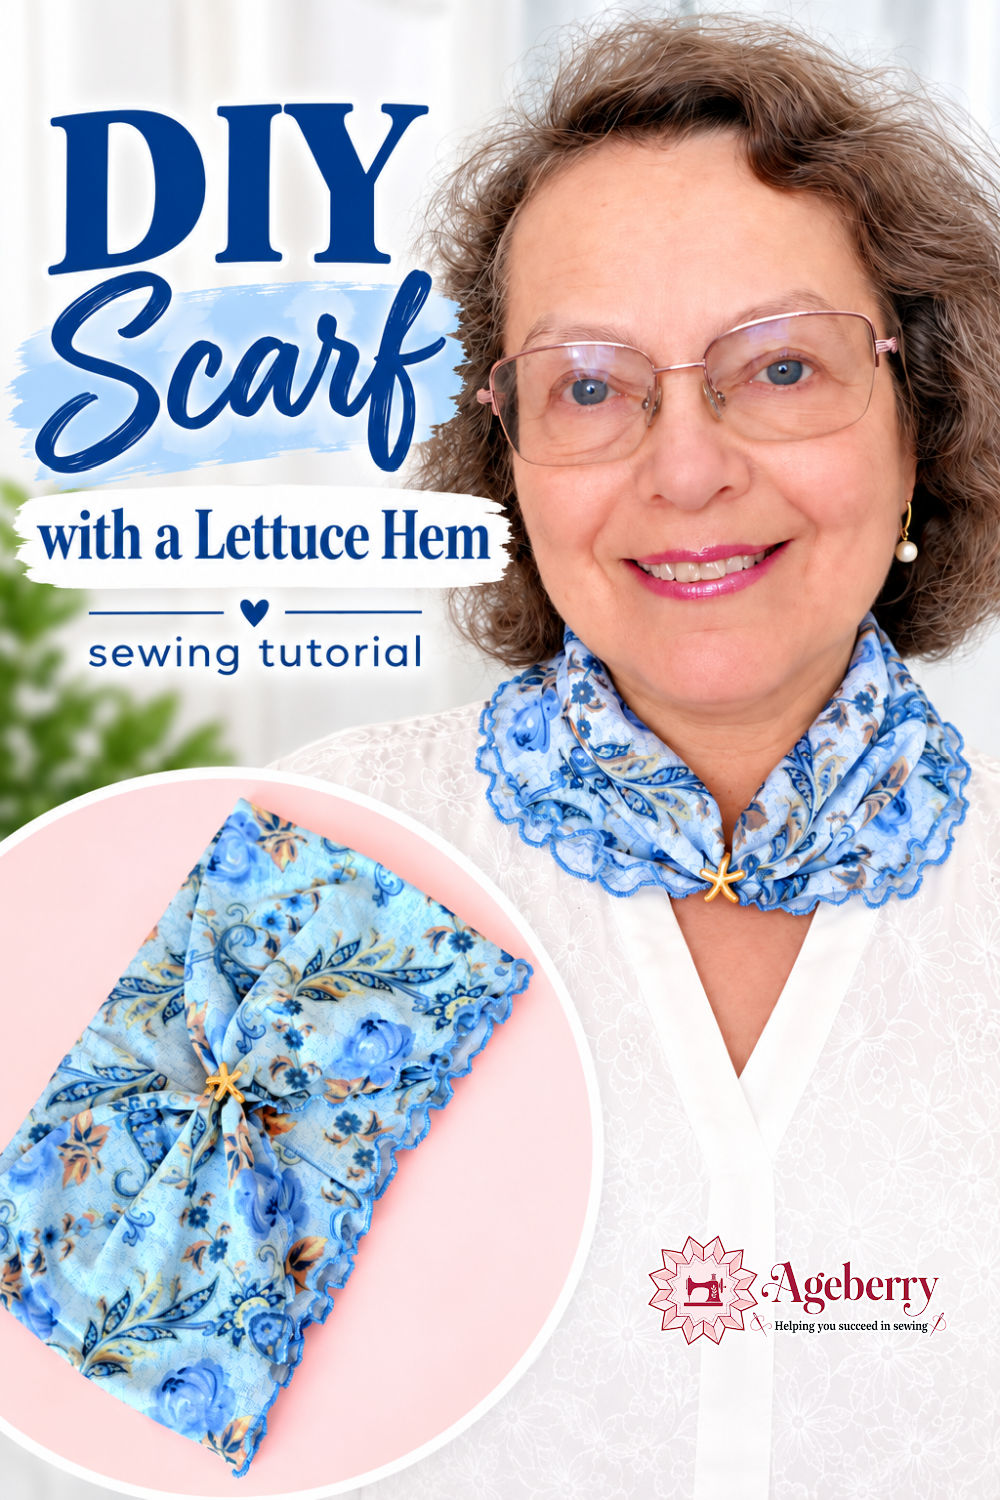
In this sewing tutorial, I’ll show you how to make a simple lightweight summer scarf and finish it with a soft, ruffled lettuce edge.
Prefer to read without ads?
I created a PDF version of this guide for anyone who likes to keep sewing guides saved, printed, or easy to read without ads. It includes the same helpful information in a simple format you can download and use whenever you need it.
The PDF is available in my shop for a small fee. It’s a nice option if you want to support my work and keep this tutorial close to your sewing machine.
I wanted a small scarf for warm weather, not the kind of scarf you wear in winter. I wanted something light enough to wear with summer clothes, something that would add a little color around my neck without making me feel hot.
I also wanted a bit more coverage. Here’s the thing about getting older — your neck starts telling on you. So a small scarf seemed like a simple way to cover some of those wrinkles while still looking like part of the outfit.
But there was another very practical reason I wanted one: the air conditioner in the car.
Of course, I need the air conditioner when it’s hot, but the cold air always seems to hit the same spot on my neck. I’ve had problems with that for years. The rest of me may be perfectly comfortable, while that one small area gets blasted with cold air the entire drive.
A heavy scarf would make no sense in summer, so I decided to sew a very lightweight neck scarf instead.
I wanted it to be soft, stretchy, and a little decorative, so I finished the edges with a lettuce hem. One pass through the serger and a plain knit edge turns into this wavy little ruffle.
This turned out to be a very simple serger project.

What Kind of Fabric Works for This Scarf?
Choosing the fabric turned out to be more important than I expected. Because this scarf is finished with a lettuce hem, I needed a fabric that was not only lightweight and comfortable around the neck, but also stretchy enough to create those pronounced wavy edges.
My First Fabric Didn’t Work
My first choice was a lightweight rayon knit with a cute elephant print. I really wanted to use it. The fabric was soft, light, and comfortable against the skin, and I liked the print.
But my lettuce hem test wasn’t successful.
The edge curled a little, but I couldn’t get the full, ruffled lettuce effect I wanted. I experimented with the serger settings, but the fabric simply didn’t stretch enough to produce a nice pronounced wave.
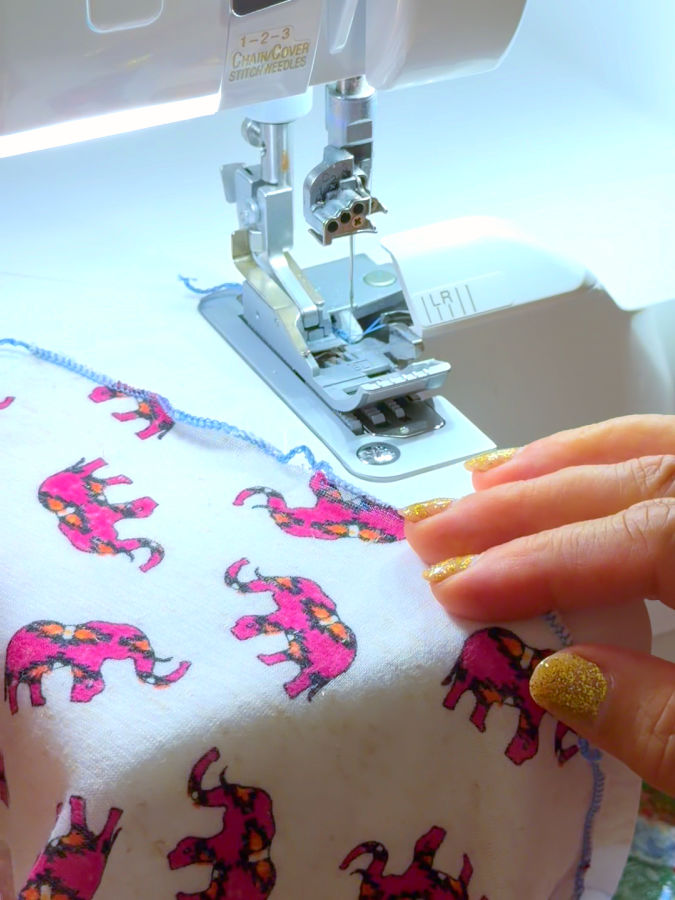
I also noticed another problem. The rolled hem stitches were not consistently forming right along the fabric edge. In some places, the thread extended beyond the edge of the fabric, leaving little gaps or loops with no fabric inside them. You can see this in the photo.
So I had to give up on the elephants for this project.
That test reminded me of something important: just because a fabric is a knit doesn’t mean it will make a good lettuce hem. The amount of stretch matters.
Note: Some of the links on this page are affiliate links. This means I will receive a commission if you order a product through one of my links. I only recommend products I believe in and use myself.
The Fabric Needs Plenty of Stretch
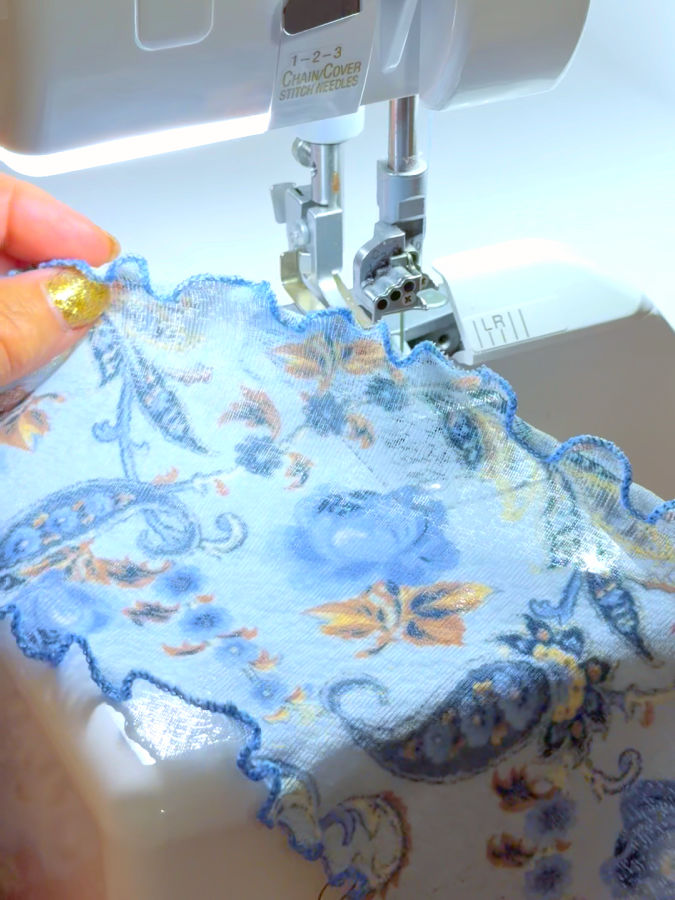
Next I tried the blue knit chiffon you see in these photos, and the difference was obvious. This fabric stretched much more, and I was able to get the soft, rippled lettuce edge I wanted.
For this scarf, I would look for a knit fabric with these characteristics:
- very lightweight
- soft and comfortable against the neck
- 4-way stretch
- plenty of stretch in the direction of the lettuce edge
- good recovery
Recovery simply means that after you stretch the fabric and let go, it returns close to its original size and shape. If you pull on a knit and it stays stretched, distorted, or wavy afterward, its recovery isn’t very good.
As the fabric returns to its original length while the serged edge remains stitched, those little waves and ruffles form along the edge.
The blue knit chiffon had the combination of stretch and recovery I needed, and it worked much better than my first rayon knit.
Test the Fabric Before Cutting the Scarf
I strongly recommend testing the lettuce hem on a scrap before cutting your scarf rectangle.
Stretch the fabric with your hands first. See how far it stretches and how well it returns to its original shape. Then cut a few scraps and run them through the serger using your lettuce-hem settings.
I made several test passes while adjusting my serger until I liked the size and shape of the waves.


Why I Used Wooly Nylon Thread
For the lettuce hem, I decided to use wooly nylon thread in the loopers. I already had several spools in my thread collection, but I don’t get many chances to use them, and this little serger project seemed like a perfect opportunity.


A lettuce hem is very visible on this scarf, so I wanted the stitching itself to look soft and full rather than like a thin line around the edge.
What Is Wooly Nylon Thread?
Wooly nylon is a soft, stretchy, textured thread that works especially well in serger loopers. Unlike regular serger thread, it expands and spreads out as it forms the stitches, so it can provide much better coverage.
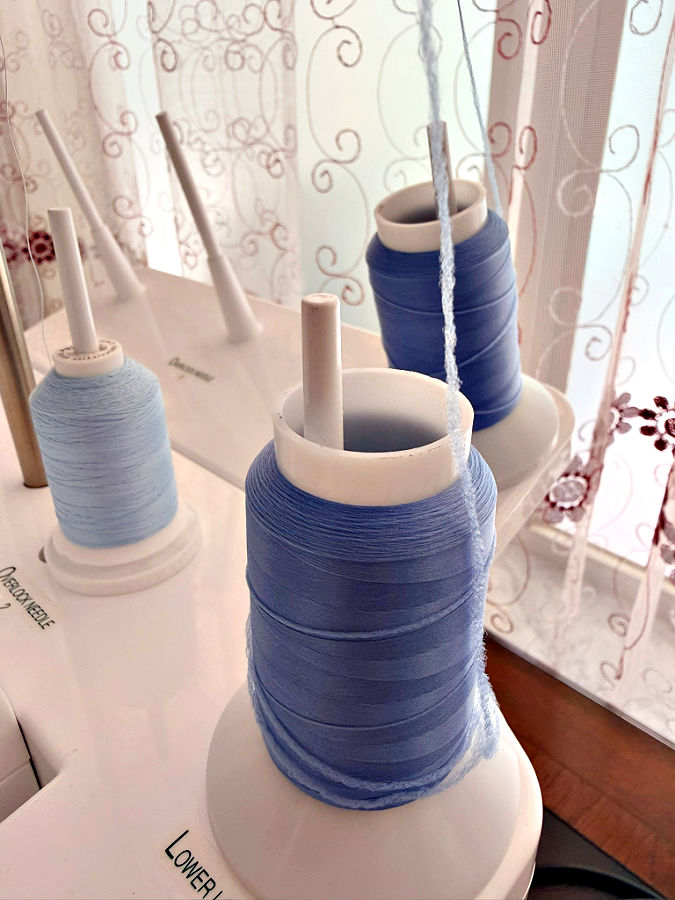
On this lightweight neck scarf, the wooly nylon helped make the lettuce edge look fuller and softer.
I used wooly nylon in both loopers and regular serger thread in the needle.
If you haven’t worked with wooly nylon before, I have a separate tutorial about this thread where I explain what it is, when to use it, and how to work with it: Wooly Nylon Thread | What It Is And How To Use
Threading Wooly Nylon
One practical thing to know about wooly nylon is that it can be difficult to pass through the tiny thread guides and looper eyes because the thread is soft and fluffy.
Instead of trying to thread it through the serger from scratch, I tied the wooly nylon to the regular serger thread that was already threaded through the machine. Then I gently pulled the regular thread through the threading path, bringing the wooly nylon with it.
This was much easier than trying to push the wooly nylon through every guide and looper eye by itself.
Test the Lettuce Hem Before Cutting
Before cutting the scarf itself, I spent some time testing the lettuce hem on scraps of the blue knit chiffon.
This step is worth doing with a serger, especially when the stitch is going to be decorative and very visible. The exact settings that work well can change depending on the serger, the fabric, the thread, how stretchy the fabric is, and how pronounced you want the lettuce edge to be.
So I didn’t want to assume that one set of numbers would work immediately. I cut a few scraps from the same fabric and experimented until I liked the shape of the waves.
The Most Important Setting: Differential Feed
For this project, the most important adjustment was the differential feed.
I lowered mine to 0.6.
Normally, differential feed is often used to help keep knit fabric from stretching while it goes through the serger. But when making a lettuce hem, I wanted the opposite effect. I wanted the fabric edge to stretch while it was being stitched.
✅ Related tutorial: Ever Tried This on Your Serger? This Differential Feed Feature Will Amaze You
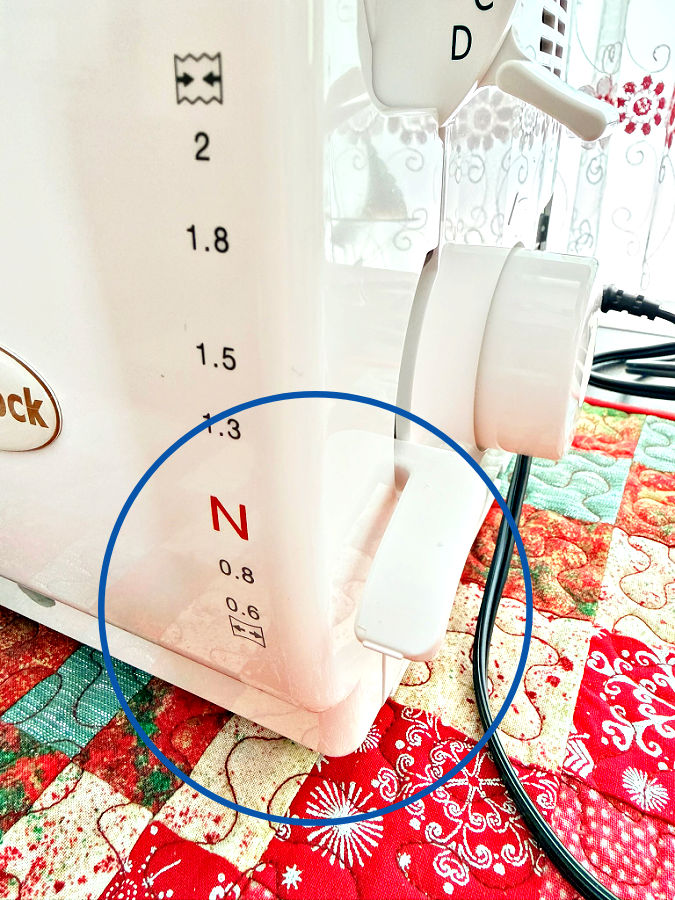
Other serger settings are a little different from one machine to another, so I don’t think there is one exact set of numbers that will work for everyone.
For a lettuce hem, start with the settings your serger uses for a rolled hem stitch. Also, use the right needle and keep the knife engaged.
Stretch the Fabric While Serging
The serger settings alone are not what create the lettuce edge. The fabric also needs to be stretched as it goes through the machine.
I stretched the knit as much as it would comfortably stretch without distorting it. I held the fabric in front of and behind the presser foot and kept a steady stretch while the machine formed the rolled hem.
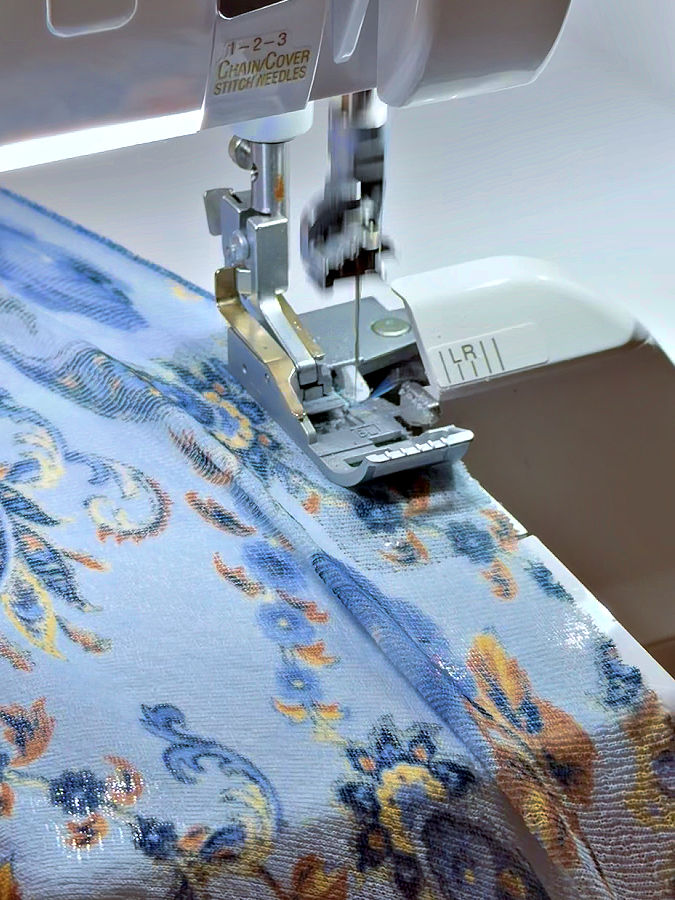
The more the fabric stretches while the stitches are being formed, the more pronounced the lettuce effect can become.
But again, this depends a lot on the fabric. Some knits produce dramatic waves with very little effort, while others barely ruffle at all.
That is another reason I was glad I tested several scraps before cutting the actual scarf.
Cut the Scarf
Once I was happy with the lettuce hem, I cut the fabric for the scarf.
The pattern could hardly be simpler. It is just one rectangle.
Cut a rectangle: 18 inches × 12 inches.
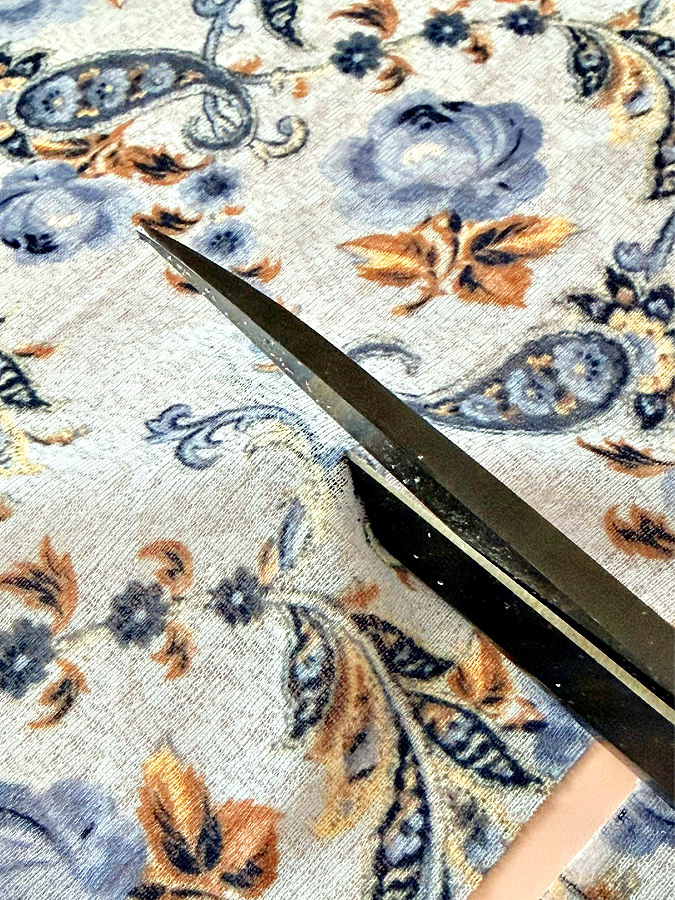
These measurements already include the seam allowance.
Because this is a very lightweight knit, I made sure the fabric was lying flat and relaxed while I measured it. I didn’t want to stretch it accidentally while cutting and end up with a distorted rectangle.
✅ Related tutorial: How To Cut Knit Fabric: Ultimate Guide
Pay Attention to the Direction of Greatest Stretch
The fabric I used has 4-way stretch, but one direction stretches more than the other.
That matters for this project.
I positioned the rectangle so the direction with the greatest amount of stretch runs along the 18-inch sides.
Those are the edges where I was going to make the lettuce hem.
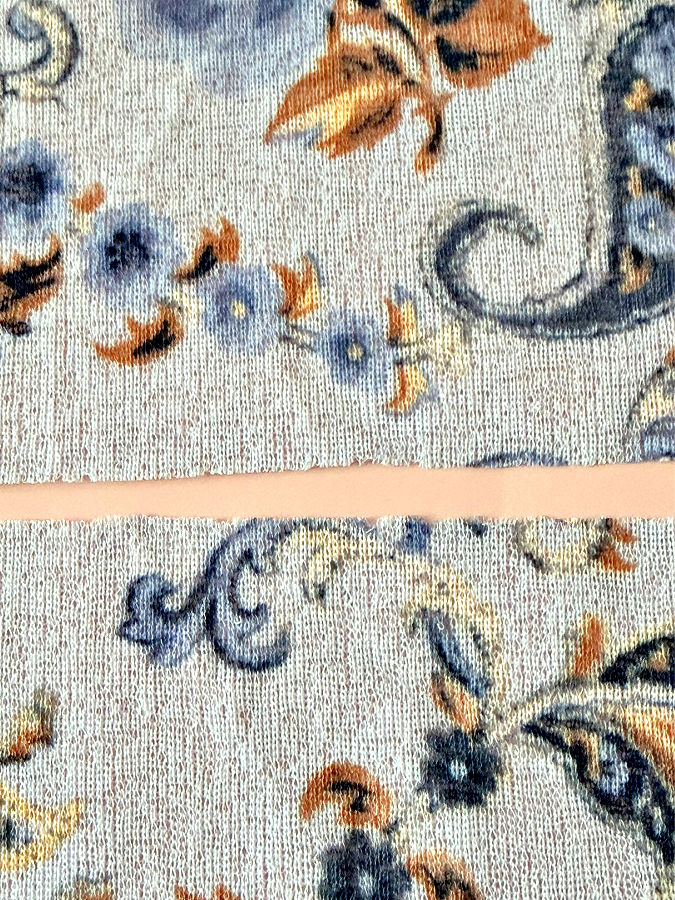
The more stretch you have along those 18-inch edges, the easier it is to create the wavy lettuce effect.
Make the Lettuce Hem
Now I was ready to work on the actual scarf.
I serged a lettuce hem along one 18-inch edge, using the same settings I had already tested on my scraps.
Then I repeated the process along the opposite 18-inch edge.
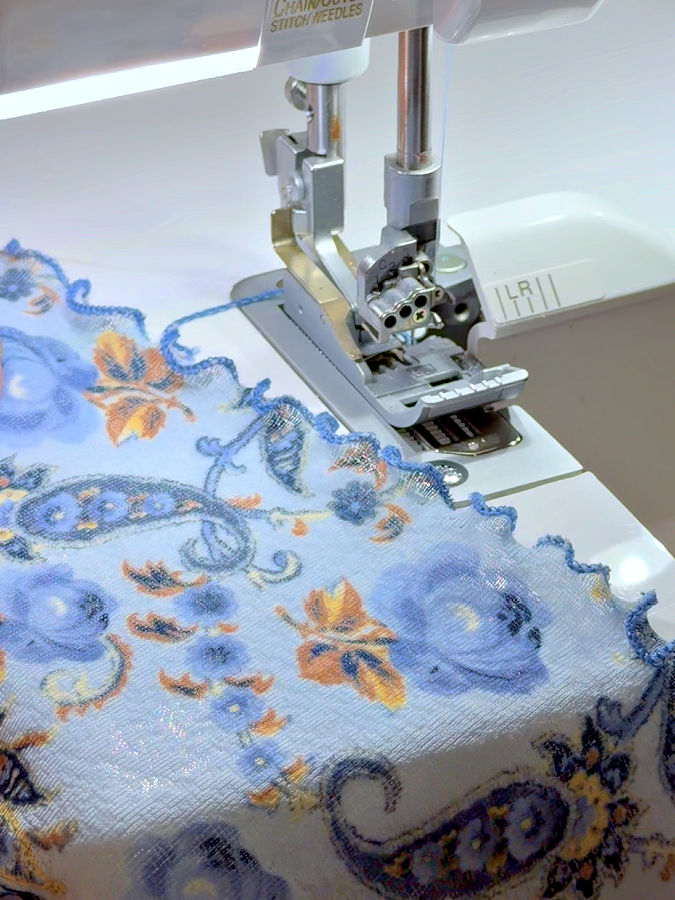
At this stage, the scarf was still a flat rectangle.
It had:
- a lettuce edge along one 18-inch side
- another lettuce edge along the opposite 18-inch side
- two unfinished 12-inch ends
Those two short ends would be joined next.
Join the Scarf Into a Tube
To turn the rectangle into the scarf, I needed to join the two unfinished 12-inch sides.
For this seam, I changed my serger from the rolled-hem setup to a regular 3-thread overlock stitch using one needle and two loopers.
✅ Related tutorial: 25 Expert Sewing Tips for Working with Stretch Fabric
And yes, I tested again on a scrap.
Changing from a lettuce hem to a regular overlock stitch means changing several serger settings, and I didn’t want to experiment on the scarf after I had already finished both decorative edges.
Once the regular overlock stitch looked good on my scrap, I was ready to sew the seam.
But I ran into one small problem.
How to Make the Lettuce Edges Match at the Seam
The two lettuce edges needed to meet neatly when I joined the short sides.
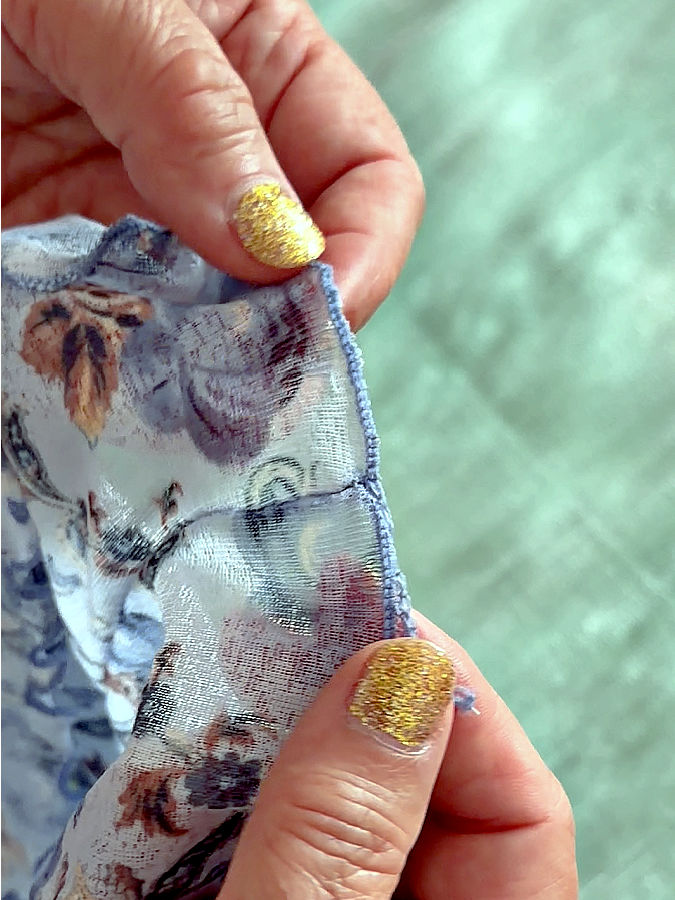
That sounds easy, but lightweight stretchy fabric can shift while you’re positioning it under the serger foot. If one layer moves even slightly, the two ruffled edges may not meet in exactly the same place.
I didn’t want one lettuce edge ending higher than the other.
So I used a very simple solution: a few hand stitches.
Hand-Baste the Corners First
I placed the two 12-inch edges right sides together and carefully aligned them.
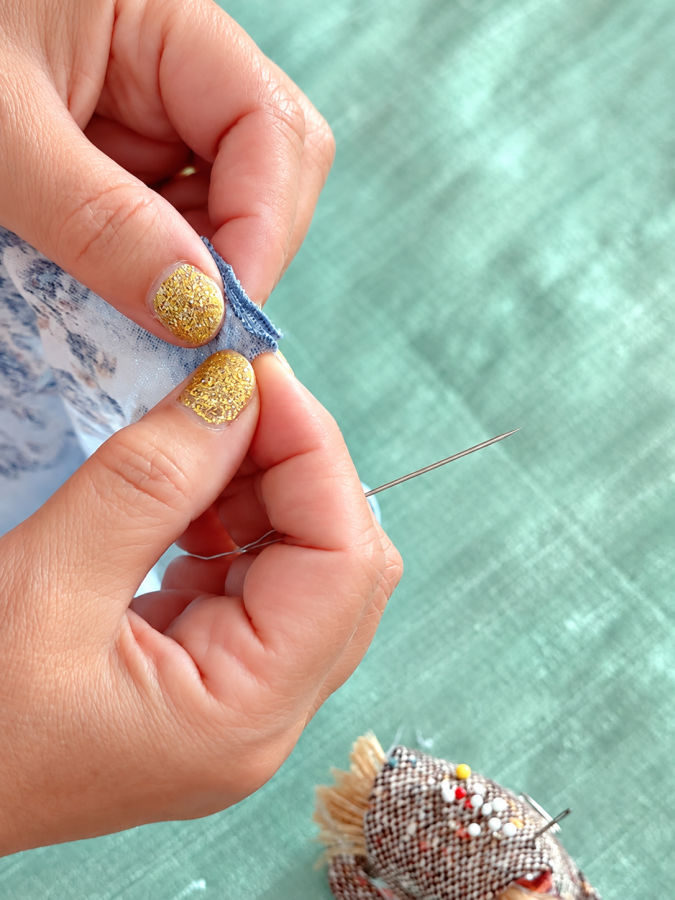
At one end, I matched the two lettuce edges and secured them together with a few hand stitches.
Then I did the same thing at the opposite end.
These little stitches held the two important points exactly where I wanted them.
Now I didn’t have to worry about the slippery knit shifting and ruining the alignment while I serged the seam.
With the two ends secured, I serged the entire 12-inch seam.
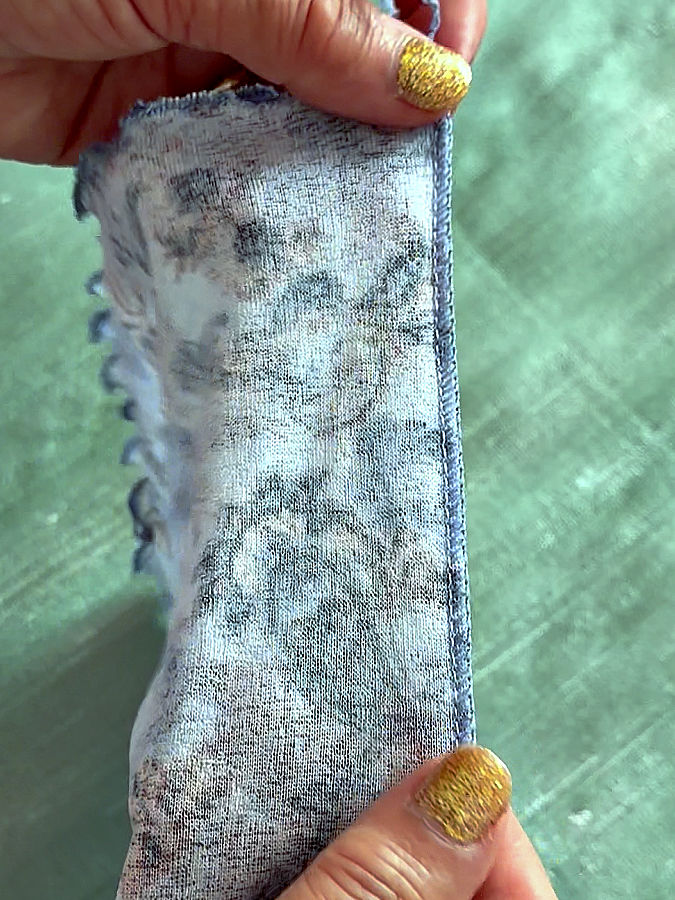
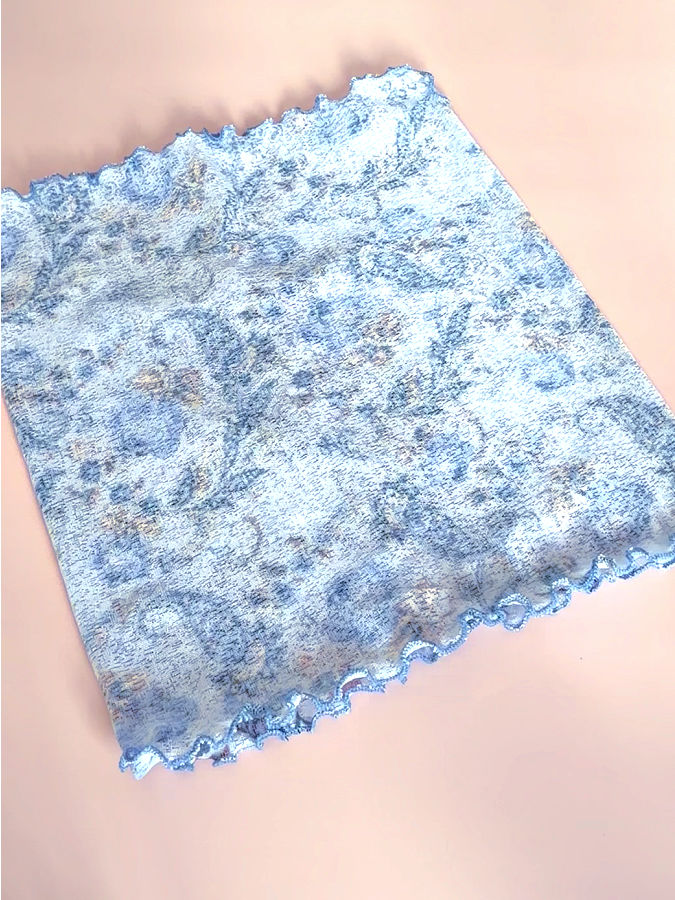
The flat rectangle had now become a tube.
This little hand-basting step took almost no time, but it made getting a neat result much easier.
Finish the Serger Tails
After sewing the seam, I had serger thread tails at both ends.
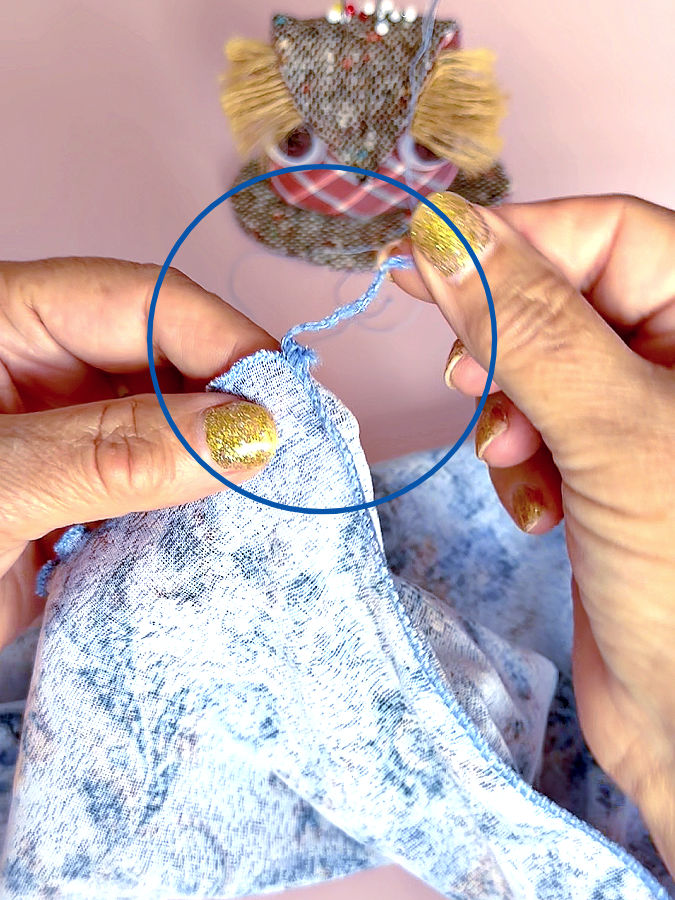
There are several ways to secure serger tails, but for projects like this I usually finish them by hand.
I leave about 1/2 inch of the serger tail and sew it to the existing serger stitches using small buttonhole stitches.
I like this method because I can control exactly where the thread ends up, especially when I’m working close to a decorative edge.
If the remaining tail is too long after it has been secured, I trim off the excess.
The important thing is not to simply cut the serger tail right at the seam before securing it.
Fold the Scarf
Now the scarf started to look much more like the finished version.
I folded the tube in half lengthwise, bringing the two lettuce edges together.
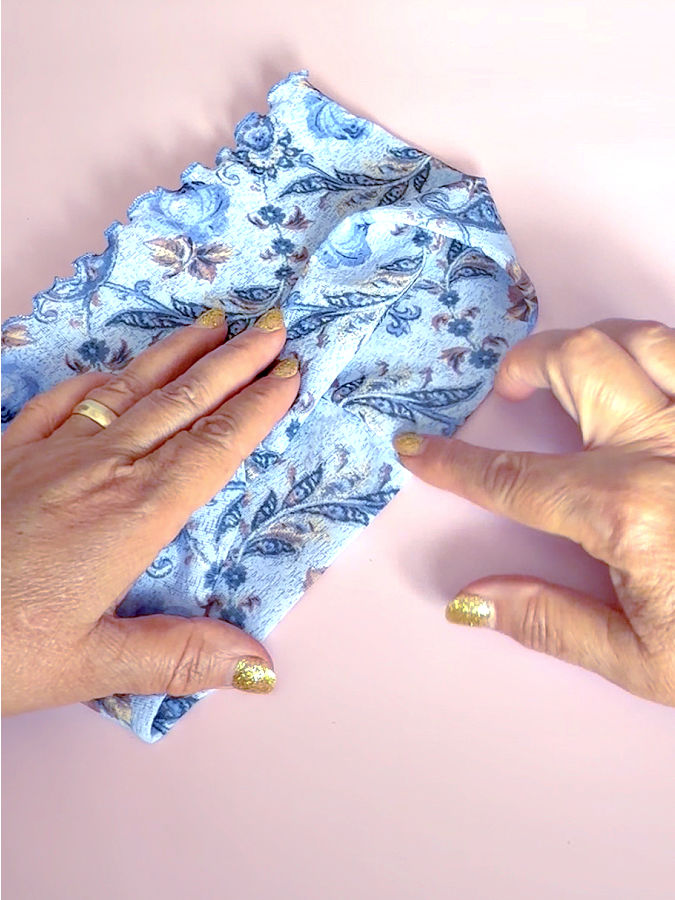
Instead of having one ruffled edge on one side and another on the opposite side, the two lettuce edges now sat next to each other.
This gave the scarf a fuller, double-ruffled edge.
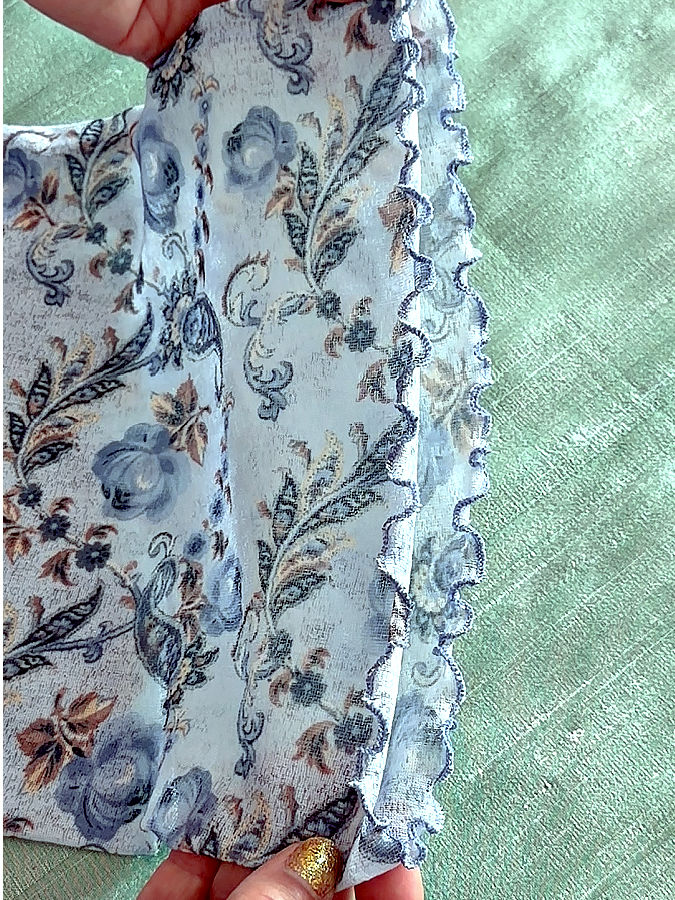
Because the knit chiffon is so lightweight, the two layers don’t feel bulky around the neck. They simply give the scarf more body and make the lettuce edge more noticeable.
At this point, the basic sewing was finished.
Add a Decorative Scarf Ring
I wanted something to gather the scarf and hold it in place without tying a bulky knot.
I already had a decorative metal ring with a little starfish on it, and it worked perfectly with the blue fabric.

I gathered (by hand, with a needle and thread) the width of the folded scarf together in one place and slipped the ring over the gathered fabric. I chose the gathering point in such a way that the seam will be in the middle of the back. The gathering is exactly opposite to the seam if you lay the scarf flat.
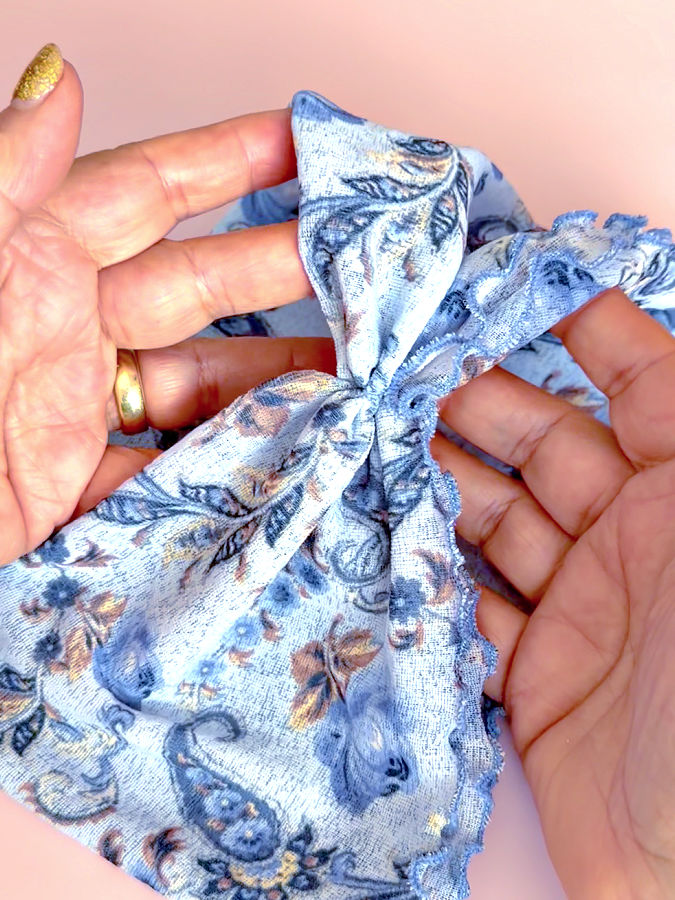
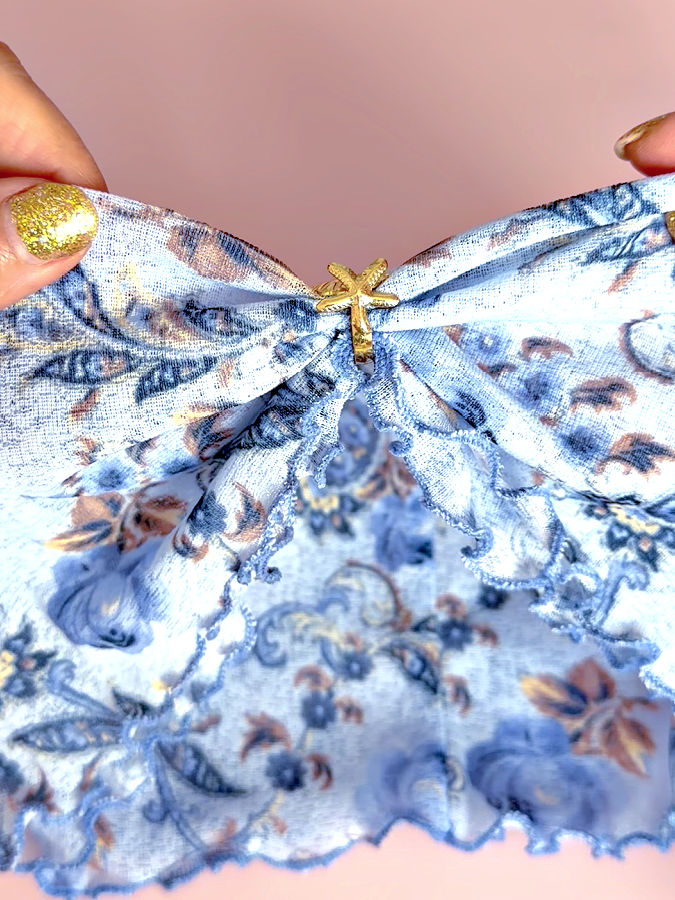
The ring does two jobs.
It keeps the scarf gathered, and it adds a decorative detail at the front.
The ring I used is adjustable so I could tighten it around the scarf and there was no need to secure it further.
Of course, you don’t need the same ring I used. A regular scarf ring, decorative slider, or another smooth ring with an opening large enough for the fabric could work.
Because the fabric is delicate, I would avoid anything with rough edges that could snag the knit.
The Finished Lightweight Neck Scarf
And that was it.
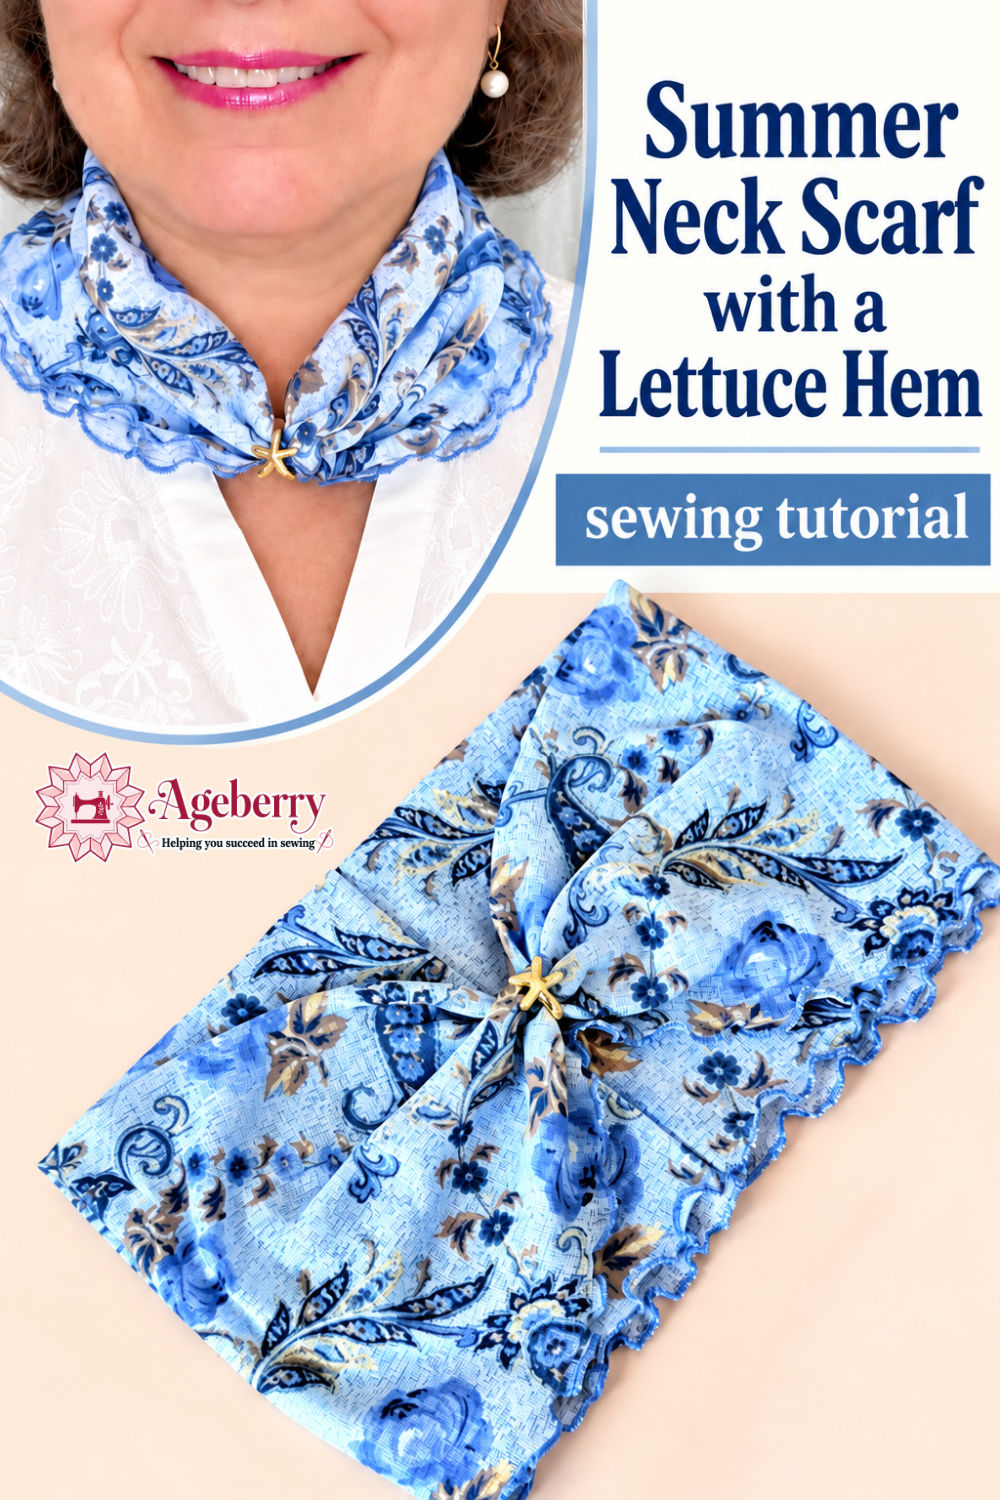
This neck scarf tutorial started with one simple rectangle of knit fabric, but the lettuce edges make the finished scarf look much more interesting.
It turned out to be exactly the type of scarf I had wanted.


It is very lightweight, so I can wear it in warm weather without feeling as though I have a winter scarf wrapped around my neck.
It also gives me a little extra coverage around the neck, which I like. Don’t ask me why.
And it solved my car air-conditioning problem surprisingly well. I still get the cool air I need in the car, but the scarf gives my neck a light layer of protection from that cold stream of air that always seems to hit the same spot.
I also like that it looks like an accessory rather than something I’m wearing purely for practical reasons. The blue fabric works with many of my clothes, and the little starfish ring adds another detail without making the scarf heavy.
Because the knit chiffon is so light, the double lettuce edge gives it visual fullness without adding much bulk.
For such a small serger project, I think it turned out to be quite useful. And now that I know which fabrics work well for a lettuce hem, I can easily make more in different colors and prints.
Would you make or wear a little scarf like this? If you’d like to try it, save the pin below to one of your sewing boards so the tutorial is easy to find later, and follow me on Pinterest for more tips, tutorials, and inspiration!

latest posts
- How to Make a Lightweight Summer Neck Scarf with a Lettuce Hem
- What Sewists Hate About Sewing: Common Complaints and Practical Fixes
- Knit Presser Foot: How It Works, How to Use It, and My Sewing Tests
- How to Sew Neat Mitered Corners at Acute Angles
- Sewing Machine Needle Organization: A Clever System I Tried
- DIY Car Armrest Organizer: Sewing Tutorial
- Easy DIY Potholder Sewing Tutorial: Better Shape, Better Grip, Smart New Design
- How to Buy a Sewing Machine (Even If You Already Have 10)
- 23 Kitchen Items That Belong in Your Sewing Room