
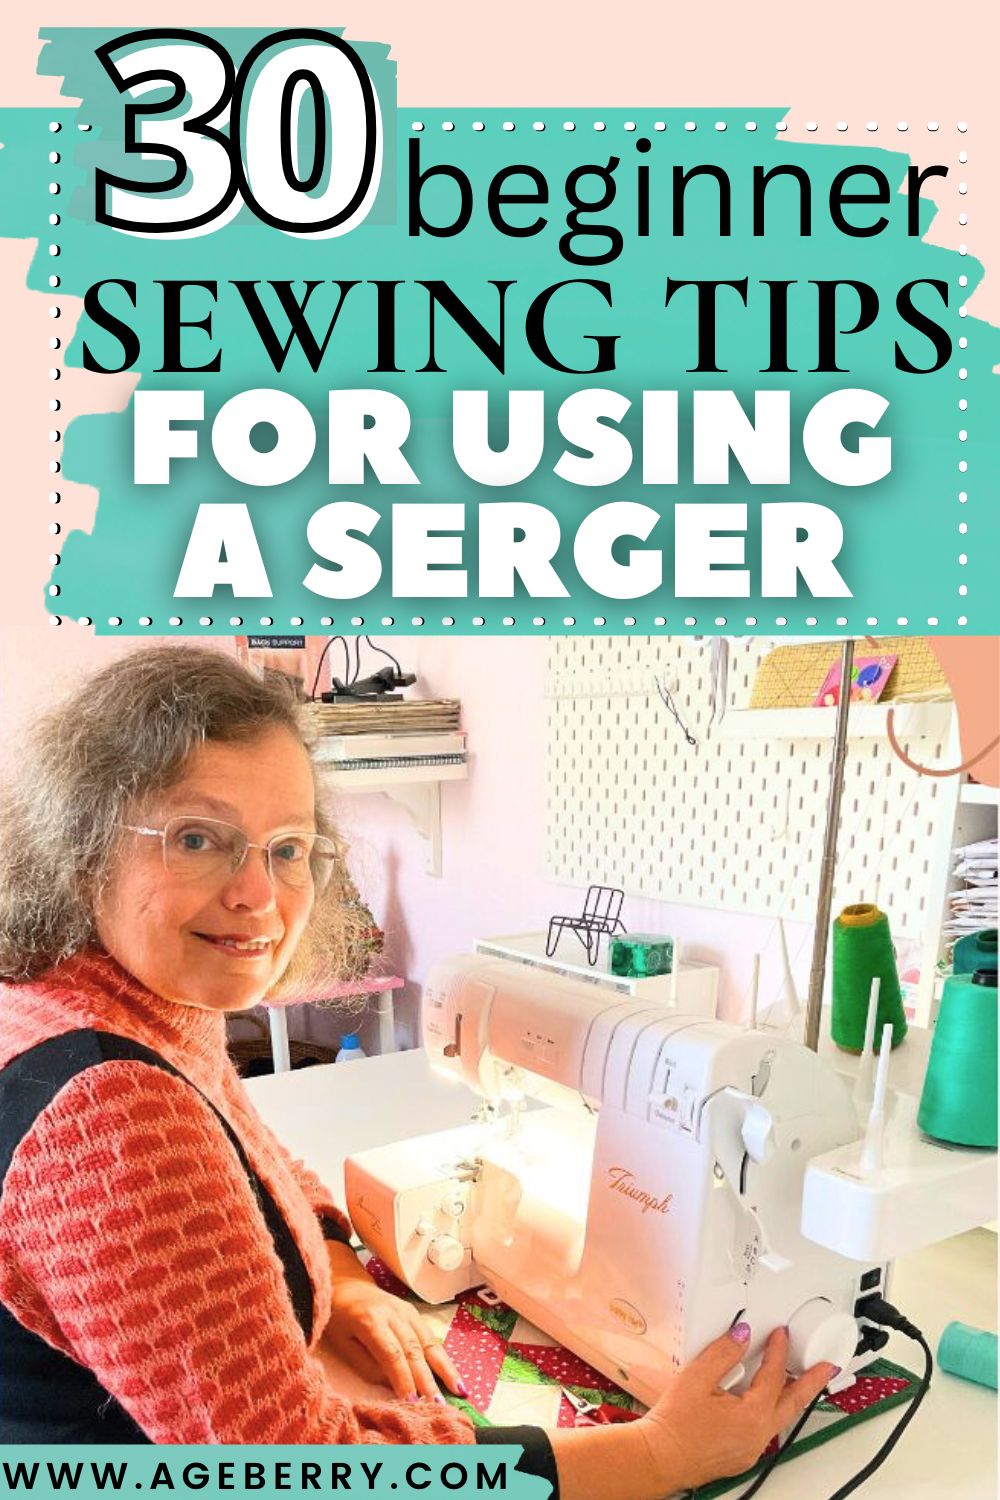
30 Essential Sewing Tips for Beginners Learning to Use a Serger
If you’re new to the world of sergers, you might feel overwhelmed by their speed, multiple threads, and extra features. But with the right guidance, a serger can become your favorite sewing machine. In this article, I’m sharing 30 essential sewing tips to help beginners navigate their serger with confidence. These tips will simplify your learning process and help you achieve professional-quality results in no time.
#1. Understand Your Machine
Spend time reading your serger’s manual – that thick, cryptic tome that often ends up as a coaster or impromptu paperweight. While diving into your serger’s manual may seem about as thrilling as watching paint dry, it’s actually your secret weapon in the battle against broken needles and wonky seams.

Each model has unique features and threading paths that can affect how it operates. Understanding your machine is like learning a new language – a language where “loopers” aren’t just carnival rides, “stitch fingers” aren’t actual digits, and “differential feed” has nothing to do with your pet’s eating habits. It’s a world where threading diagrams look like abstract art and tension dials are trickier to manage than threading a needle with a frayed thread.
But once you decipher this serger-speak, you’ll be the master of your fabric domain. You’ll confidently tweak those mysterious knobs, and thread those looper-doopers like a pro.
So grab that manual, and prepare to become fluent in Serger-ese.
#2. Master Threading First
Threading a serger is often seen as the task that can make even seasoned sewists break into a cold sweat but it’s crucial to understand the process.
It’s akin to solving a puzzle where the pieces are invisible and constantly moving. It’s a dance of loops, twists, and “wait, where did that thread go?” moments. But once you nail it, you’ll feel like you’ve just won the sewing Olympics.
Use your machine’s threading guide while you learn.

And for those who break out in hives at the mere thought of threading, there’s a plot twist in the serger world – self-threading sergers now exist! These magical machines use air to whoosh the threads into place. Do you have one of these thread-whispering wonders? If so, you might just be the envy of every sewist in your zip code.
✅ Related tutorial: The Self-Threading Serger – Yes, It Exists!
Every time you successfully thread your serger, a sewing fairy gets its wings (ha-ha). And by “wings,” I mean “perfectly finished seams.” So take a deep breath and show that serger who’s boss. Before you know it, you’ll be threading with your eyes closed (though I don’t recommend it) and laughing in the face of knotty challenges.
#3. Adjust Tension Settings
Adjusting tensions can turn your serger from a stitch-spitting dragon into a precision sewing machine.
Most sergers come equipped with a fearsome foursome of tension dials – that’s right, four knobs of potential chaos (or harmony). These tension quadruplets are the mood rings of the serger world – always changing and rarely straightforward.
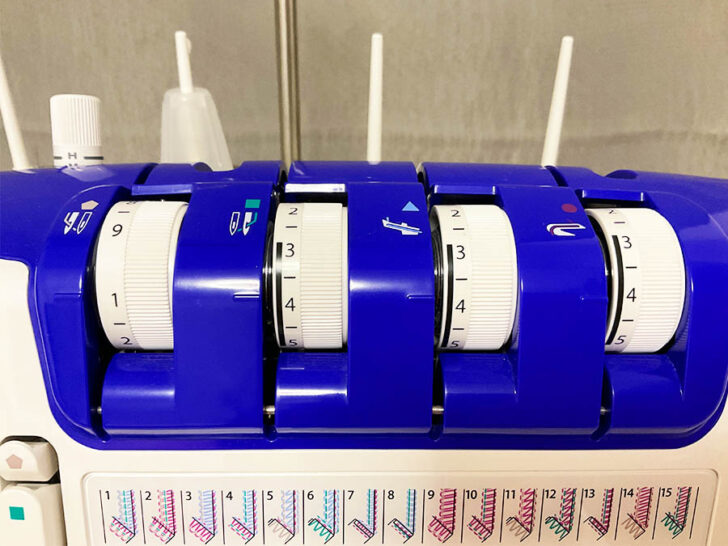
Different fabrics have different personalities. Lightweight cottons might purr along happily with your current settings, but throw in some stretchy knits, and suddenly your serger is throwing a full-blown tantrum. It’s like trying to feed a picky eater – what works for one fabric might make another turn up its nose (or in this case, its edges).
So, start investigating those mysterious dials. Turn them this way and that, and watch as your stitches transform.
If you find yourself scratching your head, just remember – you’re not alone in the tension-adjusting trenches. Keep at it, and soon you’ll be the tension whisperer, able to calm even the most rebellious of stitches.
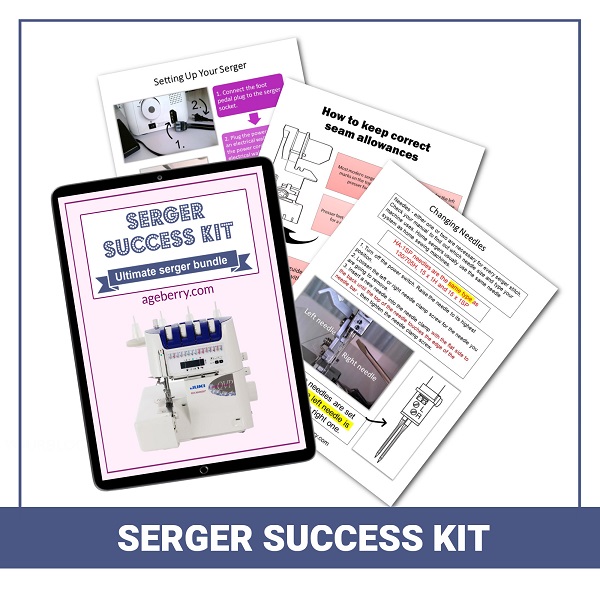
You might also like my ebook
Here is my easy guide to using your serger – Serger Success Kit. Get started with the basics of tension adjustment, stitch selection and threading.This 90-page ebook is perfect if you want some simple instructions without feeling overwhelmed by other tutorials out there. It’s all broken down into easy-to-follow tasks so it doesn’t get confusing – Serger Success Kit.
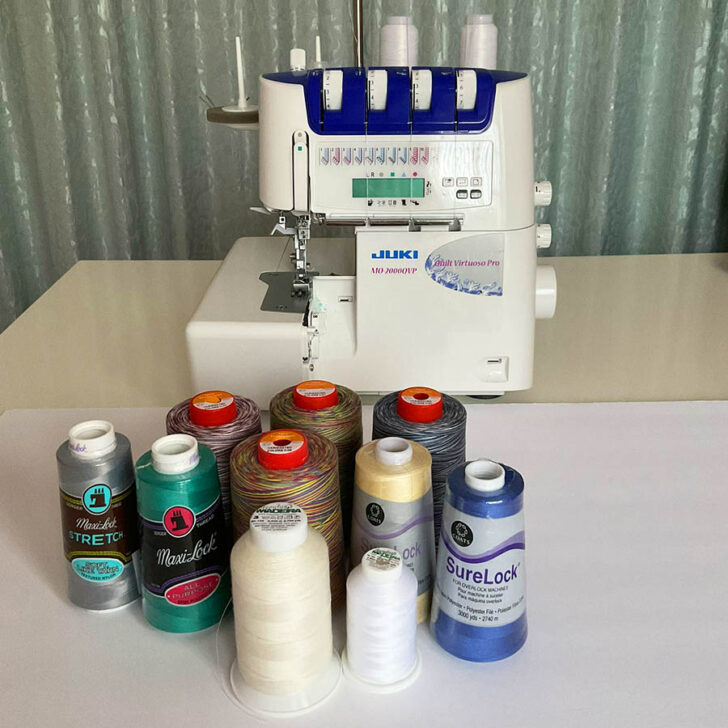
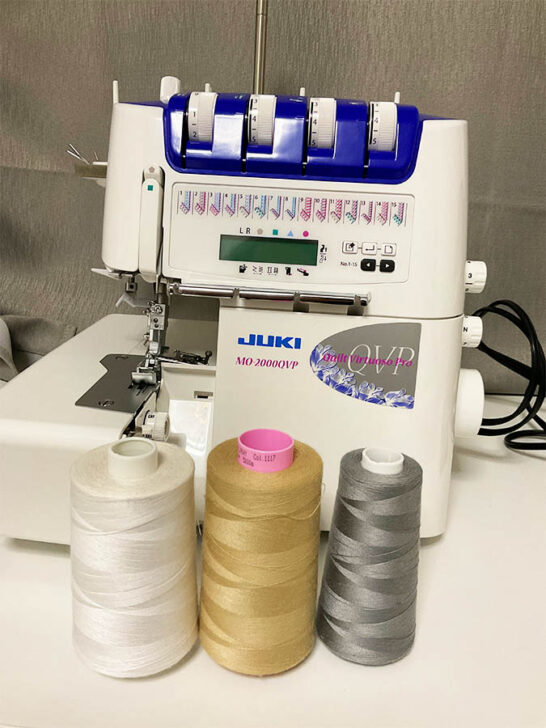
#4. Use High-Quality Thread
Sergers work at high speeds. Your serger needs a thread that can keep up with its need for speed without turning into a fuzzy mess or snapping.
High-quality thread is smooth, strong, and ready to tango with any fabric you throw its way. It won’t leave a trail of lint breadcrumbs all over your project or break mid-seam, leaving you with a half-finished hem and a full serving of frustration.
✅ Related tutorial: Best Serger Thread | What To Use | Brands
So, treat your serger to the good stuff.
Note: Some of the links on this page are affiliate links. This means I will receive a commission if you order a product through one of my links. I only recommend products I believe in and use myself.
 Each All Purpose Spun Polyester Thread 40S/2 (Tex27) for Serger, Overlock, Quilting, Piecing and Sewing - White")
All Purpose Spun Polyester Thread
#5. Keep Spare Needles Handy
Let’s talk needles – those tiny but mighty tools that can make or break your serging experience.
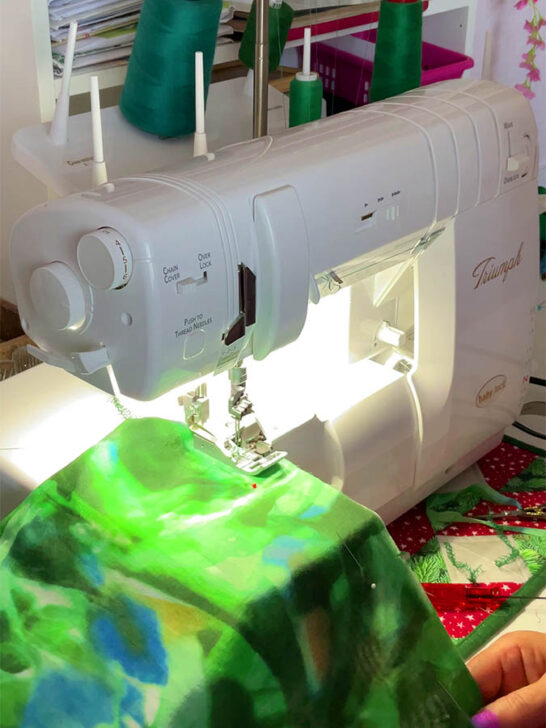
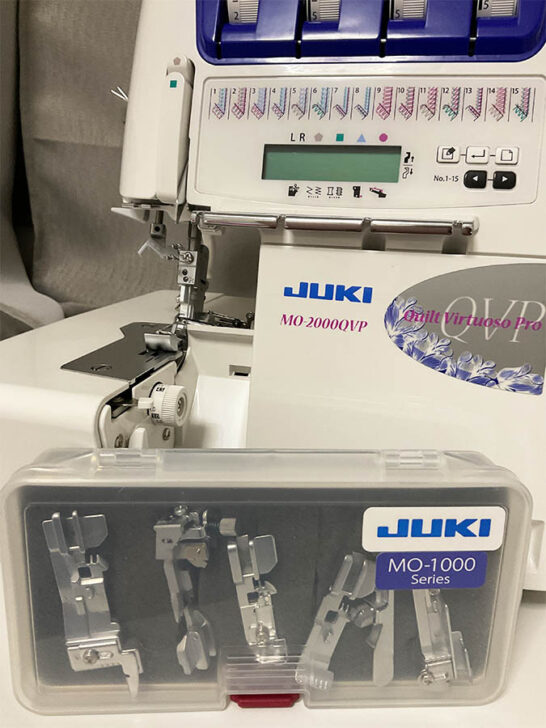
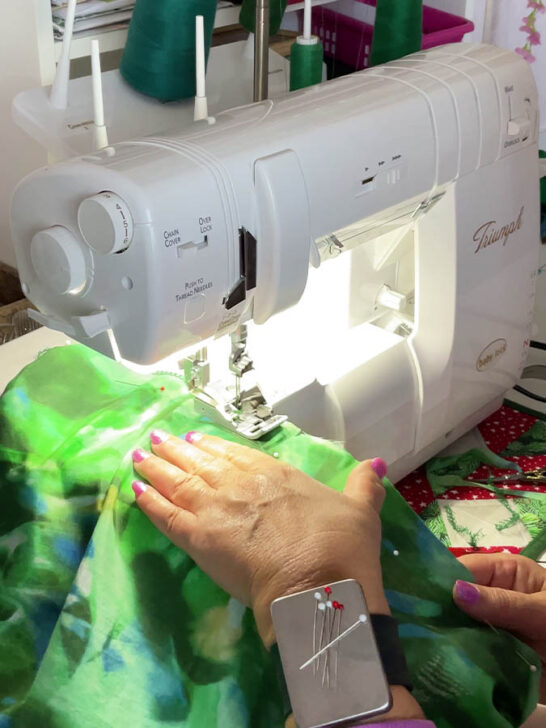
Here’s a fun fact: not all sergers play by the same rules when it comes to needles. Take my Juki MO-2000, for instance. It’s not picky and happily accepts regular sewing machine needles. But then there’s my Baby Lock serger, the diva of the bunch, insisting on its own special serger needles. It’s like they have different tastes in fashion – one’s happy in off-the-rack, while the other demands designer labels.
Regardless of your serger’s preference, keeping extra needles on hand is just good sense. It’s like always having a spare pen in your bag – you might not need it often, but when you do, you’ll be glad it’s there.
✅ Related tutorial: All About Serger Needles
Remember to change your needles regularly. A fresh needle can be the difference between a jagged edge and a perfectly smooth finish when it comes to stitch quality. Plus, it’s a lot easier to switch out a needle than to unpick a whole seam of skipped stitches!
So, stock up on the right needles for your machine. Your serger will reward you with clean, crisp stitches that’ll make your projects look professionally finished. And isn’t that why we love our sergers in the first place?


Schmetz Universal Sewing Machine Needles
#6. Practice on Scrap Fabric
Think of scrap fabric as your serger’s personal rehearsal space. Before the big performance (your actual project), let your machine warm up its gears on some understudies. Use the same fabric type you plan to sew – after all, you wouldn’t practice a ballroom dance in hiking boots, would you?
This little dress rehearsal ensures your stitches and tension are on point before the curtain rises on your main event. It’s like a sound check for your serger, making sure everything’s in harmony before the show starts.
✅ Related tutorial: 21 Scrap Fabric Projects to Transform Your Textile Trash into Treasure
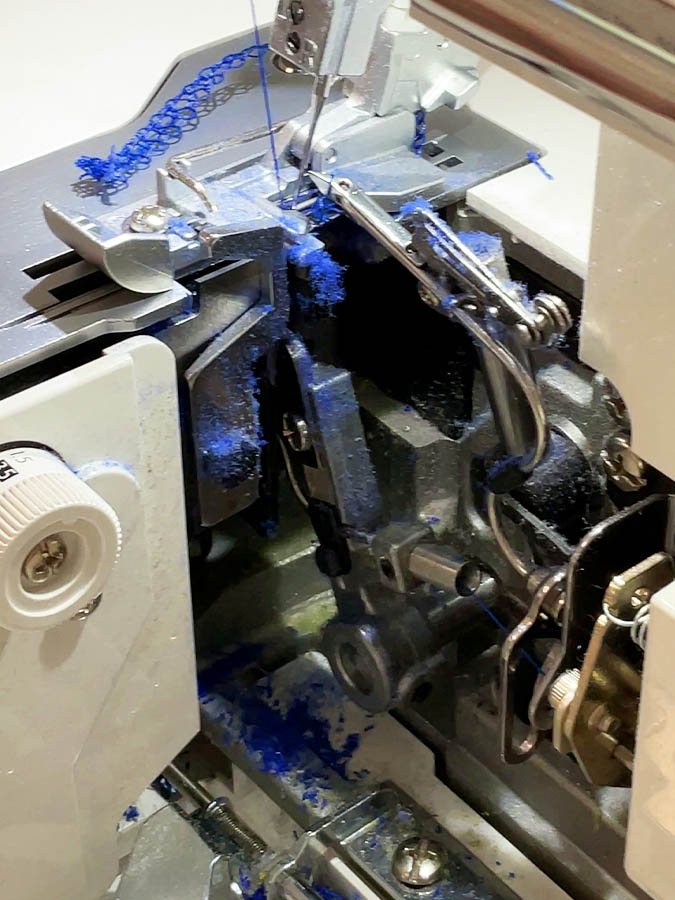
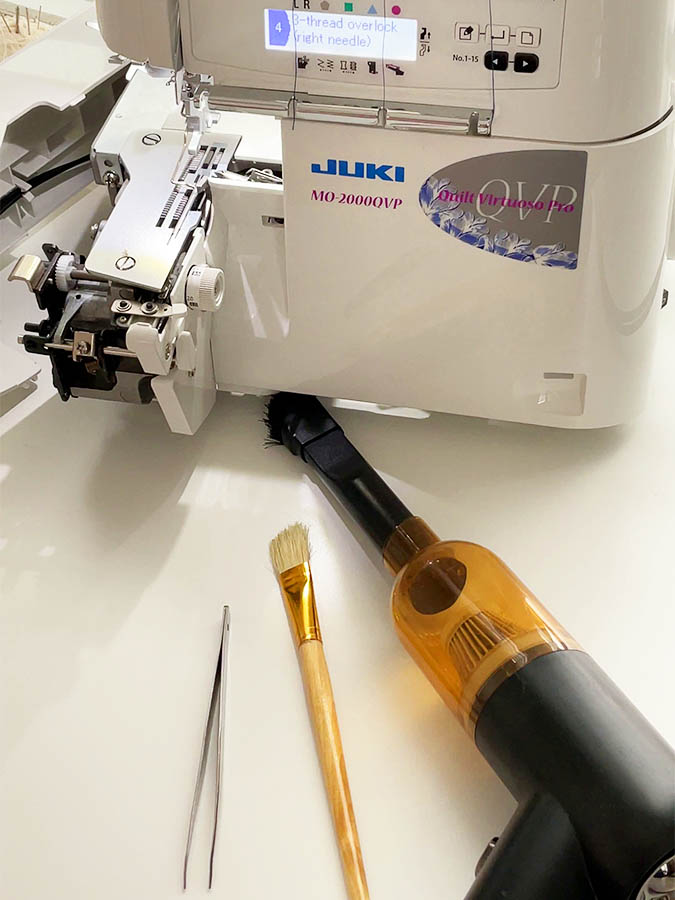
#7. Clean and Maintain Regularly
Sergers are like enthusiastic confetti makers, but instead of paper, they’re tossing tiny fabric bits everywhere. After each project, your machine deserves a little TLC to keep it running as smooth as butter on a hot pan.
Cleaning your serger is like giving it a mini spa treatment. Focus on the areas where lint loves to party – near the cutting blade and looper area. You can use a brush to sweep away the fabric confetti, but if you want to feel like a serger superhero, whip out a mini vacuum. It’s oddly satisfying to watch those tiny fabric bits disappear into the void.
✅ Related tutorial: Choosing a Mini Vacuum for Sewing Machine
So, make cleaning a regular part of your serging routine.

Auloea Mini Portable Vacuum Cleaner
#8. Start with Easy Projects
Remember learning to ride a bike? You didn’t start with the Tour de France, right? Same goes for serging. Begin with simple projects that won’t send you into a spiral of confusion.
Napkins and pillowcases are the perfect serger starter pack. They’re simple, straightforward, and satisfying. Plus, even if they turn out a bit wonky, you can always claim they’re “rustic chic.”
If you’re feeling a tad more adventurous, I’ve got just the thing for you. Check out this beautiful and useful pouch on my site – How to sew a lined zipper pouch by serger without a pattern. It’s made entirely by serger from a single rectangle of fabric.
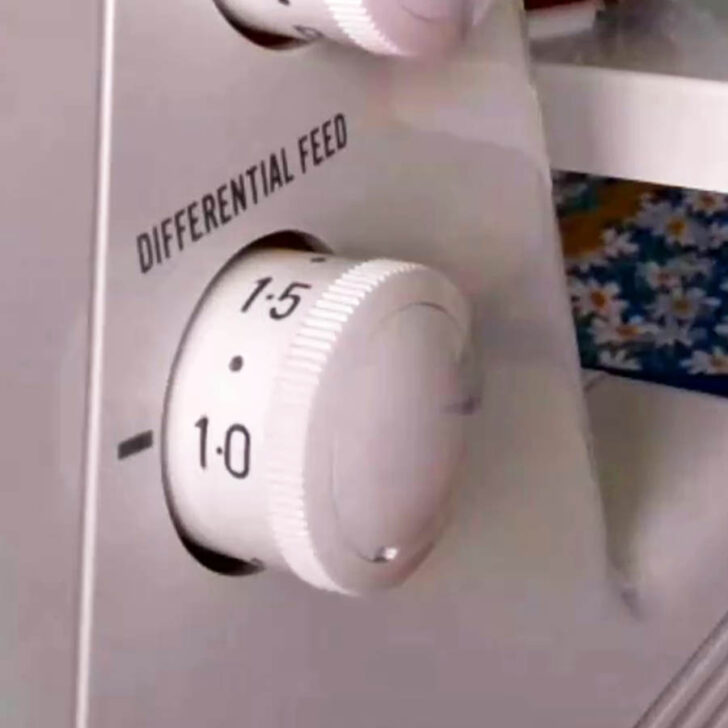
#9. Test the Differential Feed
Now, let’s talk about the differential feed. Sounds fancy, doesn’t it? This nifty feature is your secret weapon against wavy seams on knits (no more lettuce edges unless you’re actually sewing lettuce hems) and puckering on lightweight fabrics (because ruffles are cute, but not when they’re unintentional).
You can also use it to gather fabric beautifully.
Want to become a differential feed wizard? Check out my tutorial Ever Tried This on Your Serger? This Differential Feed Feature Will Amaze You where I break it down step by step.
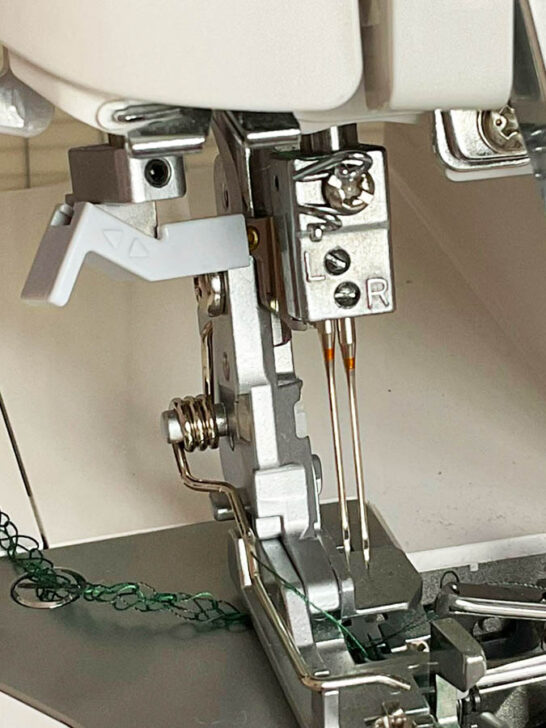
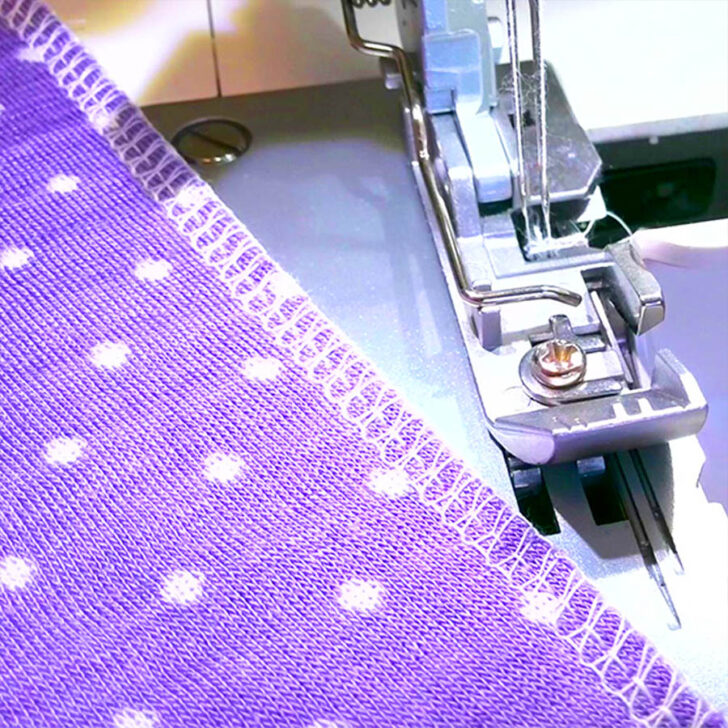
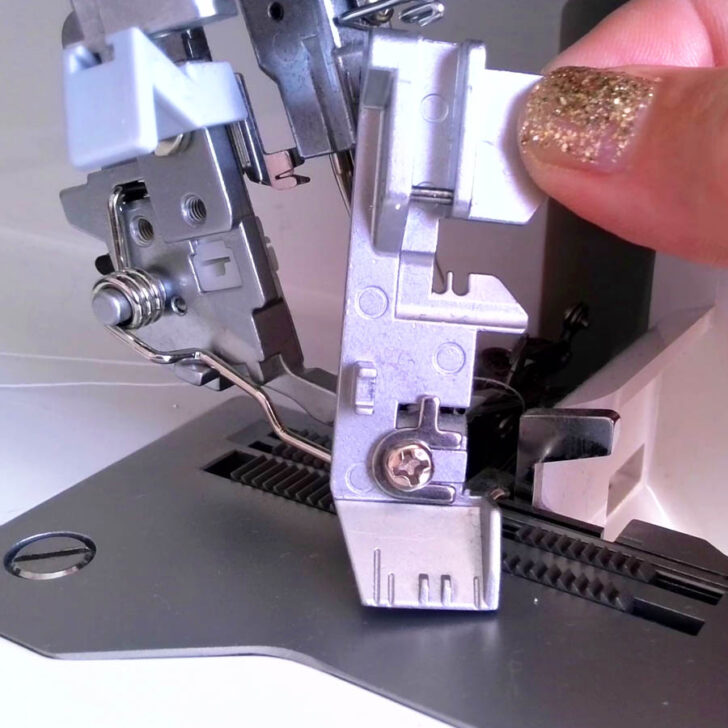
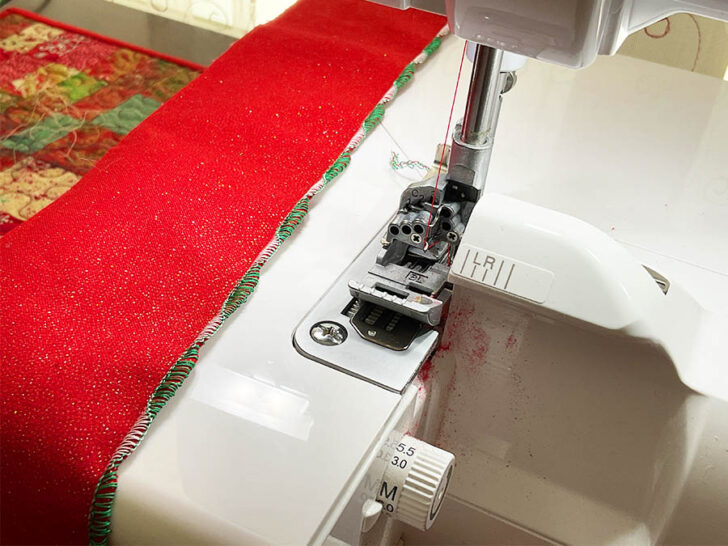
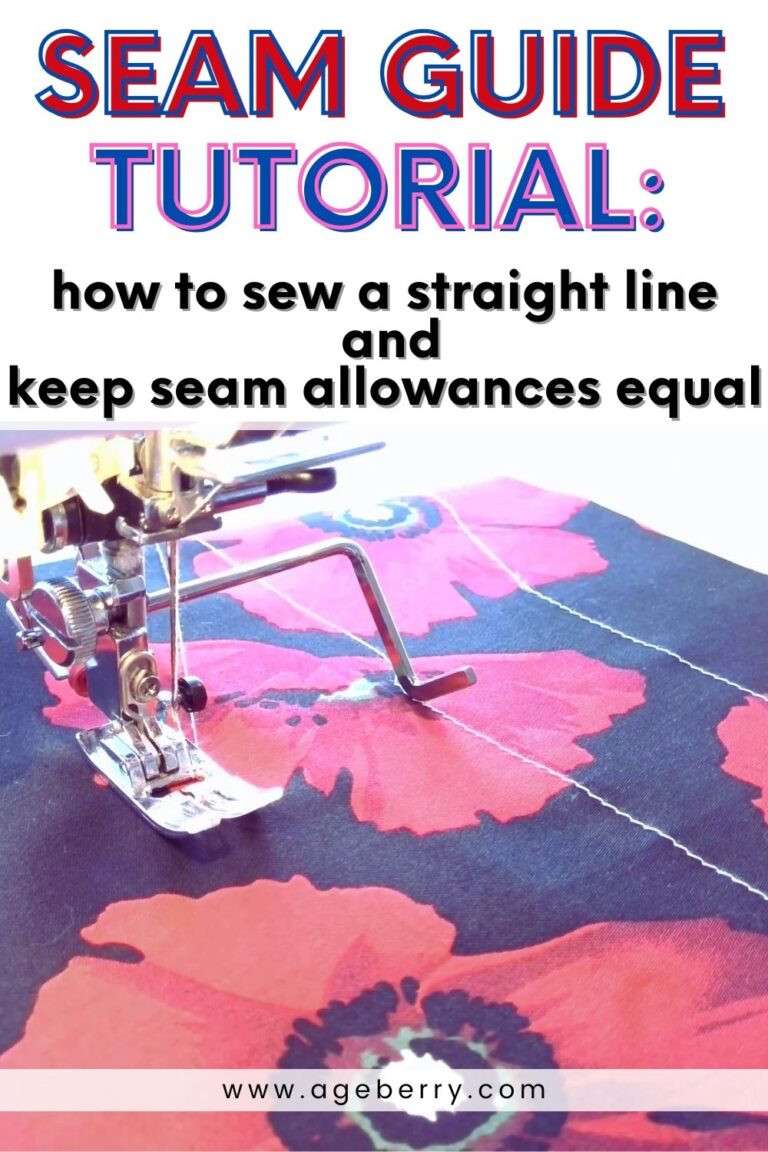
#10. Understand Seam Allowances
Be aware that serger seams are typically narrower than the standard 5/8″ seam allowances used in many sewing patterns. This narrower seam width is a fantastic advantage for reducing bulk and creating clean, professional-looking edges on garments and home décor projects. However, it requires careful consideration when planning your sewing project to ensure proper fit and finish.
When using your serger, the marks on the presser foot are invaluable tools for maintaining consistent seam allowances. These marks serve as visual guides to help you position the fabric correctly as it feeds through the machine.
Modern sergers feature lines (or marks) on the presser foot that align with the left and right needle. Some sergers also have marks that correspond to the cutting blade. These marks help you visualize how much fabric will be trimmed away as you sew.
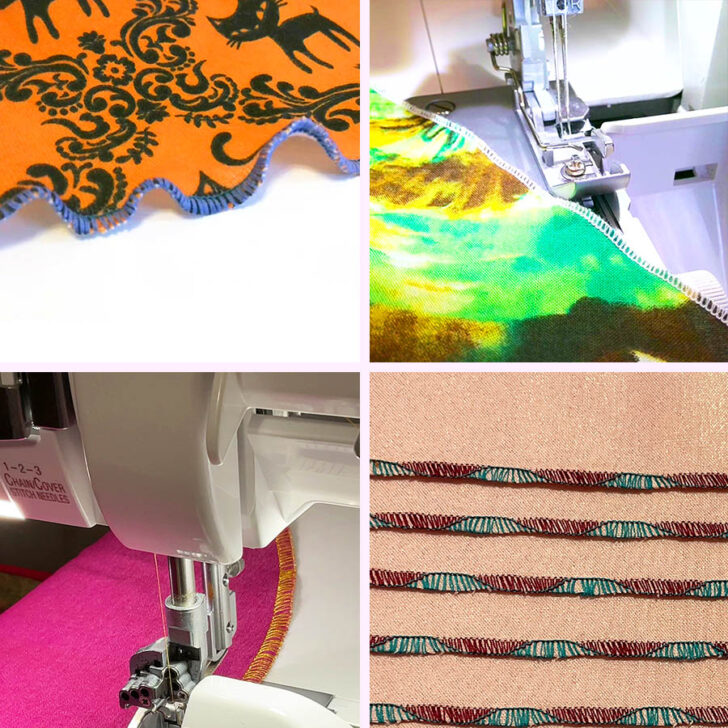
#11. Experiment with Decorative Stitches
Sergers aren’t just one-trick ponies for finishing edges.
Explore its full potential with these decorative techniques:
- Rolled hems: Create delicate, professional finishes on light to medium-weight fabrics.
- Flatlock seams: Perfect for activewear or anywhere you want a smooth, flat join.
- Decorative edges: Use specialty threads to add unique touches to your projects.
And here’s my personal favorite: the WAVE stitch on my Baby Lock serger. Who says straight lines have all the fun?
Experiment with these stitches and watch your projects go from “that’s nice” to “Wow, how did you do that?”
#12. Learn to Adjust Knife Settings
Your serger’s knife is like an enthusiastic chef – always ready to chop. But sometimes, you need to tell it to take a break. Learning to disengage the cutting knife is like giving your serger a “time out” from its trimming duties.
This skill comes in handy when you’re working with pre-cut pieces and don’t want your serger snacking on your carefully measured fabric. Also, flatlock seams require the fabric to remain untrimmed so you can achieve the correct effect.

#13. Pin Strategically
Never, ever let pins go under the serger knife. Instead, play it safe:
- Place pins parallel to the seamline.
- Keep them far from the edge, giving your serger a clear path to zoom along.
- Think of it as creating a “pin-free zone” near the knife and needles.
By pinning strategically, you’ll avoid the dreaded “clunk” of a pin meeting the knife (and potentially damaging your beloved machine). Your serger will glide smoothly through its task, and you’ll finish your project without any pin-related drama.
#14. Choose the Right Foot for the Job
Just like you wouldn’t wear flip-flops to climb a mountain, your serger needs the right footwear for different tasks. Specialty feet are like a wardrobe of shoes for your machine, each designed for a specific sewing adventure.
Specialty feet, like gathering or elasticator feet, expand your serger’s capabilities. They aren’t just fancy accessories; they’re problem solvers. They can turn tricky tasks into a walk in the park, saving you time and frustration. So next time you’re facing a challenging project, remember: there’s probably a specialty foot ready to step up and save the day.
#15. Use Stabilizers for Delicate Fabrics
Water-soluble stabilizers are like a temporary support system for your fabric. They provide a sturdy foundation, preventing your delicate or stretchy materials from being chewed up by your enthusiastic serger. Once you’re done, these stabilizers magically disappear with a bit of water, leaving no trace behind. It’s like having a fairy godmother for your sewing projects – there when you need support, gone when the job is done.
So next time you’re working with a fabric that seems too fragile to survive your serger’s embrace, remember: a little stabilizer can go a long way in creating a happily-ever-after ending for your project.

New brothread Wash Away – Water Soluble Machine Embroidery Stabilizer Backing
#16. Set Your Stitch Length Appropriately
There’s no one-size-fits-all in the world of stitch lengths. Experiment with different settings on scrap fabric to find what works best for each project.
For delicate fabrics, think shorter stitches. These create tighter seams that hold your whisper-thin materials together without letting them escape.
On the flip side, when you’re dealing with thick or heavy materials, longer stitches are your friend.

#17. Keep Fabric Flat
The key is to let the serger do its job without interference. No need to pull or stretch the fabric – your machine knows what it’s doing. Think of yourself as a fabric traffic controller, gently guiding things along without causing any jams.
If you start tugging or stretching, you might end up with puckered seams or uneven cuts.
So, keep your hands light, your fabric flat, and let the serger work its magic. With practice, you’ll develop a smooth, even feeding technique that results in beautifully finished edges every time.
#18. Learn to Troubleshoot Thread Issues
If a thread breaks, don’t panic. Rule number one: always rethread the entire machine. It’s like hitting the reset button on your serger. Don’t be tempted to take shortcuts – threading in the correct order is crucial. Think of it as following a treasure map; if you skip a step, you might end up in the wrong place.
Threading a serger is a bit like solving a puzzle. Each thread has its place, and when they all work together harmoniously, you get that satisfying “aha!” moment of a perfectly formed stitch.
So, next time your thread decides to break, take a deep breath, grab your threading chart, and methodically work your way through each looper and needle.
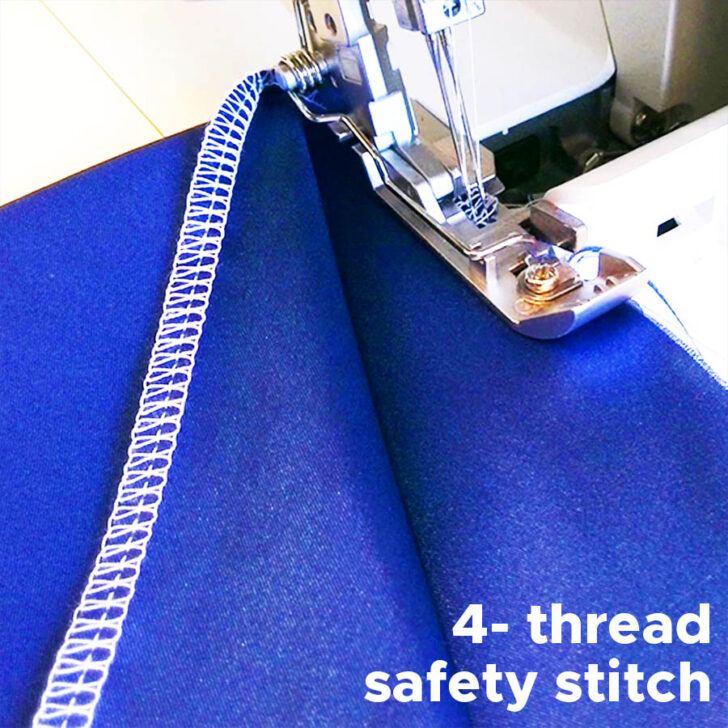
#19. Sew Seams First, Finish Later
Often, we rely on our serger’s 4-thread stitch to sew and finish seams in one go. It’s efficient, neat, and perfect for many projects. But sometimes, your sewing adventure calls for a different strategy.
For tricky projects, sew seams with a standard machine first. Sew your seams as usual, getting everything lined up just right. Then, use the serger to finish the edges for a professional result. This method gives you more control over challenging seams and is especially handy for matching patterns or working with slippery fabrics. Plus, it combines the strength of a standard seam with the professional finish of a serged edge.
#20. Make Friends with Scrap Bins
Keep a container near your serger – it doesn’t have to be fancy. But it will catch all those fabric scraps before they can escape into the wild (or worse, into your carpet).
Not only does this keep your workspace clean, but it also makes disposal a breeze.
#21. Use Safety Features
Your serger may not wear a suit and sunglasses, but it does come with its own set of safety features. These are like your machine’s personal bodyguards, there to protect you from any serging mishaps.
Many modern sergers come equipped with:
- Finger guards: These little shields help keep your digits away from the busy needle area.
- Safety switches: Some machines won’t run if the cover is open.
- Automatic shut-off: If something goes awry, some sergers will stop on their own.
These features are there for a reason. Don’t be tempted to bypass them in the name of convenience.
#22. Store Threads Properly
Sergers are thread enthusiasts, gobbling up cones really fast.
Here’s how to keep your threads happy:
- Find a dry spot: Moisture is thread’s nemesis. Keep your cones in a dry area to prevent any unwanted frizz.
- Dust-free zone: Dust can make your threads grumpy. Store them in a closed container or drawer to keep them clean.
- Avoid direct sunlight: UV rays can fade and weaken threads over time.
- Stand them up: Store cones vertically to prevent tangling.
Well-stored threads mean fewer interruptions during your serging sessions.
#23. Practice Thread Blending
Some thread colors blend well with most fabrics, making them versatile for various projects. I like to call it, “The Chameleon Technique.” Just like these color-changing lizards, your threads can adapt to blend seamlessly with different fabrics.
- Gray: The ultimate middle-ground, playing nice with both light and dark fabrics.
- Beige: Perfect for earthy tones and naturals.
- White: A classic that works wonders on lighter fabrics.
Keep a stash of these colors on hand. They’re your go-to for those “I need to finish this project NOW” moments when you don’t have time for a thread shopping spree.
The goal is for your serged edges to enhance, not distract from, your beautiful project.
#24. Create Decorative Thread Effects
Your serger isn’t just a tool for clean, professional edges – it’s also a gateway to stunning decorative possibilities. By experimenting with specialty threads, you can transform simple seams into eye-catching design features.
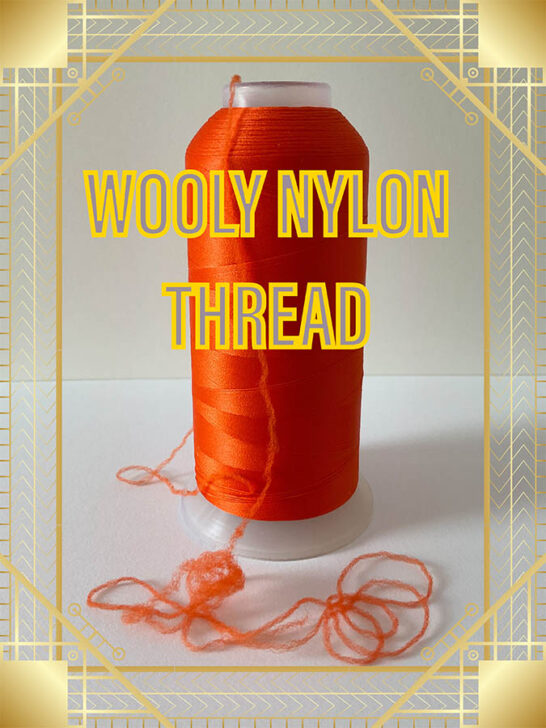
Wooly nylon, metallic threads, variegated threads, and even yarn can take your serger projects to a whole new level of creativity. These threads add texture, color, and personality, making them perfect for embellishing garments, home décor, and accessories.
Wooly nylon is a stretchy, soft thread often used in the loopers of a serger. Its fluffiness fills in the gaps between stitches, creating a fuller, more textured appearance.
✅ Related tutorial: Wooly Nylon Thread | What It Is And How To Use
Metallic threads bring sparkle and shine to your serger projects. While they can be slightly more challenging to work with due to their delicate nature, they’re worth the effort for decorative stitching.
✅ Related tutorial: Metallic Thread For Embroidery And Sewing: Top 10 Tips You Must Know
Variegated threads change color along their length, creating a beautiful gradient effect.
Many sergers can handle lightweight yarns in the loopers, offering a unique opportunity to add bold texture and style to your projects.
#25. Mind the Noise Level
Sergers can be noisy little machines. They hum, buzz, and sometimes sound like they’re having a lively conversation with your fabric. While we appreciate their enthusiasm, sometimes we need to turn down the volume a bit.
So, use the vibration-absorbing mat. Placing your machine on one of these mats can help reduce the noise, so you don’t feel like you’re operating heavy machinery, keep your serger stable, preventing it from doing the cha-cha across your sewing table, and minimize vibrations, which can be especially helpful if you live in an apartment or sew late at night.
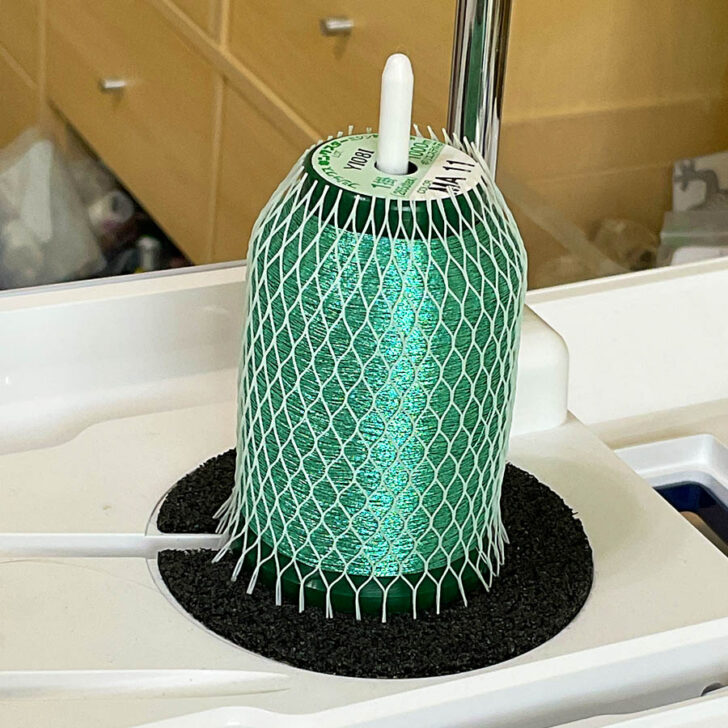
#26. Use Thread Nets for Slippery Threads
Some threads have a rebellious streak. Rayon, metallic, and their slippery friends like to misbehave, tangling and unwinding. But thread nets are here to save the day.
They keep everything in check without cramping your thread’s style.
They prevent thread from unwinding too quickly, reducing those annoying tangles. They help maintain consistent tension, leading to more even stitches. They’re easy to use – just slip them over your thread cone and you’re good to go.
So next time you’re working with those fancy, slippery threads, remember: net it and forget it!
#27. Embrace Stretch Fabrics
Stretch fabrics and sergers go together like peanut butter and jelly – they’re just meant to be! Your serger absolutely loves to sew with knits and other stretchy materials. It’s like they speak the same language of flexibility and fun.
Working with stretch fabrics on your serger isn’t just easy – it’s downright enjoyable. So go ahead, grab that jersey knit or spandex blend, and let your serger show off its moves!
To make this even smoother use a ballpoint or stretch needle. They glide between the fabric fibers instead of piercing them.
#28. Don’t Fear Mistakes
Oops! Did you make a mistake? No worries! Contrary to popular belief, serger seams aren’t permanent tattoos on your fabric. In fact, they’re more like those temporary tattoos you had as a kid – removable with a little effort.
If you find yourself in a “whoopsie” moment:
- Take a deep breath. Remember, even sewing superstars make mistakes sometimes.
- Grab your seam ripper. It’s here to save the day.
- Gently unpick the stitches. It’s usually easier than you think – those threads will often come out in one satisfying pull.
- Redo the section. Now you get a second chance at serger perfection!
The key is to not let fear of mistakes hold you back. Your serger is forgiving, and so should you be. Each little mishap is just a stepping stone on your path to serger mastery.
This reminds me of a joke: “My husband told me to embrace my mistakes; I gave him a hug”.
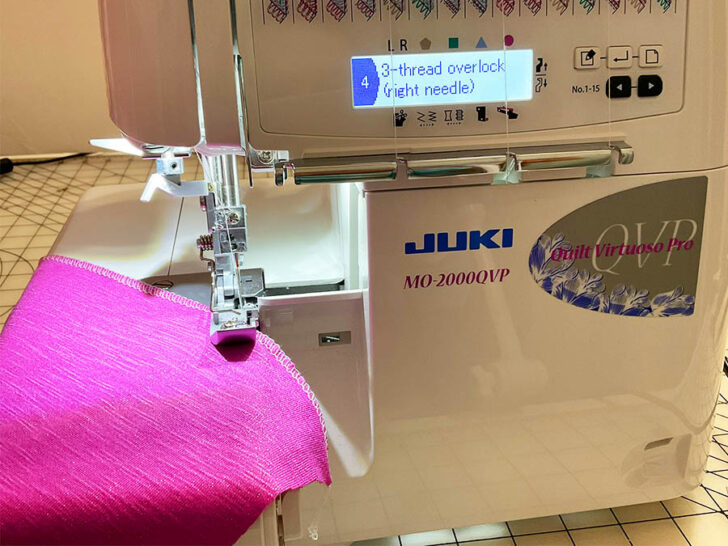
#29. Start with Basic Stitches
Think of your serger as a friendly language tutor. It’s eager to teach you all sorts of fancy stitches, but it knows the importance of starting with the basics. The 3- and 4-thread overlock stitches are simple, useful, and a great place to start.
Why stick to the basics at first?
- They’re versatile: These stitches work for most everyday projects.
- They’re forgiving: Perfect for when you’re still getting to know your machine.
- They build confidence: Mastering these is like getting your first gold star in serger school.
Even expert sewists use these basic stitches regularly. So don’t feel pressure to jump into advanced techniques right away. Your serger isn’t going anywhere – those rolled hems will still be there when you’re ready for them.

#30. Have Fun Experimenting
Once you’ve got the basics down, it’s time to let your serger out to play. Think of your machine as a box of colorful crayons – sure, you can use it to draw simple lines, but why stop there when you can create a masterpiece?
Try these fun techniques:
- Lettuce hems: Give your edges a playful, ruffled look.
- Flatlocking: Create interesting decorative seams that look great on both sides.
- Mixing thread colors: Who says all your threads need to match? Go wild with color combinations!
The key is to approach each new technique with a sense of adventure. Don’t worry about perfection – focus on the fun! Every experiment teaches you something new about your serger’s capabilities (and your own creativity).
Remember, there’s no “serger police” checking if you’re doing things the “right” way. So go ahead, break some rules, try new things, and most importantly, enjoy the process. Your serger is ready for whatever wild ideas you throw its way!
Did you find this tutorial helpful? If so, save this pin (see below) on your sewing board so you can come to these sewing tips later, and follow me on Pinterest for more tips, tutorials, and inspiration!
latest posts
- Corset Pressing Board for Sewing: What It Does and How I Use It
- 7 Essential Tools and Settings for Sewing Denim on a Regular Sewing Machine
- That Purple Thang: 10 Smart Ways to Use This Weird Little Tool
- 20+ Reasons Your Sewing Machine Thread Keeps Breaking (+ Solutions)
- Dresden Plate Quilt Block: 4th of July Fireworks
- How To Sew Curves the Easy Way Using a Curve Master Presser Foot
- 30 Sewing Hacks That Turn Ordinary Items into Useful Sewing Tools
- Seam Allowances in Sewing Patterns: What They Are and How to Use Them
- What Do You Call a Person Who Sews? I Asked My Readers and Got 1,408 Opinions


I’m interested in your ebook. Do the 30 esssenttips sewing tipsapply to all sergers?
I own a Baby Lock Imagine.
I believe the tips apply to all sergers; however if you find the book is not useful please let me know I will offer a full refund.
Adjusting the tension on the serger can be easier to learn if 4 different colors of thread are used in the beginning. I learned by using red, blue, yellow and green to be able to see which tension wheel I need to adjust and how much to achieve the stitching I wanted.
Also, for a catch bin for the trimmings, I use a small plastic grocery bag. I place one handle under the left leg of the machine and one handle under the right leg. Pull the opening of the bag closest to you and everything will just fall in as you sew. When it is full, just remove it and dump it into the trash. Start again. Viola!!