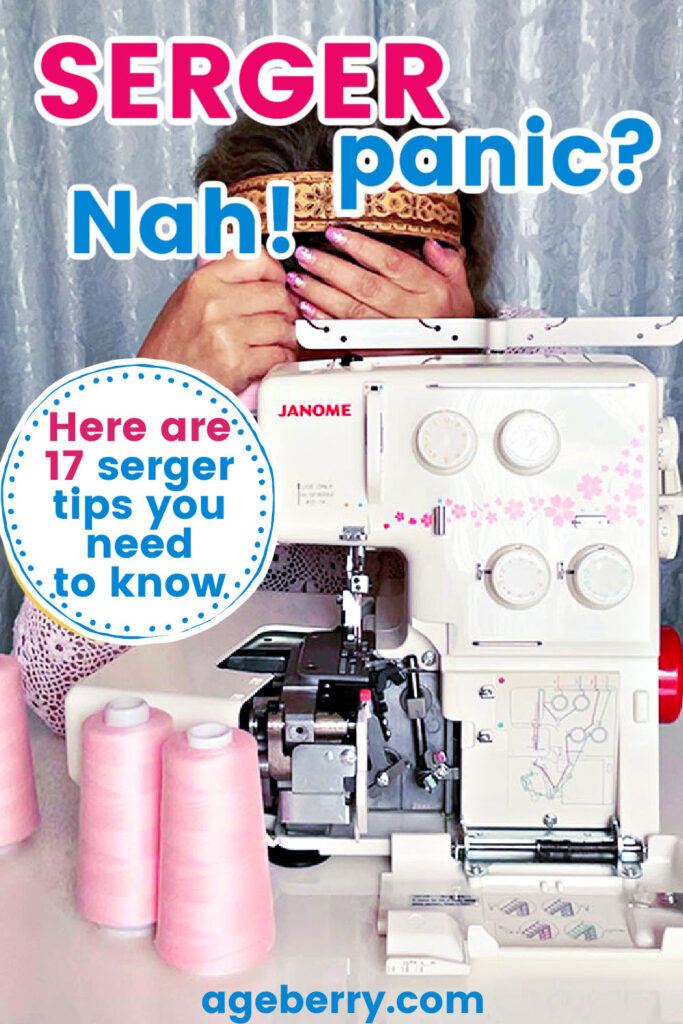
Serger Panic? Nah! Here Are 17 Serger Tips Every Sewist Needs to Know
First, let’s clarify one thing: the “serger” and “overlocker” are nowadays the same machine under a different name. “Serger” is the preferred term in North America while the rest of the world seems to prefer “Overlocker” or “Overlock machine”.
But no matter the name, the serger is a machine that can still intimidate beginners (and sometimes even experienced sewists)
I still remember the first time I sat in front of my serger. There were four threads, two needles, a blade, and what felt like a hundred dials staring back at me. It looked less like a sewing machine and more like something NASA might use to launch satellites. And of course, my very first seam came out looking like a bird’s nest had a bad day.
Over the years, I’ve learned that every sewist goes through the same serger “panic phase.” One day, the stitches are perfect. The next day, your serger decides to throw a tantrum—skipping stitches, breaking threads, or chewing up fabric.
✅ Related tutorial: Serger vs. sewing machine
I get questions about serger problems all the time from my readers:
- “Why is my serger skipping stitches?”
- “What is this differential feed thing and why does it sound like math homework?”
- “Do I really need special serger thread, or is regular thread fine?”
So, I decided to gather some of the most common serger questions and put them in one post.
Why is my serger skipping stitches, and how can I fix it?
If your serger starts skipping stitches, it can quickly disrupt your sewing rhythm. Those unexpected gaps aren’t just annoying—they weaken your seams. But there’s no need for panic yet—this common serger hiccup usually has an easy fix.
Most often, skipped stitches happen due to these reasons:
- Dull or Damaged Needles: Sergers are needle-sensitive machines. Even slightly dull or bent needles (perhaps invisible to the naked eye) can lead to skipped stitches. Swap your needles regularly—after 8 to 10 hours of sewing, or if you’re noticing issues. Sharp, fresh needles make all the difference.
- Incorrect Needle Type or Size: Using the wrong needle is like trying to unlock a door with the wrong key—it just won’t work. Always use needles recommended for your serger. Universal or ballpoint needles, typically sizes 75/11, 80/12, or 90/14, work best.
- Threading Issues: Check your threading carefully. Even seasoned serger users can occasionally miss a guide or tension disk. Re-thread completely (yes, all threads!), making sure each one clicks into the correct tension disks.
- Fabric and Needle Compatibility: Sewing thick fabrics with too small needles or thin, stretchy fabrics with universal needles can also cause skips. Match your needle type to your fabric: ballpoint for knits and universal needles for woven fabrics.
- Tension Troubles: If your tensions are too tight, loops can’t form properly, resulting in skipped stitches. Slightly loosen the tensions and test on scrap fabric until stitches are consistent.
If you’ve tried these fixes and your serger still skips stitches, it might be time to check with your dealer or sewing machine technician. But most likely, one of these quick fixes will get your serger happily stitching again in no time.
What’s causing loose serger stitches?
Loose stitches often appear as loops hanging off the fabric edge or seams that pull apart too easily. When this happens, two settings are usually to blame—thread tension and stitch width.
- Incorrect Thread Tension:
Your serger has separate tensions for the needles and loopers. If both looper tensions (upper and lower) are too low, the threads will look loose and form sloppy loops along the fabric edge. If the needle tension is too loose, the seam may not hold firmly, and the fabric can gap. The fix? Adjust one tension dial at a time, starting with the loopers. Make small changes and test on scrap fabric until the stitches tighten up and form a balanced seam. - Improper Stitch Width:
The stitch width affects how securely the loops wrap around the fabric edge. A width that’s set too narrow (when all other serger settings are correct) can make the stitches look loose and floppy. Widen the stitch width slightly and test until the stitches grip the fabric cleanly.
Other factors like incorrect threading or worn needles can cause loose stitches too, but tension and stitch width are the most common culprits.
Note: Some of the links on this page are affiliate links. This means I will receive a commission if you order a product through one of my links. I only recommend products I believe in and use myself.
How often should I change the needles on my serger?
If you read sewing books, they’ll tell you to change serger needles every 8 to 10 hours of sewing time. That sounds great in theory… but honestly, who is tracking serger hours like it’s a gym membership? I use my serger all the time, and I have never thought, “Ah yes, that’s been exactly 9.5 hours. Time for fresh needles!”
In real life, a better rule is every few projects or whenever the stitches start looking less than perfect. For heavy fabrics like denim or canvas, or for projects with lots of layers, you may need to replace them even sooner.
You should also change needles if you notice:
- Skipped or uneven stitches.
- Popping or clicking sounds while sewing.
- Tugging or small holes in delicate fabrics.
Always change both serger needles at the same time. Even if only one needle seems worn, replacing them as a pair ensures consistent stitch quality.
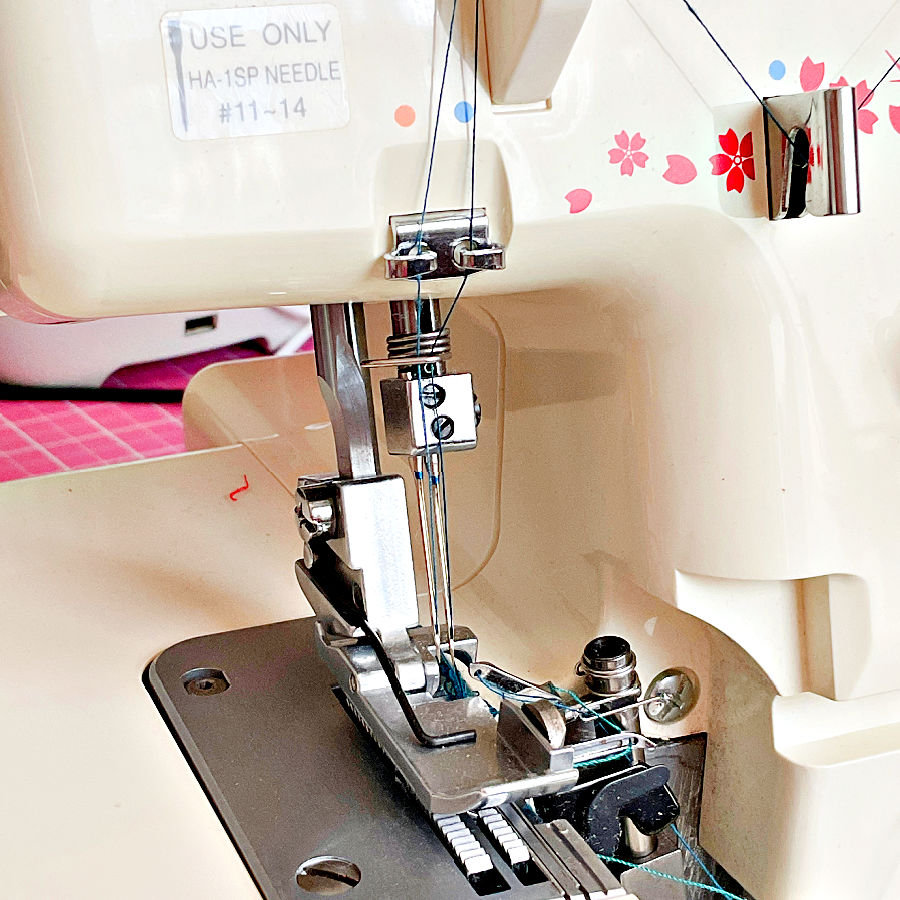
Let me mention that I have a detailed guide called All About Serger Needles. Check it out if you want to know which needles to use and why they matter.
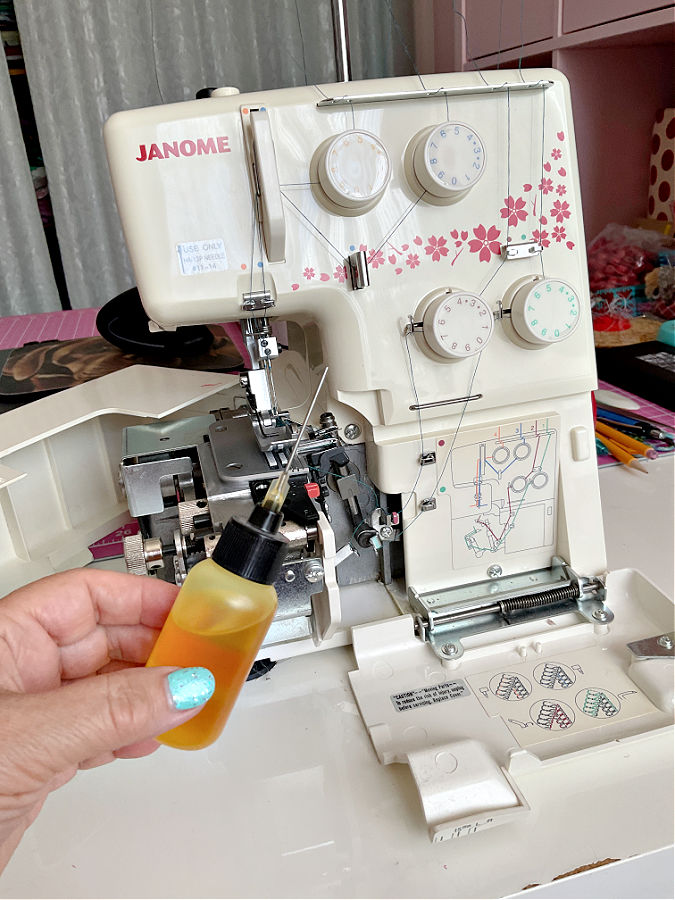
Of course, if you look at the image above, the manufacturer (Janome) has seen the issue of the needle type important enough to place the needle type on the note right above the needle assembly!
Do I really need special serger thread, or can I use regular sewing thread?
Yes, most of the time you really do need serger thread. Serger thread is finer, smoother, and wound on large cones so it can glide through your machine at high speeds without breaking or creating bulky seams.
Regular sewing thread is generally thicker, which can make your stitches look bulky. Plus, sergers eat thread quickly, and using small spools means you’ll run out mid-seam more often than you’d like.
But sometimes, regular sewing thread is fine too. For example:
- When you only need a small amount of a specific color and don’t want to buy full cones.
- If you’re serging a visible seam where you want the stronger, slightly thicker look of regular thread.
A good compromise is to use regular sewing thread in the needles and serger thread in the loopers. This combination works well because the loopers use far more thread, while the needle stitches are less visible and can benefit from the stronger regular thread.
There’s also specialty serger thread like wooly nylon. This soft, fluffy thread is perfect for sewing swimwear, lingerie, or anything with a lot of stretch. It creates beautiful, full coverage edges and works wonders in rolled hems. I have a detailed tutorial on using wooly nylon thread Wooly Nylon Thread | What It Is And How To Use so, take a look if you want to see how this magic thread works.
If you want to dig deeper into all the different types of serger threads, I have a complete guide that covers it all – Best Serger Thread | What To Use | Brands
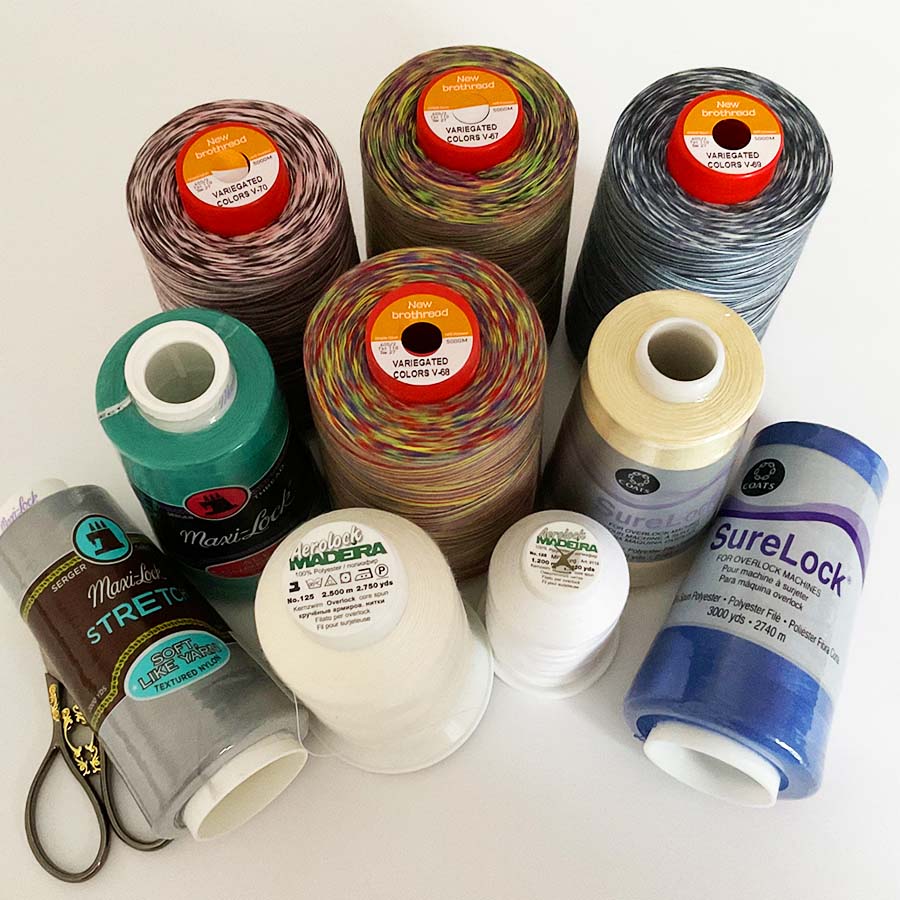
There are many brands of quality serger thread, and they’re easy to find. I’ve had excellent results with New Brothread serger threads. It is available in large cones (lower price) and in many colors.


How do I know when the blade on my serger needs replacing?
The blade on your serger works hard, but from my experience, it does not need replacing very often. Many sewists go years without changing the blade even if they serge frequently. If you mostly sew light- to medium-weight fabrics like cottons or knits, your blade will probably last a long time.
Actually, all the sergers I have seen have two blades, usually called “upper” and “lower” blades. The upper blade is moving while the lower one is usually fixed.
A serger’s blade is like a pair of scissors that trims every seam as you sew. Over time, it will dull, and when that happens, your serger will let you know— though not always in the most polite way.
Here are the telltale signs.
- Frayed or Ragged Edges: Instead of cutting cleanly, the blade chews the fabric, leaving a fuzzy or uneven edge.
- Difficulty Cutting Thick Fabrics: If you notice the serger struggling with thicker layers that used to glide through, the blade is probably dull.
- Threads Snagging on the Cut Edge: A dull blade can pull threads rather than cutting them cleanly, which leads to messy seams.
- A Noticeable “Crunching” Sound: A dull blade can sound rough when cutting, especially on woven fabrics.
For most sewists, replacing the blade every few years is enough, unless you regularly work with heavy fabrics like denim, canvas, or upholstery fabric.
Can you change it yourself?
Yes, in most cases you can. The process is usually as simple as loosening a couple of screws and swapping out the blade, but you’ll want to follow your serger’s manual carefully.
If you’re not comfortable doing it yourself, your local sewing machine shop can change it for you when you bring your serger in for maintenance.
Where to buy blades for your serger
Replacement blades are easy to find online. Check sewing specialty stores, your serger’s official website, or Amazon. Always make sure to buy blades that match your serger model — universal blades are not always a good fit. If you’re unsure, your local sewing machine dealer can usually order the correct set for you.

Can I sew without the cutting blade engaged, and when should I do this?
Yes, you can sew without the cutting blade engaged on your serger. Most sergers have a setting or lever that lets you disengage the blade. But the thing is that you usually want that blade working because it trims the fabric and keeps your seam neat. Without it, the serger stitches can look uneven or fall off the fabric edge if you’re not guiding it perfectly.
When can you turn the blade off?
- Decorative Stitching: If you’re using your serger for flatlock stitches, disengage the blade.
- Pre-cut Fabric Edges: For some projects where the edges are already cut to the exact size with exact seam allowances you don’t want to cut, trimming isn’t necessary.
- Delicate Fabrics: Some lightweight or lace fabrics can snag or stretch when trimmed. Turning off the blade can help prevent damage.
A word of caution: Without the blade, you need to guide the fabric with extreme precision. If you steer too far away from the edge, the loops will hang off and leave the seam weak. If you push the fabric too far inside, the stitches will land in the middle of the fabric instead of wrapping the edge. This can make the seam bulky, and the threads may snap or the needle may break from the strain.
I know a sewist who disengages the blade even for regular overlock stitches because she doesn’t want to dull the blade. Personally, I don’t think that’s a good idea. A serger’s purpose is to trim and finish edges in one smooth step.
For most seams, especially in garment sewing, leaving the blade engaged will always give the cleanest, most reliable finish. Blades are designed to handle regular trimming, and they don’t dull quickly with normal fabrics.
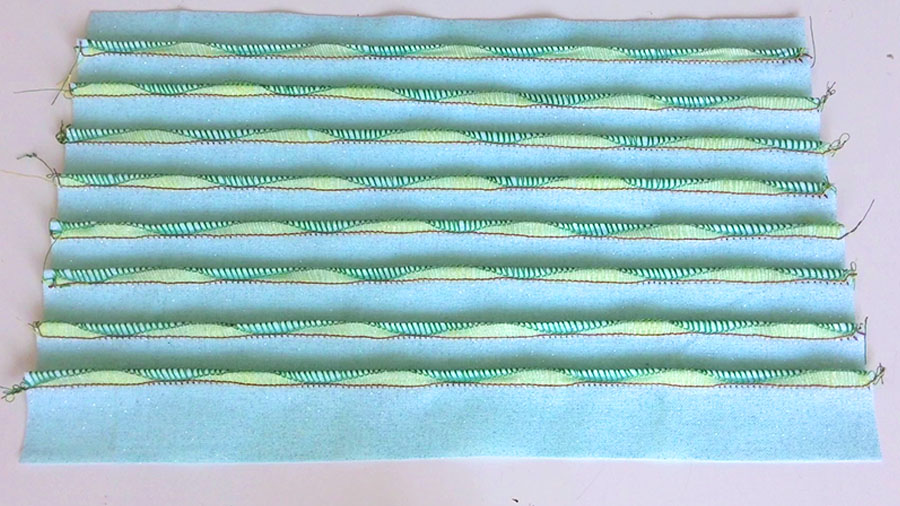
How can I prevent fabric edges from curling or waving when using my serger?
If your fabric edges look like ruffled potato chips after serging, it’s usually not the fabric’s fault—it’s the settings. Sergers are powerful, and when the settings don’t match your fabric, the feed and tension can stretch or distort it. Luckily, there are a few easy fixes.
1. Adjust the Differential Feed
The differential feed is your best friend here. If your fabric edges are waving or stretching, increase the differential feed slightly. This helps move the front and back feed dogs at different speeds, preventing the fabric from being pulled too much as it’s stitched.
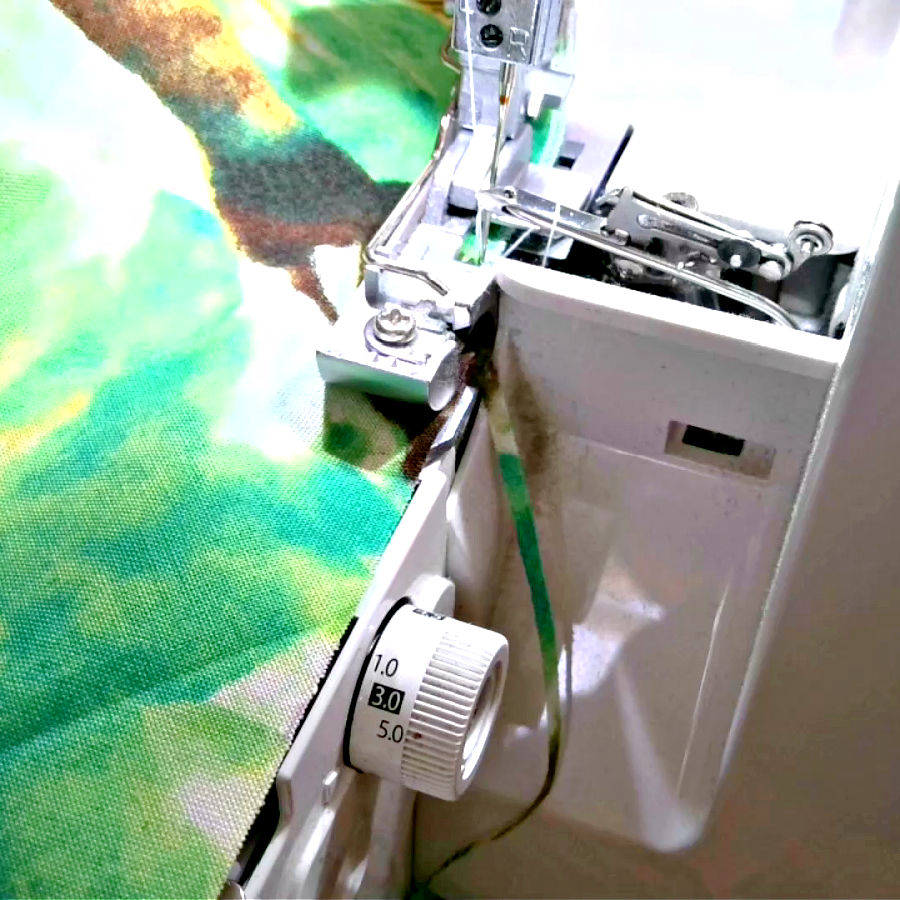
2. Lengthen the Stitch Length
A very short stitch length can sometimes cause curling, especially on lightweight or stretchy fabrics. Try lengthening the stitch slightly to see if the edge relaxes.
3. Reduce Presser Foot Pressure
Too much pressure can stretch delicate fabrics. If your serger has an adjustable presser foot pressure setting, lower it just a bit (check your manual to see how to adjust this on your model).
4. Watch Your Tensions
Overly tight needle or looper tensions can create puckering or pulling along the edge. Test by loosening the tensions one at a time until the stitch looks smooth.
5. Stabilize the Fabric
For ultra-light fabrics (think chiffon or silky knits), you can use a water-soluble stabilizer to prevent stretching as you sew.
6. Let the Serger Feed the Fabric
Resist the urge to pull or push your fabric through. Even a slight tug can stretch knits or delicate materials, causing that wavy look.
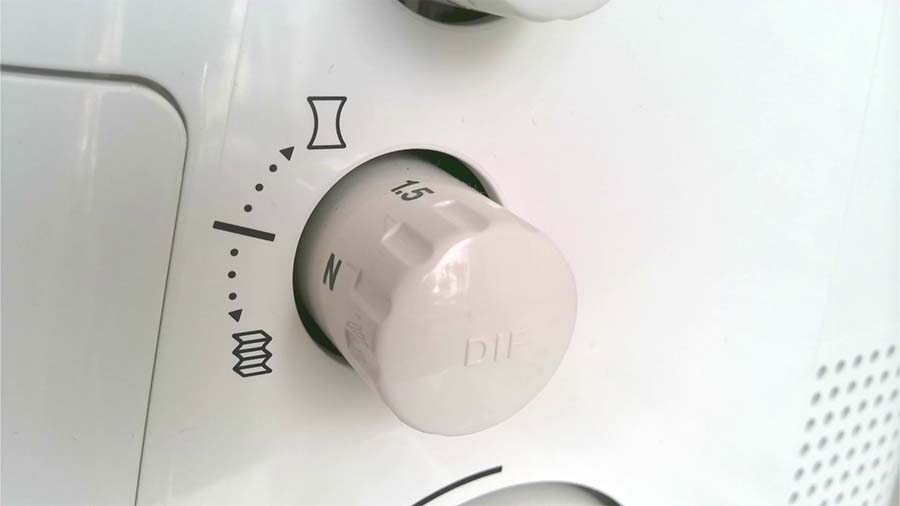
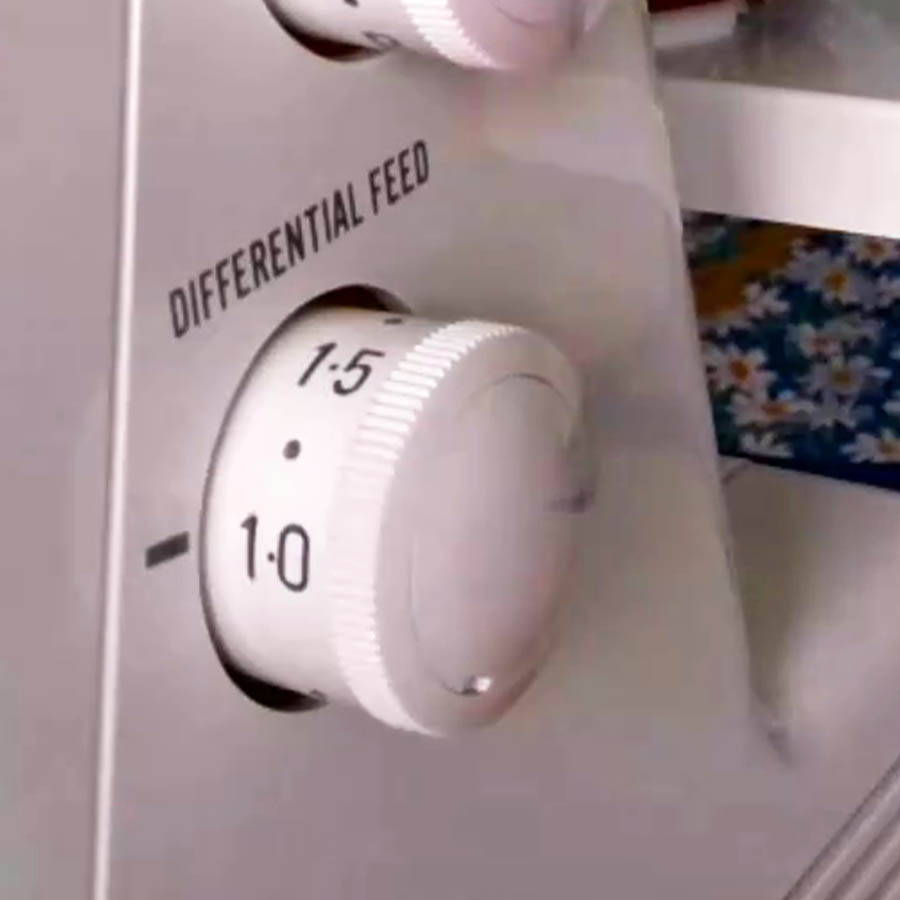
What’s the purpose of differential feed, and when should I adjust it?
Differential feed controls how the front and back feed dogs move fabric through your serger. Instead of both sets feeding at the same speed, you can adjust the ratio so that one set pulls or pushes fabric slightly faster. This feature is very useful when working with tricky fabrics that like to stretch, pucker, or ripple.
- When to Increase Differential Feed: If your knit fabrics are stretching or producing wavy seams, turning the differential feed up helps to prevent the stretching.
- When to Decrease Differential Feed: This lower setting is typically used to stretch the fabric slightly as it is being serged. If your seams are puckering, especially on lightweight woven fabrics, lowering the differential feed helps prevent gathering and keeps the edge smooth.
- For Decorative Effects: You can even play with extreme settings to intentionally create lettuce edges or ruffles.
I have a detailed tutorial on using the differential feed with examples and step-by-step adjustments. If you want to see how it works in real projects, check out my full guide – Ever Tried This on Your Serger? This Differential Feed Feature Will Amaze You
Why does my serger keep jamming, especially on thicker fabrics?
If your serger is jamming on thick fabrics, it’s usually because it’s being forced to chew through more layers than it can handle without adjustments. Here’s what to check.
- Needles and Blade: Dull needles or a blade that’s past its prime can snag on thick layers, causing jams. Fresh needles and a sharp blade make a difference.
- Presser Foot Pressure: If your presser foot pressure is too high, it can prevent thick fabric from feeding smoothly. Lower it slightly.
- Thread Tension: Tight tensions can make thick fabric resist moving under the foot. Loosen them a bit and test again.
- Stitch Length: A longer stitch works better on bulky fabrics. A short stitch can get stuck in dense layers.
- Fabric Prep: Trim extra bulk at seams before serging. For example, cut down heavy seam allowances or grade layers to reduce thickness.
If all else fails, slow down your speed. Sergers are fast, but thick fabric needs a little patience.
Can I use my serger to sew woven fabrics, or is it only for knits?
Yes, your serger can absolutely sew woven fabrics. While sergers are often linked with stretchy knits because of their ability to handle stretch without popping seams, they work just as well on woven fabrics. You can use a serger to:
- Finish raw edges of woven fabrics to prevent fraying.
- Sew seams on lightweight wovens like cotton or linen.
- Create rolled hems for a clean finish on delicate fabrics like chiffon or organza.
For wovens, make sure you’re using universal needles (not ballpoint) and adjust your tension and stitch width to suit the fabric. You may also want to reinforce the seam with a straight stitch from your sewing machine, especially on high-stress areas like shoulders or side seams.
What’s the best way to clean and maintain my serger at home?
Sergers work fast and generate a surprising amount of lint, especially when trimming fabrics. A regular cleaning routine will keep your stitches smooth and prevent mechanical problems.
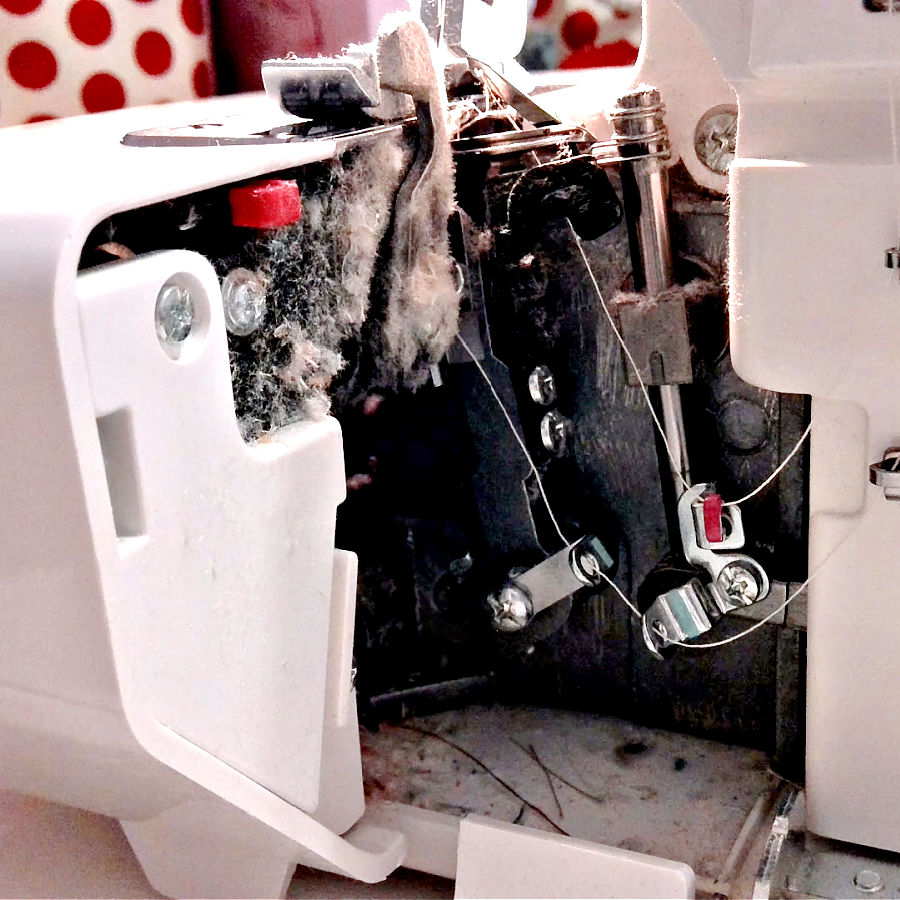
Here’s a simple cleaning routine.
- Unplug the machine before you start.
- Open the front cover to access the loopers and lower threading area.
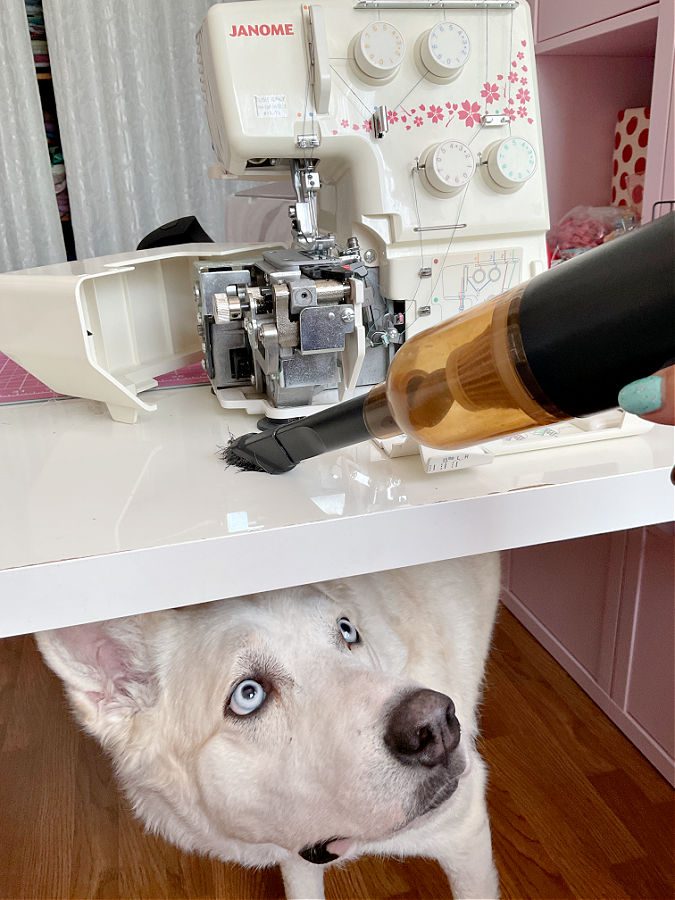
- Use a small brush or mini vacuum to remove lint. Mini vacuums are amazing for this because they pull out every bit of dust and thread fluff hiding in corners—way better than just brushing. I use mine every time I serge.
- Wipe the exterior with a soft, dry cloth.
- Oil if needed (check your manual—many modern sergers are self-lubricating, but some require a drop of sewing machine oil in key spots).
✅ Related tutorial: Sewing Machine Oil | Top 10 Questions Answered
- Change needles and check the blade as part of routine maintenance.
- Cover your serger when not in use to keep dust away.
If you want to see which mini vacuums work best for cleaning sewing machines, I’ve put together a detailed guide with my recommendations – Choosing a Mini Vacuum for Sewing Machine
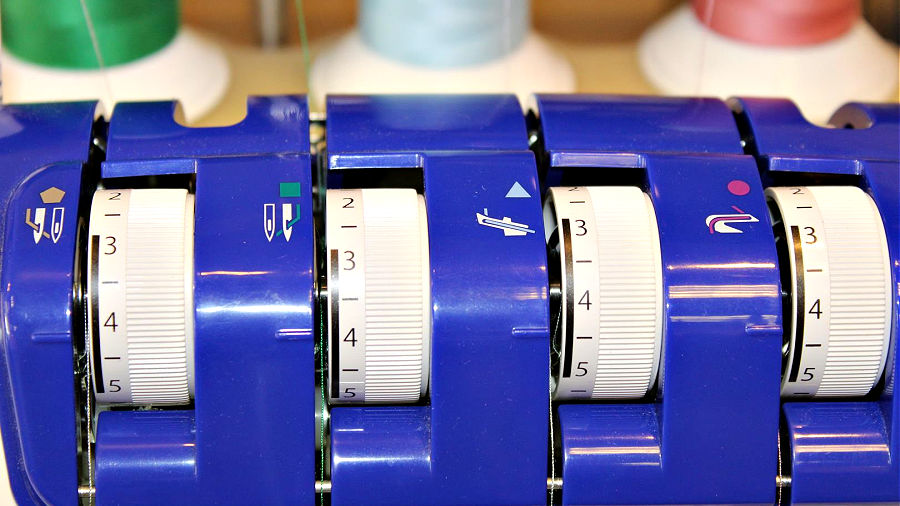
What should I do if my serger tension settings don’t match the manual’s recommendations?
This is perfectly normal and happens more often than you think. The numbers in your manual are just starting points, not strict rules. Different fabrics, threads, and even humidity levels can change how your serger behaves.
Start with the recommended settings. If the stitch doesn’t look good, adjust one tension dial at a time until the stitch is balanced and neat. It’s all about testing and fine-tuning—sergers are picky, and sometimes the perfect tension is a half-turn away from what the manual says.
But what if no adjustment fixes the problem?
- Check your threading: A thread that’s not fully seated in a tension disk or guide will make perfect tension impossible.
- Clean the tension disks: Lint or dust can prevent proper tension. Slide a piece of thick thread or dental floss between the disks to clear debris (machine off, of course).
- Look at your thread quality: Cheap or fuzzy thread can throw everything off.
- Test with new needles: Worn needles can cause stitch issues that mimic tension problems.
Think of the manual’s numbers as a suggestion, not a promise. The “right” tension is the one that makes your stitches look great on your fabric.
Why is oil leaking from my serger, and how do I stop it?
A tiny bit of oil around the looper area can be normal, especially after servicing. But visible drips or oily stains on fabric mean something is off.
Common reasons for oil leaks:
- Too much oil applied: Over-oiling is the most common cause. A few drops are all that’s needed.
- Oil from storage or shipping: If the machine was tilted or moved around, oil can migrate and drip out.
- Mechanical issues: Persistent leaks can signal a problem inside the machine that needs professional attention.
What to do:
- Wipe away any visible oil and run the serger on scrap fabric to soak up residual oil.
- Be careful not to over-oil—check your manual for exactly where and how much oil is needed.
- If oil continues to leak even after cleaning, bring the machine in for servicing.
Are expensive sergers really better than budget models, and why?
The answer is not as simple as “expensive equals better.” I’ve owned all types of sergers, from the cheapest models to high-end machines, and each one has its place.
My very first serger was a basic Singer I bought about 30 years ago. It was cheap, no fancy features — just straightforward overlocking. Guess what? It still works today! It’s reliable, but really only good for finishing edges.
Later, I bought a Janome serger, also in the low-cost range. I’ve had it for about 15 years, and it’s still going strong. It doesn’t offer many stitches or advanced settings, but it does the basics very well.
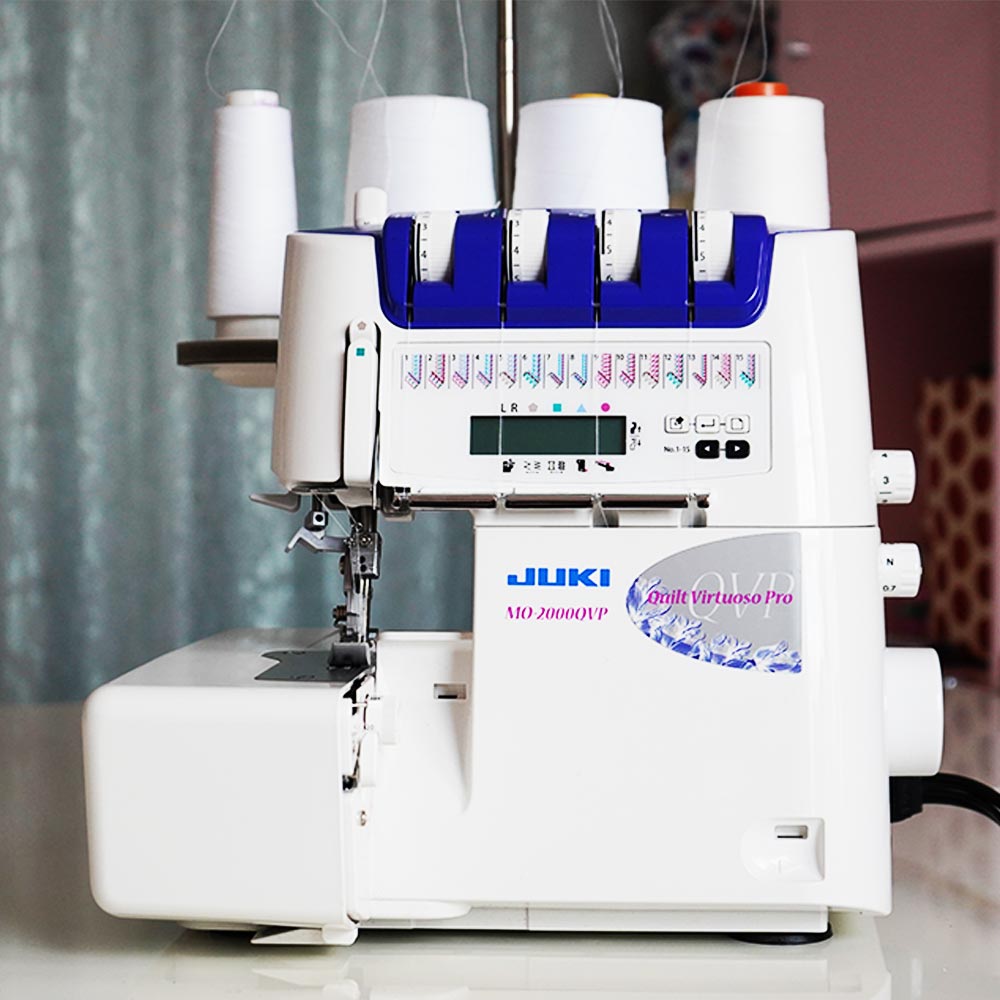
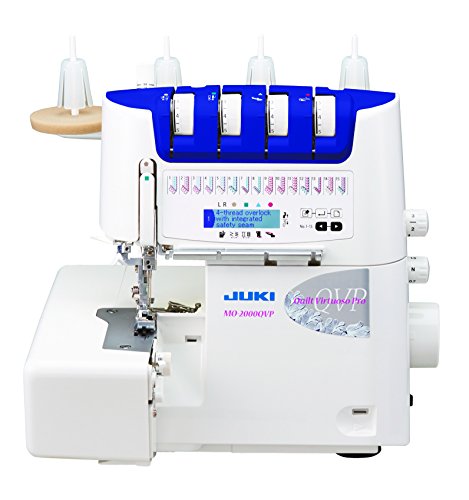
Then I upgraded to a Juki MO-2000, and oh my goodness, what a game-changer! It has self-threading, 15 different stitches, and so many thoughtful features that make sewing faster and easier. I love this machine — really, love it. I don’t necessarily love the price though, but looking back, it was not THAT bad.

✅ Related tutorial: Review of JUKI serger MO-2000 QVP

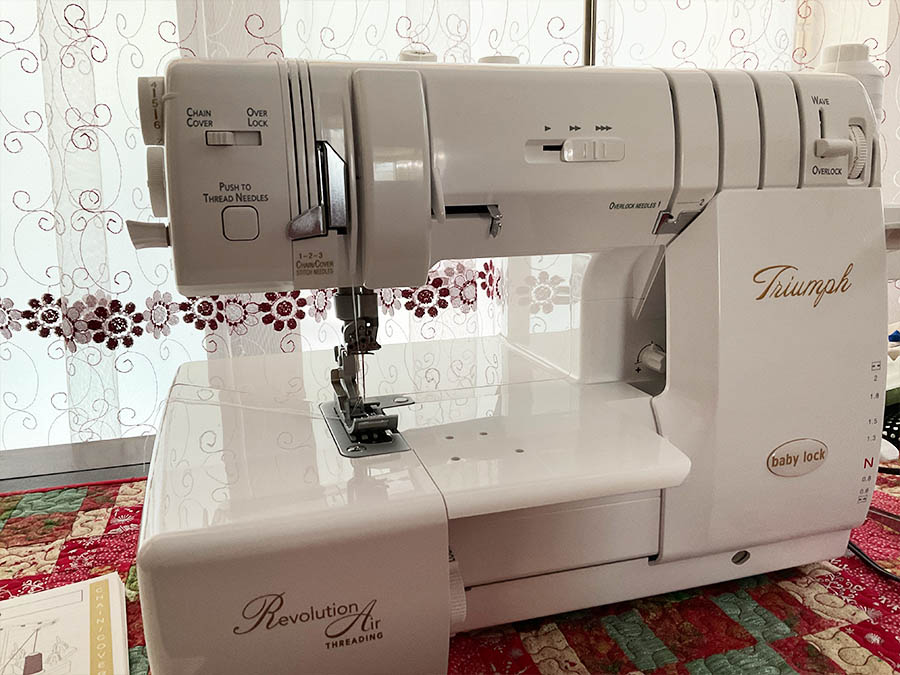
Finally, I splurged on the Baby Lock Triumph, which comes with automatic tension, self-threading, and a variety of specialty stitches, including the wave stitch. Honestly, I was just curious about having all those extra options. It’s a fantastic machine and also doubles as a coverstitch, which is how I use it most of the time.
My conclusion? A mid-range serger like my Juki MO-2000QVP (or it’s slightly less expensive cousin, the Juki MO-1000) is the sweet spot. It has all the essential features, runs beautifully, and I rarely find myself missing those extra decorative stitches. The fancy stitches like the wave stitch are fun, but I hardly use them.
✅ Related tutorial: Review of JUKI serger MO-2000 QVP
So, are expensive sergers better?
- They’re packed with features, but you pay for that convenience.
- For most home sewists, a reliable mid-range serger is plenty.
- A budget serger can also serve you for decades if all you need is edge finishing.
Can I sew seams entirely with my serger, or should I reinforce with a sewing machine stitch?
The answer here is yes, you can sew seams entirely on the serger and yes, there are instances when reinforcing the serger seam is a good idea.
Yes, you can sew seams entirely with your serger — especially when working with knits. A 4-thread overlock stitch is very secure because it has two rows of straight stitches. If one row of needle stitches breaks under stress, the second row still holds the seam together.
However, this security depends on having the correct tension settings —especially the needle tension. If the needle threads are too loose, the seam can pull apart. Always test your stitch on a scrap of the same fabric, give it a gentle tug, and make sure it stretches and recovers without gaps.
For woven fabrics, reinforcing the seam with a straight stitch from your sewing machine is often a smart idea. Sergers don’t create a true straight stitch, so high-stress seams benefit from a quick pass under your sewing machine before or after serging especially if you use strong thread.
What about knits? You shouldn’t reinforce knit seams with a sewing machine straight stitch. A straight stitch has no stretch, so it will break as soon as the fabric is stretched. For knits, a properly set 4-thread serger stitch is all you need.
When You Can Reinforce a Serger Seam:
- Garments made from woven fabrics, especially those with stress points (side seams, or crotch seams).
- Heavy or bulky fabrics where the serger’s tension alone might not be enough to hold layers together.
- Clothing for kids, which often gets pulled during wear.
- Areas that need topstitching or extra durability, like waistbands or bag handles.
What’s the difference between 3-thread and 4-thread overlock stitches, and when should I use each?
- 3-Thread Overlock: Uses one needle and two loopers. It’s perfect for finishing raw edges, rolled hems, or decorative seams because it’s narrower and uses less thread. But it’s not as strong as a seam stitch.
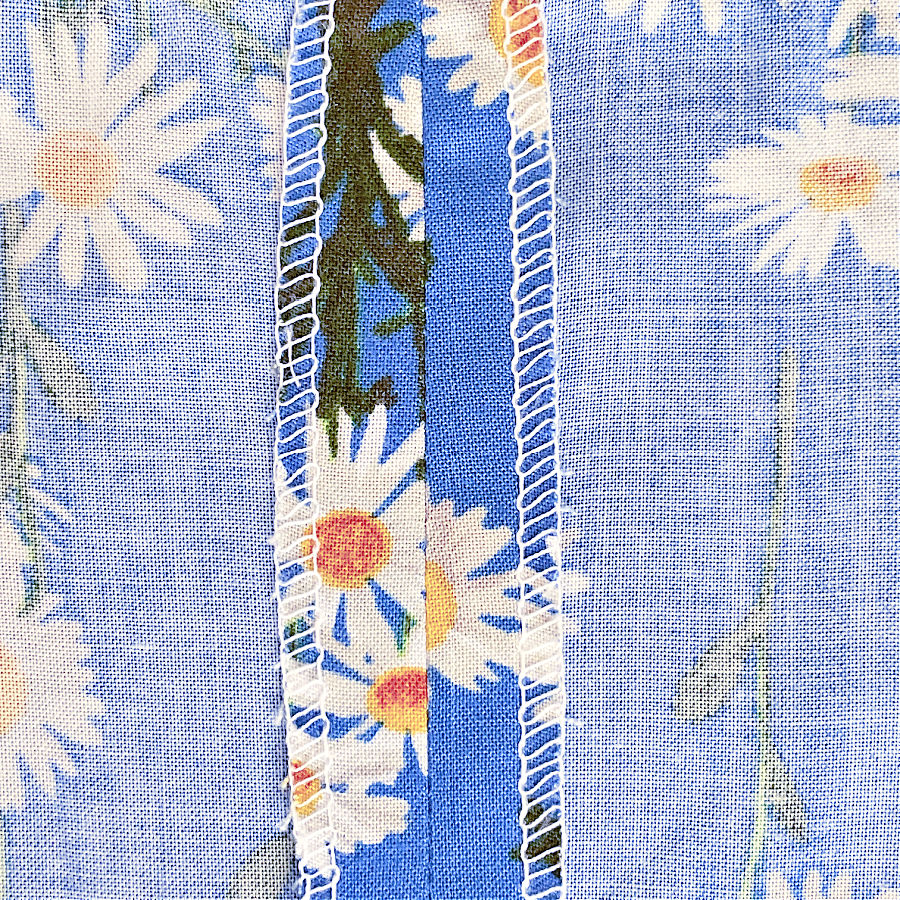
- 4-Thread Overlock: Uses two needles and two loopers. This creates a seam plus an overlock finish, making it strong enough for both knits and wovens.
When to use each:
- Use 3-thread for edge finishing.
- Use 4-thread for sewing and finishing seams in one step.
How can I reduce the noise or vibration from my serger during use?
Sergers are naturally louder than sewing machines, but if yours sounds like a freight train, there are a few things you can do:
- Check your table surface: A flimsy table amplifies vibration. Place your serger on a sturdy surface or add a foam pad under the machine.
- Clean and oil the machine: Dust and lack of lubrication can increase noise.
- Use quality needles and threads: Cheap or bent needles can cause more clatter.
- Slow down slightly: Sergers run fast, but slowing your speed just a bit reduces both noise and vibration.
- Regular servicing: A well-maintained machine always runs quieter.
If your serger sounds like it’s about to take flight, the problem isn’t the machine — it’s usually the table it’s sitting on. A wobbly or hollow table can amplify vibration and noise, making even a quiet serger seem loud. A sturdy, well-designed table makes a huge difference, not just for noise but also for comfort and stability while you sew.
I have a full guide on choosing the best serger tables, including what to look for in stability, size, and ergonomics. Take a look at my serger table guide – Best Serger Tables: Everything You Need to Know
If this guide did not answer all your questions, you may be interested in my Serger Success Kit which is a 90-page eBook. You will learn essential serger terms, parts of the machine, serger settings, types of serger stitches, serger threading, serger maintenance – all you need to get started with your serger.

Liked this serger guide? Save this pin to your sewing Pinterest board so you can find these tips whenever your serger decides to act up! For more practical sewing tutorials, serger tricks, and inspiration, don’t forget to follow me on Pinterest.

latest posts
- What Do You Call a Person Who Sews? I Asked My Readers and Got 1,408 Opinions
- DIY Round Purse: PDF Sewing Pattern and Detailed Instructions
- Mini Wonder Clips By Clover: Useful Sewing Tool Or Just Another Notion?
- Non-Slip Grips For Quilting Rulers: A Small Notion With A Useful Job
- Fabric Eraser for Sewing: What It Removes and When to Use It
- What Is The Best Thread For Sewing Machine Projects? Let’s Find Out!
- Butterfly Quilt Block Tutorial – Foundation Paper Piecing
- How To Sew Quilt Squares So The Corners Match
- Sewing With Fork Pins: How They Help With Pattern Matching, Slippery Fabric, And Seams