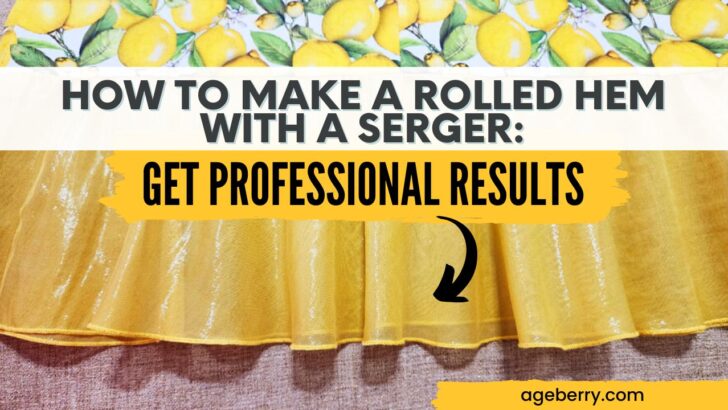
How to Make a Rolled Hem with a Serger: Get Professional Results
As sewists, we understand the importance of giving our projects the perfect finishing touch. And what better way to achieve that than with a delicate rolled hem? Luckily, we have a perfect tool in our arsenal – the serger. With its ability to cut and sew at the same time, this versatile machine can help you achieve that flawless rolled hem in no time. In this tutorial, we will be diving into the various techniques of creating a rolled hem using a serger. From choosing the right thread to adjusting the tension, you will learn the ins and outs of achieving the perfect rolled hem every time.
What is a Rolled Hem?
When it comes to hemming, there are many popular options, and a rolled hem is one of them. It’s a tiny, narrow hem that is usually found on lightweight fabrics like chiffon and silk and some medium-weight fabrics like cotton and rayon. The rolled hem is created by rolling the edge of the fabric under itself and securing it with stitches.
Traditional rolled hems are typically sewn using a sewing machine but using a serger for sewing a rolled hem has several advantages that make it a popular choice among sewists:
- Speed: Sergers are faster than traditional sewing machines, allowing you to finish projects more quickly.
- Professional Finish: The rolled hem created with a serger has a clean, polished look that mimics the finish of professional garments.
- Variety of Decorative Edges: By making minor adjustments to the rolled hem stitch and using special decorative threads, you can create various decorative edges (for example, a lettuce hem) adding a unique touch to your projects.
- Fray Prevention: A serger effectively prevents fabric edges from fraying, ensuring durability and longevity of your projects.
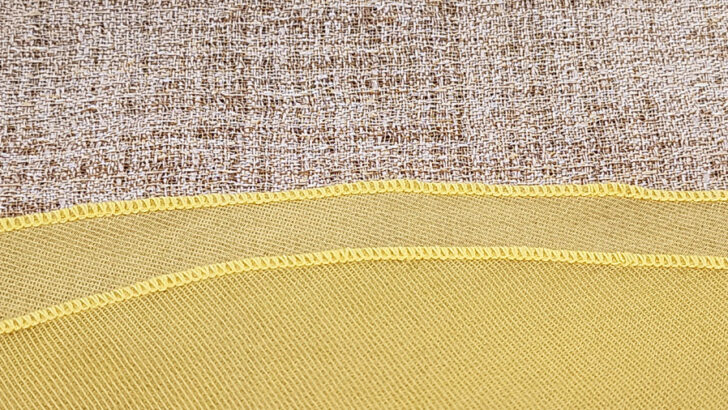
The rolled hem is one of the most popular serger stitches. But rolled hems are unique compared to other serger stitches because they are specifically used as an edge finish and decorative touch rather than for making seams and sewing two pieces of fabric together in construction. This stitch creates a narrow, dense, wrapped edge on the fabric.
Gathering Tools and Materials
Before you start sewing a rolled hem with a serger, there are certain tools and materials you need to gather.
Selecting a Serger
It is important to choose a serger (or overlocker) that has a rolled hem feature and allows easy adjustments to stitch length, width, and tension. The machine should be suitable for a variety of lightweight and delicate fabrics, such as chiffon or silk.
If you don’t have a serger you can check my article Best Serger For Beginners: Serger Buying Guide in 2023
Choosing Thread
Sewing a rolled hem with a serger requires choosing the appropriate thread for the project. A lightweight thread, such as a 60-weight serger thread, usually works best for rolled hems, as it won’t add bulk to the finished edge.
I usually use a high-quality polyester serger thread to create a densely wrapped edge.
✅ Related tutorial: Best Serger Thread | What To Use | Brands
This stitch is often used as a decorative finish, so using an attractive thread is important. You can use a woolly nylon thread or any decorative thread in the loopers (like rayon thread or even metallic).
Recently I bought metallic/rayon thread from WonderFil and it created a wonderful rolled hem.
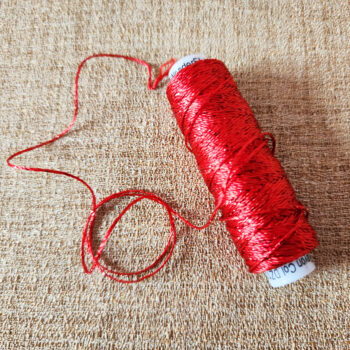
But have in mind that decorative threads are used in loopers and in the needle you use a regular serger thread.
You may also want to experiment with different thread colors to see which works best with your fabric.
Setting up the Serger
To sew a rolled hem with a serger, you’ll need to set up your serger correctly.
There are different ways to create a rolled hem on a serger. Regardless of the stitch used, the key to a successful rolled hem is to ensure that the fabric is fed through the serger evenly and that the stitch length, width and tension are adjusted correctly.
Here are a few tips on how to set up your serger for making a rolled hem.
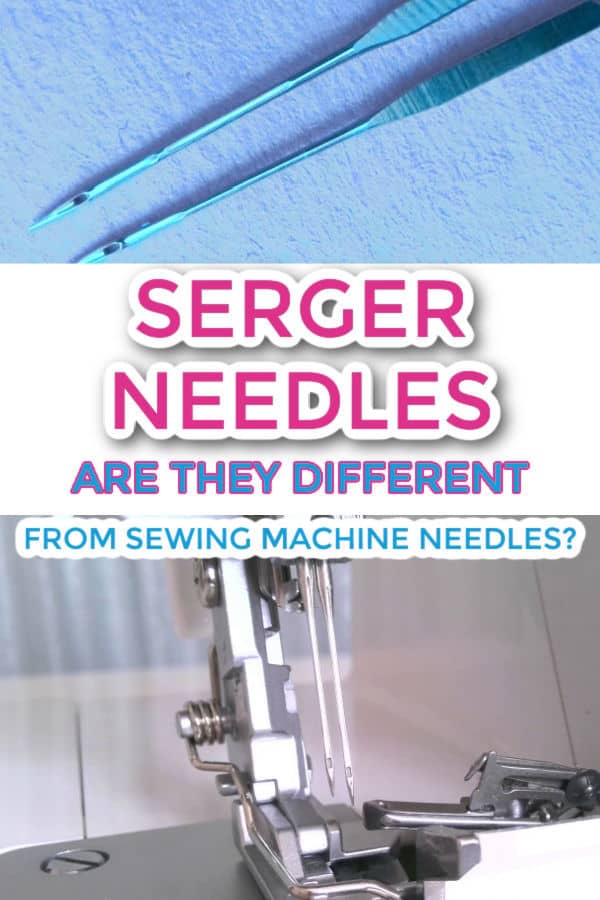
- Install the right needle only. This will create a narrow hem.
- Use a regular serger foot. (I don’t think a special rolled hem foot for a serger exists, I have 3 sergers and none of them has it)
- Adjust the differential feed to normal – N. This will help to prevent any puckering or stretching of the fabric.
- Set the shortest stitch length (usually 1 or 1.5 but some sergers have different parameters). This will ensure that the stitches are close together.
- Adjust the stitch width to the narrowest setting.
- Use a lightweight needle, such as a size 75/11 or 80/12.
✅ Related tutorial: All About Serger Needles
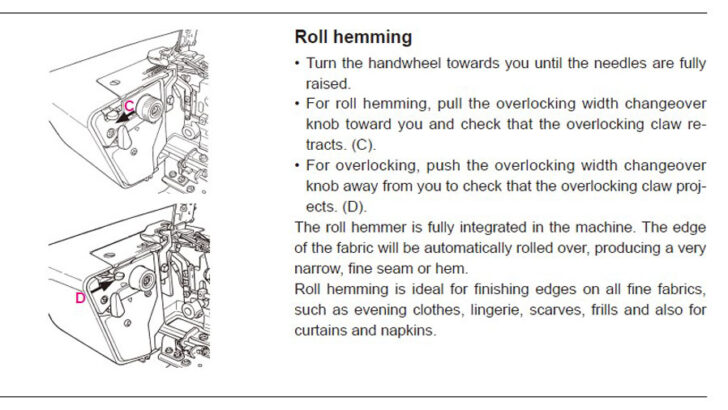
Some sergers also have a special lever or knob you need to move. For example, Juki MO-2000 has a lever called rolled hem selection lever, and you need to pull it toward you if you want to make a rolled hem.
Refer to your serger’s manual for specific serger settings for each type of rolled hem. This is a page from my manual.
Once you have adjusted the settings, it’s important to test the stitch on a scrap piece of fabric before starting on your project. This will help you to make any necessary adjustments before sewing on your final piece.
3-thread Rolled Edge
This is a three-thread stitch, produced by the right needle and both loopers. It’s the most common rolled hem stitch available on practically all models of sergers.
For this stitch, set the upper looper tension to a lower number (around 3.5 average), set the lower looper tension to a higher number (usually around 6-7). By tightening the lower looper tension you will make the serger to pull the upper looper thread completely to the underside so that the upper looper thread will wrap around the edge.
Keep the needle tension at normal setting at 4.
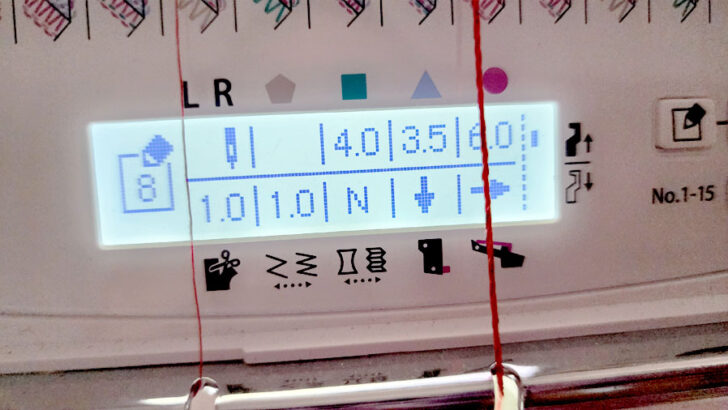
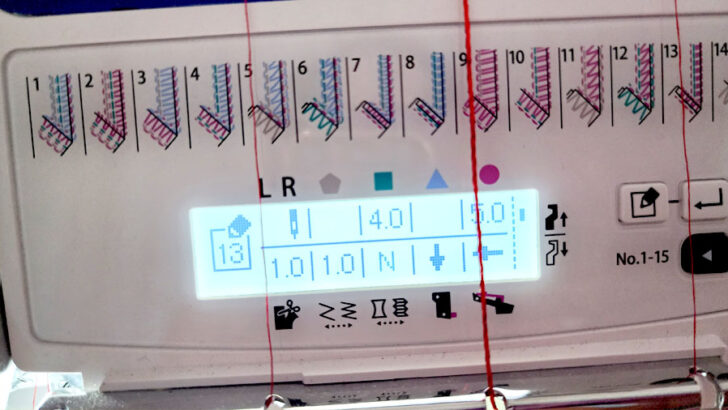
My Juki MO-2000 serger makes perfect rolled hems. It has a screen and I can see all the necessary settings for every stitch I make. These are the settings for the 3-thread rolled hem.
Note: Some of the links on this page are affiliate links. This means I will receive a commission if you order a product through one of my links. I only recommend products I believe in and use myself.
So, if you want to buy this serger (and it’s THE BEST serger, in my opinion) here is my affiliate link to Amazon:
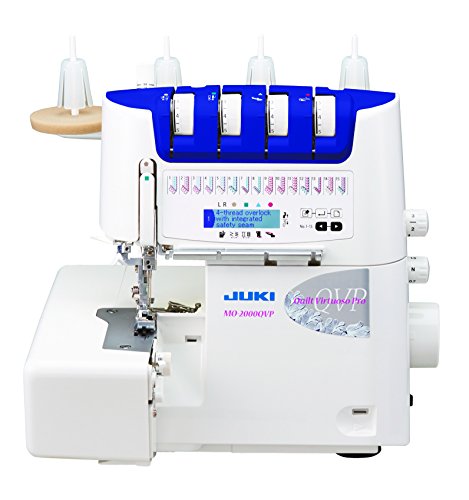
✅ Related tutorial: Review of JUKI serger MO-2000 QVP
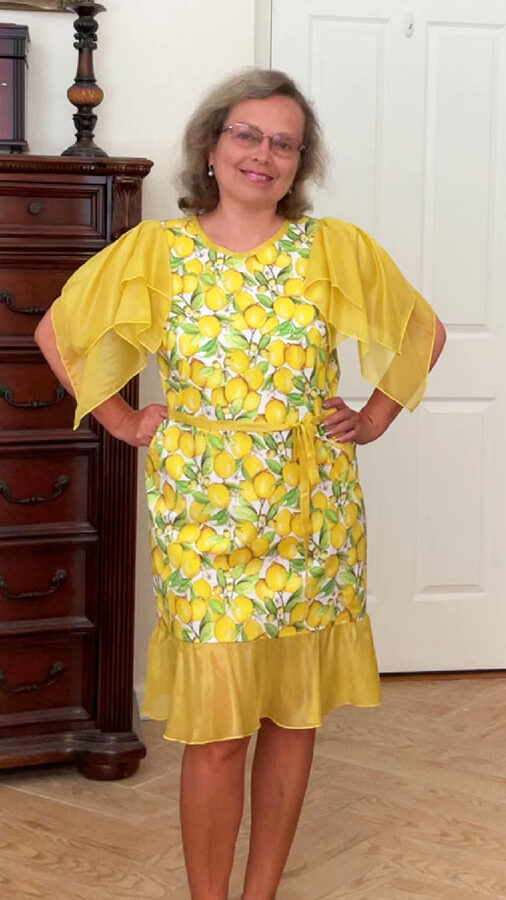
I use this stitch often for my projects. Here are some of them.

2-thread rolled edge
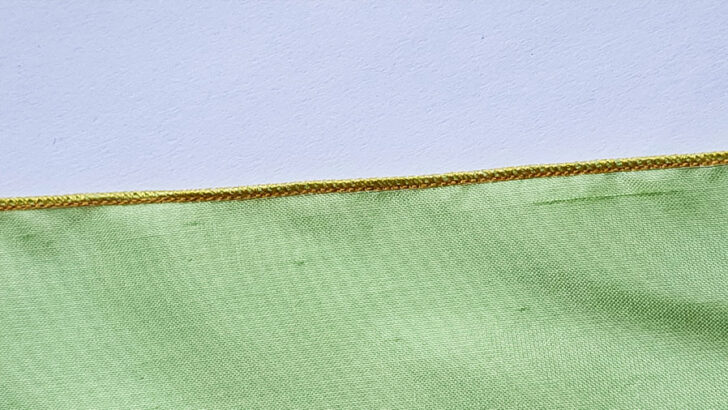
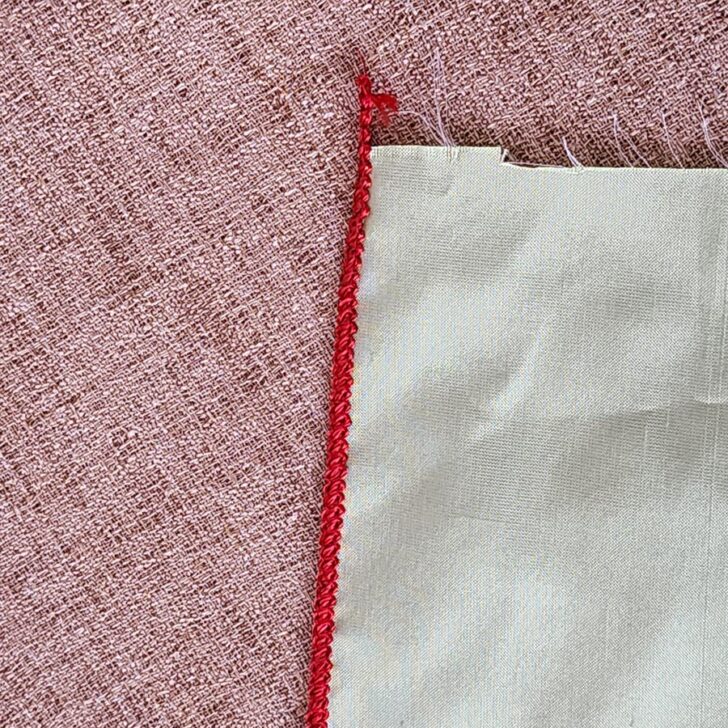
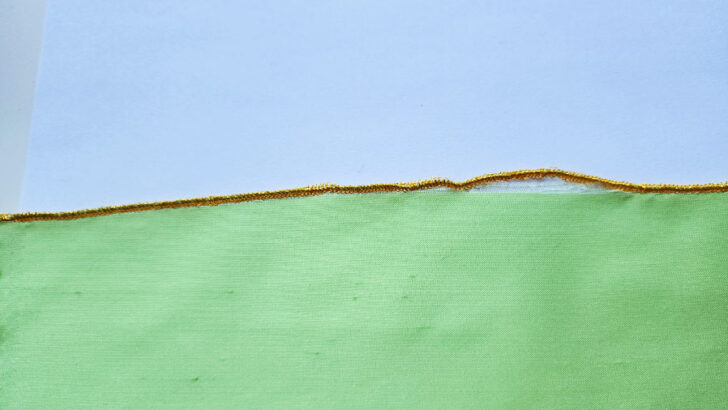
This stitch is using only 2 threads and is made by the right needle and the lower looper. It’s also a very nice stitch producing a rolled hem. In the image below, you can see a 2-thread rolled hem on silk dupioni fabric, and I am using gold metallic thread in the lower lopper.
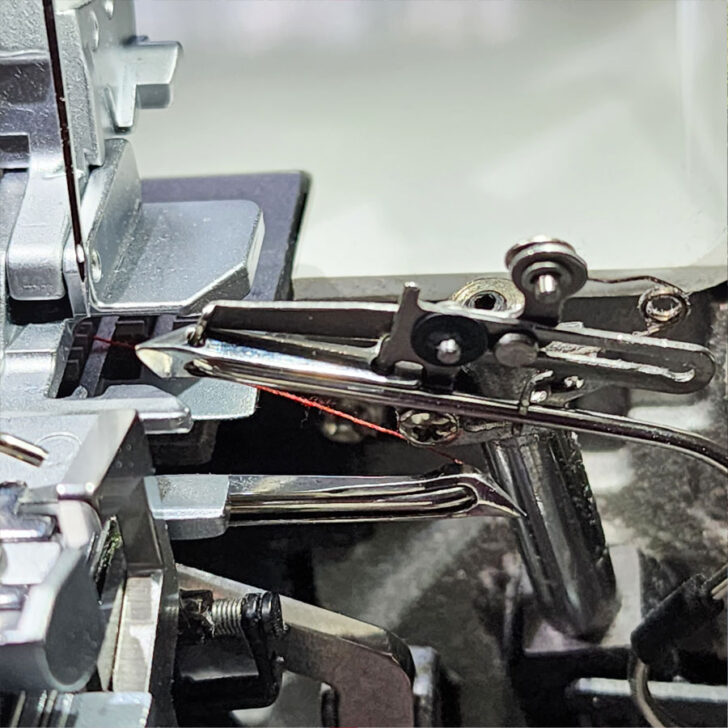
The main thing is that you need to disengage the upper looper. Not all sergers have this feature because for this stitch you should be able to deactivate the upper looper. Sergers have a special attachment called 2-/3-thread changeover attachment. You can insert it into the hole of the upper looper so the thread will be not fed through the upper looper. Here is this attachment on my Juki MO-2000.
What are the settings for this stitch? Usually, the needle has the normal tension at 4 and the lower looper should be set to a higher number (usually around 5) so it wraps completely and evenly around the edge and causes it to roll.
3-thread narrow edge
On my serger, there is also a stitch that looks pretty much like a rolled hem, and that’s why I included it in the list. But it’s not truly rolled hem as the fabric edge doesn’t roll to the underside. Nevertheless, I like to use this stitch and you can never say it’s just a narrow hem and not a rolled hem.
This is also a three-thread stitch, produced by the right needle and both loopers. But it looks a little different from the previous stitch and the settings are different too.
For this stitch, set the upper looper to the normal setting at 4, set the lower looper tension to a higher number (usually around 5), and increase the needle tension to 4.5.
You can also create a very nice narrow hem using a sewing machine and a ban roll tape. Check out my article Narrow hem tutorial: how to make a narrow hem using a Ban Roll tape
Sewing the Rolled Hem
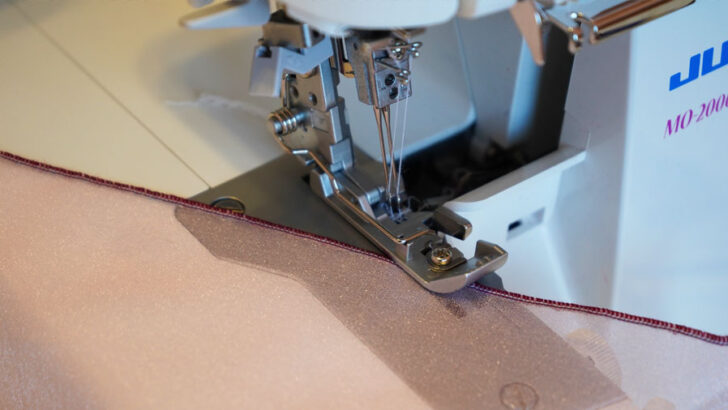
The fabric should be properly prepared. Trim any frayed edges and cut the material to the desired size.
Place the fabric under the presser foot with the right side of the fabric facing up. Line up the edge of the fabric with the edge of the presser foot.
Start sewing slowly, making sure the fabric is feeding evenly through the machine. Use your left hand to guide the fabric and keep it lined up with the edge of the presser foot.
Make sure that the stitch is consistent and the looper thread fully wraps the edge to create a narrow rolled edge.
As you sew, the serger will create a rolled hem. Continue sewing until you reach the end of your fabric.
Rolled Hem with a Decorative Thread
If you want to add some extra flair to your rolled hem, using a decorative thread can be a great option.
- Choose a decorative thread that complements your fabric. Wolly Nylon, metallic or variegated threads can add a nice touch.
- Thread your serger with the decorative thread in the upper and lower loopers and a matching or neutral thread in the needle.
- Set your serger to one of the rolled hem stitches.
- Adjust the tension settings as needed. You may need to experiment a bit to find the right tension for your particular thread and fabric combination.
- Serge the rolled hem as you normally would.
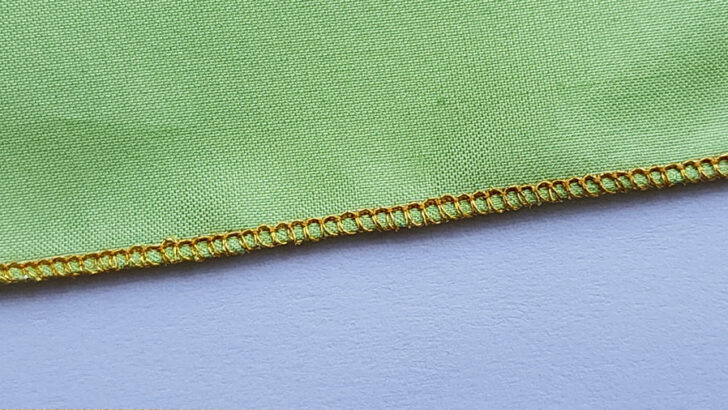
Here is the rolled hem made with metallic thread. In reality, it’s very shiny but the image doesn’t really show it.
✅ Related tutorial: Metallic Thread For Embroidery And Sewing: Top 10 Tips You Must Know
Common Troubleshooting Tips
I’ve found that understanding the machine settings, threading the serger correctly, and getting comfortable with adjusting the stitch width, length and tension are crucial in creating a nice rolled hem. Here is what has helped me: thoroughly reading the serger manual to understand its features and settings and practicing on scrap fabric to build confidence without the fear of ruining a project.
You will notice that sewing rolled hems on different fabrics can produce varying results.
Let’s discuss some common troubleshooting tips for sewing a rolled hem with a serger.
Tiny threads are visible at the edge
Sometimes you can see tiny fibers poking out through the stitching at the edge.
It usually happens when you are using chiffon fabric or fabric with a loose weave. Widening the stitch a little might help to solve this problem.
You can also try shortening the stitch length (if it’s not already at minimum) to cover the edge more completely.
Changing the thread thickness might be helpful too – choose a little thicker thread. Or use woolly nylon thread that fluffs up and fills in the spaces between stitches.
✅ Related tutorial: Wooly Nylon Thread | What It Is And How To Use
Stitches pull off the edge
This also happens with sheer or loosely woven fabric.
Try to increase the stitch length a bit so the holes made by the needle won’t be too close together.
You can also increase the stitch width slightly and loosen the lower looper tension.
Change the thread – polyester thread might be much stronger than the fibers of the fabric and the stitches might pull away from the fabric.
Thread Breaks
To prevent thread breakage, I suggest:
- Checking the quality and condition of your thread. Make sure it’s not too old or tangled.
- Using woolly nylon thread as this thread is very strong.
- Ensuring that the tension settings on your serger are appropriate for the fabric and thread you’re using. If the tension is too high the thread can break.
- Inspecting the machine for any burrs or rough spots on the thread path that could be causing snags and breaking the thread. If any are found, smooth them out or have your machine serviced.
Stitches look uneven
If you’re experiencing uneven stitches when sewing a rolled hem, I recommend:
- Adjusting the tension settings on your serger to make sure they’re suitable for your fabric and thread.
- Considering threading both loopers with woolly nylon thread for better coverage
Fabric Puckering
Fabric puckering is another potential problem. To address puckering:
- Make sure the fabric is fed smoothly and evenly into the serger.
- Double-check your needle tension settings and adjust accordingly.You might need to loosen the needle tension slightly.
- Adjust the differential feed settings on your serger, as incorrect settings may cause puckering.
In conclusion, mastering the rolled hem on a serger is a valuable skill for any sewist. I highly recommend exploring and practicing this stitch to elevate your sewing techniques. Making a rolled hem is not a difficult task that once you get some practice, you’ll be a pro in no time.
latest posts
- What Do You Call a Person Who Sews? I Asked My Readers and Got 1,408 Opinions
- DIY Round Purse: PDF Sewing Pattern and Detailed Instructions
- Mini Wonder Clips By Clover: Useful Sewing Tool Or Just Another Notion?
- Non-Slip Grips For Quilting Rulers: A Small Notion With A Useful Job
- Fabric Eraser for Sewing: What It Removes and When to Use It
- What Is The Best Thread For Sewing Machine Projects? Let’s Find Out!
- Butterfly Quilt Block Tutorial – Foundation Paper Piecing
- How To Sew Quilt Squares So The Corners Match
- Sewing With Fork Pins: How They Help With Pattern Matching, Slippery Fabric, And Seams