Serger Buying Guide: What to Know Before You Buy
A serger can change how your finished projects look on the inside and the outside. In the UK and much of Europe, the same machine is called an overlocker or an overlock machine, so you will see both names in shops and reviews.
This guide is for anyone shopping for a serger. Maybe you have sewn for years and never owned one. Or maybe your old serger is slowing you down, and you want a machine with features it doesn’t have. This guide covers every feature to check before you buy, so you pay for what you will use and skip what you won’t.
Selecting a Serger
A serger trims the fabric edge, stitches the seam, and wraps the raw edge in thread, all in one pass. That one pass is why serged seams look neat, stretch with knits, and hold up through years of washing. Knit fabrics in particular become much easier to sew, because the stitch stretches with the fabric instead of popping.
✅ Related tutorial: What Is A Serger & What Can I Do With It?
Shopping for a serger is where many people get stuck. Store pages list loopers, differential feed, stitch fingers, etc. as if everyone knows what they are. You want a machine that is simple to set up and use, but capable enough that you won’t outgrow it in a year.
Prices make the choice even harder. A basic 3/4-thread model starts at around $250, and a top 8-thread machine with air threading can cost $5,000 or more. Price alone won’t tell you which one fits you. Plenty of mid-range machines sew beautifully, and some expensive features matter only for certain projects.
Note: Some of the links on this page are affiliate links. This means I will receive a commission if you order a product through one of my links. I only recommend products I believe in and use myself.


Each feature is explained in plain words, with what to check in the store or in the product listing. By the end, you will know which features are worth paying for in your sewing room.

Finding the Best Serger that’s Right for You
Start with your projects, not with the machine. Pillow covers, bags, and table linens need very different features than leggings and swimsuits.
Think about the next few years too. Most people buy a serger to finish seams, and then find more uses for it once it sits on the table. A machine that also sews a coverstitch gives you the stretchy double-row hem you see on store-bought T-shirts, pant legs, and knit dresses.
Then think about money and use. A serger you pull out twice a year has a different budget than one you run every weekend. If you sew often, even a pricier machine pays off quickly in time saved and in seams that last.
Before you choose, read reviews from people who have owned the machine for a while, not only from people who opened the box last week. A model with a good track record is often a better buy than the newest release, even if it came out last year or the year before.
Compare the price, the average rating, and the number of reviews together. A 4.8 rating from 12 reviews tells you less than a 4.5 rating from 1,500 reviews. Check several retailers, YouTube demos from independent sewists, and sewing groups on Facebook, where owners talk openly about what breaks and what they love.


If you’re upgrading, your current serger is the best guide you have. Make a list of everything that slows you down on it. It might be threading, tension that never looks right, a stitch it can’t sew, or no differential feed. That list becomes your shopping list, and it keeps you from paying for extras that don’t solve your real problems.
Your old serger doesn’t have to go, either. Many sewists keep it set up for one stitch, like a rolled hem or a specific thread color. Then they don’t have to change the settings back and forth on the new machine.
What Features to Look for in a Serger
Once you know what you want to sew, it’s time to look at the machines themselves. Here is every feature to check, from the ones that affect your daily sewing to the small extras.
Number of Threads
The number of threads decides which stitches a serger can make. Most home sergers use 3 or 4 threads, and the top models use up to 8.
A 4-thread overlock is the standard seam for knits and wovens. It is strong and stretchy, and it’s the stitch you will use most. A 3-thread overlock is lighter and works well for finishing edges and for rolled hems. If the machine can also sew with 2 threads, you get the lightest edge finish of all, and a few more stitch options.
For everyday sewing, a 2/3/4-thread machine covers almost everything most sewists need. If you know you want coverstitches and chainstitches, look at machines that use 5 to 8 threads. For example, the Pfaff Coverlock 4.0 is a 5-thread machine, and the Baby Lock Triumph is an 8-thread serger.
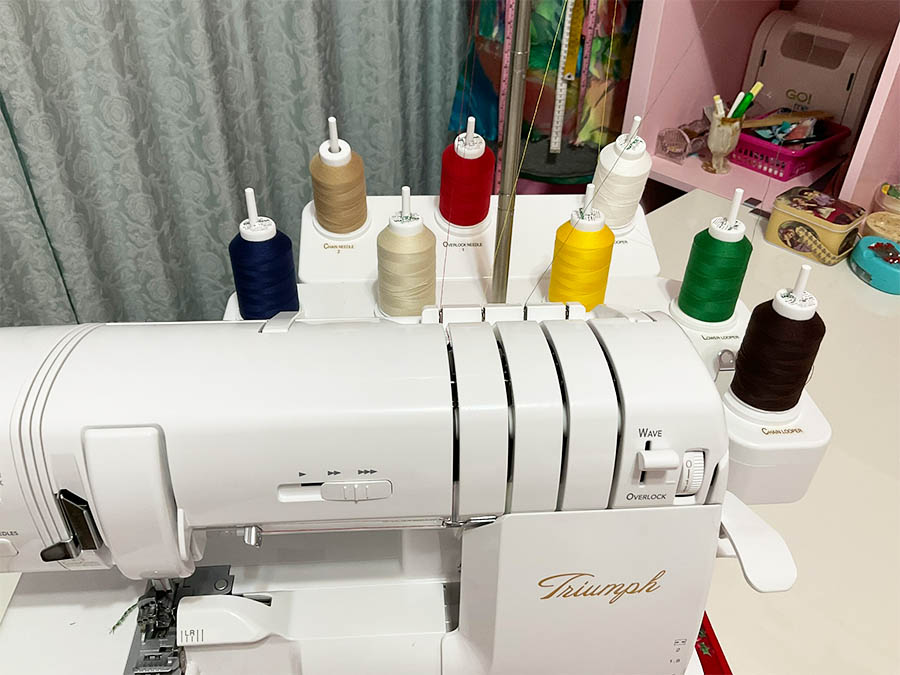
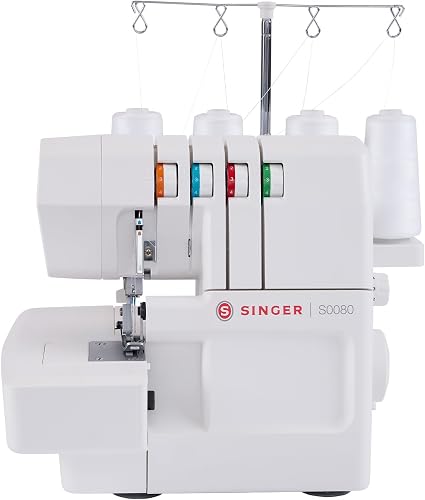
One more thing to check: some very popular entry-level models, like the Brother 1034DX, are 3/4-thread only. They are great machines, but they can’t sew the 2-thread stitches.

✅ Related tutorial: Best Serger Thread | What To Use | Brands
Needle System
Many sergers use the same needles as your regular sewing machine. These are listed as 130/705H or HAx1. If a needle breaks, you can grab one from the pack you already own.
Other sergers need special serger needles, usually marked ELx705 (or 2022, SY2922, and similar codes). They have a slightly different shape and won’t work in a regular sewing machine.

A serger can sew with one needle or two. A serger/coverstitch combo machine can sew with three needles at once for a triple coverstitch.
Most serger/coverstitch combo machines use special needles too. For example, the Baby Lock Triumph uses ELx705 needles, which don’t fit home sewing machines.
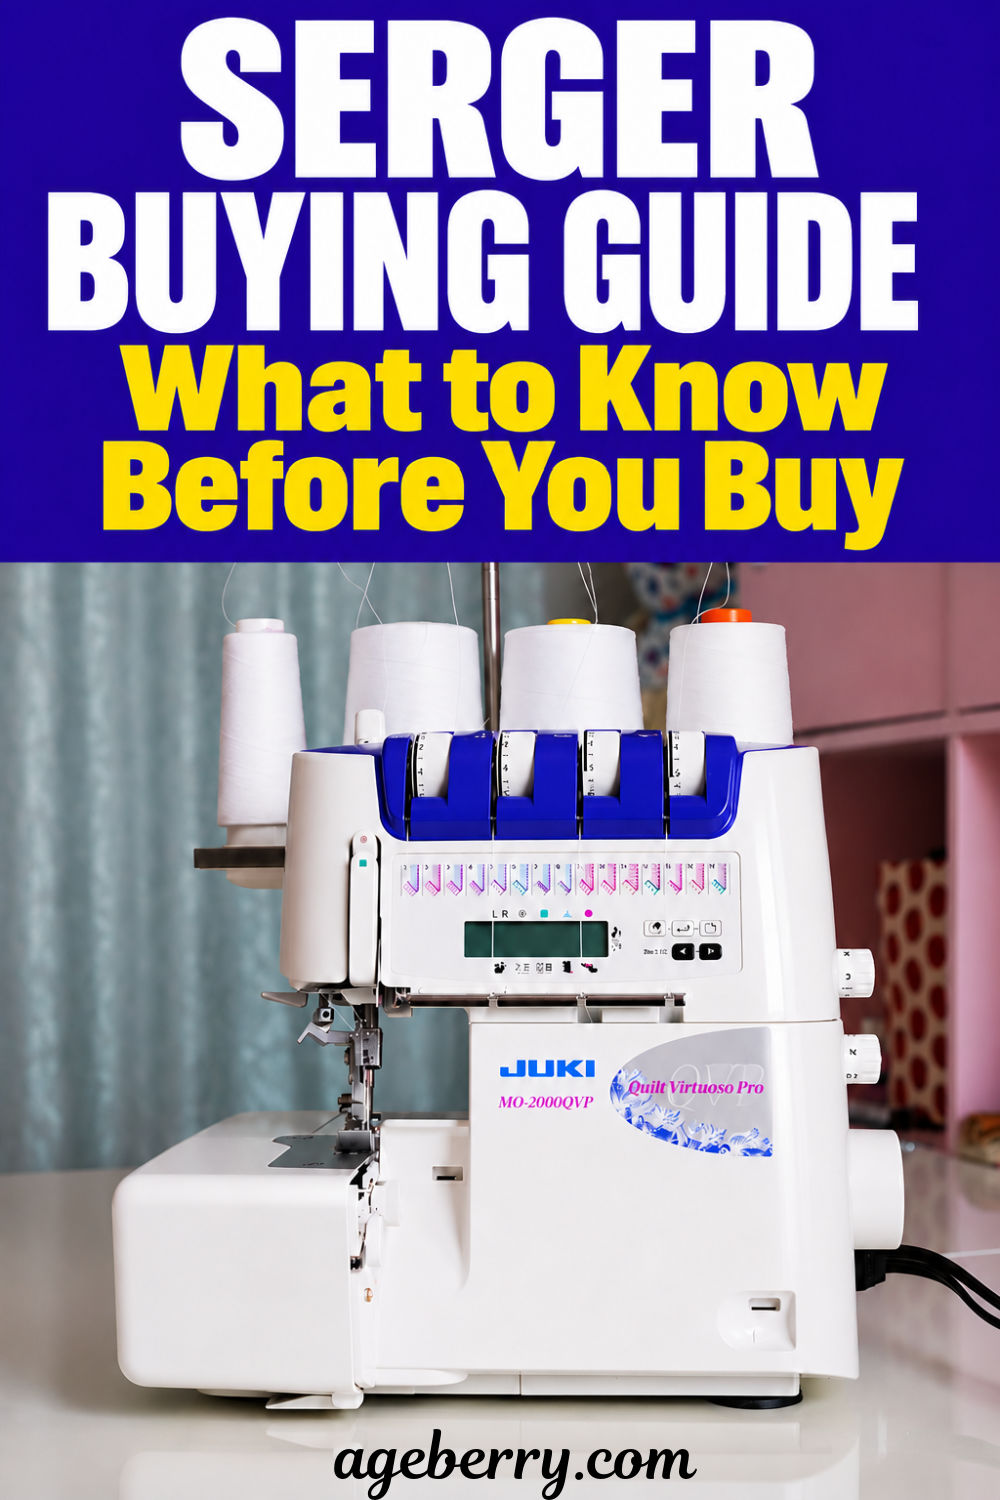
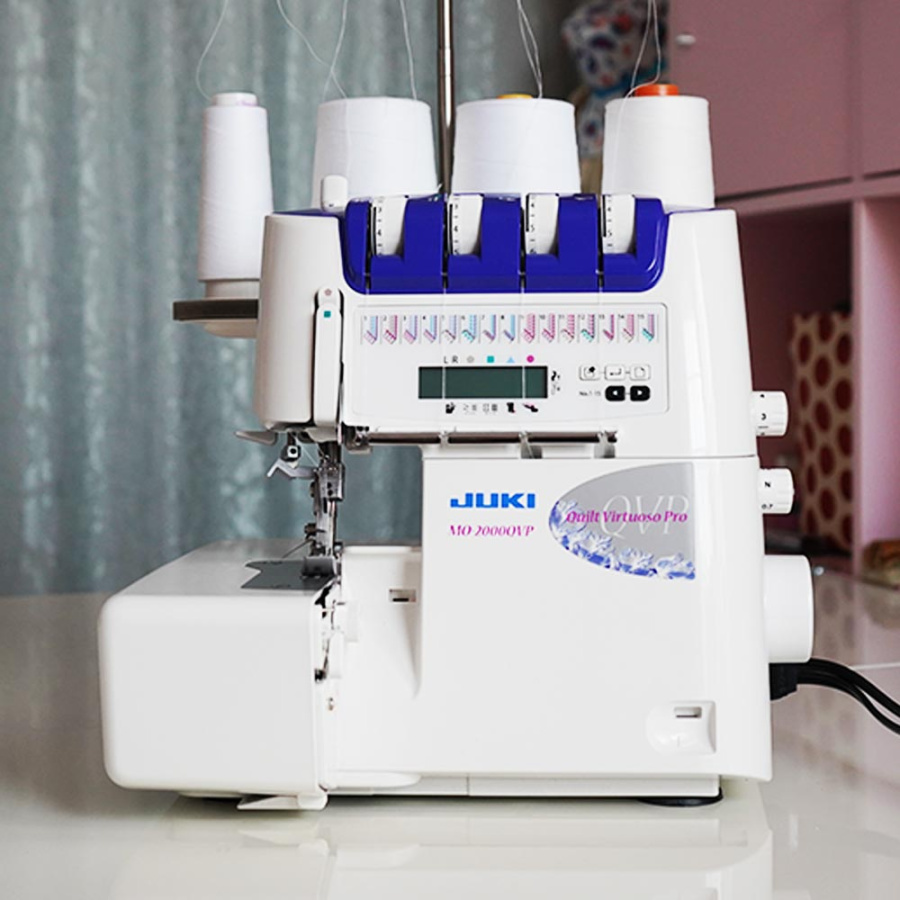
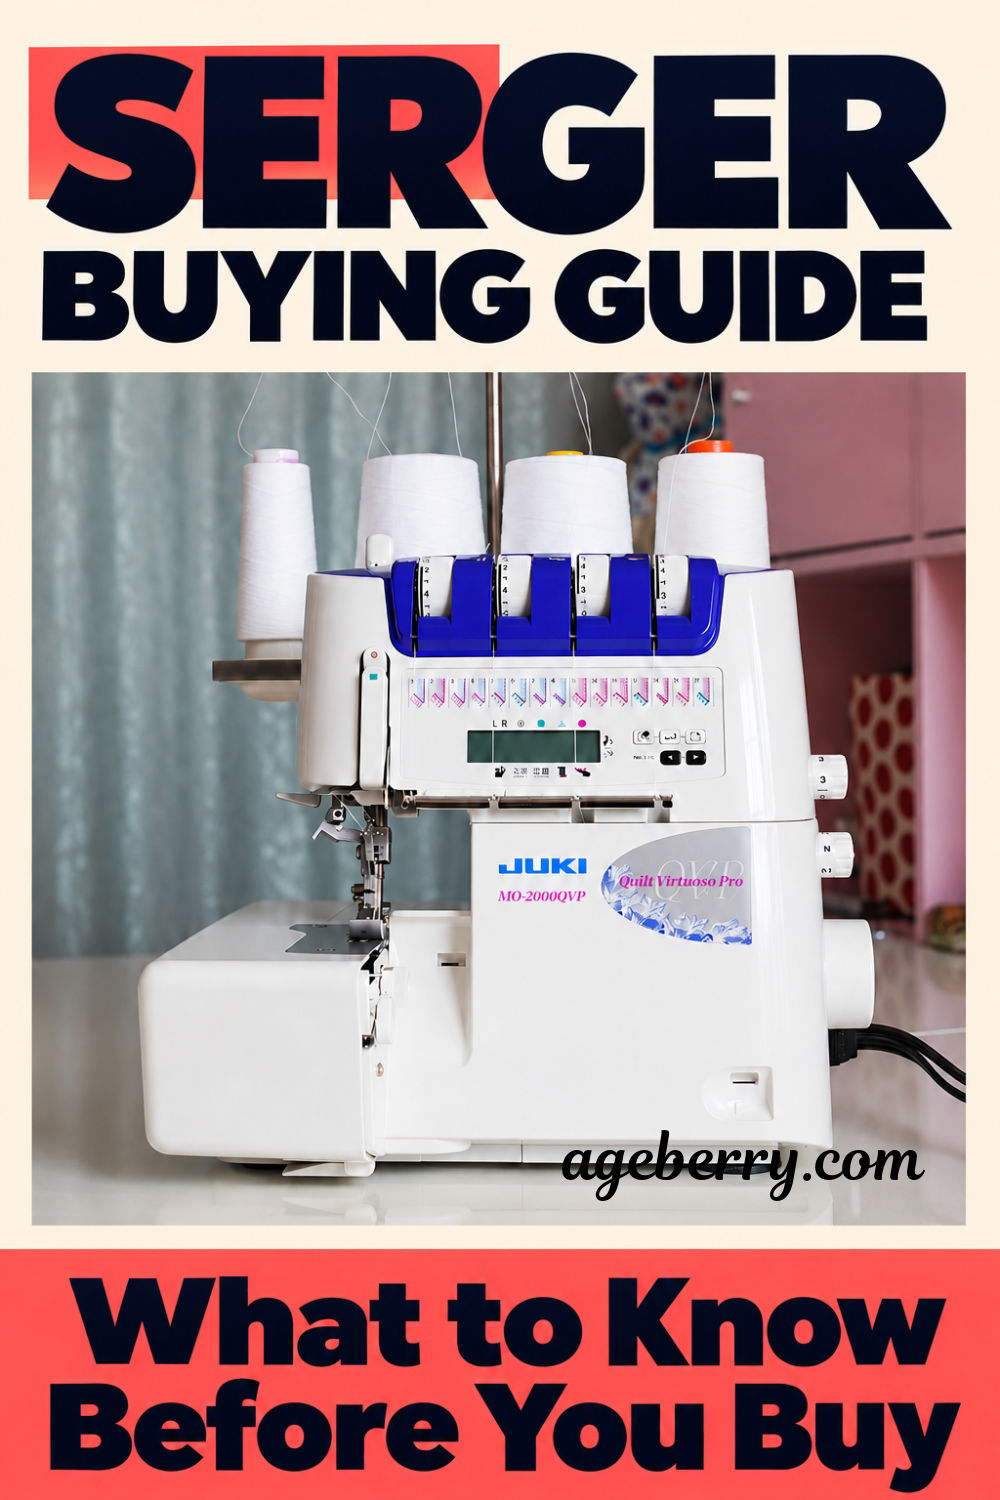
My advice is to choose a serger that takes regular sewing machine needles, unless you want a combo machine that needs special ones. One example is the Juki MO-2000 2/3/4 Thread Serger with Air Supported Threading, which uses household needles.
A quick trick before you buy: download the machine’s manual from the brand’s website and search for the word needle. You will see the needle system in seconds, before you spend any money.
✅ Related tutorial: All About Serger Needles
Ease of Threading
Threading is the part that scares most people away from sergers. Older models had long, confusing thread paths through two loopers, and a single missed guide meant starting over. Newer machines usually have color-coded thread paths printed right on the machine, so you follow one color from the spool to the looper.
The top of the range goes further. Air threading machines blow the thread through the loopers when you press a button or lever. It’s a big time-saver, but it also raises the price a lot. If threading is the main reason you want a new serger, this is the feature worth paying for.

Then there are the needles. Many sergers have nothing to help you thread the needles, so you need to be comfortable threading them by hand. Check my video tutorial on how to thread a sewing machine needle easily. It shows several ways to do it, and they work on serger needles too.
Some sergers have a built-in needle threader. My Juki MO-2000QVP has one, and I use it all the time. It’s one of those features you don’t think about in the store and then appreciate every single day.
✅ Related tutorial: The Self-Threading Serger – Yes, It Exists!
Tension System
Each thread on a serger has its own tension setting. Most machines use dials or tension disks you turn by hand. Some computerized models use buttons and show the numbers on a screen.

A few computerized sergers set the tension automatically. Sensors read the thread, the fabric, and the selected stitch, and the machine sets the tension for you. Some machines skip tension dials completely and feed the exact amount of thread for each stitch. This is a big help on a new serger, because tension is where most early serger frustration comes from.
Also check how the tension releases. On a good machine, you can raise the presser foot and pull the threads out easily. If you have to tug hard, you will bend needles and pull the fabric out of shape when you remove a project.
✅ Related tutorial: Serger Panic? Nah! Here Are 17 Serger Tips Every Sewist Needs to Know
Ease of Stitch Width and Length Adjustment
If you sew on a regular machine, you already know how much stitch length and width change the look of a seam. Sergers work the same way.
A short stitch length gives a dense, satin-like edge for rolled hems. A longer stitch is better for thick fabrics and for seams that need more stretch.
Stitch width controls how far the threads reach across the edge. A wider stitch holds better on loosely woven or fraying fabrics.
Look for a machine with clearly marked dials you can reach without turning the machine around or opening a cover. On some sergers, you change the width by moving the knife, and on others, by switching the needle position. Ask which one your machine uses, because it changes how quickly you can adjust between projects. You want settings that cover lightweight fabrics, heavy fabrics, and everything in between.
Retractable Knife
The knife trims the fabric right before the threads wrap the edge. For most seams, you want it working.
For some techniques, you don’t want the edge cut at all. Flatlock seams and decorative topstitching along a fold need the fabric edge to stay uncut. A machine with an upper knife you can disengage lets you sew these stitches.
Most modern sergers have this feature, but check how easy it is. On some machines, you turn a knob. On others, you open the front cover and push the knife down and lock it.
Number of Different Stitches
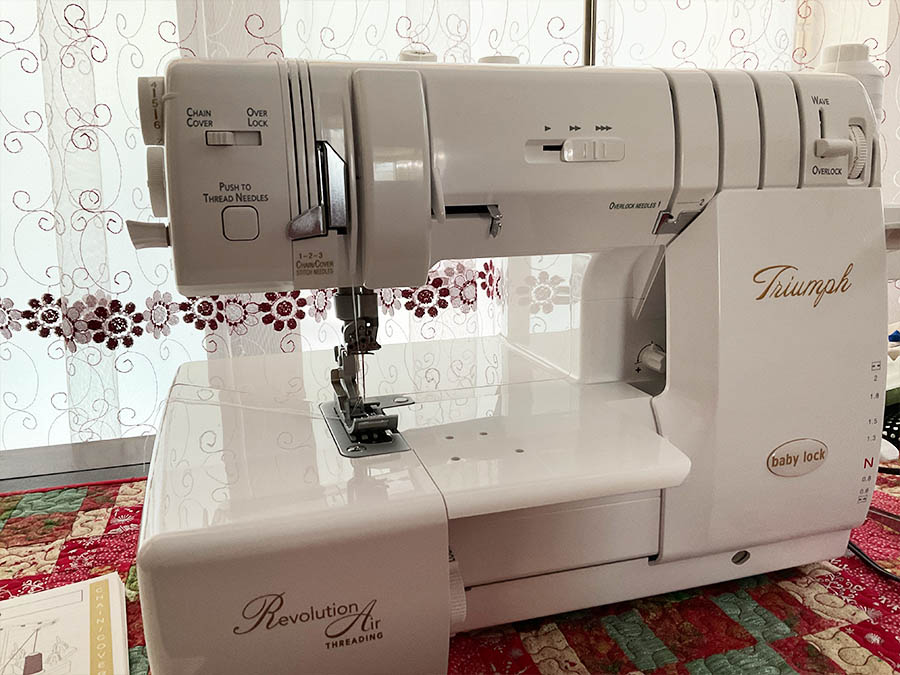
Sergers range from about 5 stitches on basic models to 15, 25, or even more on advanced machines. The Baby Lock Triumph lists 87 stitch combinations.
Ask yourself which of them you will really use. Check whether the machine sews a flatlock, a rolled hem, and a coverstitch, and whether it offers any decorative stitches you would enjoy. Most sewists end up using two or three stitches for nearly everything: the 4-thread overlock, the 3-thread overlock, and the rolled hem.
A simpler machine can be plenty if you mostly finish seams. If you’re upgrading, you already know which stitches you’re missing, so look for those first. Also check that the machine offers the right stitch for the fabrics you use most, from lightweight silk chiffon to heavy denim.
Ease of Converting to Coverstitch and Back
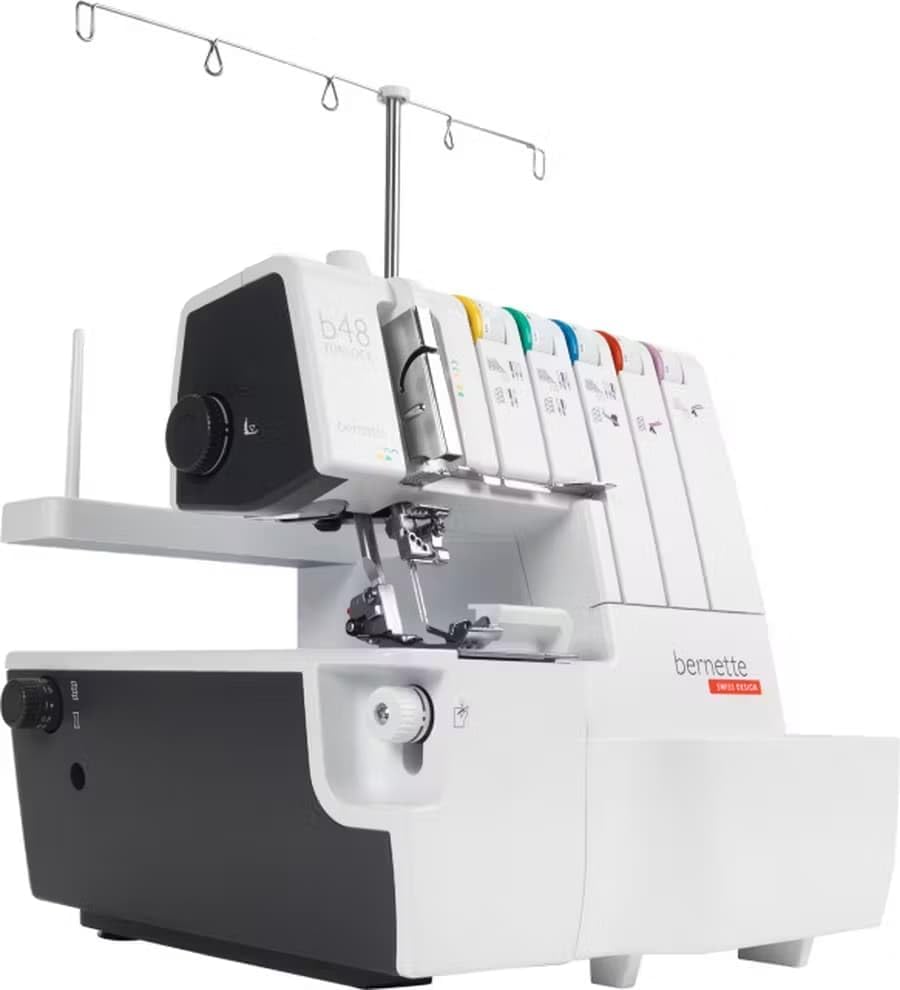
This matters only if you want a serger/coverstitch combo machine, but then it matters a lot. The question is how many steps it takes to switch from overlock stitches to coverstitch and back again.
I had one of the first serger/coverstitch combo machines on the market. Converting it was a nightmare. I had to change several parts, rethread, and adjust settings whenever I wanted to hem a T-shirt. I ended up selling it and buying a separate Janome coverstitch machine. I’m still glad I did. Now I just move from one machine to the other.
Modern combo machines, especially the expensive models, are much better. Many switch with a couple of levers and a different presser foot. Still, read reviews and then decide whether you would be happy doing it in the middle of a project.

✅ Related tutorial: Coverstitch vs. Serger
Presser Feet
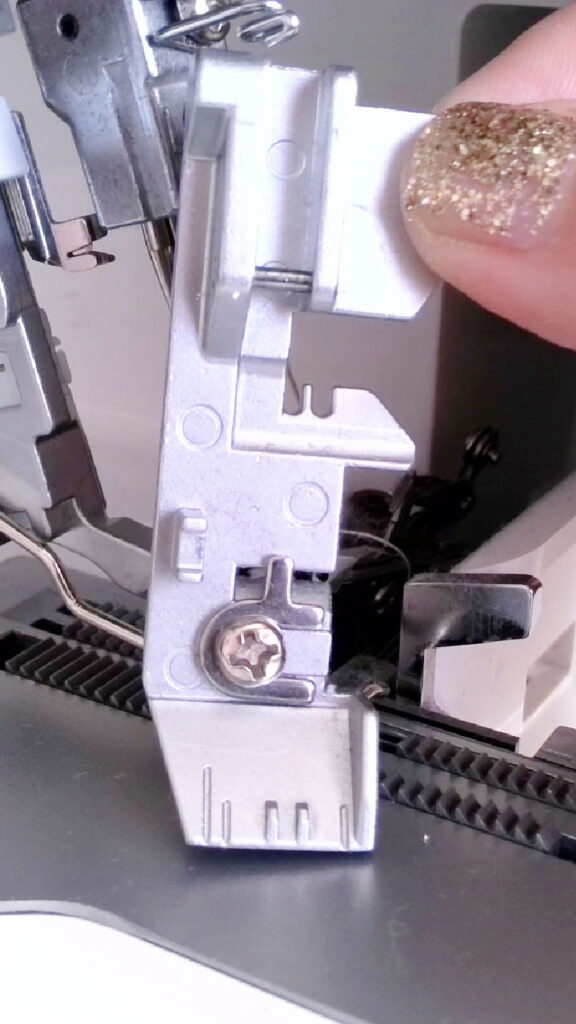
Specialty presser feet let your serger do much more than finish seams. There are feet for blind hems, ruffles, piping, beading, and cording. The elasticator foot attaches elastic to edges on swimwear, children’s clothes, and lingerie.
✅ Related tutorial: How to Sew Elastic into Waistbands: A Casing Method by Serger
Before you buy, check which feet come in the box and which ones you can buy later. Look up the price of the extra feet too. Some brands sell full foot kits, and others sell each foot separately at a much higher price.
Check how the feet change. On many sergers they snap on and off in seconds. On others, you need a screwdriver for each change. If you plan to use specialty feet often, snap-on feet save a lot of time.
If you’re upgrading, don’t count on your old feet fitting the new machine. Serger feet usually fit only the same brand, and sometimes only certain models. Check before you buy, especially if you have a collection of feet you love.
Disengaging the Upper Looper (or 2 Thread Converter)
To sew 2-thread stitches, the serger needs a way to take the upper looper out of the stitch. This part is often called a 2-thread converter or a changeover attachment.

Some sergers have it built in, and you just move a small lever. On others, it’s a separate attachment that clips onto the upper looper. It’s tiny, and it’s easy to misplace. Some sergers don’t have it at all, so you can’t sew many of the 2-thread stitches with them.
2-thread stitches are the lightest finishes a serger makes. They work well for sheer and lightweight fabrics, where a 3- or 4-thread edge would look heavy.
Differential Feed/Feed Dog Adjustment
Differential feed is one of the most useful features on a serger. A regular sewing machine has one set of feed dogs. A serger has two sets, one in front of the other.
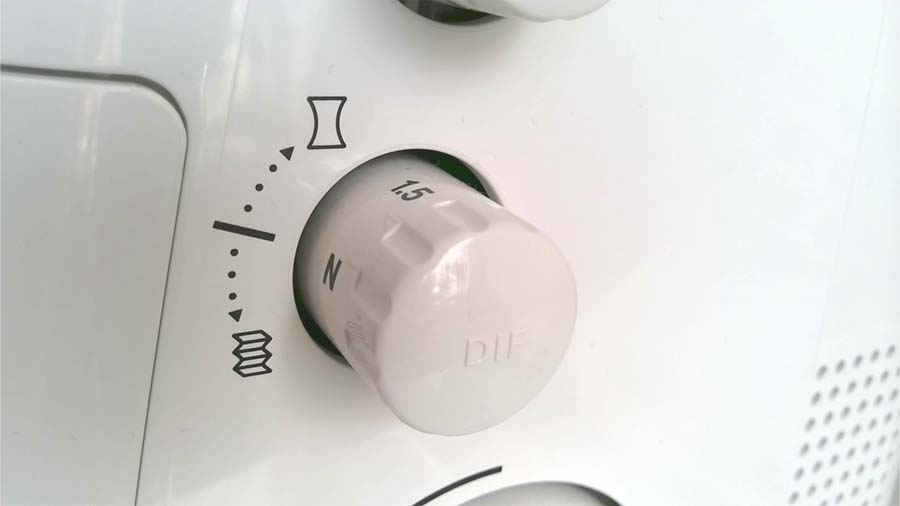
Differential feed lets these two sets move at slightly different speeds. When the front set moves more fabric than the back set, the fabric eases in, and knits don’t stretch into a wavy seam. When the front set moves less, the fabric is held slightly taut, and lightweight fabrics don’t pucker.
The setting is usually a dial with numbers. Most sergers now have differential feed, but make sure the one you choose does, and that the dial is easy to reach while you sew.
✅ Related tutorial: Ever Tried This on Your Serger? This Differential Feed Feature Will Amaze You
Rolled Hem Option
A rolled hem is a very narrow edge rolled and wrapped tightly in thread. It looks lovely on ruffles, scarves, napkins, and home decor projects.
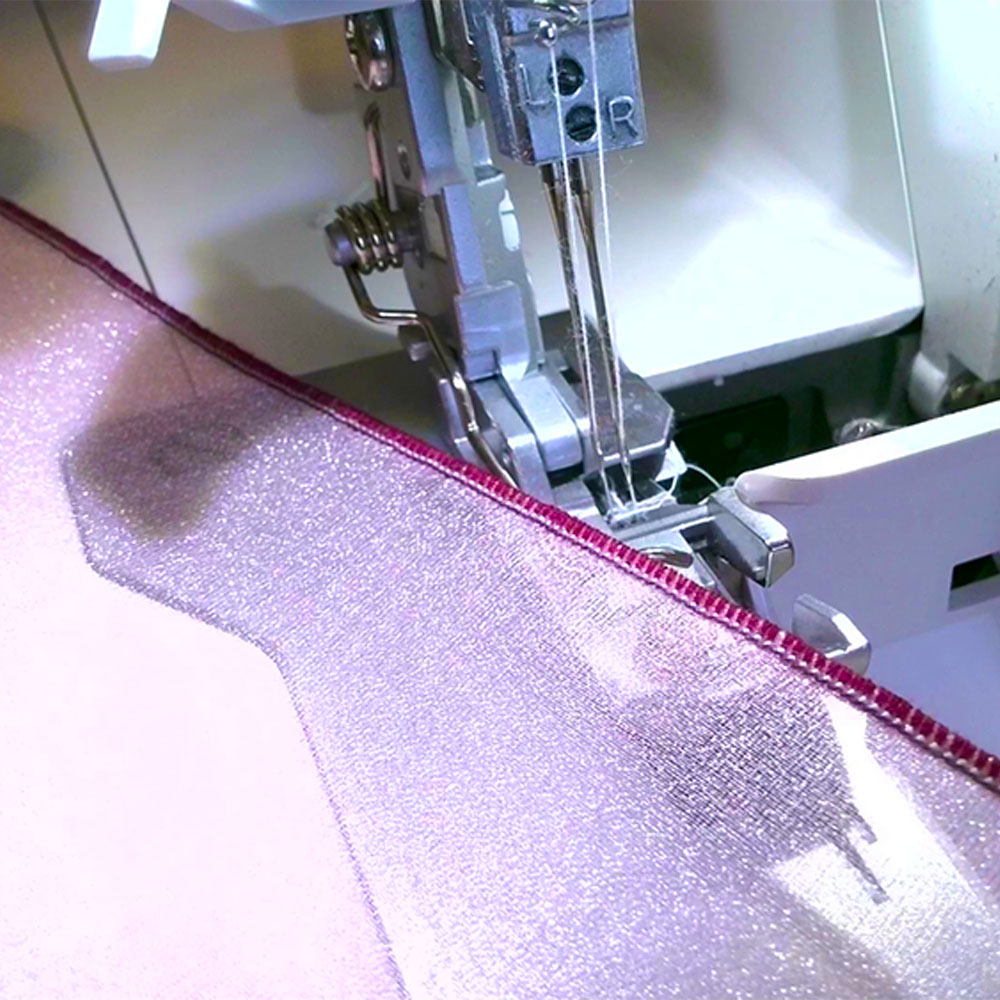
The rolled hem option is common, but some basic machines don’t include it, so check before you buy. Also check how you switch to it. On some sergers, you move a lever, and this is called a built-in rolled hem. On others, you need to change the needle plate or a part called the stitch finger. The lever version is much faster.
✅ Related tutorial: How to Make a Rolled Hem with a Serger
Stitch Speed/Speed Control
Sergers are fast. Many home sergers sew around 1,300 to 1,500 stitches per minute, which is much faster than most home sewing machines. When you’re working with a blade, four threads, and a machine that is still new to you, that speed gets overwhelming quickly.
Check how you control the speed. On most sergers, the foot pedal is the only speed control. A few models have a separate speed setting. The Baby Lock Triumph has a slider with low, medium, and high speeds, and the Singer 14SH654 Finishing Touch lets you set a maximum speed. These are the exceptions, not the rule. On most machines, a good pedal is what matters.
LCD Screen
Some modern sergers have an LCD screen. The JUKI MO-2000, for example, has a graphic screen that shows all the settings for the stitch you select.

The screen tells you the recommended tension, stitch length, width, and differential feed for each stitch. On some models, it also explains how to use the stitch. It’s a nice help when you’re still figuring out the settings. It’s also one more part that can break, and it adds to the price, so think about whether you need it.
Memory
Some computerized sergers have built-in memory. You can save your own settings for each stitch, which saves time if you sew the same fabric often.
Some machines also remember the last stitch you sewed. When you turn the machine back on, you can continue your project where you left off, without resetting everything.
Free Arm
A free arm works the same way on a serger as on a sewing machine. You remove part of the bed, and a narrow arm remains. You can slide sleeves, armholes, pant legs, and other tube-shaped pieces around it to hem and finish them.
Most basic sergers don’t have a free arm. Coverstitch machines and combo machines are more likely to have one, because hemming sleeves and pant legs is what a coverstitch is used for most.
✅ Related tutorial: How To Hem On A Coverstitch Machine
Waste Collector
This is a small feature, but it’s nice to have. When the knife trims the seam allowance, the scraps have to go somewhere. Without a collector, they end up on your lap, the table, and the floor.
Many sergers come with a small waste bin that attaches to the front of the machine. It keeps your sewing space tidier. You will still need to brush the lint out of the machine regularly, because sergers make a lot of it.
Light
Check the light over the sewing area. Serger lights are often smaller and dimmer than sewing machine lights, and you need to see the needles, the knife, and the edge of your fabric clearly.
Bright LED lights are best, and some machines have several of them.
Extra Presser Foot Height
Some sergers let you raise the presser foot higher than the standard position. This extra height gives you room for several layers or heavy fabrics, like denim seams, fleece, or quilted fabric.

Check the presser foot height in the specifications, usually listed in millimeters. If you sew bags, home decor, or anything thick, a few extra millimeters make a big difference in how easily the fabric slides under the foot.
✅ Related tutorial: How to Sew a Lined Zipper Pouch by Serger Without a Pattern
Thread Cutter
A serger leaves a thread chain at the end of every seam. A built-in thread cutter lets you cut that chain quickly without reaching for scissors.
The cutter is usually a small blade on the side of the machine, behind the presser foot. It’s a simple feature, but you will use it dozens of times on a single project.
Accessory Storage
This one is a nice-to-have, and completely optional. Many sewing machines have a storage compartment, but not many sergers do.
When a serger has one, it’s usually a small drawer that pops out of the base. It holds extra presser feet, needles, tweezers, and the 2-thread converter. It’s handy, because serger accessories are tiny and easy to lose.
Brand Reputation
Once you find a machine with all the features you want, look at the brand. Pick one or two models from different brands with similar features, and compare their reviews side by side.
Look for repeated complaints in the reviews. One person with a broken knife is bad luck. Twenty people with the same broken knife is a pattern. Also check whether the brand sells parts and replacement knives easily, because sergers need new knives from time to time.
Warranties
When you narrow it down to a few machines, compare the warranties. Some brands offer long warranties and good repair programs. Others offer limited customer support after the sale.
Where you buy matters too. Some brands honor their full warranty only when you buy from an authorized dealer. Read the warranty terms before you click the button, not after the machine arrives.
Ease of Repair
Repairs are where a good local dealer is worth the most. So check where the nearest authorized repair shop is. If the closest one is two hours away, that’s worth knowing before you choose a brand.
Yes, carrying a serger to the store is a hassle. But hands-on help makes a huge difference when you get stuck. Often the problem is a simple adjustment, and someone can show you the fix in five minutes. Even experienced sewists need that kind of support with a new type of machine.
Price Range
Price is always a big factor. If you’re spending several hundred or several thousand dollars, you want a machine with the features you need at a fair price.
Set your budget after you make your feature list, not before. That way, you won’t pay extra for features you won’t use, and you won’t end up with a cheap machine that is missing the one feature you needed most.
How to Match Serger Features to What You Sew
Start with your projects, not with the machine. Write down everything you sewed in the last few months and what you want to sew next. Then look at your list and see which group most of your projects fall into. Each group needs different features, and this tells you where to spend your money.
Home decor and bags. Pillow covers, tote bags, table linens, and curtains are mostly woven fabrics, often thick ones. A 4-thread overlock and a 3-thread edge finish do almost all the work here. Pay attention to extra presser foot height and to how easily the knife cuts canvas, denim, and upholstery fabric. Look at the maximum stitch width too, because wide stitches hold better on fabrics that fray a lot, like linen. You will rarely use a coverstitch or a flatlock, so don’t pay extra for them.
Knits and clothing. T-shirts, leggings, kids’ clothes, and swimsuits need differential feed most of all, so the seams don’t come out wavy. If you want store-bought-looking hems, look at machines that also sew a coverstitch, or plan to buy a separate coverstitch machine. A free arm helps with sleeves and pant legs. If you sew swimwear or lingerie, check whether an elasticator foot is available for the machine.
Lightweight and delicate projects. Scarves, napkins, ruffles, and silk or chiffon pieces need a good rolled hem. A built-in rolled hem lever saves a lot of time. 2-thread stitches matter here as well, because a 3- or 4-thread edge looks heavy on sheer fabric.
A mix of everything. Most sewists have projects from more than one group. Let the projects that come up most often on your list decide the features. If you sew knit tops once a year, you can still hem them on your sewing machine with a twin needle. You don’t need to buy a coverstitch machine for that.
Then turn your list into a feature checklist. It keeps you focused on the machines that fit your sewing, and it makes the price comparison later much easier.
Serger Brands and Models to Consider When Choosing a Serger
Several serger brands have earned good reputations over the years. I wanted to give you a fair look at the features that matter, rather than push one brand. Each brand has pros and cons, and they often change from model to model.
Your sewing needs are your own. They depend on the projects you love, how often you sew, and how you like to work. Before you decide based on a brand name alone, go through all the features above and see which machine checks the most boxes for you.
The reputable serger brands to explore are:
- Brother
- Baby Lock
- Janome
- Singer
- Juki
- Bernina
- Pfaff
- Elna
Read my review of the Juki MO-2000 serger here. I found the Juki MO-2000 is a nice serger for everyday sewing. Still, weigh the cost against how much you plan to use it, because it costs more than many other models.
✅ Related tutorial: Best Serger For Knits | Top Picks For Every Budget
If you sew regularly and want stronger seams and more finishing options, a serger is a great addition to your sewing room. If you already have one, the right upgrade can save you time on every project. Decide which features matter most to you, and then compare the machines that have them.


Once you start using your new serger, I think you will enjoy the extra finish it brings to your projects. It takes a little while to get used to it, but it’s worth the effort for durable seams that look as good inside as they do outside.
✅ Related tutorial: First 10 Things You Should Do After Buying a Serger
Save this pin to your sewing board so you can refer to this serger buying guide when you’re ready to compare machines. For more sewing tips, tutorials, and project ideas, follow me on Pinterest.

latest posts
- Serger Buying Guide: What to Know Before You Buy
- Envelope Pillow Cover Tutorial for Beginners: Easy DIY with Just Two Seams
- Easy Christmas Sewing Project for Making Fabric Gift Bags in Different Sizes
- Secrets to Sewing with Difficult Fabrics: Tips for Perfect Results
- How to Add a Fabric Insert to a Hemmed Edge: The Wrap-and-Turn Trick
- The Little Triangle Trick for Clean Hem Corners
- 25 Little Sewing Habits That Make Your Work Look Better
- How to Sew a Pointed Fabric Zipper End Tab
- 15 Sewing Machine Parts You See All the Time — But Probably Ignore