
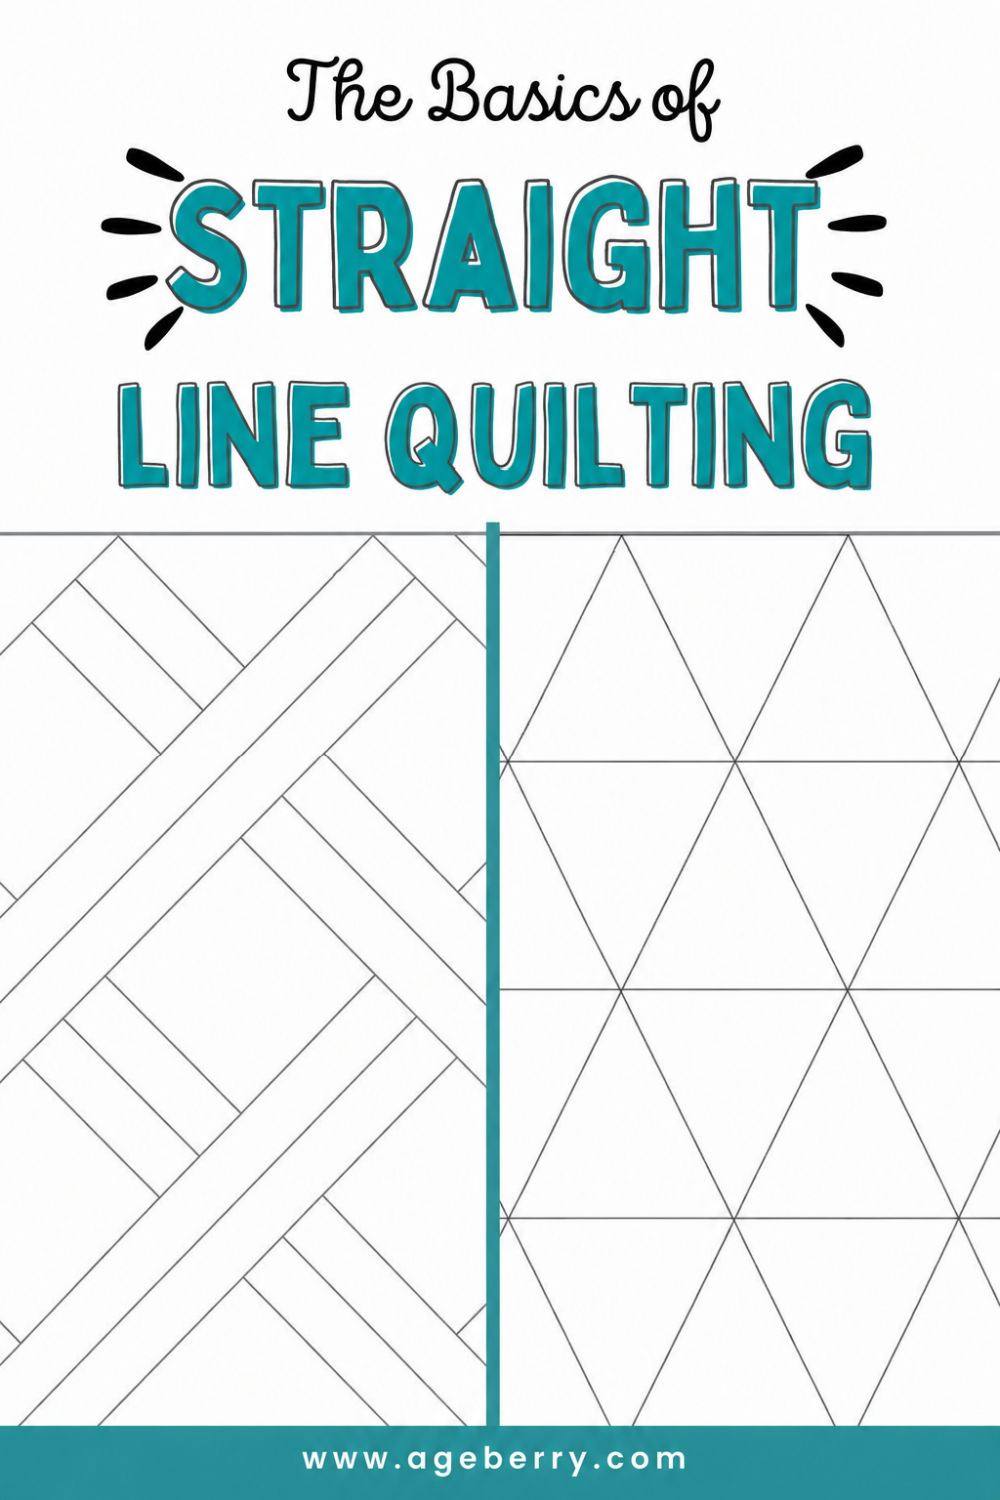
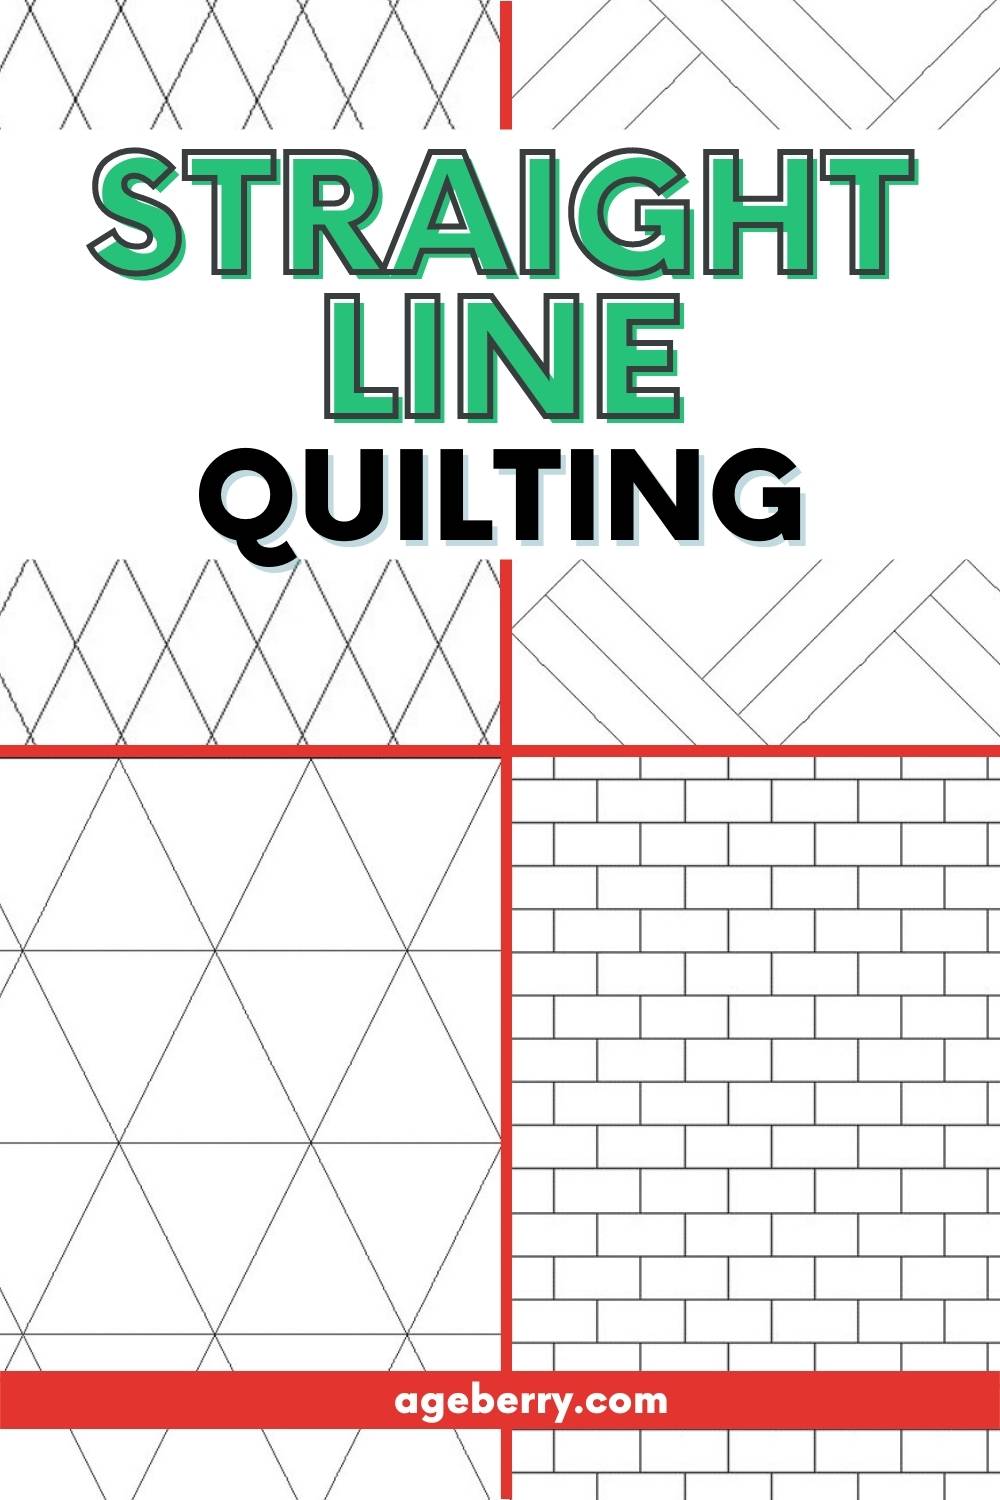
The Basics of Straight Line Quilting
One technique that is often overlooked in quilting is straight line quilting. If you’ve ever made a quilt, chances are you’ve used the straight line quilting technique. It’s a popular choice mostly for smaller projects like table runners, potholders, placemats, baby quilts, etc. but can be used for big size quilts too.
Straight line quilting may not be the flashiest way to finish off a quilting project but it certainly has its merits. It can be used to create unique looks with just a few simple stitches. Whether you’re working on something small like a potholder or large like a king size quilt – learning how to do straight line quilting will open up new creative possibilities when you start using this technique.
The main benefit of using straight line quilting is that it’s not complicated and easy for beginners. This means that it’s time-efficient and even cost-effective when compared with other forms of quilting.
Prefer to read without ads?
I created a PDF version of this tutorial for anyone who likes to keep sewing guides saved, printed, or easy to read without ads. It includes the same helpful information in a simple format you can download and use whenever you need it.
The PDF is available in my shop for a small fee. It’s a nice option if you want to support my work and keep this tutorial close to your sewing machine.
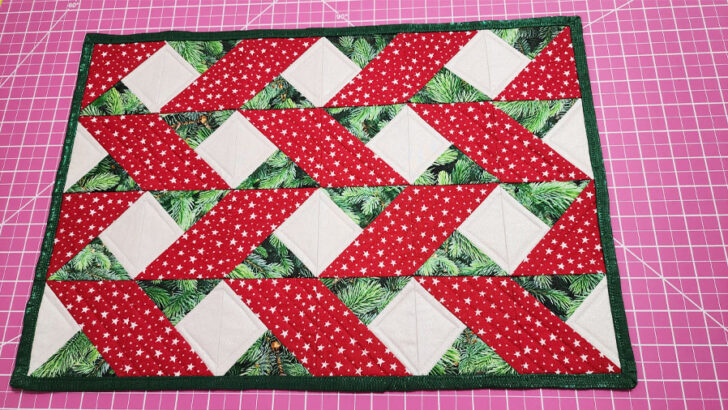
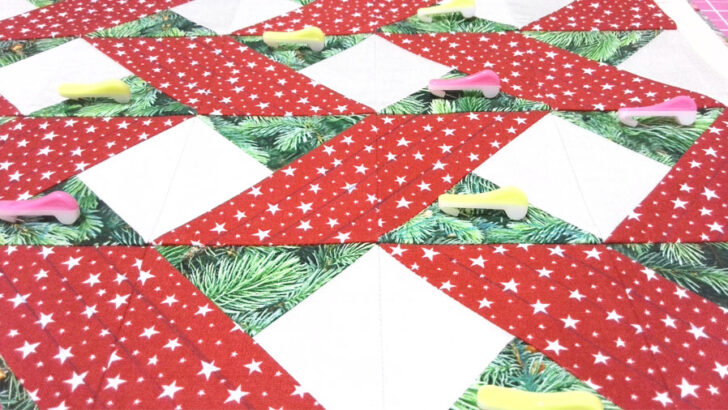
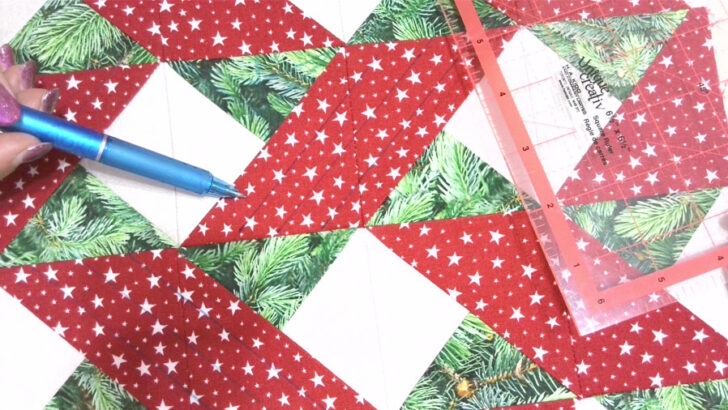
The placemat I recently made for Christmas was the perfect project to practice my straight line quilting. I personally love the look of straight line quilting and how it adds an extra bit of flair to the pieces. It’s easier than most other forms of quilting, so if you have tried but been disappointed by more complex methods, this could be a good alternative.
- What Is Straight Line Quilting
- How To Do Straight Line Quilting
- How To Mark A Quilt For Straight Line Quilting
- How To Use Painter’s Tape To Mark A Quilt For Straight Line Quilting
- Straight Line Quilting Using A Walking Foot
- Straight Line Quilting Without Using A Walking Foot
- Stitches For Straight Line Quilting: Adding Visual Texture And Stability
- Stitch Length For Straight Line Quilting (Guidelines)
- Straight Line Quilting Spacing
- When Straight Line Quilting, Where Do You Start?
- Tips On Sewing A Straight Line When Doing Straight Line Quilting
What Is Straight Line Quilting
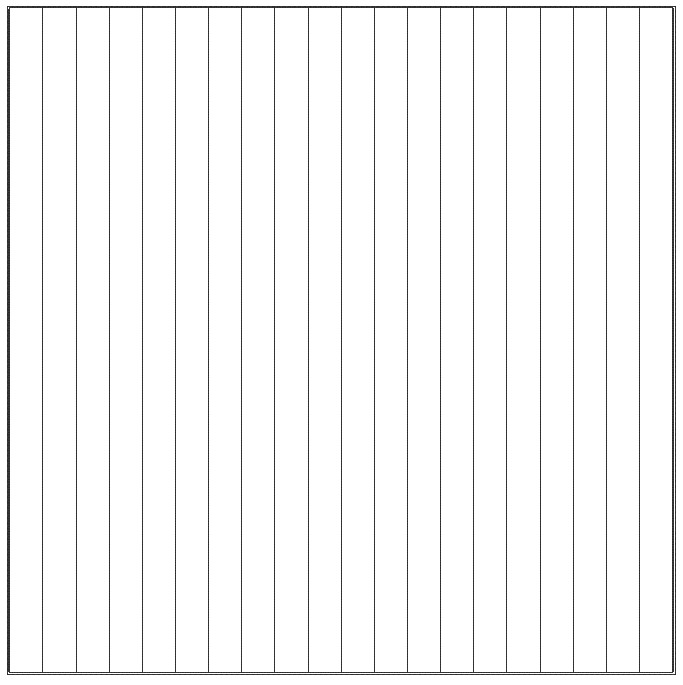
Straight line quilting is a popular quilting technique that uses straight stitching lines to create quilts. This method of quilting involves stitching in only straight lines. It is a great alternative to free motion quilting, as it does not require as much intricate stitching. Instead, the basic idea behind straight line quilting is to densely cover the space between two defined areas with parallel rows of stitches.
This produces a crisp look with clear geometric shapes such as x’s, grids, and cross hatching – and it’s usually great for modern designs and colorful fabrics. With practice, this quilting technique can become second nature and will provide you with stunning results for your next quilting project. All you need is patience and accuracy.
Straight line quilting is a great quilting technique for beginner quilters. It’s the simplest way to finish a quilt, whereby you sew straight stitching lines – rows and columns, diagonals and spirals – to form your desired quilting design. Plus, it can be done easily with a home sewing machine, so there’s no reason not give it a go if you’re new to quilting.
While straight line quilting may seem like a too simple choice at first glance, there are many ways to make it interesting. You can use different types of thread, use contrasting colors, or add decorative stitches such as stars or flowers in between the lines for extra texture and interest.
You can change the spacing between stitching lines, use different stitching patterns to add texture and dimension, or change the angle at which you stitch (diagonal lines instead of horizontal). If you want something even more creative, try combining several different stitching patterns together in one design. All these variations are easy to do and will give your project a unique look.
I was surprised to discover that there are even different types of straight line quilting. Some of them are:
- Grid quilting
- Stitch-in-the-ditch quilting
- Outline (or echo) quilting
- Channel quilting
- Matchstick quilting
- Free motion ruler quilting
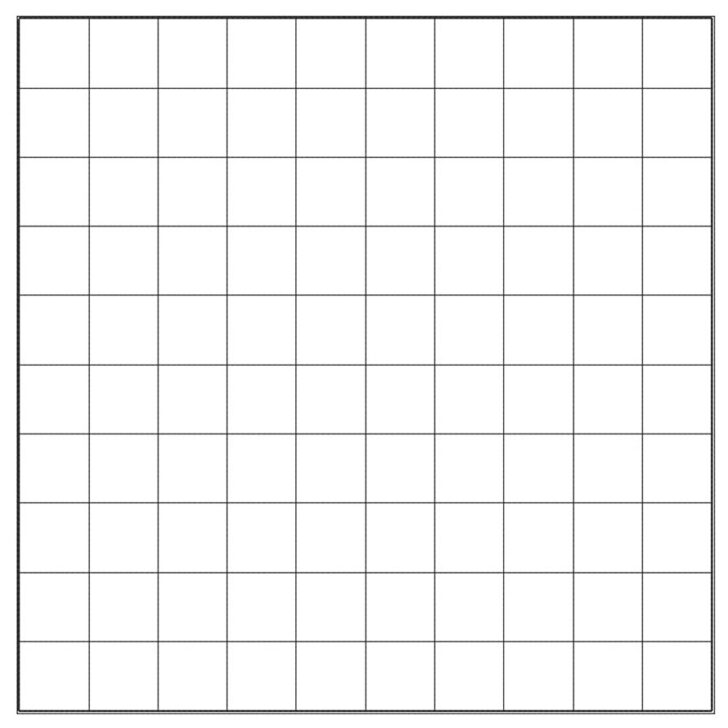
Grid quilting is a technique for making quilts that create a grid design on the surface of the quilt, usually square or diamond shapes depending on the pattern desired. It’s the perfect way to add texture, shape and definition to any project. The great thing about grid quilting is that you can work in any direction and use whatever size pieces you like, so it’s awesome for beginners who are just getting started in quilting. The quilting lines can be diagonal in both directions, or both vertical and horizontal.
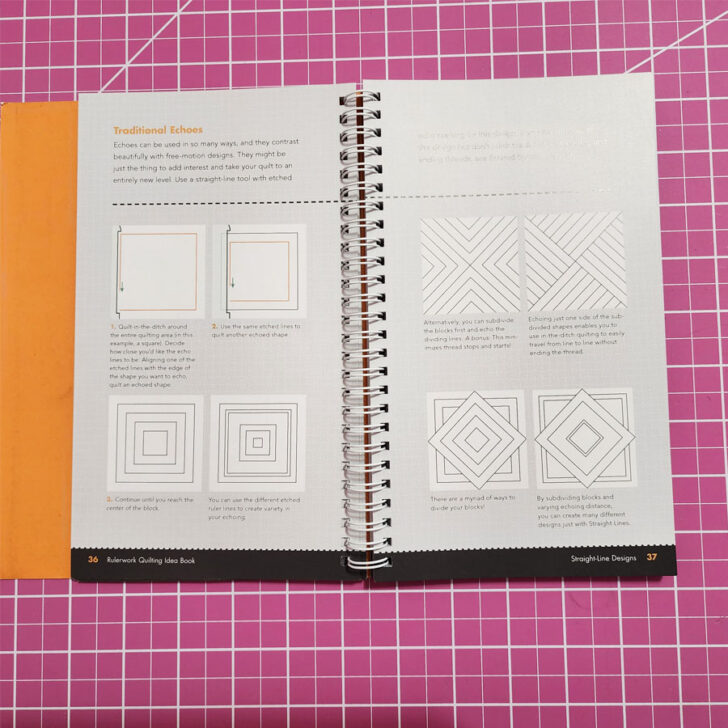
Stitch-in-the-ditch quilting technique is used to accentuate the seam lines between two fabrics that are sewn together. The finished stitches should be almost unnoticeable as they sit inside the seam crease of the materials. Stitch-in-the-ditch quilting avoids drawing attention to the stitching and allows your fabric shapes to truly stand out in the finished project.
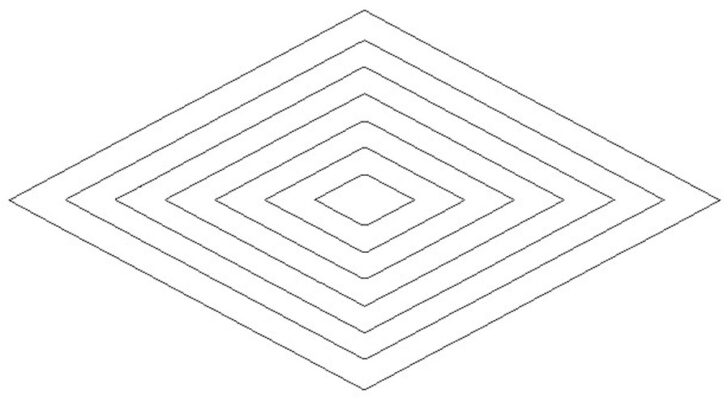
Outline (or echo) quilting emphasizes the pieced design. It’s stitched at a small distance (often ¼”) from the seam lines, outlining the pieces or blocks. Outline quilting highlights the pieced design. This creates an effect that outlines and sets off each shape or block in the pattern from its neighbors. With outline quilting, it’s easy to emphasize intricate patterns with multiple shapes and colors by creating contrast between each piece.
Channel quilting is created by stitching in a series of evenly spaced lines either horizontally, vertically or diagonally, forming ‘channels’ for the pattern. Depending on the type of stitch and thread used, channel quilting can add a decorative flourish to your project as well as provide much-needed structure and stability.
Note: Some of the links on this page are affiliate links. This means I will receive a commission if you order a product through one of my links. I only recommend products I believe in and use myself.
Free motion ruler quilting is an increasingly popular form of quilting that uses a specialized ruler foot and rulers to guide your fabric through traditional quilting designs. The foot basically acts as a stitching guide, allowing you to make precise, even stitches that repeat along straight lines ( and curved edges too).
Learning how to do rulerwork is a really fun and satisfying skill, but it can be hard to figure out the first few steps. That’s why I was so excited when I found this book on ruler quilting – it lays everything out in an easy-to-follow way with lots of helpful graphics and photographs.
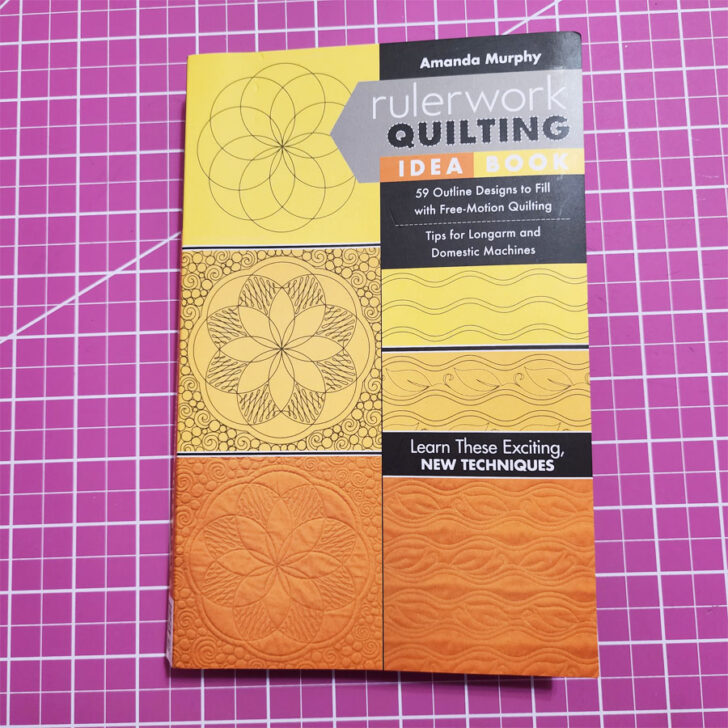
There are many straight line quilting designs in this book!
How To Do Straight Line Quilting
Here are some general tips on how to do straight line quilting that will help you get started.
#1. Start Simple & Build Gradually
When first learning how to do straight line quilting, it’s best to opt for a simple design with few angles and turns. This will help you build your confidence as you practice and hone your technique. As your skills improve, you can move onto more intricate patterns featuring turns and angles.
#2. Think About Stitch Length & Spacing
The size of stitches you use and the spacing between them can have a huge impact on the look of your finished piece. When deciding what stitch length to use, consider the thickness of the batting in your piece. Thicker batting will require longer stitches while thinner batting can handle shorter stitches without any problems. The same goes for stitch spacing—the closer together they are, the better support they provide for thicker batting layers.
✅ Related tutorial: What is the stitch length and how to adjust it for different fabrics – a sewing tutorial
#3. Practice Makes Perfect
As with any new skill, there’s no substitute for practice when it comes to learning how to do straight line quilting properly. Start small by creating a practice fabric sandwich using scrap pieces of fabric and then sew lines into it using different stitch lengths and spacings until you find something that works well for your project. Once you get the hang of things, try sewing diagonal lines before moving on to more complicated patterns.
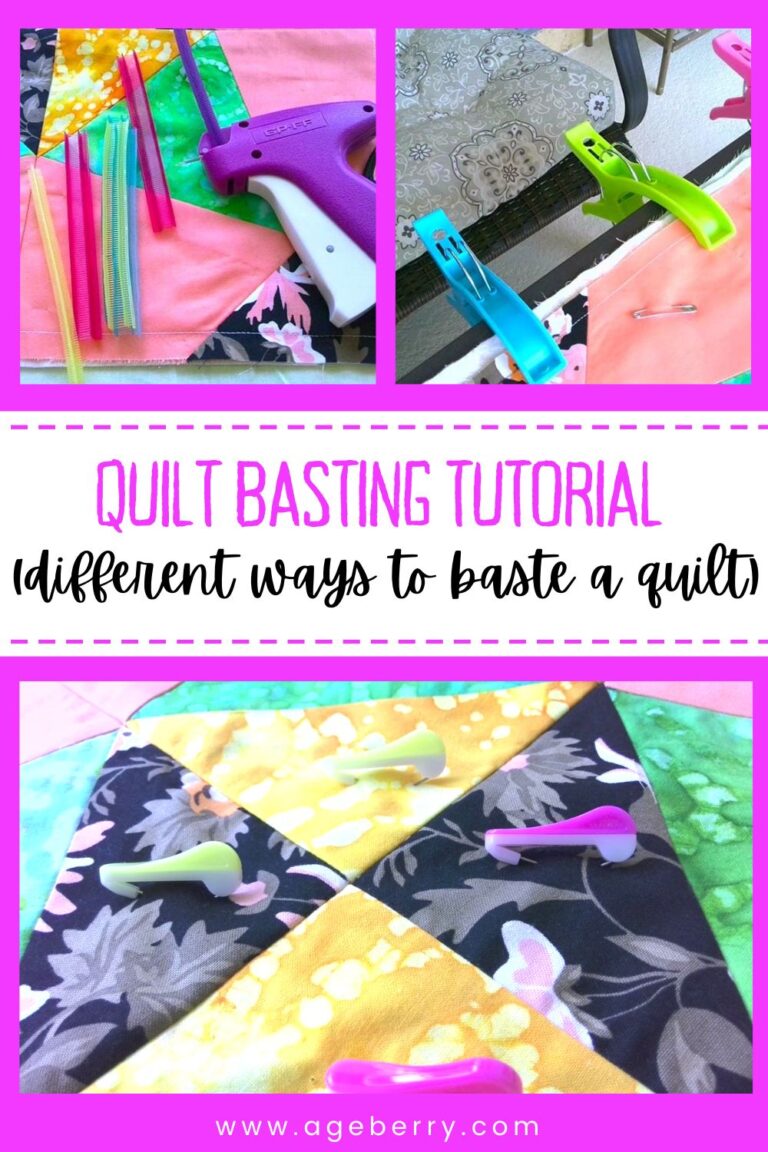
#4. Secure Your Layers
You can baste the top layer, batting and backing with a needle and thread, use safety pins designed for holding the layers in place or use a special adhesive spray. The point is to make sure your layers stay put while you keep them from slipping around while you stitch them together.
✅ Related tutorial: Quilt basting tutorial – learn different ways to baste a quilt
Wondering what I am using to secure this quilt top? The answer is Wonder Pins from Clover. I did not use them myself but I have friends who also like the Magic Pins from Taylor Seville.


# 5. Mark Your Quilt Top (optional)
Before you begin stitching, it’s better to use a fabric marker or chalk to mark your quilt top with the desired lines of stitching. This will help keep your stitches even and consistent. Be sure to use a marker that will easily wash away once the quilt is finished.
✅ Related tutorial: Your Guide For Choosing The Best Quilt Marking Pens For Every Project
You may want to draw the lines on paper before marking the actual quilt top to become familiar with the design.
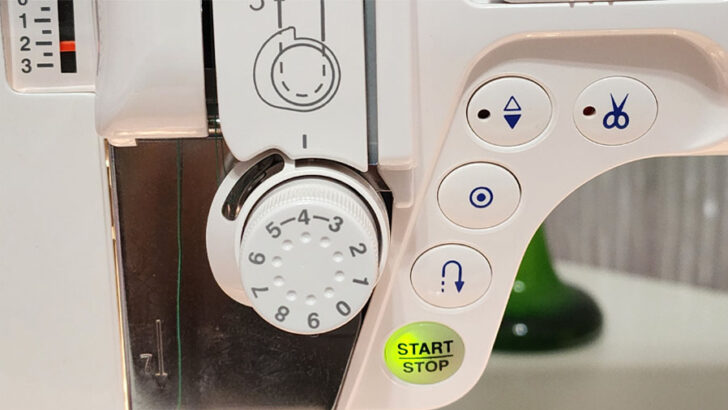
#6. Adjust Your Tension Settings
Once you’ve marked your quilt top, it’s time to adjust tension settings on your sewing machine. For most projects, a medium tension setting between 3 and 4 should work just fine but if you find that your stitches are too loose or too tight, adjusting the tension can help get them just right.
#7. Adjust Your Presser Foot Pressure
If necessary, adjust the presser foot pressure on your sewing machine so that it holds the fabric in place while stitching without causing any puckering or distortion in the fabric itself. Experimenting with different settings until you find what works best for each project is key.
#8. Start With A New Needle
A size 80/12 or 90/14 Universal needle is recommended for most fabrics. For heavier fabrics, like denim, you may need a larger needle. I use Schmetz needles usually but I also like Organ which I find are very good quality too.


Related article: Everything You Ever Wanted to Know About Schmetz Needles
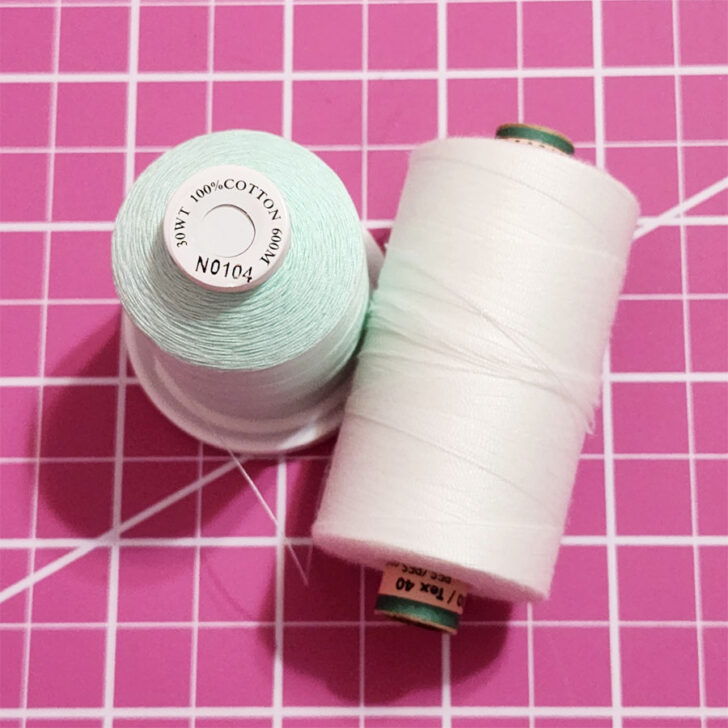
#9. Choose A Strong Thread
The right thread can make all the difference when it comes to straight line quilting.
I like to use a 30-weight 100% cotton thread when sewing 100% cotton fabrics and batting. But polyester threads or cotton covered polyester are good too. Choose matching or contrasting colors for the top and bottom according to your preferences. You may also use a lighter weight bobbin thread or a polyester bobbin thread if you are using a polyester or high-loft batting. As a note for beginners, the smaller the number, the stronger the thread. So, 50 weight thread is lighter than 30 weight thread, which is stronger.
✅ Related tutorial: Sewing thread types and uses
#10. Use A Walking Foot And A Guide Bar
✅ Related tutorial: How to use a walking foot
#11. Slow Down.
Sewing straight lines requires that you take your time.
How To Mark A Quilt For Straight Line Quilting
Have you ever wondered how to get such perfectly straight lines when quilting? Mark the quilt. This involves using tools like rulers, fabric markers, and templates to draw out the exact pattern that will be quilted onto the fabric.
The first step in marking your quilt is to decide on a pattern. You can opt for something simple like straight lines or something more intricate like diagonals and shapes. Once you’ve settled on a pattern, it’s time to start marking. The most common tool used for this is a long ruler with a straight edge.
Use the ruler to draw a line from edge to edge, making sure it’s level throughout. If there are any areas that need extra attention, use smaller rulers or templates to accurately mark those areas as well.
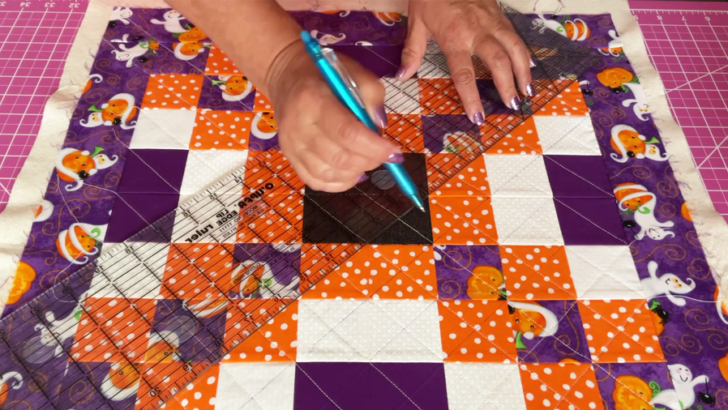
Fabric markers come in many different colors so choose one that will be easy to see against your project’s background color.
Make sure that all of your marks are even and consistent—you don’t want any stray lines or uneven spots when you start stitching.
Take your time and measure twice before quilting once.
There are a number of ways to mark a quilt for straight line quilting. You can do something as simple as using a long straight edge ruler and a fabric marking pen to draw a straight line from edge to edge of your project and use that as a starting guide.
Here are three other common ways that quilters mark a quilt for straight line quilting.
- Using stencils and templates. Pin or stitch paper stencils in place and use them as a tracing guide to lay out a straight line quilting pattern on your quilt top. You can also use temporary spray adhesive to hold cardboard and plastic templates and stencils in place to mark stitching lines.
- Another option is using tape. Tape can be used to quickly mark out evenly spaced lines on any fabric surface without having to worry about accuracy or consistency. This method involves laying down strips of adhesive tape that guide your stitching. This eliminates any visible marks on the front side of the quilt while still providing accuracy and stability during construction.
How To Use Painter’s Tape To Mark A Quilt For Straight Line Quilting
Let me explain how you can use painter’s tape to mark your quilt for straight line quilting. Painter’s tape comes in a wide array of sizes from a quarter inch up to four inches. I would recommend buying the size closest to your preferred size. Get a good quality product because you want to reuse each strip (maybe eight to ten times if you are making a full-sized quilt).
The best part about using painter’s tape is that it won’t leave any residue on the fabric when removed which makes it perfect for marking your quilt.
The key to successful marking with painter’s tape is accurate placement and measurements. Cut your strips of tape according to how far apart they need to be spaced in order for your pattern to work out properly. Cut the tape strips into manageable lengths that are suitable for your quilt and its size. Place each strip on top of the fabric in a straight line.
- Start by aligning your tape with the edge of your project.
- Slowly unroll the tape until you reach the opposite side of your quilt or some other point.
- After placing your tape you can sew from top to bottom on each side of your tape.
- Gently lift the tape and place it down again to continue with quilting aligning the tape with the stitches you just made.
- Repeat sewing until you complete your project.
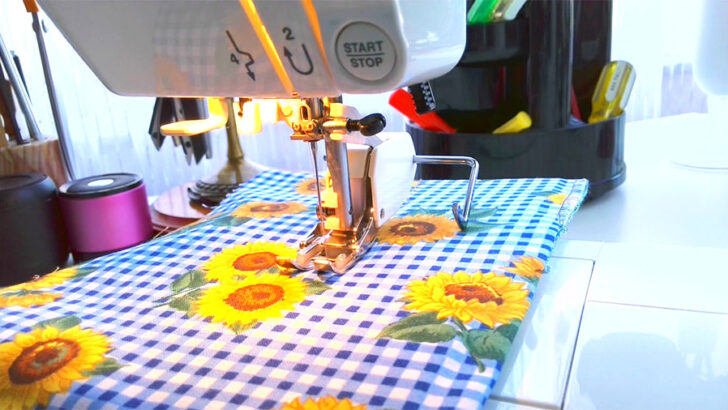
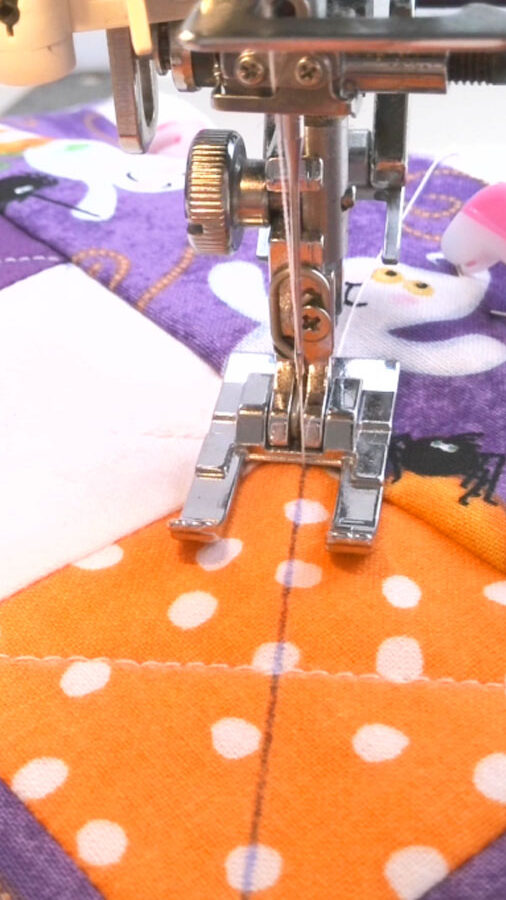
Straight Line Quilting Using A Walking Foot
A walking foot is a special type of sewing machine presser foot that helps keep multiple layers of fabric from shifting while stitching. When straight line quilting, it’s essential that all three layers (top, batting, backing) move through the machine smoothly and evenly so that there aren’t any puckers or pleats in the finished product. The walking foot can help with this by making sure that all three layers stay even as they travel through the machine.
✅ Related tutorial: Walking Foot Attachment For A Sewing Machine: What It Is And Why To Use It
The walking foot attachment has teeth on the edge that act as an upper feed dog to drag the upper fabric along with the lower layer to ensure all layers are pulled together at the same pace. This means that your “quilt sandwich” is stitched consistently top-to-bottom as you sew your straight lines. No bunching or puckering. Your back will be as neat and pretty as your front!
The process of sewing with a walking foot for straight line quilting is basically the same as sewing with a standard pressure foot, except it is so much easier to manage multiple layers of fabric. You simply remove your standard presser foot and then attach the walking foot in place according to your sewing machine instructions. This attachment works best at a slower than normal pace, perhaps medium speed, or even slower. It is important to note that while you can make two or three back stitches to start or end a seam, most walking foot attachments are designed to only make forward straight and zigzag stitches.
✅ Related tutorial: Brands of walking foot attachments: buying guide
Straight Line Quilting Without Using A Walking Foot
The walking foot may be the go-to tool for straight line quilting, however, there are other presser feet that can be beneficial depending on the kind of quilting you’re doing. Let’s take a look at some of the different presser feet available and how they can help with various types of quilting projects.
An open toe presser foot has an open toe design that allows you to see exactly where the needle will enter and exit your fabric as you stitch. This makes it easier to control the precise placement of each stitch and also makes it easier to adjust if needed.
An open toe presser foot is ideal for light or thin batting because it allows you to see what you’re stitching better than a regular foot does. A clear view of your stitching lines makes this type of foot ideal for precision sewing.
I used the open toe presser foot in this simple patchwork quilt – a placemat.
A ruler foot is designed to help you create perfectly straight lines in your quilt top. If you’re using free motion ruler work, then this type of presser foot can be invaluable because it helps keep your ruler steady and prevents it from slipping while sewing.


There are also specialty feet available for specific tasks like echo quilting and stitch-in-the-ditch quilting. These feet can all be used as alternatives to the traditional walking foot depending on what type of work you’re doing at the time. Many machines come with these feet included but they can also be purchased separately if needed.
Stitches For Straight Line Quilting: Adding Visual Texture And Stability
Stitches for straight line quilting are typically seen on the top and bottom of the quilt.
There is often a misconception that straight line quilting is all about simplicity and straight stitches. But, in reality, you can use a wide variety of stitches. The rule is to sew them in a straight line.
The most common type of stitch used in straight line quilting is the standard straight stitch. But have in mind that the straight stitch is quite versatile and can be used on all kinds of fabrics. It’s ideal if you want something simple but effective.
✅ Related tutorial: Types of Sewing Machine Stitches: Unraveling the Mysteries of the Straight Stitch
However, there are other types of stitches that can be used as well. Zigzag stitches are great for adding texture and they also provide extra stability when stitching in a straight line. Decorative stitches are also an option – they can be used to create intricate patterns on top of the fabric or even just to add a bit of color.
Try experimenting with different stitches when working on your next quilt.
In addition to standard stitches, you can also try out the stitch in the ditch for your straight line quilting projects. This technique involves stitching along the seams between fabric pieces in order to reinforce them and hold them together securely. It may take some practice at first but once you master this technique you will be able to quickly create quilts without any visible stitching on the outside.
Stitch Length For Straight Line Quilting (Guidelines)
An important factor to consider when quilting is the stitch length, which will affect the look and feel of your finished product. But what are the guidelines for stitch length when it comes to straight line quilting? Let’s take a look.
Stitch length is typically measured in millimeters, although some machines allow you to measure in other units as well. The shorter the stitches, the denser and more compact the quilt will be; longer stitches will give a looser and more airy feel to it.
I find that 2.5 mm to 3.0 mm is good for most machine quilting projects. If you want a denser quilt or need extra stability, you may want to go with a shorter stitch length (around 2 mm). On the other hand, if you want a looser quilt or just want something that looks nice without being too dense or tight-looking, then longer stitch lengths (around 3 mm) may be better for you.
If your fabric has thick layers or bulk, then you may want to increase your stitch length slightly so that your stitches don’t break or get stuck in the fabric. On the other hand, if your batting is thin and the fabric is delicate or lightweight, then try decreasing your stitch length to 2mm for better results. There are exceptions to every rule, of course; experiment with different settings until you find one that works best for each particular project you’re working on.
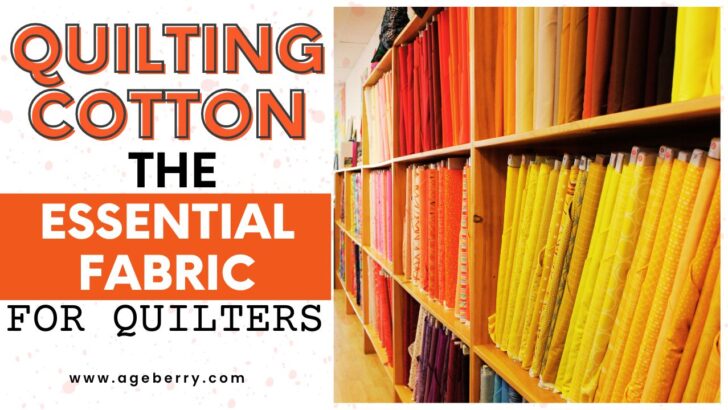
Speaking of fabric for quilting, I have a guide that covers everything you need to know about quilting cotton, from thread count and fabric weight to pre-washing and using it in all kinds of sewing projects: Quilting Cotton: The Essential Fabric for Quilters
Straight Line Quilting Spacing
When it comes to spacing, there really is no right or wrong choice. You just imagine what you want your quilt to look like when you are finished and go with that.
The first step is to decide how much space you want between each line of stitching. This is mostly a matter of personal preference, but it’s important to be consistent throughout your entire project so that all of your lines are even and symmetrical. For example, if your chosen distance is 1/2”, make sure that all of your lines are spaced exactly 1/2” apart from each other. To help ensure consistency, use a ruler or measuring tape as you stitch along each line.
You also want to consider the size of the quilt before deciding on a pattern. If it’s a larger quilt, then larger spaces between each stitching line might be best. For smaller quilts, however, smaller spaces between each line might be more appropriate as it will create a denser texture that will add visual interest to the piece.
If you are making a big quilt and don’t mind spending some extra time and want a dense quilt, mark your lines about one inch to one and a half inches apart. If you are in a bit of a hurry, you can go up to two or three inches apart. I have heard of some quilters going up to six or eight inches apart. I would not recommend that. It saves time, but you lose some stability in the process. The further apart your quilting lines are the “squishier” your quilt will be.
But…your batting will also begin to break down and shift if you wash your quilt a lot. The batting will eventually get lumpy. It is a good rule of thumb to read the batting manufacturers’ recommendations and pattern suggestions (unless you designed your own) before making a decision about line spacing.
When Straight Line Quilting, Where Do You Start?
The design you choose will play a role in determining where to begin quilting. Certain designs are best suited for starting at the edge while others should be started in the center and moved outward. Since this is a straight line pattern, it is best to sew as much in one sitting as possible and avoid multiple starts and stops with your needle.
If your design has a grid, for example, then starting at an edge or corner would be more effective as it would provide sharper lines and emphasize its unique shape. If it is a symmetrical design that radiates out from one point, then starting from the center will give you better results as it will allow for more even coverage than if you were to start from one edge or corner and work inward.
Another factor to consider when deciding where to start is how many times you want the needle to stop while quilting. Fewer breaks in your stitching will lead to smoother lines overall in your finished piece.
Also, pay attention to any existing seams or points of interest on the quilt top that could influence where you begin sewing stitches. Starting at these points ties together different parts of the quilt’s overall design.
Tips On Sewing A Straight Line When Doing Straight Line Quilting
Learning how to keep the lines straight is something that comes with patience and a lot of practice. I talked about this in my tutorial How to Sew Straight. There are many tools and gadgets out there that can help you sew perfectly straight lines while doing patchwork quilting.
✅ Related tutorial: Seam Guide Tutorial – all you need to know about how to sew a straight line and keep seam allowances equal
Here are a few tips to get you started.
- Lightly starch and press your pieces, when piecing blocks (so they are not stretchy).
- Pin the pieces together when constructing blocks and joining layers.
- Mark the beginning and ending sewing points of your seams so points and corners match perfectly.
- Use the marks on your sewing machine to sew the appropriate seam allowance called for on your pattern.
- Use special presser feet for sewing straight.
- Use different seam guides.
- Keep your eye on the guide line and not on the needle.
- Use previous stitching lines as guides for straight line quilting as you quilt your finished project.
- Make sure your machine is properly set up before you start sewing. Adjust the needle position and stitch length so that your stitches look even and consistent throughout your project. If necessary, use a walking foot attachment for added accuracy when stitching long seams or blocks of fabric together.
- Mark Your Fabric. To ensure that your lines are as straight as possible, it’s always a good idea to mark out where you plan on stitching beforehand using chalk or a disappearing ink pen (or both!). This way, you’ll have a guide for where you plan on stitching and can make adjustments if necessary before actually starting to sew.
- Take your time while quilting. This may sound obvious but it really does make all the difference
But the best way to ensure that your lines are straight is by using a seam guide. These handy gadgets are designed specifically for quilters and they attach right to the machine to provide a visual guide for where your stitches should be placed. With a seam guide attached, all you have to do is focus on keeping your needle in line with the markings on the guide.
Did you find this tutorial helpful? If so, save this pin (see below) on your sewing board so you can come to this tutorial later when you need this information on straight line quilting, and follow me on Pinterest for more tips, tutorials, and inspiration!
latest posts
- Corset Pressing Board for Sewing: What It Does and How I Use It
- 7 Essential Tools and Settings for Sewing Denim on a Regular Sewing Machine
- That Purple Thang: 10 Smart Ways to Use This Weird Little Tool
- 20+ Reasons Your Sewing Machine Thread Keeps Breaking (+ Solutions)
- Dresden Plate Quilt Block: 4th of July Fireworks
- How To Sew Curves the Easy Way Using a Curve Master Presser Foot
- 30 Sewing Hacks That Turn Ordinary Items into Useful Sewing Tools
- Seam Allowances in Sewing Patterns: What They Are and How to Use Them
- What Do You Call a Person Who Sews? I Asked My Readers and Got 1,408 Opinions

Thank you for your instructions on how to do straight line quilting. It was very helpful 🙂 .
Thanks! I am always glad when my articles are useful.