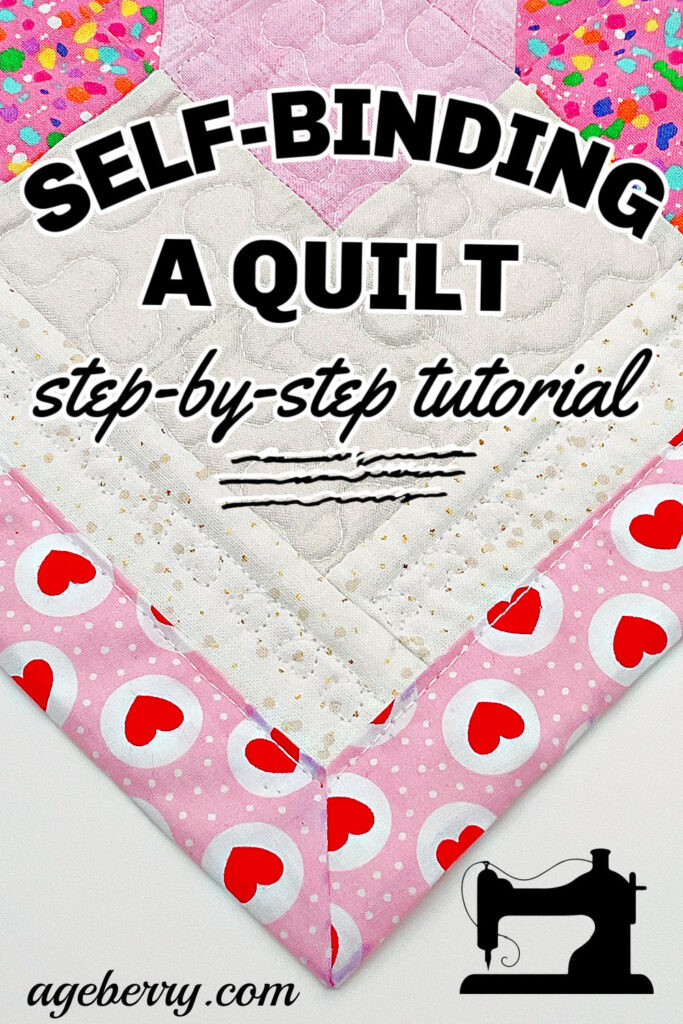
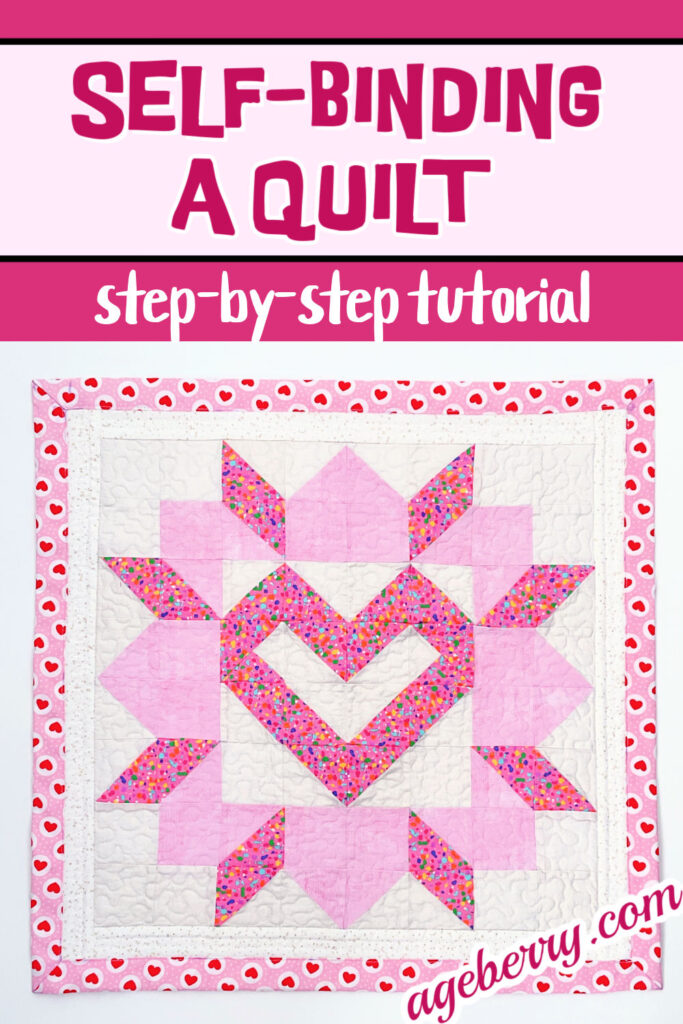
Self Binding Quilt Tutorial: Easy Steps for Perfect Mitered Corners and a Professional Finish
In this tutorial, I want to show you a time-saving technique that simplifies the quilt finishing process – self-binding. Binding a quilt doesn’t have to involve the time-consuming process of cutting and attaching separate binding strips. There’s a simpler way that saves time and effort: making a self-bound quilt.
In this method, the backing fabric is used to create the binding. You just wrap it around the edges. The finished edge looks just like traditional binding, but takes far fewer steps to complete.
This technique works great for quilts you’re going to hang up or put on a table, such as wall hangings or table runners. I think it looks just as good as the usual way.
What You’ll Need
- Quilt: Ensure it is completed and squared up.
- Backing fabric for binding: Select a piece that is at least 3 inches larger on all sides than the quilt top, as this extra fabric forms the binding.
- Cutting tools: Scissors, a rotary cutter, a cutting mat, and a quilting ruler.
- Regular sewing notions
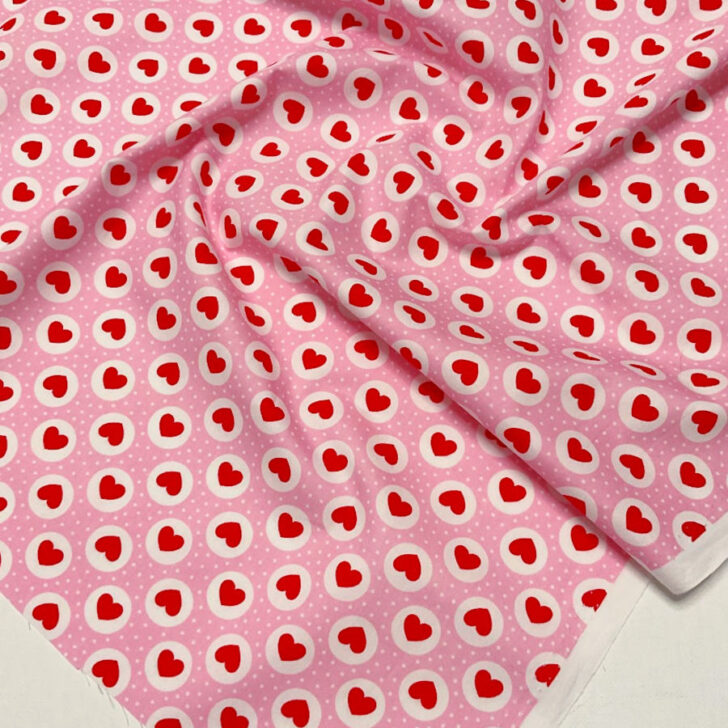
Just have in mind – pick a backing fabric that looks good with your quilt top. It’ll show up as the edge on the front, so you want it to match nicely.
So, read on for step-by-step guidance to create your own self-bound quilt.
Step-by-Step Instructions for Self-Binding a Quilt
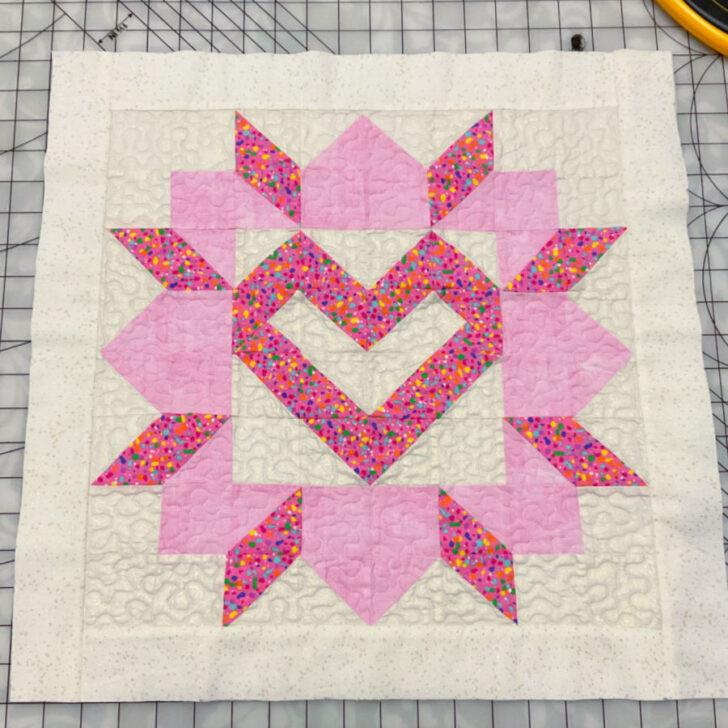
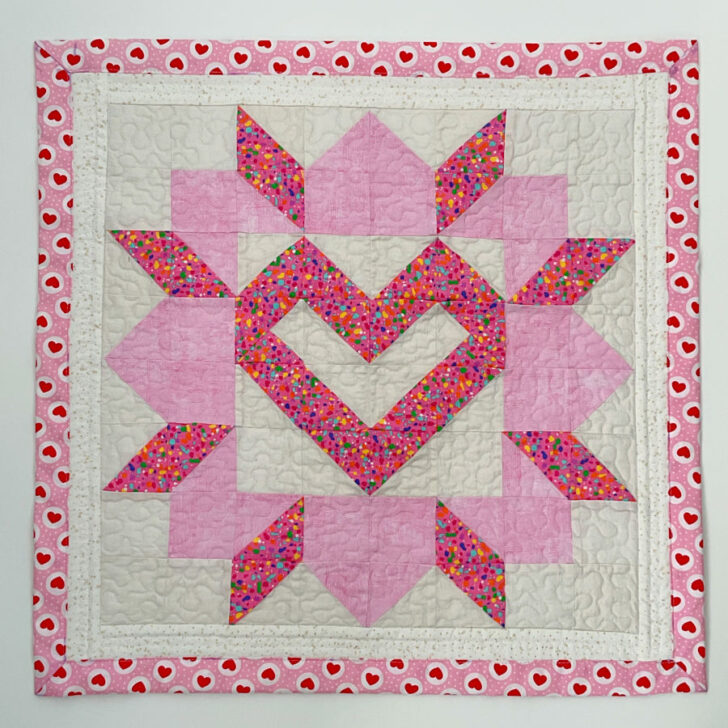
Here’s the quilt I’ve been working on, and it’s ready for the final step – binding. I pieced together all the parts of this block, added batting, and attached a thin cotton backing. Then, I quilted everything together using my embroidery machine.

✅ Related tutorial: Quilting with an embroidery machine – be amazed!
Now, it’s a finished quilt, with all the layers stitched together and the quilting complete. The only thing left is to bind the edges. I’ve decided to use a self-binding method for this one. It’s simple, and it will let the backing fabric frame the quilt beautifully. Perfect for wrapping up this project.
Step 1. Square Up the Quilt
Before you begin binding, make sure your quilt is squared up. Use a rotary cutter, a quilting ruler, and a cutting mat to trim away any uneven edges. Check that the corners are at a 90-degree angle and the sides are straight. This step is essential for getting a professional-looking finish when you bind the quilt. It works well for smaller quilts since they are more manageable on your cutting mat.
Step 2. Calculate the Size of the Backing Fabric
For a self-binding quilt, the backing fabric needs to be larger than the quilt top. Here’s how to figure out the right size.
- Decide how wide you want the binding to be. I chose 1 inch.
- Add 1/2 inch to account for fabric that will be folded under while sewing.
- Add 1/8 inch for some wiggle room, especially if the quilt is thick due to batting.
Final Calculation: 1 + 1/2 + 1/8 inches = 1 5/8 inches extra on each side.
Note: Some of the links on this page are affiliate links. This means I will receive a commission if you order a product through one of my links. I only recommend products I believe in and use myself.
By the way, if you like to use the metric system and measure in centimeters, use one of these measuring tapes that have inches on one side of the tape and metric (mm & cm) on the other.

Step 3. Cut the Backing Fabric
First, we have to compute the size of the cut. Measure your quilt top and add 1 5/8 inches to all sides.
For example, my quilt top was 19.5 inches square, then my backing fabric should be cut to 22 3/4 inches square.
Here is how I calculated the size of the backing square:
- Quilt top size: 19.5 inches square
- Extra fabric for self-binding on each side: 1 5/8 inches
Add 1 5/8 inches x 2 (for both sides) to 19.5 inches:
19.5 + (1.625 x 2) = 22.75 inches
So, the backing fabric should be cut to 22 3/4 inches square.
✅ Related tutorial: How To Cut Fabric Straight | 8 Easy Ways Explained
Step 4. Working with the Backing Fabric
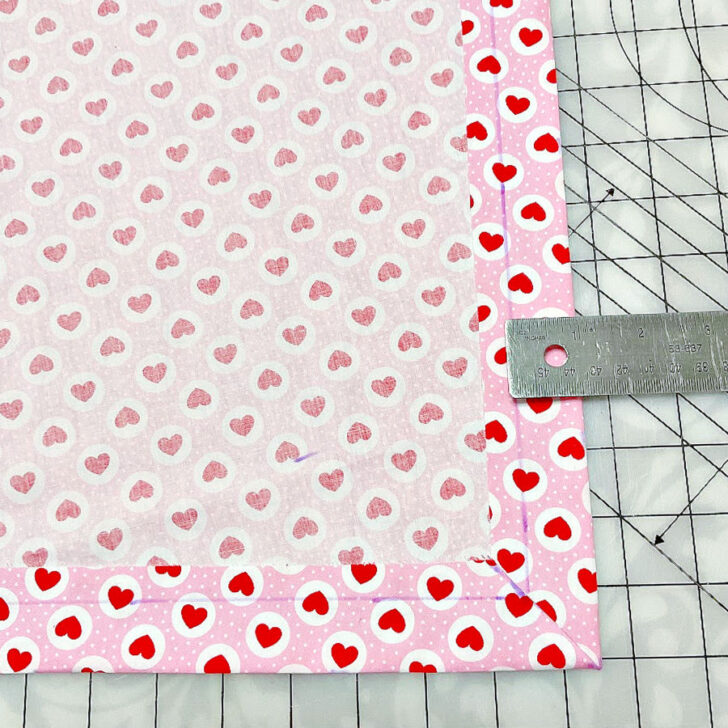
To prepare for self-binding, start with one corner of the backing fabric square. Fold the corner diagonally so that the raw edges meet, with the right sides of the fabric facing each other. Make sure the edges are perfectly aligned, as this ensures a neat and accurate binding later. Use a pin to secure the fold in place, as shown in the image, so the fabric doesn’t shift while marking.
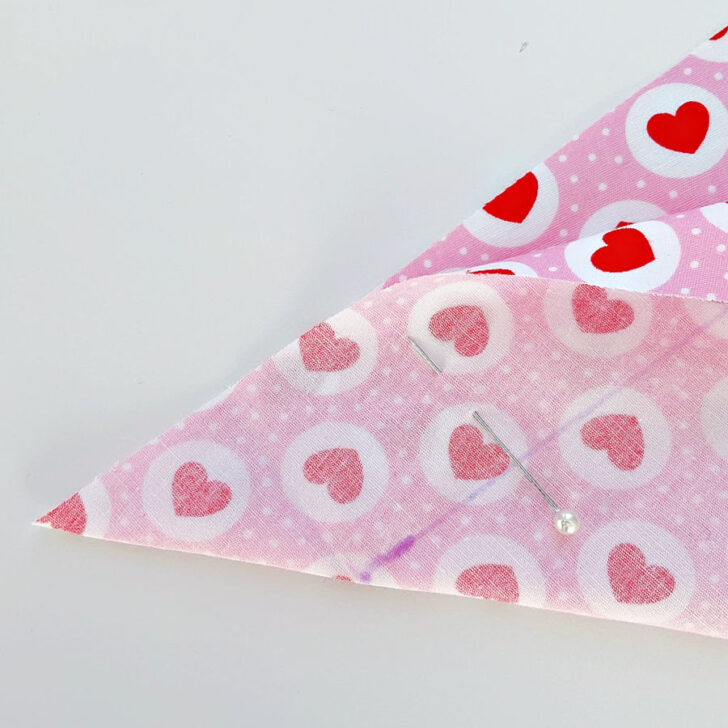
Now, you need to draw a line that is exactly perpendicular to the raw edges. But at what point to draw this line?
- Find points on the folded edge and the raw edge where the distance is exactly 1 1/2 inches. This is the width I’ve chosen for my binding. If you’re using a different width, adjust your measurement accordingly.
- Use a ruler to connect these two points, creating a straight line that runs at a 90-degree angle to the raw edges.
Mark the line clearly with a disappearing marker or another safe marking tool, ensuring it won’t stain or damage the fabric. This line will guide you for the next steps in shaping and stitching the binding.
✅ Related tutorial: How to easily finish outside corners (especially acute)
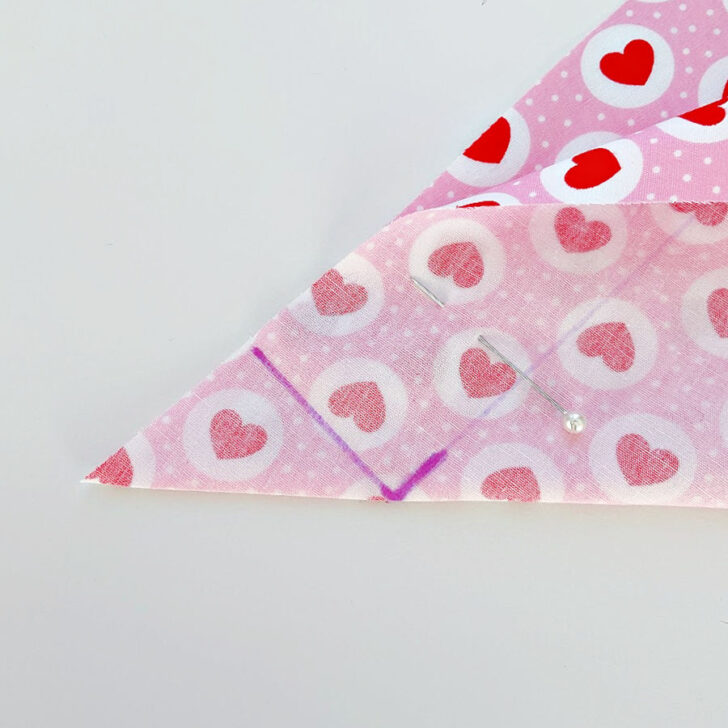
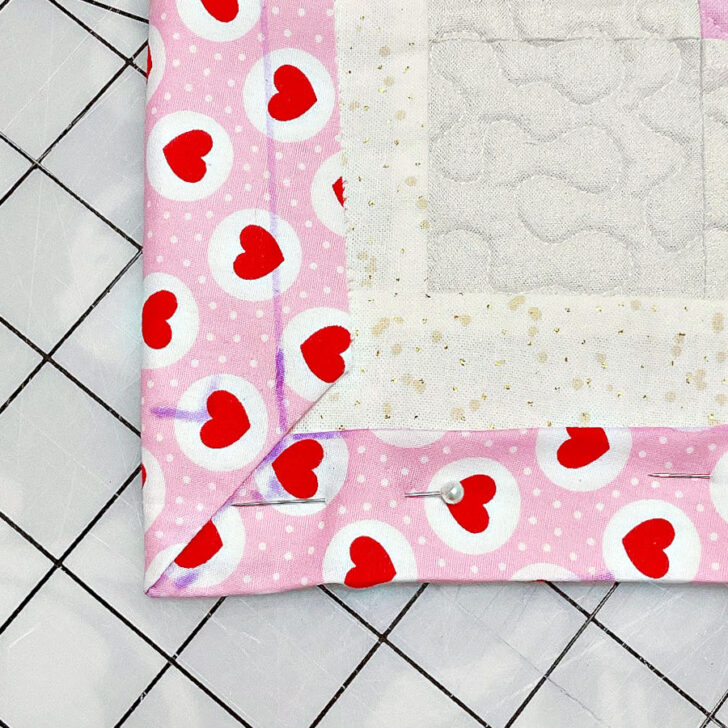
Step 5. Creating the Stitching Line for a Mitered Corner
Fold the fabric along the line you marked in Step 4. Align the raw edges carefully, as shown in the image, to ensure the fold is neat and precise. Smooth the fabric to create a sharp fold, which is essential for accuracy.
Next, use a marking tool to trace along this folded edge. This line is essential for forming the mitered corner.
The precision of this fold and the marked line will directly impact how clean and professional your mitered corner looks when the binding is finished. Taking your time here ensures a beautifully mitered result.
Now you need to find a spot on the line you just marked (the one from the folded edge) where the perpendicular distance to the raw edges equals your seam allowance. In this case, the seam allowance is 1/2 inch, so measure 1/2 inch perpendicular from the raw edges to the marked line.
Mark this exact spot clearly.
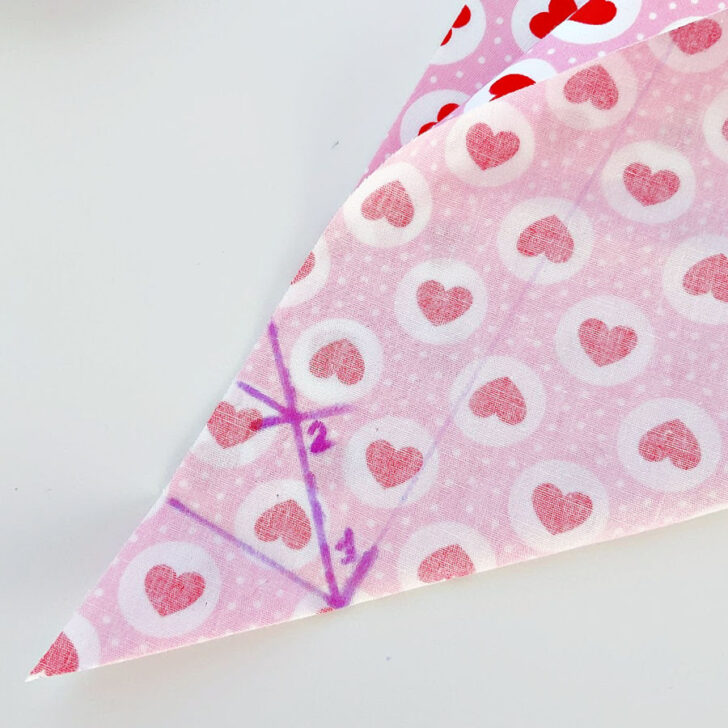
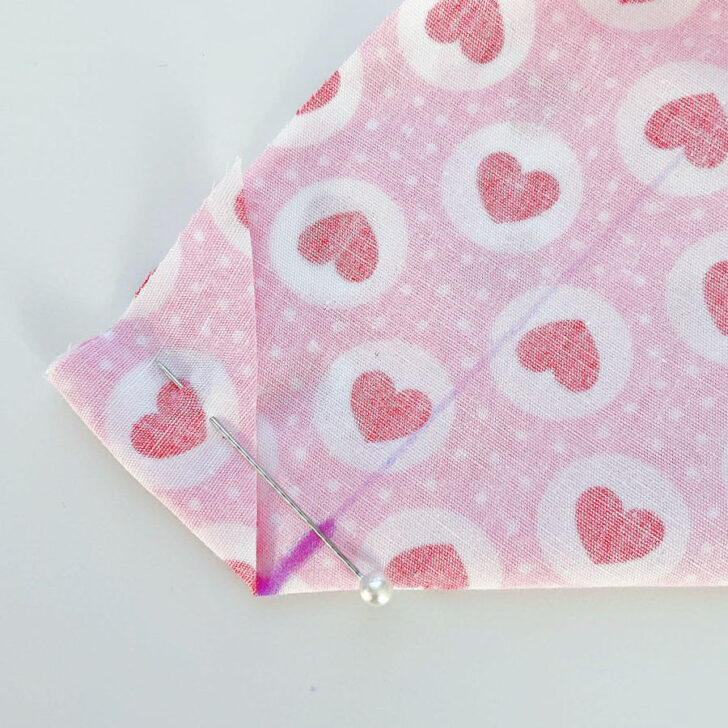
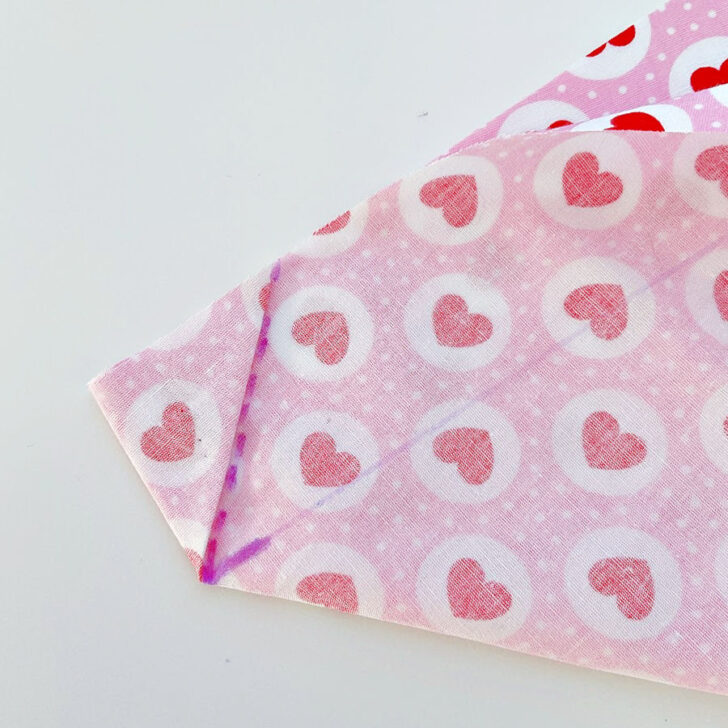
So, the line between points 1 and 2 is your stitching line. Use pins to secure the fabric along this line. Pinning will prevent the fabric from shifting while you sew.
Now, take your fabric to the sewing machine and stitch along the marked line, from point 1 to point 2. Take your time to sew carefully, as this step is key to creating a neat mitered corner for your self-binding.
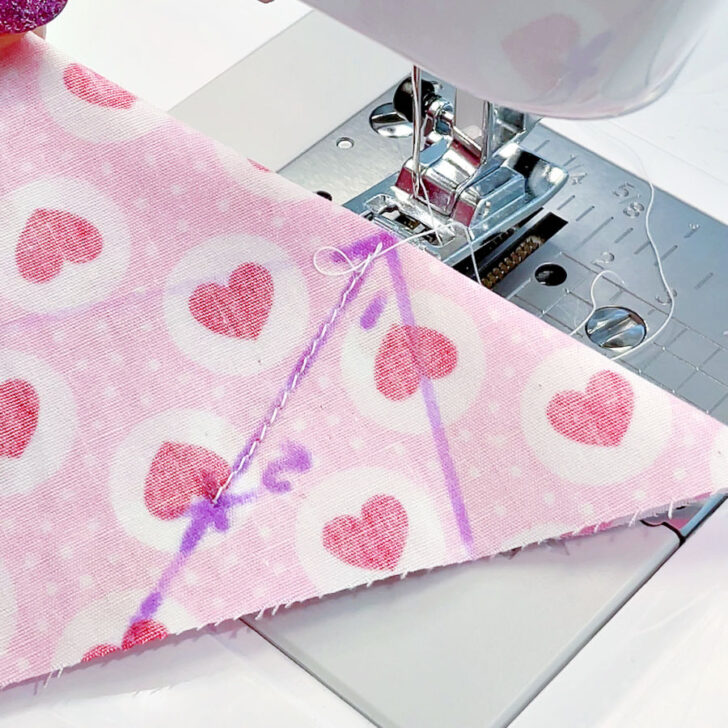
Once you’ve stitched the first corner, repeat the same process for the remaining corners of the backing fabric.
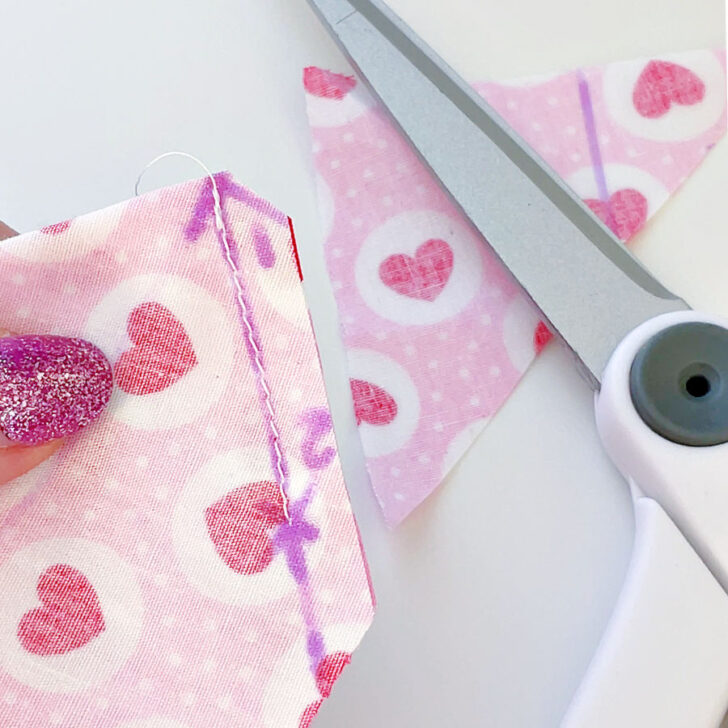
Step 6. Trimming and Turning the Corners
After stitching all the corners do the following:
Trim the seam allowance – use sharp scissors to cut off the excess fabric from each corner, as shown in the images. Be careful not to cut into the stitching line. This step reduces bulk, helping the corners lie flat when turned.


Flip each corner right side out, pushing the fabric through gently.
Use a corner-turning tool or a similar object to push out the fabric and shape the corners into neat, sharp points. Take your time to ensure the corners look crisp and professional.
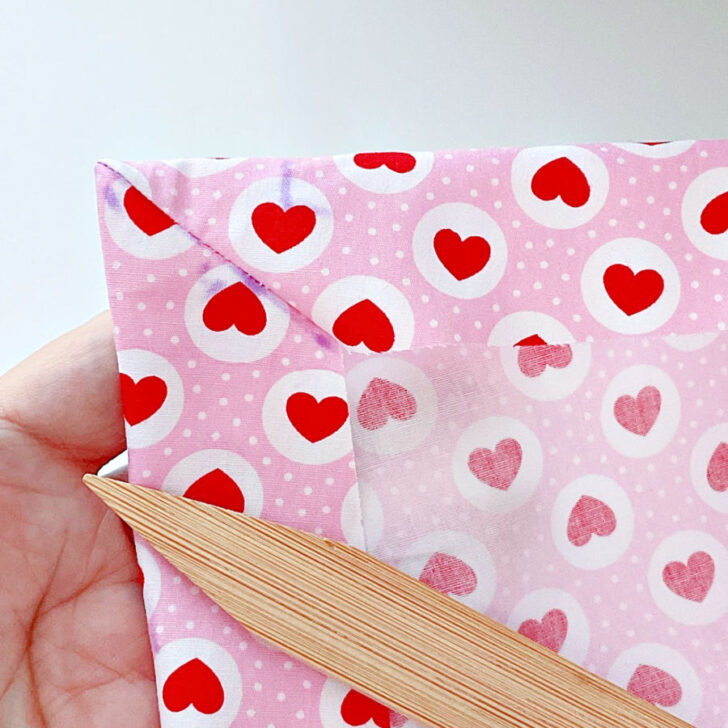
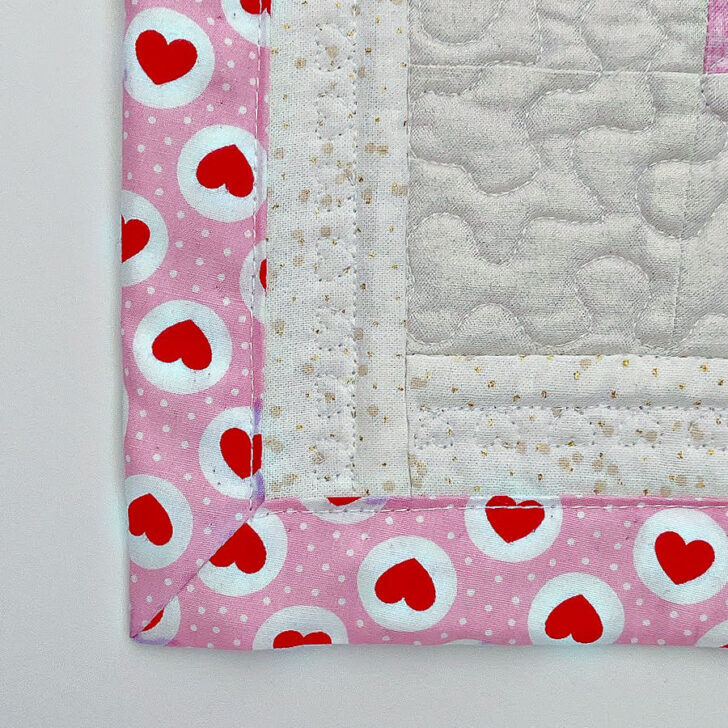
Once all the corners are turned and shaped, the edges of your quilt will begin to form clean mitered corners, ready for finishing.
✅ Related tutorial: How To Make Quilt Binding From Start To Finish – Easy Binding Tips And Tricks
Step 7. Preparing the Binding Edges
Measure 1 1/2 inches from the edge of the quilt backing all the way around and fold the backing fabric over. Press the fold with an iron to create a crisp edge.
Lay the quilt top into this prepared backing. Carefully adjust the placement to ensure the corners are square and the quilt top sits evenly within the folded edges.
Fold the raw edge of the backing fabric under by 1/2 inch to create a neat seam. Pin the folded edge in place, working your way around the quilt.
For extra security, baste the folded edges in place. This keeps everything from shifting before sewing. Then, give the edges a final press with the iron to set the folds.
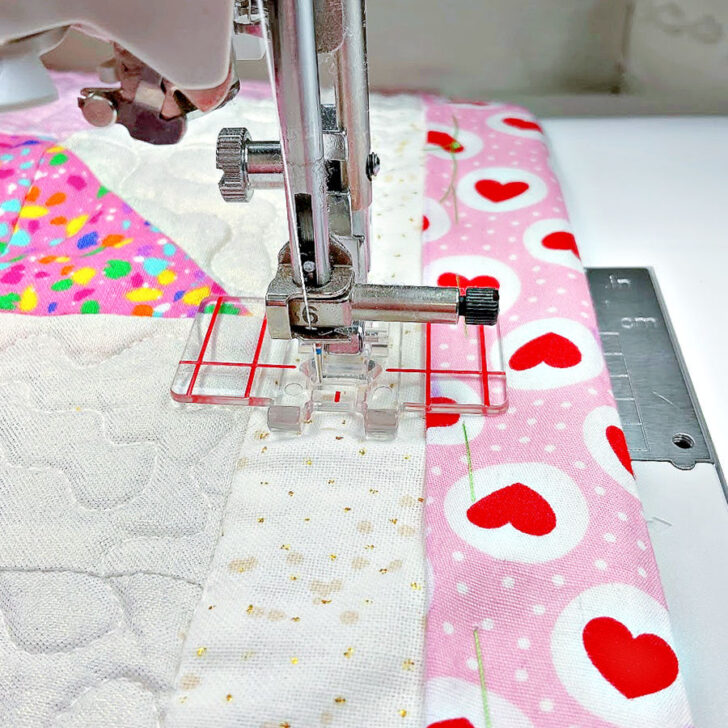
Step 8. Securing and Finishing the Self-Binding
To secure the backing fabric to the quilt top, I started by stitching in the ditch. I stitched along one of the long seams where the quilt block meets the border strips. This step ensures everything stays in place during further sewing.
You may want to use a walking foot so your layers will not shift.
✅ Related tutorial: How to use a walking foot
Next, I added a decorative stitch by sewing along the center of the white borders. I chose a decorative heart stitch to match the theme and give the quilt some extra charm. You can use any decorative stitch that suits your design.
✅ Related tutorial: Decorative Sewing Machine Stitches: Ideas, Projects and Inspiration
Finally, I finished the self-binding by stitching close to the inner edge of the folded backing fabric. I used a straight stitch to secure the binding all the way around the quilt, ensuring the edges are neat and firmly attached.
✅Related tutorial: Types of Sewing Machine Stitches: Unraveling the Mysteries of the Straight Stitch
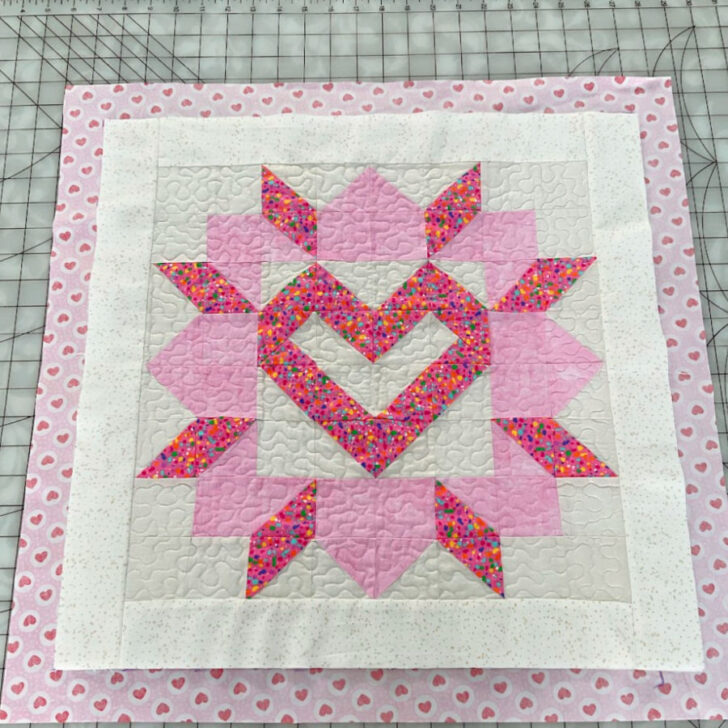
I gave the quilt a final press, and it’s now finished. The mitered corners turned out beautifully, and the binding looks nice. What do you think?
Did you like this article? Did it offer some useful information? Well, grab that pin below and stick it on your quilting board on Pinterest. And while you’re in a pinning mood, why not follow me on Pinterest? It’s like subscribing to a never-ending show of sewing tips, tutorials, and enough inspiration to make your sewing machine purr with excitement!
latest posts
- 25 More Smart Sewing Shortcuts for Better Results With Less Effort
- 25 Sewing Shortcuts That Make Sewing Easier and More Efficient
- Types Of Sewing Machine Feet And Their Uses
- The Interfacing Cutting Guide: Methods, Folds, and Seam Lines
- Steam or Dry Heat for Fusible Interfacing: Which Actually Works
- Essential Sewing Tips: How to Apply Fusible Interfacing Correctly
- Types of Interfacing Explained: Woven, Non-Woven, Knit, Fusible, and Sew-In
- Fabric Eggs DIY: Quick Easter Craft Decorations From Scraps
- Stuffed Bunny Sewing Pattern And Tutorial (Free Download)