
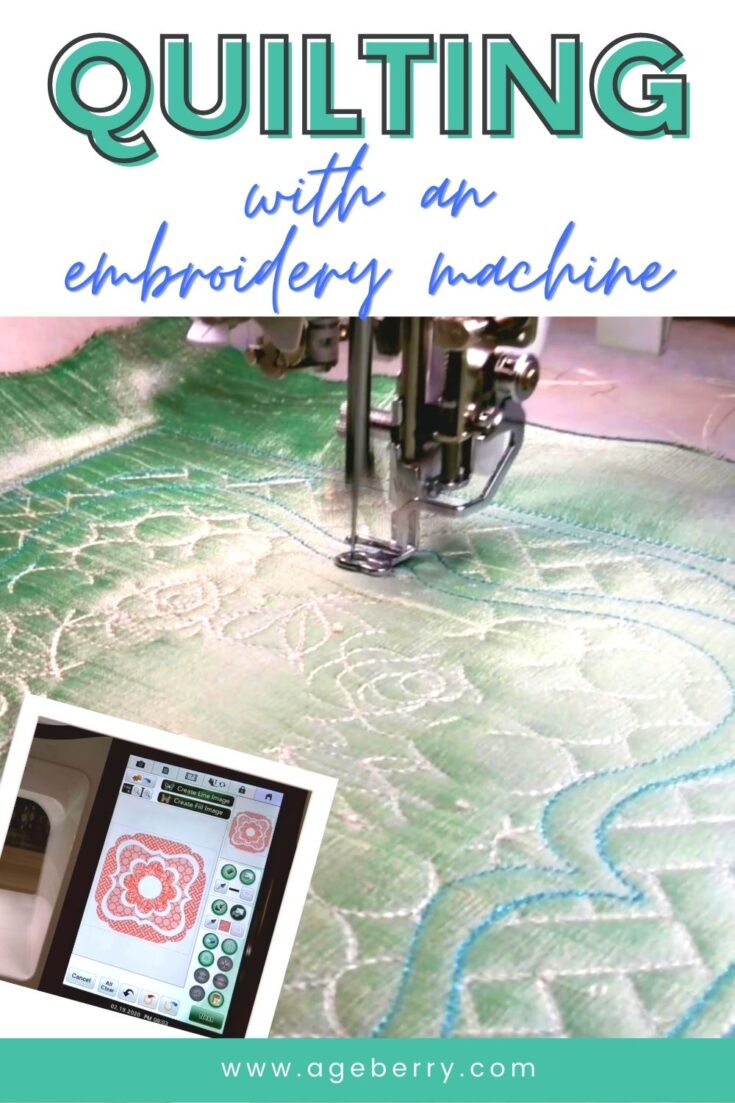
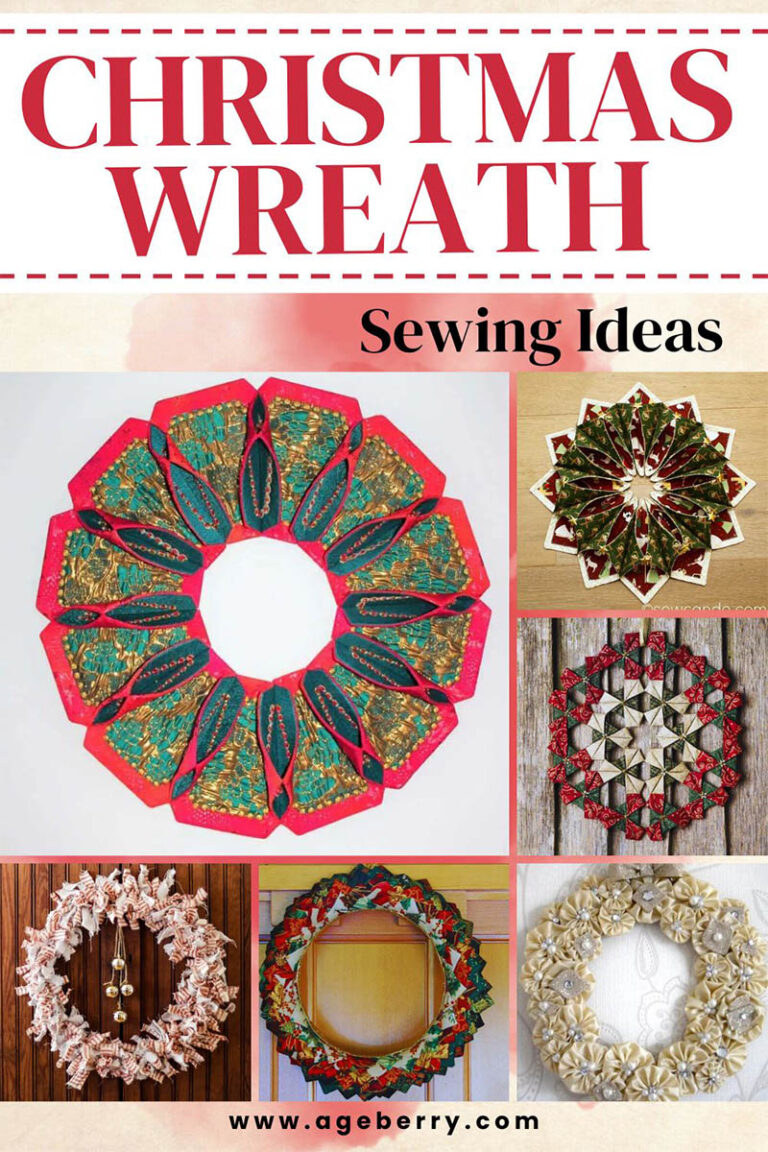
Quilting with an embroidery machine – be amazed!
In this post, I would like to show you how we can quilt with an embroidery machine. Creating quilt blocks has never been easier – modern sewing and embroidery machines are new wonders of the world.
Spend 5 minutes – and you are done with your one-of-a-kind quilting design. Another 5 minutes – and your wonderful block is ready. Make as many exactly the same blocks as you want.
I am still new to quilting but I can make nice quilts in no time at all with my Destiny 2.
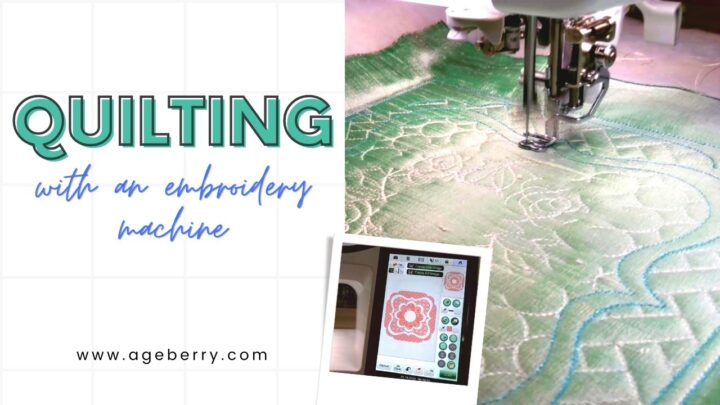
Check out the quick video I made for YouTube and BE AMAZED. It will change the way you see the world of quilting.

This is genuinely fascinating, right?
Do you have a similar machine?
Then you may like these step-by-step instructions for creating quits with ease in your embroidery hoop.
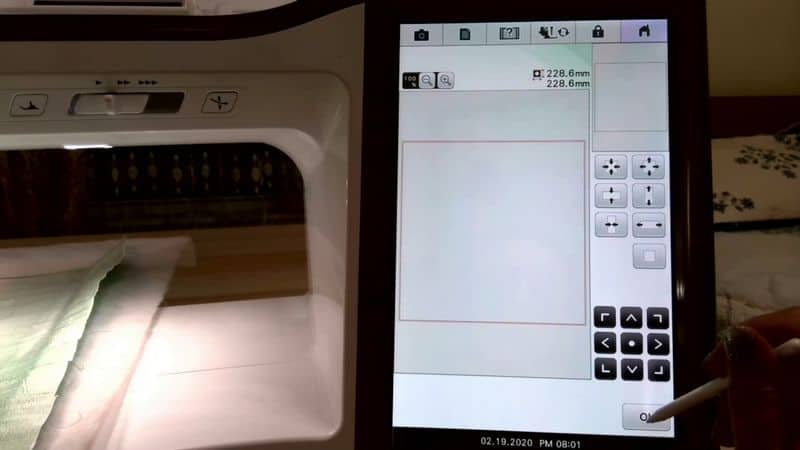
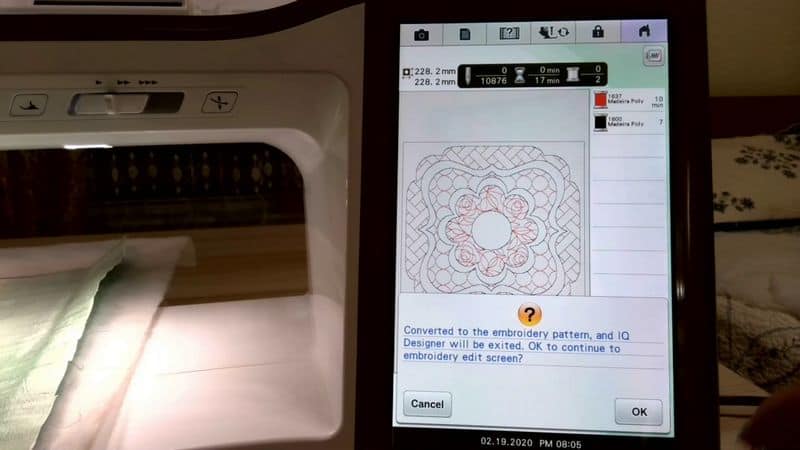
Open IQ Designer (or its equivalent if your machine is not a Baby Lock). Choose your embroidery hoop. Select a square shape and resize it according to your preferences. It will be your block outline/placement stitch. I made mine 9 x 9 inches.
Select a shape you want and see how it fits inside your block.

You can copy the shape and resize it as you want it. Press SIZE to position your copy in the center of the block (press the dot in the center).

Choose other shapes you like to use in your quilting design. Resize them and position them as you like.
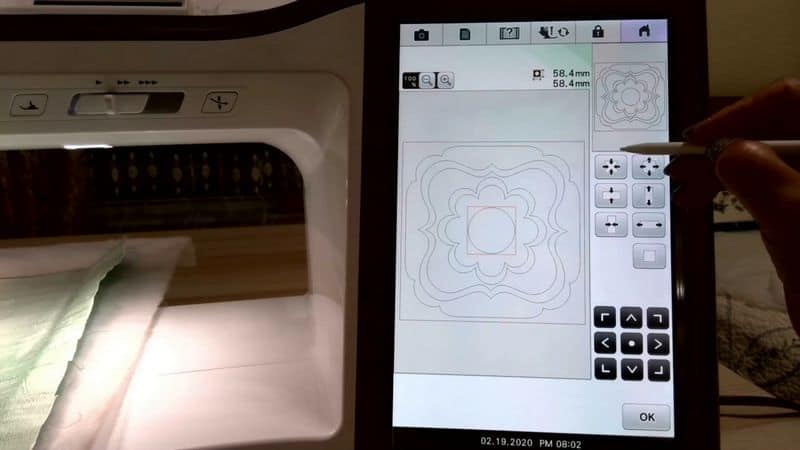
Combine different shapes and give them different decorative fills.
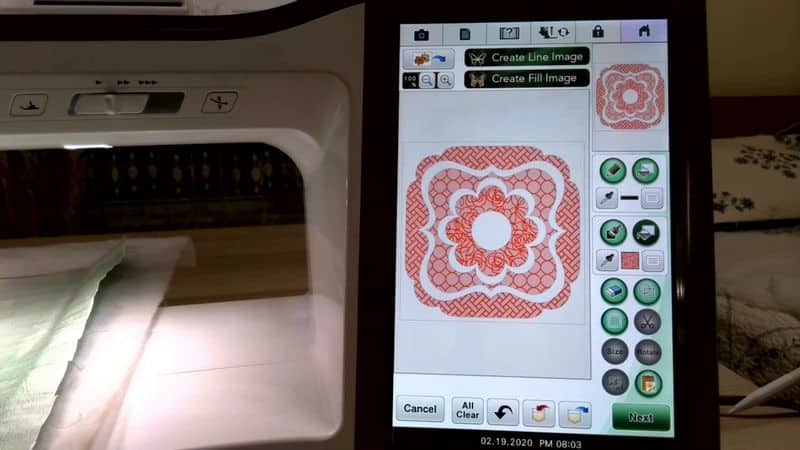
Specify stitch settings you want to use (such as satin stitch, or running stitch). You can also specify stitch length, width, and density.

Save your design in the machine memory and convert image data to embroidery data.
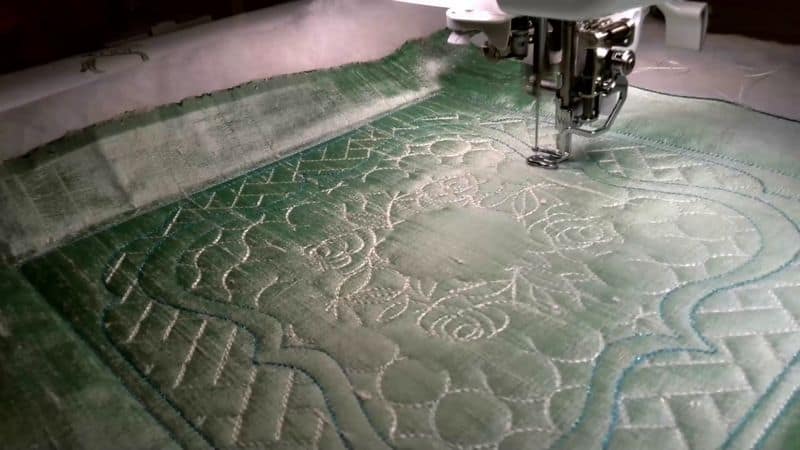
Hoop your fabric (I used 100% silk dupioni) and batting, choose threads and press the start button – the machine will quilt your wonderful design.
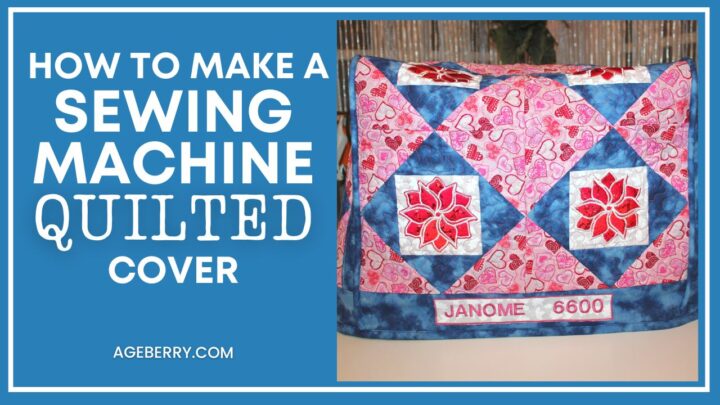
Check out my other tutorial on quilting with an embroidery machine – A cover your sewing machine absolutely needs: a quilted cover with piecing in the hoop
You might also like these tutorials.
Did you find this tutorial helpful? If so, save this pin (see below) on your sewing board so you can come to this tutorial later and follow me on Pinterest for more tips, tutorials, and inspiration!
latest posts
- What Do You Call a Person Who Sews? I Asked My Readers and Got 1,408 Opinions
- DIY Round Purse: PDF Sewing Pattern and Detailed Instructions
- Mini Wonder Clips By Clover: Useful Sewing Tool Or Just Another Notion?
- Non-Slip Grips For Quilting Rulers: A Small Notion With A Useful Job
- Fabric Eraser for Sewing: What It Removes and When to Use It
- What Is The Best Thread For Sewing Machine Projects? Let’s Find Out!
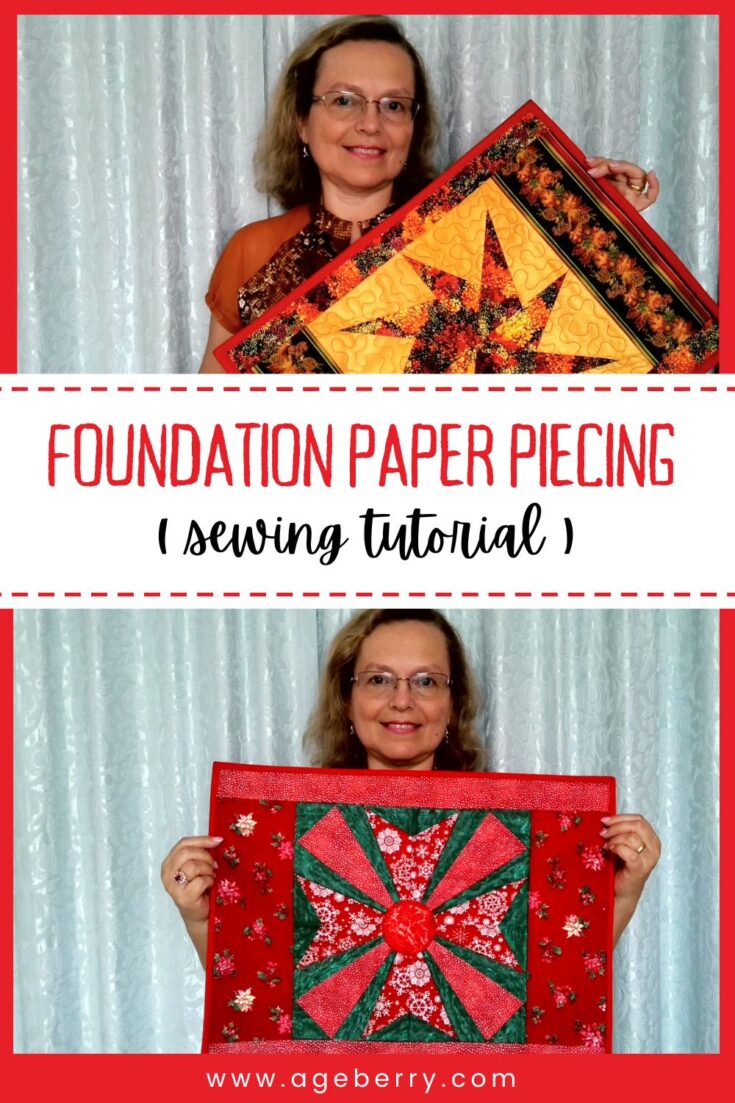
- Butterfly Quilt Block Tutorial – Foundation Paper Piecing
- How To Sew Quilt Squares So The Corners Match
- Sewing With Fork Pins: How They Help With Pattern Matching, Slippery Fabric, And Seams

Nicely done! Have you done a review of embroidery machines? I am finding them all rather expensive and wondering whether there might be a less-expensive option that is still useful and reliable?
I have not done a comparison between embroidery machines because it is unfair to compare a machine that costs over $10000 (this was the suggested retail price of a new BabyLock Destiny II a couple of years ago, of course I did not pay this much for it!) with a relatively simple machine that costs under $500. But I had in my sewing “career” machines starting with a Brother PE-180 (which cost I think under $300) going through a Janome 350E (which I still have) and then this Baby Lock Destiny II. I loved them all when new to me! And of course in 3, 5 years I wanted a newer one, shinier, with more features, larger hoops, etc. So while I did not compare them per se, I can say this: buy the best you can afford, without overextending yourself, and make sure you buy from a reputable store that accepts returns and offers warranty. Perhaps start with a simple one, see if you have “the bug”. You will find out soon enough if you really want a more complex one!
Your quilt square is gorgeous. Do you use a stabilizer? How do you piece them together?
Thank you! No, I didn’t use a stabilizer, but I used 2 layers of regular polyester batting. I didn’t piece anything for this project, everything was done with my embroidery machine. The design was created with my embroidery machine. Check the video.
@Olga Balasa, Hi! How would one go about piecing the squares together? Did you have the backing in the embroidery hoop as well? I couldn’t tell for sure from the video.
You amaze me, I look so forward to your emails. I have learned so much from your lessons and your humor.
Thank you
I’m glad you found my site helpful! I’m always happy to hear when my work has been useful to someone. A lot of research and thought goes into each article, so it’s nice to know that it’s appreciated. Thanks for taking the time to read and comment!