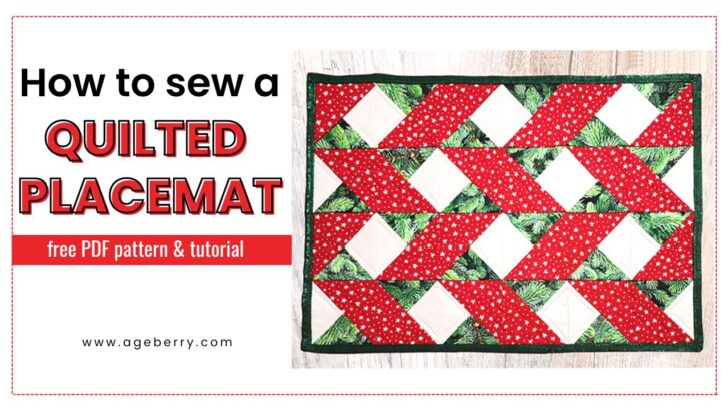
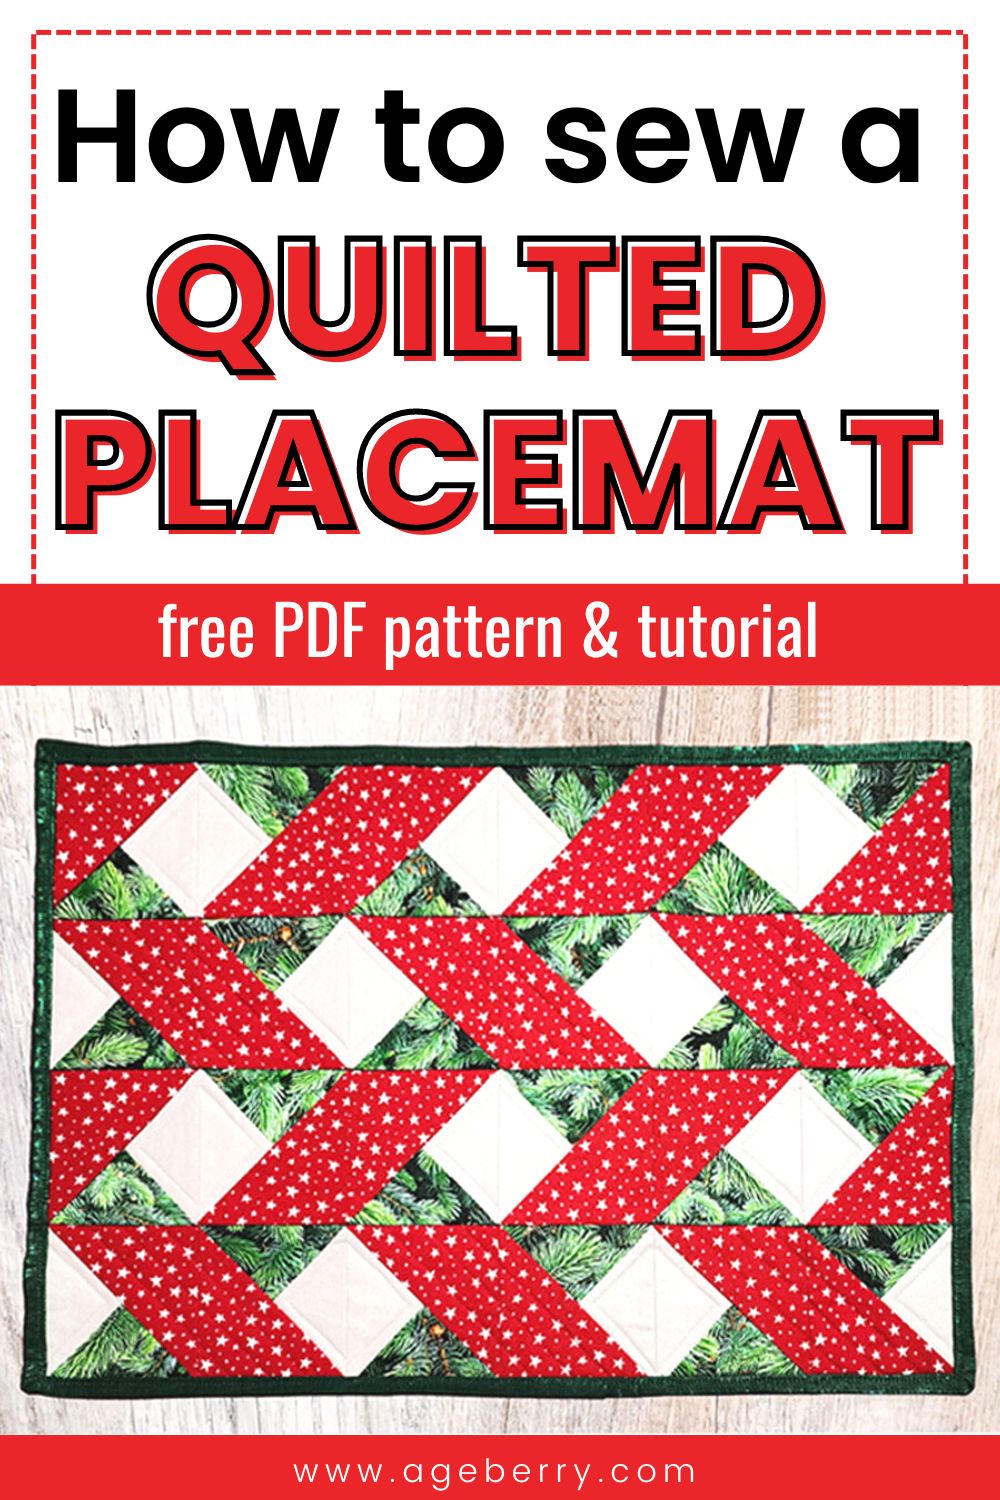
How To Sew A Quilted Placemat (Free Pattern & Tutorial)
Looking for a fun new quilting project that won’t take forever to complete? This tutorial will show you the fastest and easiest way to sew a placemat from start to finish – even if you’ve never made one before.
Each step of this project is rather not very common and can be used to create larger quilts.
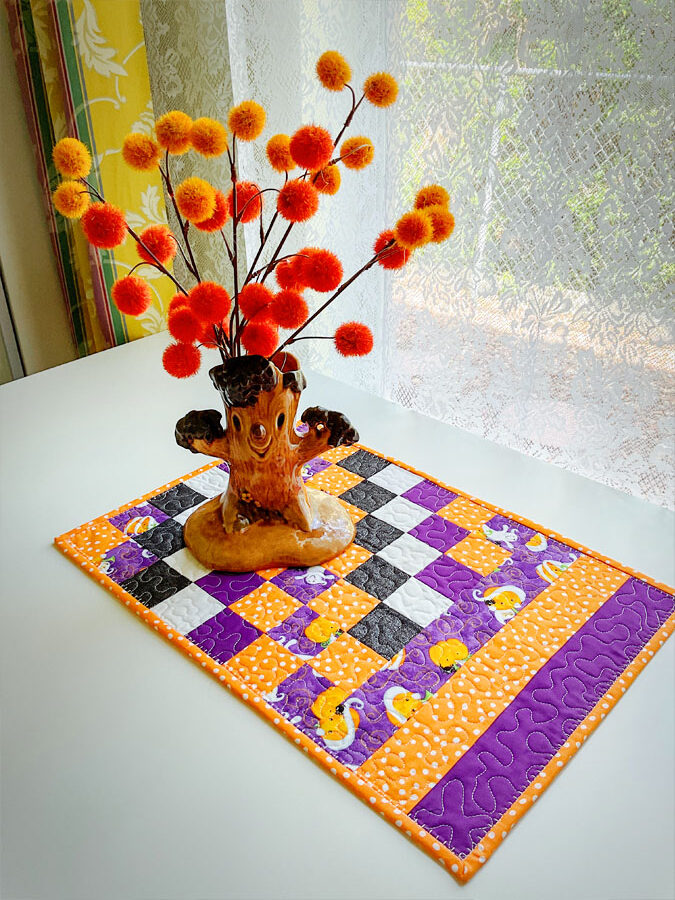
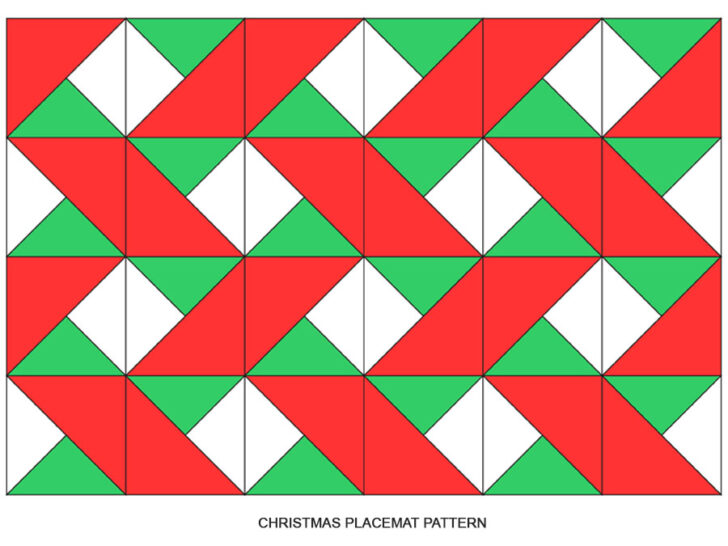
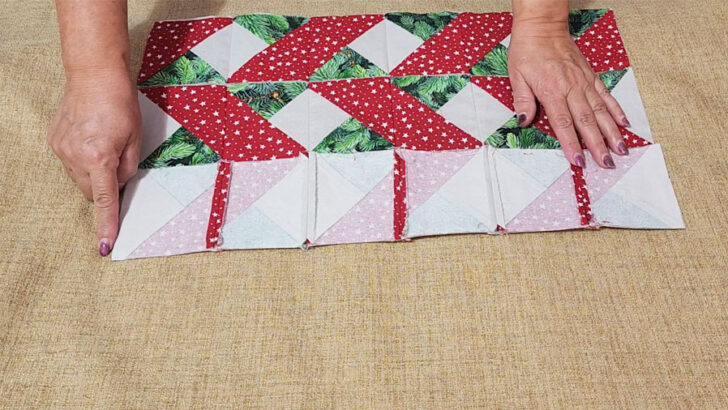
- Look at this placemat: you see many different shapes – triangles, some parallelograms, and some squares. But you don’t need to cut all these different shapes to get the results – just 24 identical squares will do the trick.
- I’ll then guide you through the process of sewing all the squares together with a fast new method that uses fusible interfacing.
- You can also learn how to easily quilt your placemat using your home sewing machine and a straight line quilting technique.
- Finally, I’ll show you how to create perfect mitered corners when binding.
The final size of the placemat is 19” x 13”.
Note: Some of the links on this page are affiliate links. This means I will receive a commission if you order a product through one of my links. I only recommend products I believe in and use myself.
What You’ll Need For The Project
- Fabric
Choose three fabrics like these from Amazon which contrast nicely but still work together to provide an interesting combination. I used Christmas fabrics, such as rich red, lush green, and shimmering silver – you can’t go wrong with these timeless festive colors. Before starting the project, iron the fabrics and make sure they are wrinkle-free; this will ensure your project looks good when finished.
You will also need fabric for backing and binding.
I usually prewash fabrics before starting a project.
Pre-washing fabric can be beneficial for multiple reasons. It ensures that the fabric won’t shrink later in the project when washed. It also gives you a chance to see how well the fabric absorbs dyes before embarking on your quilt.
Prewashing your fabrics eliminates any leftover residue from manufacturing, such as sizing for example, making them more pliable and easier to work with. Prewashing fabric is an important part of creating a successful quilt and while it is up to you whether you decide to do it or not, it is almost always recommended. If you are interested in reading more about prewashing fabric check out this article on my site.
- Batting
I used fusible batting for the project.
- Fusible interfacing
Use very lightweight fusible interfacing.
- Quarter inch presser foot for your sewing machine
- Regular sewing notions (rotary cutter, cutting mat, quilting ruler, thread, etc.)
Free Placemat Pattern
You can find the printable PDF pattern in my shop at this link but it’s free for subscribers to my newsletter.
Step #1. Cutting Fabric Squares For The DIY Placemat
Cut 4 ½” squares
- 6 silver
- 6 green
- 12 red
You can cut fabric squares using a quilting ruler and rotary cutter. I’m a big fan of using a Martelli rotary cutter and cutting mat. The unique shape of the rotary handle reduces hand and arm strain and the blade is sharp enough to cut through multiple layers with ease.
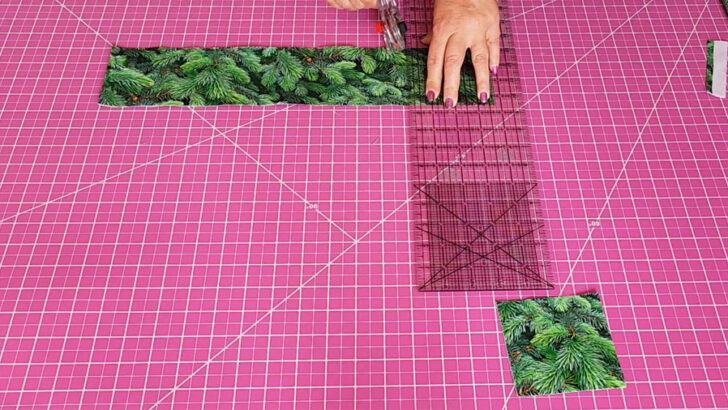
If you’re looking for more instructions on how to cut fabric for quilting with a rotary cutter, my detailed tutorial will provide you with all the details you need. From prepping fabrics and cutting techniques, to helping you develop accuracy and consistency in every cut – my tutorial can walk you through the entire process step by step.
It’s important to have squares that are all identical when making a quilt, otherwise it won’t look quite right. However, it can make it difficult to get them exactly even; no matter how hard I try, sometimes the squares just don’t come out the exact same size.
So I found a way to solve this problem – I cut my fabric squares with Accuquilt Go fabric cutter. If you’re curious to know more about the AcciQuilt Go cutting machine, I wrote a detailed guide on the subject.
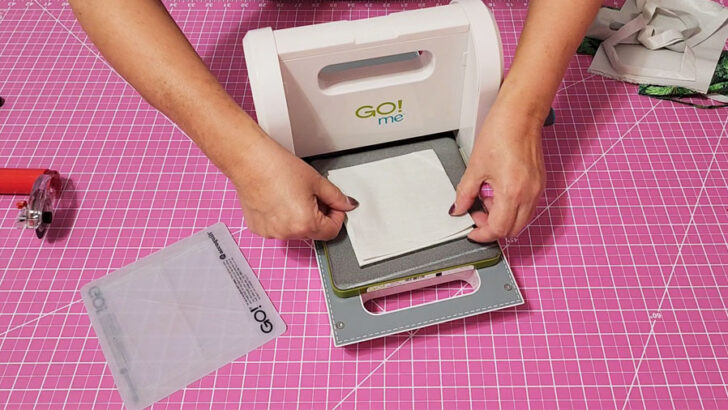
What is the AccuQuilt Go fabric cutter?
It’s an amazing fabric cutter that offers convenience and efficiency when creating quilts. It is designed to be easy to use, even for beginner quilters, and it can cut up to 6 layers at once. This advanced system makes it faster than ever to accurately cut complex shapes with a single pass, saving you time in comparison to the traditional rotary cutting method.
The AccuQuilt Go also eliminates any errors that may occur with manual cutting.
And there is a perfect die to cut 41/2” squares.
Step #2. Sewing Half Square Triangles 2 At A Time
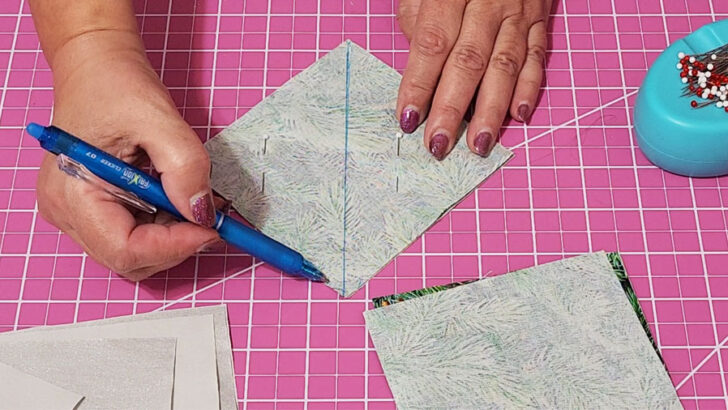
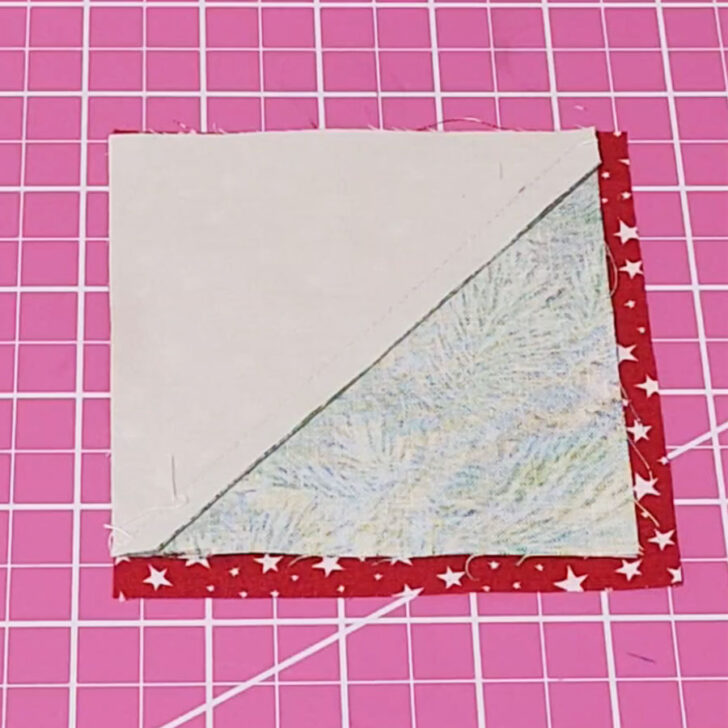
Place silver and green fabric squares right side together.
Draw a diagonal line across the wrong side of the lightest colored fabric. Pin the squares in two places.
✅ Related tutorial: Your Guide For Choosing The Best Quilt Marking Pens For Every Project
Next, sew stitching lines on each side of the diagonal a quarter inch away from the center line.
I rely on my special quarter inch presser foot. It’s designed to keep the seam allowances an exact quarter inch and it really helps me achieve those neat stitches. It’s much easier than marking out all the seams before I start stitching. If you’re looking for accuracy in your sewing, consider investing in a quarter inch presser foot for your machine.

But if you don’t have the foot you can mark the stitching lines using a marking pen.
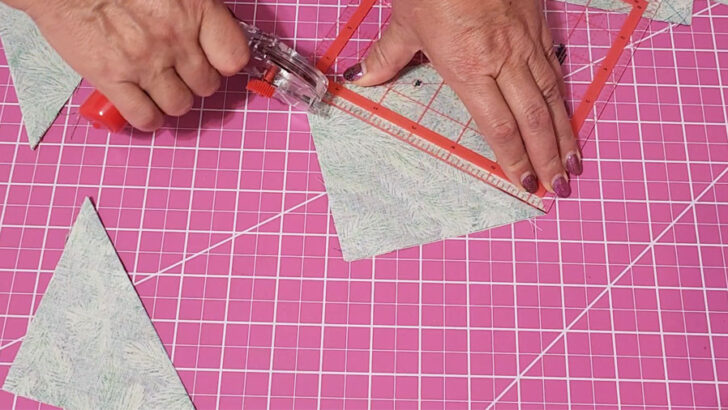
Next, cut along the center diagonal line to separate the two new squares.
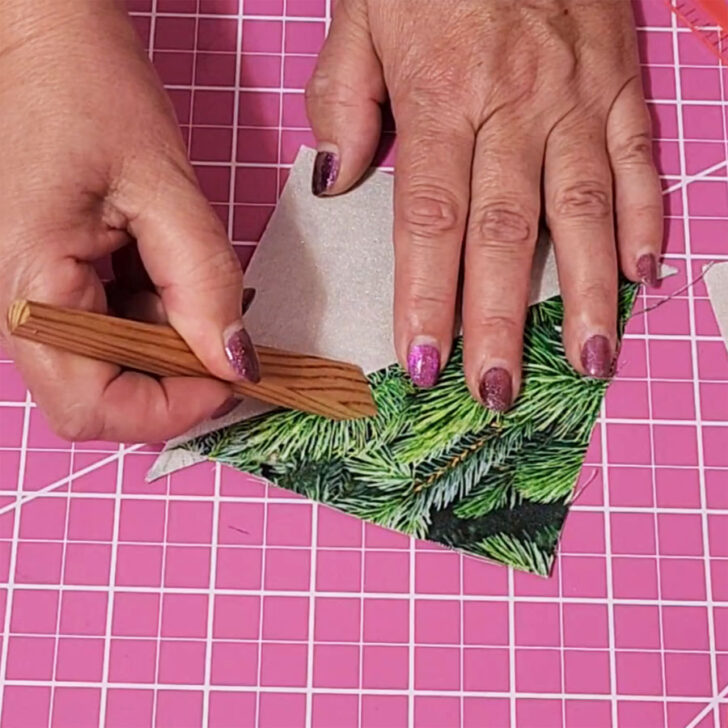
Fingerpress the seams toward the darker fabric (green in my case). I use my favorite tool for this – a fingerpresser. It’s one of those tools that gives you a nice finish, making sure that the seam allowance is securely pressed in one direction. Plus, it’s small and lightweight.
Do the same with the other white and green squares.
After you are done, press the seams with a hot iron and trim away the little dog ears on the corners.
You now have 12 square blocks with 2 HST in each.
Step #3. Sewing HST 2 At A time With The Other Squares
Now place the new squares you just made together with squares you cut from red fabric.
You will notice that the red squares are a little bigger than the new squares made from HST. Trim the red squares on two sides to make them all the same size.
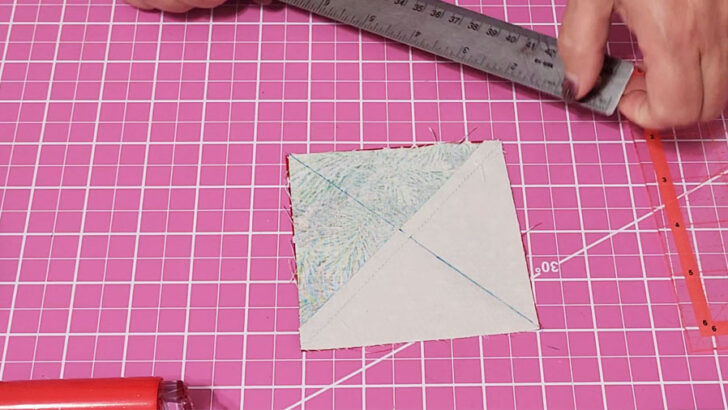
Draw a diagonal line across the wrong side of the red colored fabric. You can do it on the other side too.
But the diagonal must connect different points now and be perpendicular to the previous diagonal.
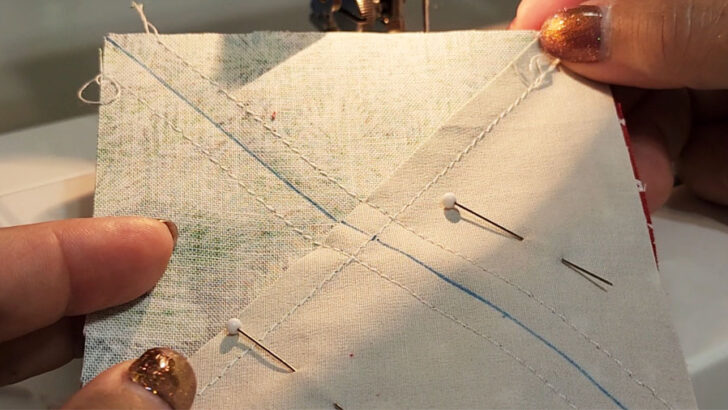
Pin the squares together in two places and sew on two stitching lines ¼” from the diagonal line. Use the quarter inch presser foot.
Cut along the center diagonal line to separate the two new HSTs.
Fingerpress the seams toward the red fabric.
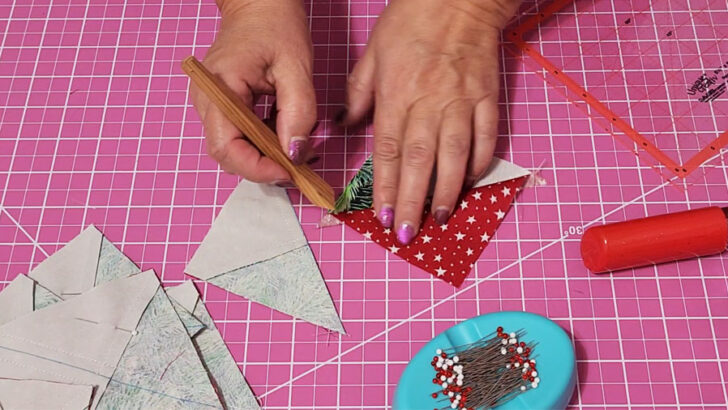
Press the seams with a hot iron and trim away the little dog ears on the corners. You now have again two HST blocks.
Do the same with the other 11 squares.
Step #4. Sewing All The Squares Together At Once
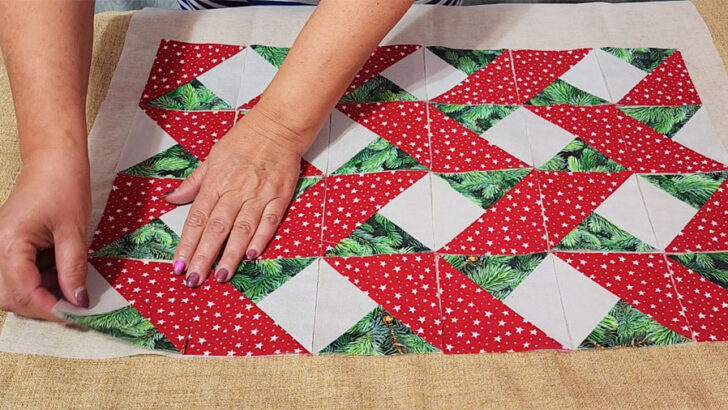
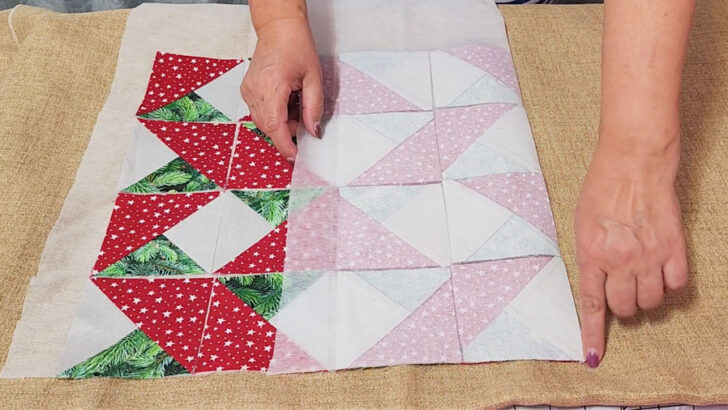
Now we have to sew all these squares together using this pattern.
If you want to achieve perfect corners for your patchwork projects, I’ve got a technique that’s sure to help. It does require a piece of fusible interfacing – lightweight is key as heavier weights will make sewing difficult.
✅ Related tutorial: How to sew quilt squares together (step-by-step tutorial)
Furthermore, make sure to use a flat and smooth surface such as a wool pressing mat because later on, you will need to press the prepared fabric squares with a hot iron. An ironing board might be too small for the squares to fit.
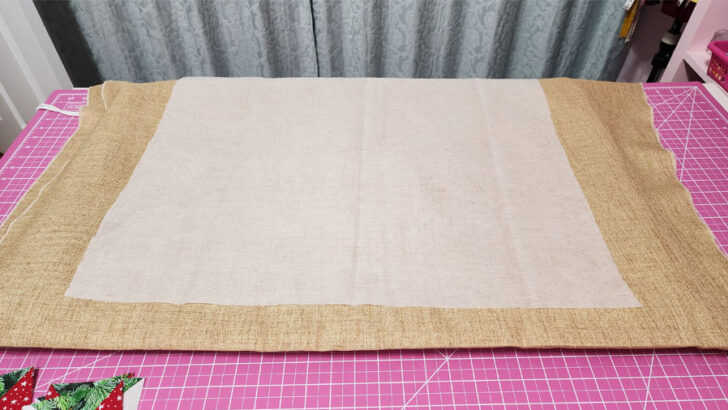
✅ Related tutorial: Wool Pressing Mat: How to Use, Pros and Cons, Best Brands, Sizes
Next, lay out the fabric squares in rows and columns on top of the interfacing, following the quilt pattern. Make sure you leave no gap between each of the squares while also ensuring they don’t overlap. Begin at the top of the interfacing piece to get a straight starting point and keep each row and column lined up evenly. Before pressing your fabric, ensure each square is completely smooth with no creases or folds, as these can become permanent once it has passed under heated iron.
Now that you have your fabric squares arranged and ready to go, it’s time to press them with a hot iron. Simply press the iron down onto the fabric for a few seconds, moving it around until the entire surface is fused. Once you’re done, let the squares cool completely before you begin using the sheet.
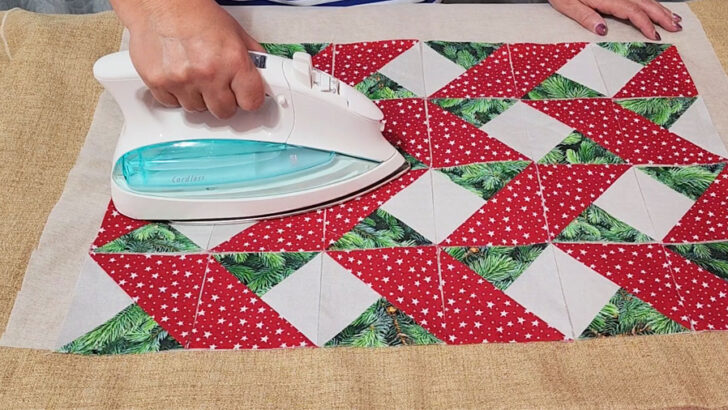
You can use a pressing cloth. This way, if any glue comes off of the interfacing, it will be absorbed by the pressing cloth instead of sticking to the iron. But try not to touch the interfacing with the iron.
Make sure that the iron is set to the appropriate heat level. You don’t want to damage the fabric. I kept my iron on medium heat (or wool setting).
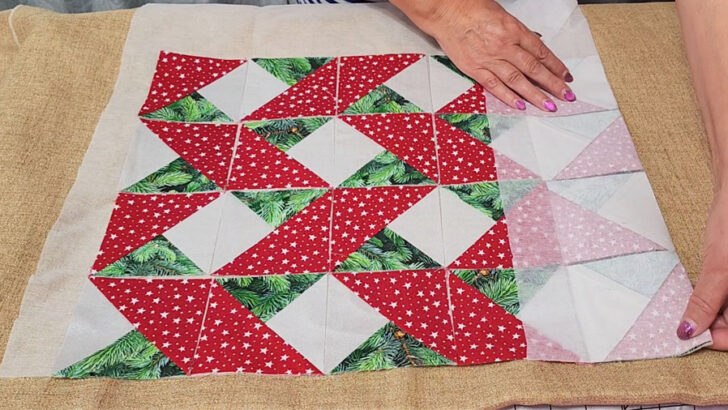
Once you’ve finished fusing the interfacing, trim away any excess interfacing.
✅ Related tutorial: How To Use Fusible Interfacing (Video + Tips And Tricks)
Sew row by row in one direction
Now that you cover the entire interfacing sheet with fabric squares, it’s time to move on to the next step.
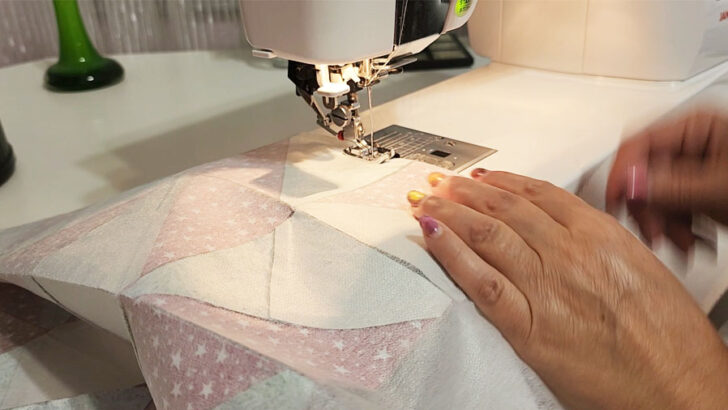
Fold the first row of squares right sides together with the whole sheet, and stitch along the fold using ¼” seam allowances.
Continue until all the rows in one direction are stitched together.
It’s very important to keep the same seam allowances (¼”) over the entire piece. But it’s very easy to do if you use the special quarter-inch presser foot.
Open The Seams And Press
Use a seam ripper to cut the interfacing between seam allowances. This will enable you to easily open up the seams.
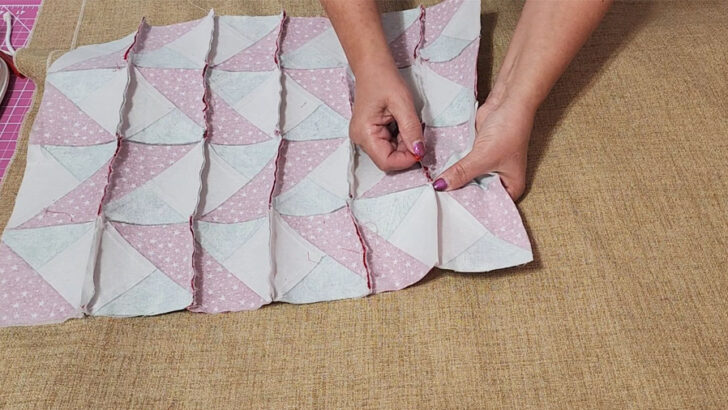
After that, simply press the seams open with a fingerpresser and then smooth them out using a steam iron. This will ensure that the prepared sheet is completely flat, giving you optimal results.
Sew Rows Of Squares Perpendicular To The Already Sewn Rows
Now it’s time to sew the remaining rows. To do this, simply fold down the first row so that the right sides are together with the sheet, and then sew along the fold in the same manner as you did with the previous rows. Work your way across the whole piece until all of the rows have been sewn.
It’s very important to keep the same seam allowances over the entire piece.
Press The Seams
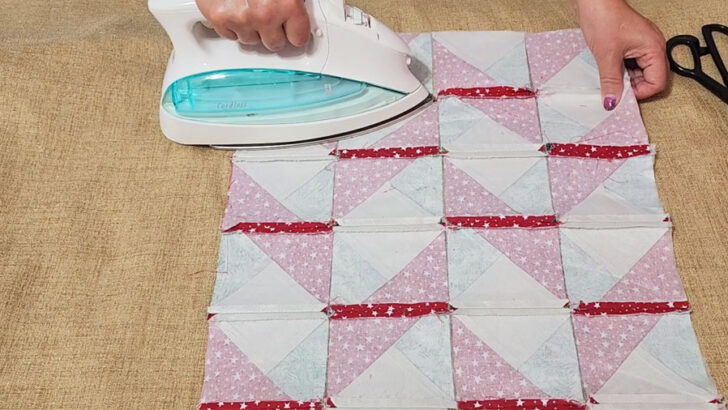
These seams don’t need to be open. Press them on one side all in the same direction. Use a fingerpresser first and after that, press with an iron. It’s better to do it from the front side of the block.
Hopefully now you can see that all squares in this quilt block are exactly the same size and the corners are perfectly matched.
Ok, the quilt top is now ready.
Step #5. Prepare The Block For Quilting
There are many ways to do the quilting. I decided to use the simplest method for the placemat – straight line quilting – sewing straight lines with my home sewing machine. If you have questions on straight line quilting that need thorough answers, my article will provide reliable information.
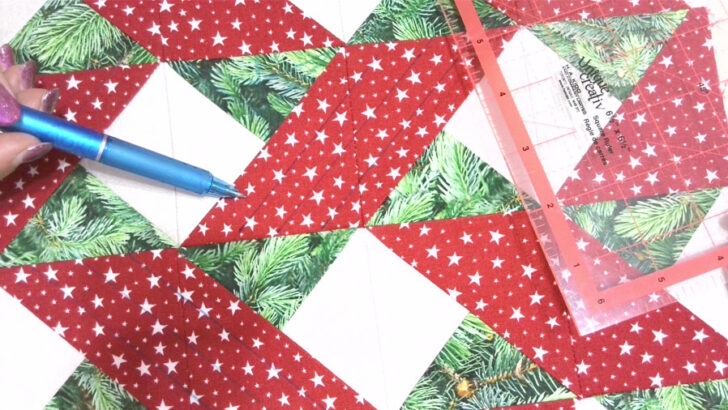
I planned to sew straight stitching lines only on red shapes of this quilt. Each shape is getting 3 parallel lines, and each line will be equal distance apart from each other.
So for this, I need to mark the stitching lines.
I use different marking tools but I like the most heat erasable pens – pressing these with a hot iron ensures that there is no evidence of ever having drawn a line.
The next step is cutting batting and backing. There are different types of batting. You can read about them in my tutorial – How to Choose the Right Quilt Batting for Your Project.
For this placemat, I am using fusible batting.
Cut the batting and backing fabric about the same size as the placemat, only slightly bigger on all sides.
Place the prepared quilt top on a piece of batting and press with a hot iron to fuse it.
Place the prepared placemat top on the backing fabric making a quilt sandwich.
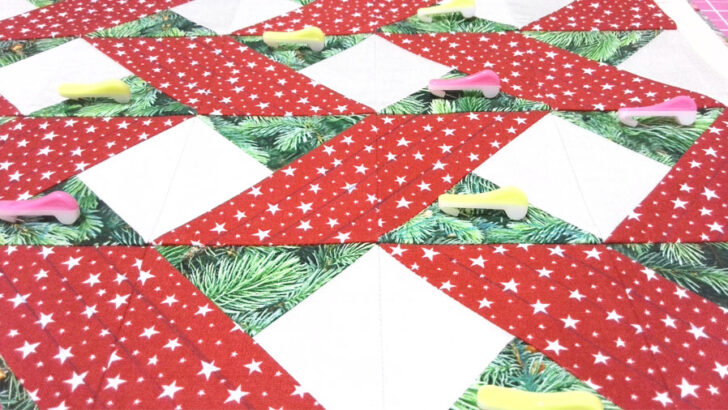
Next, you need to baste the quilt top and batting and backing together for quilting.
✅ Related tutorial: Quilt basting tutorial – learn different ways to baste a quilt
I like to use Clover Wonder pins.
They combine the convenience of safety pins with the strength and sharpness of straight pins. They are colorful and easy to handle. They are also slim but strong enough for thick fabrics or multiple layers. Best of all, you don’t need two hands to use them; with just one hand you can maneuver Clover Wonder Pins into place quickly and efficiently.

The quilt is now ready for quilting.
Step #6. Quilt The Placemat
For my placemat project I’m using a straight stitch of my home sewing machine and quilting with red cotton thread. I’m stitching over the marked lines trying to keep the thread continuous. To go from one shape to another I just use the stitch in the ditch technique so I won’t break the thread. To my surprise, this was much faster than expected!
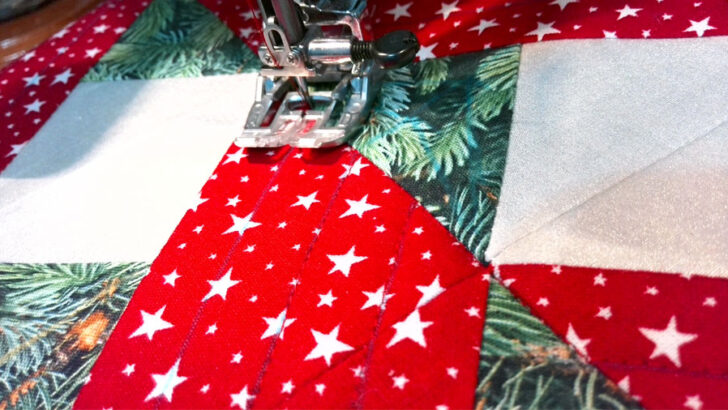
For the silver squares, I opted to skip any marking, relying instead on my quarter inch presser foot for accuracy. It allowed me to easily sew ¼ inch away from seams. Instead of red cotton thread for this section, I went with white, as it seemed like a better choice for these particular shapes.

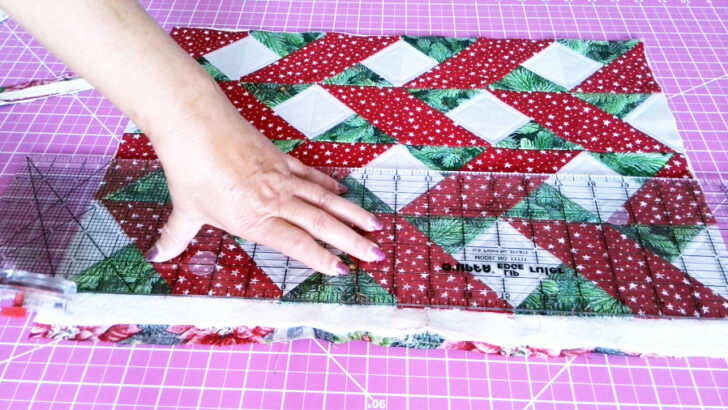
After quilting, I trimmed the rectangular block and this is what it looks like. Now I only need to sew binding.
Step #7. Sew Binding
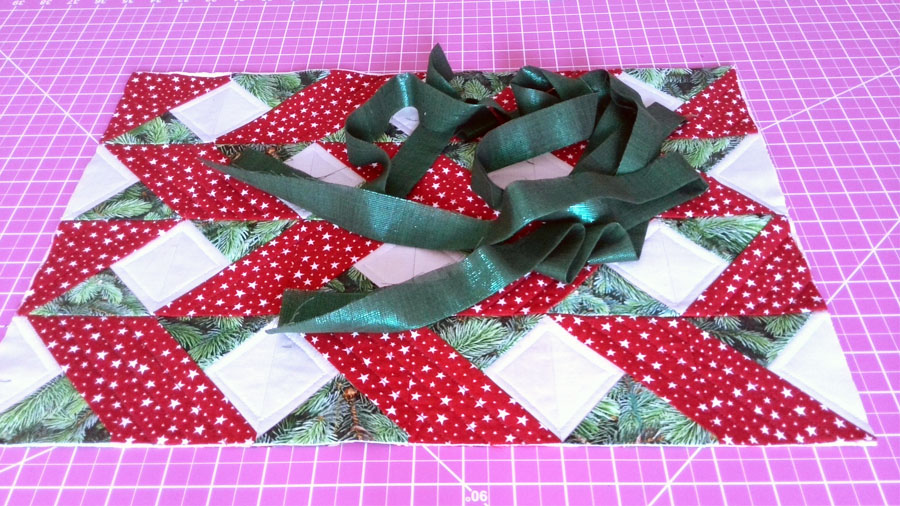
You will need to cut fabric for a binding strip 2 ¼” wide, and about 70” long. Quilting cotton fabric, which is typically 44″ wide, can be used for this and it might require sewing two strips together to make it long enough. For this step, all you have to do is place the ends of the strips in a perpendicular direction and sew them together with a ¼” seam allowance. After that press the seam open to minimize bulkiness.
Make sure your binding strip is long enough for your placemat.
How Wide To Cut Quilt Binding?
I made my binding 2 ¼ in wide but I think a good width would be from 2 in to 2 ½ in.
Fold the binding strip in half lengthwise wrong sides together and press with an iron.
✅ Related tutorial: Making quilt binding with a serger – step-by-step tutorial
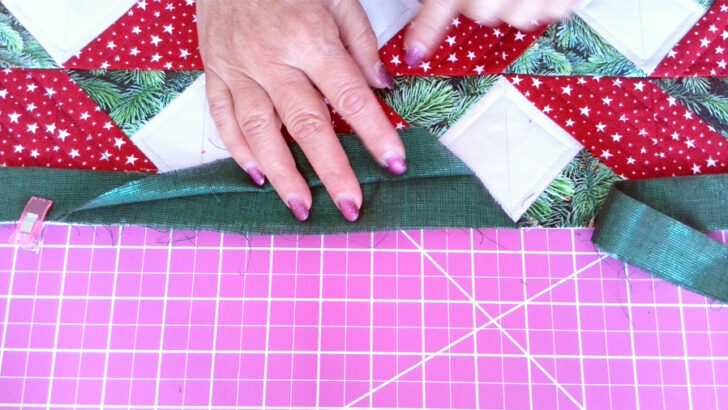
Start sewing binding on a side of the placemat, somewhere in the middle of one side, never start in a corner. You can begin binding anywhere along the edge of the quilt except in a corner. It’s also better not to start sewing close to the corners because it may be a little difficult to join the quilt ends near the corners.
After you have decided where to start, run the binding strip around the edges of the project to make certain that the binding seam doesn’t fall into corners. If you see it happens readjust your starting point until there are no seams near the corners.
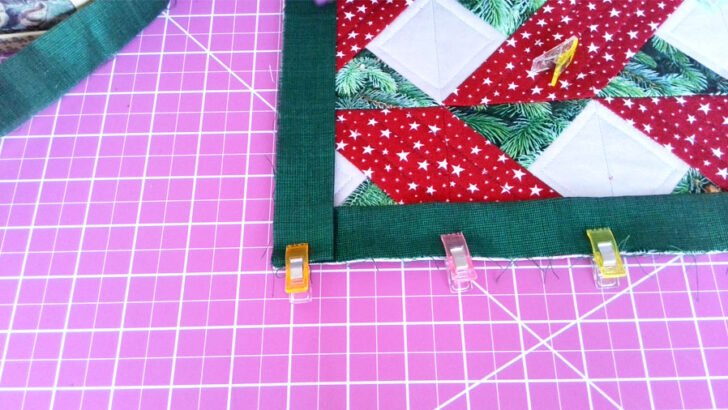
Place the folded binding strip on the quilt matching raw edges. The raw edges of the binding are placed against the raw edge of the quilt.
I usually use Wonder clips to secure the binding in place.
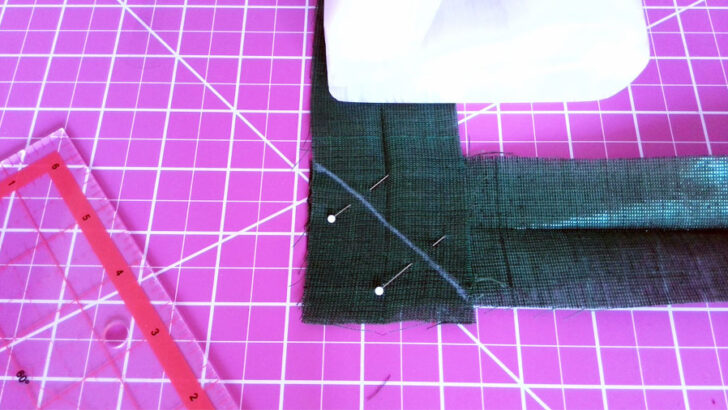
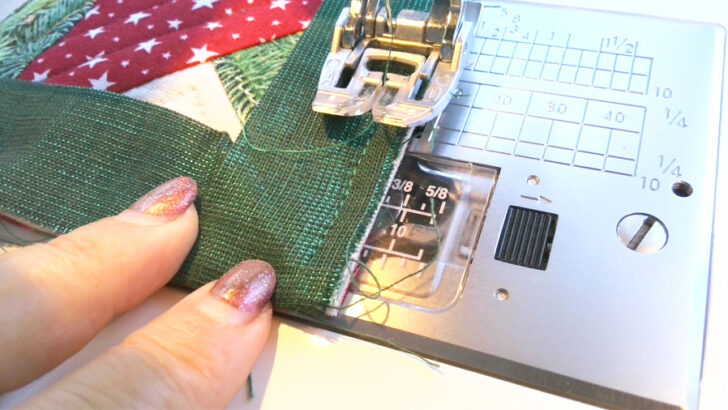
At each corner, fold the binding strip up diagonally to form 45 degree angle at the crease as shown in the image below (45 degree angle).

The binding strip should be exactly perpendicular to the quilt side you just sewed and the raw edge of the binding strip is exactly parallel to the other side of the quilt.
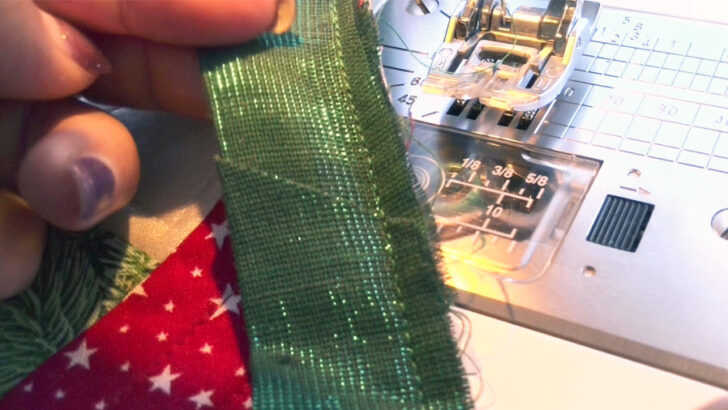
Fold the strip down, so that fold is even with the top edge and the raw edges are lined up with the raw edges of the quilt again.
Cut one end of your binding strip at 45-degree angle. Then fold the edge in ¼ in and press.
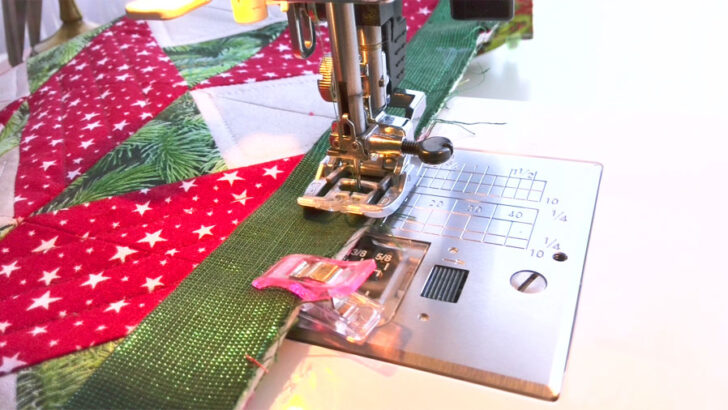
Use a walking foot to sew binding. Read about how to use a walking foot in my tutorial How to use a walking foot.
How To Sew Around A Corner
You have to stop sewing before you reach the corner. So, when to stop? The distance to the quilt edge is equal to the width of the seam allowances. In my case the seam allowances are ¼ inch, so I should stop ¼ in from the edge.
If you are not sure where to stop make a mark on the quilt. It’s better to stop before the ¼ in point (even if you stop a few millimeters before) than to sew over it. If you sew past this point your corners will never look right.
Put the needle and the presser foot in the up position and remove the project from under the presser foot.
Start stitching again from the very edge of the quilt.
Continue around entire quilt, repeating this procedure at each corner.
Overlap the edges of the binding strip to enclose raw edges. Slip the end of the binding strip into the starting end. Stitch the final section of binding to the project.
That’s how the binding looks like after stitching.
Turning The Binding
Flip the binding over and form the corners. You can see that the corners are perfectly mitered on the right side.
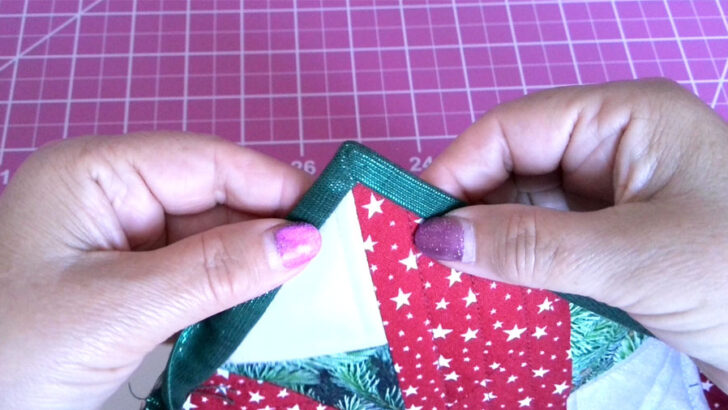
On the other side, you just need to fold them properly – and this is so easy to do.
I like to use Wonder clips to hold the binding in place.
Work your way around the quilt.
I want my binding to be perfectly even so I often prefer to sew binding on the wrong side by hand.
There are many different ways to sew the folded edge down. You can sew it by hand, you can stitch in the ditch.
Sew carefully, use caution, because it must look good on both sides of the quilt.
Congratulations! You’ve just completed your placemat. Binding was the last step and it gave the placemat a beautiful finished look. Now that you know the fastest and easiest way to sew a placemat, you can make placemats for every occasion – from weekend dinners to holiday celebrations. Have fun picking out fabrics and colors to create a unique collection of placemats.
Did you find this tutorial helpful? If so, save this pin (see below) on your sewing board so you can come to this tutorial later when you need this information on making a DIY placemat, and follow me on Pinterest for more tips, tutorials, and inspiration!
latest posts
- What Do You Call a Person Who Sews? I Asked My Readers and Got 1,408 Opinions
- DIY Round Purse: PDF Sewing Pattern and Detailed Instructions
- Mini Wonder Clips By Clover: Useful Sewing Tool Or Just Another Notion?
- Non-Slip Grips For Quilting Rulers: A Small Notion With A Useful Job
- Fabric Eraser for Sewing: What It Removes and When to Use It
- What Is The Best Thread For Sewing Machine Projects? Let’s Find Out!
- Butterfly Quilt Block Tutorial – Foundation Paper Piecing
- How To Sew Quilt Squares So The Corners Match
- Sewing With Fork Pins: How They Help With Pattern Matching, Slippery Fabric, And Seams