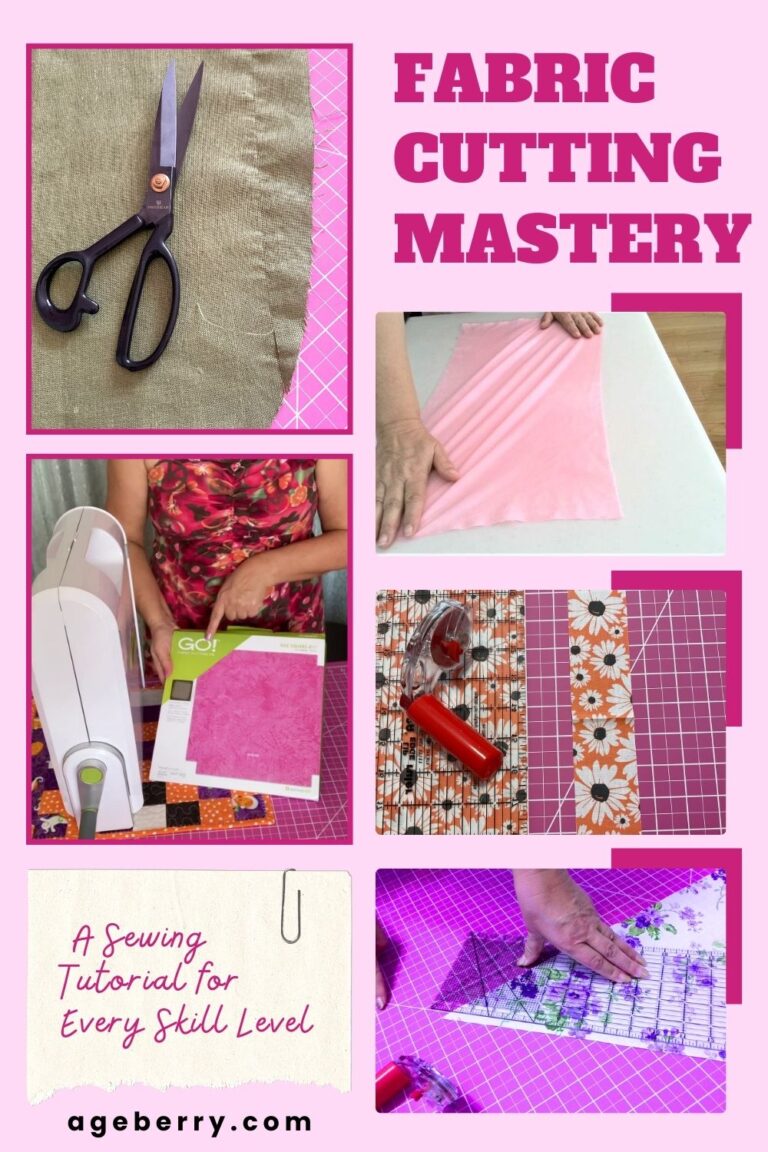
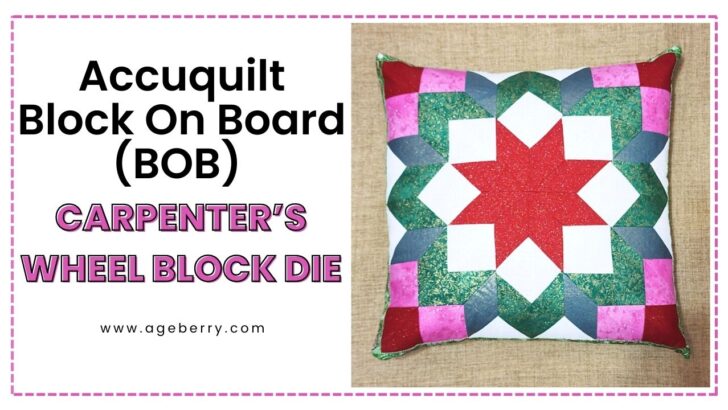
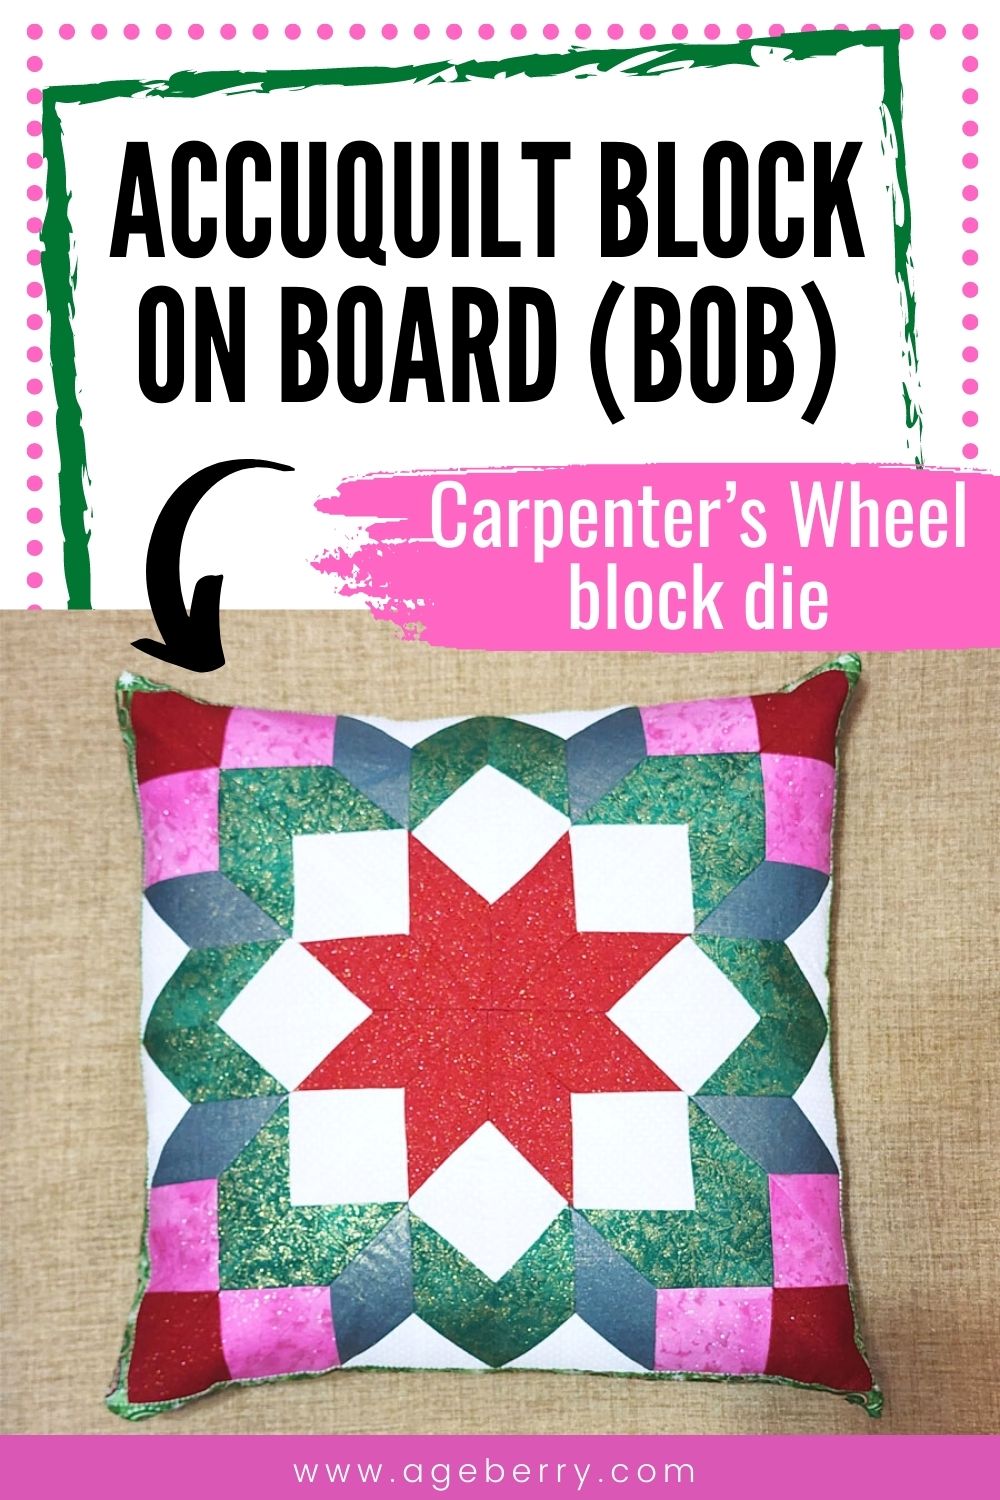
Accuquilt Block On Board: Carpenter’s Wheel Die
Today I’m going to show you how to make an 18″ Carpenter’s Wheel block with one of Accuquilt amazing dies called BOB – Block on Board. It’s an impressive quilt design, and it’s also not really hard to put together. Block on Board dies are fantastic specialty items that make cutting different quilt shapes easy.
So… It all began on Black Friday when I decided to browse AccuQuilt website. As I scrolled through the quilting patterns, my eyes were instantly drawn to a particularly intricate one. It was beautiful, but after spending hours on simpler projects before, I had serious doubts about whether or not it would be something I could actually make.
Just as I was about to give up hope and search for something easier, a description caught my eye: BOB! What on earth did that mean?
After some further browsing, it became apparent that BOB stood for “Block on Board”.
This meant that instead of cutting individual fabric pieces to make a block – which is what usually happens with complex quilts – this particular pattern came with a specially designed die that included all the shapes necessary for the block.
All of a sudden I felt confident enough to take on the challenge of making this intricate quilt.
Note: Some of the links on this page are affiliate links. This means I will receive a commission if you order a product through one of my links. I only recommend products I believe in and use myself.
What Is Accuquilt?
Before I explain how to use the Accuquilt Block on Board die to create a Carpenter’s Wheel quilt block, let me give you a brief overview of what Accuquilt is.
Accuquilt is a fast, easy and precise fabric cutting system that eliminates the need for tedious, time-consuming hand-cutting of fabric with rotary cutters or scissors. It consists of a variety of die cutting machines, dies and quilting accessories that help quilters cut fabrics precisely and accurately with minimal effort. The dies are constructed with steel blades that ensure precise cuts for a variety of materials.
You can also find a large assortment of Accuquilt machines on Amazon: Accuquilt on Amazon.
The patented die design offers superior accuracy when compared to other cutting methods. The results are cleanly cut and perfectly shaped pieces in much less time than it would take to achieve the same results by hand.
The company has been in business since 1990, offering a range of fabric cutting solutions that truly revolutionized the quilting industry and made it much easier for people to create beautiful quilts at home.
All quilters will appreciate the accuracy, ease of use and consistency that comes with using AccuQuilt.
You can read more about Accuquilt in my tutorial How to cut fabric for quilting with modern fabric cutting machines: AccuQuilt and Cricut.
What Is BOB – Block On Board
A Block on Board die from AccuQuilt is an incredibly useful cutting tool for quilting, as it includes all the shapes you need to make an entire quilt block in one easy go. All major pieces are conveniently organized in different sections and they will even indicate which color of fabric to cut each piece out of.
This fantastic product can save time and adds accuracy to any quilting project. It’s especially useful when a pattern requires many pieces that have different shapes and sizes. It’s also very convenient as you don’t need to purchase multiple dies for a quilt.
With the help of AccuQuilt BOB dies, it’s easy to get consistent results when different shapes fit together perfectly.

How To Make A Carpenter’s Wheel Block Using Accuquilt Block On Board Die
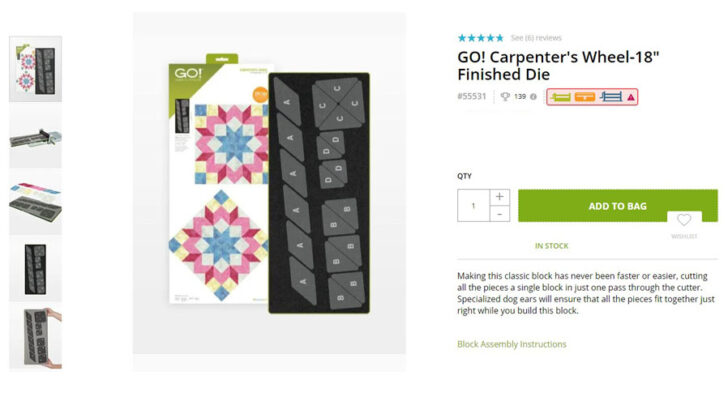
Now let me show you how to make a great quilt block efficiently with this interesting die. It’s called Carpenter’s Wheel and finishes to an 18-inch finished block. The die includes 20 shapes. Every shape has screen printed letters for easier piecing and organization of shapes. The die features specialized dog-ears and ¼” seam allowances for easy alignment and piecing.
It’s a great project for any quilter, because I think it looks really complicated, but it’s just one block and it went together really well. But still, keep in mind it’s an advanced pattern, so be ready for a challenge.
Step 1: Read The Pattern Instructions
All Accuquilt dies come with free patterns. You can download free block assembly instructions as printable PDF.
Taking the time to read the pattern instructions thoroughly is an important step when starting on a new project. This may seem tedious and time-consuming, but it can save you a lot of frustration later on. I know from experience that once I took a moment to really digest what the pattern was asking of me, the whole project became easier.
In fact, the first time I read through this Carpenter’s Wheel pattern, I was confused and felt a bit overwhelmed; however, after taking some time to understand it more deeply, I found myself understanding better how it all fit together.
Step 2: Prepare Your Fabric For Cutting
The first step to using your AccuQuilt BOB dies is to prepare your fabric for cutting on the die.
The Carpenter’s Wheel die includes multiple shapes that need to be cut in different fabrics.
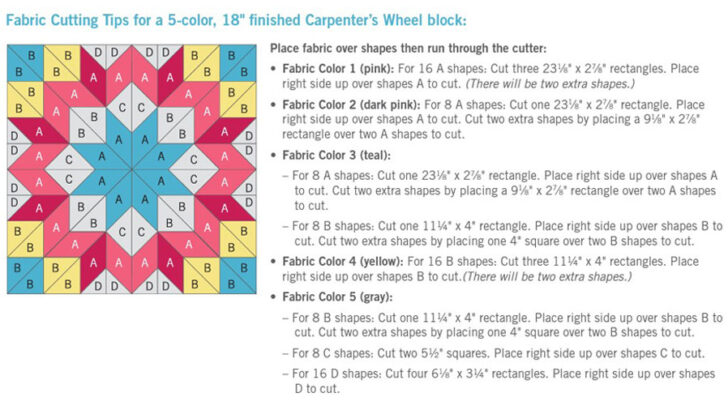
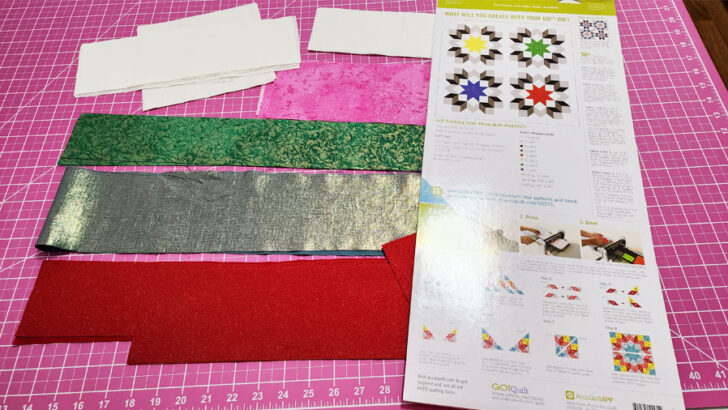
You will need to prepare 5 different fabrics for this pattern, preferably contrasting. I used Christmas colors as it was my Christmas project. Just think of all the fun colors you could use.
So the pattern for my Carpenter’s Wheel block is looking like this:

When working with quilting cotton fabric, it is essential to make sure you choose the best quality for your project. Opt for finely woven fabrics that are not prone to stretching, as using loose fabric that stretches can result in distorted shapes and crooked seams.
But if you already have fabric that you like and you see that its weave is not really tight you can use spray starch to make the fabric stiffer.
✅ Related tutorial: The Essential Guide To Spray Starch: What It Is | How To Use It | Types
You’ll just need to sub cut the fabric according to the directions in the pattern. You can’t just place a yard of fabric on the die and cut it. Usually you need to cut fabric rectangles from yardage first using a rotary cutter and cutting mat.
For example, for this project I needed to cut three 23 1⁄8″ x 2 7⁄8″ rectangles from green fabric, one 23 1⁄8″ x 2 7⁄8″ rectangle from dark green fabric, three 11¼” x 4″ rectangles from pink fabric, etc.
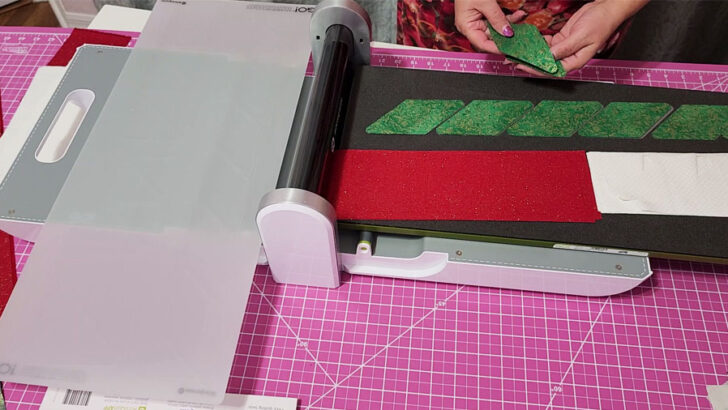
Step 3: Place Fabric Rectangles On The Die
I placed the fabric rectangles I prepared over the shapes on the die.
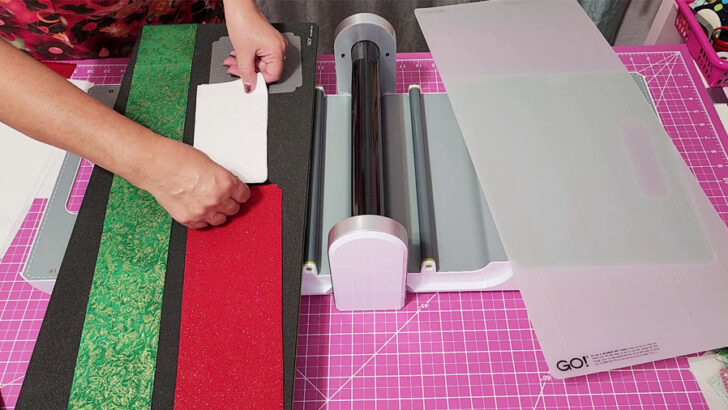
You should always follow cutting tips for Accuquilt Go dies – you want to be cutting with the lengthwise grain parallel to the length of the cutter.
You can see that blades on this die are positioned at an angle. So I have to align fabric with the edges of shapes, not the edge of the die board.
I just place the fabric rectangles right over those shapes, put the cutting mat on top, and so just in a minute I will have most of the Carpenter’s Wheel block cut.
Make sure that the fabric is securely held down by the cutting mat before beginning to cut.
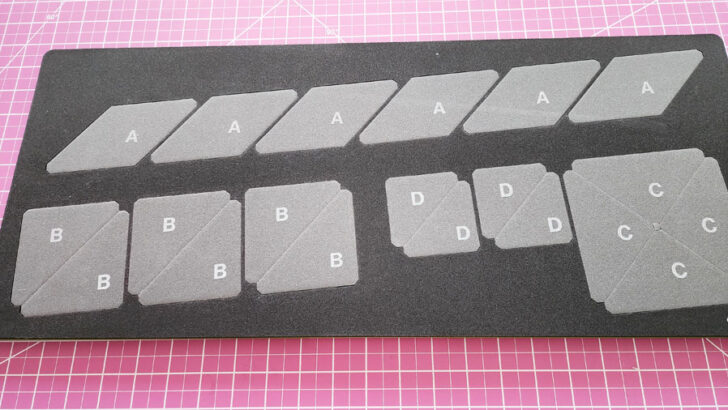
Step 4: Cut All Necessary Shapes
Roll the die through the cutter.
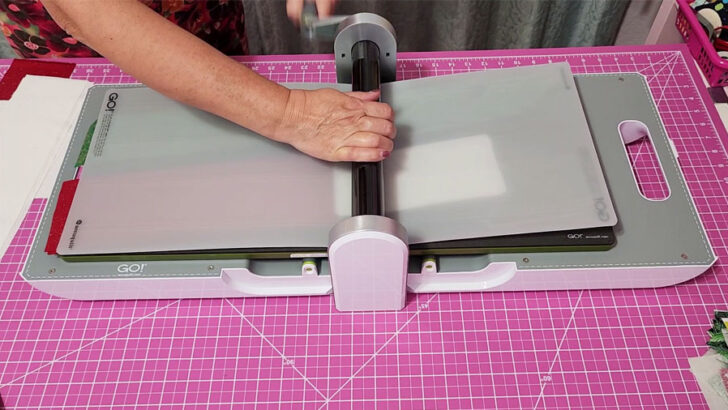
After each pass through the cutter carefully peel back excess fabric. You can see how perfect those shapes are on the board.
Reattach fabric for another round of cuts until all shapes have been cut from their fabrics.
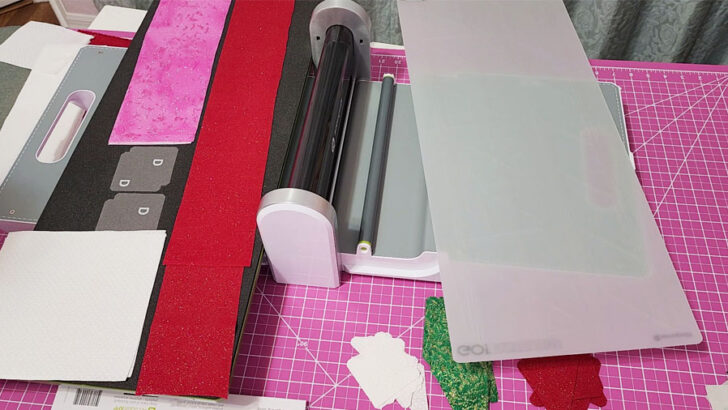
So I have all necessary shapes for the block after just 2 passes through the cutter – just imagine how long would it take to cut all these with a rotary cutter.
So now I am ready to start sewing all these shapes together.
I hoped I didn’t get confused with all these pieces.
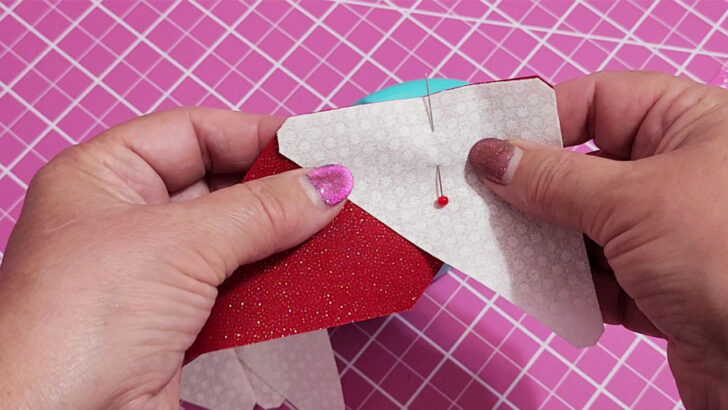
Step 5: Piecing All The Shapes Together
Now it’s time for piecing together all these shapes.
According to the instructions, this 18″ square block requires 8 steps to assemble. Although the block may seem big, it’s entirely achievable because it’s broken down into manageable chunks.
For example, the first step is making right facing A/B/A/B/B unit and there should be 4 of them, and the second step is making 4 left facing A/B/A/B/B units.

It’s really helpful to arrange on a table all the shapes in each unit at once.
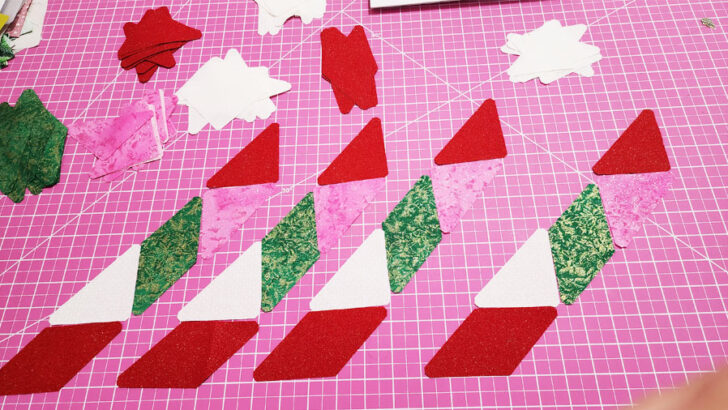
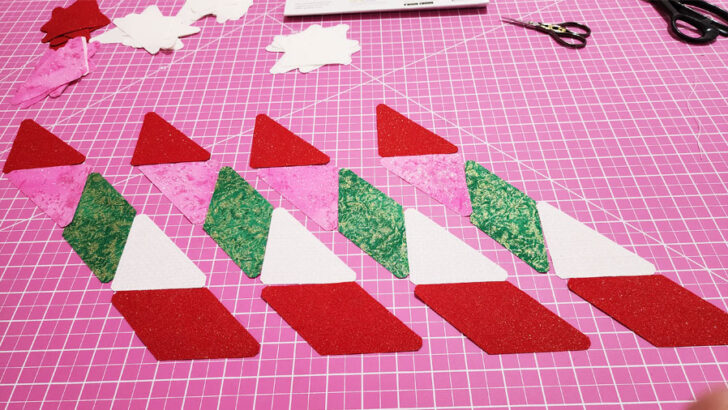
I am sure you already noticed that every shape has the “dog ears” already cut, so your shapes will fit together perfectly like a puzzle. Even if you’re connecting two already sewn shapes, they’ll align without any problem due to the precise measurements of the Accuquilt die.
The method I was using to sew the shapes is called chain piecing. Chain piecing is a great way to speed up the process of making quilts. This method involves sewing pieces together without cutting the thread in between.
After one piece is sewn, move it out of the way and lay another piece next to it and sew. Then continue adding pieces until you have a chain with all your shapes. The advantage of this technique is that you don’t need to trim threads after each piece is sewn.
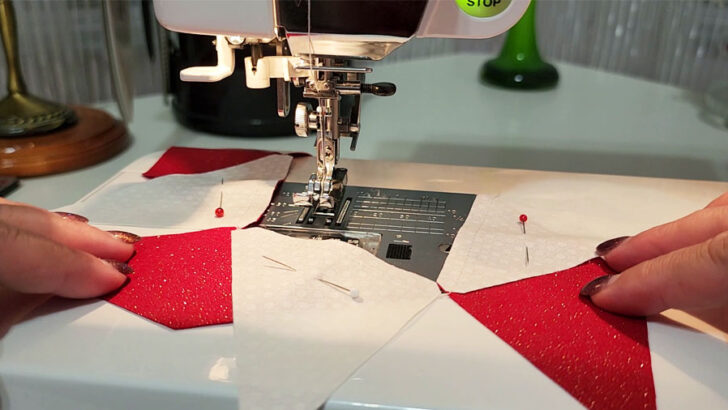
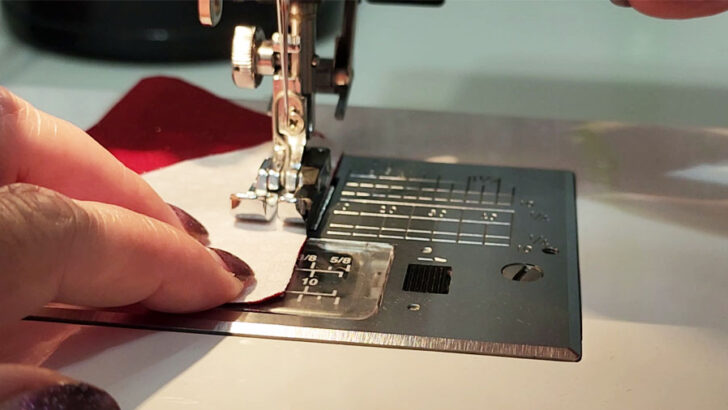
It’s essential to work with precision when piecing. I am using a special quarter inch presser foot. It ensures equal allowances on multiple pieces so that when you come to assemble all the parts of the quilt together, everything is in neat order and straight corners form symmetrical shapes. Your quilt block shouldn’t end up crooked or misaligned. It might seem like a small detail but attention to this will make sure that your project turns out looking exactly how you want it in the end.
But as you can see my block is not without mistakes. Every millimeter counts when you cut and piece quilt shapes together and mistakes can occur, leading to discrepancies or misalignments that are difficult to fix. Do you see the mistake in the center of the block?
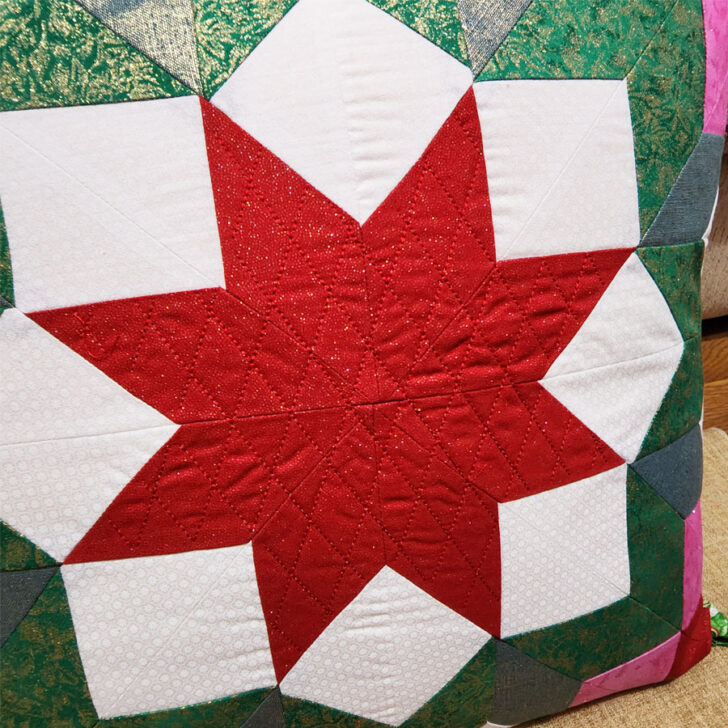
My mistake on this Carpenter’s Wheel block is not very visible, especially since I quilted it. And I think it happened because I didn’t press seams open as it’s written in the pattern instructions.
Following pattern instructions when piecing can be tricky and oftentimes, we find ourselves trying to make things work our own way no matter what — which is what I did when I chose to press seams on one side of the block instead of pressing ¼” seams open as the instructions advise.
However, when I had completed the block, it was clear that the accuracy and quality of my work had decreased a bit due to ignoring this advice. I should trust in the pattern’s instructions if I want a better result which is why I know that next time I choose this die, I will press my seams open as advised. It may require a bit more effort but if it means achieving a higher quality project in the end then it’s definitely worth it.
I was delighted when I finished this quilt block. It looked very complex, but with some patience and attention to the details of the pattern, I was eventually able to piece together all the parts needed for the block. When I finally saw the finished block ready for use, it was so rewarding. I used this block to create a Christmas pillow sham.
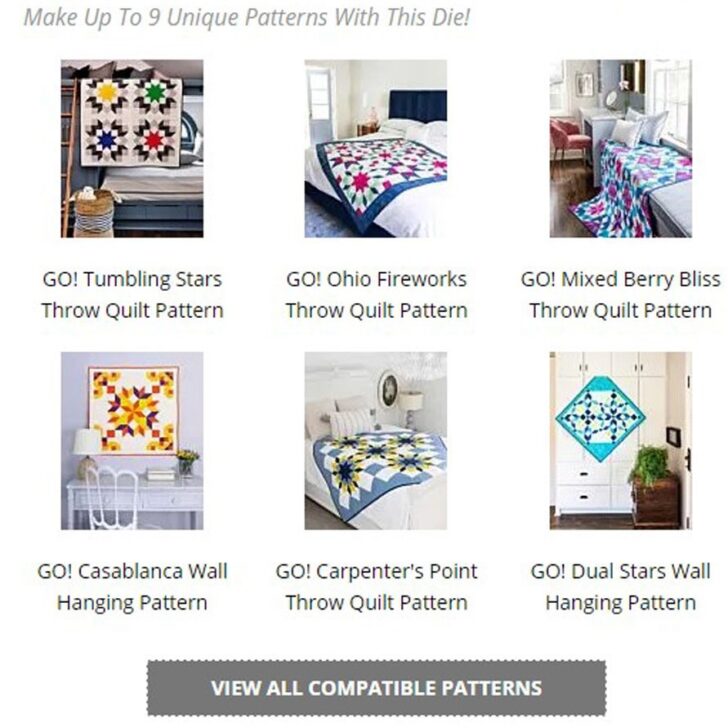
I would say Accuquilt Carpenter’s Wheel die is a real game changer for quilters. It also can be used in nine unique quilt patterns. Each quilt created with the die looks truly stunning – they’re guaranteed to catch anyone’s eye and stand out in any room.
So if you are looking for a high-quality die that will save you time and energy while creating beautiful art pieces, then Accuquilt Carpenter’s Wheel die is an absolute must have. Here is a screenshot from the Accuquilt site.
latest posts
- Corset Pressing Board for Sewing: What It Does and How I Use It
- 7 Essential Tools and Settings for Sewing Denim on a Regular Sewing Machine
- That Purple Thang: 10 Smart Ways to Use This Weird Little Tool
- 20+ Reasons Your Sewing Machine Thread Keeps Breaking (+ Solutions)
- Dresden Plate Quilt Block: 4th of July Fireworks
- How To Sew Curves the Easy Way Using a Curve Master Presser Foot
- 30 Sewing Hacks That Turn Ordinary Items into Useful Sewing Tools
- Seam Allowances in Sewing Patterns: What They Are and How to Use Them
- What Do You Call a Person Who Sews? I Asked My Readers and Got 1,408 Opinions