Do you know the basic parts of a sewing machine and their functions?
Everyone knows that sewists need to be experts in the craft – but what they may not realize is just how many tiny little parts a sewing machine has. It’s like a complex jigsaw puzzle with its bobbins, presser feet, spool pins, and feed dogs. To help make this task easier, I’m here to give you an entertaining and informative introduction to the essential components of a sewing machine. With my guide, you’ll soon see that mastering sewing machine parts can be fun – and even funny, lol. So sit back, relax and get ready for some needle-sharp hilarity.
Ok, let’s start with this image.
Sewing Machine TNG (TNG means The Next Generation in this case)
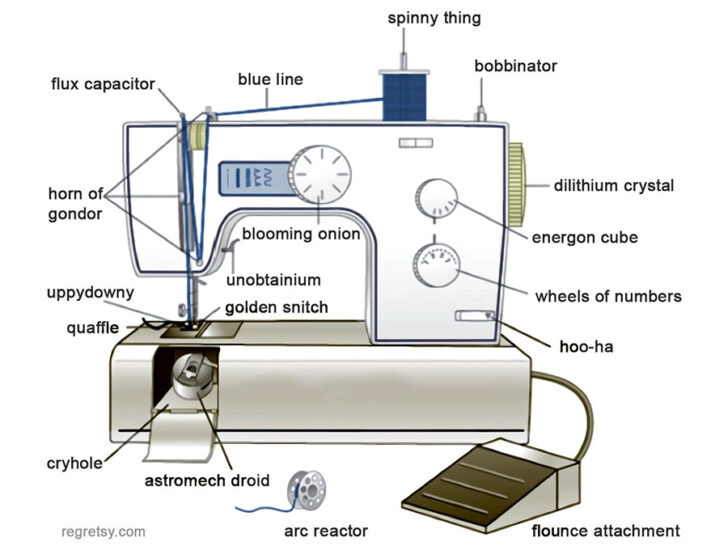
As if the world of sewing machines wasn’t cool enough! This hilarious yet genius image (from a website that doesn’t exist anymore) has taken it a notch higher by giving common parts of a sewing machine nicknames from some of the best movies and books. From ‘Astromech Droid’ and ‘Ark Reactor’ from Star Wars, to ‘Flux Capacitor’ from Back to the Future, and even ‘Horn of Gondor’ from The Lord of the Rings – this image has got it all.
Of course, you could always cheat and Google what is the real name for each part… Or maybe you’re more of an old-school type who likes to figure things out without help? Whichever your way, this image gives us a great excuse for some much needed mid-sewing break.
Trying to figure out the real world counterpart of these fantastical sewing machine components is really quite the puzzle. It’s certainly an amusing take on home crafting, trying to fuse the magic of classic stories with these most traditional activities. It’s not too hard to tell what this machine would look like in action – just picture putting together Leia’s dress in Star Wars using this Bobbin-O-Matic pictured above rather than an ordinary sewing machine.
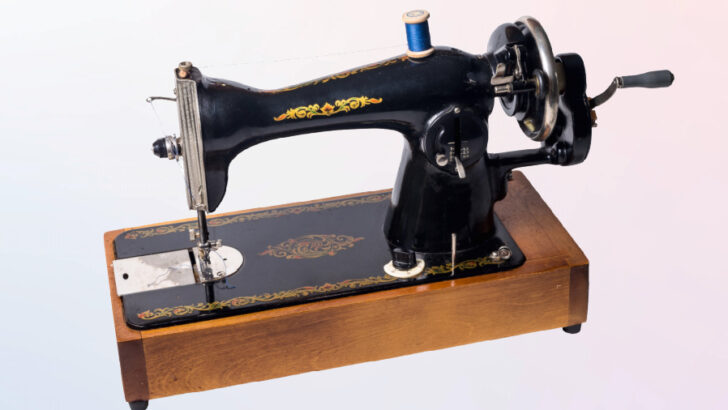
Sewing machines have been in use for over a hundred years. So, with all of the fancy gadgets that have been added to sewing machines, especially in the past 30 years, new machines are basically completely different than what was made for use back in the 1970s or 1990s? Right?
Well, maybe a little. Today’s new sewing machines do have some fancy doo-dads that make sewing more fun and easier. After all, your grandma probably would have loved to sew with a machine that threaded the needle for her. She wouldn’t have had to get out that bulky old magnifying glass to do it! And your Aunt most likely would have been thrilled to have a machine that could sew some fancy stitches that would have dressed up her homemade pillowcases and curtains.
However, you shouldn’t let those complicated computerized displays fool you. While we do have machines with nifty, helpful gadgets on them, the basic parts of the machine are still the same as what was used back in the 1960s… While the way that you thread the needle or wind the bobbin might vary slightly, they generally operate in similar ways, regardless of how fancy the machine may be.
This is a great thing, especially if you have sewed in the past, but let your skills lapse. You can do basic sewing with your fancy machine, and you don’t have to use modern accessories, add-ons and gadgets until you build your confidence.
Your manual will explain all of the specifics of your machine and is a great resource for learning about the parts of your sewing machine and their functions. Each machine is a bit different and the manual will help you figure it out quickly.
If you have a secondhand machine or you’ve lost the manual, you may be able to find one online in PDF form or available for order from the manufacturer. Additionally, if your machine is older, you can check out sites like eBay to purchase a printed manual.
Here are the basic things that most sewing machines have in common. I’m pretty confident that you will be able to spot every one of these things on your machine, no matter how complicated or simple it is. You probably won’t even need your manual to find them.
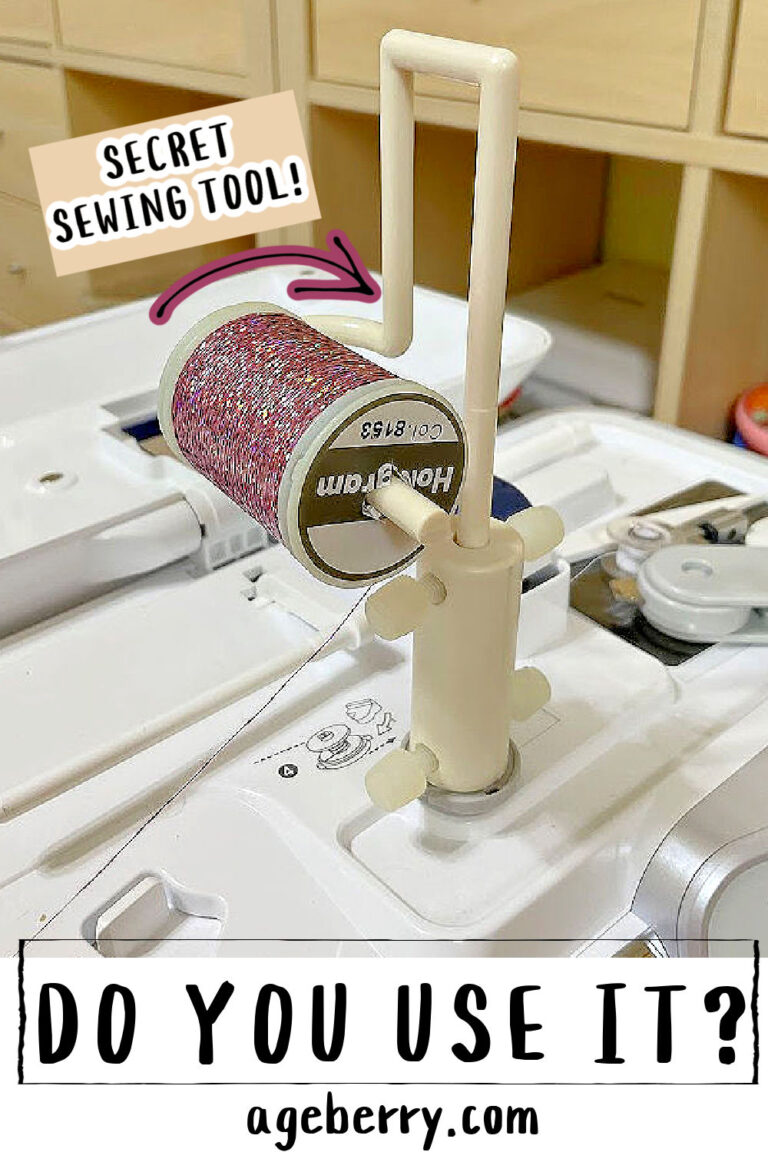
Sewing Machine Spool Pin
The spool pin sometimes referred to as a thread holder, is a post that holds your spool of thread in place. It’s an important part of any sewing machine. Without it, you wouldn’t be able to properly thread your machine and begin sewing.
But why is it that some machines have vertical spool pins while others have horizontal spool pins? Let’s explore the differences between these two types of spool pins and how they can affect your sewing experience.
Vertical spool pins can be of two types. One is usually found on older models of sewing machines. If you place a spool of thread on a vertical spool pin the spool will rotate when a sewing machine is working. Some modern machines have it too.
If you look at the funny image above Sewing machine TNG you can see that the spool pin is called “spinny thing”.
But it’s actually not really always the case – many modern machines have vertical spool pins that don’t move. These vertical pins are often adjustable in terms of height, making them more versatile when working with different types of spools.
Horizontal spool pins are often found on newer models of sewing machines.
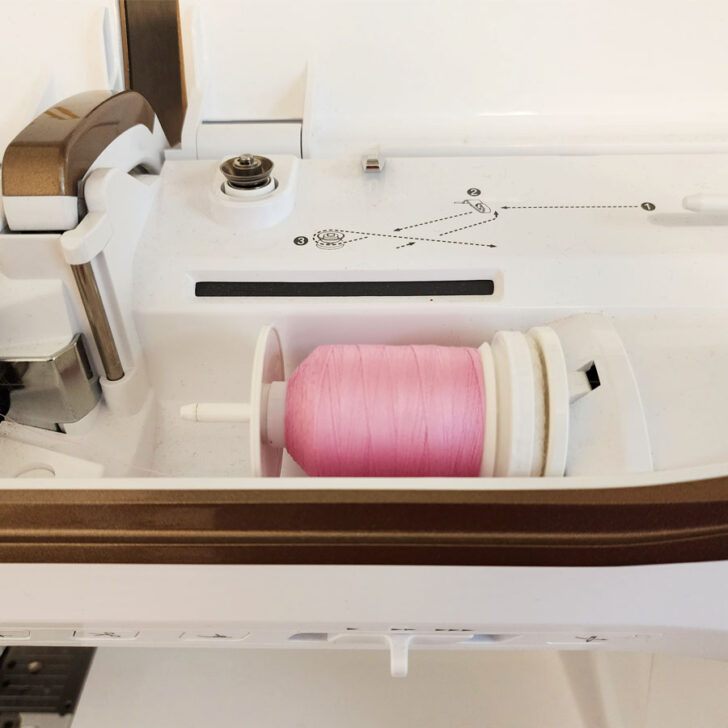
The main difference between the old type of vertical pins (that rotate) and modern vertical spool pins and horizontal spool pins (that don’t rotate) is the direction in which the thread runs off the spool.
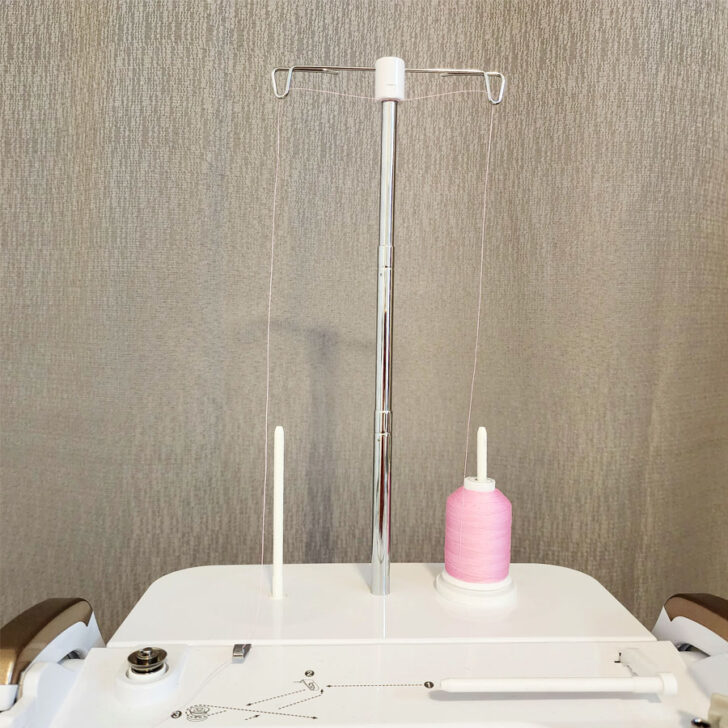
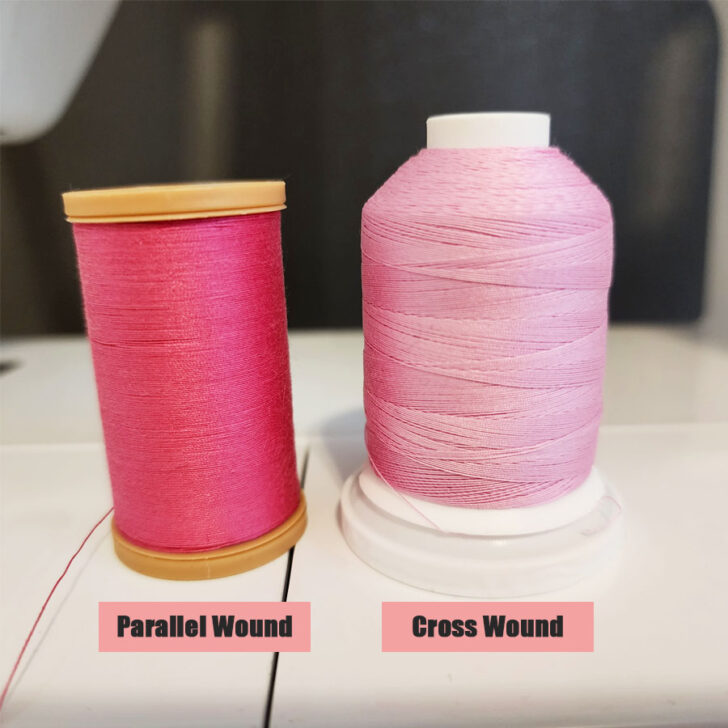
With a modern vertical spool pin and a horizontal spool pin, the thread runs off the top of the spool that doesn’t move, while with an old vertical spool pin, the thread runs off the side of the rotating spool. Knowing which type of spool pin your machine has – either vertical and rotating or a pin that doesn’t rotate – is essential for ensuring your machine runs smoothly and doesn’t break the thread. If you’re using an old-style vertical pin, make sure you use spools with parallel wound threads. For other types of spool pins, cross wound thread is the way to go. If you’d like more detailed information on this topic, I invite you to check out my YouTube video Thread Secrets.
✅ Related tutorial: What is a Sewing Thread Stand for a Sewing Machine, and Why Do I Need One?
Sewing Machine Bobbin
Oh, sure, you probably think you know all there is to know about bobbins. Well, don’t be too quick to dismiss this info. Keep reading and discover a few surprising things about the bobbin – who knows; maybe you’ll even learn something that will make your life easier.
A bobbin is a small spool of thread that fits inside your sewing machine. It holds the lower thread for your stitches – the top thread being supplied by the needle. With its tiny size and humble appearance, the bobbin is a key component in any sewing machine.
Before you can start sewing, you have to “wind the bobbin.” Thankfully, sewing machines do this for you. The filled bobbin goes underneath the area under the presser foot and needle. The needle penetrates the fabric and draws the bobbin thread up in a loop. This gives you a strong, double-threaded seam. The bobbin thread runs along the underside of your seam.
✅ Related tutorial: How to thread a bobbin
Sewing machine bobbins can be plastic or metal and there are several different styles made of both plastic and metal. Not all of them are interchangeable, so check out the specific ones that are recommended for your machine. While the differences in bobbin styles are slight, they can make sewing nightmarish if you don’t have the right bobbin.
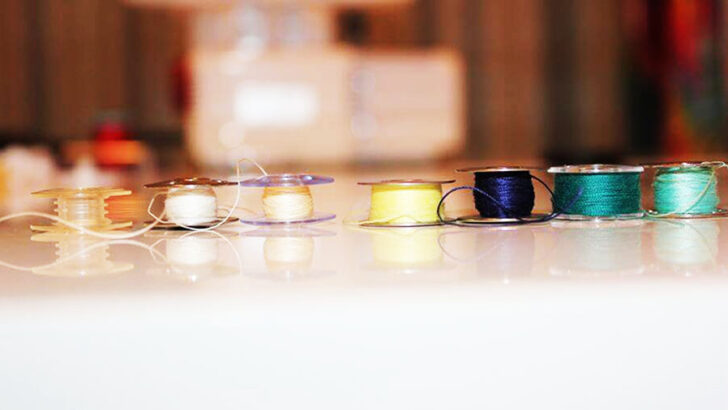
If you buy a second-hand machine, make certain that the bobbins that come with the machine are the right ones! I bought a used machine once and some of the bobbins were not the correct ones, leading me to tons of sewing frustration until I figured it out. To make sure you use the right type for your machine, consult your owner’s manual before purchasing new bobbins.
You may need to wind your own bobbins or purchase pre-wound ones.
Note: Some of the links on this page are affiliate links. This means I will receive a commission if you order a product through one of my links. I only recommend products I believe in and use myself.

Simthread 25pcs Assorted Colors Size A Class 15 (SA156) 60WT Prewound Bobbins Thread with Clear Storage Plastic Box for Brother Embroidery Thread Sewing Thread Machine DIY

New brothread 25pcs Assorted Colors 70D/2 (60WT) Prewound Bobbin Thread Plastic Size A SA156 for Embroidery and Sewing Machine DIY Embroidery Thread Sewing Thread

New brothread 25pcs White 60S/2 (90WT) Prewound Bobbin Thread Plastic Size A SA156 for Embroidery and Sewing Machines DIY Embroidery Thread Sewing Thread Cottonized Soft Feel Polyester Thread
Have you ever experienced the horror of running out of bobbin thread when topstitching something important? No one wants to go through that kind of stress, which is why the most desirable feature on a sewing machine has to be its ability to alert users when their bobbin is starting to run empty.
This revolutionary technology was once only a pipe dream – now, it’s a reality thanks to modern sewing machines. Sure, you may have had a few mishaps with an empty bobbin in the past, but at least you don’t have to worry about it now. So make sure to get yourself a good machine that can tell you when the bobbin is approaching zero. I think my Youtube Short video might just be the thing you need to watch. In it, I’m showing off my awesome sewing machine with this revolutionary feature: when the bobbin is running out of thread, it sends me an alert.
Alrighty then, now let me tell you about an awesome trick – it’s something not many sewists know about. You can actually sew on your machine without any top thread. All you need to have is a bobbin thread. Yep, you heard right. It’s an excellent technique for sewing darts on sheer fabric. I made a video tutorial to share with you – after all, more people should know about this magical bobbin trick.
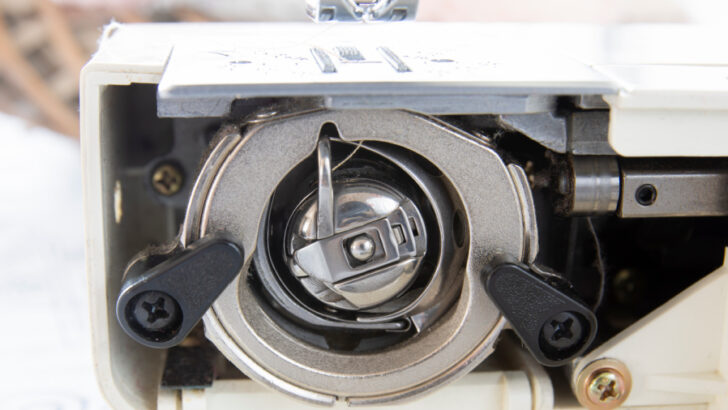
Bobbin Case
Sewing machines have a bobbin case into which the bobbin is inserted.
Bobbin cases can be metal or plastic.
The bobbin case holds the bobbin in place and provides the correct thread tension. You should learn how to adjust the tension on your bobbin case. This bobbin case helps draw the top thread down into the bobbin and feed the thread through the machine.
There are two types of bobbin cases for sewing machines—the front loading bobbin case and the top loading bobbin case.
Front loading bobbins cases are inserted in a vertical position through an opening at the front or side of your machine. The bobbin case will have a small latch on one side that needs to be opened before inserting the bobbin into place. Once inserted, close the latch and make sure it is securely fastened before beginning to sew. It can sometimes be difficult to remove a front loading bobbin case as they often become stuck in place due to tension or lint build-up, so make sure you check it regularly for any debris that might be stuck inside before starting to sew with it again.
A top loading bobbin case is inserted from above through an opening on top of your machine near where you insert your needle. Unlike a front loading bobbin case, a top loader does not have any type of latch and should slide easily into place without any extra effort needed from you. Make sure that your top loader is properly aligned before beginning to sew; if it isn’t aligned correctly, then it won’t create a proper lock stitch when sewing with it.

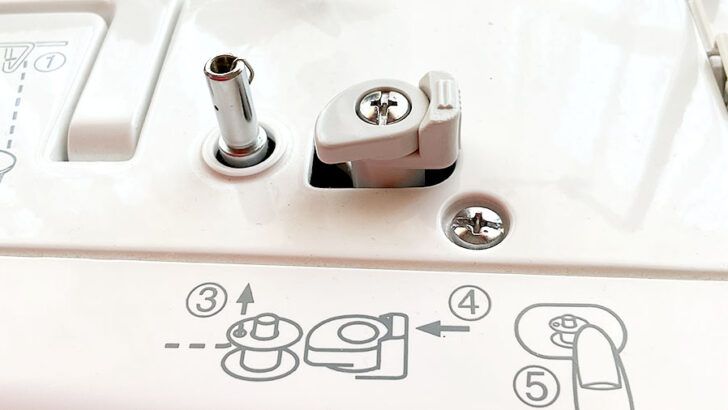
Bobbin Winder
When you are sewing, you ideally want the top thread and the bottom thread to be the same color. This means that you have to get some of the thread from your spool onto the bobbin. Don’t worry! You do not have to spend your valuable sewing minutes winding thread onto a bobbin by hand. Sewing machines have a bobbin winder that winds the thread on the bobbin.
The bobbin winder on a sewing machine is intended to evenly wind the thread. Bobbin winders on various machines can differ, so it’s really important to know how your specific machine works.
✅ Related tutorial: Common Sewing Machine Bobbin Problems And Solutions (+Videos)
Sewing Machine Needle
The sewing machine needle does much of the hard work of making a seam when you sew by machine. Different machines have different methods of threading the needle, so check out your manual to ensure that you do it correctly.
Sewing machine needles have a flat side and a round side to help you get the needle installed in the right position.
There are many different types and sizes of sewing machine needles, so you should make sure that you have the correct one for both your machine and the sewing that you want to do. Different sewing projects have different needle requirements. For instance, knit fabrics require a ball-point needle.
Also, a dull needle will result in skipped stitches or other problems. Be sure to have plenty of spare sewing machine needles so you always have an extra when you need one.
✅ Related tutorial: How to thread a needle on a sewing machine
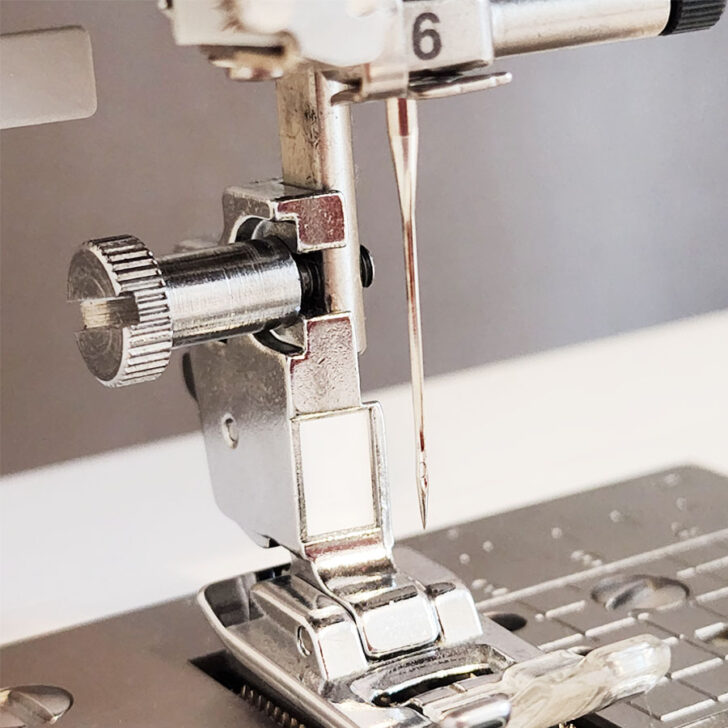
Needle Bar
The sewing machine needle bar holds the needle in place attached to the sewing machine. It usually looks like a long tube or cylinder. A screw is in the needle bar to help you tighten the needle and hold it in place.

Sewing Machine Tension Guide
When you stitch a seam, the top thread and the bottom thread are looped together through the fabric to create a sturdy seam. Different fabrics have varying weights and thicknesses, so the amount of “tightness” that the machine needs to hold on the thread will vary. The tension guide makes slight adjustments to the tautness of the thread, so that the two threads in the seam that you are stitching loop together perfectly.
The upper thread tension is held by a pair of metal discs connected by a coiled spring. Usually, using a knob or a button you can tighten or loosen the tension so that the thread is held more or less taut. When the thread tension is correct in your seam, you will only see the top thread on the top of the fabric and the bottom thread on the underside of the seam. If your thread tension is off, the seam may have thread bunched on the bottom or it may pucker and not be smooth.
✅ Related tutorial: Sewing Machine Tension Adjustment
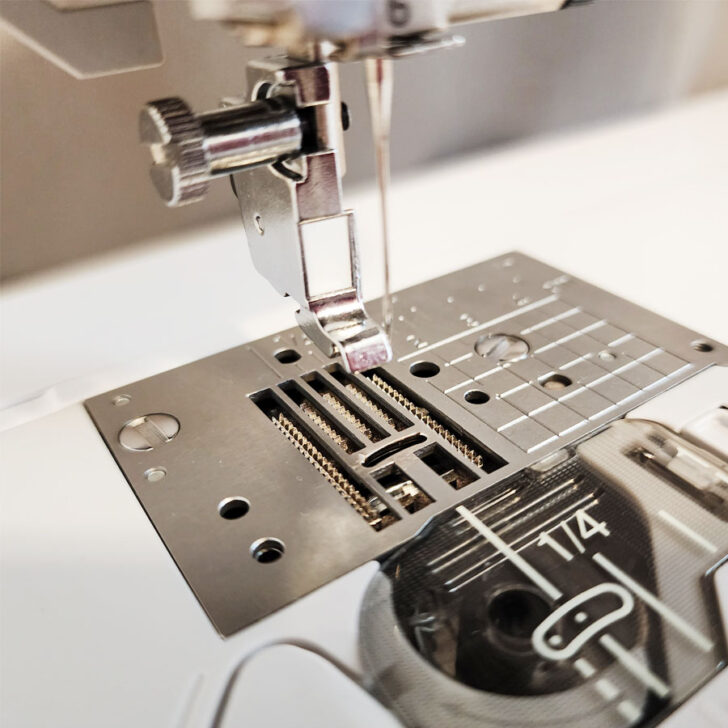
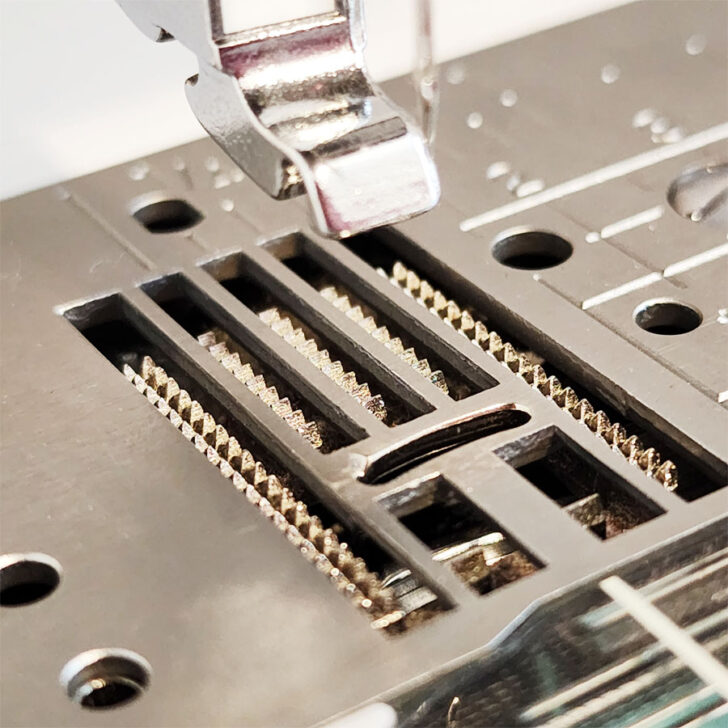
Sewing Machine Throat Plate / Needle Plate
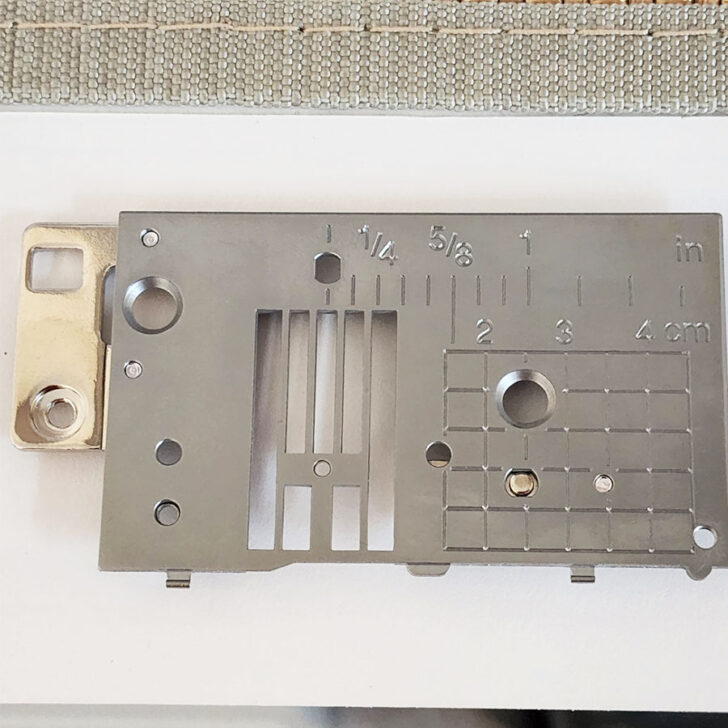
The throat plate is located on the bed of your sewing machine. It is a metal plate with holes in it through which the needle penetrates down into the bobbin casing. Metal teeth called feed dogs protrude through the throat plate to help with feeding the fabric. Often, the throat plate has markings on it so that your seam allowance can stay consistent and appropriate as you sew.
There are two main types of throat plates: regular plates and straight stitch plates. Regular plates have a big opening for different stitch widths, allowing you to do all standard stitches including zigzag stitches and decorative stitches.
Straight stitch plates, on the other hand, only have one small hole for the needle to pass through, making it ideal for straight stitching only. Straight stitch plates provide more stability when stitching long seams or hems because there’s less chance for skipped stitches or puckering fabric. This makes it ideal for stitching very lightweight fabrics such as silk or chiffon.
It’s important to have an undamaged throat plate installed on your machine at all times in order to achieve accurate results with every project. Over time, lint can build up around the feed dogs or in any of the openings in the plate which can cause problems with tension or other issues – so remember to periodically clean it.
✅ Related tutorial: Types of Sewing Machine Stitches: Unraveling the Mysteries of the Straight Stitch
Presser Foot
One of the most important pieces of any sewing machine is the presser foot.
A presser foot is simply an attachment that holds fabric in place as you sew it together. The presser foot applies pressure against the fabric so that it stays flat and smooth as you stitch, allowing for more even and accurate stitches. It also helps keep layers from shifting while sewing.
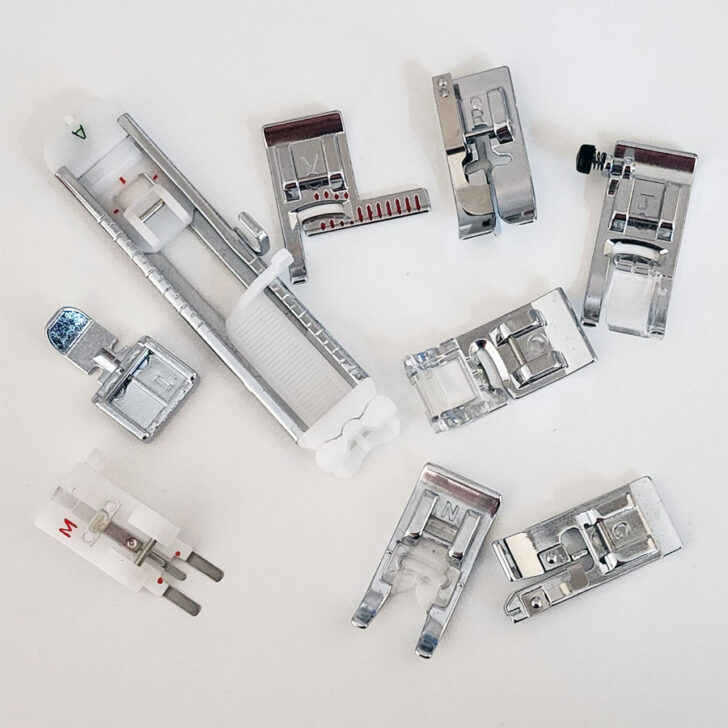
The most common type of presser feet is the standard presser foot, which works with almost any fabric. This type has no extra features; it simply holds down fabric while stitching. It’s great for everyday tasks like hemming or making simple garments.
Other types are designed for specific tasks such as overcasting fabric edges, gathering fabric, attaching elastic, making buttonholes, or inserting zippers. Each type has different features that make them well suited for certain tasks, so take some time to explore which ones would work best for your projects.
Having the right presser foot makes all the difference in achieving quality results. Take some time to research what kinds of projects you plan on doing with your machine and then look into which types of presser feet will help you get those jobs done quickly and easily.
Presser feet also come in two varieties—snap-on and screw-on styles.
The most common type of presser foot is snap-on—it snaps onto the shank of the machine in seconds without any tools or screws required. Snap-on presser feet come in various sizes and shapes so they can accommodate different types of fabrics or stitches. Different brands may offer their own unique snap-on presser feet with specific features, but they all operate similarly—simply attach them to the shank and start stitching.
Another popular type of presser foot is screw-on—as its name suggests, this type requires a small screw that attaches the foot to the shank for a secure fit. This provides added stability when working with thick fabrics or multiple layers, making it ideal for quilting projects where accuracy is key. If you have a vintage machine, chances are it uses screw-on presser feet instead of snap-ons since they were more common before snap-ons became popularized in modern machines.
Check if your machine supports both snap-on and screw-on attachments; some newer models do provide both options.
- ✅ Related tutorials:
- Cording foot – what it is and how to use it,
- Presser foot guide: what is a Rotary Even Foot and how to use it
- Buttonhole Presser Foot 101: What It Is And How To Use A Buttonhole Foot To Create Nice Buttonholes
- How to use a walking foot
- The Invisible Zipper Foot: What It Is And How To Use It
- Blind hem foot: How to sew an invisible hem with a sewing machine
- How to use overcast presser feet for sewing overcasting stitches
Presser Foot Lifter
The presser foot lifter does exactly what it sounds like. It’s a handle or lever that lifts and lowers the presser foot. This allows you to easily maneuver the fabric as you sew and make sure that everything is in place before you start stitching. The presser foot lifter can also be used to raise the presser foot when you need to change out the bobbin or thread colors, etc.
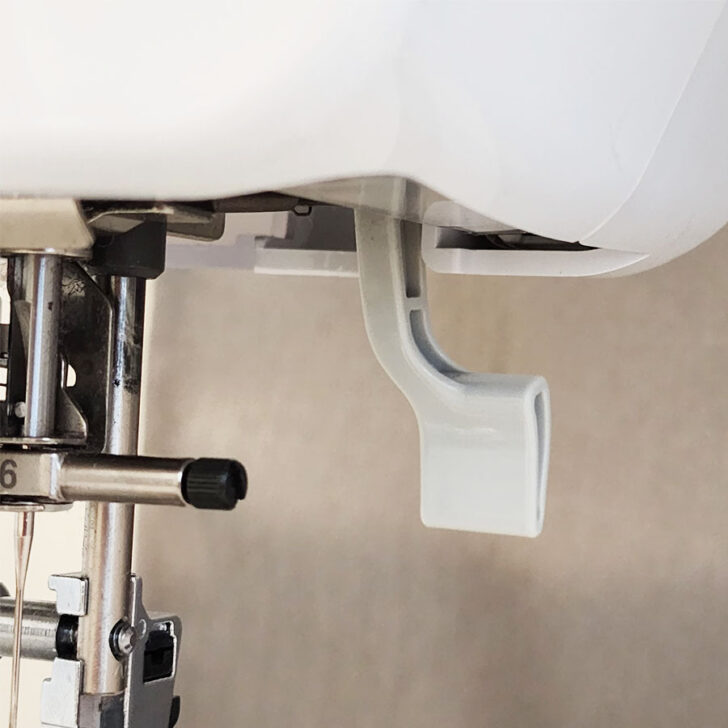
Some modern sewing machines have an adjustable presser foot height for various fabric thicknesses so a presser foot lifter can be raised higher than regular. It has actually two positions when raised. With it, stitching bulky projects is no longer a challenge because the machine allows the extra-high lift of presser feet. It allows for thick fabrics to go underneath easily.
Feed Dogs
Feed dogs are metal teeth that are found underneath the presser foot on a sewing machine, usually in pairs or rows of three or four teeth. They act like a conveyor belt, gripping onto the fabric and moving it along as you sew. This helps keep the fabric taut and steady as it travels through the machine.
Feed dogs act like little fingers under your fabric, pushing it forward with each stitch. As the needle goes up and down, the feed dog grabs onto the fabric and pulls it through before releasing it so that another stitch can be made. This process is repeated with each rotation of the needle until you finish your seam. The speed at which your feed dog moves can be adjusted by changing the stitch length on your machine. The shorter the stitch length, the faster your feed dog will move; conversely, a longer stitch length means that your feed dog will move more slowly.
Remember, when you are sewing, you do not have to yank or pull the fabric through the machine. Just allow the feed dogs to move the fabric and then you will have perfectly even stitches.
Some machines allow you to turn off the feed dogs, which drops them below the level of the throat plate. This will be useful when you need more freedom to move the fabric on your own when free motion quilting.
Your manual should give instructions for raising or lowering your feed dog—this determines how close they will be to your presser foot when stitching.
Sewing Machine Knobs and Dials
Most sewing machines have several knobs and dials. With these dials, you may be able to adjust the stitch length, the stitch type, the tension of the thread, etc.
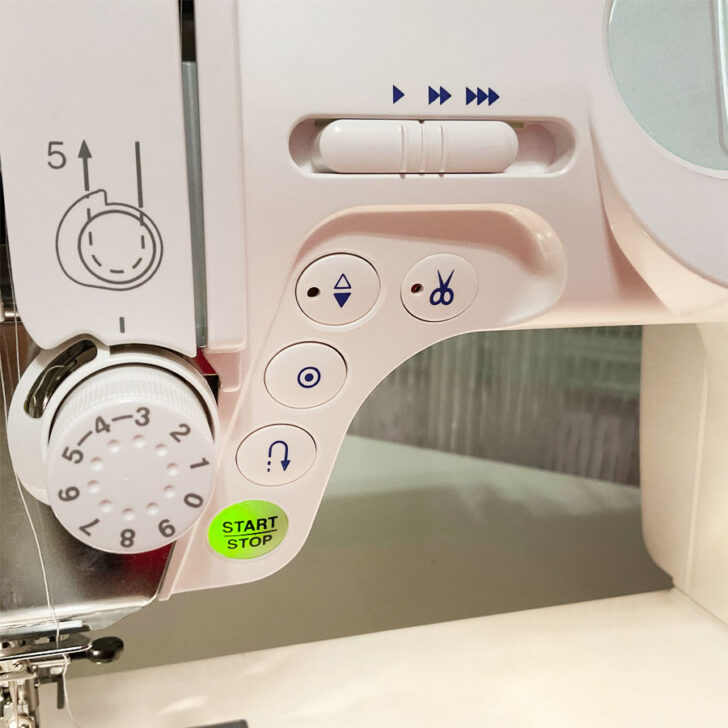
Sewing Machine Buttons
Your machine also likely has multiple buttons. The on/off switch, the thread cutter button, or the reverse stitching buttons are all possibilities on your machine. Don’t be afraid to tinker with the buttons on your machine to see what they can do. However, you should only do this with scrap fabric in the machine, and not anything that you want to make into a project.
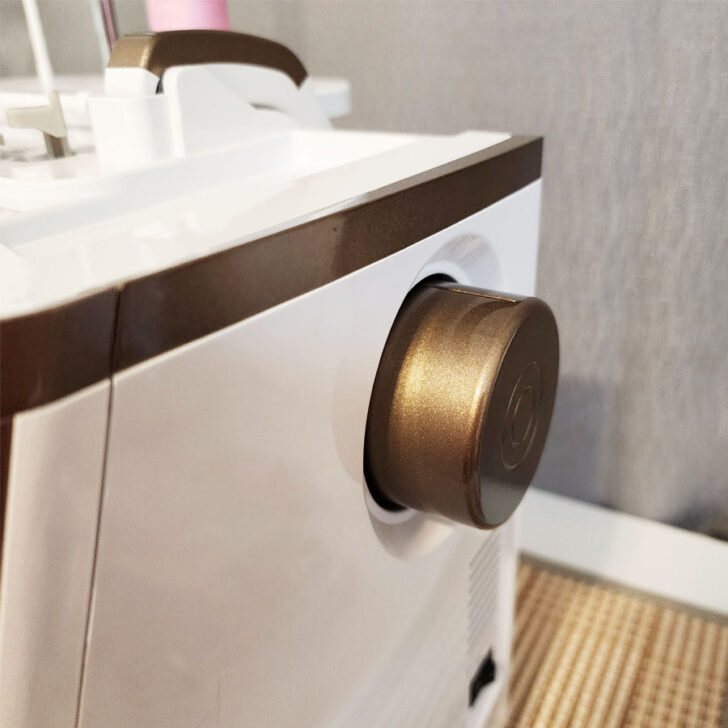
Handwheel
The sewing machine handwheel is usually on the righthand side of the sewing machine. You can turn the handwheel to raise or lower the needle. This is useful when you want to make tiny adjustments to the position of the needle.
Foot Pedal
The sewing machine foot pedal works just like a car’s gas pedal. Press it harder, and you’ll sew faster. Take it easy and you’ll sew more slowly.
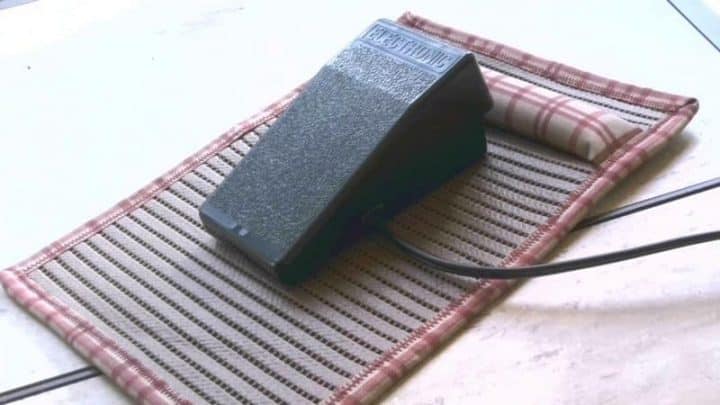
✅ Related tutorial: How to sew a non-slip foot pedal pad for a sewing machine
Other Sewing Machine Parts
While most machines have all of the above items, your machine may have a few extra things too.
You may see computerized displays, a light switch, a thread cutter, an automatic needle threader, just to name a few parts. If you can’t figure out what something is, look it up in your manual. Every sewing machine has a few extra unusual parts. Does yours? See if you can figure out what they do!
In conclusion: Knowing all of the different parts of a sewing machine is important for being an experienced sewist – from understanding when to use certain presser feet to knowing how to adjust tension settings, etc. With just a bit of practice and research, you’ll soon be able to identify each part without even thinking about it – allowing you to quickly troubleshoot problems and get back to stitching in no time.
Knowing all the different sewing machine parts and their functions will help you make more informed decisions when buying, maintaining, and using your sewing machine.
Did you find this tutorial helpful? If so, save this pin (see below) on your sewing board so you can come to this tutorial later when you need this information on sewing machine parts and their functions, and follow me on Pinterest for more tips, tutorials, and inspiration!
latest posts
- Corset Pressing Board for Sewing: What It Does and How I Use It
- 7 Essential Tools and Settings for Sewing Denim on a Regular Sewing Machine
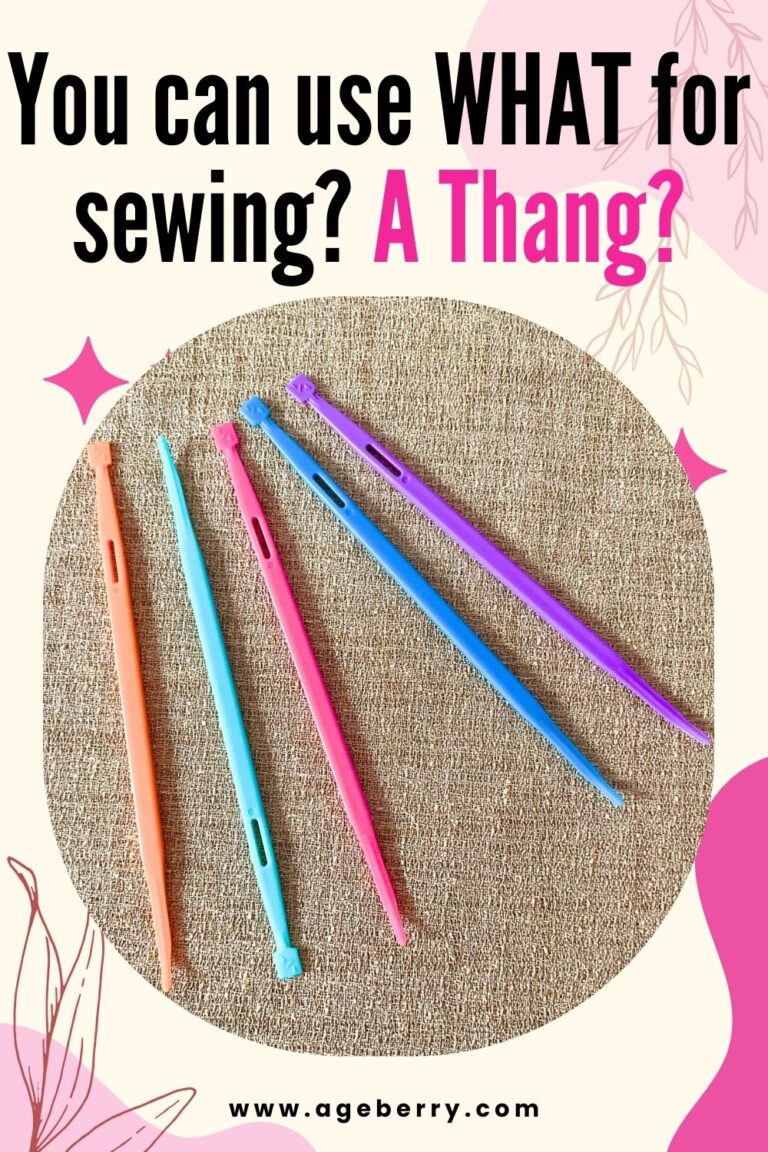
- That Purple Thang: 10 Smart Ways to Use This Weird Little Tool
- 20+ Reasons Your Sewing Machine Thread Keeps Breaking (+ Solutions)
- Dresden Plate Quilt Block: 4th of July Fireworks
- How To Sew Curves the Easy Way Using a Curve Master Presser Foot
- 30 Sewing Hacks That Turn Ordinary Items into Useful Sewing Tools
- Seam Allowances in Sewing Patterns: What They Are and How to Use Them
- What Do You Call a Person Who Sews? I Asked My Readers and Got 1,408 Opinions