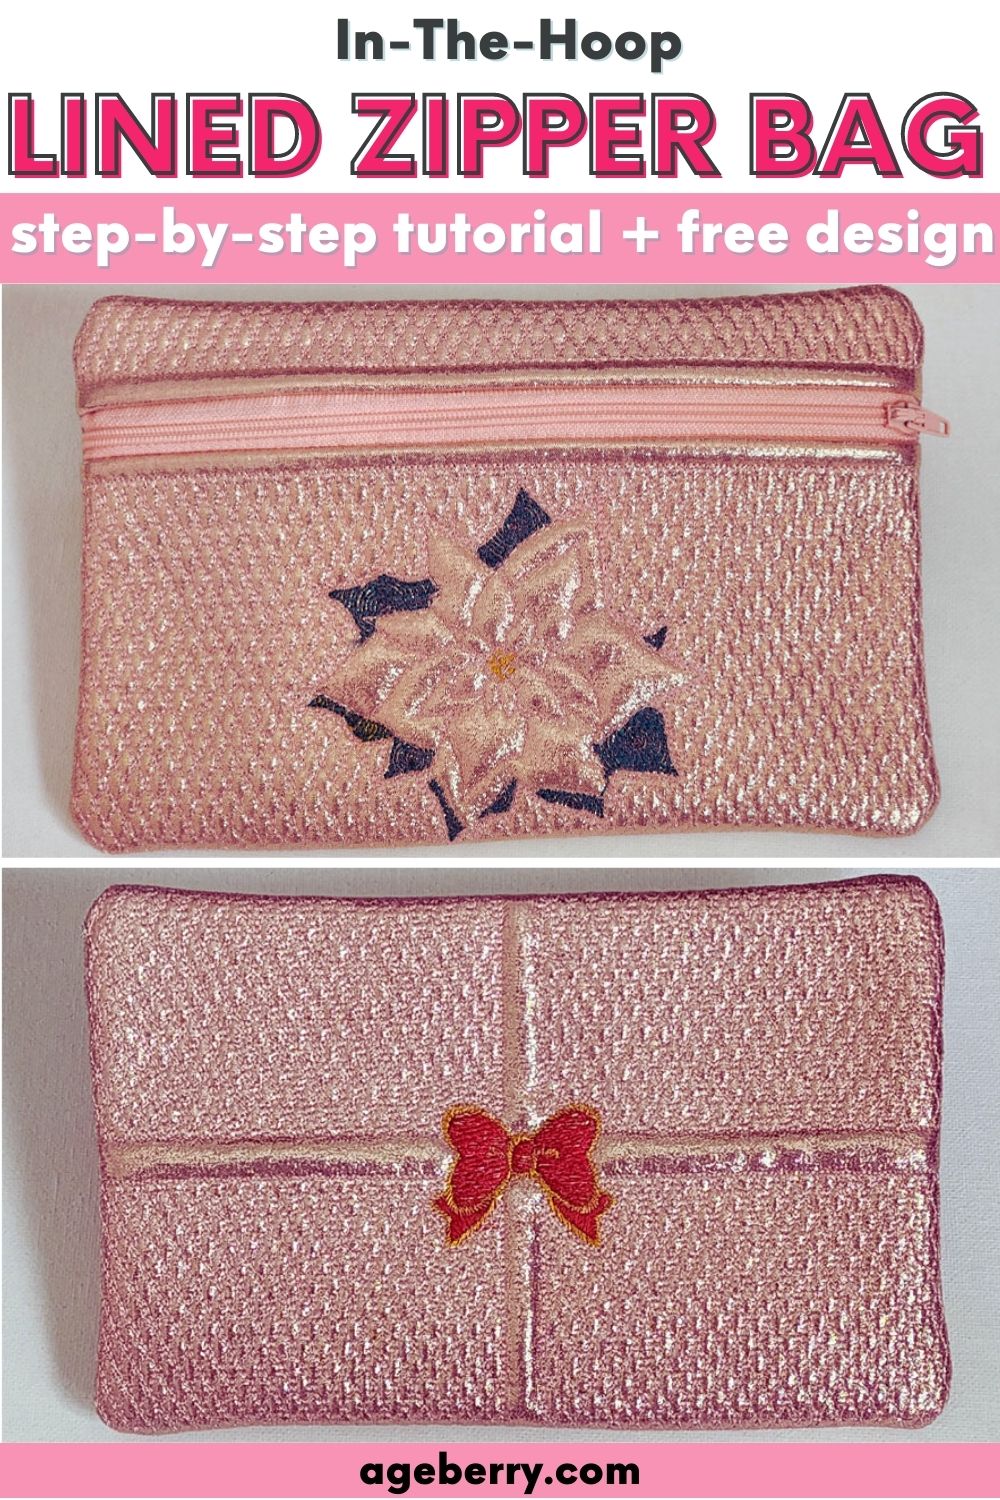
How To Make In-The-Hoop Lined Zippered Bags: A Step-By-Step Tutorial, Free Design
In this tutorial, I will show you how to make a lined zippered bag entirely in the hoop using your embroidery machine. I’ll walk you through each step of the process and by the end, you’ll have a beautiful and functional zipper bag that you made entirely with your embroidery machine.
This project may not be suitable for beginners and will require a modern embroidery machine with a large hoop. Before starting, make sure you have the necessary equipment and are comfortable with basic embroidery techniques.

Making zipper bags in the hoop is a lot of fun for me. I love how quick and easy they are to create. It’s exciting to see each bag turn out unique and special.
The best part is that everything is done in the hoop, so there’s no need for complicated sewing steps. I get to choose the fabric and design, making each bag truly one-of-a-kind. It’s a satisfying and rewarding project that I enjoy doing over and over again.
Whether it’s for myself or as a gift, these zipper bags are a wonderful way to keep things organized in style. They become handy organizers for my daily essentials, perfect for keeping makeup, stationery, or other small items neatly tucked away.
Note: Some of the links on this page are affiliate links. This means I will receive a commission if you order a product through one of my links. I only recommend products I believe in and use myself.
What You Will Need To Make In-The-Hoop Lined Zippered Bags
Embroidery machine with a large hoop, at least 6″ x 10″
Zipper (desired length for the bag)
Outer fabric
Lining fabric
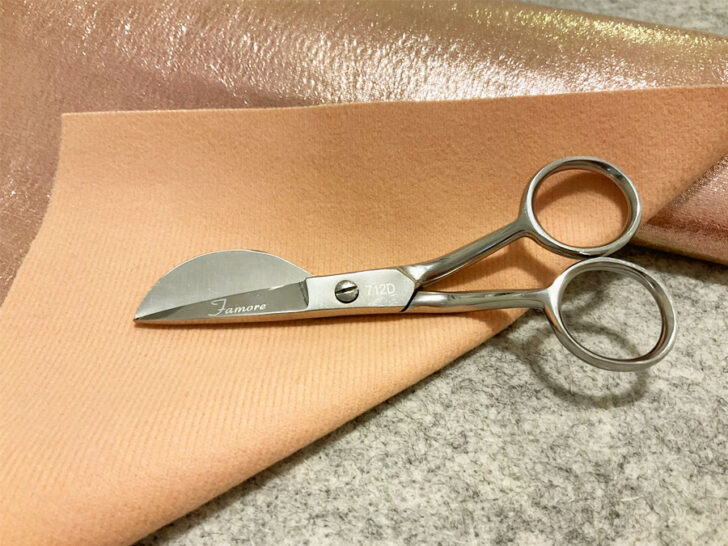
Embroidery scissors (duckbill scissors)
Embroidery design ( in the format for your embroidery machine) – you can get it free by subscribing to my weekly newsletter.
If you are a subscriber you can find the design files in all popular formats (including PES and HUS) in my Resource Library.
If you are not a subscriber click the link below to subscribe and download your FREE machine embroidery design files from my Resource Library!
Let’s talk about a zipper first because we can’t have a zippered bag without a zipper, right?
Choose a zipper with thin plastic teeth. Your embroidery machine will stitch over coils and you don’t want a broken needle because it hits metal. But embroidery needles go over plastic coils easily. The zipper has to be longer than the width of the bag – 1 inch on each side at least. Make sure that the zipper ends are outside of the placement stitches.
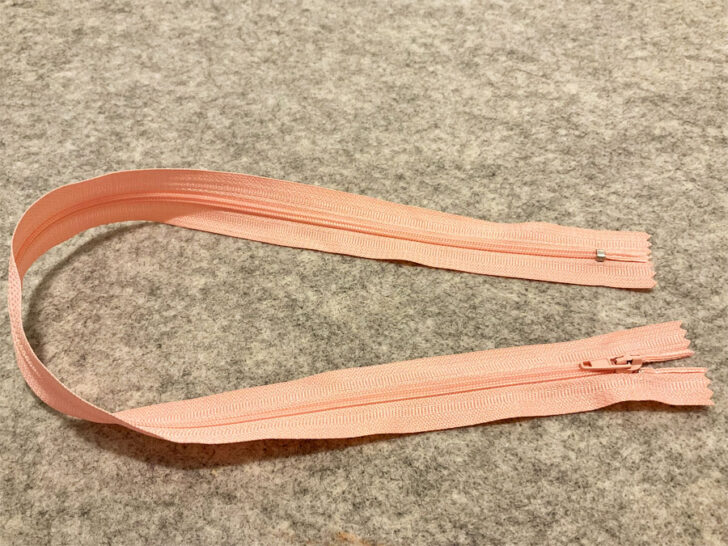
The zipper shouldn’t be invisible – you know this kind of zippers used for clothes. It also shouldn’t be a separating zipper.
What fabric to choose? Of course, you can use quilting cotton. For this project, I used thin vinyl fabric, or maybe it’s better to call it faux leather. I decided to use a solid color, not printed fabric because the embroidery will stand out better on a solid fabric.
You can use printed fabric for the lining that will coordinate with the outside of the bag. Have fun with it and make it your own.
Always remember to fill in enough bobbins for your projects or use pre-wound bobbins for your embroidery machine.
Embroidering The Back Of The In-The-Hoop Lined Zipper Bag
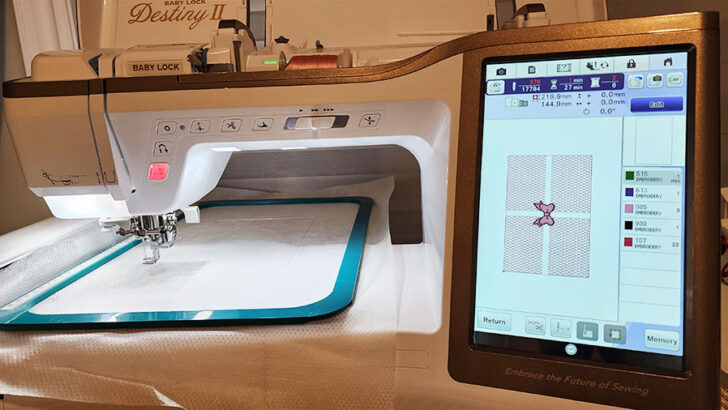
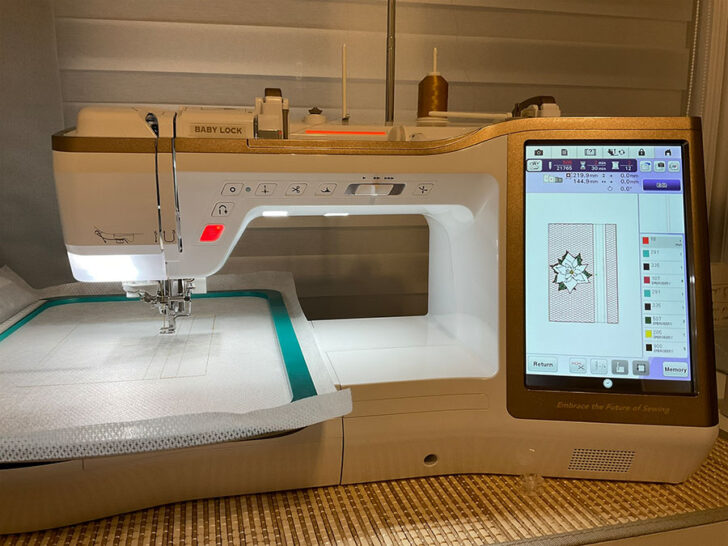
Load the design of in-the-hoop zipper bag into your embroidery machine.
To begin making the lined zipper bag, you’ll need to stitch out the back design first. Once the back is completed, you can set it aside while you work on the front design.
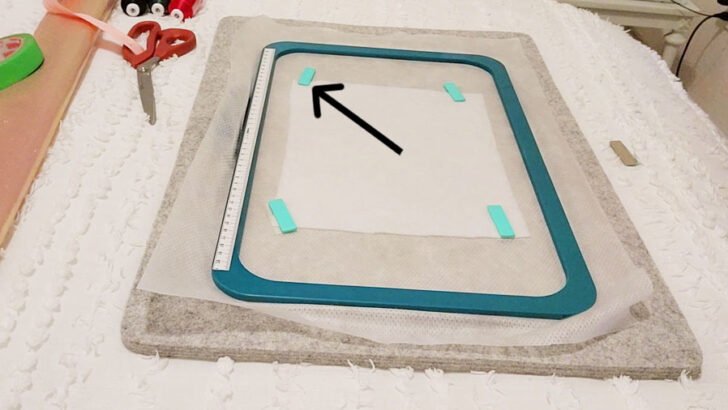
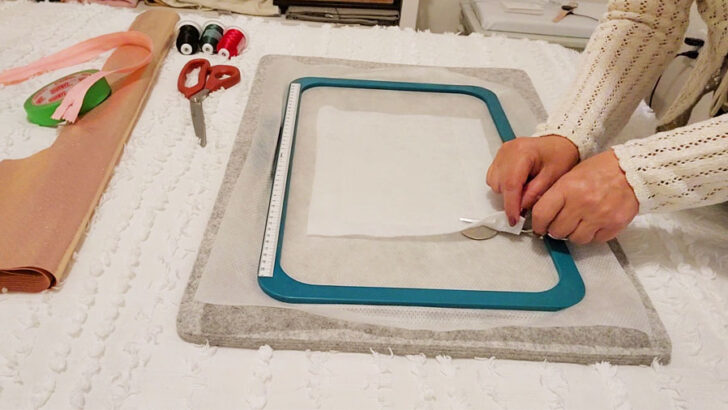
Step 1. Hoop a piece of No-show Mesh Stabilizer. This type of stabilizer is perfect for in-the-hoop embroidery projects as it provides good support without adding bulk to the design.
Once the stabilizer is hooped, run the first step of the design, which is the placement stitch for the batting. This stitch will guide you on where to place the batting for the project.
I like to use a Dime magnetic hoop (here is my affiliate link if you are interested to buy the hoop) for projects in-the-hoop. This type of hoop is designed to make hooping easier and more efficient, especially for this kind of projects. With its magnetic design, the hoop holds the thin stabilizer in place without the need for clamps or screws. This allows for a more even and secure hold.
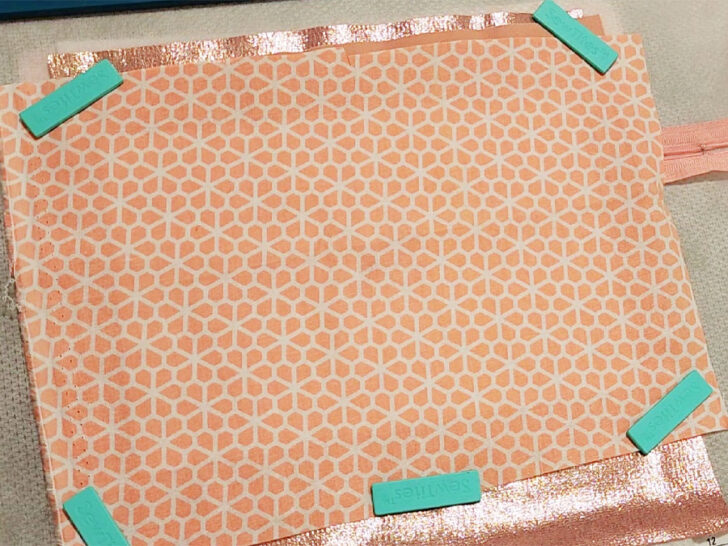
Place a piece of batting completely covering the placement stitches. You don’t need to remove the hoop from the machine. But I did it just to make this image.
You can secure the betting with painter’s tape or just hold it so no puckering occurs. I like to use SewTites for this – you can read about them in my article The Essential Guide To SewTites: What They Are |How To Use|Types
Step 2. The next step in making the lined zipper bag will be the tack down stitch for your batting. This stitch will secure the batting in place.
Step 3. Once the batting is secure, remove the hoop from the machine and trim away the excess batting very close to the stitches using duckbill scissors. If you are not familiar with duckbill scissors you can read about them in my article Duckbill Scissors: What They Are And How To Use Them.
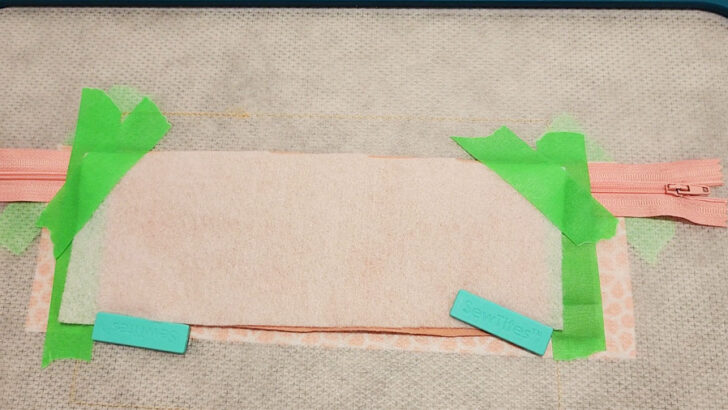
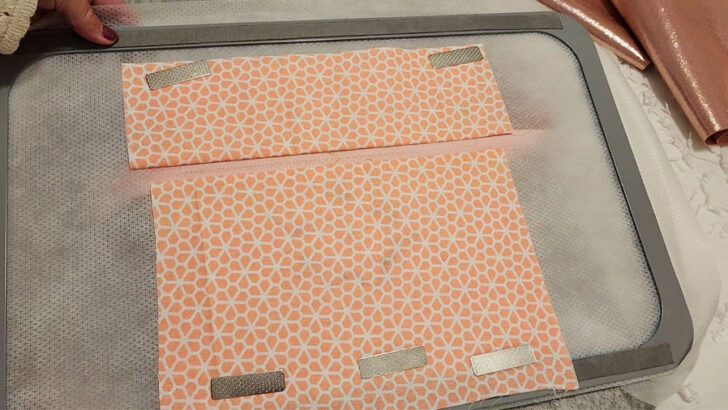
Step 4. Next, lay a piece of your base fabric right side up, completely covering the placement stitches. Leave some excess fabric on all four sides.
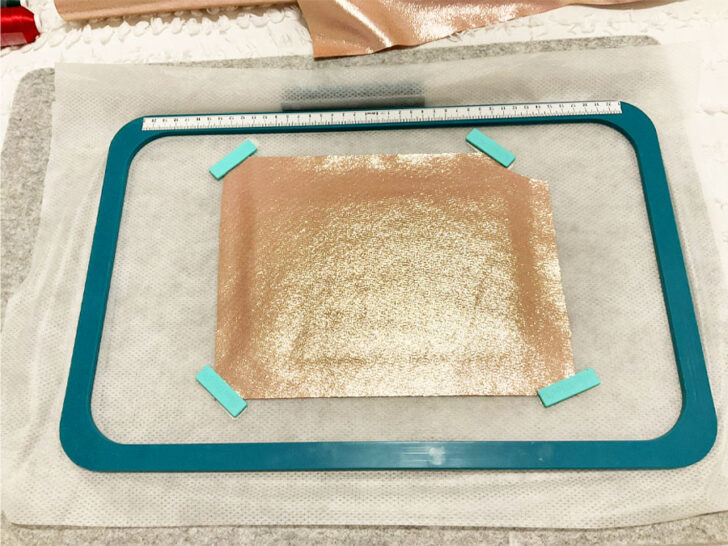
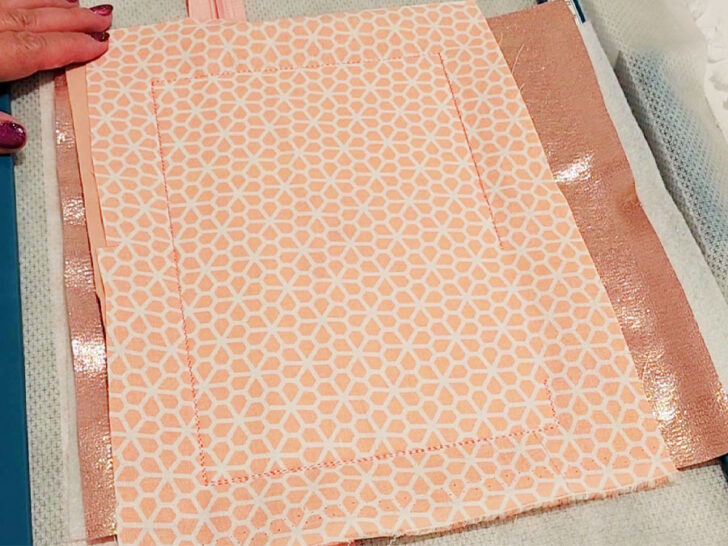
Step 5. Run tack down stitches for the base fabric and then embroidery and decorative stitches to create a quilting effect.
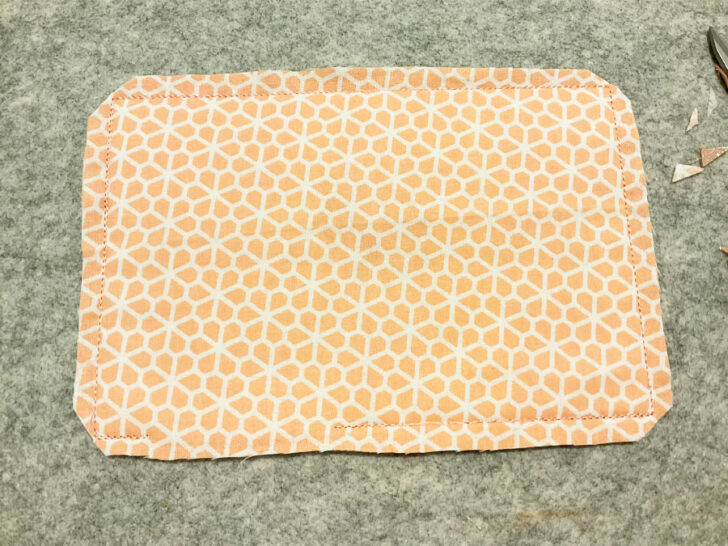
Step 6. Remove the project from the embroidery hoop and cut it out along the fabric edges.
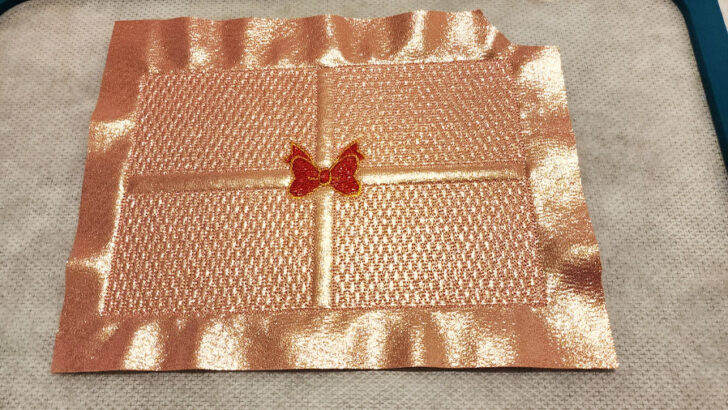
So the back of the zipper bag is prepared. Put it aside and make the front. The back will be ready to be attached.
Attaching A Zipper For The Front Of The In-The-Hoop Lined Zipper Bag
Load the design for the front of the bag. The design will appear on your screen.
Step 1. Hoop a piece of No-show Mesh stabilizer. Run the first step which is your placement stitches for the front of your bag and for the zipper.
Remove the embroidery hoop from the machine and place it on a flat surface. But don’t unhoop the stabilizer.
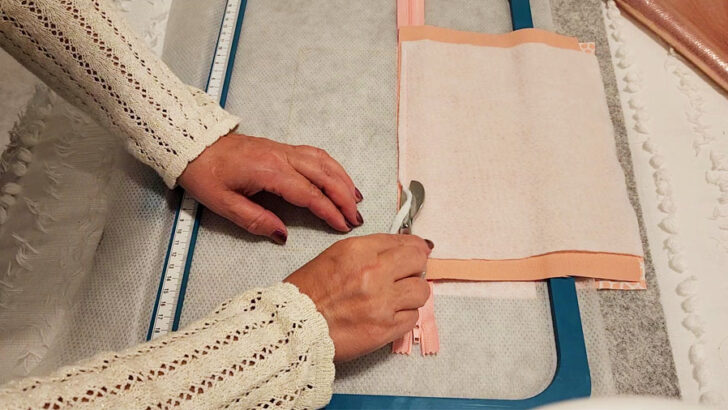
Step 2. Prepare the zipper for stitching.
It’s very important to place the zipper correctly. If you make a mistake and the zipper teeth will not lay over the middle line exactly, your zipper will be attached not straight.
You will see three lines of stitches on the stabilizer – they are here to show you where to place your zipper.
Zipper teeth have to line up perfectly with the middle line.
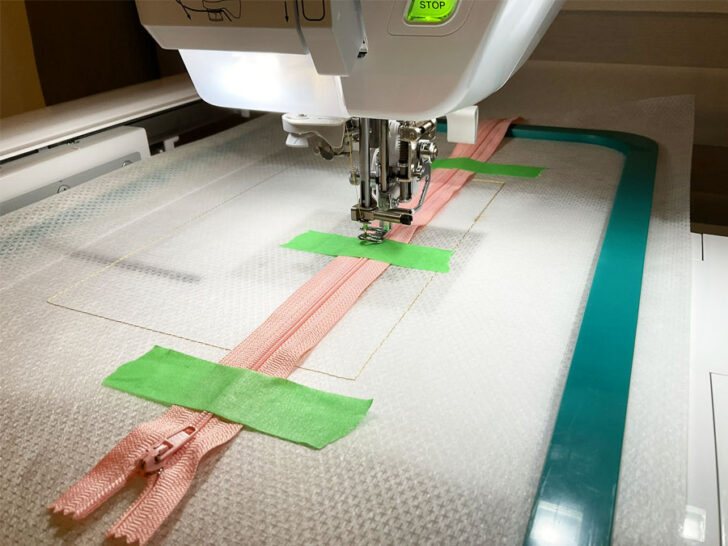
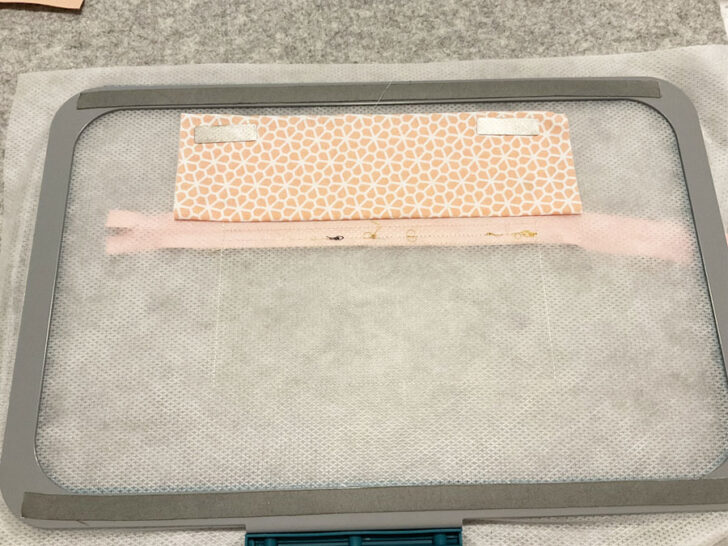
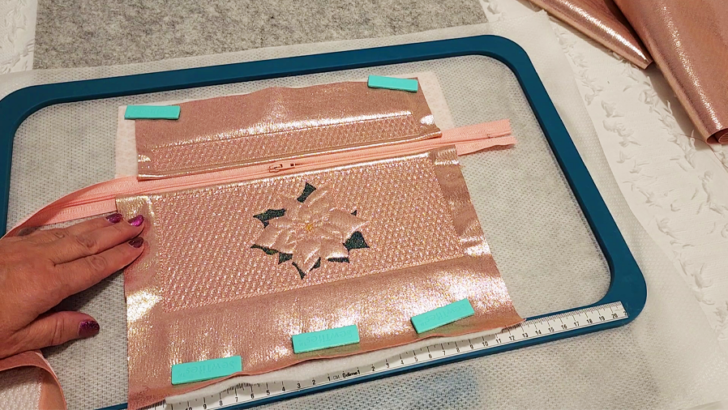
The zipper goes right side up on the stabilizer. Use painter’s tape to secure the zipper.
Now turn the hoop on the wrong side and check if the placement of the zipper is correct. The zipper teeth should be exactly in the middle.
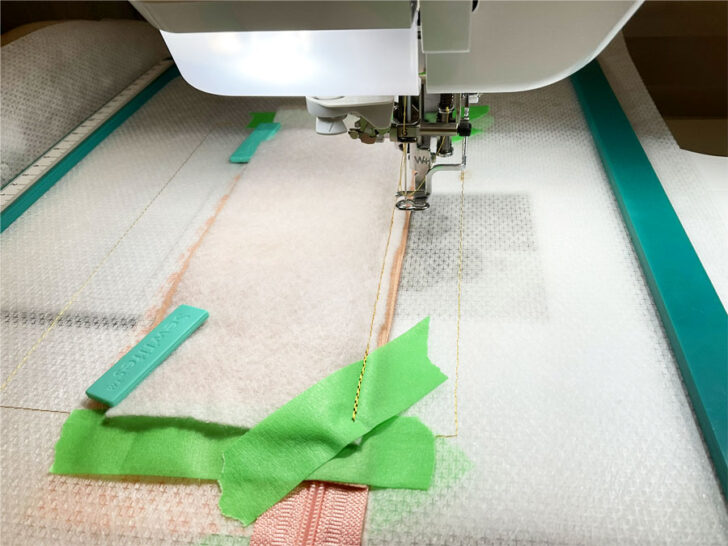
Step 3. Stitch the next step of the design – tack down stitches for the zipper.
Remove the embroidery hoop from the machine and place it on a flat surface.
Attaching The Upper Front Fabric And Lining To The Zipper
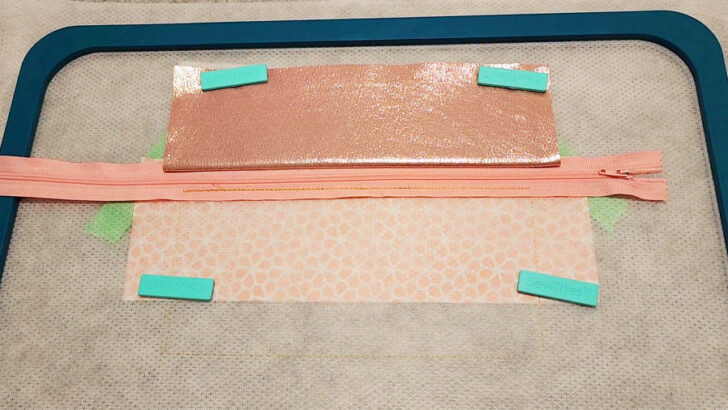
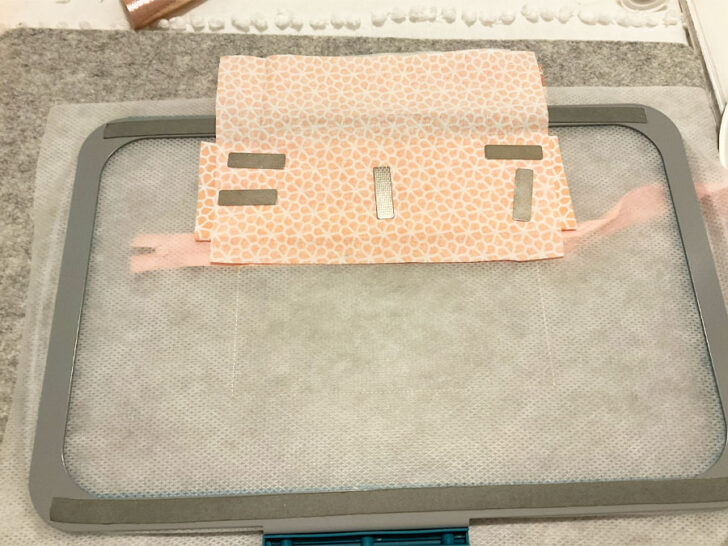
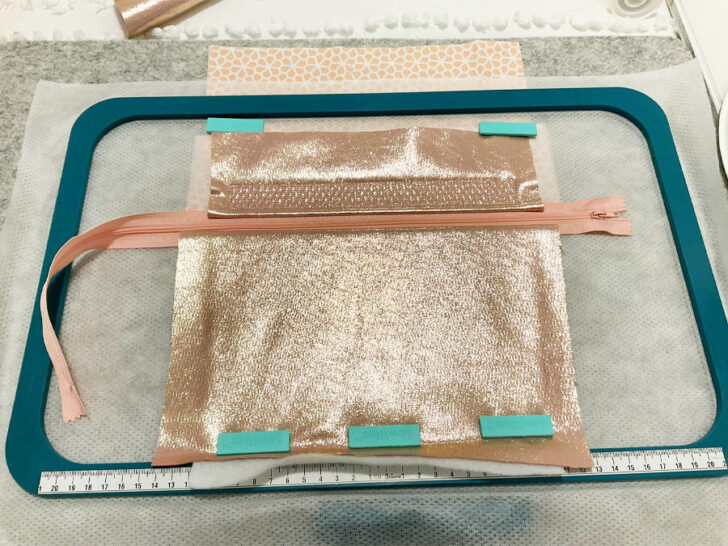
Step 1. Place the fabric for attaching the upper front fabric of your bag first.
Place the fabric right side down. Overlap the zipper teeth by ⅜ inch or so. The piece of batting will go on top of the fabric. You can use tape or SewTites to hold the fabric and batting in place.
Step 2. Flip the hoop and add your lining fabric to the back of the hoop. Place your lining fabric wrong side up on the lower front part of the bag. Overlap the zipper teeth by ⅜ inch or so. Use tape or SewTites to secure the lining in place.
The front and back of your embroidery hoop should have both top portions (base fabric and lining) of the zipper bag taped to the hoop.
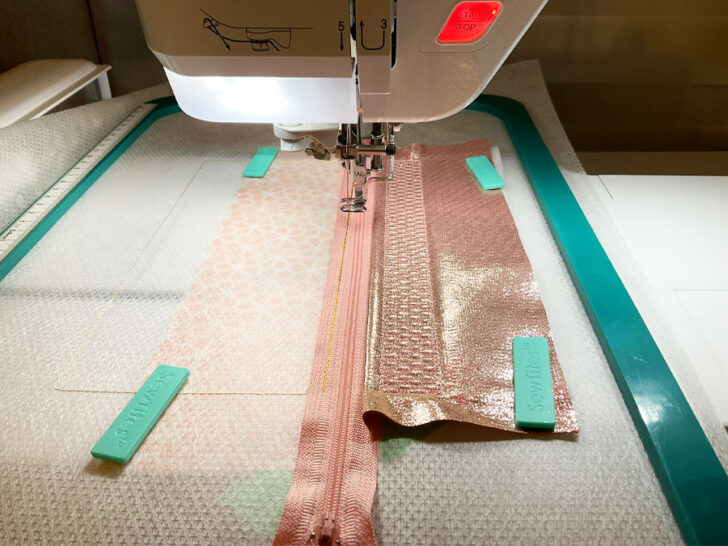
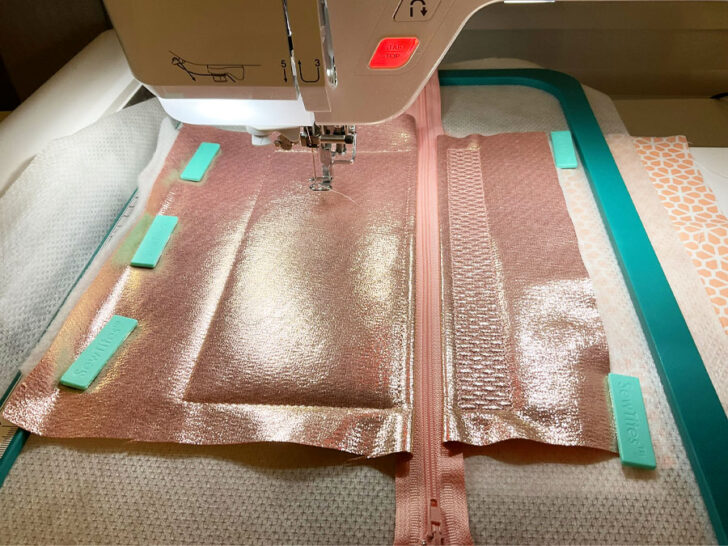
Step 3. Insert the hoop back into the machine and run the next step of the design attaching the upper front fabric to the zipper. This is the folding stitch for the upper part of the bag.
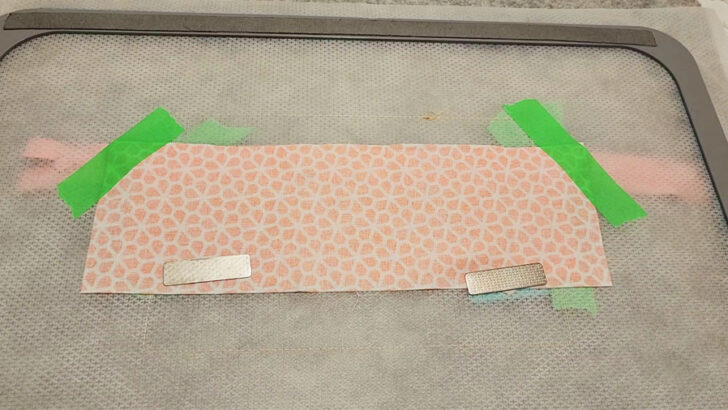
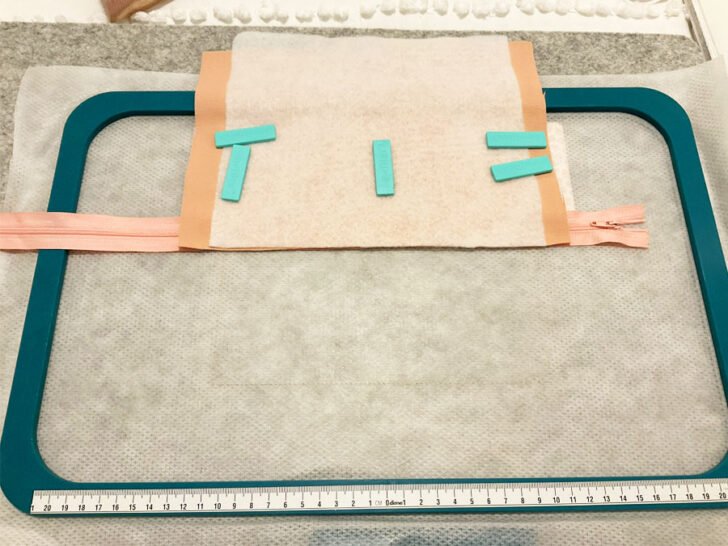
In this image, you can see the front of the hoop after you made the folding stitch.

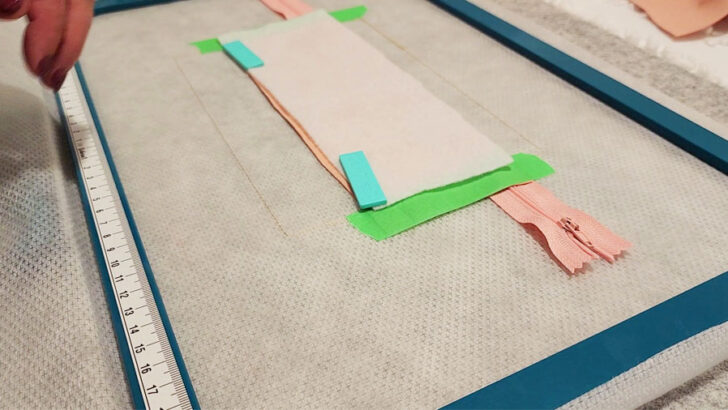
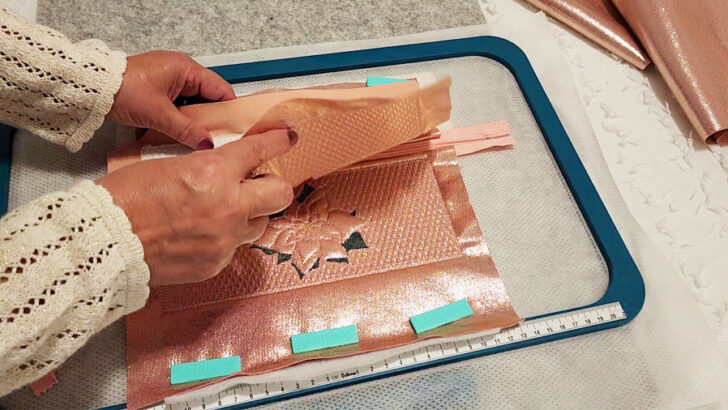
Step 4. Remove the tape and fold up only the base fabric together with the batting. Make sure the fabric is smooth, and tape it in place.
Don’t fold up the lining fabric at this stage.
Step 5. Run the next steps of the design which are the tack down stitches and embroidery stitches for the upper front base fabric.
Step 6. Remove the hoop from the machine and fold the lining piece up in the same manner that you did with the base fabric. Secure the lining with tape or SewTites.
Attaching The Lower Front Fabric And Lining To The Zipper
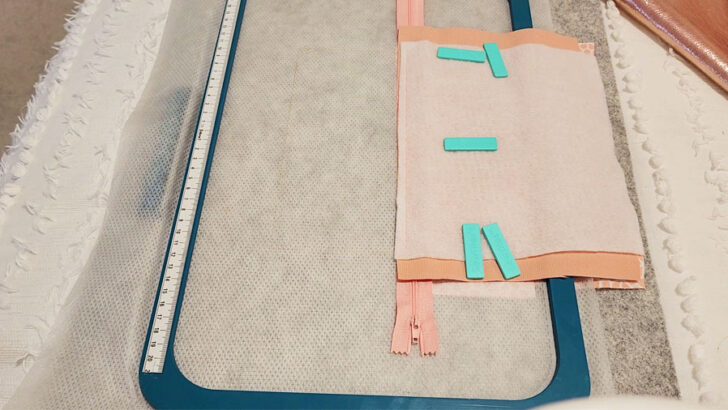
Step 1. After you folded and secured the lining piece in the previous step, keep your hoop with back side up. Place another piece of lining wrong side up overlapping the lower part of the zipper by ⅜ “.
Secure the lining in place with tape or SewTites.
Step 2. Turn the hoop over so the front side is up. Place a piece of fabric (right side down) and a piece of batting for the lower part of the zipper bag overlapping the zipper by ⅜”. Secure in place.
Step 3. Run the next step of the design which is the folding stitch for the base fabric and lining of the lower part of the bag.
I usually cut seam allowances of the batting piece close to the stitches to avoid bulk.
Step 4. Fold down only the base fabric together with the batting. Make sure the fabric is smooth, and secure it in place.
Don’t fold down the lining fabric yet.
✅ Related article: Sewing Vinyl: 17+ Expert Tips For Beginners
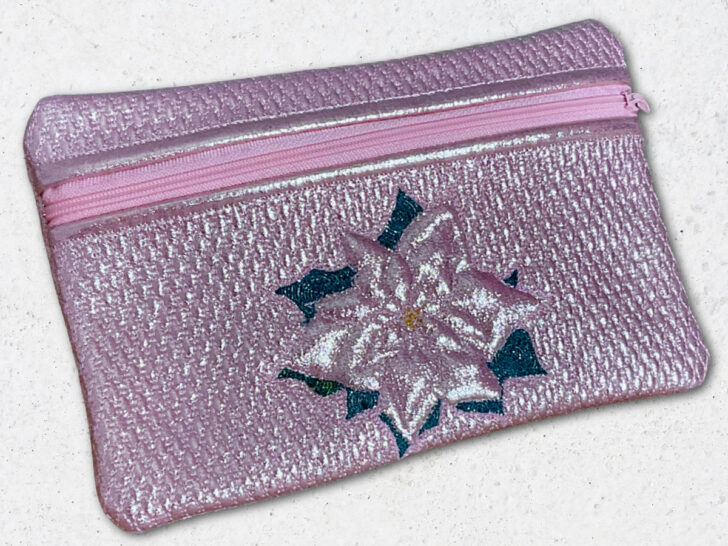
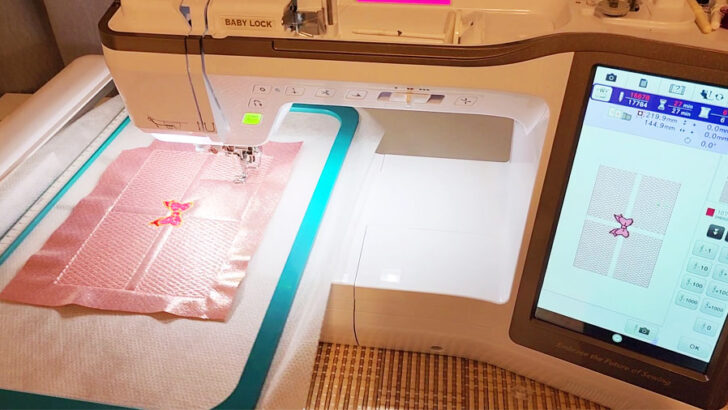
Step 5. Return the hoop to the machine, tack down the base fabric and run the next steps of the design embroidering a poinsettia.
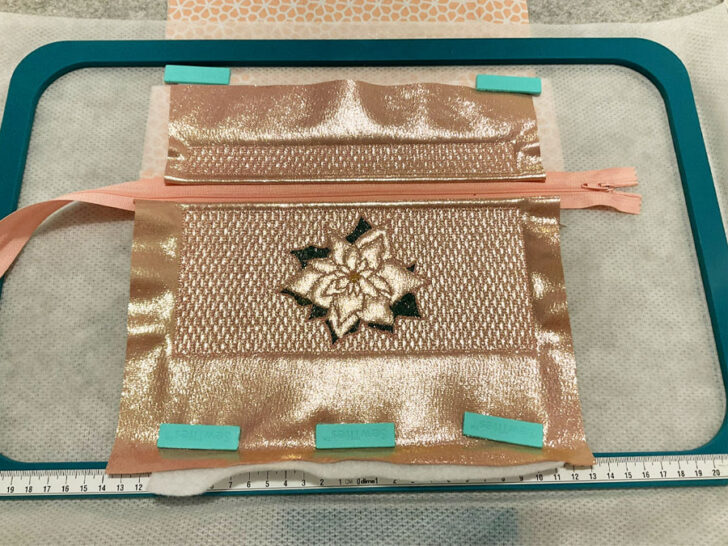
Step 6. Remove the hoop and fold down the lining piece. Secure it in place.
Finishing The Lined Zippered Bag In The Hoop
Step 1. Very important step – open your zipper to the center of your bag or even more. Otherwise your bag will be sewn shut and ruined.
Step 2. Place the back of the zipper bag you prepared before, right-side down, over the design. Making sure that the stitches are aligned for the back and the front.
Run the next step of the design, which will attach the back of the zipper bag to the front.
Step 3. Remove the hoop from your embroidery machine and flip it over.
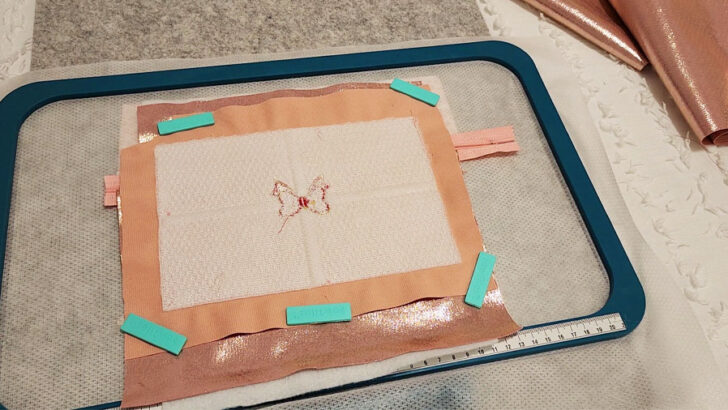
Take another lining piece and position it on the bag with wrong side up. Make sure the lining piece covers the entire bag.
Run the final step of the design.
You will see there is a not stitched part at the bottom. This is important because you will need to turn the bag right side out through this opening.
Step 4. Remove the projects from the machine and from the hoop.
Trim away the excess fabric around the edges, leaving approximately 1/4 inch seam allowance.
The bag should look like this at this stage.
Clip the corners as shown. This reduces the excess fabric and allows the corners to lay flat and sharp when you flip the piece right side out. Clipping helps eliminate the bulk and ensures that the corners look well-defined and not rounded or lumpy.
Use sharp scissors to cut a small triangle from each corner of the seam allowance. Be careful not to cut through the stitching; the cuts should stop right at the stitching line.
Step 5. Once you’ve clipped all four corners, turn the bag inside out through the opening gently pulling the fabric.
Cut away the excess stabilizer from the zipper using a seam ripper.
Tuck in the raw edges of the opening in the lining. You can use your fingers or a pin to align the edges neatly. Sew the opening closed by hand. Select a simple hand-sewing stitch, such as a ladder stitch, which will create an invisible closure.
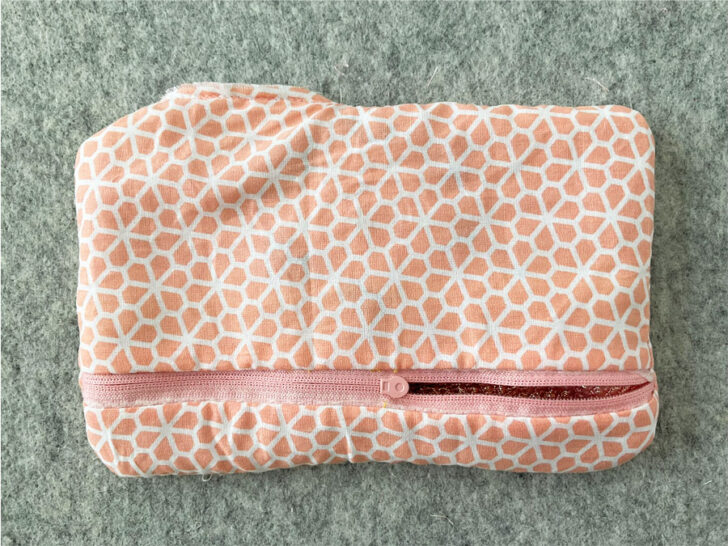
Step 6. Turn the bag right side out using the zipper opening.
Use your fingers to push out the corners as much as possible from the inside.
Take a point turner and carefully insert the pointed end into a corner. The pointed end will help you get into the corners more precisely than using your fingers alone.
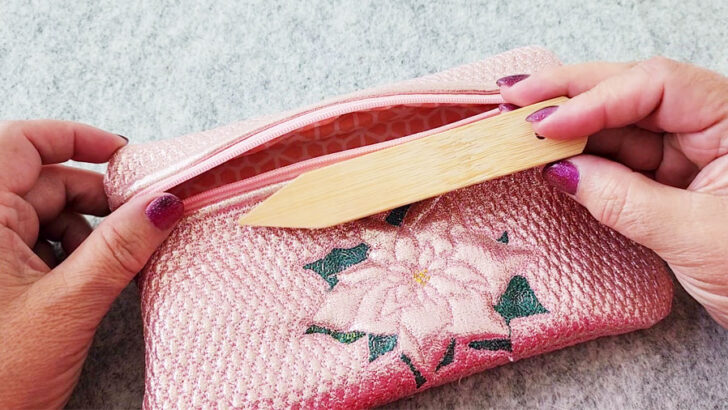
With the point turner inside the corner, gently push the fabric outward. The tool will help you reach the corners without damaging the fabric or seams.
After shaping all the corners, check them visually to ensure they look well-shaped. However, you may encounter some challenges with bulky materials like batting and vinyl fabric, which can affect the sharpness of the corners. The bulkiness can make it difficult to achieve perfectly defined corners, and you might notice that they appear slightly rounded.
Congratulations on creating your very own zipper bag entirely in the hoop with an embroidery machine!
Making zipper bags using this technique is both fun and addictive – once you get started, you’ll find yourself wanting to explore even more intricate and advanced methods in no time.
Embroidery machines offer endless possibilities for customizing your zipper bags. You can experiment with various designs, thread colors, and fabric combinations.
One of the best things about these in-the-hoop zipper bags is that they make fabulous gifts for your loved ones.
If you enjoyed making the zipper bag in-the-hoop using your embroidery machine, then you’ll definitely want to check out my tutorial on making Halloween treat bags in the hoop! These fun and festive bags are perfect for trick-or-treating or for gifting to friends and family. You can find the tutorial on my website: In-the-Hoop Embroidery Designs: Halloween Treat Bags.

Did you find this tutorial on how to make a lined zippered bag in-the-hoop helpful? If so, make sure to save this pin (see below) on your sewing board so you can easily come back to it later when you need this information. And while you’re at it, why not follow me on Pinterest for more tips, tutorials, and inspiration?
In-the-hoop Embroidery Projects


latest posts
- What Do You Call a Person Who Sews? I Asked My Readers and Got 1,408 Opinions
- DIY Round Purse: PDF Sewing Pattern and Detailed Instructions
- Mini Wonder Clips By Clover: Useful Sewing Tool Or Just Another Notion?
- Non-Slip Grips For Quilting Rulers: A Small Notion With A Useful Job
- Fabric Eraser for Sewing: What It Removes and When to Use It
- What Is The Best Thread For Sewing Machine Projects? Let’s Find Out!
- Butterfly Quilt Block Tutorial – Foundation Paper Piecing
- How To Sew Quilt Squares So The Corners Match
- Sewing With Fork Pins: How They Help With Pattern Matching, Slippery Fabric, And Seams