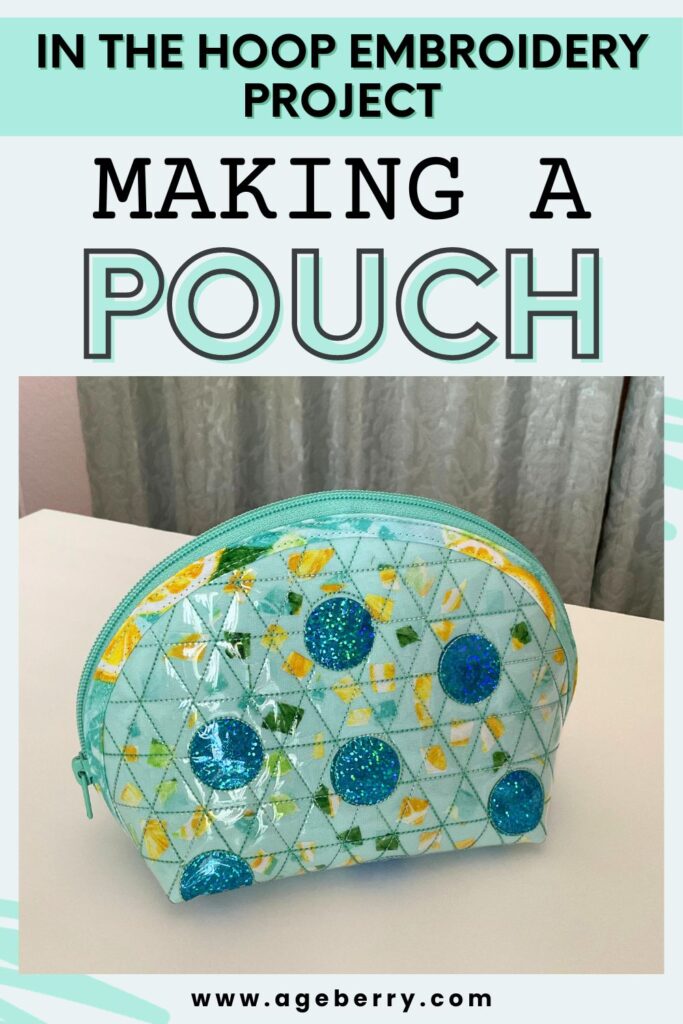
Unique In the hoop embroidery project: a Zipper pouch (free design)
Looking for a fun in-the-hoop machine embroidery project that won’t take forever to complete? This tutorial will show you the unique way to make a lovely zipper pouch from start to finish.
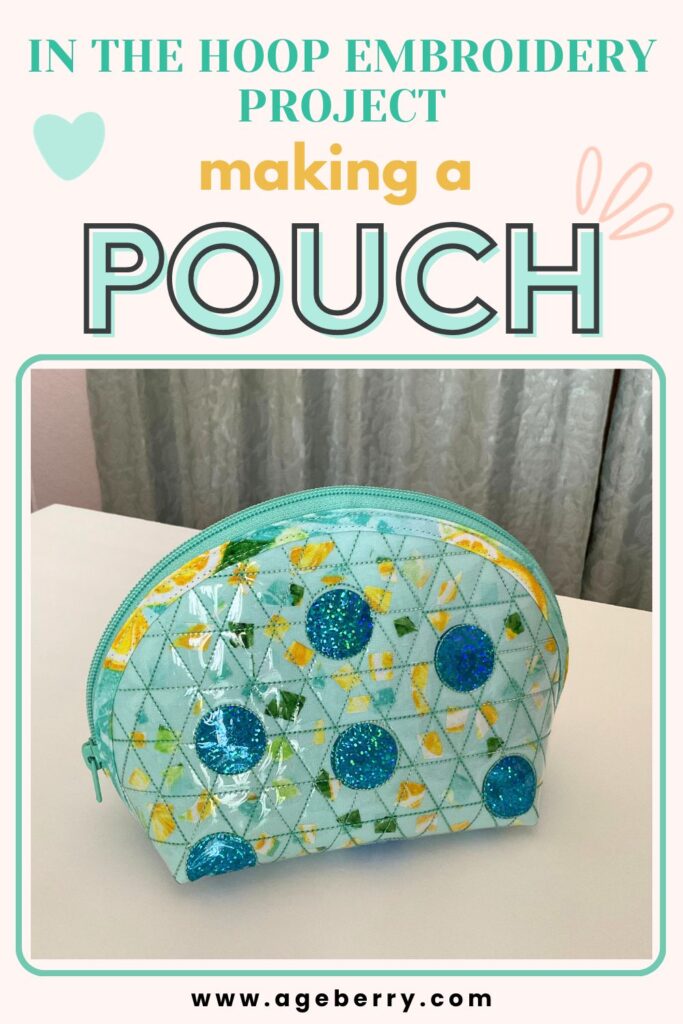
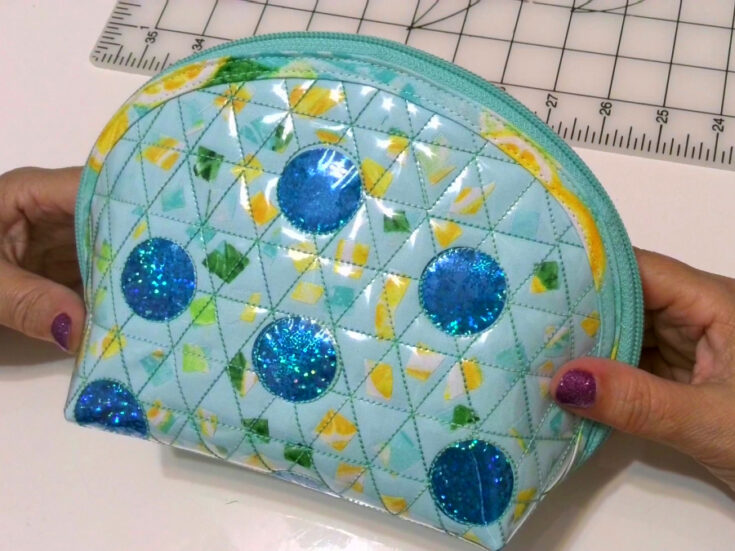
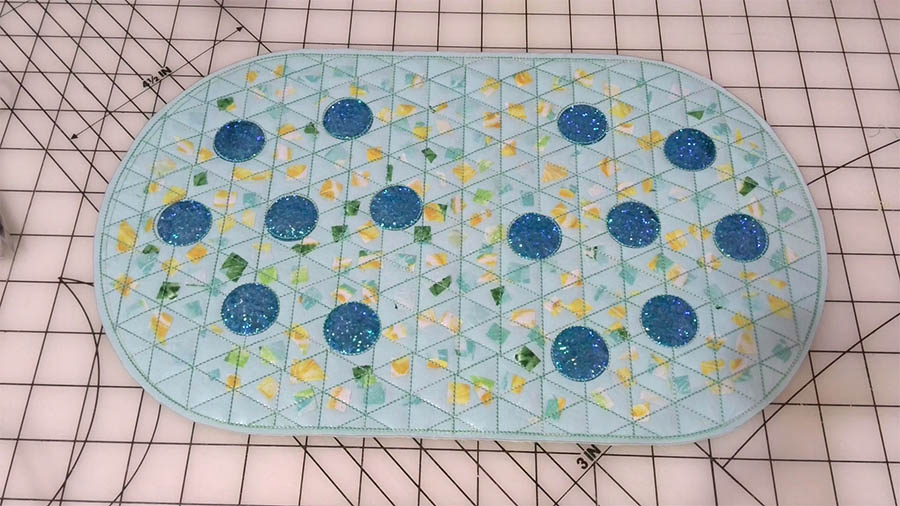
The pouch has intricate detailing, complete with vibrant colors and an eye-catching design. I was trying to blend both style and function in creating this one-of-a-kind item.
I achieved this by using multiple different materials and utilizing the capabilities of my embroidery machine.
This project is the perfect way to make use of all those small scraps of fabric that inevitably accumulate when sewing.
To ensure the small fabric pieces stays securely in the pouch, it’s covered with a layer of clear vinyl. Vinyl is durable and waterproof, so it can keep the pouch looking neat and resistant to dirt and stains, while also making it super simple to wipe away any messes when they occur.
The pouch can be used as a makeup bag or toiletry holder at home, or easily tucked away into a purse when traveling. It’s ideal for storing small items such as lipsticks or jewelry.
An embroidery machine can be really powerful in creating truly unique items that seamlessly combine artistry with usability.
You can get the embroidery design (in the format for your embroidery machine) free by subscribing to my weekly newsletter.
If you are a subscriber you can find the design files in all popular formats (including PES and HUS) in my Resource Library. If you are not a subscriber click the link below to subscribe and download your FREE machine embroidery design files from my Resource Library!
In The Hoop Embroidery: How To Make A Unique Zipper Pouch
Materials
- Piece of fabric for the exterior of the pouch about 15” x 22”
- Piece of fabric for the lining (the same size as above)
- Piece of batting (the same size as above)
- Piece of clear vinyl (at least 9” x 14”)
- Fabric scraps
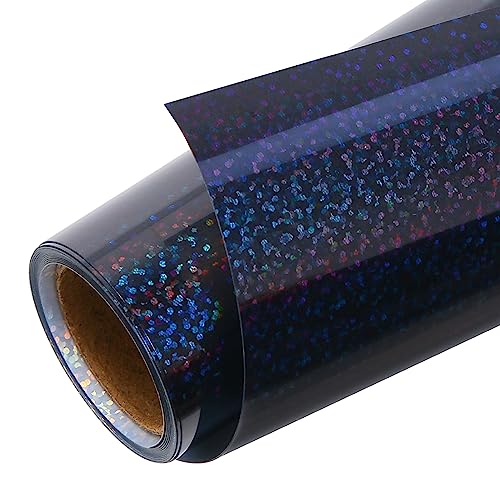
- Holographic iron-on vinyl (12” x 12”)
- Cricut to cut vinyl (optional)
- Zipper 20”
- SewTites (optional)
- Regular sewing notions
- Modern embroidery machine with at least 9 1/2” x 14” hoop.
- In the hoop embroidery design - you can download it (free for subscribers to my newsletter) from my Resource Library.
Instructions
Step 1. Prepare all necessary materials
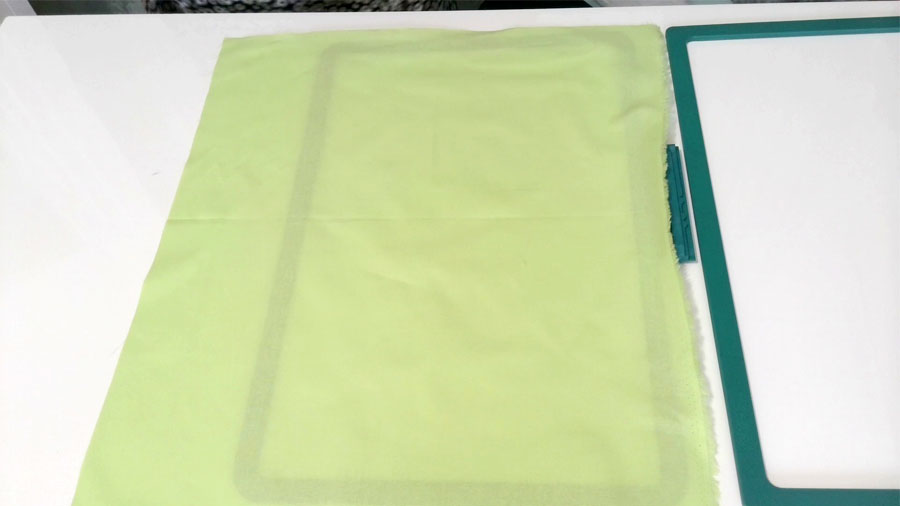
Press the fabric to remove any wrinkles. You will need only small pieces of fabric for the pouch so you might use fabric leftovers from previous projects.
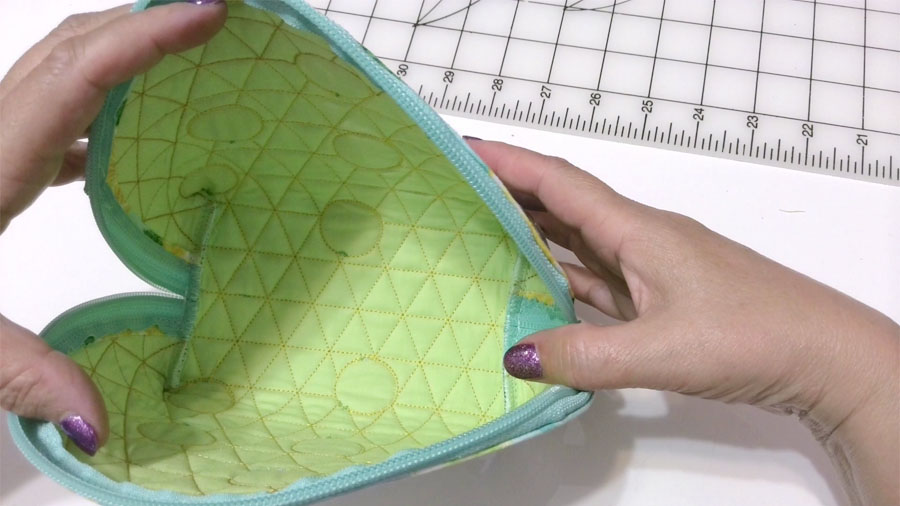
Cut two pieces of fabric measuring 15” x 22” each. Solid color fabrics work well for the pouch and that’s what I did. But using a printed fabric for the lining adds interest to the design; plus, it's great for hiding any visible thread ends once the embroidery has been completed.
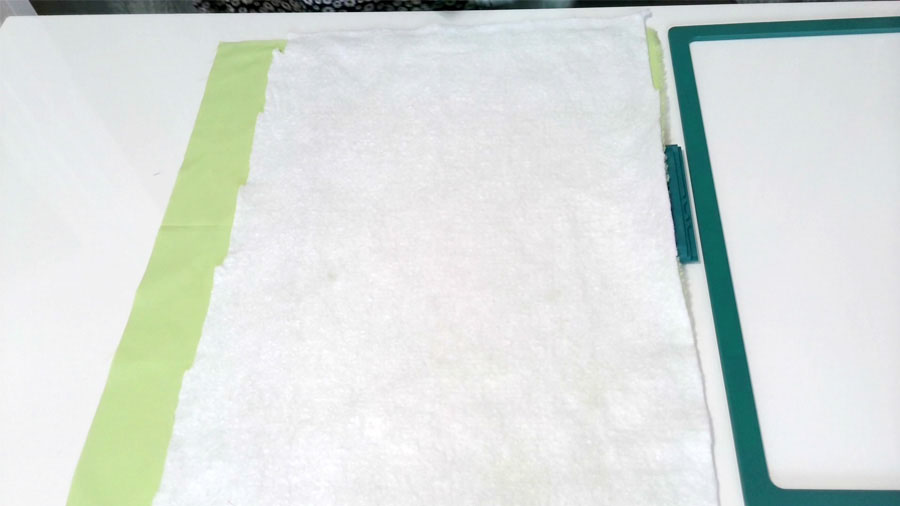
Cut a piece of thin batting the same size and a piece of clear vinyl.
Download the in the hoop embroidery design for the pouch.
Prepare your embroidery machine - thread with suitable thread, insert a new needle.
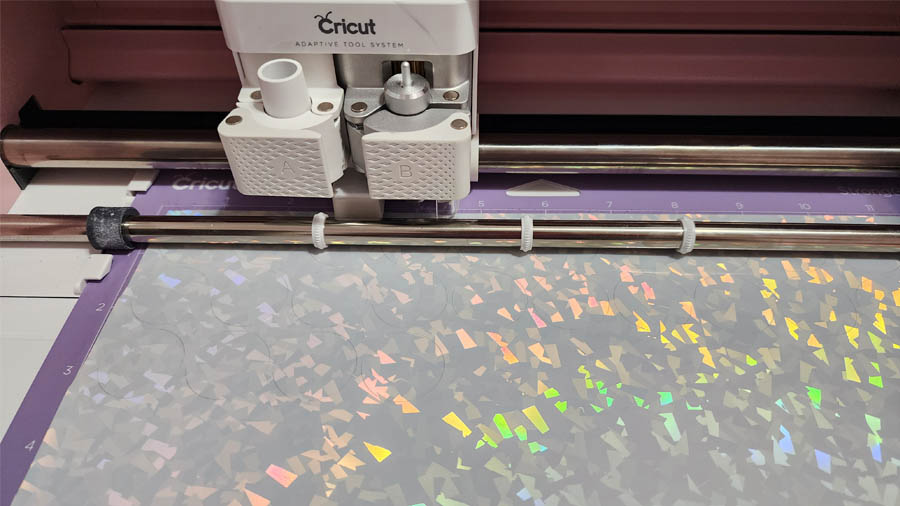
Cut 18 circles (you will need only 14 but cut more, just in case) from holographic iron-on vinyl using a cutting machine. I used the Cricut Maker. All you have to do is find the circle shapes inside Cricut Design Space and select the size you need for your project - it’s 1.02 inches (26 mm). The turquoise color of this vinyl adds a delightful sparkle that hopefully will make the design stand out.
Prepare small fabric pieces. For this, gather some scraps of fabric, ideally in colors and textures that complement one another. Then make sure to use very sharp shears to cut the fabric into tiny squares. To avoid any fraying of your fabric, consider spraying it with a bit of starch before cutting. This will help maintain neat edges.
The image below shows different fabric than I used for this pouch but you get the idea.
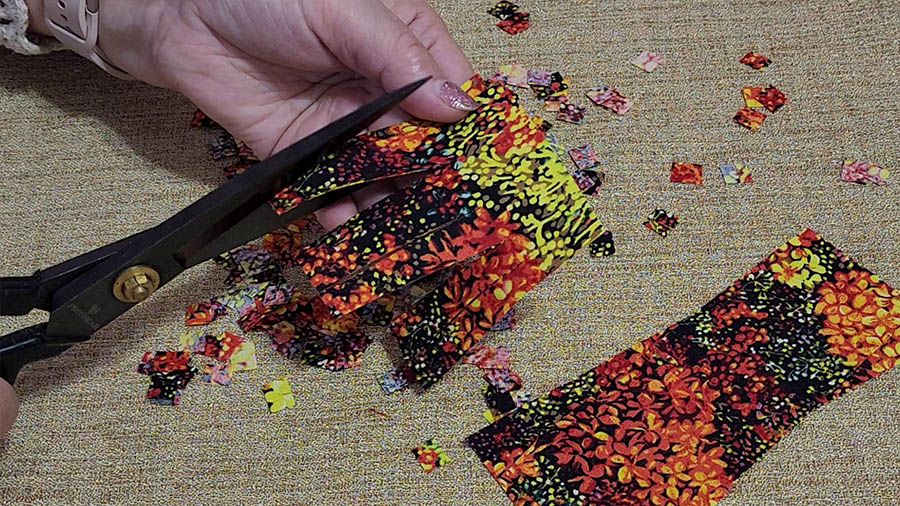
It would help if both sides of the fabric look similar, because there is no need to worry about which side will show in the finished pieces. Have fun turning common fabric scraps into beautiful little confetti pieces that can be used in numerous craft projects.
Cut 2 binding strips. It is best to cut on the bias. This gives the binding a slight stretch and makes it simpler to attach to curves without puckering. Take a piece of quilting cotton and cut two strips at 45 degrees angle. Your cutting mat should have helpful lines that you can use as guidelines for proper alignment. For quick, precise cuts, I like to use a Martelli rotary cutter.
✅ Related tutorial: How to cut fabric on the bias
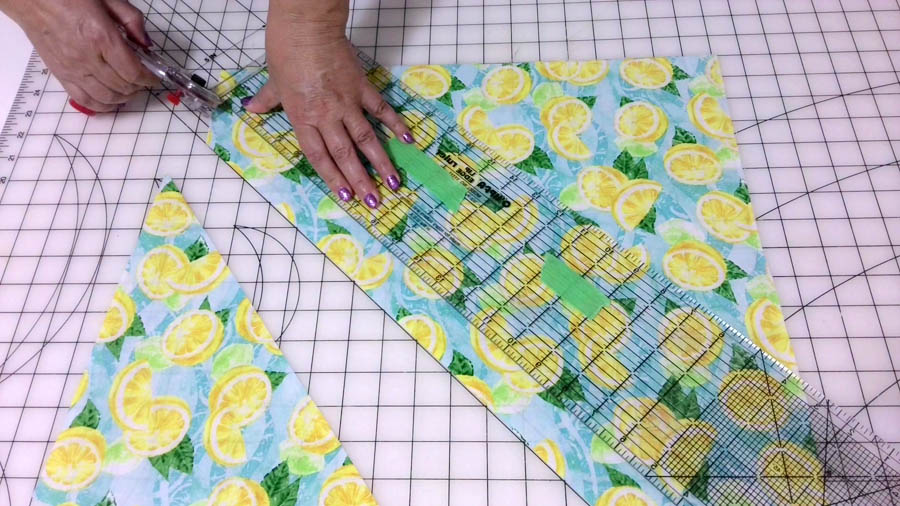
The width of the binding strips is 1.5 inches or 3.8 cm. The length of these strips is 20 inches (or 50-51 cm).
Step 2. Make the first step of the in the hoop embroidery design
I like to use a Dime magnetic hoop for most of my embroidery projects because it's so easy to use and it keeps the fabric in place. However, a regular hoop can be used just as well.
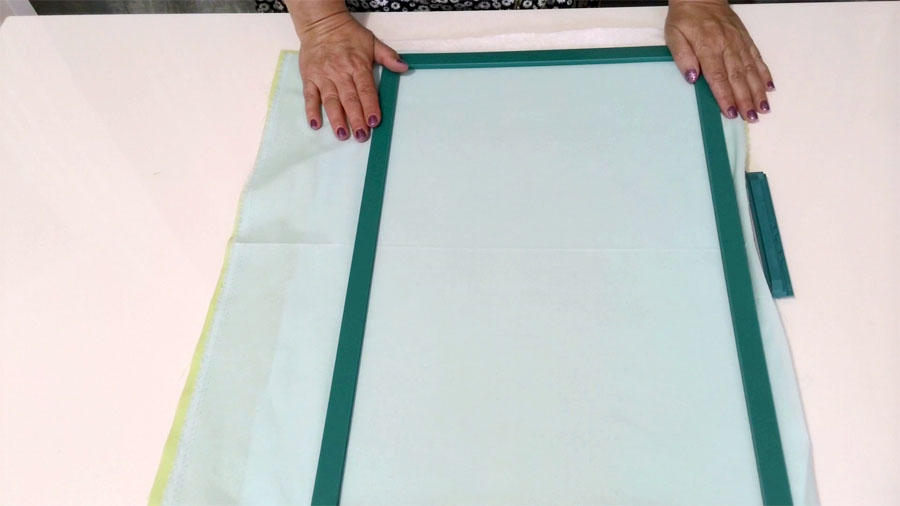
For this project, I designed an embroidery that fits into a 91/2” x 14” hoop, but I wanted some extra space around the design, so with my Brother Luminaire machine, I decided to use the largest hoop size – 10.5” x 16”.
To get started, place a piece of lining fabric on the lower part of the hoop right side down and top with a thin batting before placing the main fabric right side up on top.
Then securely fasten the top part of the hoop while keeping everything taught so there are no folds or pulls in this “sandwich”.
Run the first step of the design.
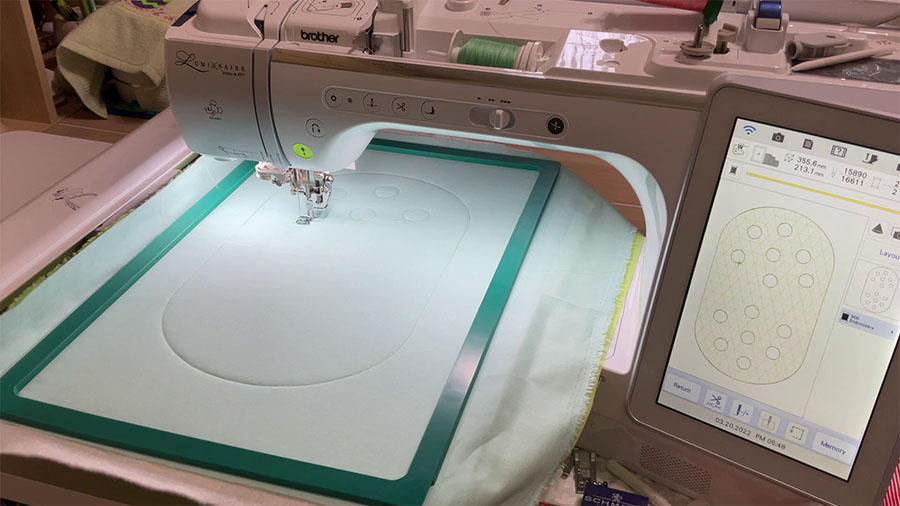
Take the hoop out of the machine, but make sure you don't unhoop the project at this point as this could disrupt your design. We are going to work now with the hoop.
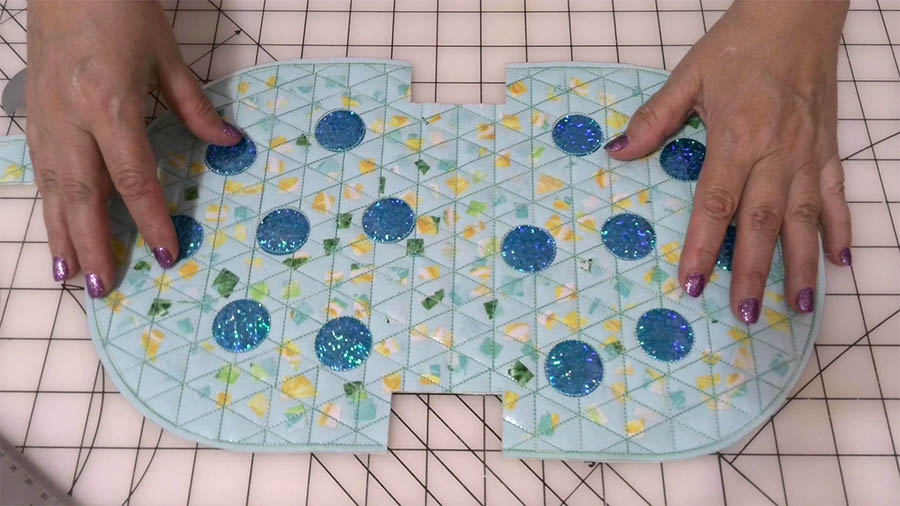
Step 3. Scatter small fabric pieces over the design
Add fabric pieces to the design. It's okay to have it go slightly over the design edges — we'll cut around it later.
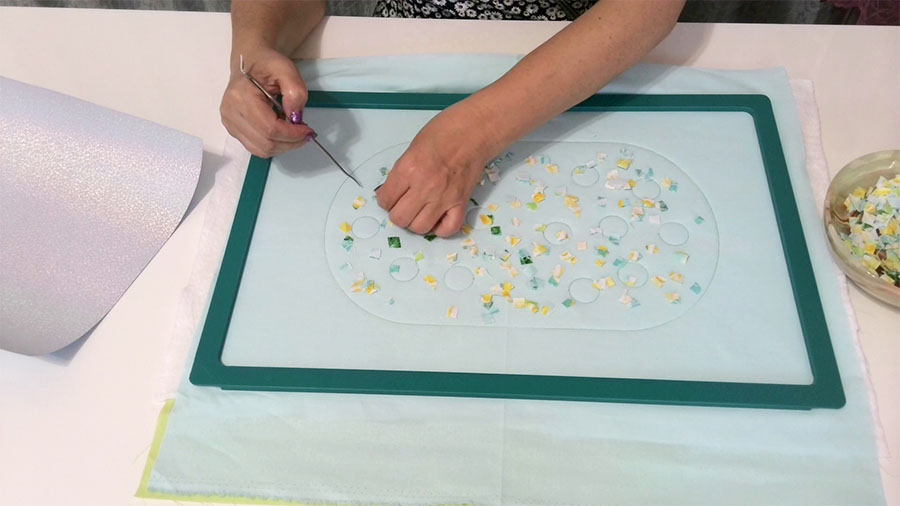
Take care not to move the fabric in the hoop.
Try not to cover the circles with fabric pieces.
Check your fabric before placing the pieces - if your fabric has different right and wrong sides, make sure you arrange all of the fabric pieces on the right side so that when sewn in place they will be visible. Try to evenly spread the pieces out to avoid any bunches of fabric in any one area.
Step 4. Fuse vinyl circles in place
Fuse vinyl iron-on circles in place. Before fusing these circles, I took off each vinyl circle from the clear plastic cover.
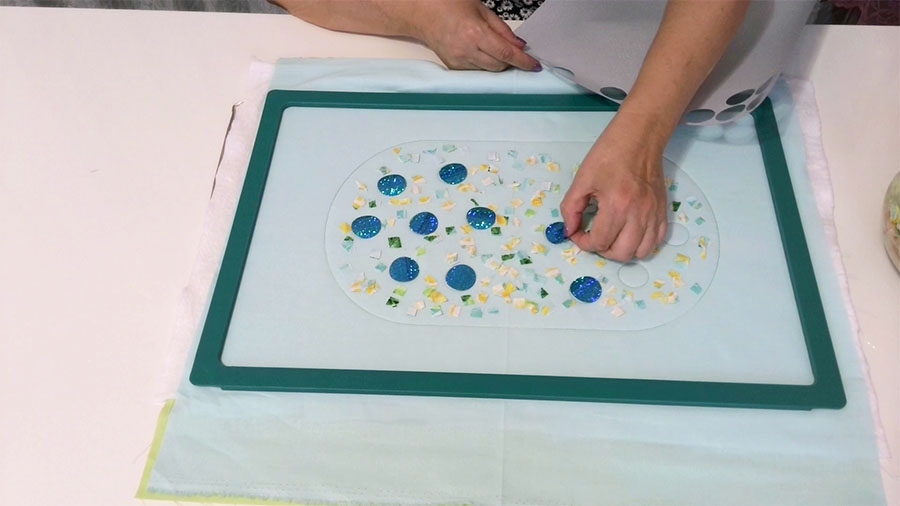
Place the iron-on pieces over the circles in the embroidery. Cover the circles with pressing cloth or parchment paper making sure they are not moved from their positions.
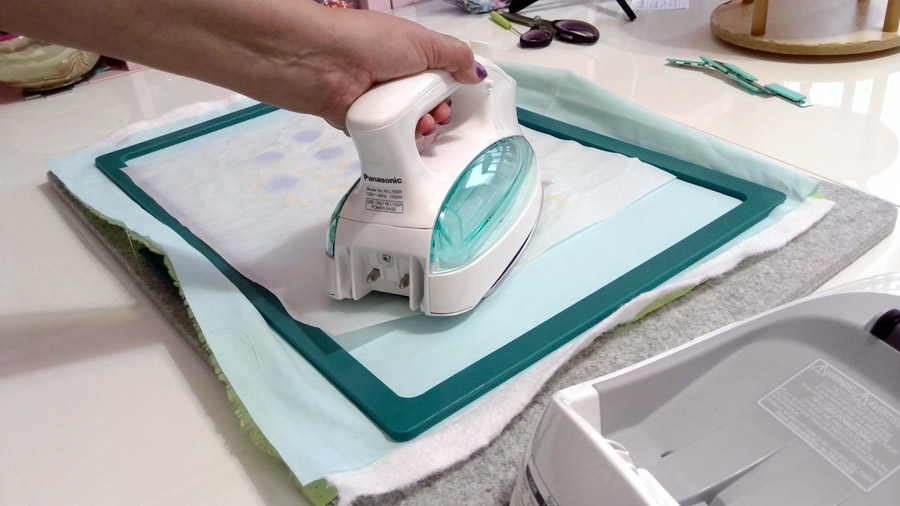
I used parchment paper over the circles and kept the iron for about 8 seconds for the circle to fuse to the fabric.
The heat will cause the iron-on holograms to fuse to the fabric, creating a permanent bond.
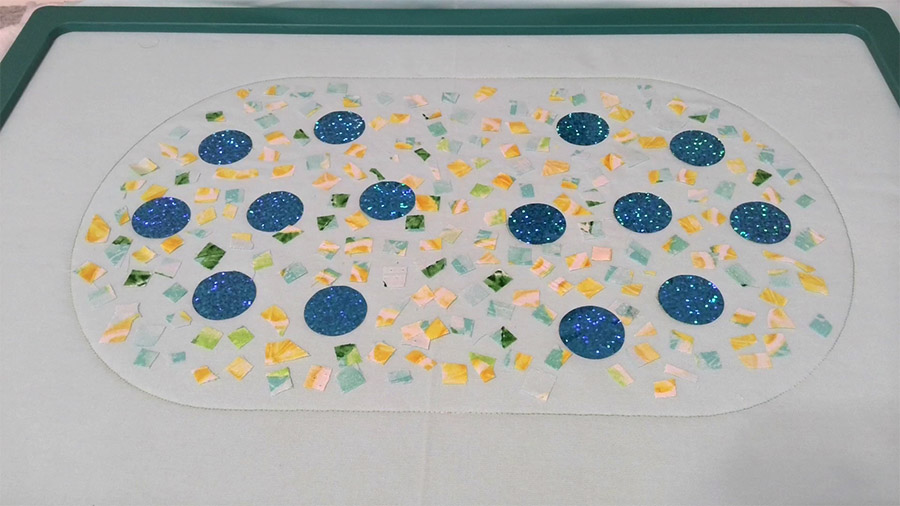
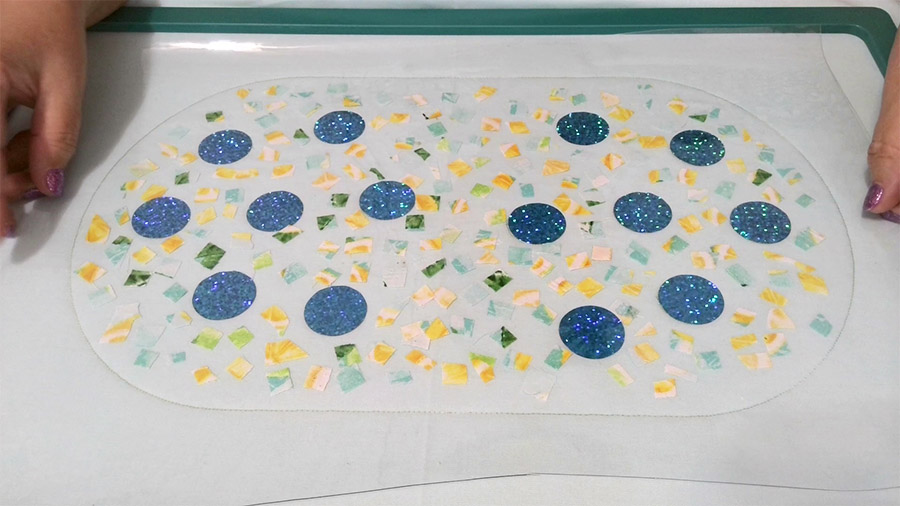
So, after I attached all 14 holographic circles it looked like this.
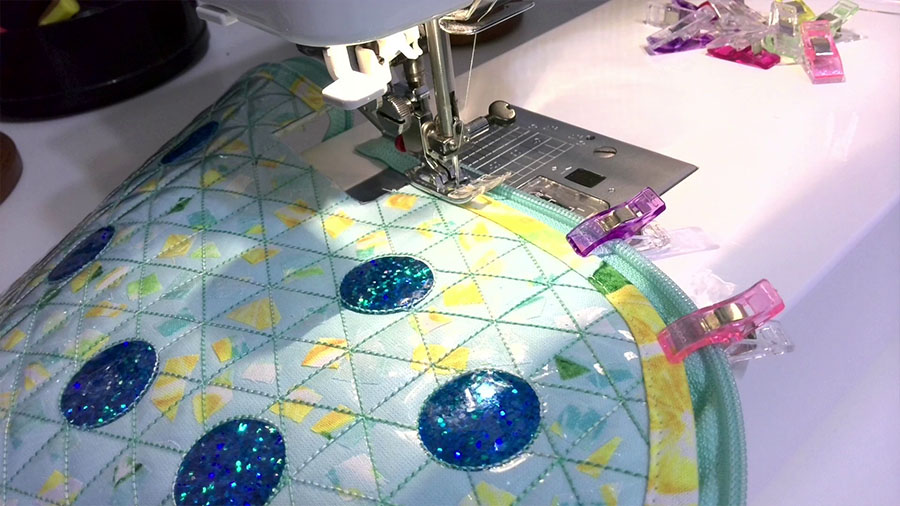
Step 5. Run the next step of the in the hoop embroidery design - quilting over vinyl
Place a piece of clear vinyl over the fabric confetti area. The vinyl can’t be put inside the hoop. So we are going to make floating embroidery.
You can use tape to secure the vinyl and prevent it from shifting in the hoop during embroidery.
But recently I found a great tool called SewTites. Did you use them before?
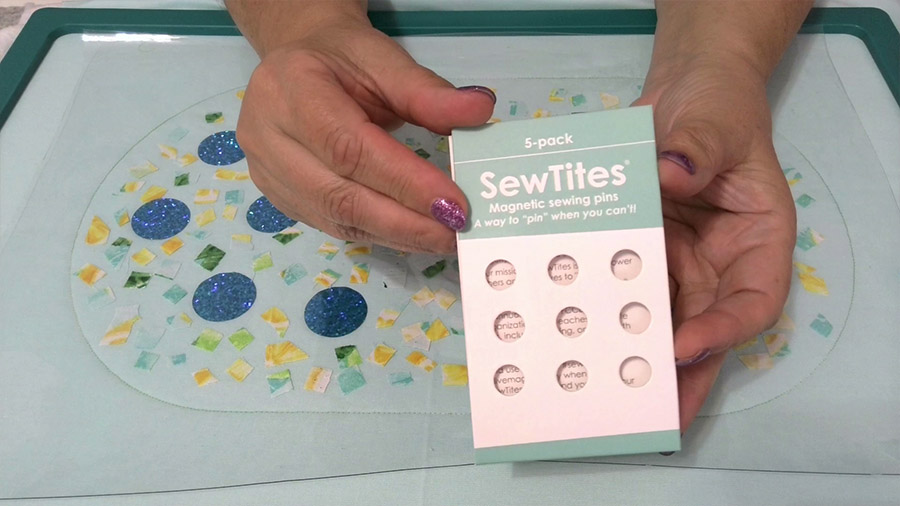
I can easily secure the vinyl in the hoop with these SewTites - they are strong magnets and hold the vinyl in place very well. Now I can’t make in the hoop embroidery without these small magnetic “holders”. Just make sure they are not close to the design.
To see just how helpful these awesome tools really are and learn more about using them in your projects, have a look at my blog article detailing all the tricks that come with SewTite use - The Essential Guide To SewTites: What They Are |How To Use|Types
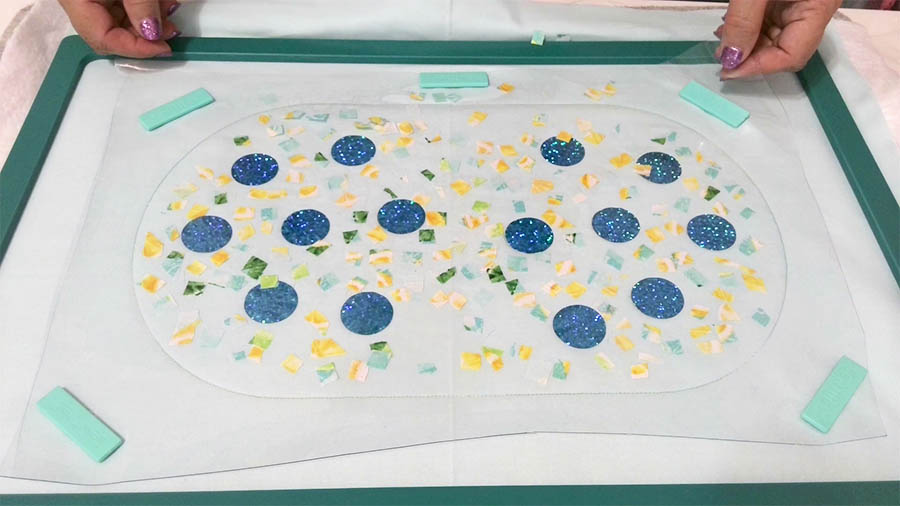
Return the hoop to the embroidery machine and let it run the next step of the design.
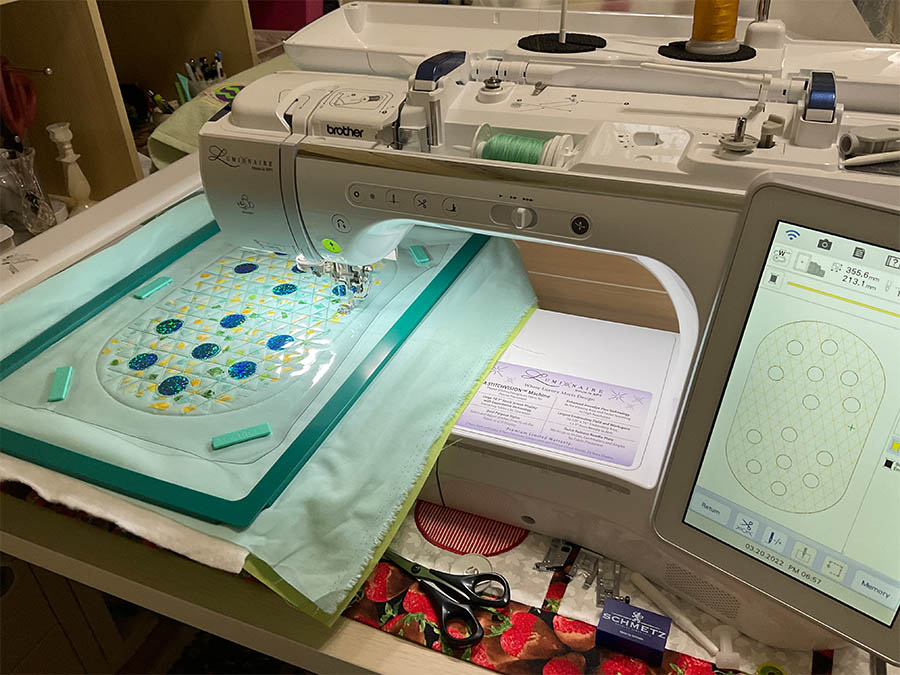
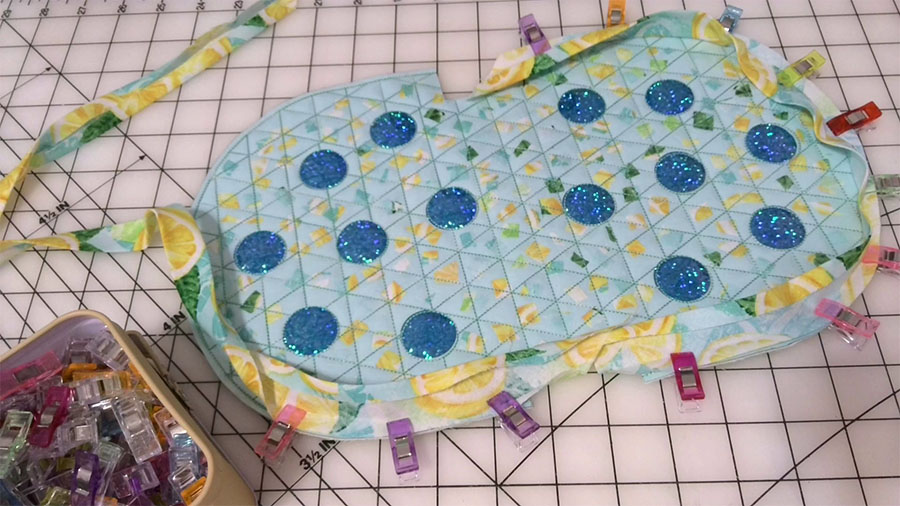
Take the project out of the hoop. Cut around close to the stitching.
Cut thread tails on the lining side. Use the duckbill embroidery scissors to cut very close to the fabric.
✅ Related tutorial: Duckbill Scissors: What They Are And How To Use Them
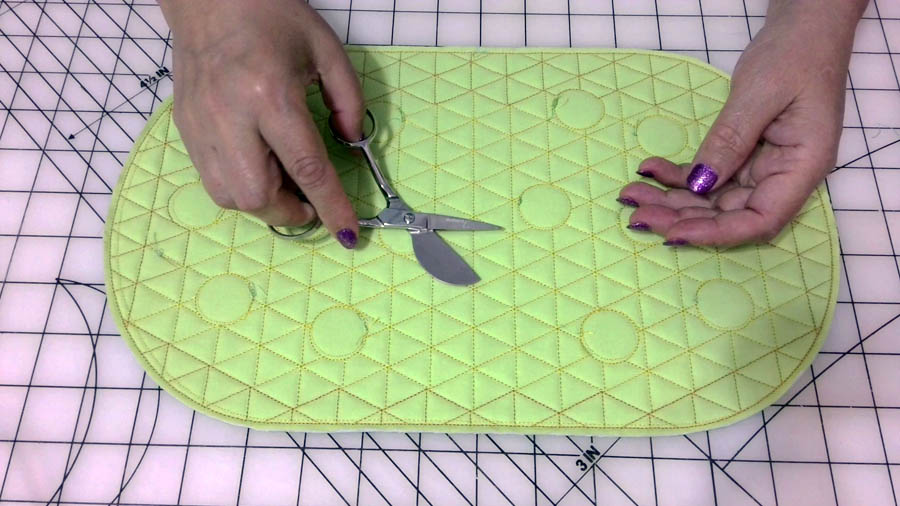
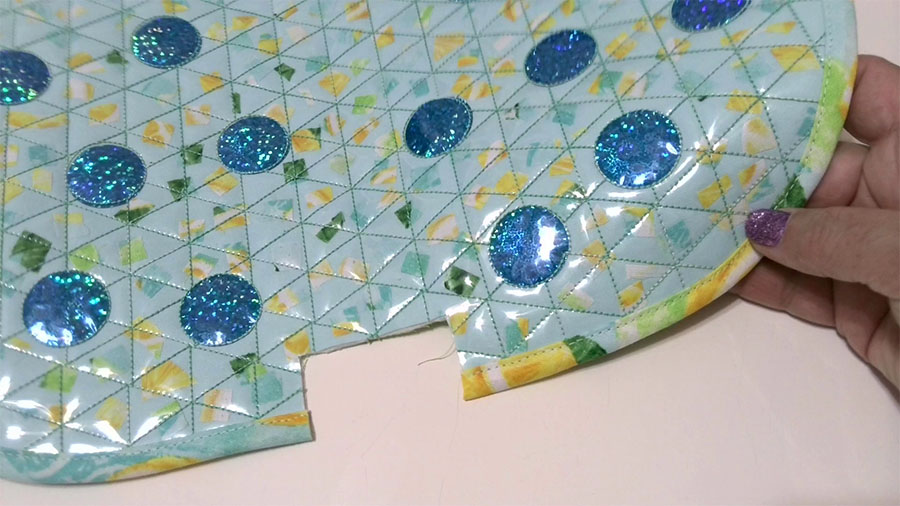
Step 6. Cut a rectangle on each long side of the project
Fold the project in half vertically and find the center line.
Cut a rectangle on each side of the project. The size of the rectangle is 1 5/16” inches (3.3 cm) by 3 inches (7.6 cm).
Step 7. Sew the binding
Use a bias tape maker (often called SewMate) to make the binding - the strips need to be double folded. The size of the maker is ¾” or, if you use metric versions, 18 mm.
✅ Related tutorial: Bias tape tutorial: how to use a bias tape maker
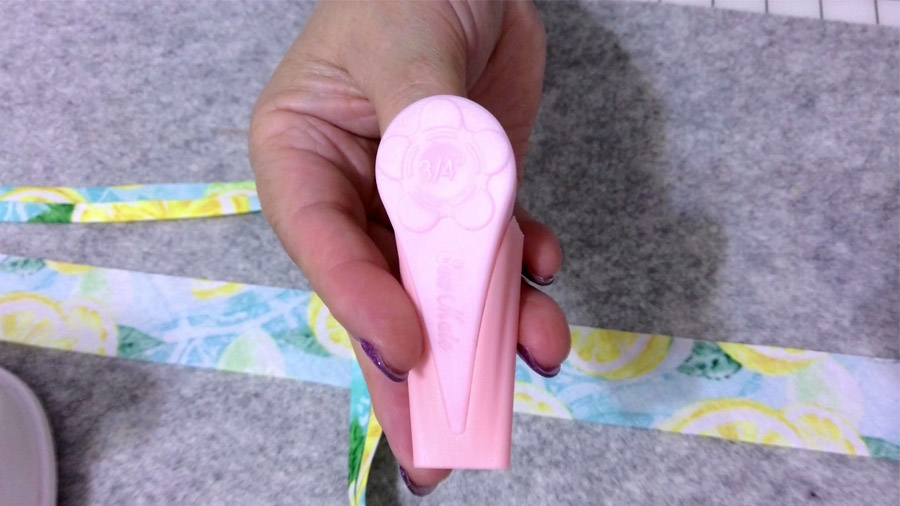
Inserting the strip into the tape maker correctly is key to creating a beautiful tape. To do this, make sure that the wrong side of the fabric is up, and feed one end of the strip into the wide end.
When you start trying to push it through, it might not be so easy to move the fabric through the channel down the center of the tape maker. Once you can see that the fabric edge is coming out of the narrow end, pull this edge out while keeping an eye on how it's folding - it may need a little maneuvering in order to fold in perfectly even lines.
You can see that the fabric tape coming from the tool is folded. I mean both edges of the strip are folded toward the center. So iron the folded tape while pulling the tape maker but don’t pull too hard, just lightly.

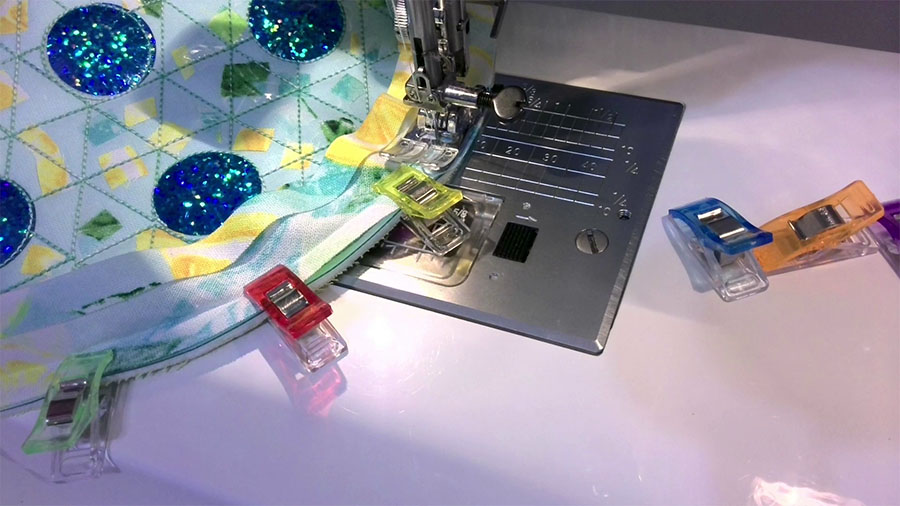
To attach 2 binding strips on each side of the oval, first unfold the binding strips. Use Wonder clips to baste them securely in place.
✅ Related tutorial: Sewing Clips vs. Pins | Which To Choose?
Stitch exactly in the fold and use a walking foot to make sure that your fabric doesn't bunch up under the needle.
✅ Related tutorial: How to use a walking foot
Once attached on the right side of the pouch, flip it over and stitch the binding on the right side close to the seam. Make sure the binding is attached on the lining side too.
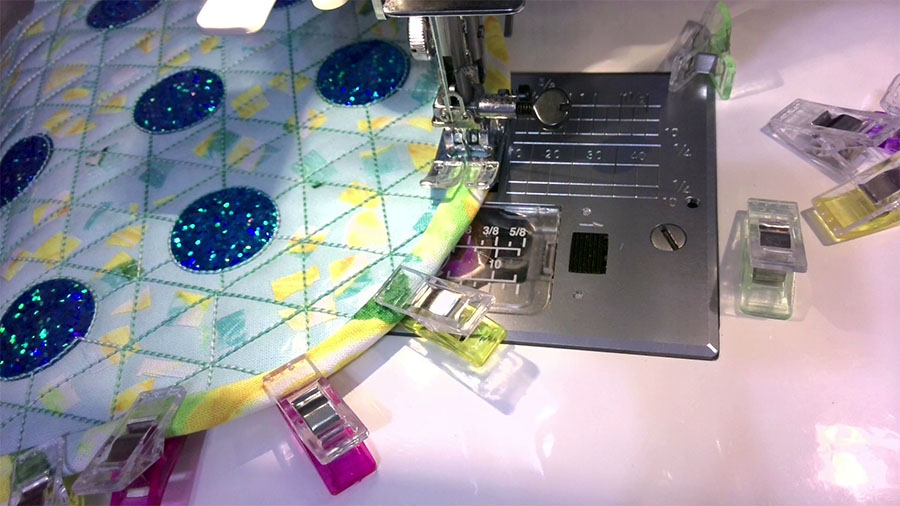
So now the edges of the pouch are finished with this binding.
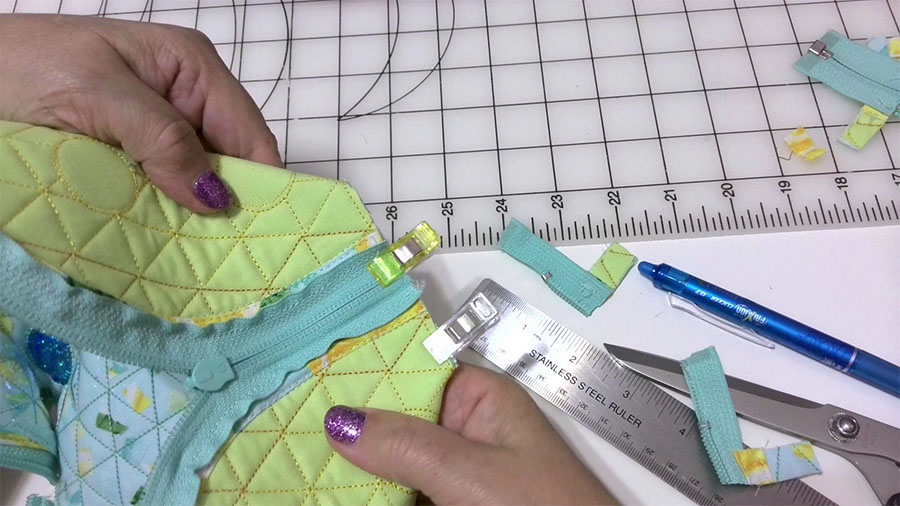
Step 8. Sew the zipper
Attach one half of the zipper tape to the curved edge using wonder clips, making sure to position the zipper teeth close to the binding edge. As curves can be difficult to sew along, I recommend basting the tape also with a needle and thread before stitching it on.
After you secured the zipper tape with thread, sew along the binding using a walking foot.
When finished, attach the other half of the zipper tape to the other curved edge and remember to match up both sides so they line up properly. Close your zipper halfway and then cut off any excess material at either end.
Step 9. Finish the pouch
Turn the pouch wrong side out and fold it forming two corners at the bottom of the pouch.
There is something to keep in mind when folding in your corners. Make sure that the length of the rectangles you cut is as precise as possible - 3 inches should equal exactly two sides with zipper teeth and each side should have a total length of 1.5 inches including the zipper teeth.
Make sure to secure the corners with Wonder clips so they stay in place.
Make stitches over the zipper ends to hold the zipper ends in place. Sew the corners in place using a triple straight stitch. Use a zigzag stitch to finish the raw edges.
✅ Related tutorial: Mastering the Zigzag Stitch on a Sewing Machine

You can also finish off each corner by binding them with fabric for extra reinforcement.
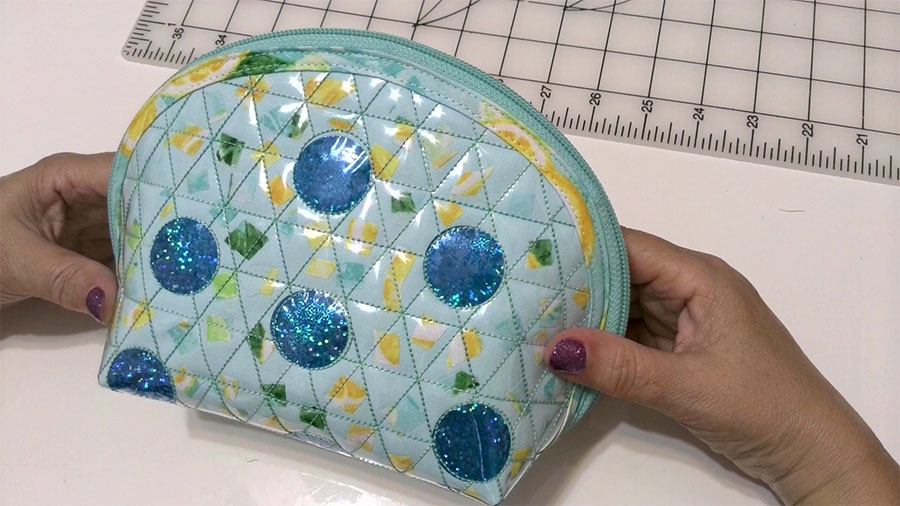
After finishing this step, you will have a durable and beautiful final product.
Recommended Products
As an Amazon Associate and member of other affiliate programs, I earn from qualifying purchases.
-
 Mybecca Clear Marine Vinyl 4 Gauge Sold Folded by Separate Yard
 -
 TORC Holographic Black HTV Heat Transfer Vinyl Roll 12 in x 5 ft Metallic Iron-on Transfer for Cricut T-Shirts
 -
 Cricut Maker 3 with Digital Content Cutting Machine, Mist
 -
 Zippers for Sewing, DOITEM 48 pcs 50cm/20 Inch Multicolor Nylon Coil Zippers for Sewing and Crafts 24 Colors
 -
 SewTites Magnetic Sewing Pins (5)
 -
 Snap Hoop Monster for Baby Lock/Brother (10.5" x 16") Magnetic Embroidery Hoop for Machine Embroidery
Now that the pouch is complete, feel free to get creative – make a few more pouches. Add some personal flair by selecting different fabrics and playing around with color. Have fun with it, and enjoy watching your creation come alive with each new combination you try.
If you found this tutorial useful, be sure to save this pin (see below) to your machine embroidery board so you can easily access it later when you need to make a zipper pouch using in-the-hoop embroidery techniques. Don’t forget to follow me on Pinterest for more inspiration, tips, and tutorials!
Did you like this tutorial? I have another fun in-the-hoop embroidery project for you to try out with your fabric scraps – making DIY fabric coasters! So if you want to put your embroidery skills to use and create something both functional and beautiful, visit this tutorial – DIY fabric coasters | in the hoop embroidery project. You can create a set of lovely coasters that you can use in your home or give as a thoughtful gift to a loved one.
In-the-hoop Embroidery Projects


latest posts
- Butterfly Quilt Block Tutorial – Foundation Paper Piecing
- How To Sew Quilt Squares So The Corners Match
- Sewing With Fork Pins: How They Help With Pattern Matching, Slippery Fabric, And Seams
- How Much Fabric Do I Need? 21 Helpful Tips For Calculating Fabric Yardage
- Easy Simple Sewing Project: Fabric Jar Opener
- DIY Oven Mitts: Step-by-Step Sewing Tutorial
- Easy DIY Potholder: New Design
- Tailor’s Clapper: What It Does, Why It Works, And How To Use It Right
- Heat Resistant Batting for Sewing: What It Is, How It Works, and What Makes a Difference