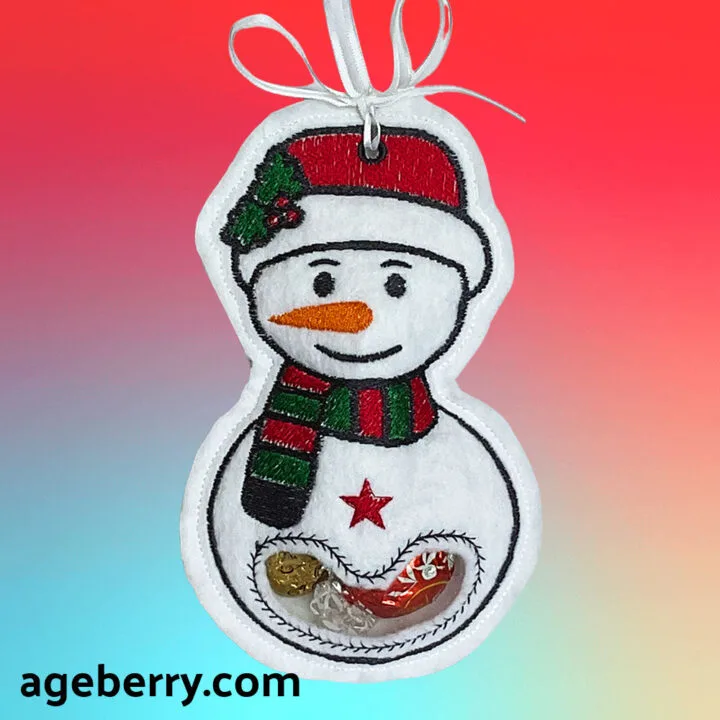
Do you have an embroidery machine? These In-the-Hoop Christmas ornaments are perfect for people with a 5″ x 7″ embroidery hoop. In-the-hoop designs are a good way to get more use out of your embroidery machine. They’re great for beginners and advanced users alike!
These stuffed Christmas ornaments are easy to stitch, even if you don’t have much experience with embroidery. You can make them very fast. You can fill them with treats like chocolate kisses or peppermint patties during the holiday season. There are many possibilities when it comes to what you can do with these cute designs.
Make these adorable ornaments as gifts for friends and family members or keep them all for yourself. We hope they bring joy to your life this year.
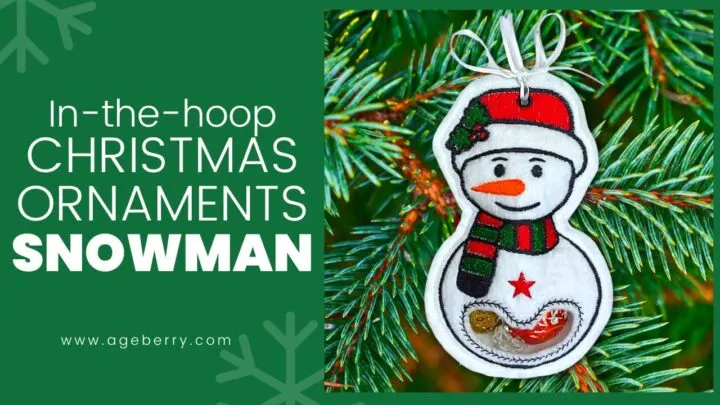
In the spirit of Christmas, I chose a very well-known shape for this tutorial: a snowman which I digitized myself using the Palette embroidery software. But all others in the hoop embroidery designs are available in my shop.
Christmas was always my favorite holiday; and not only because of the religious connotation, but also because it brings families together and it reminds us that giving is something we need to do from the heart.
Of course, when I had a job the fact that we had a long holiday didn’t hurt either 😊
Making Christmas ornaments was one of my “jobs” every Christmas. In the years past, I made a number of them: Unique DIY Christmas ornaments, No Sew Fabric Christmas Ornament, and DIY Christmas Angel. This is in addition to the many table runners, wreaths, and Christmas trees that I created. Of course, I could not allow this year to go by without another ornament!
What supplies you’ll need to make an in-the-hoop Christmas ornament – a snowman
In the hoop embroidery design – you can find the design in .pes, .hus, and other formats in my shop, they are inexpensive
Embroidery machine with a hoop size 5″ x 7″ or bigger
Felt pieces
Small piece of clear vinyl
Tear-away embroidery stabilizer
Machine embroidery threads
Embroidery scissors
Machine embroidery needle 90/14
Sticky tape
Note: Some of the links on this page are affiliate links. This means I will receive a commission if you order a product through one of my links. I only recommend products I believe in and use myself.
Don’t be surprised if many of the steps below are similar or even identical to the ones from the Halloween treat bags; even if the designs are different, the principle is the same.
The one difference between the Halloween treat bags project and this one is that I used the Brother Luminaire in the Halloween project and for the in-the-hoop Christmas ornaments I used the Baby Lock Destiny II.
Let’s talk about the products above; some affiliate links are below.
What is a TEAR-AWAY embroidery stabilizer?
I used the Tear-Away stabilizer which is a type of stabilizer easy to tear away when your machine has finished your embroidery design. It comes in light, medium or heavyweight versions, suitable for all kinds of projects. Instructions on how to use it are usually included with the material.
I recommend 4 – 8 gauge clear vinyl (a higher gauge number translates into thicker vinyl). The vinyl is easy to sew, is a flexible and durable material, and is also easy to clean. I used it to make a “window” in the stuffed Christmas ornaments so kids can see what’s inside.
The felt sheets I used are felt sheets 9″ x 12″ – nonwoven material, soft, densely made from 100% recycled plastic bottles! Felt sheets can have different thicknesses and I used thicker ones for these projects.
Also, use a thicker machine embroidery needle (size 90/14) so your embroidery machine can go over vinyl without any problems. Thinner needles might result in breaking threads or needles with thicker materials. You can also check my detailed tutorial on machine embroidery needles.
Curved or duckbill embroidery scissors are very helpful for these projects. Check out my guide Cutting Tools For Sewing: Ultimate Guide.
Step 1
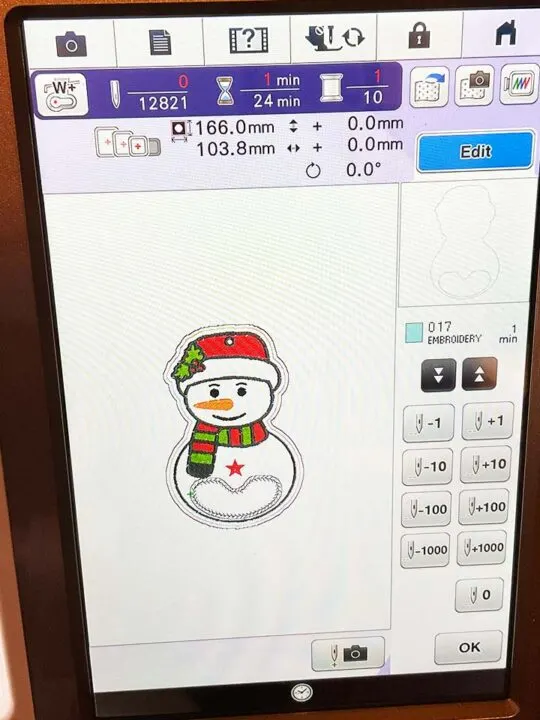
Load the in-the-hoop embroidery design into your machine. Prepare all necessary tools and materials
Many modern “smart” embroidery machines might try to rearrange/optimize the steps in the embroidery design. I recommend that you don’t change the order of steps. You must stitch these designs in the correct order to ensure that the stuffed ornaments are stitched properly.
Also, choose the thread colors as needed, you do not need to use the colors from the design file. When digitizing the design, I used different colors to specify stop points in order for the embroidery to go in the correct order (the machine would stop when the thread needs to be changed), but this does not necessarily mean that you need to change the thread.
These are not all colors recommended for the project; they’re simply for the machine stops. Pick your own colors for your projects.
Always remember to fill in enough bobbins for your projects or use pre-wound bobbins for your embroidery machine.
Step 2
Hoop tear-away stabilizer for this ITH Christmas ornament
Cut a piece of tear-away stabilizer that fits your 5″ x 7″ embroidery hoop. The piece will be larger than the hoop because the hoop has to lock it in place. Place it in the hoop, make some small adjustments if necessary and tighten the hoop.
It’s critical to hoop the stabilizer correctly so it maintains tension and doesn’t move around within the hoop.
It’s really important that the stabilizer is quite tight in your hoop at all times. Stretching of the stabilizer with too much hoop handling during embroidery might cause alignment problems, resulting in gaps or bubbles between stitches.
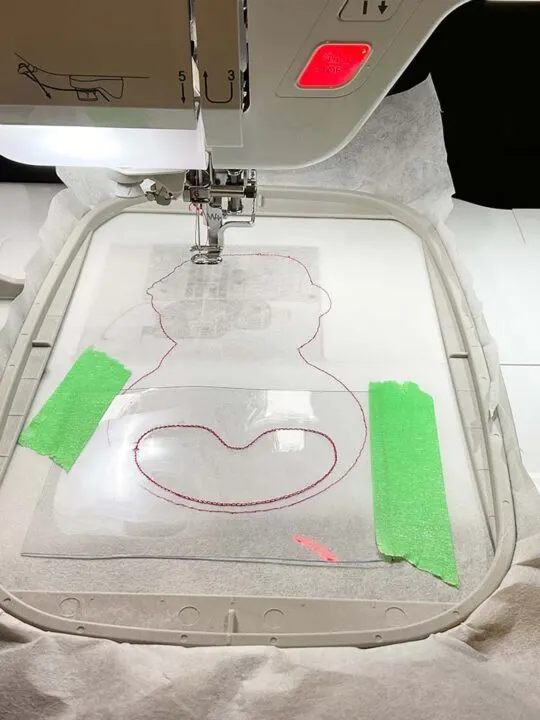
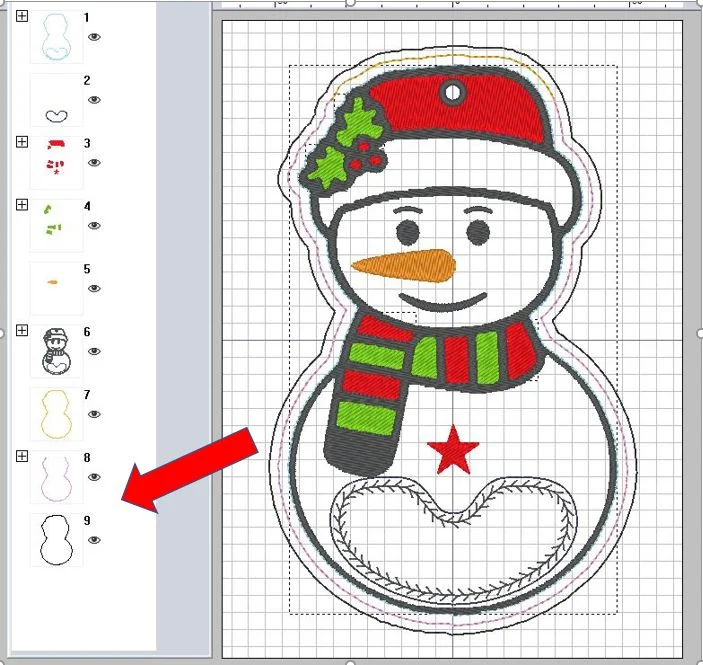
Run the first step of the design (color 1) which is the placement stitch for a piece of clear vinyl as well as the outline of the snowman on the stabilizer. Just push a button and the machine will do it automatically.
Choose a different color thread than I have in the design. As for me, I used a red thread so I don’t need to change threads for the next steps.
Step 3
Stitch the piece of clear vinyl to the tear-away stabilizer
Place a piece of clear vinyl on top of the placement stitch and run the next step of the in-the-hoop embroidery design (color 2). I used the red thread again. The machine will stitch the vinyl in place on the stabilizer. Use tape to secure the vinyl temporarily.
Step 4
Trim the vinyl around the tack-down stitches
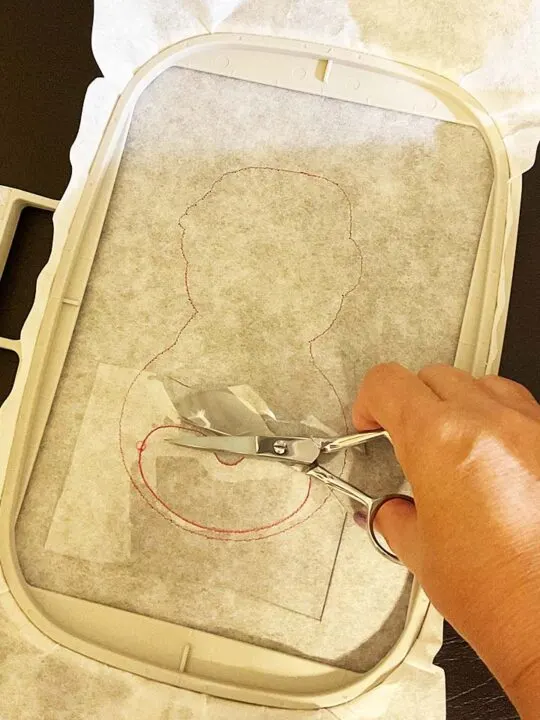
Remove the hoop from the machine but don’t unhoop the project. Use scissors to trim the excess vinyl from around the tacking stitch. Don’t cut too close to stitches, just cut around to trim the vinyl. The cut edges will stay on the wrong side of the project and won’t be seen.
I used the duckbill scissors to cut the vinyl at this point.
Step 5
Stitch the next steps of the design
Return the hoop to the machine.
Place a piece of felt over the placement stitch. Make sure it completely covers the placement stitch we made in step 2. Temporary sticky tape (I always use painter’s tape) may be used to hold the felt in place in the hoop at several points. You need to do that so everything aligns properly and the felt won’t be distorted during embroidery.
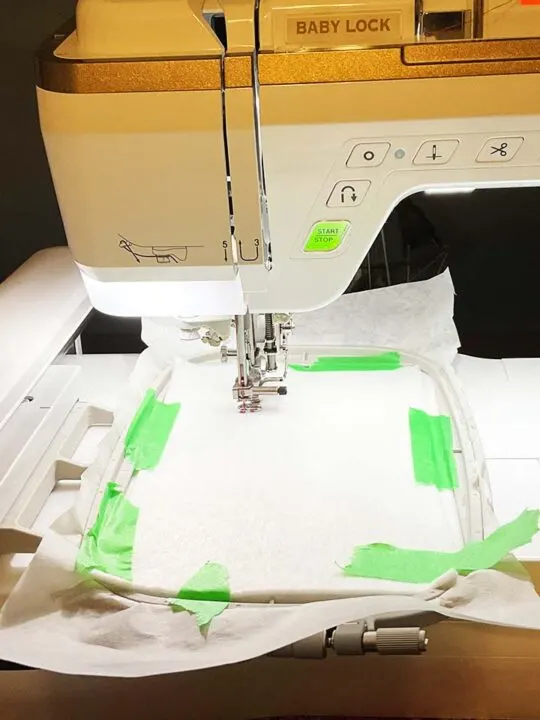
Run at this time the number of the next steps of the ITH embroidery design.
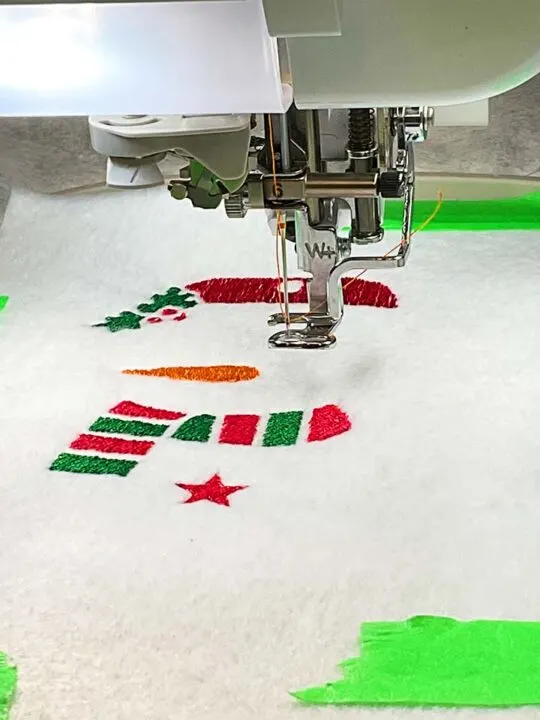
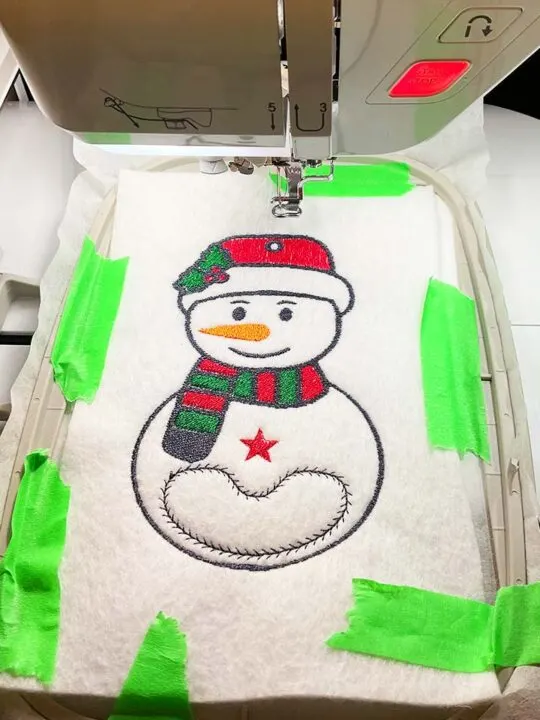
Stitch out color 3 (I used red thread) which is the hat, scarf, flowers, and the star, color 4 (I used green thread) which is the scarf and leaves, color 5 (I used orange thread) which is the nose of the snowman and color 6 (I used dark grey color thread) which is the eyes, mouth, eyelet, outline of the vinyl window and the final outline of the snowman. You can choose the same colors or try your own colors.
Step 6
Stitch the project outline
It’s color 7 of the ITH embroidery design. I suggest using a thread color that is very similar to the felt color. I used white color in this case.
All these colors (3 – 7) should be stitched before you attach the felt to the back of the project, otherwise, you won’t have an opening at the top where the treats can go.
Step 7
Tear away the stabilizer from the clear vinyl window
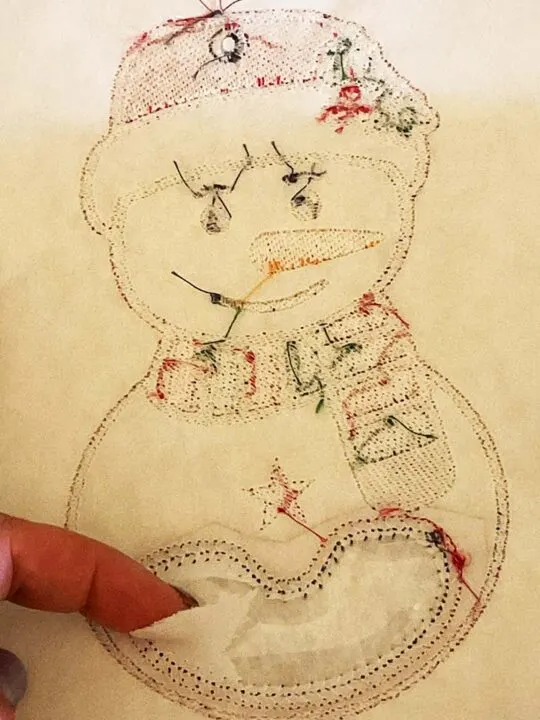
Take the hoop from the machine and remove the tear-away stabilizer from within the vinyl window on the back of the hoop.
Make sure that all remnants of the stabilizer are removed from around the edges so that after you cut the felt from the front no pieces of stabilizer are visible.
As well, be sure to cut all thread tails on the back of the design, especially around the window’s perimeter to prevent them from being seen through the transparent vinyl.
Step 8
Finish the snowman design in the hoop
Place another piece of felt over the placement stitches on the back of the hoop and tape it in place with painter’s tape again to secure it. Make sure the piece of felt is covering all the design but is not bigger than the hoop itself.
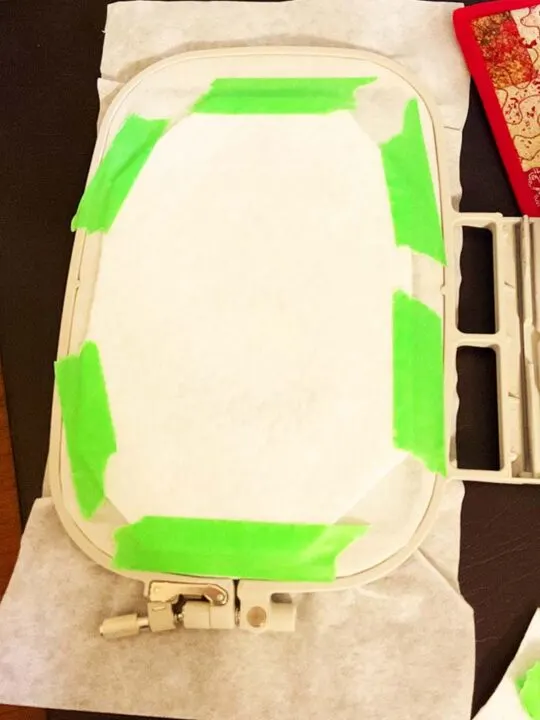
Return the hoop to the machine and stitch colors 8 and 9 (I used white color thread) to finish off the lower outline using the same color thread as in the previous step (color 7).
The color 9 outline is a CUTTING LINE for the designs. This color 9 is not really necessary to stitch, it’s optional because you can carefully cut around the design with scissors without any stitched outline.
In this case (if you didn’t stitch this optional outline) trim about 1/8 inch from the snowman outline making sure this distance is the same all over.
But if you want to be sure to cut an equal distance you may stitch this final project outline and cut exactly along it. Just take out a few threads that might be left in the felt.
Step 9
Finish in the hoop Christmas ornament
Remove the hoop from the machine and unhoop the project. Trim the design, keeping the opening’s edges together while you cut.
Using curved embroidery scissors, trim also the felt from the inner side of the vinyl window. Be careful not to cut the vinyl underneath or the threads, take your time doing so. Trimming the felt while folding it back might assist in achieving a nice tidy finish.
Remove the stabilizer from the design as much as you can, especially from between the felt pieces.
Make a small hole in the eyelet using a hollow punch. Make sure you do not cut any of the threads around the hole, also both sides (front and back) of the stuffed Christmas ornament should be cut.
I asked my husband to do it.
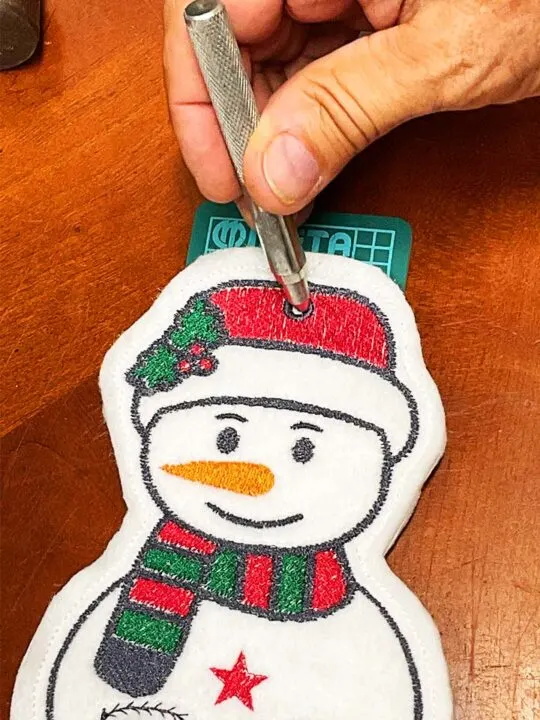
Place a piece of wood under the punch, I used my mini-cutting mat at first but the punch will cut it. As you can see in the images. For the next design, I got smarter and I used a piece of wood instead.
Feel the ornament with candies and chocolates.
Starting at the front, thread the ribbon through the eyelet from the front to the back. Tie the ends together in a bow at the front.
This is what your in-the-hoop Christmas ornament should look like. Please, save it on one of your Pinterest boards!
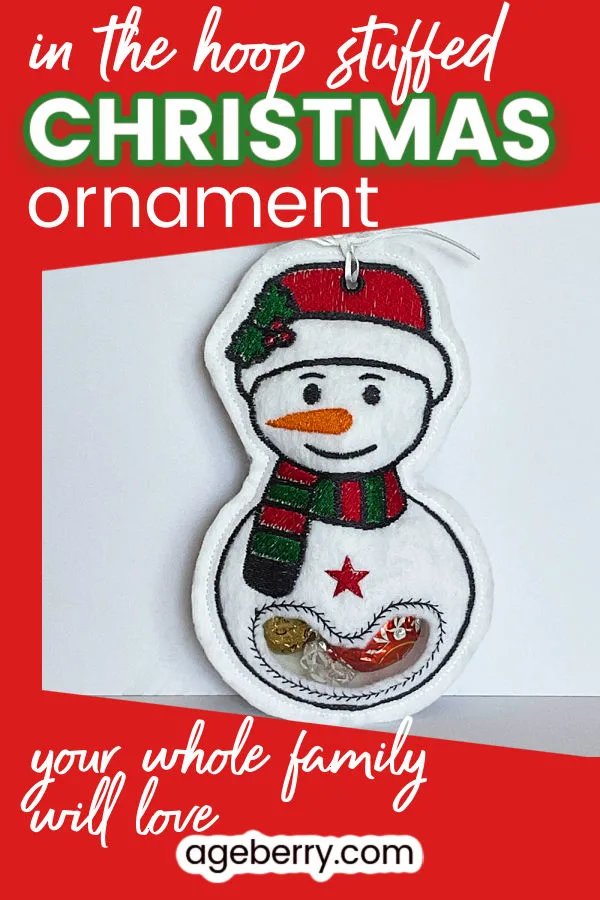
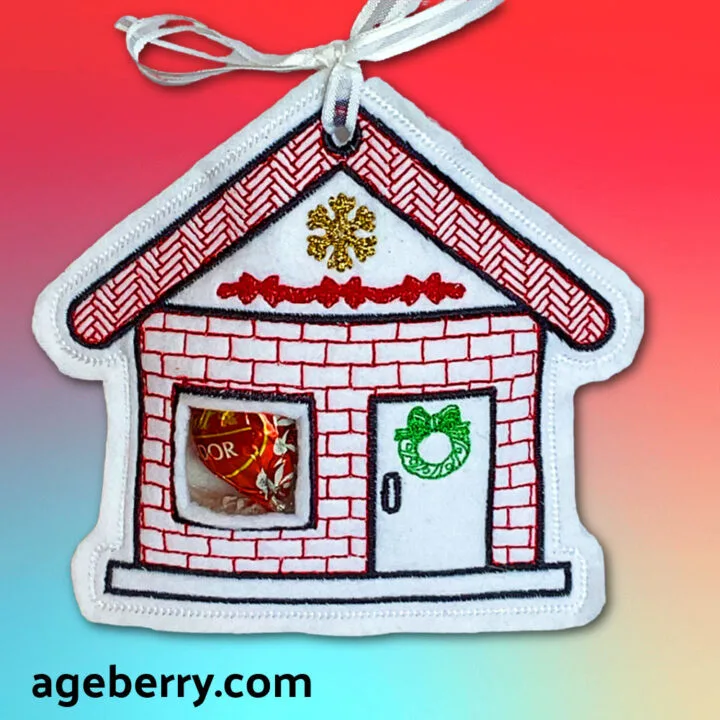
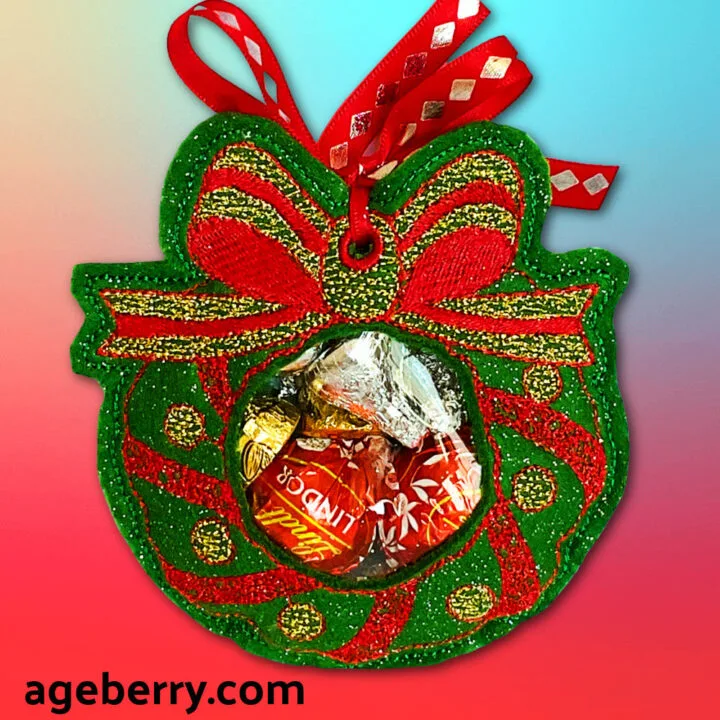
But only one type of ornament is not enough! I also made (using the same procedure) other types of Christmas stuffed ornaments, for which the designs are also available in my shop: a Christmas house and a Christmas wreath.
Here they are:
latest posts
- Ever Tried This on Your Serger? This Differential Feed Feature Will Amaze You
- Ditch My Sewing Machine? Not in This Lifetime!
- Adorable DIY Needle Book | Easy Tutorial for Beginners
- Master the Seam Ripper: Your Ultimate Guide to Precision Stitch Removal
- Think You Know Zippers? This Installation Guide Might Surprise You
- Why Does Your Seam Ripper Have a Red Ball? Discover Its Purpose!
- Topstitching Troubles? This Simple Trick Will Turn It Around Instantly!
- How to Sew Shirring: A Step-by-Step Guide to Elastic Thread Gathering
- Are Self-Threading Needles Really Useful?

