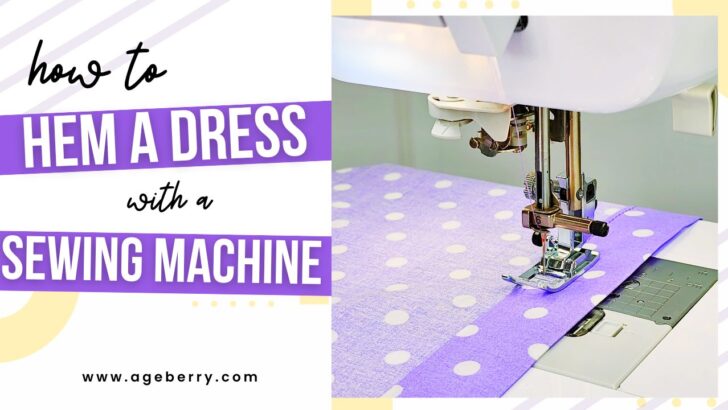
How To Hem A Dress With A Sewing Machine
In this tutorial, I’ll be sharing everything you need to know about hemming a dress with a sewing machine. Whether you’re working with a store-bought dress that needs a little alteration, or you’ve made a dress from scratch, hemming is an essential part of finishing your garment beautifully. Not only does it provide a polished and professional look, but it also prevents unraveling and fraying ensuring the dress lasts for years to come. Learning how to hem a dress with a sewing machine is the key to achieving beautiful results.
Thankfully, hemming dresses with a sewing machine makes quick work of the task compared to doing the same thing by hand. You can sew the entire hemline of a dress in just minutes with your machine, but doing it by hand could take well over an hour.
Your machine will provide consistent, high-quality results and offer several types of hemming techniques so that you can choose the best one for the project and fabric you’re working on.
In fact, I recently published a tutorial on the different types of hems for your sewing projects. When you hem a dress with a sewing machine, there are several methods you can use, including the double-fold, single-fold, blind, narrow, rolled hems, etc.
General Tips For Hemming A Dress With A Sewing Machine
#1. Choose the right hemming method for your project. The type of fabric you’re using will impact the way you sew the hem. For example, if you’re working with a delicate fabric like silk, you’ll need to use a different technique than if you’re working with a heavier fabric like coat wool.
#2. Consider the type of garment you’re working with. If you’re hemming a dress with a circle skirt, you’ll need to use a different method than if you’re hemming a straight dress. Or, you would most likely use a single-fold hem on a knit dress, but that same type of hem wouldn’t work for hemming a chiffon prom dress.
#3. Use the right sewing machine and presser feet. Depending on the type of hem you’re sewing, you may need to use a serger, a coverstitch machine, or a blind hem foot.
✅ Related tutorial: What Is A Serger & What Can I Do With It?
#4. Think about the design you have in mind. Do you want a narrow hem, a standard double-fold hem, or a decorated hem? The type of hem you choose will impact the way you sew it.
#5. Always practice on a scrap piece of fabric to get the technique right before moving on to the actual garment.
#6. You will need to iron the hem a few times. Skipping this step may result in a wavy or distorted hem. Use a pressing cloth to protect delicate fabrics from the heat of the iron.
#7. Consider your sewing experience level. If you’re a beginner, you may want to stick with a simpler hemming technique until you gain more experience.
#8. While sewing, remember to take your time and be patient as rushing can lead to crooked stitches or uneven hems.
I recommend starting with basic options if you’re new to hems (or sewing in general!).
That being said, I also encourage you to learn multiple ways to make a hem so you can choose (and execute) the best one for each project. You’ll find that the best option for hemming a knit dress will differ from hemming a formal chiffon dress, for example.
Let’s explore various dress hemming options in greater detail so that you can learn how to create the best finish for all your projects.
Note: Some of the links on this page are affiliate links. This means I will receive a commission if you order a product through one of my links. I only recommend products I believe in and use myself.
Preparing A Dress For Hemming
Before you begin hemming a dress, there are a few things that you need to do in preparation.
You need to gather a few supplies, including:
- Sewing machine
- Serger (overlock machine)
- Ruler
- Sharp fabric scissors
- Tape measure
- Sewing thread – either a matching color or a contrasting color, depending on the look you want
- Marking tools – such as tailor’s chalk, etc.
- Sewing pins
- Iron
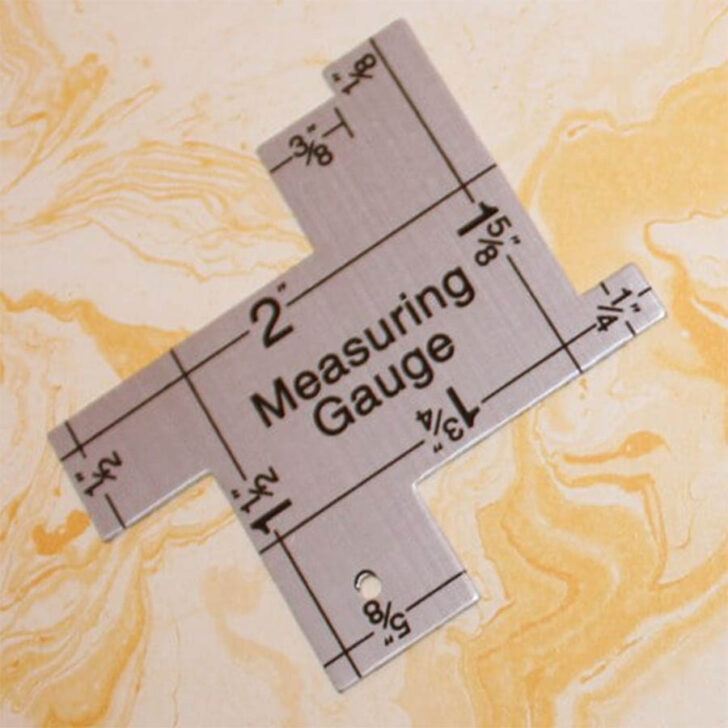
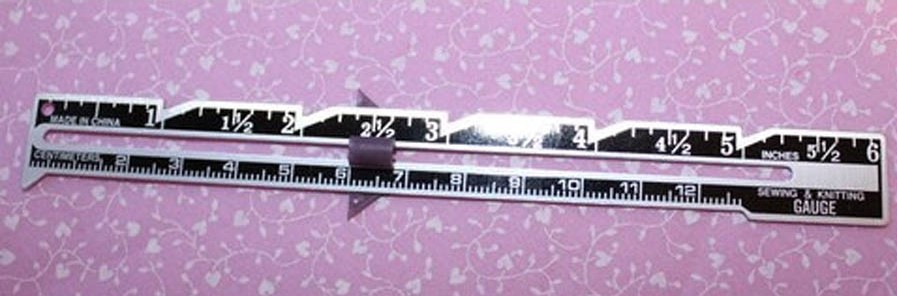
There are some special rulers that make the process of measuring hems faster. I use these measuring gauges very often:
Iron the dress so the hem is not wrinkled or twisted.
Pro Tip: Beginner sewists often fret about hemming dresses and other garments for fear of messing them up. As someone who has been sewing for decades, let me tell you an insider’s tip: the secret to an easy hem lies in the prep because, believe it or not, there’s more preparation than actual sewing.
Choose A Type Of Hem For The Dress
So, you have your dress ready to hem. But before you start sewing, you need to choose the right type of hem for your dress. This step is important as it will determine the final look and feel of your garment.
There are different types of hems to choose from, such as a double fold, single fold, rolled hem, blind hem, etc. Each type of hem has its own unique characteristics and is suitable for different types of fabrics and styles of dresses. Take some time to consider the style, weight, and drape of your dress, as well as your personal preferences, to choose the best hem for your project.
Just as I shared above, the best hem for your dress will depend on the fabric you’re using and the type of dress you’re sewing.
Some dresses, such as a-line or pencil dresses, have straight hems. On the other hand, styles such as prom dresses or other full skirt dresses have curved hems.
You’ll also need to factor in the material you’re working with. A double-fold hem may work with a woven fabric that’s not too thick, but it won’t work with knits. Likewise, you’ll want to use a narrow hem when working with chiffon, but that same hem type won’t work on a denim dress.
As I walk through each type of hem in more detail below, I’ll offer guidance on which materials work for each style.
Once you’ve decided on the type of hem, you can move on to the next step and start sewing.
How To Measure A Dress For Hemming
There are different ways to measure a dress for hemming. And they are the same if you made a dress yourself or if you are altering a store-bought dress.
#1. Put the dress on and decide where you want the hem to fall. It allows you to see how the dress will look when it’s being worn and adjust the hemline accordingly. The hemline can greatly affect the overall look and feel of the dress. Consider the occasion, the style of the dress, and your personal preferences when deciding on the hemline.
Make sure the dress is hanging straight and not twisted or bunched up.
Since every body type and dress is different, I prefer to use this practical method to measure a hem to ensure the final garment is flattering and comfortable. But it’s good only if the difference between the current length and the desired length is not too big.
Fold the fabric at the desired length and insert a pin or two at that length, then check in a mirror while standing straight. If two pins are not enough for you to see if you like the length insert a few more.
If needed, adjust the pins until you mark the desired length.
Once you have the desired length, take the dress off and use pins to mark the approximate hemline all around the dress. You can see how much fabric you turned under when you inserted a pin, so fold the same amount all around the dress. Next, put the dress on again and see if you like the length.
Take the dress off again and mark the hemline using a ruler and a marking pen (see below in detail).
If you have someone to help you, you could stand in the dress and let them pin it all the way around. It will make the process a little faster, but it is possible to do it yourself if necessary (as I described above).
#2. Use your existing skirt or dress with the length you like. This method is good if you have a skirt length that you know is flattering on you. So put the dress on, and tie elastic (or even a piece of rope) around your waist to see where your natural waistline is. Measure that length (I mean the skirt length) from the waist and mark it on the dress in a few places. Take the dress off and measure this distance from the current length of the dress all around the hemline.
If you have a dress with a hem length you love, you can also use it as a guide by laying it on top of the new dress and measuring the desired hem length. Make sure there are no wrinkles or folds.
If the difference between the current length and the desired length is too big (for example, when you want to make a knee length dress from a maxi dress) you should cut the dress first and after that measure the hem. For cutting, you should measure the same amount all over the hemline and cut.
#3. Another good method to measure a dress for hemming is using a yardstick. You will need somebody to help you or use a dress form. The point is to have the dress on your body or a dress form.
First, stand up straight. Let your friend hold the yardstick vertically against your body, with the bottom of the yardstick touching the floor. Make sure the yardstick is straight and not tilted. Look at the yardstick and note the measurement where it meets the desired length. This will give you the measurement from the floor to the hemline. Repeat this process all the way around the hemline of the dress to ensure that the hemline is even all the way around.
How To Mark The Hemline
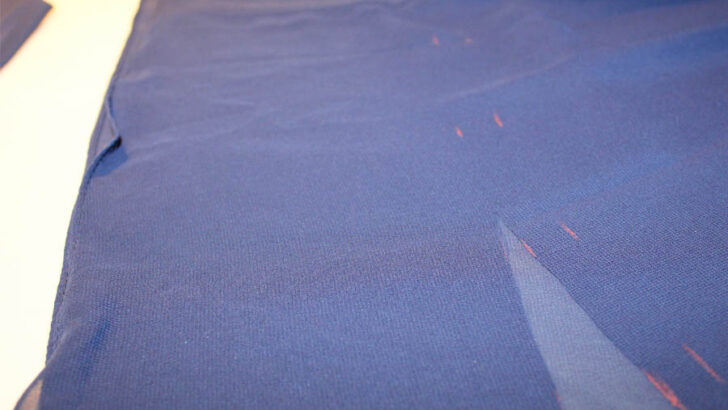
#1. Once you know how long you want the hem to be, take the dress off and turn it inside out, and spread it on a flat surface.
#2. Measure from the bottom edge (the current length of the dress) to the marked line (the folded line) with your tape measure or a ruler, then repeat that measurement around the dress, marking the hemline with tailor’s chalk, a marking pen, or adding pins as you go to mark the length (depending on your preference).
#3. You should round the number. For example, if the distance from the bottom edge to the marked line is 4 1/16 inches you round it to 4 inches or 4 ¼ inches.
#4. Be precise with your measurements to ensure the hemline is even all the way around.
#5. Make your hem marks close enough together (or connect them to form a solid line or sew a basting stitch to connect them) to see (and cut) your hemming line.
#6. Add a seam allowance for the hem. The seam allowance is the amount of fabric needed to turn under the fabric and create the hem without making the dress shorter than desired.
#7. So, measure and draw another line below the first line that’s parallel to the first line. This will be your cutting line, and the measurement for your seam allowance will vary (usually between ¼” and 2”) based on which material you’re working with and the type of hem you’re sewing.
#8. If you’re working with a fabric that frays easily, you may want to add an extra half inch to the seam allowance to allow for finishing the raw edge. But keep the seam allowance small if you’re sewing a full skirt on a dress (the equivalent of a circle skirt) to avoid puckering and bunching.
#9. Cut the fabric along this second line. It’s very important to make a clean cut to ensure an even hem when sewing. Use good quality fabric shears or a rotary cutter. But remember – measure twice cut once.
#10. Once you have measured your hemming line, fold it at the line you created and pin it or baste it in place.
#11. You can also mark a hemline with a basting stitch. For example, if you want to keep your curved hem even sew a basting stitch half an inch from the raw edge all the way around the bottom. Then take the raw edge, fold it under the stitches, and iron it down, working just a little bit at a time around the skirt.
How To Prepare Your Sewing Machine For Hemming A Dress
First, you’ll start by threading your machine. You should choose your bobbin thread color according to whether you want it to match or contrast the fabric of your dress.
Also, be sure to pick an appropriate sewing machine needle for the material and attach the correct presser foot.
Then, you’ll need to choose your preferred stitch type and set the stitch length.
Use a seam guide or an adjustable guide presser foot as it’s very important to sew straight when sewing a dress hem.
✅ Related tutorial: How to sew straight
Sometimes you can also use a walking foot to prevent the fabric layers from shifting while sewing.
✅ Related tutorial: How to use a walking foot
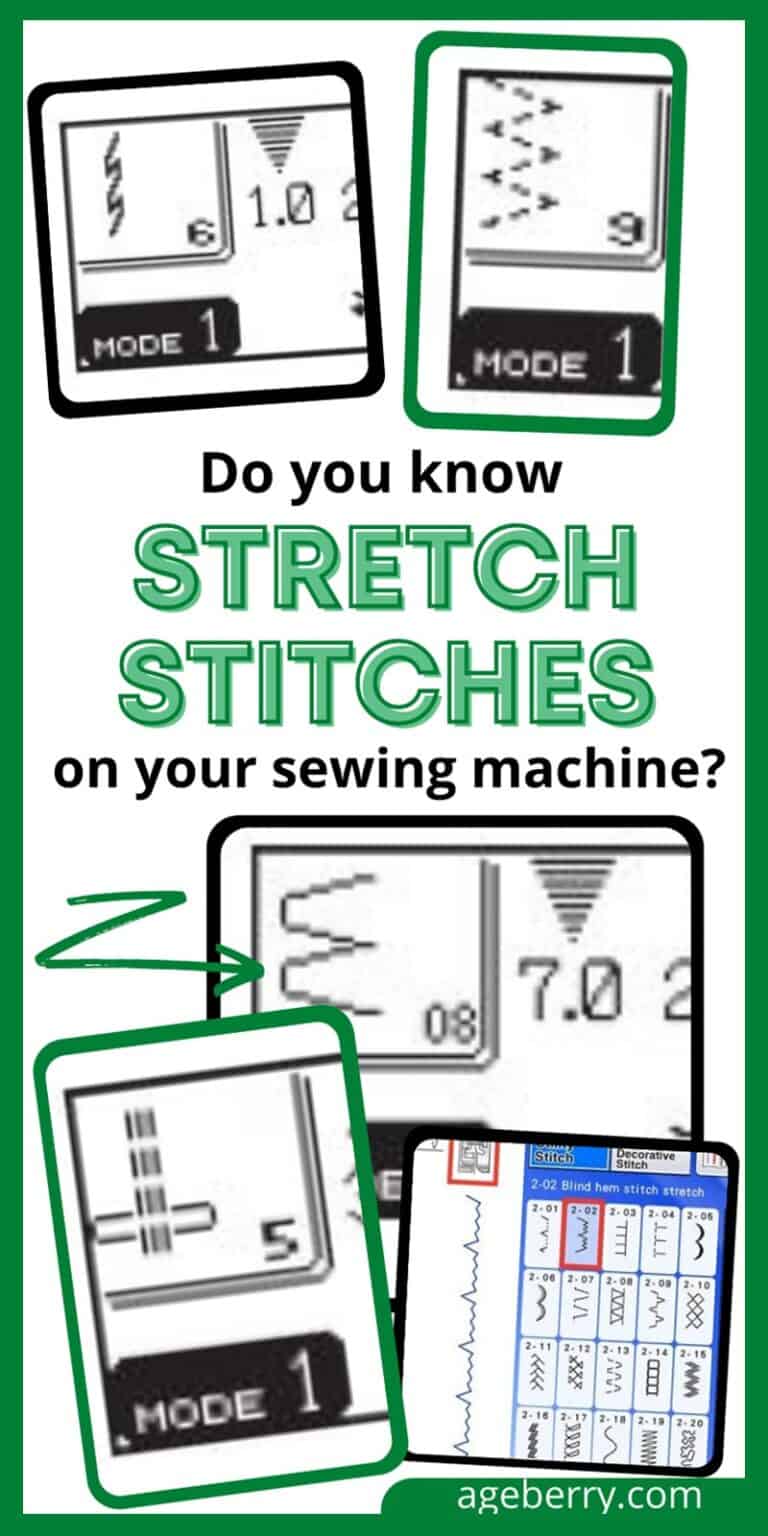
What Type Of Stitch To Use For Hemming A Dress With A Sewing Machine
You’ll need to choose which stitch you use with your fabric in mind because not all fabrics are the same. A type of stitch that works for stretchy material (ex: knits) won’t work for thin and slippery ones (ex: silk and satin).
When hemming dresses with your sewing machine, you can use several different stitches.
- Straight – Straight stitches are just what they sound like: a straight row of close-together stitches. You can vary the length of straight stitches to be more like basting stitches for marking hemlines or shorten them to secure your double fold hem.
- Basting – A basting stitch is basically a long, stretched-out straight stitch that’s used to loosely hold the fabric together temporarily or mark a line on your fabric for later reference.
- Zig-zag – The zig-zag stitch is also aptly named because it runs left to right in a zig-zag (think of a continuous lightning bolt).
- Blind hem stitches – A blind hem stitch is a type of stitch that is used to create a hem that is almost invisible from the right side of the fabric.
- Overcast stitches – If you don’t have a serger or an overlocker, you can use the overcast stitch to secure the raw end of your fabric.
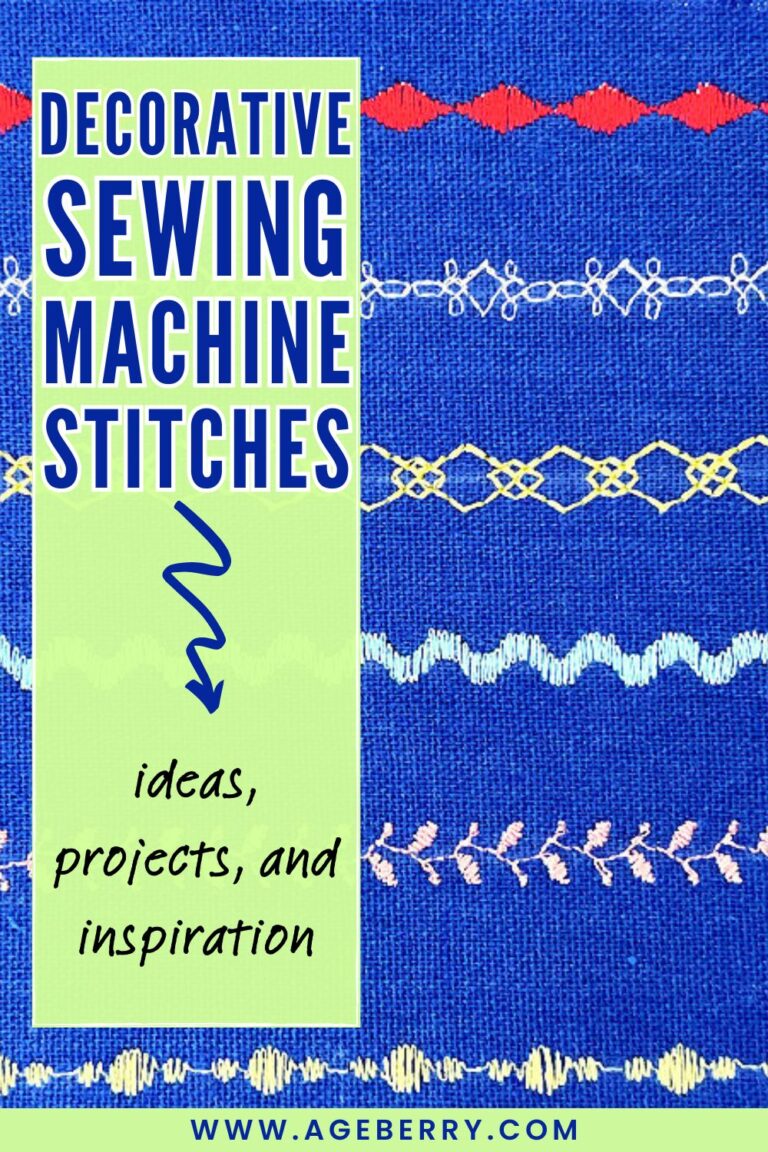
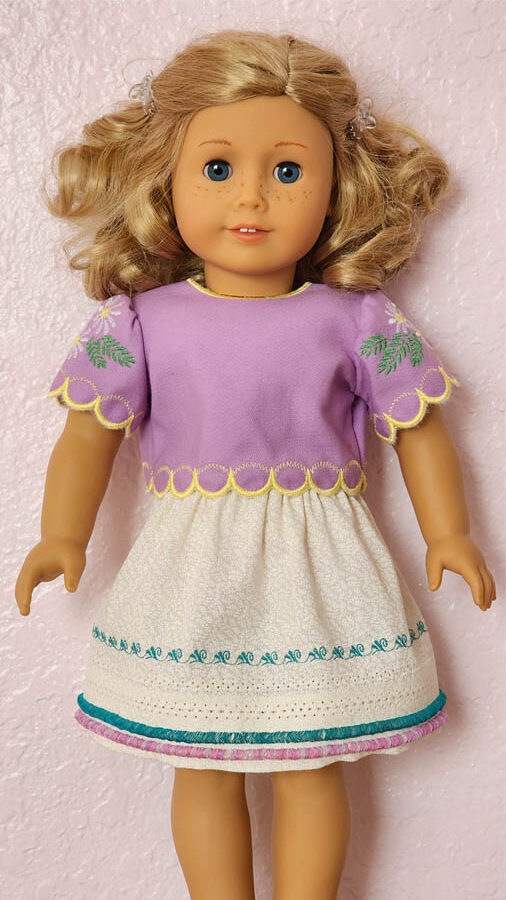
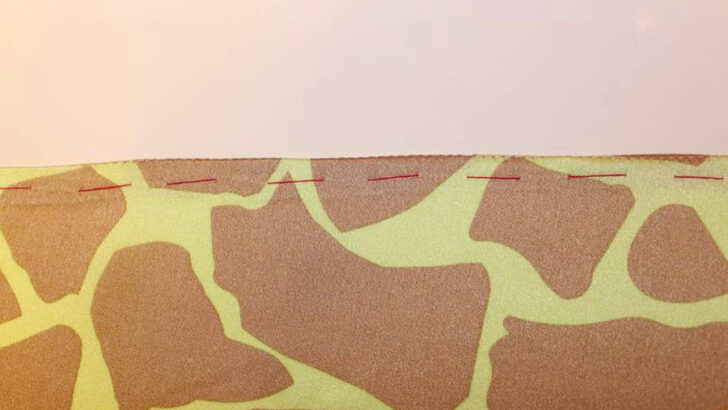
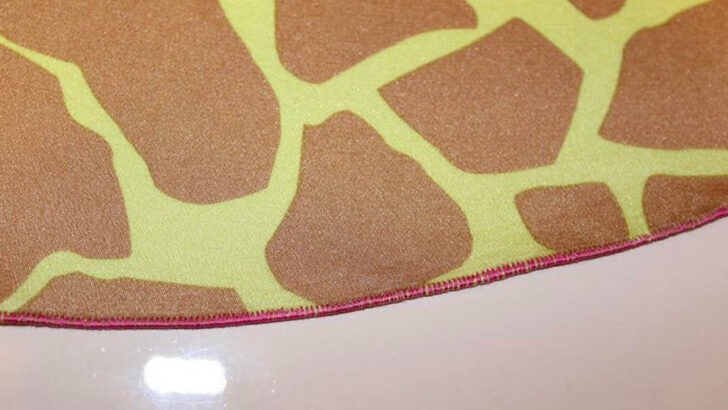
- Decorative stitches – You can also use decorative stitches to sew a dress hem. In the image below you can see how I used 3 types of decorative stitches to sew a hem on a doll dress.
✅ Related tutorial: Fringe Foot Fun: Adding Textured Accents to Your Sewing Projects
✅ Related tutorial: How to Use a Wing Needle for Hemstitching
5 Most Common Ways To Hem A Dress With A Sewing Machine
When you sew a hem with a sewing machine, there are five main types of hems that you can use. As I shared above, the type of fabric you’re using and the final look you want to achieve will determine which one is best. But if you learn all of these types of hems, you’ll be able to hem just about anything!
1. Double Fold Hem
This type of hem is exactly what it sounds like: a hem made of two folds and sewn into place.
Here’s one way to do it:
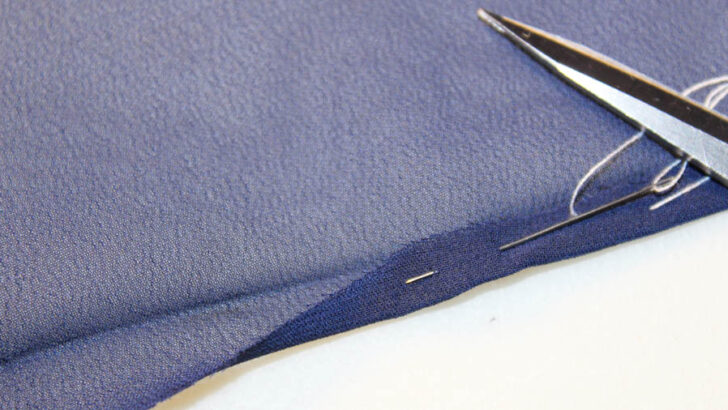
- Fold the raw edge under to the hemline. Use pins or baste the hem by hand.
- Iron it to get a good, clean crease.
- Open the crease just enough to fold the raw edge again so that it meets the crease you just ironed, and roll it over so that the raw edge is folded under and out of sight. Pin or baste again. I prefer to baste using a different thread color than when basting the first fold. If you prefer pins use plenty of pins to make sure the fabric doesn’t shift while you’re sewing. Place pins perpendicular to the hemline to avoid puckering. Also, pin it so that you can easily pull the pins out as you sew. Check if the fabric is smooth and the hem is even all the way around.
- Use your iron to press your double fold hem.
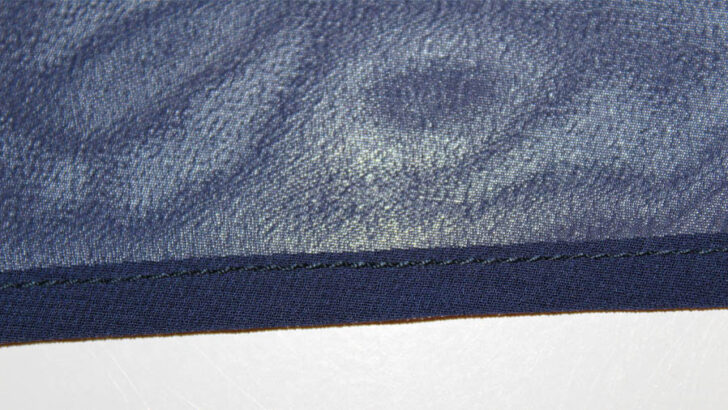
- Sew a straight stitch close to the top fold line.
- Using a straight stitch or a decorative stitch, sew around the hemline, catching both layers of fabric. You can use a matching thread color or a contrasting color for a decorative touch.
- Press the hemline once more with an iron to ensure a crisp finish.
Pro Tip: Avoid sewing in the middle between the folds because, over time, that top fold will become a flap and won’t look good.
There is another method to make a double fold hem. Here’s a detailed description of that method:
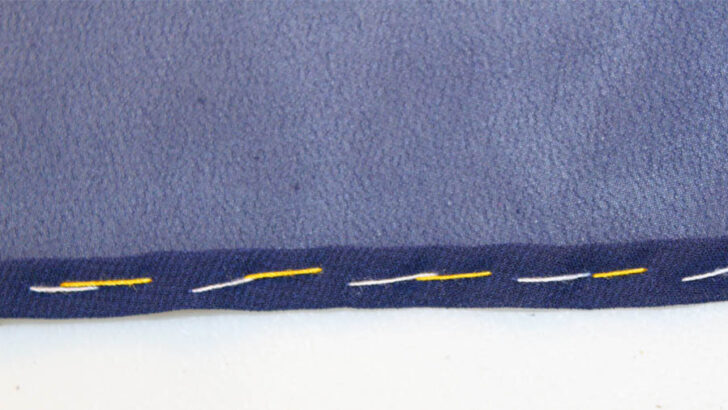
- Start by folding the raw edge of the fabric up by 1/4 inch or 3/8 inch and basting it in place. This will help prevent fraying. Use a ruler to measure this distance all around the hem. You will make the first fold of your double fold hem.
- Fold the fabric up again by 1/2 inch – 1 1/4 inch (or even more) and pin or baste it in place. This will create the second fold of your double fold hem.
- Press the hem. Make sure the fabric is smooth and the hem is even all the way around.
- Sew around the hemline, catching both layers of fabric. Use a matching thread color or a contrasting color for a decorative touch.
- Press the hemline once more with an iron to ensure a crisp finish.
This method is slightly different from the previous one, as it involves folding the fabric up twice instead of folding it once and then tucking the raw edge inside. Both methods can be effective, so it’s up to you to choose which one you prefer based on your personal preferences and the fabric you’re working with. As always, take your time and be patient to ensure a beautiful and professional-looking hem.
This hem is great for many fabrics (cotton, polyester, etc.) as well as many styles of dresses from casual to formal.
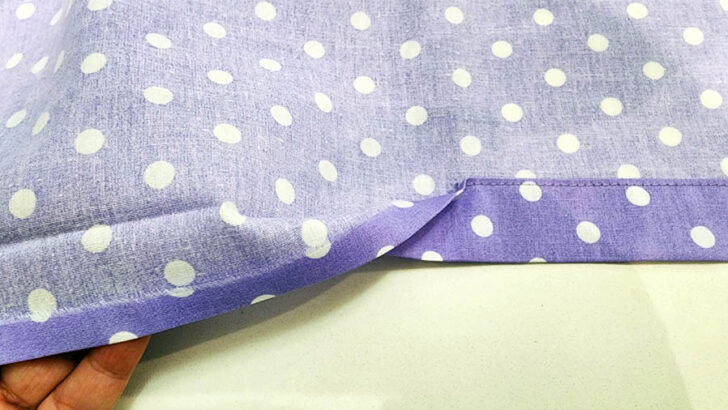
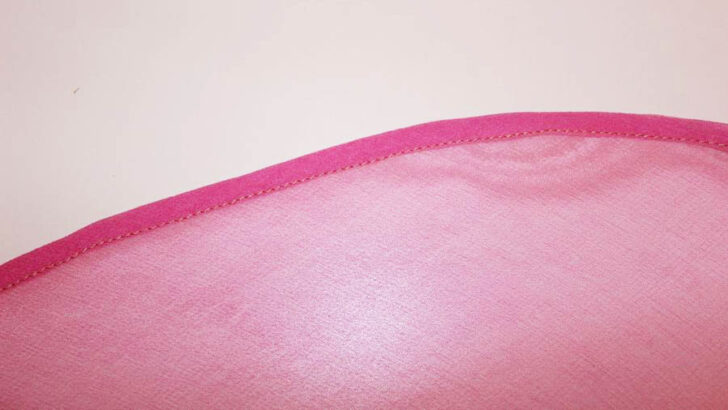
2. Single Fold Hem
This simple hem is an excellent option for most fabrics and seams. Here’s how to make it:
- Finish the raw edge of the fabric with a serger or an overcast stitch of your sewing machine. Fold the raw edge under the fabric at the hemming line so that the wrong sides of the material touch each other.
- Pin it or baste to create a clean-looking hem. Press the hem.
- Sew it near the finished edge using the stitch of your choice.

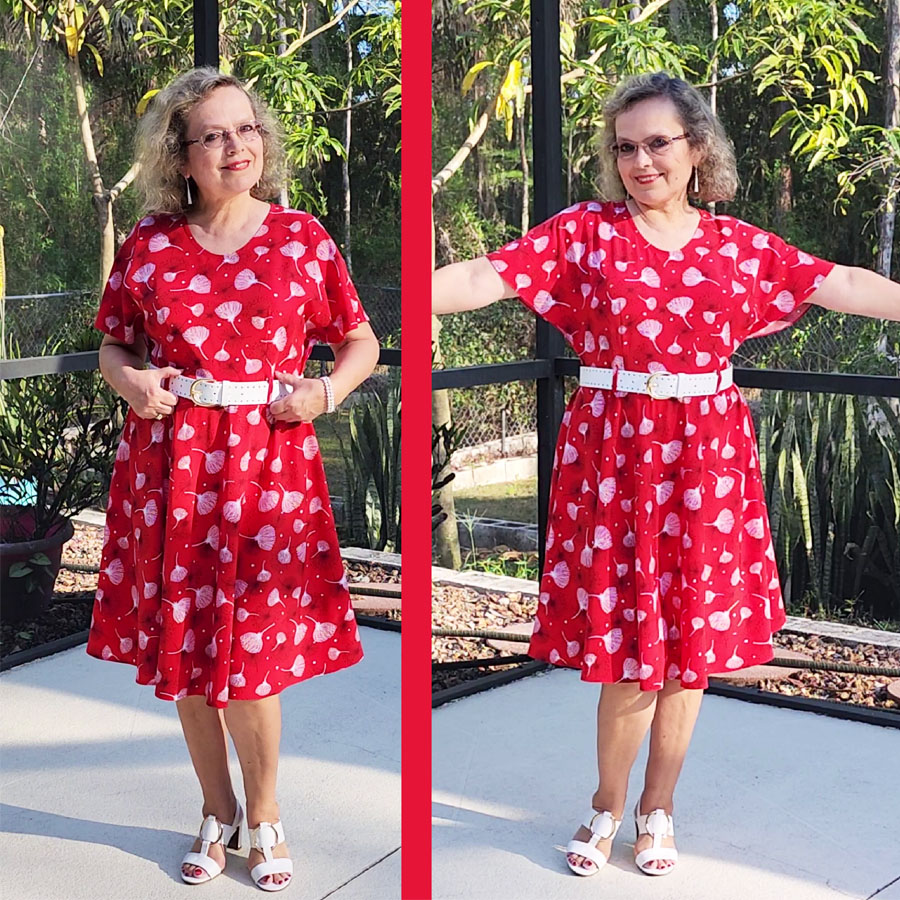
This is an image of the dress with the single-fold hem shown above. I have a tutorial that will guide you through every step of the process and will provide you with the knowledge and skills you need to sew your own dress – How To Make Your Own Beautifully Tailored Dress.
Pro Tip: If you use this stitch on woven fabrics, I recommend serging it or using a zig-zag stitch or overcast stitch over the raw edge to prevent the fabric from fraying before sewing your single-fold hem.
This hem is great for heavier-weight fabrics, stretchy knits (if using a zig-zag stitch or double needle), and casual dresses. Avoid using this type of hem with sheer fabrics, which look better with a narrow hem.
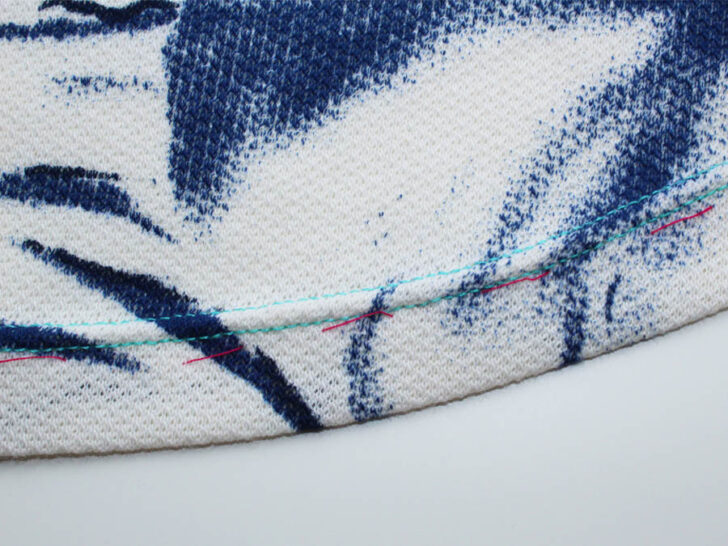
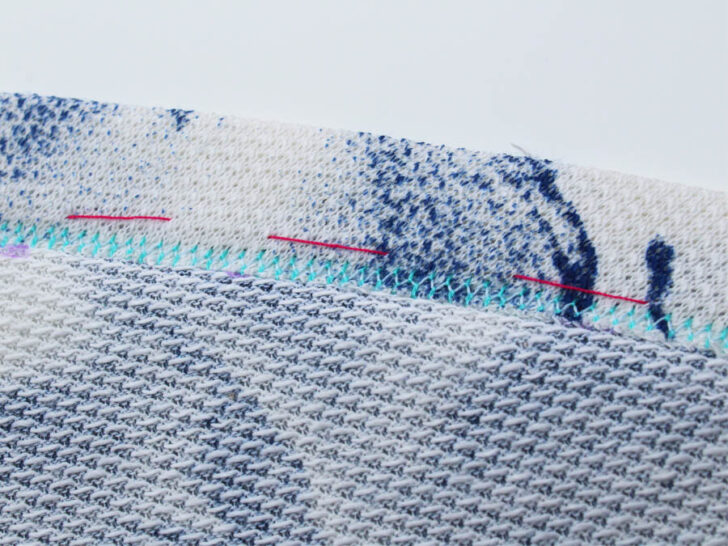
Sewing A Single Fold Hem On A Stretch Knit With A Double Needle
The double needle will sew two rows of straight stitches on the top and a zig-zag on the back at the same time to resemble a coverstitch. This is a great hem option for stretchy knits because it will stretch with the material without snapping the thread when you will wear the dress.
Here’s how to make this hem using a double needle:
- Fold the raw edge under the fabric at the hemming line so that the wrong sides of the material touch each other.
- Pin it and baste. Press it.
- Turn the dress so that the raw edge is down and the right side faces up.
- Try to sew with the raw edge between the two needles so that the zig-zag will cover the edge of the material. But usually, it’s not easy to do, so it’s not a problem if the raw edge is not between the two needles. You can trim the fabric later after you finish the hem.
This hem is great for stretchy materials such as jersey knits.
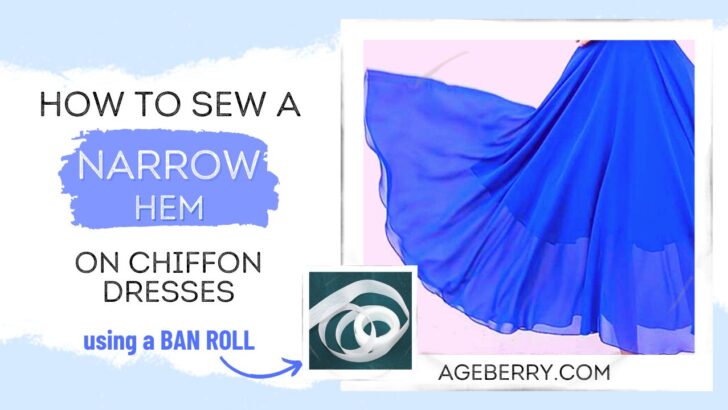
3. Narrow Hem
This hem is very similar to the double-fold hem, but the hem is much more narrow. Here’s one method how to do it:
- Fold the raw edge under ⅜”. Baste the hem.
- Press it to get a good, clean crease.
- Stitch as close to the folded edge as you can.
- Take a sharp pair of scissors and trim close to the stitching line. But it’s not really easy to do and you can cut the delicate fabric while trimming the hem.
- Fold the hem again, making a ⅛” or ¼” hem, baste and stitch over the first row of stitching you did.
- Press the hem to finish it.
This hem is great for lightweight or sheer fabrics such as chiffon and formal dresses (such as prom dresses).
There is an easier method of making a narrow hem on lightweight fabric.
If you are struggling with sewing narrow hems and ending up with uneven or messy edges check my tutorial on using Ban Roll tape – a little-known but highly effective tool for achieving a professional finish. It’s a real game-changer! Not only does it make the process much easier, but it also ensures that your hem is flawless every single time. Once you try it out, you’ll wonder how you ever managed to sew a narrow hem without this method.
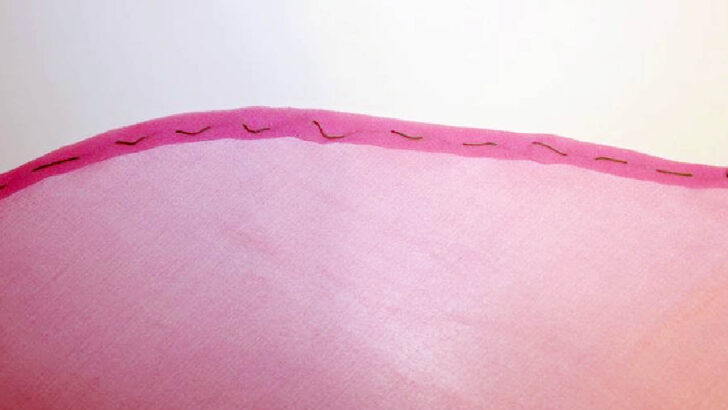
4. Blind Hem
This type uses a blind hem foot to form a nearly invisible hem from the right side of the fabric and is perfect for dresses made from non-stretch materials.
It is a variation of a zig-zag stitch that combines a straight stitch and a zig-zag stitch to form a hem with an intermittent stitch on the right side of the material. When you use a matching thread color, the stitches that were already barely there seem to disappear.
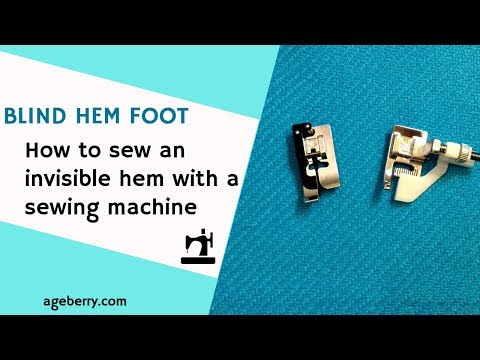
I have a YouTube video on how to sew a blind hem. Check it out.
This type of dress hem seems a little like putting a puzzle together. You can follow this process to create a blind hem with your sewing machine (and there are other ways to do it):
- Mark your fabric with three lines at ¼,” ⅝,” and 1¼.”
- Finish the raw edge of the fabric with a serger, zig-zag stitch, if needed (and usually it is needed).
- Fold the fabric along the first line and press it to smooth it out.
- Next, fold the fabric along the upper line and pin it in place but don’t iron it.
- Baste the fabric along the middle line (as a guide) and fold it along the basting, with the wrong side facing up and the edge sticking out a little.
- Insert the blind hem foot into your machine.
- Select a blind stitch.
- Place the folded fabric with the folded edge against the guide of the blind hem stitch foot and lower the foot. Adjust the stitch width if needed so that the needle barely catches the fold in the hem when it’s in the leftmost position.
- Once you finish sewing the hem with your machine, remove the basting stitches, open the hem, and press it smooth.
It can be tricky to figure out how to sew a blind hem if you’ve never done it before. That’s where my detailed step-by-step tutorial can come in handy so check it out – Blind hem foot: How to sew an invisible hem with a sewing machine.
This hem is great for medium-weight woven fabrics, some heavyweight fabrics (ex: linen and wool), and medium-weight knits that aren’t very stretchy. It’s an excellent choice for business casual or semi-formal dresses where you don’t want to see any stitches at the hem.
5. Rolled Hem
Rolled hems are a type of hemming technique that produces a narrow, dense, thread-wrapped edge on the fabric. When done correctly, this type of hem gives a professional and polished look to garments, making them durable and less prone to fraying.
There are many different ways to sew a rolled hem.
One of the ways is using a special rolled hem foot that rolls the fabric into a ⅛” double fold roll and the machine wraps it in threads as you sew.
However, you can also make a rolled hem even if you don’t have a rolled hem foot. When sewing a rolled hem without a special presser foot, I rely on the versatile zigzag stitch. It’s possible to achieve a professional-looking rolled hem using just a zigzag stitch on your sewing machine.
To begin sewing a rolled hem with a zigzag stitch, first set your sewing machine to the zigzag stitch with a width of 3 – 4 mm and a very short stitch length – I used 0.4 mm. Use regular polyester thread or cotton embroidery thread.
Fold, baste, and press your fabric edge ⅝” – 1/2″ to the wrong side all the way around the hem. You can turn under quarter inch too but I found it not enough for a nice rolled hem. I usually make a stitch with my sewing machine ⅝” from the edge and fold the fabric using this stitch as a guide.

Using a handwheel on your sewing machine put the needle down – it should be in its right position of the zigzag stitch. Place the fabric right side out on the machine in such a way so that the folded edge of the fabric is right against the needle. Lower the presser foot. Use a zigzag presser foot for zigzag stitches.
Start stitching over the fabric edge, ensuring the right side of the zigzag goes outside the fabric fold (but right near it) while the left side hits the fabric just beyond the folded edge. Sew slowly and steadily feed the fabric through the machine, maintaining consistent stitching and remaining focused. The thread will wrap the fabric edge and you will have the rolled hem.
Continue stitching until you reach the end of the hem. Pause and realign the fabric if necessary. Cut the thread and remove the fabric from the machine. Press the hem again to flatten it and remove any wrinkles.
And now the most important step – carefully use sharp scissors to cut away any excess fabric, being cautious not to cut through the stitches. It’s best to trim as close to the stitches as possible, but make sure not to compromise the integrity of the hem.
This method of sewing a rolled hem will work with thinner lightweight woven fabrics even if they are tricky to handle.
There is another method of sewing a perfect rolled hem that is done with a serger – this is my favorite way to make the rolled hem on a dress. I have a detailed tutorial with step-by-step instructions, check it out here – How to Make a Rolled Hem with a Serger: Get Professional Results
FAQs
New sewists, understandably, tend to have many questions about hemming dresses. Here are a few that I frequently see.
How Long Does It Take To Hem A Dress?
It depends on the type of hem you’re making and how big the skirt of the dress is. If you’re doing a simple single fold or double fold hem, it may only take about an hour. More complex hems could take a few hours. As tempting as it is, don’t rush the process! You’ll almost always regret it.
What Stitch To Use For Hemming A Dress?
Most of the time, you’ll probably use a straight stitch because it works for many different fabrics and with many types of hems. However, if you’re working with a knit or stretchy material, you’ll want to use a special stretch stitches because it has more give allowing the fabric to stretch without the threads breaking.
Where Should A Dress Hem Fall?
There is no hard and fast rule here! Since every dress and every body shape is different, you get to choose the hem length that looks great on you, and that you feel the most comfortable wearing.
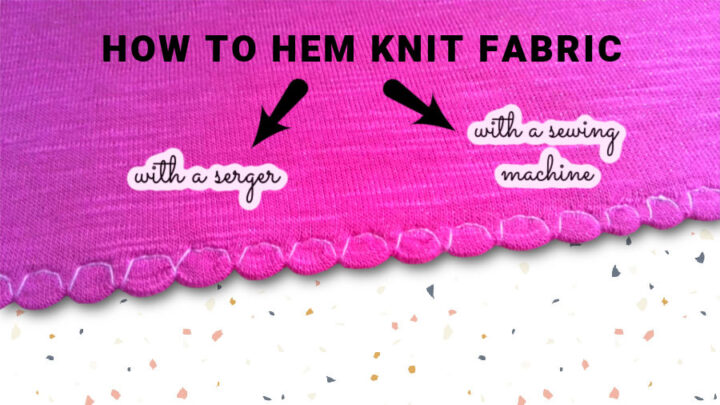
If you’re interested in learning how to hem a knit dress, be sure to check out my tutorial on the topic – How To Hem Knit Fabric. Hemming a knit dress is a bit different than hemming a woven dress, so it’s important to know the proper techniques for a professional finish. My tutorial will guide you through the steps needed to hem a knit dress.
Did you find this tutorial helpful? If so, save this pin (see below) on your sewing board so you can come to the article later when you need this information on how to hem a dress with a sewing machine, and follow me on Pinterest for more tips, tutorials, and inspiration!
latest posts
- What Do You Call a Person Who Sews? I Asked My Readers and Got 1,408 Opinions
- DIY Round Purse: PDF Sewing Pattern and Detailed Instructions
- Mini Wonder Clips By Clover: Useful Sewing Tool Or Just Another Notion?
- Non-Slip Grips For Quilting Rulers: A Small Notion With A Useful Job
- Fabric Eraser for Sewing: What It Removes and When to Use It
- What Is The Best Thread For Sewing Machine Projects? Let’s Find Out!
- Butterfly Quilt Block Tutorial – Foundation Paper Piecing
- How To Sew Quilt Squares So The Corners Match
- Sewing With Fork Pins: How They Help With Pattern Matching, Slippery Fabric, And Seams