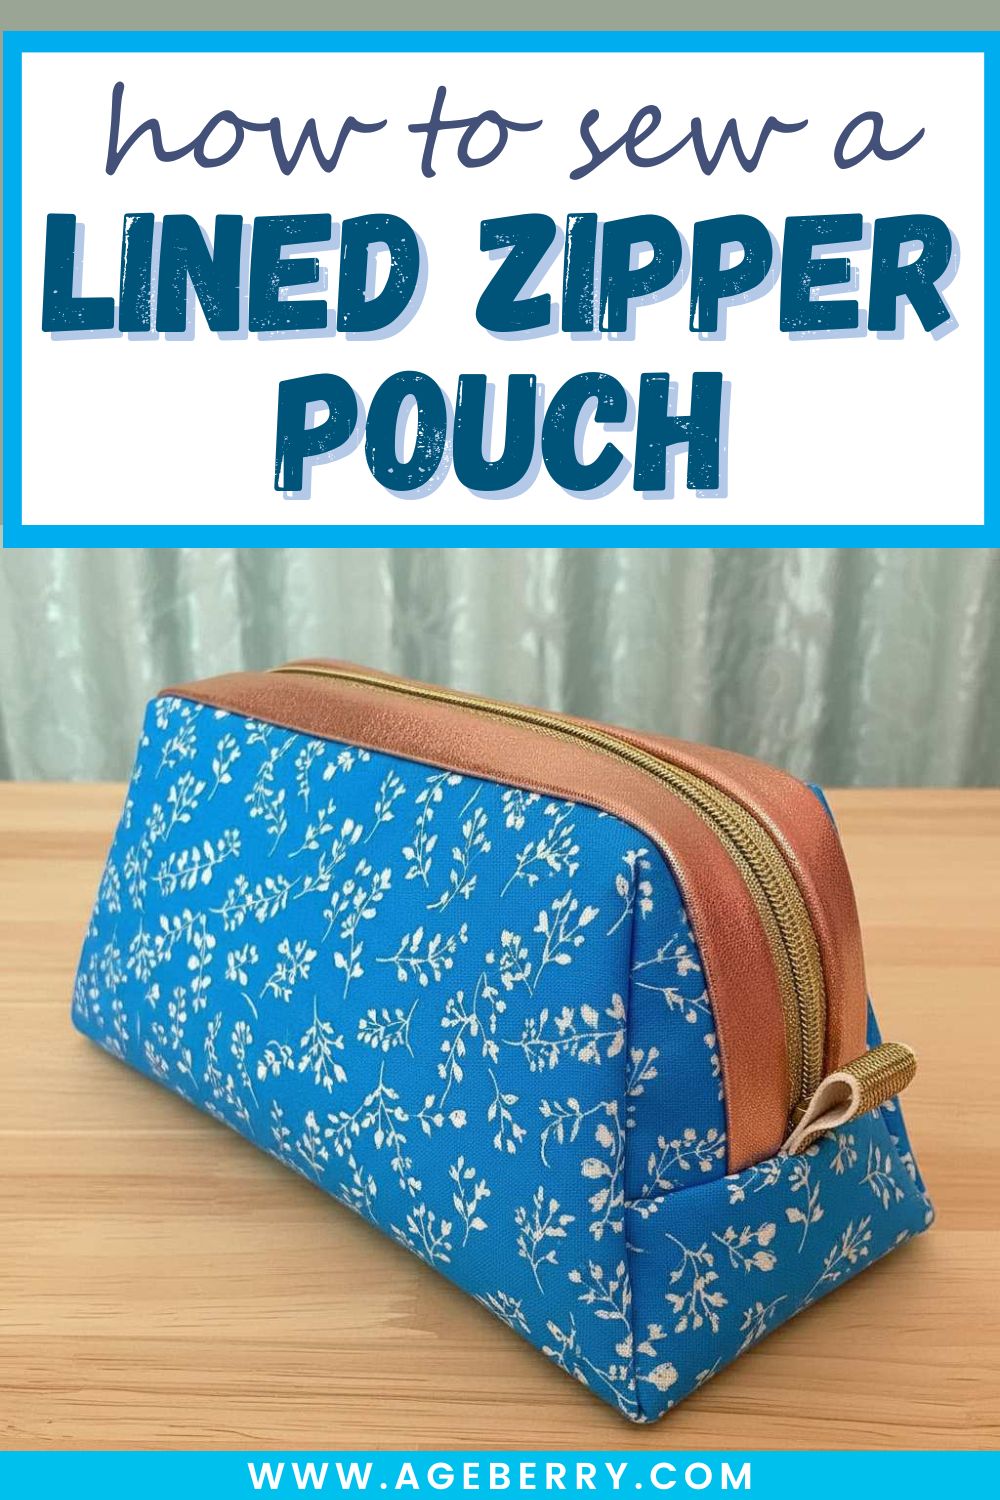
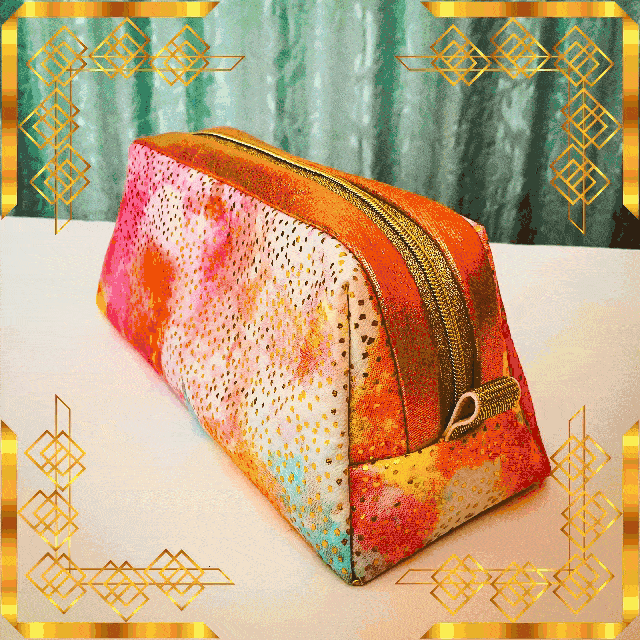
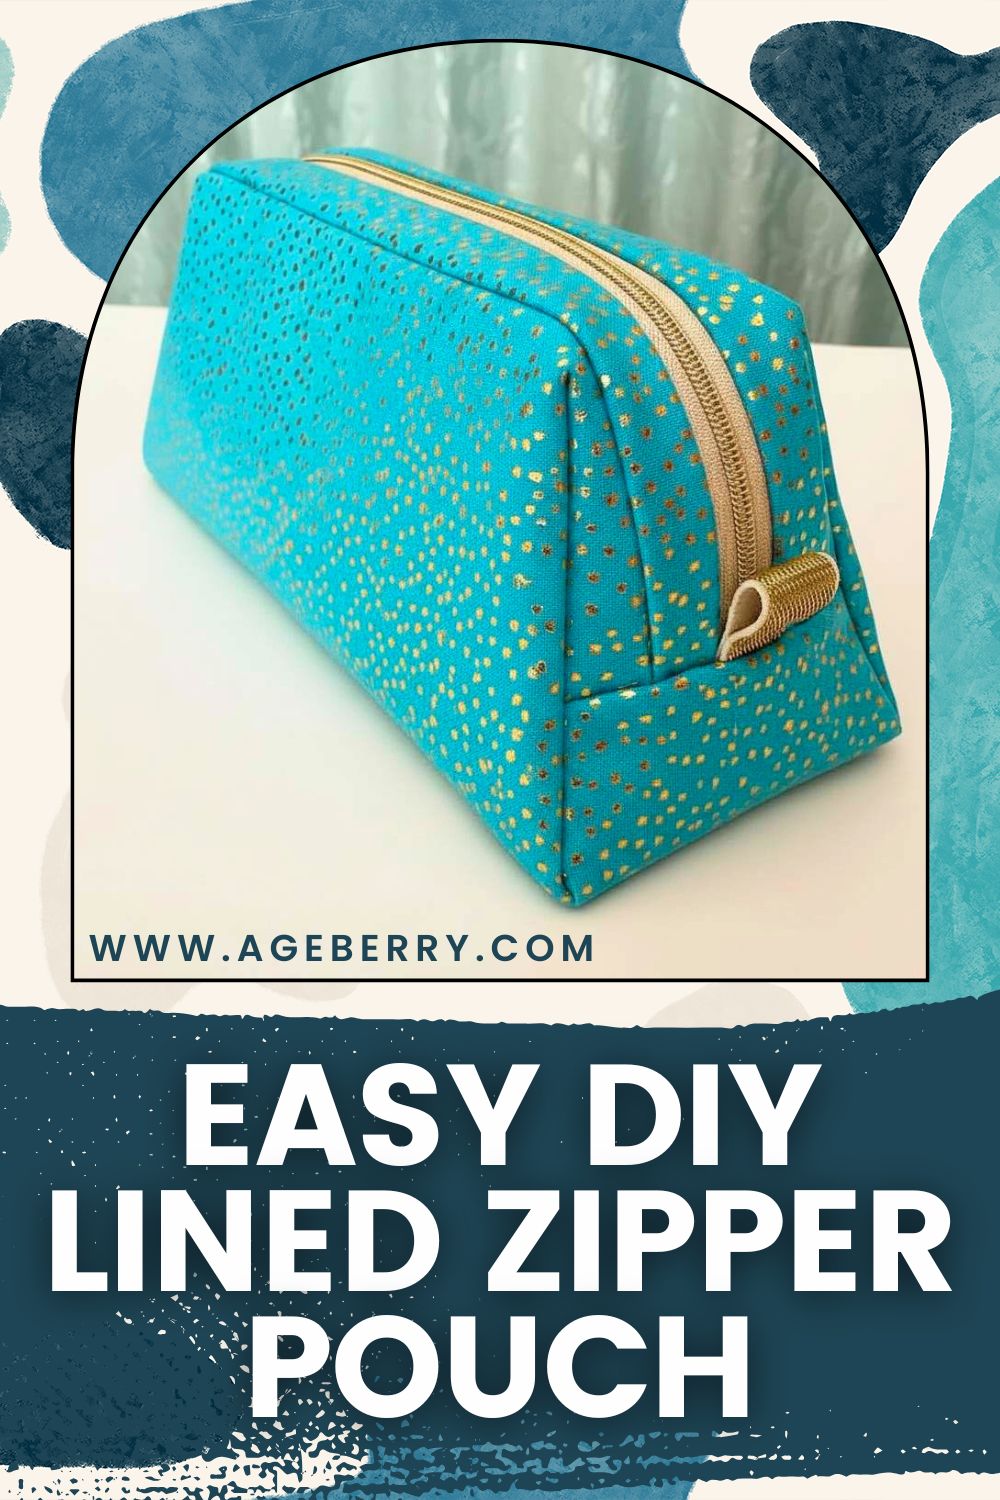
How To Make A Lined Zipper Pouch | Step-By-Step Tutorial And A Free Pattern
In this sewing tutorial, I will show you how to make a cute lined zipper pouch sewn entirely by serger. If you’re interested in learning how to use a serger, there’s no better way than to jump in and start sewing! A serger is a great tool, and if you have it you should use it. In this project, you’ll make a useful zipper pouch while also practicing using your serger.
But of course, you can also sew it on a regular sewing machine if you don’t have a serger. The project is very easy and fast and can be made without a pattern. However, I made a printable PDF pattern anyway if you prefer to use one.
A zipper pouch is a versatile and handy item that can be used for a variety of purposes. For example, it can be used as a cosmetic case to store makeup and other beauty products.
Or it can be used to store small sewing notions such as threads, needles, and buttons.
Additionally, zipper pouches make great gifts for friends and family members. They are practical and thoughtful and can be customized to suit the recipient’s individual style.
With just a few simple supplies, you can create a zipper pouch that looks just as good as any designer version.
What you’ll need to make a lined zipper pouch
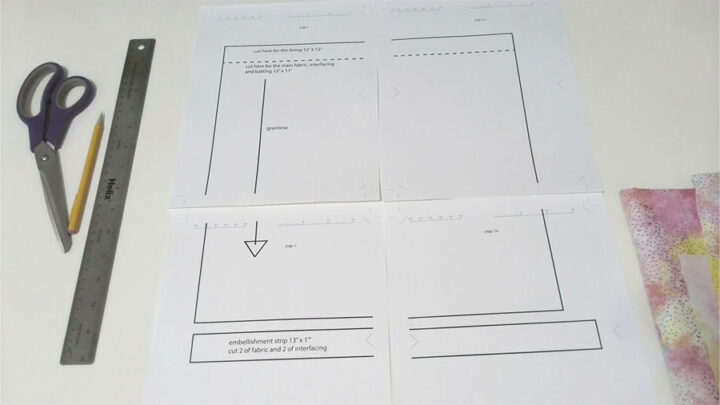
- Small piece of fabric for the pouch 12” x 11’
- Small piece of fabric for the lining 12” x 12”
- 2 strips of contrast fabric for the embellishment 13” x 1” each
- Piece of batting 12” x 11”
- Piece of medium weight fusible interfacing
- Plastic zipper 15” or longer
- Serger / overlocker (optional)
- Small piece of ribbon for the loops 5 inches long
- Regular sewing notions
- Printable PDF pattern of the zipper pouch (optional)
The pattern is free for my subscribers. You can find it in my Resource Library. So if you are not a subscriber to my newsletter subscribe in the form below and I will send you the password for my free files and patterns.
Before starting to make the zipper pouch, it’s good to read the entire tutorial. This will give you a good overview of the materials and tools you will need, as well as the steps involved in completing the project. It is also a good opportunity to get a sense of the project timeline and to make sure you understand all the instructions. This way, you can be sure that you have all the information you need to complete the project successfully.
Note: Some of the links on this page are affiliate links. This means I will receive a commission if you order a product through one of my links. I only recommend products I believe in and use myself.
Step 1. Prepare all necessary materials (and tools) for making the zipper pouch
My fabric for the pouch is quilting cotton fabric, but you can also use heavier weight fabric like home decor fabric or upholstery fabric which is stiffer than quilting cotton. However, you can easily make any quilting cotton fabric stiffer with interfacing so the pouch holds its shape well.
I used fusible fleece for this zipper pouch but you can use other types of batting and it doesn’t need to be fusible batting.
And for the lining, I used the same fabric as for the pouch exterior. You can use any lightweight fabric.
For embellishment, I used medium-weight knit-backed vinyl fabric – it’s quite sturdy but still flexible.
A zipper for the project – it has to be a regular plastic zipper with small nylon teeth preferably not a separating zipper. But I couldn’t find a regular zipper in gold color so I used a separating one. Don’t use invisible zippers, metal teeth zippers, and zippers with big plastic teeth. It needs to be a bit longer than 12”, use 15” or longer.
The zipper pouch has small loops on each side. For these loops, I used a golden ribbon. But they can be easily made from the fabric.
Thread your serger with suitable threads (or prepare your sewing machine, if you don’t have a serger).
What’s the best serger for beginners in 2022? Here are some things that you should look out for when shopping around. If you’ve never used a serger before but want something user-friendly and robust enough to handle future sewing projects as well, here is my sewing tutorial on selecting a machine that will suit you and meet your needs today, while still being functional as you grow into more advanced sewing skills.
Best serger for beginners – Serger buying guide
Prepare your cutting table. I don’t know about you, but in my sewing room the cutting table is often cluttered, and I usually have to free it from patterns, fabric, threads, pins, etc. Make sure you have all the necessary cutting tools within reach.
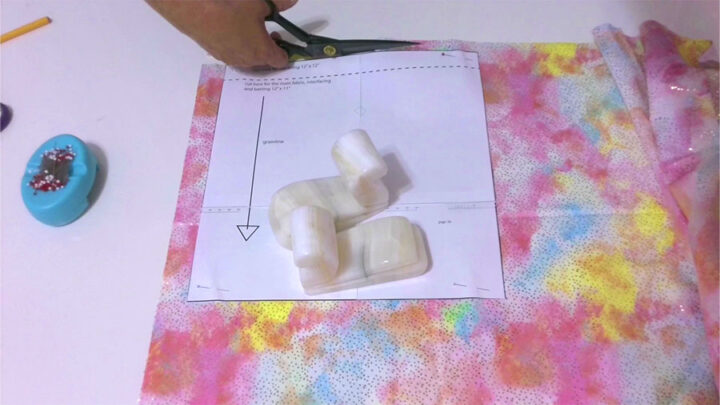
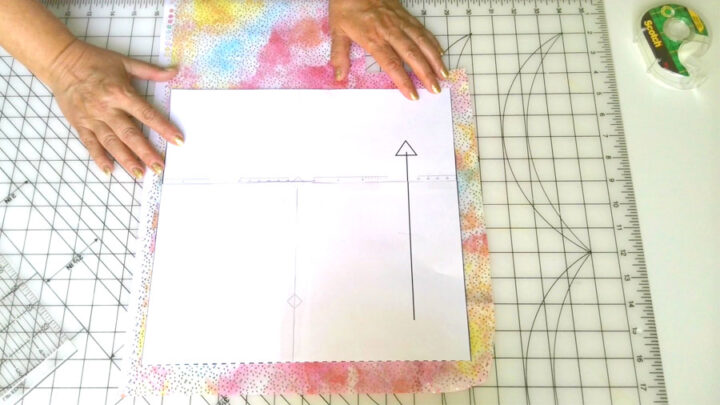
Print the PDF pattern (read the entire tutorial to decide if you need to use the pattern) and arrange the pages.
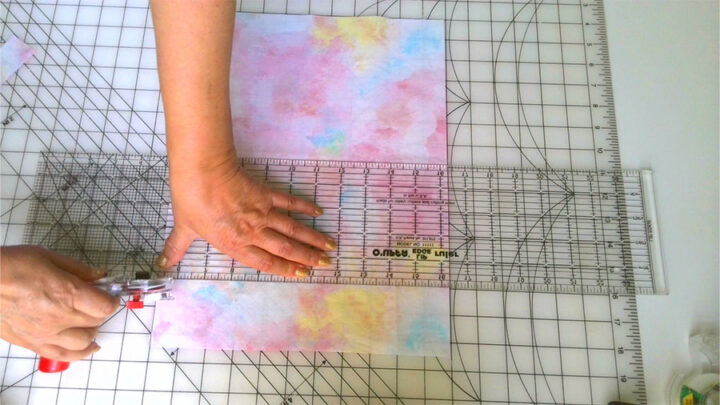
Step 2. Cut the fabric and interfacing for the zipper pouch
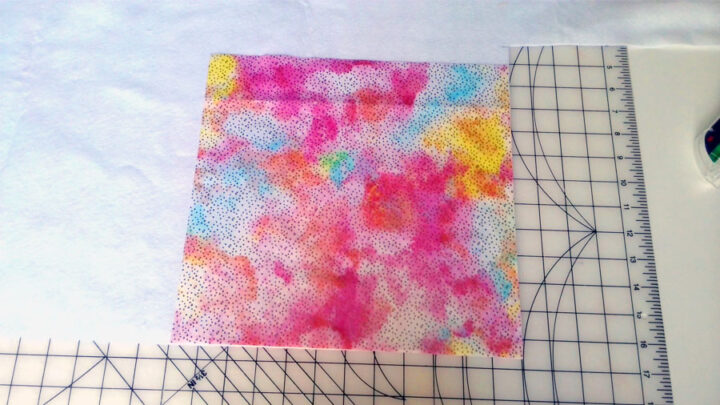
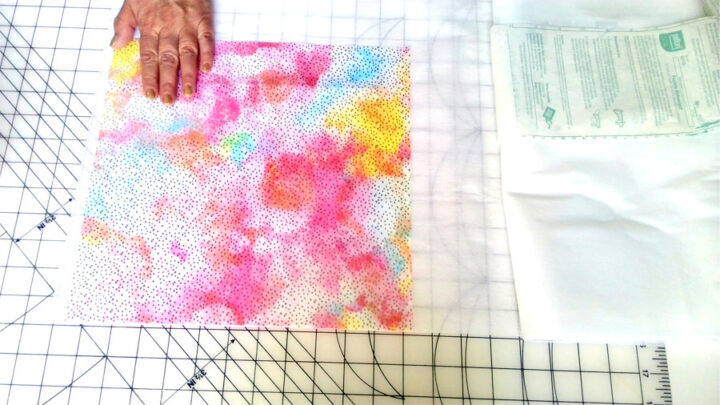
First, cut a piece of fabric for lining – 12” x 12”. I used the same quilting cotton fabric for the lining as for the pouch itself.
What cutting tools do you prefer to use? Shears or rotary cutters?
I like my Martelli rotary cutter. And of course, I can’t use the rotary cutter without a cutting mat.
A cutting mat provides a stable, self-healing surface to cutting fabric on, and the grid lines make it easy to measure and cut fabric accurately. Most cutting mats are marked with one-inch grid lines, making it easy to cut the fabric into squares, in my case – 12-inch squares.
Simply align the edges of the fabric with the lines on the cutting mat and use a rotary cutter to make straight clean cuts. The cutting mat will protect your tabletop from the blade and also prevent the fabric from shifting as you cut. Plus, the grid lines on the cutting mat will ensure that your cuts are perfectly straight.
But if you don’t have a cutting mat and rotary cutter, you can use the pattern I provided and cut the fabric with shears. Just make sure you place the pattern correctly so that the grainline is parallel to selvages.
Next, cut a piece of fabric for the zipper pouch – 12” x 11”. The size of the exterior fabric for the pouch is 1 inch smaller than the lining because I used some strips for embellishment around the zipper.
You can cut using again the grid lines of your cutting mat. Or use the PDF pattern – just cut 1 inch off the 12” x 12” square (use a dashed line on the PDF pattern).
Next cut a piece of batting 12” x 11”. You can use the fabric rectangle you just cut as a template.
Cut a piece of medium-weight fusible interfacing 12” x 11” so you can make the soft quilting cotton a bit stiffer.
Cut 2 strips of embellishment fabric – 13” x 1”. Use the grid lines of your cutting mat or the provided PDF pattern.
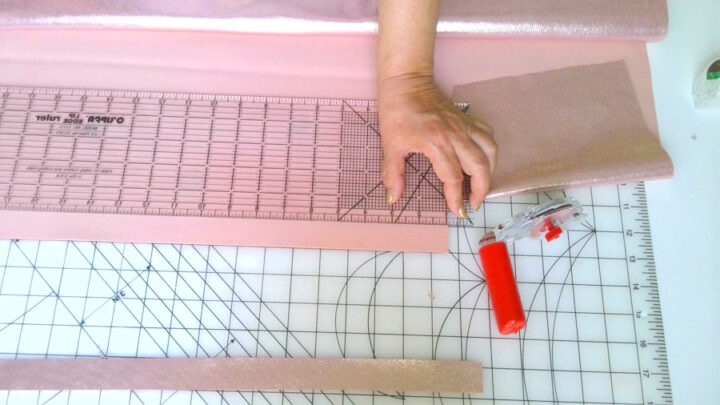
Cut 2 strips of interfacing to make the embellishment fabric stiffer.
Cut 2 pieces from a ribbon for the loops – 2.5” long each.
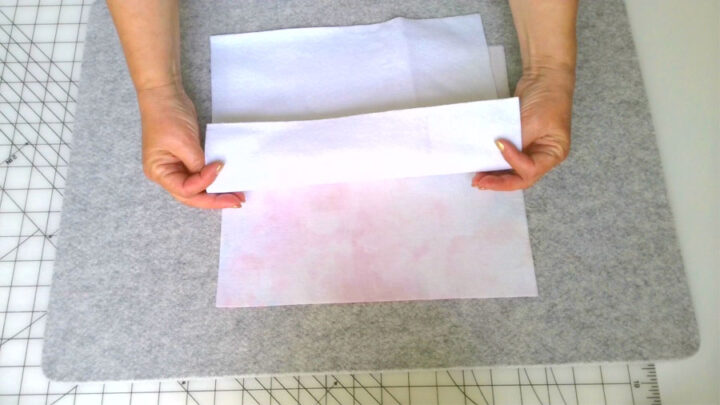
So, I did all the cutting and now I need to go to my iron and attach the pieces of fusible fleece and interfacing to the fabric.
Fuse interfacing to the fabric pieces (leave the lining piece without interfacing).
✅ Related tutorial: How to fuse interfacing
I used fusible fleece for the main rectangle but I didn’t fuse the entire piece to the fabric, I fused it only around the edges to keep it in place while sewing the pouch. If you are using just regular batting, pin it to the quilting cotton so it stays attached to the fabric.
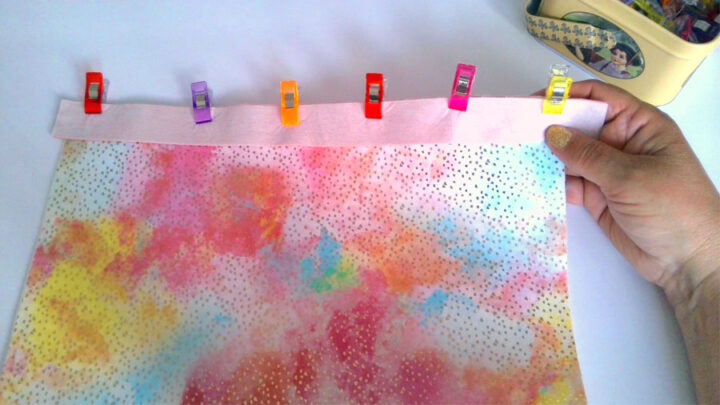
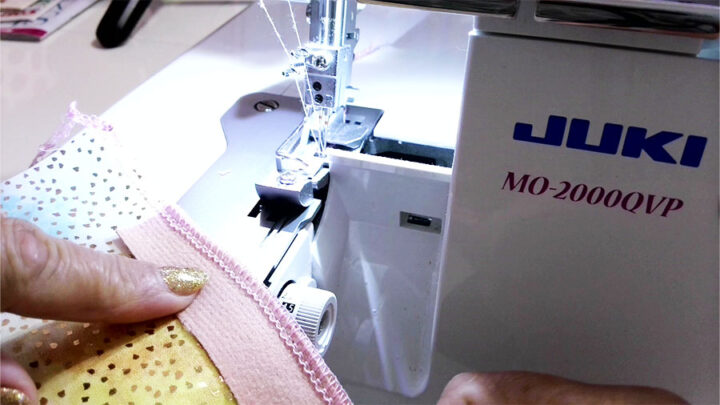
Step 3. Attach embellishment strips to the fabric rectangle
Place interfaced strips of fabric (they are cut from vinyl in my case) right side down on the right side of the main fabric. Use sewing clips to secure the strips.
Go to your serger and make a test stitch checking all the settings of the serger. Use 4 thread 2 needle serger stitch. I tried the settings for this stitch on the same fabric and I see that the stitch is pretty good but still is not right.
The only thing that I don’t like is the needle thread. It can be seen on the right side of the fabric. Not good!
So I need to tighten the left needle thread tension and I also want to make the stitch length a little smaller. Now it’s set at 2.5. I will make it 2. And this is it, I like how it is and will use these settings for my project.
The very good thing is that the width of this serger stitch is quarter-inch – that’s the size of my seam allowances for this zipper pouch.
Stitch the strips to the main fabric (don’t forget – the batting is attached to the main fabric so the batting goes into the seams too).
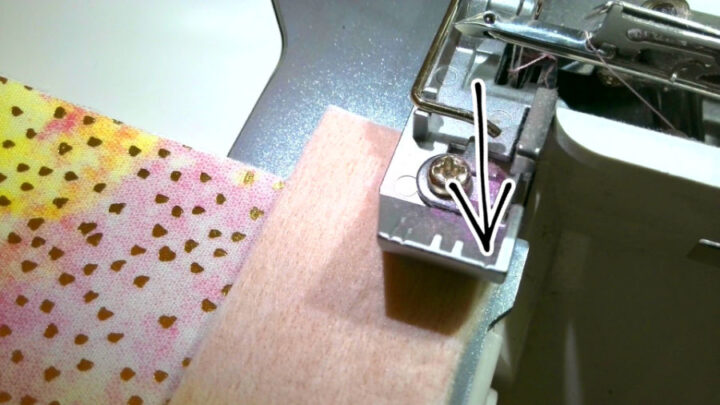
Make sure not to cut anything with the serger knife.
Do you know how to do it? The serger presser foot usually has this line – it marks the knife cutting line. So if you align this mark with the fabric edge you will not cut anything.
Become A Serger Expert With My Ultimate Serger Bundle
Serger Success Kit – a bundle of 90 printable sheets that will cut through the confusion and overwhelm and help you to learn your serger and use it for all your sewing projects.

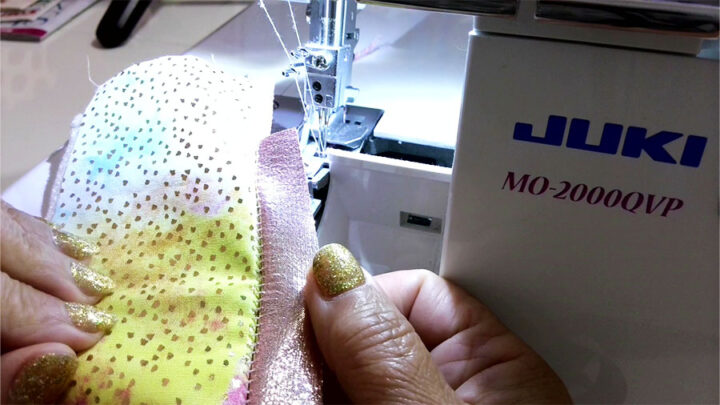
Take the clips out one by one when you stitching the fabric.
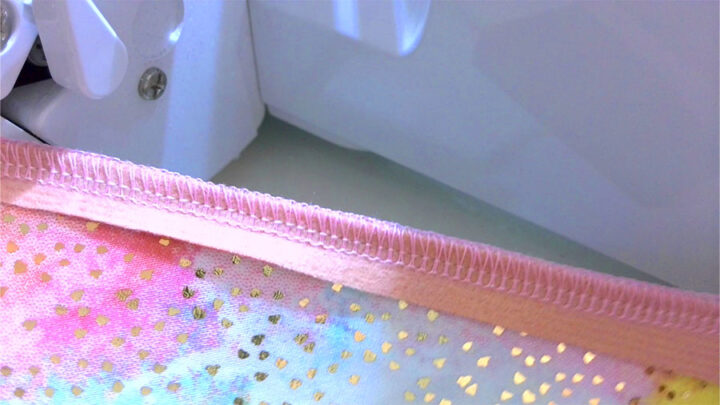
Press the seam allowances toward the strips.
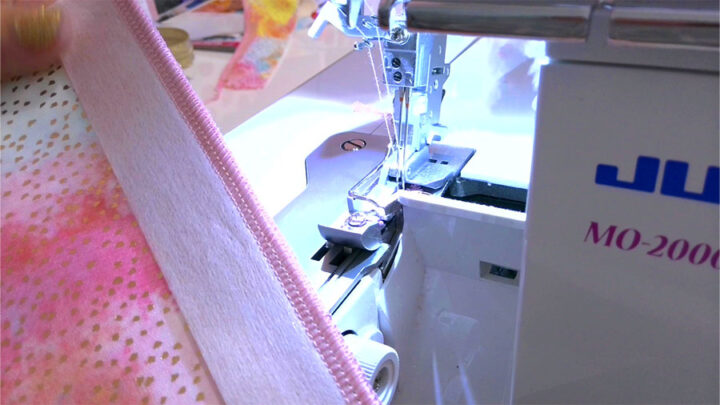
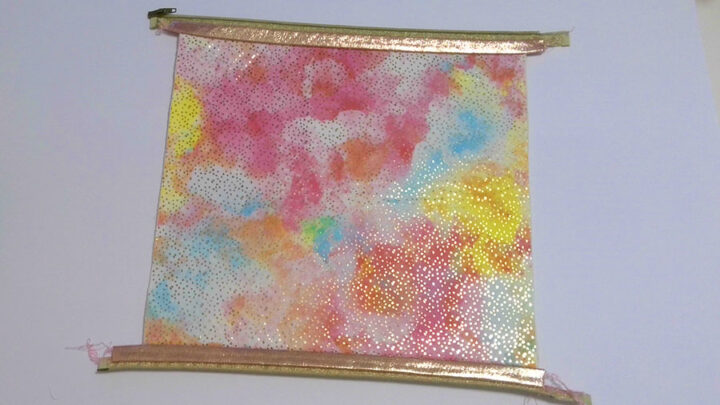
Step 4. Sew a zipper
So, now is the time to attach a zipper.
Place the zipper right side on the right side of the fabric strip as you see in the image below. Use sewing clips to hold the zipper. Open the zipper and go to your serger.
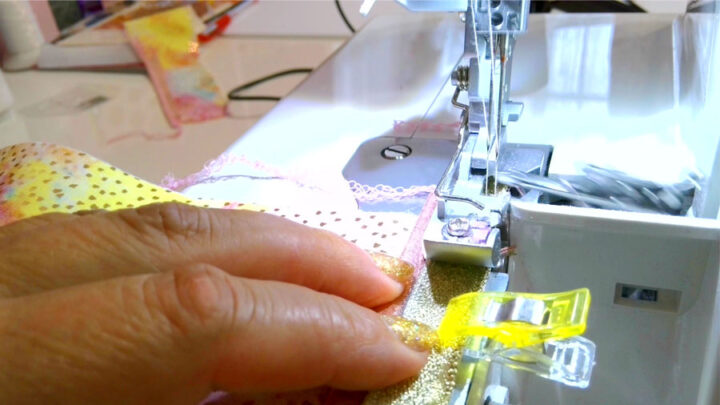
Start stitching on the zipper side about 1 inch from the fabric edge.
When you come to the fabric be sure to align the zipper and the fabric edge.
Also, make sure not to cut anything with the serger knife. The zipper lace is quite narrow so we don’t want to cut it even more.
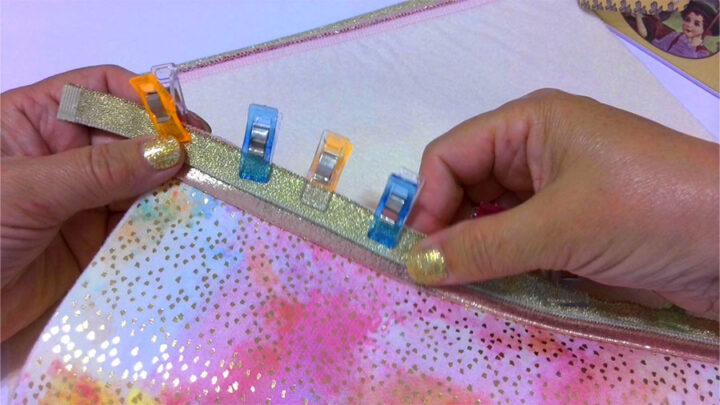
Ok, this part of the zipper is attached.
Now we need to attach the other part. It’s very easy to do. Close the zipper, fold the fabric as you see in the image, and align the fabric edges. Use wonder clips again to secure the zipper lace in place.

After that, open the zipper again.
And now you stitch again on the zipper side.
Press the seam allowances toward the fabric. Use pressing cloth so you don’t destroy the zipper teeth and the fabric.
Step 5. Sew the lining for the zipper pouch
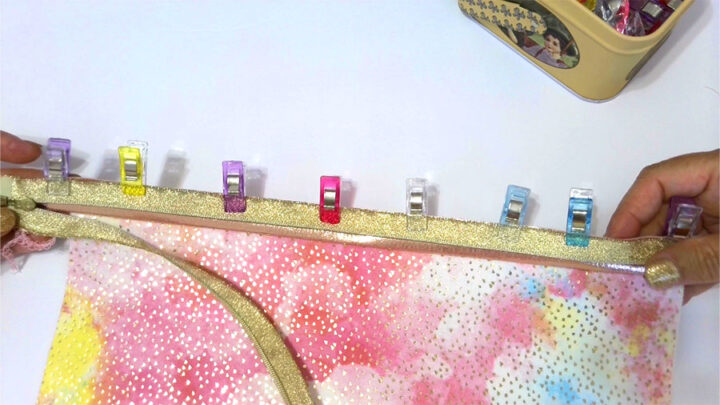
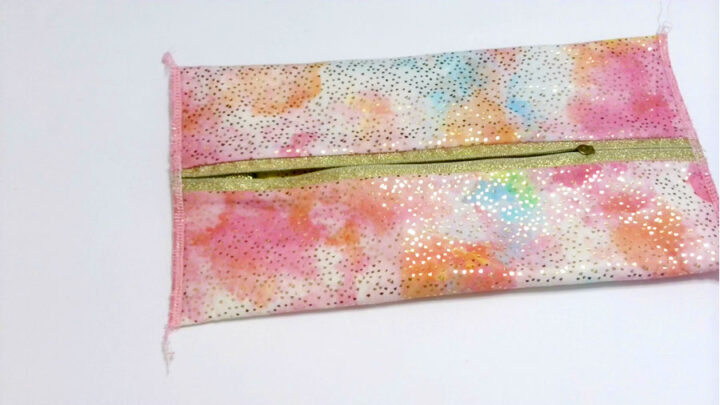
Now both sides of the zipper are attached to the fabric and it’s time to attach the lining.
Place the lining ( you remember it’s a square piece of fabric 12” x 12”) on top of the fabric with an attached zipper, right side to the right side. That’s how it’s going. Use wonder clips again. Align both squares. The zipper lace will be sandwiched between the fabric.
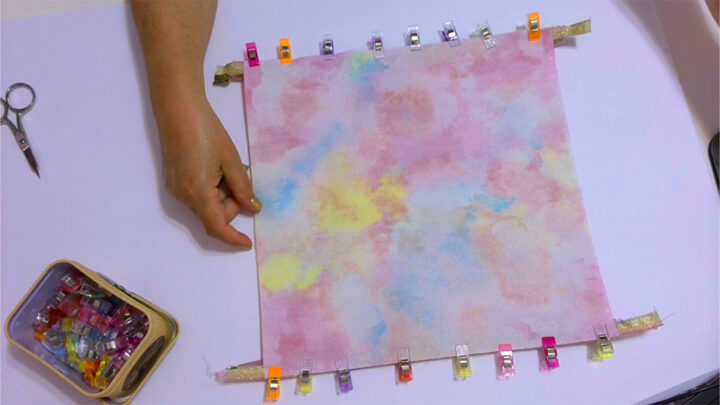
Start stitching one inch from the fabric edges. Make sure to perfectly align the fabrics at the corner.
Again, don’t cut anything with the serger knife. Align the mark on the presser foot with the fabric edges.
I attached the lining and the next step is pressing, so let’s turn it like this and go to the iron, we need to close the zipper for this.
Ok, I pressed the fabric around the zipper.
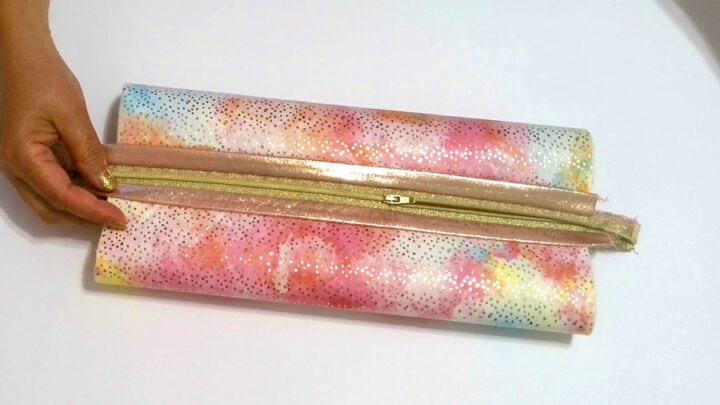
Turn the bag lining side out.
Now open the zipper, not fully, only to the middle of the bag.
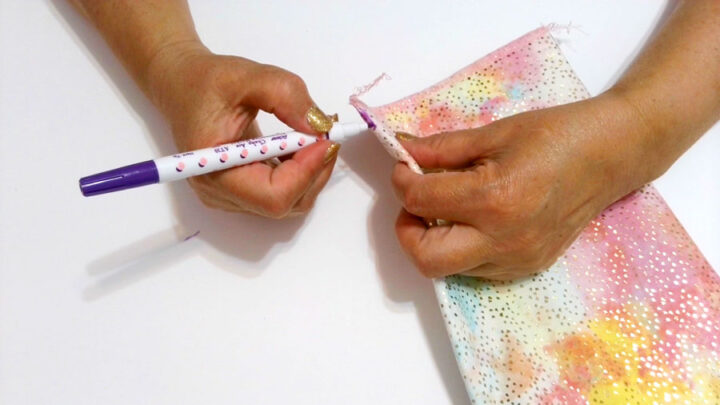
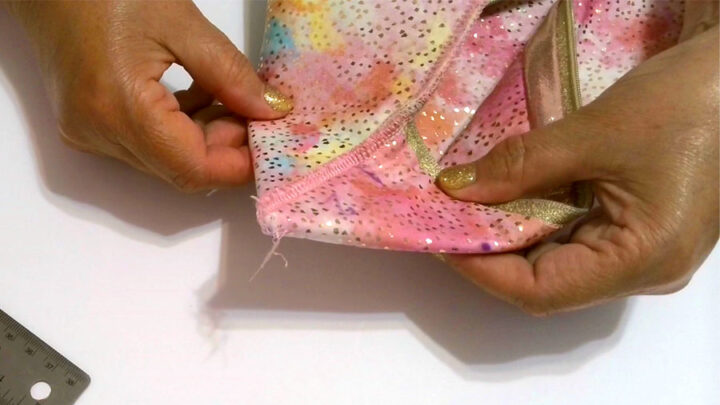
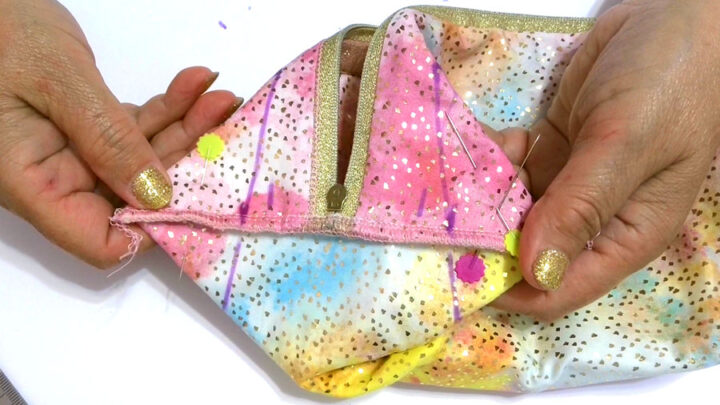
Step 6. Sew the side seams of the zipper pouch
The next step – fold it like this you see in the image below so you can find the center point of the pouch. And mark it. I am using a disappearing ink pen. I really like to use it as my marking tool. Put the mark on the right side of the bag, not on the lining side. And make the same on the other side.
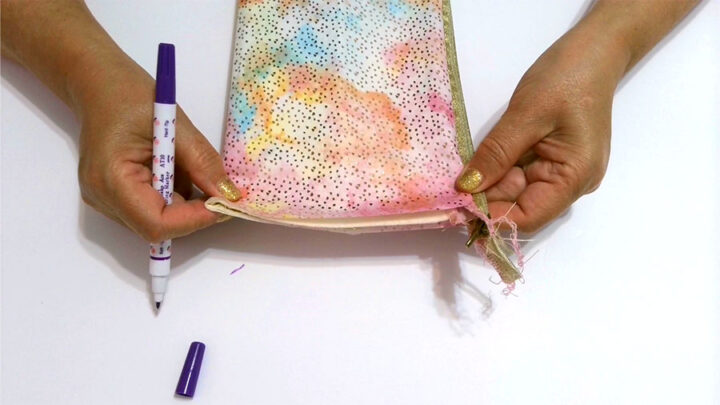
The next step is to align the teeth of the zipper with these marks. Use pins to keep it in place.
And the same on the other side. Don’t close the zipper, keep it open.
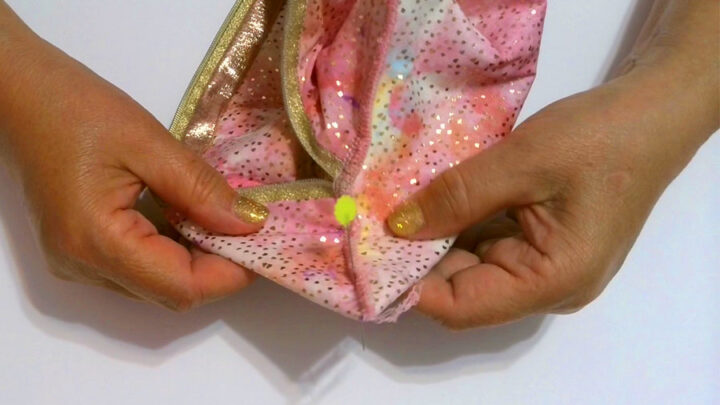
But before that, you want to insert the loops. I am going to use a ribbon, but the loops can be easily made from the same fabric as our zipper pouch.
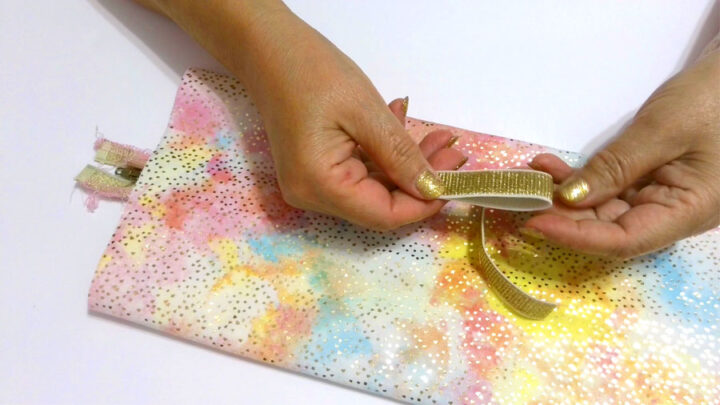
Here we might have a small problem. The loops usually unfold and we can’t keep them in place with a pin, because we are going to stitch the seam by serger.
So I am using fabric glue to keep these small loops folded and exactly where I want them to be – in the center of the bag. This part of the loop is going outside of the stitch so it wouldn’t gum up the serger needles.

I have to put the zipper ends so they overlap a bit. So when I sew by serger they don’t go too far apart. If you don’t do this you might end up with a big gap here. So put them on top of each other.
Let’s go to the other side now. You can cut the zipper ends now.
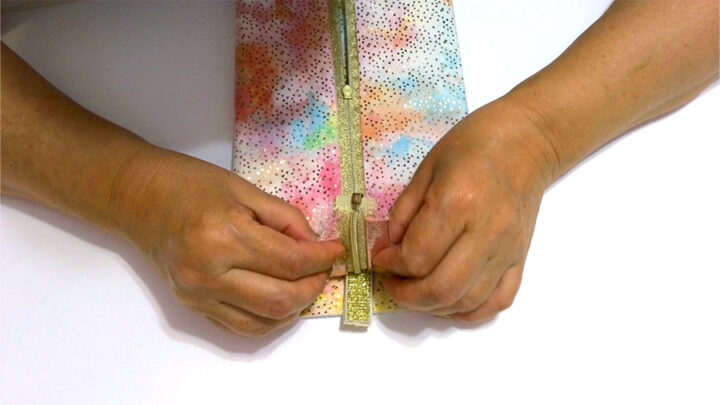
The next step is stitching by serger – don’t cut the seam allowances with the serger knife. The serger will go over the plastic zipper teeth without any problem.
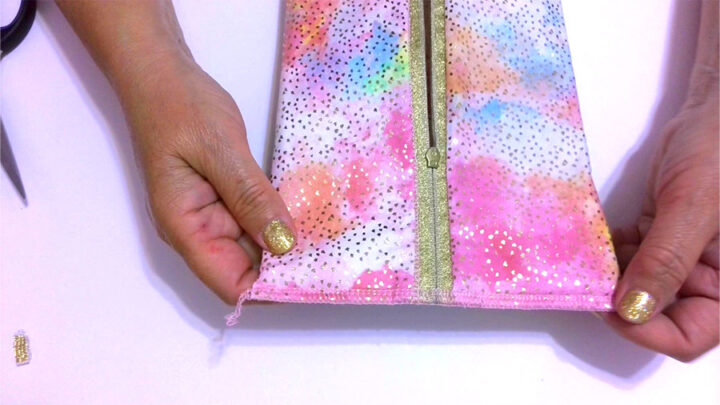
So what do we have here?
I made the seams on both sides of the bag. Don’t cut the thread tails yet. See the zipper teeth on the left side are very close to each other. As they suppose to be.
Now I would use a sewing machine and make a few stitches over the zipper teeth to secure the seams even more.
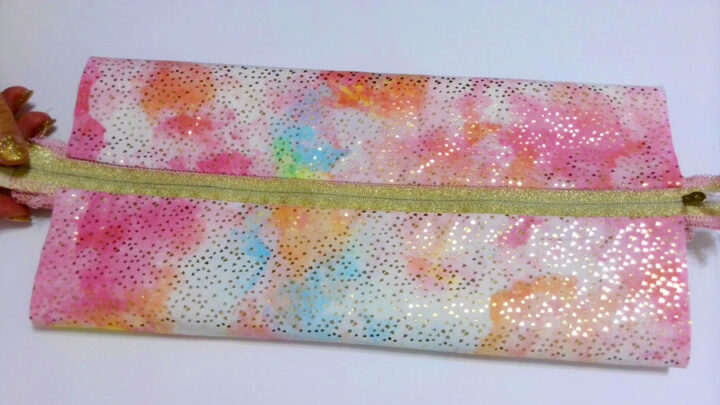
Step 7. Finish the zipper pouch
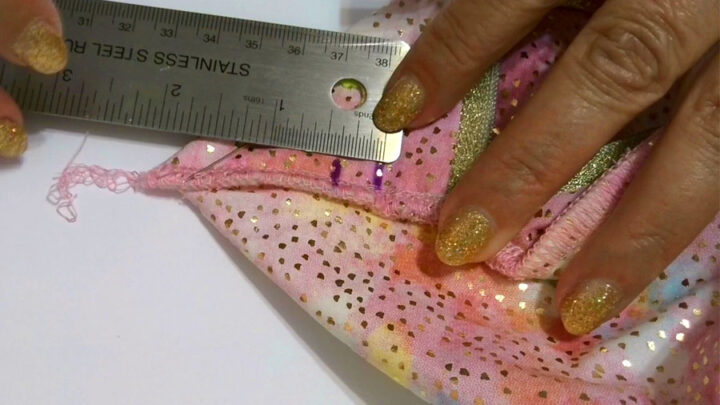
Take your marker and mark the fold lines in all corners. We will use the marks a bit later.
Now I am going to use my ruler to find a few points. I am going to mark in inches. But I will tell you the equivalent in centimeters too.
From every fold line measure exactly 2 inches (or 5 cm) toward the zipper. Put a mark.

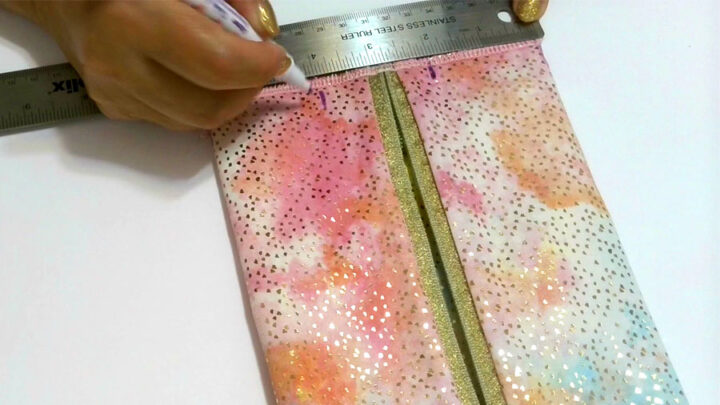
From this mark measure 2 ⅜ inch parallel to the zipper. 2 ⅜ inch is exactly 6cm. From the very edge.
Mark these points.
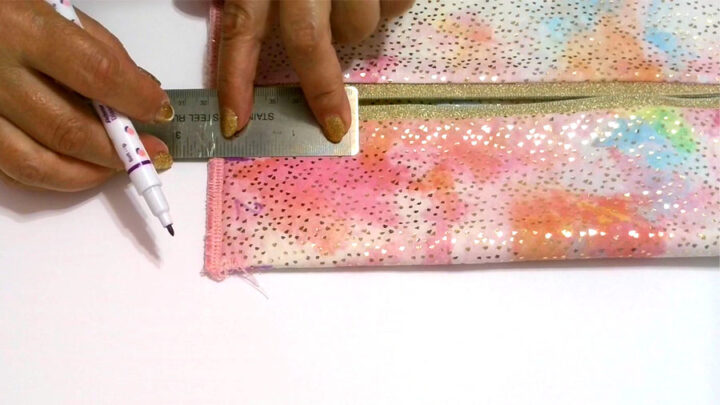

Now we have to fold the corner in such a way so the fold is going from the corner to this point we just marked.
Make sure that the seam line is aligning with the fold mark we made before (use a pin for this). If they are not aligning move it a little until they are. When you position the corner correctly pin it.
Now let’s put another mark. Measure ⅜ inch (or 1 cm) from this point toward the corner.
Draw a line connecting these 2 points. This is our stitching line for the zipper pouch.

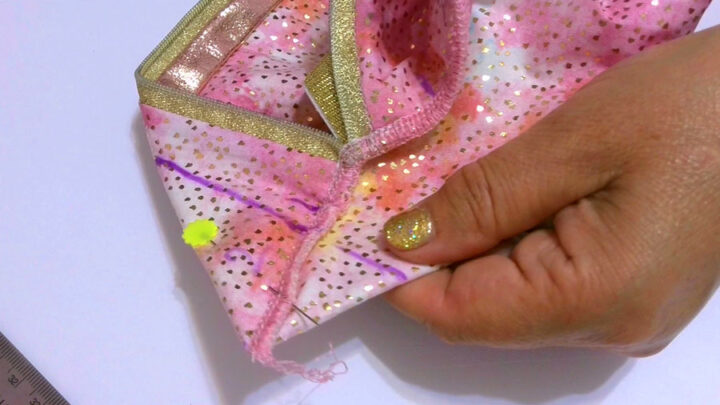
Let’s do the same with the other corner.
Now we have two stitching lines and they are exactly symmetrical to each other toward the center of the zipper.
Do the same with the opposite corners.
So I stitched the corners on my serger. I hope you know how to stitch so the seam goes exactly at the marked line. You have to align the left needle mark on the presser foot with the marked line on the fabric.
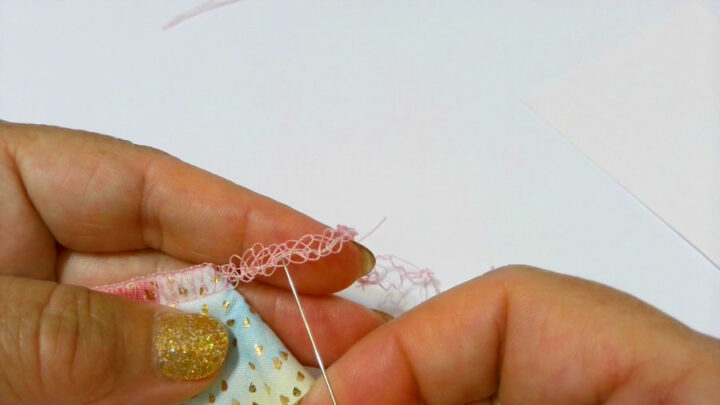
Now I am going to deal with thread tails.
Take the 2 needle threads out of the stitch, and the looper threads will come apart. Now tie the thread ends and cut close to the knot. I will put a small amount of glue so they will stay put. This is not going to touch any skins so glue is good here.
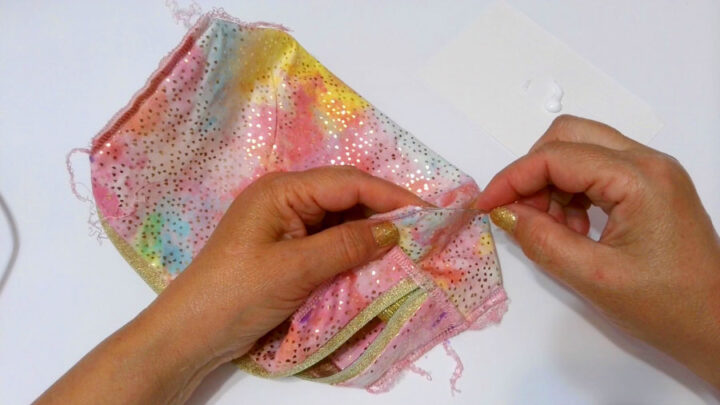
Turn the zipper pouch right side out. And it’s ready.
Did you find this tutorial helpful? If so, save this pin (see below) on your sewing board so you can come to this tutorial later when you need this information on how to make a zipper pouch, and follow me on Pinterest for more tips, tutorials, and inspiration!
latest posts
- What Do You Call a Person Who Sews? I Asked My Readers and Got 1,408 Opinions
- DIY Round Purse: PDF Sewing Pattern and Detailed Instructions
- Mini Wonder Clips By Clover: Useful Sewing Tool Or Just Another Notion?
- Non-Slip Grips For Quilting Rulers: A Small Notion With A Useful Job
- Fabric Eraser for Sewing: What It Removes and When to Use It
- What Is The Best Thread For Sewing Machine Projects? Let’s Find Out!
- Butterfly Quilt Block Tutorial – Foundation Paper Piecing
- How To Sew Quilt Squares So The Corners Match
- Sewing With Fork Pins: How They Help With Pattern Matching, Slippery Fabric, And Seams