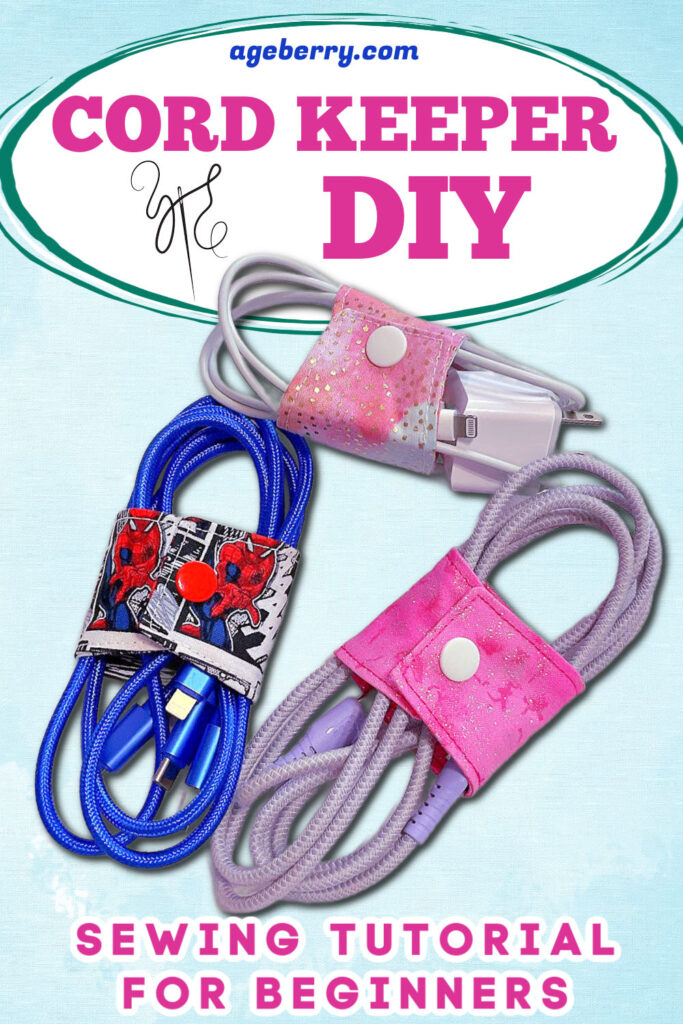
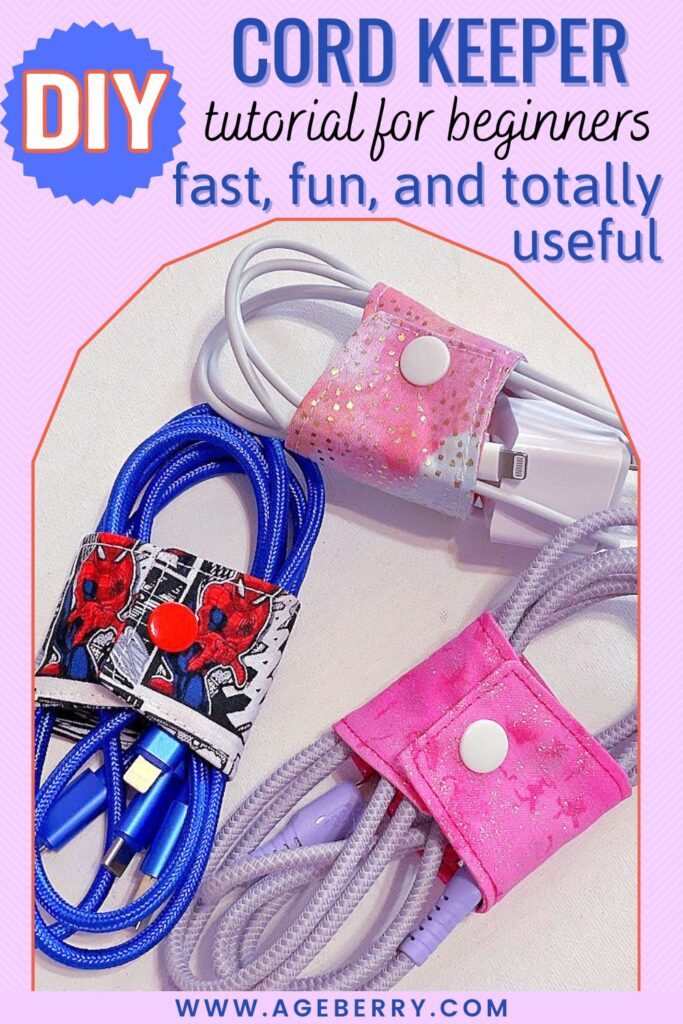
DIY Cord Keeper Tutorial for Beginners: Fast, Fun, and Totally Useful
There’s a special kind of chaos that lives at the bottom of a handbag or drawer – a tangled jungle of earbuds, phone chargers, and mystery cords that somehow reproduce when you’re not looking. But not today. Today, we sew order. Today, we sew cord keepers.
This tutorial will guide you through making your own fabric cord keepers using KAM snaps. These handy little organizers are quick, clever, and dare I say… sew cute you’ll want to make dozens.
And yes, this is another one of those “10-minute sewing projects” I joke about – like all those other “quick” projects that somehow end with you at your wit’s end, as you still sit unthreaded, untangled, and slightly betrayed by the concept of time.
If you love parody sewing projects as much as I do, check out my funny round-up of “10-minute” sewing dis-adventures – I started a 10-minute sewing project yesterday. I hope to finish it tomorrow. Spoiler: not one of them took ten minutes. But this one? It might actually be close.
Get ready to transform your closet drama of tangled cords into a well-organized symphony of neatness. We’re not just sewing today – we’re staging a cord intervention.
What You’ll Need
- Small pieces of cotton fabric
- Lightweight fusible interfacing
- Template (available in my Resource Library for subscribers to my newsletter)
- KAM snaps and snap-setting pliers
- Scissors or rotary cutter
- Point turner
- Your choice of drama-free music (optional)
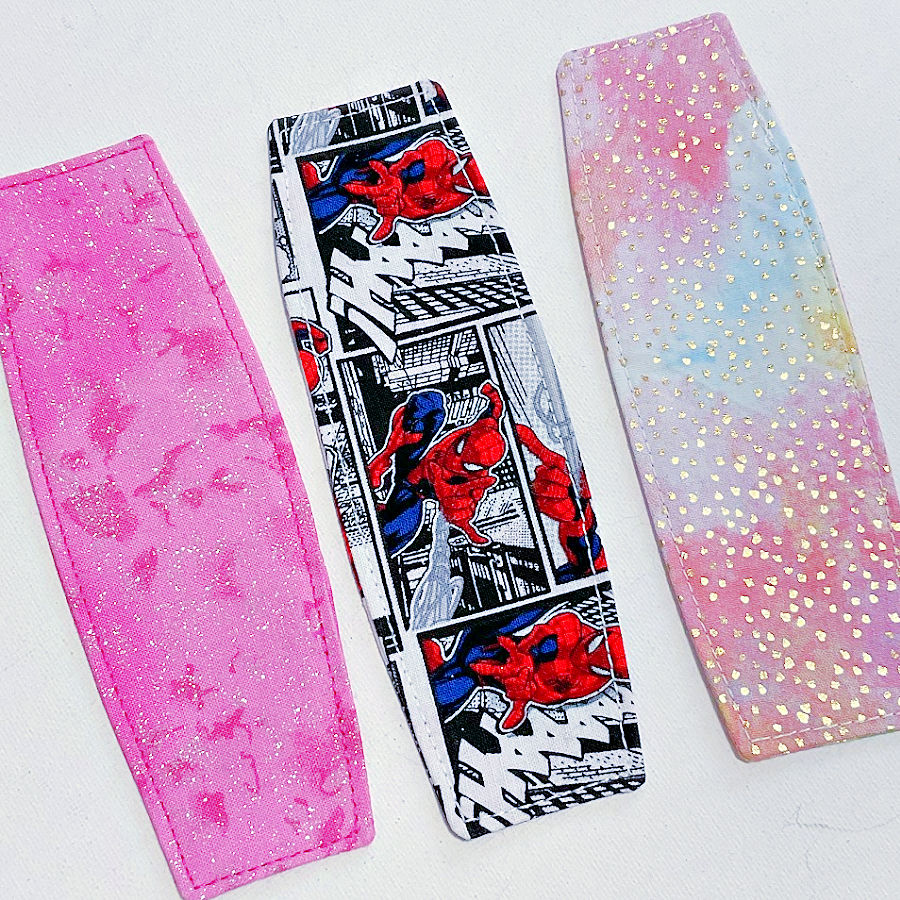
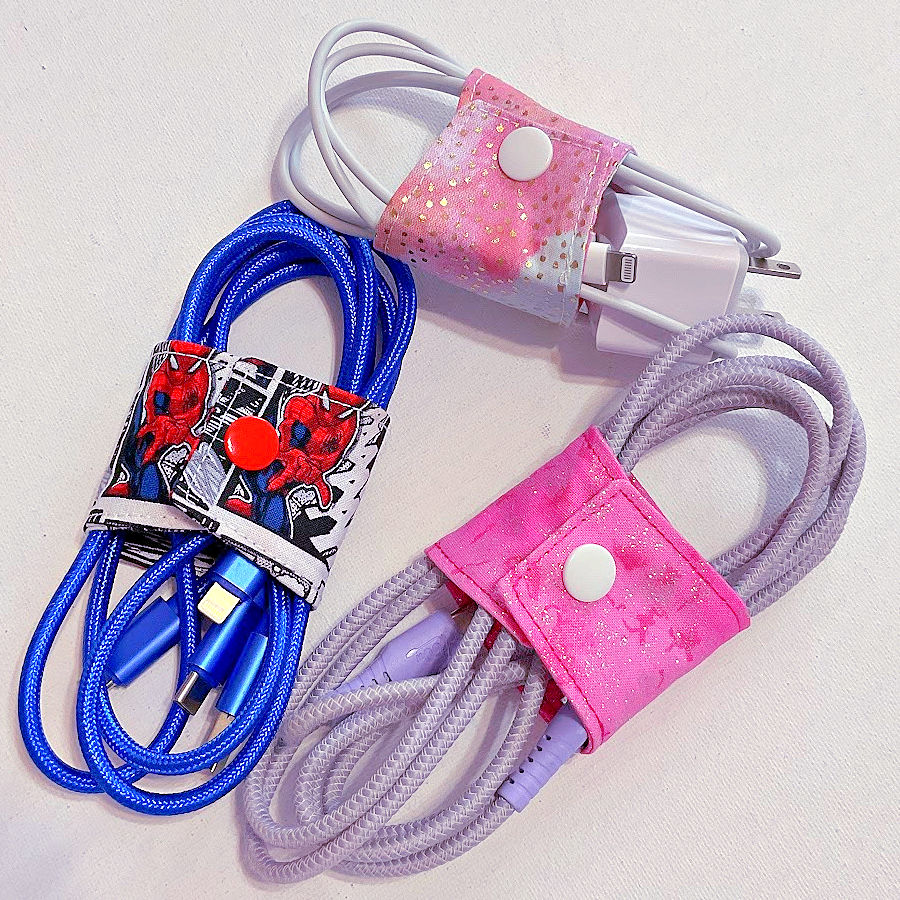
I am making three cord keepers in this tutorial. Why three? Because one is never enough. You’ll give one away, misplace another, and suddenly the third is your only line of defense against cord chaos. But honestly? You should make more. Five? Ten?
These are quick, satisfying, and strangely addictive. Once you see how useful they are, you’ll want one for every cord you own – and maybe a few extras for surprise gifts. Plus, making them assembly-line style saves time – once you’re in the groove, each step flows into the next.
And yes, this is a wonderful scrap-buster. If your fabric bin is overflowing with odd bits you couldn’t bring yourself to toss, this is their time to shine. Each keeper only needs a small rectangle, so those leftover corners from bigger projects? They’re perfect here.
✅ Related tutorial: 21 Scrap Fabric Projects to Transform Your Textile Trash into Treasure
This also makes a great back-to-school sewing project. Whether it’s for organizing USB cables, headphone cords, or charging wires, these are small enough for lunchboxes and backpacks. Plus, kids love the clicky KAM snaps. You can even make them in school colors or with fabric that matches their pencil pouch. Organization never looked so cute.
I’ve created a handy template to make cutting easier. You can find it in my Resource Library, free for all subscribers to my newsletter. If you’re already on the list, just use your password to log in and download it. If not, it only takes a moment to sign up – and you’ll get instant access to this template along with all my other free sewing patterns and printable goodies.
Note: Some of the links on this page are affiliate links. This means I will receive a commission if you order a product through one of my links. I only recommend products I believe in and use myself.
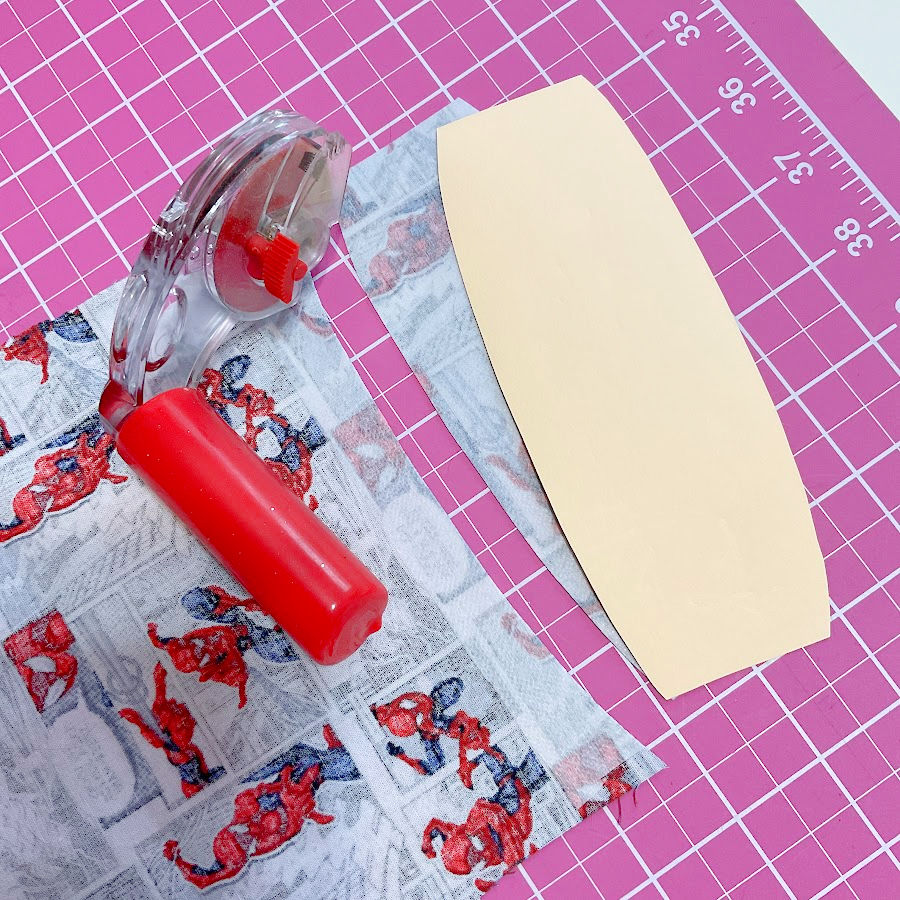
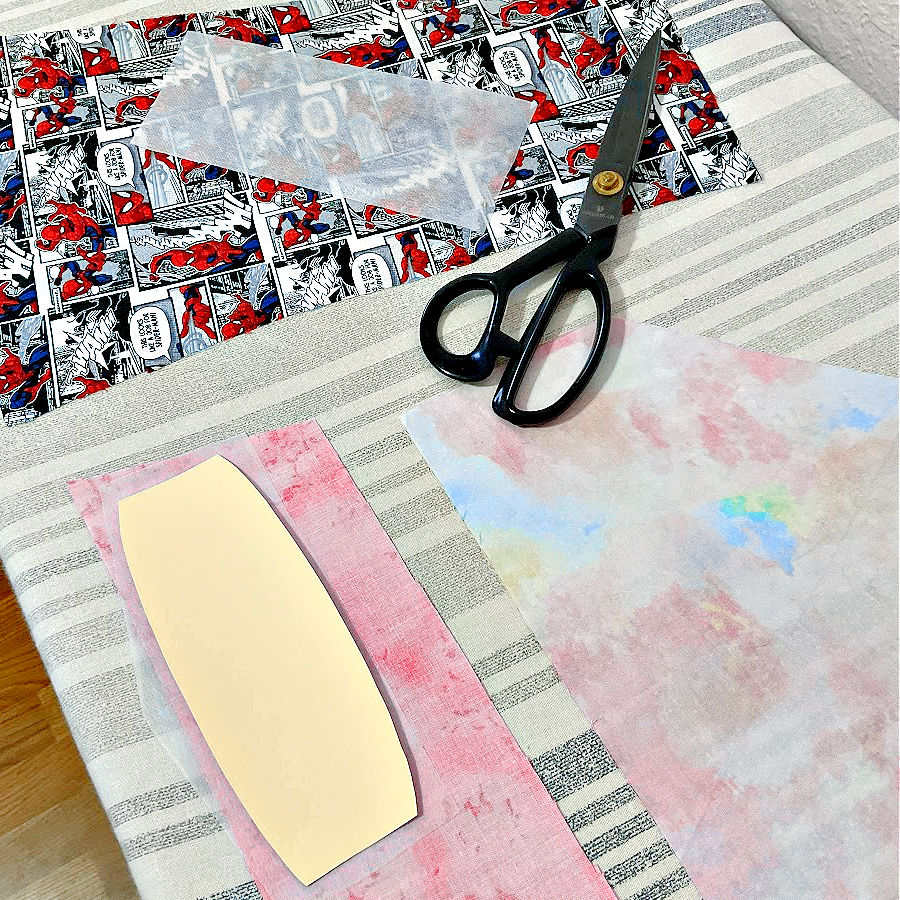
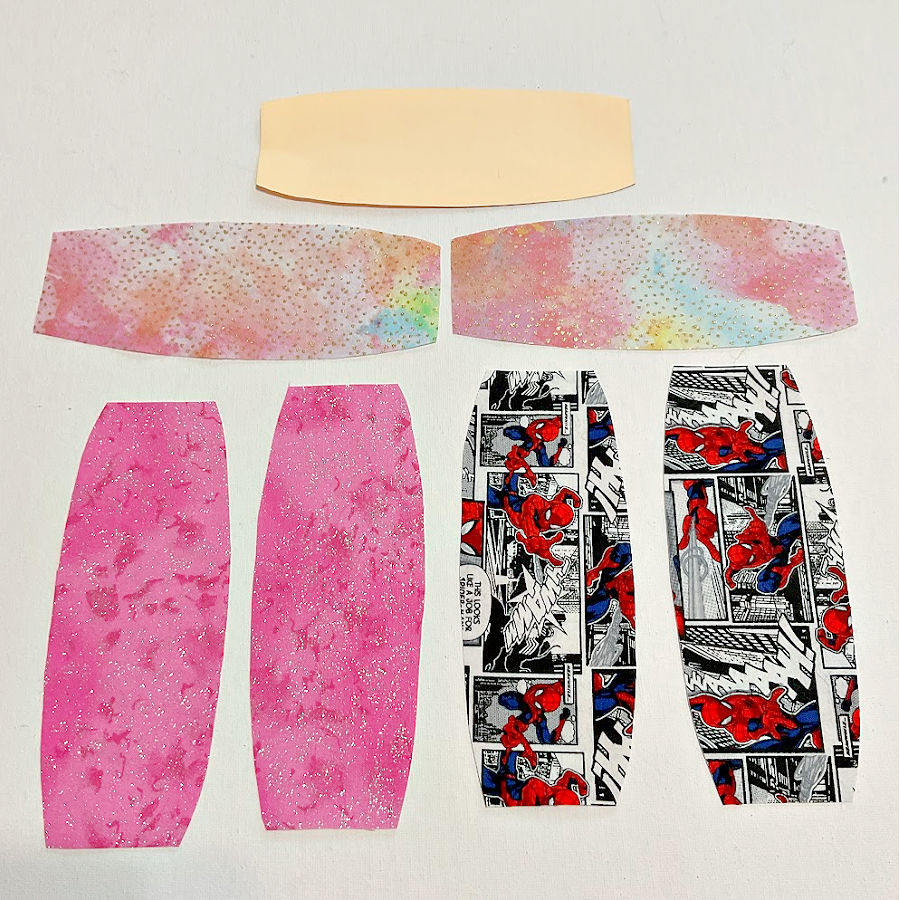
Step 1. Choose Your Fabric and Cut with the Template
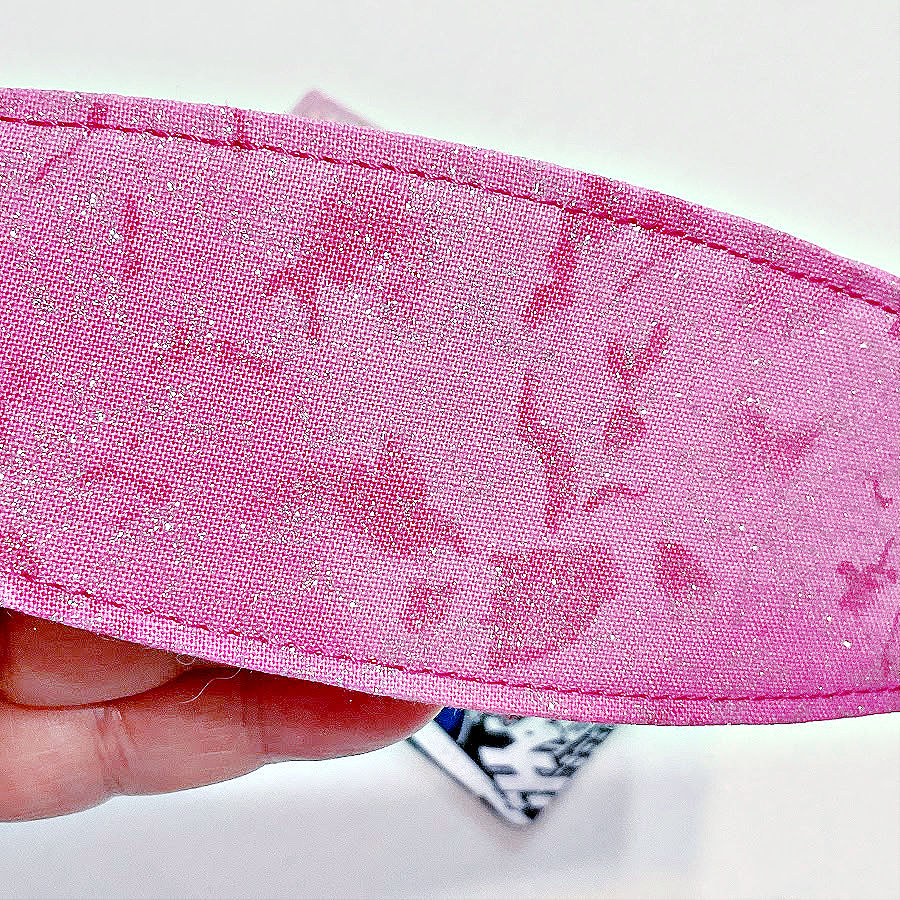
Start by picking cotton fabrics. This is a perfect project for using up those cute scraps you’ve been saving (or hoarding, no judgment).
You’ll also need lightweight fusible interfacing. It gives the cord keeper the structure it needs to snap and hold its shape.
Apply interfacing to just one piece – the outer fabric only. No need to add it to both layers.
Use the template from my Resource Library to cut everything out.
Now, about cutting: You can use good old-fashioned fabric scissors, of course. But I love using my rotary cutter for this. No ruler needed – just place the template (I cut mine from medium-weight cardstock) on your fabric and carefully glide the blade around it. Slowly. Carefully. Respect the blade. These things are sharp enough to cut through many layers, so keep those fingers clear.

My tip: Fuse the interfacing before cutting your shape. It keeps everything stable and saves you from trimming twice. Just be sure to place the adhesive side down – that’s the side that sticks to fabric, not your iron.


Want to know more about interfacing? I’ve written a detailed guide to fusible interfacing – how to choose it, apply it, and avoid the most common mistakes – How To Use Fusible Interfacing (Video + Tips And Tricks)
And if your iron now has a shiny coat of fusible goo? Don’t worry – I’ve been there. Here’s a video that shows you how to clean it without crying: How to clean your iron.

Ready to cut? Great. Just try not to blink while slicing.
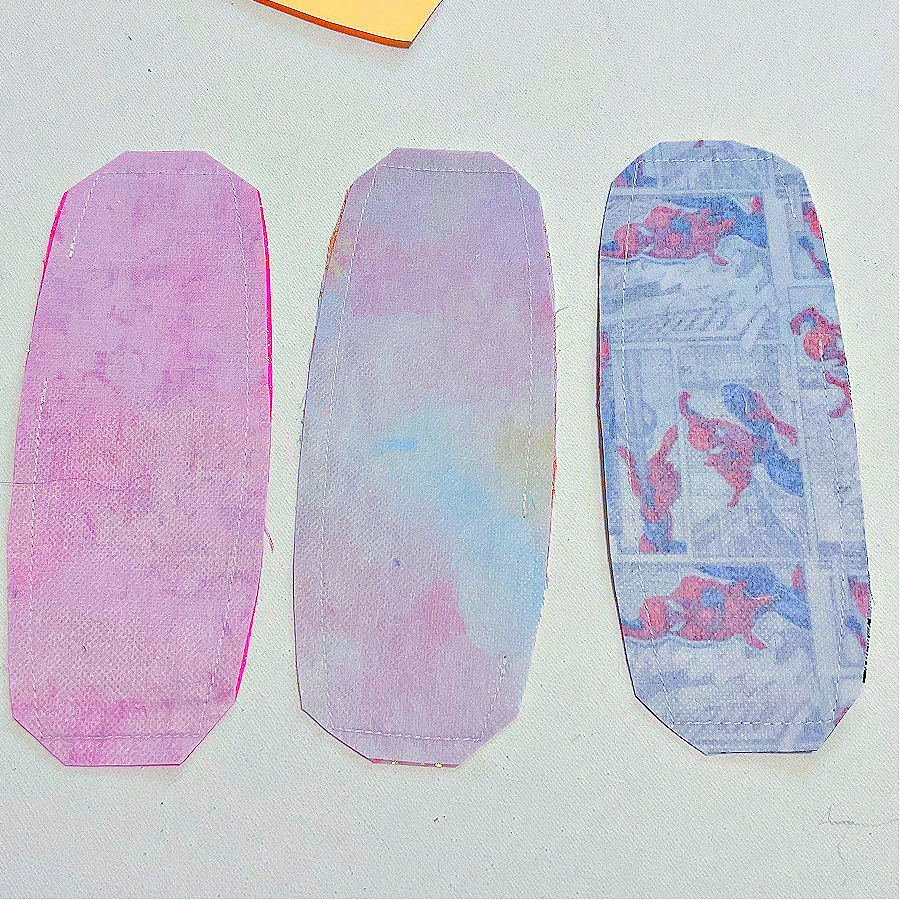
And this is what you’ll have after cutting – three outer fabric pieces with interfacing, and three inner fabric pieces. Colorful, tidy, and ready to sew. We use the same template for both inner and outer fabric pieces.
Step 2. Sew Right Sides Together
Prepare your sewing machine. Load matching thread in the top and bobbin, insert a new needle (a universal 80/12 works well here), and attach your regular presser foot. Set your stitch length to 2.5 mm, check the tension, and you’re good to go.
✅ Related tutorial: What is the stitch length and how to adjust it for different fabrics – a sewing tutorial
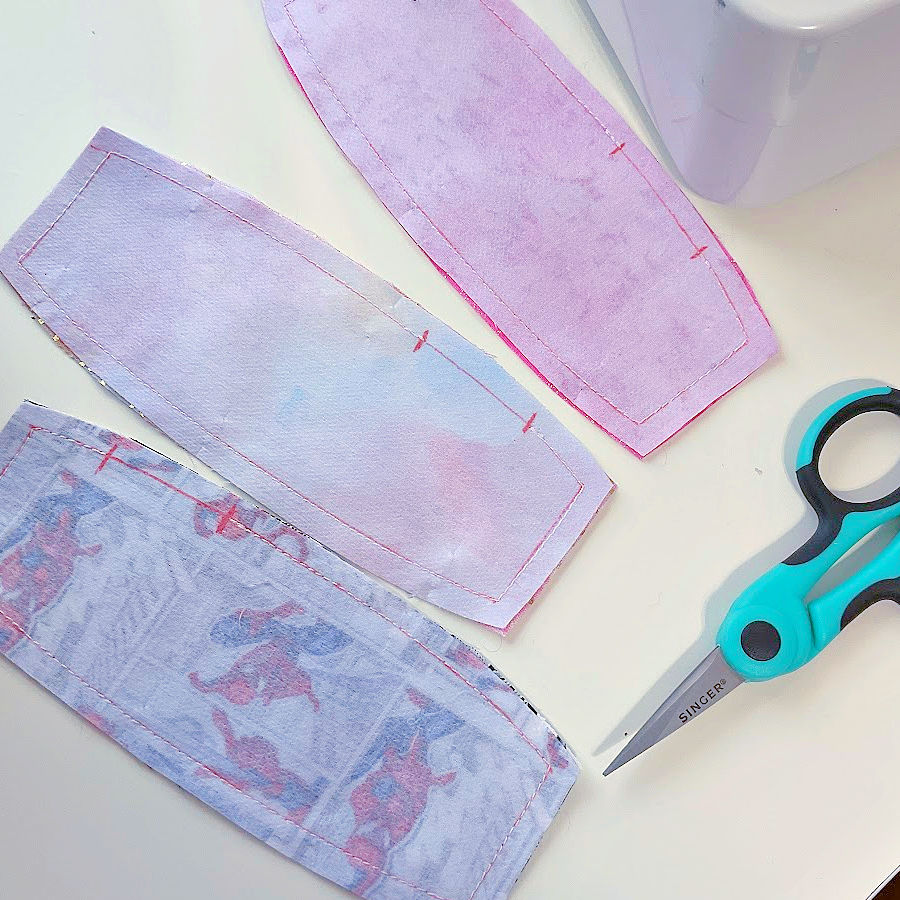
Now, place your two fabric pieces right sides together – outer fabric with interfacing and inner fabric, perfectly aligned. You’ll be sewing around the entire shape, leaving a gap on one long side. This opening will let you turn the piece right side out later.
Seam allowance tip: These little curves are tight. Sewing a 1/4 inch seam allowance on a small piece like this can be tricky. That’s why I included a second version of the template – one without seam allowances.Here’s what I do.
I place this second template on top of the fabric sandwich and trace the stitching line directly onto the fabric using my Frixion pen. (If you haven’t used one before, they’re magic – the ink disappears with heat. Just run your iron over the lines after you’re done and poof! They’re gone.)
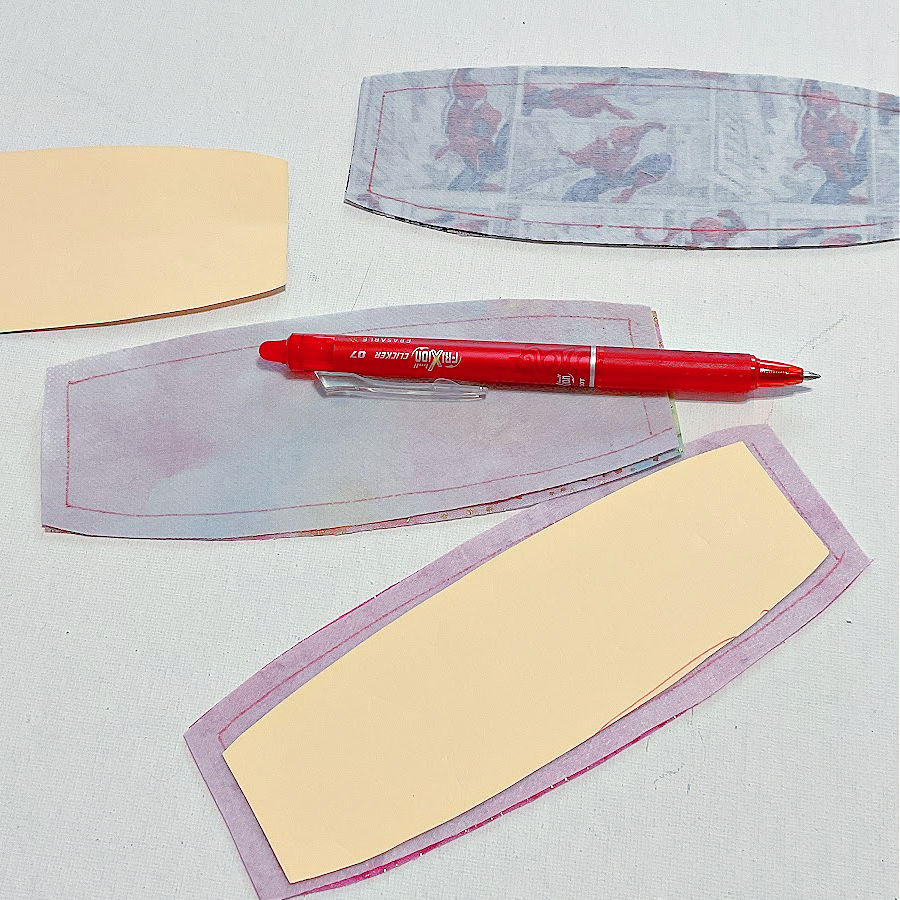

Mark the stitching line and clearly mark the gap. I like to add little red tick marks to remind myself not to go rogue with the presser foot and sew the whole thing shut.
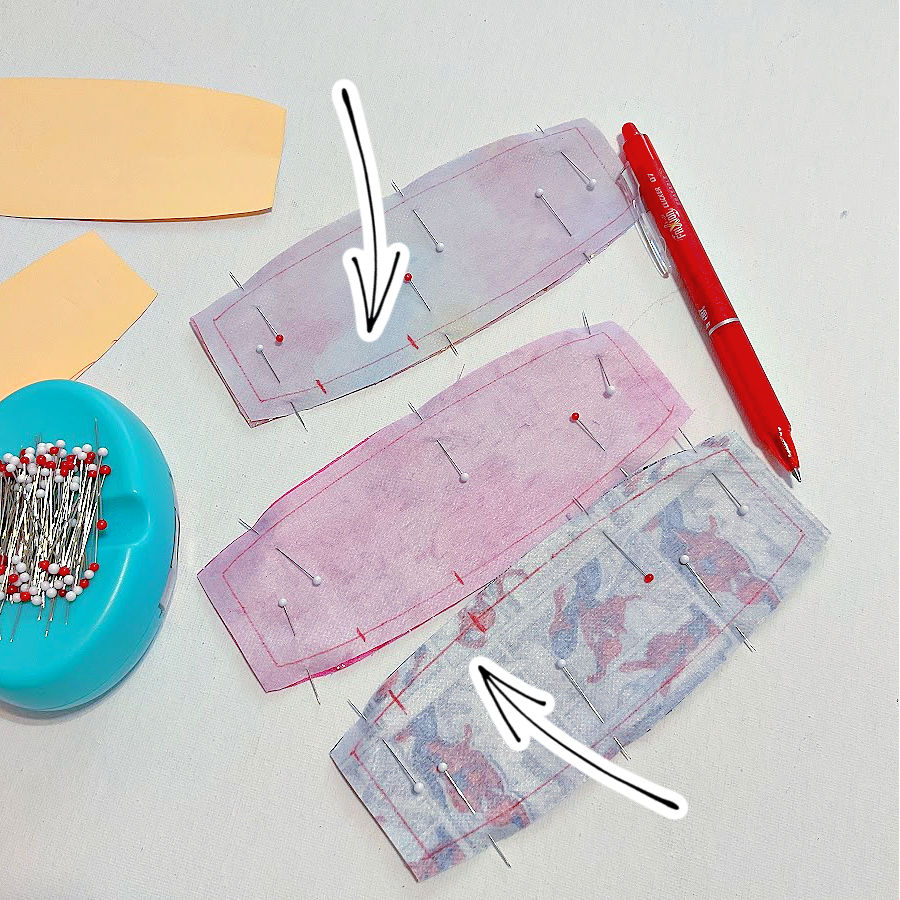
Pin the layers together because they’re shifty. It keeps everything stable while sewing.
✅ Related tutorial: Types of sewing pins and their uses: all you need to know about straight pins for sewing
Start sewing at one end of the marked gap.
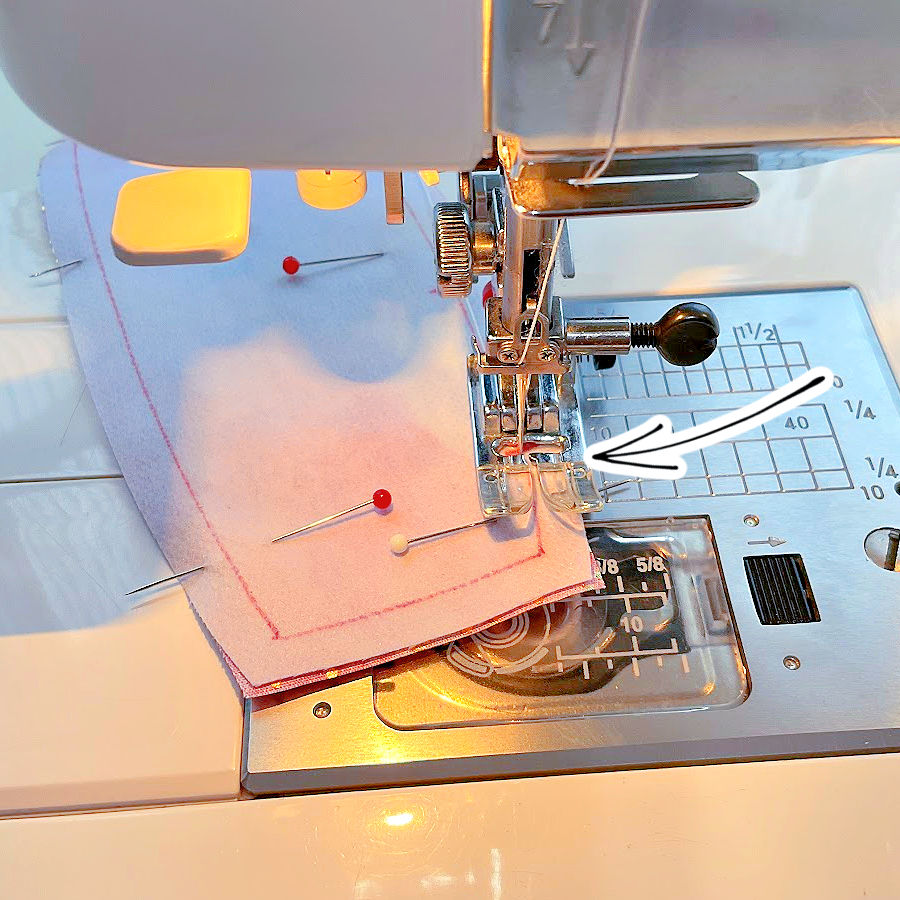
Backstitch at the beginning and end to secure your stitches. And please – do your pins a favor and remove them before you sew over them. They’ve done nothing to deserve that kind of treatment.
Once each piece is sewn, give it a quick press with your iron. It helps set the stitches and makes the next step easier. If you marked your stitching lines with a Frixion pen earlier, now’s your chance to sweep them away.
✅ Related tutorial: Pressing Matters: 15 Common Ironing Mistakes to Avoid

Step 3. Turn and Press
First, clip diagonally across the corners without snipping through your stitching. When you turn your fabric right side out, clipped corners help reduce bulk. If you skip this step, your corners will look more like squishy lumps than neat angles. Clipping removes the extra fabric that bunches up inside, so your corners can come out looking crisp and clean.
Next, turn it right side out through that little gap you so thoughtfully left open. It might feel a bit like pulling socks through a keyhole, but stay with it.
Use a point turner (or the back end of a pen or chopstick – no judgment) to gently push out those corners and curved edges. Gently is the key word here. We’re aiming for crisp seams, not a rip in the time-space-fabric continuum.
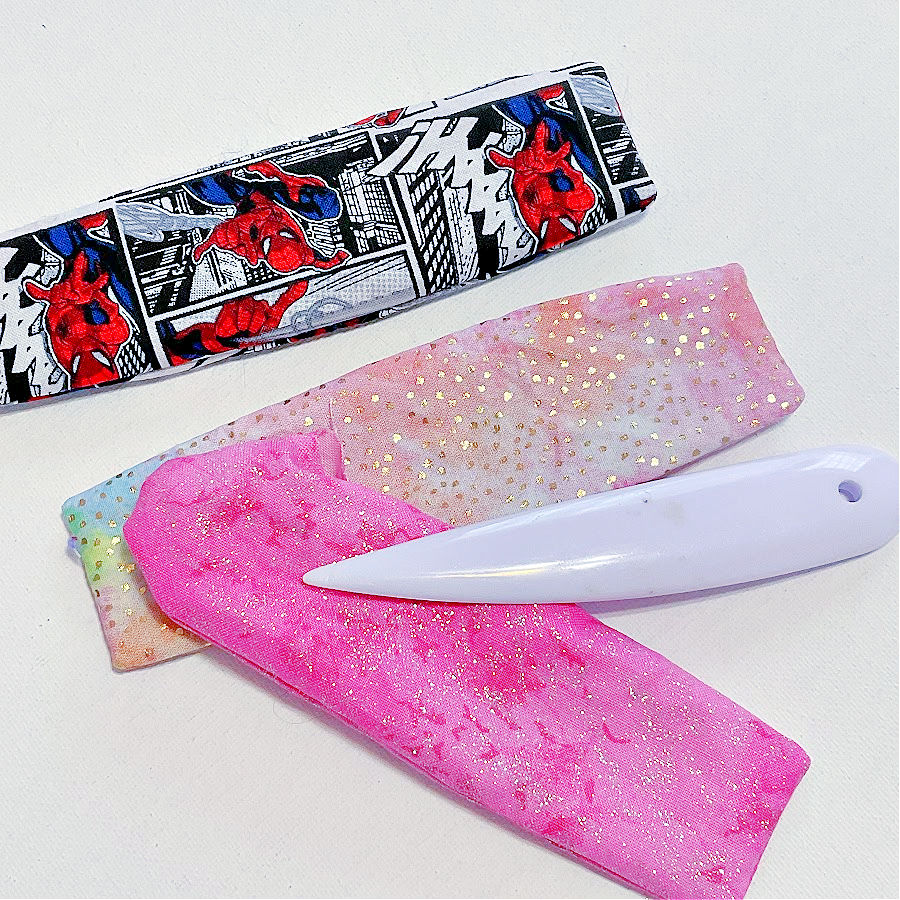

Once you’ve wrestled everything into place, press your piece flat with an iron. Tuck the raw edges from the opening to the inside as you press. That little gap should now look like it was never even there.
Take a second to admire your work. It’s officially looking like something useful – and cute! You’re halfway to cord-wrangling greatness.
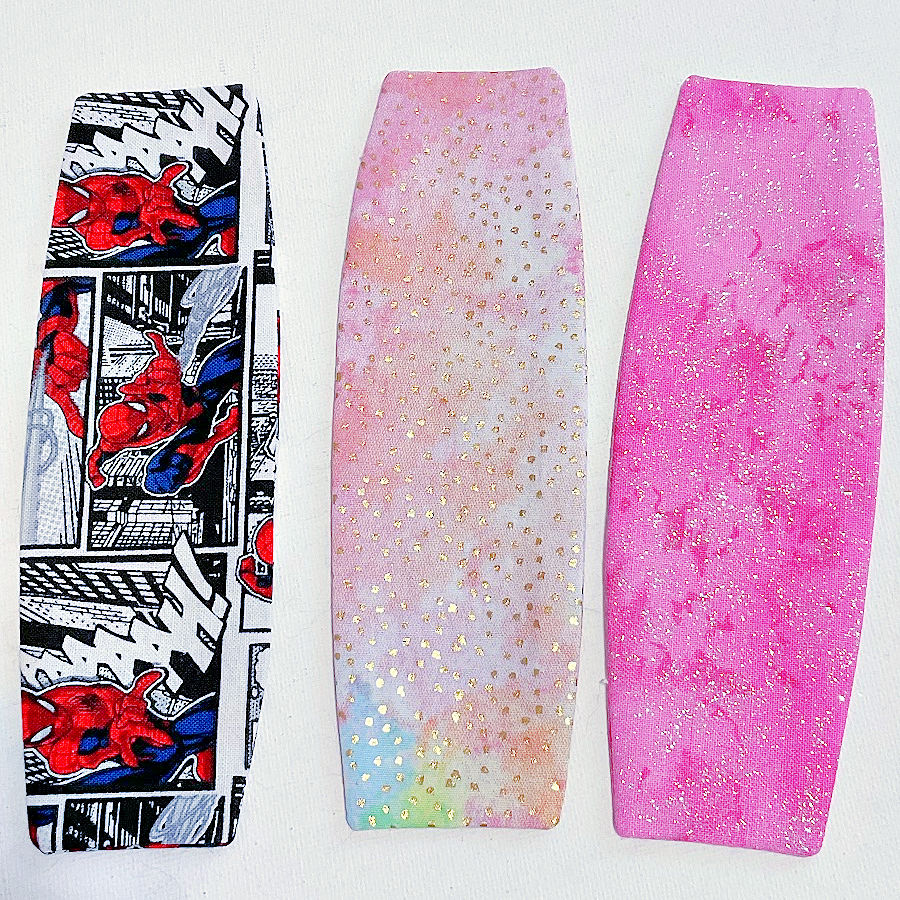
Step 4. Topstitch
Time to give your cord keeper its final polish – the topstitch. This step closes the turning gap, locks everything in place, and adds a crisp, professional-looking edge.
Set your stitch length a little longer than usual – try 3.0 to 3.3. Longer stitches look neater along the edge.
Sew about 1/8 inch from the edge, all the way around. And here’s where it pays to slow down and breathe. Try your best to keep the distance consistent. If your stitch line starts to wobble like it just got off a rollercoaster, it’s the first thing people will notice.
If you’re new to topstitching or just want a little refresher, I have a full post on how to topstitch – How To Topstitch | 17 Topstitching Tips Every Beginner Should Know.
Thread choices: You can use a matching thread to keep things subtle, or let your wild side out with a bright, contrasting color. Metallic? Why not. Rainbow? Yes.
Pro tip for smooth corner starts: Sometimes your machine hesitates at the beginning of a seam or chews on the corner like it’s a snack. To avoid this, place another finished cord keeper (or a scrap of folded fabric) behind the presser foot, so it acts like a little ramp. This helps your machine start cleanly without bunching or that annoying “stitching in one spot” dance.

I’ve got a helpful tutorial that shows you this simple trick to make your stitching smooth – Topstitching Troubles? This Simple Trick Will Turn It Around Instantly!
When you’re done topstitching, give each cord keeper one final press. This helps the seams relax, sets your stitches, and makes everything look sharp and tidy. Now they’re officially ready to snap into action.
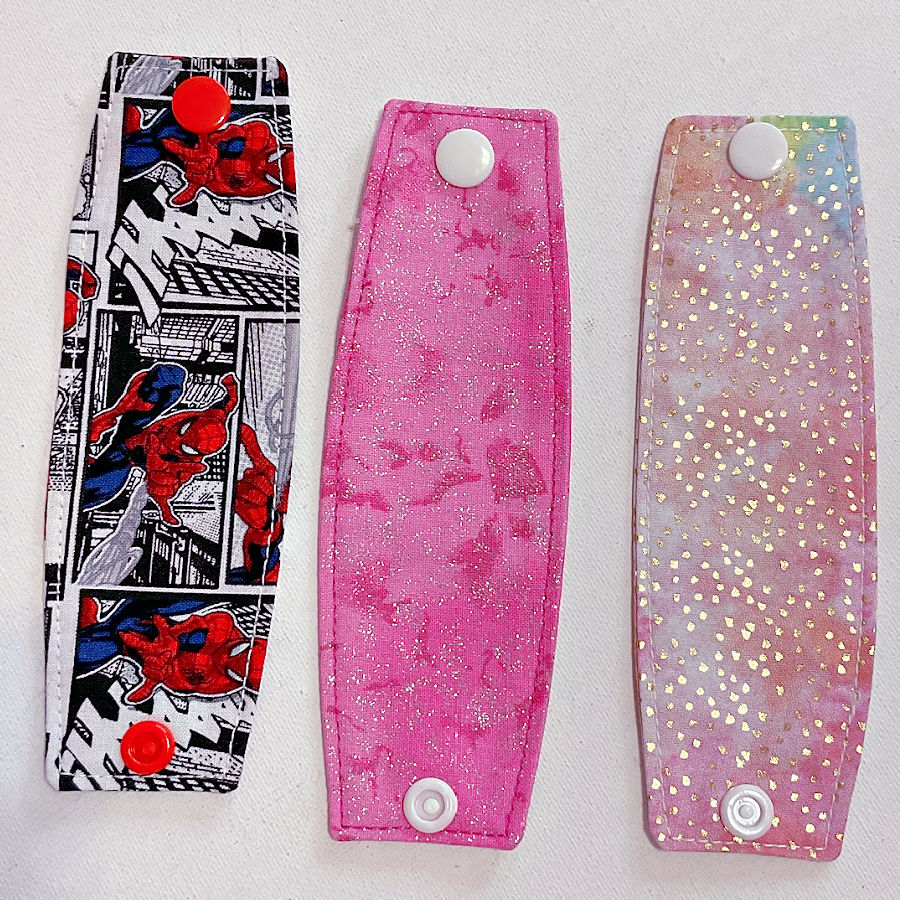
Step 5. Time to Snap
This is where your cord keeper goes from “adorable fabric strip” to “actually useful”.
We’re installing KAM snaps. One snap near each short end – about 3/8 inch from the edge – will do the trick. It should close comfortably when the keeper is wrapped around your cord.
Need a refresher on KAM snaps? I’ve got a detailed tutorial you can check out right here: How to Install and Use KAM Snaps. But since we’re in the sewing zone, I’ll walk you through it below using this very project.


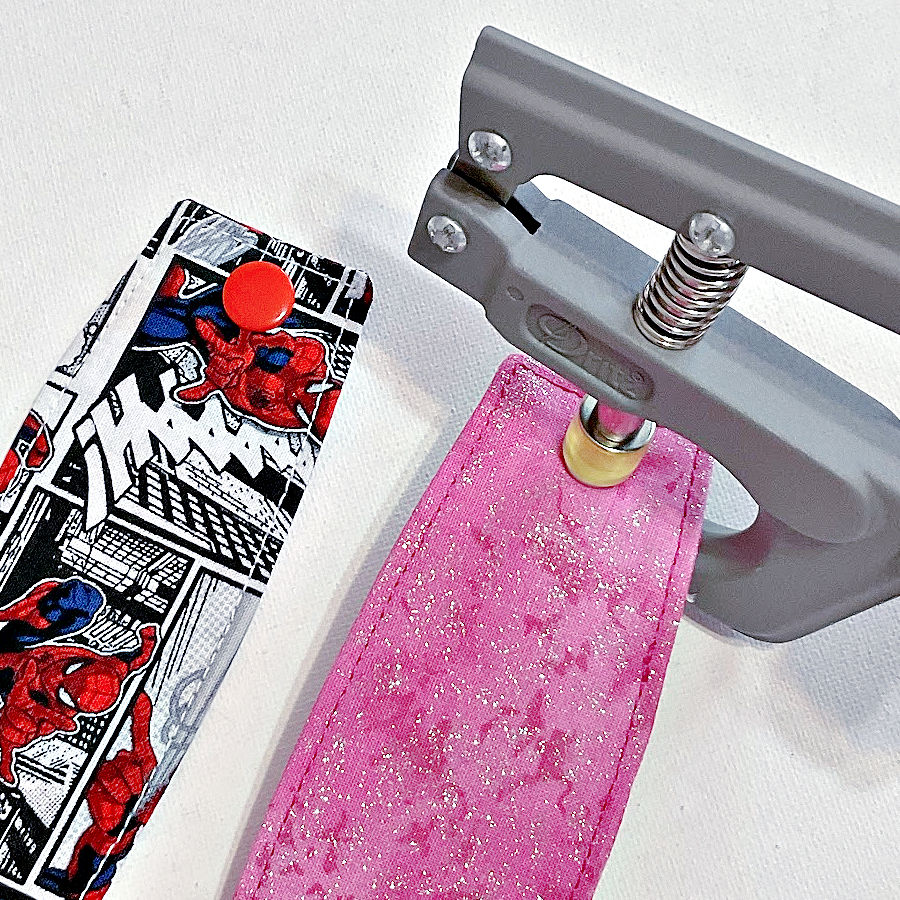
Step 1 – Mark and Pierce
First, decide where your snaps will go. You’ll need one snap for each end – one for the socket side and one for the stud.
Use an awl to poke a small hole through the fabric. Pierce both layers together to keep the alignment perfect. That way, your snaps will meet exactly where they should when folded.
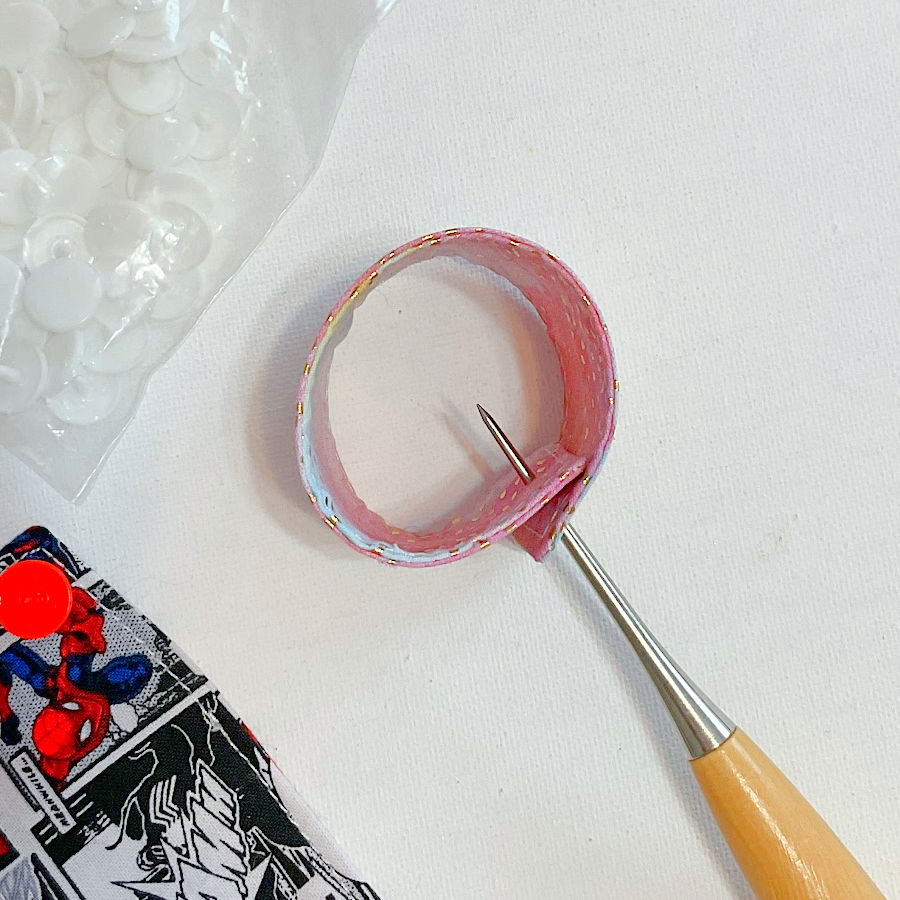
The holes just need to be large enough for the prong on the KAM cap to slide through – no need for drama. Do not make the holes larger than necessary, that would weaken the hold of the snap to the fabric.


Step 2 – Add the Stud
Take one KAM cap and push the prong through your first hole, from the right side of the fabric to the back. Now place the stud piece (the one with the raised nub) onto the prong on the wrong side.
This stud is the part that will snap into the socket later – they’re a matched set.
Step 3 – Use the Pliers
Time to bring in the snap pliers! Set the cap into the black rubber tray at the base of your pliers. Line up the stud with the clear pressing head at the top.
Make sure everything is straight and snug in the tool – this is not the moment for creative angling.
Hold the fabric steady and squeeze the pliers firmly but gently.
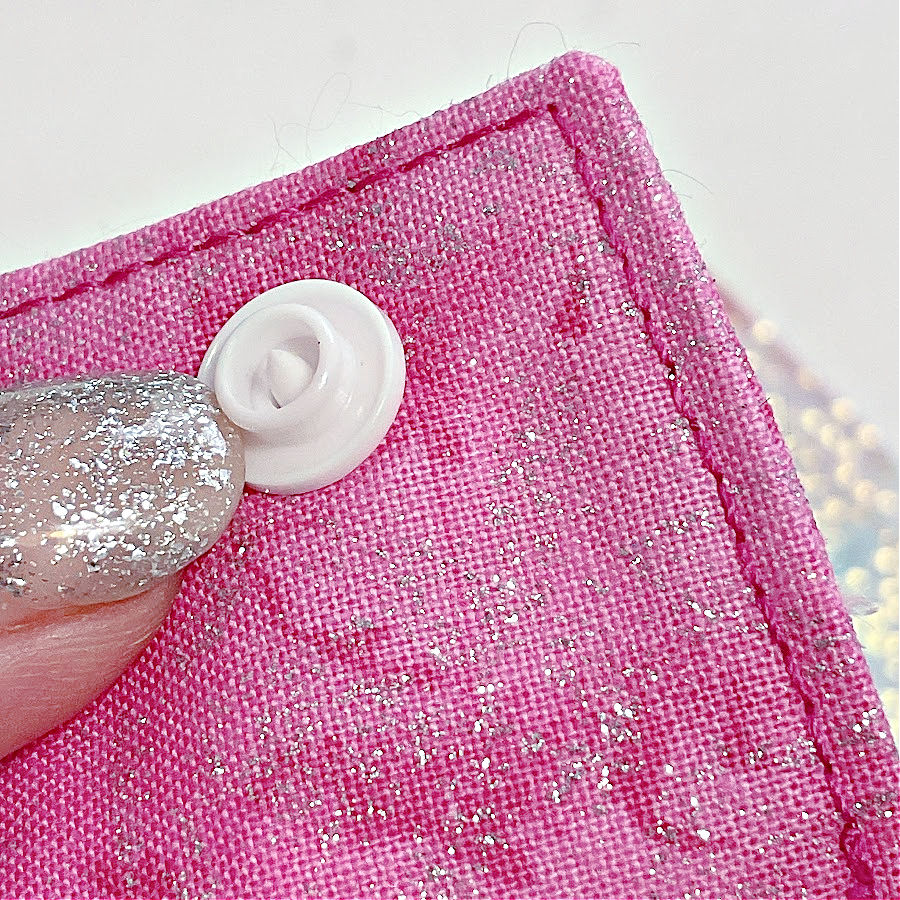
Step 4 – Add the Socket
Now let’s do the other side. Take another KAM cap and push the prong through from the wrong side of the fabric this time.
Place the socket piece (the one with the little circular ridge) on the front side.
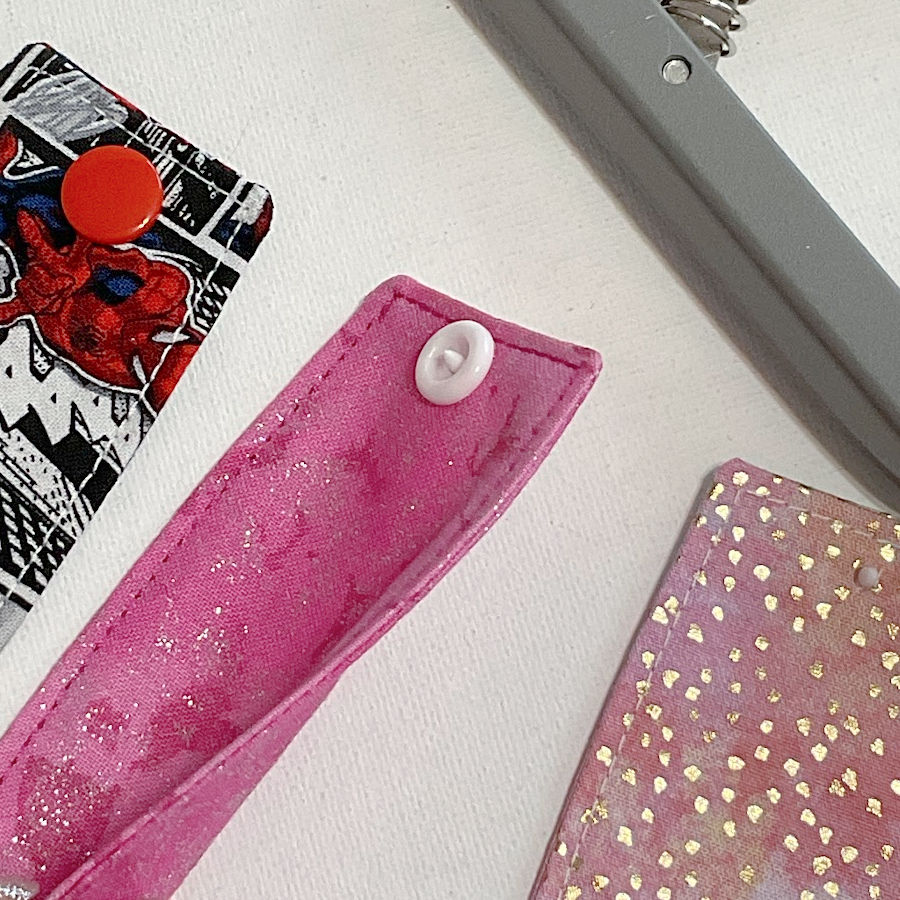
Set this all into your pliers again – cap in the tray, socket under the pressing head. Make sure everything’s straight and smooth.
Squeeze! And just like that, you’ve got a full snap set installed.

Step 5 – Snap Test
Now close your cord keepers and give the snaps a try. It should click together easily and feel nice and secure. If it’s a little tight at first, just open and close it a few times – like breaking in a new pair of shoes.
And if the snap doesn’t hold or feels loose? Double-check that the prongs were flattened all the way. If needed, you can remove the snap and install a fresh one – just don’t ask me how I know.
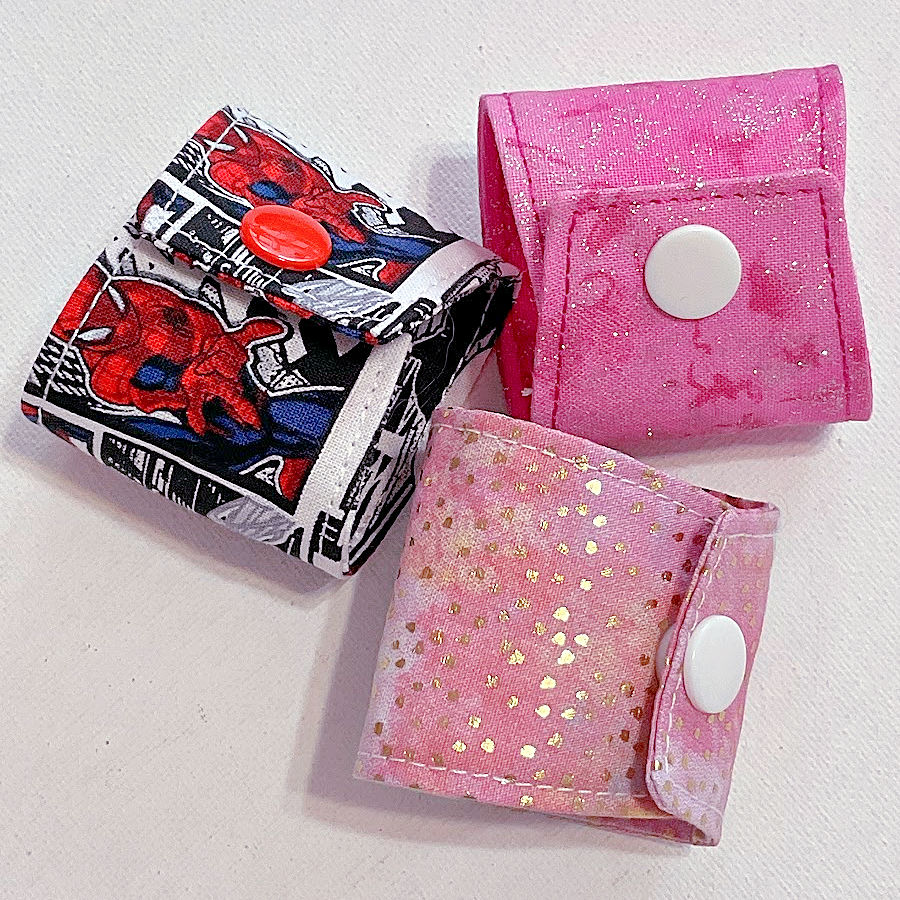
Step 6. Snap and Smile
That’s it! Snap your keepers around curled cords and admire the neatness. Make a few more – you’ll be surprised how fast these multiply.
Want to Get Fancy?
Once you’ve made the classic version, try these upgrades.
- Add a label tag before stitching for a personalized touch.
- Use quilted fabric for extra texture and grip.
- Make it reversible by using contrasting fabrics for the inside and outside.
- Add embroidery or a tiny patch for a pop of personality.
FAQs
Can I use Velcro instead of snaps?
Yes, if you’re feeling rebellious or have a love for fuzzy closures. But beware – Velcro tends to snag on delicate fabrics and doesn’t look as polished.
✅ Related tutorial: How to Sew VELCRO® the Right Way: 23 Tips That Actually Work
Do I need interfacing?
Yes, it helps the keeper hold its shape, especially for larger cords.
How many can I make in one hour?
Well, that depends… Are you answering texts between every seam? In theory, you could make 5 or 6 in an hour. In reality, probably 3 and a coffee break.
A Note on the “10-Minute Project” Myth
We love calling these fast-and-fun projects “10-minute makes.” But let’s be honest – there’s no such thing. By the time you:
- Pick fabric
- Fumble for interfacing
- Re-thread the machine
- Remember where your snaps are…
…you’ve probably used up more than an hour and started muttering to yourself.
So if you want a laugh and a little honesty, check out my humorous collection of 10-minute sewing projects that weren’t:
I started a 10-minute sewing project yesterday. I hope to finish it tomorrow.
Jokes About Sewing: The Never-Ending Story Of The 10-Minute Sewing Project (Part 2)
Make a Set and Gift Them
Cord keepers are great for gifts. Make a set in coordinating fabrics and wrap them up with a new charger or earbuds. They also make thoughtful stocking stuffers or craft fair favorites.
Wrap-Up: A Small Project with Big Satisfaction
There’s something deeply satisfying about taming the mess with just a few stitches and a colorful snap. These little fabric cord keepers are proof that practical can also be pretty. So grab your scraps, warm up the iron, and make one… or ten.
Just don’t expect it to take ten minutes.

Did you like this guide? Don’t let it slip away like charger cords in the bottom of your bag. Save the pin below and tuck it into your Pinterest board – your future self will thank you next time cords start staging a mutiny. And hey, while you’re pinning, follow me on Pinterest too! It’s like stitching your feed with non-stop sewing tips, tutorials, and enough fabric-filled inspiration to make your scrap pile feel like buried treasure. Your pins will be organized. Your cords will be organized. It’s a win-win.
latest posts
- Butterfly Quilt Block Tutorial – Foundation Paper Piecing
- How To Sew Quilt Squares So The Corners Match
- Sewing With Fork Pins: How They Help With Pattern Matching, Slippery Fabric, And Seams
- How Much Fabric Do I Need? 21 Helpful Tips For Calculating Fabric Yardage
- Easy Simple Sewing Project: Fabric Jar Opener
- DIY Oven Mitts: Step-by-Step Sewing Tutorial
- Easy DIY Potholder: New Design
- Tailor’s Clapper: What It Does, Why It Works, And How To Use It Right
- Heat Resistant Batting for Sewing: What It Is, How It Works, and What Makes a Difference