
I started a 10-minute sewing project yesterday. I hope to finish it tomorrow.
You’ve seen the claims: “Sew this in just 10 minutes!” — as if sewing is powered by fairy dust alone. So today, I present to you a parody sewing tutorial, where we’ll explore what actually happens when a normal human being attempts one of those “quick and easy” projects.

Now, before we dive in, let me be clear — I have nothing against quick sewing projects. In fact, I admire people who can whip up something cute and functional in ten minutes flat. I know the “10-minute project” label is often just a catchy title or a hopeful exaggeration. And hey, no judgment—sometimes a little sewing optimism is exactly what we need! But that doesn’t mean we can’t have a little fun with it, right?
I’m going to say “I” throughout this post, but this isn’t the current, slightly more organized version of me who runs a sewing site and actually labels thread drawers. No, the real star of this story is past me—the hopeful, scattered, fabric-hoarding beginner who truly believed she could start and finish a project in 10 minutes. Bless her innocent heart.
So grab your seam ripper and your sense of humor — this isn’t your average sewing tutorial. This is what happens when real life crashes headfirst into magical Pinterest promises. Let’s begin… one misplaced pattern, mismatched thread, and pricked finger at a time.
#1. Choosing a Pattern
What I should accomplish in 10 min:
Pull out the box with patterns. Flip through a few patterns and choose one to use.
Actual finish:
Oh, honey. Let me walk you through the emotional rollercoaster that is “just picking a pattern.” It starts innocently enough — I’ll just grab this box and find something quick!
Twenty minutes in, I’ve rejected seventeen patterns. That wrap skirt requires WHAT kind of interfacing? That top has FOURTEEN pattern pieces? Who are they kidding?

By minute thirty, I’ve abandoned the first box entirely and am now elbow-deep in the “Vintage Patterns” collection because suddenly I’m convinced I need to make a 1950s cocktail dress. Makes perfect sense at the moment.
Minute forty-five finds me sprawled on the floor surrounded by pattern envelopes, muttering, “But will this one make me look like I’m wearing a pillowcase with armholes?” I’ve now developed very strong opinions about dart placement that I didn’t even know I had.
At the one-hour mark, I’ve set a playful tone for myself by asking my cat Bobbin (yes, I named my cat after a sewing notion — judge me) if she thinks I’d look good in culottes. The cat, being a harsh critic with excellent taste, walks across the pattern I was considering and knocks it to the floor. Rejection noted.
By hour one and a half, I’ve abandoned physical patterns entirely and have fallen down the Pinterest rabbit hole. “Just one more scroll,” I whisper, as my finger, now developing carpal tunnel, continues its endless journey down the screen. I’ve saved 43 patterns I will absolutely make …never.
Eventually, around the two-hour mark, I return to the very first pattern I pulled out— simple pants with two pattern pieces—and decide it’s perfect. The irony isn’t lost on me as I consider this – most designers probably don’t spend two hours choosing what to make next.
And let’s not even talk about the fifteen minutes I spent daydreaming about being the kind of person who creates their own patterns. Ha! As if I need another hobby to be mediocre at!
So yes, technically “choosing a pattern” takes ten minutes. If you’re some kind of mythical sewing unicorn who doesn’t second-guess every life choice while staring at pattern envelopes. For the rest of us mere mortals? Block off your afternoon and bring snacks.
And keep the cat away from the patterns.
✅ Serious tutorial: A Guide to Choosing the Right Sewing Pattern for Your Body
#2. Preparing Pattern Tracing Supplies
What I should accomplish in 10 min:
Find tracing paper, pencil, pattern weights, ruler, scissors. Start tracing.
Actual finish:
So, the mythical “pattern tracing setup” that YouTubers accomplish in a single elegant montage! Let me share the unedited director’s cut of this thrilling adventure.
First, I locate my tracing paper, which has somehow migrated to the most logical place in my home—wedged between the shelves and wall in my closet. It’s slightly crumpled, naturally.
Next comes the Great Pencil Hunt of 2025. Despite owning many pencils, not a single one can be found when tracing is imminent. I eventually discover one in the kitchen (why?), only to drop it immediately, watching in slow motion as it rolls under the stove. After retrieving it with a coat hanger and some colorful language, I see it’s dull.
The pencil sharpener, of course, is empty of batteries. No problem! I’ll just use my backup manual sharpener, which promptly sharpens my pencil into oblivion, leaving me with a stub the size of my last shred of sewing patience.
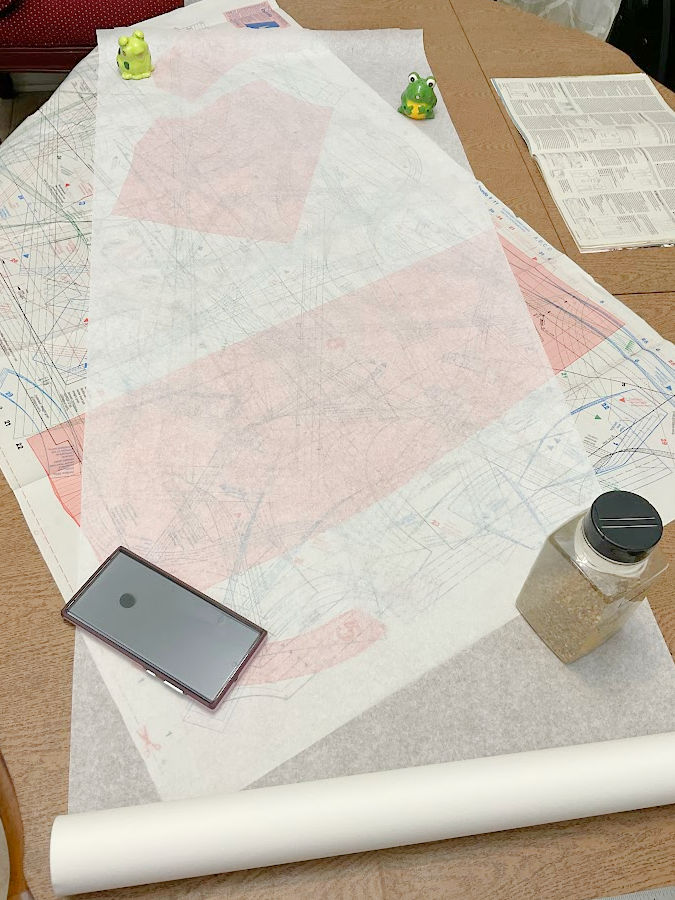
Pattern weights? Those professional, purpose-made items I saw online? Please. I’m using a motley crew of random household objects: a half-empty spice jar, my phone (which will inevitably ring the moment I position it perfectly), and small ceramic frogs I bought many years ago (I don’t remember why) whose sole purpose has become “pattern weights.” You get the idea.
The ruler? After searching everyplace that could hold it, I find it being used as a bookmark in my “Quick & Easy Sewing Projects” book — the irony is not lost on me here either.
By the time I’m actually set up to trace the pattern, a full hour has evaporated. In the mean time I had to wrestle the pencil from the claws of the cat. This was the easy part, she did not really have a strong opinion about it.
The actual tracing requires Olympic-level concentration as I attempt to follow dotted lines that seem determined to merge into one confusing blob. I contort my body into positions yoga instructors would admire, just to reach that one curve without disturbing my precarious arrangement of “weights.”
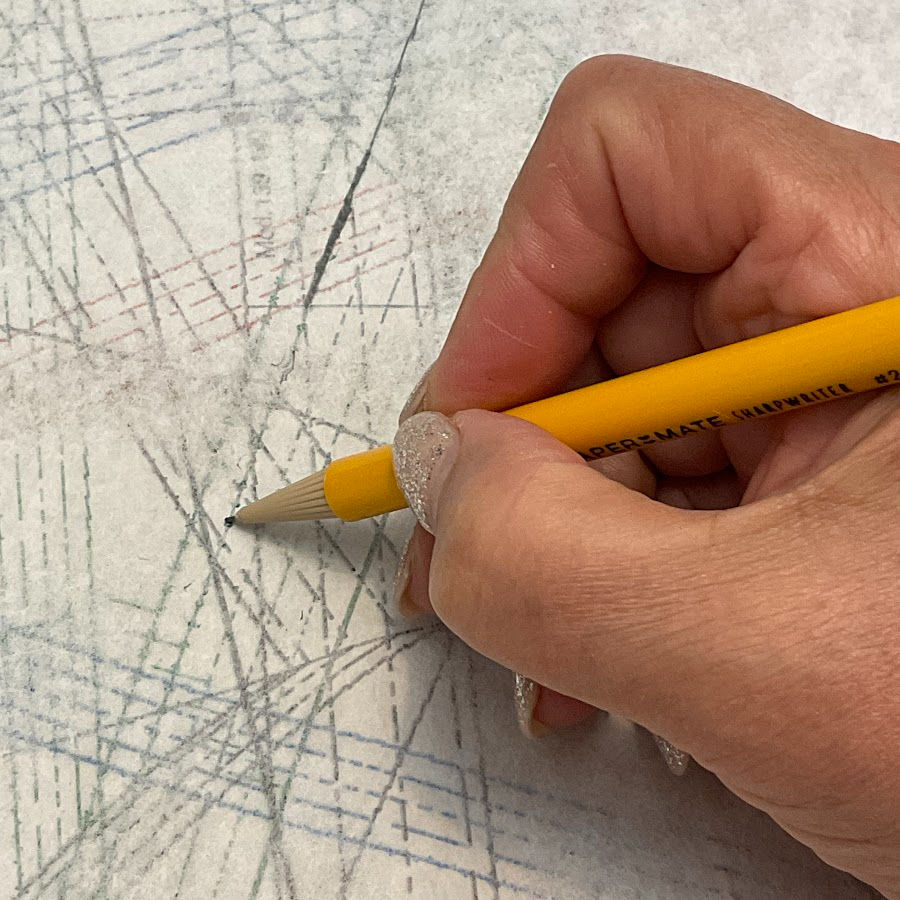
One hour later, I’ve successfully traced the pattern pieces, developed a permanent hunch, and have pencil marks on parts of my body I can’t explain. But I’m ready to sew!
Just as soon as I find where I put those pattern pieces I just traced…
✅ Serious tutorial: Tracing Wheel In Sewing – what it is and how to use it
#3. Selecting Fabric
What I should accomplish in 10 min:
Open the fabric cabinet. Pull out several fabrics, place them on the table and choose one.
Actual finish:
Ok, fabric selection—that quick, straightforward process where I simply choose an appropriate textile for my project!
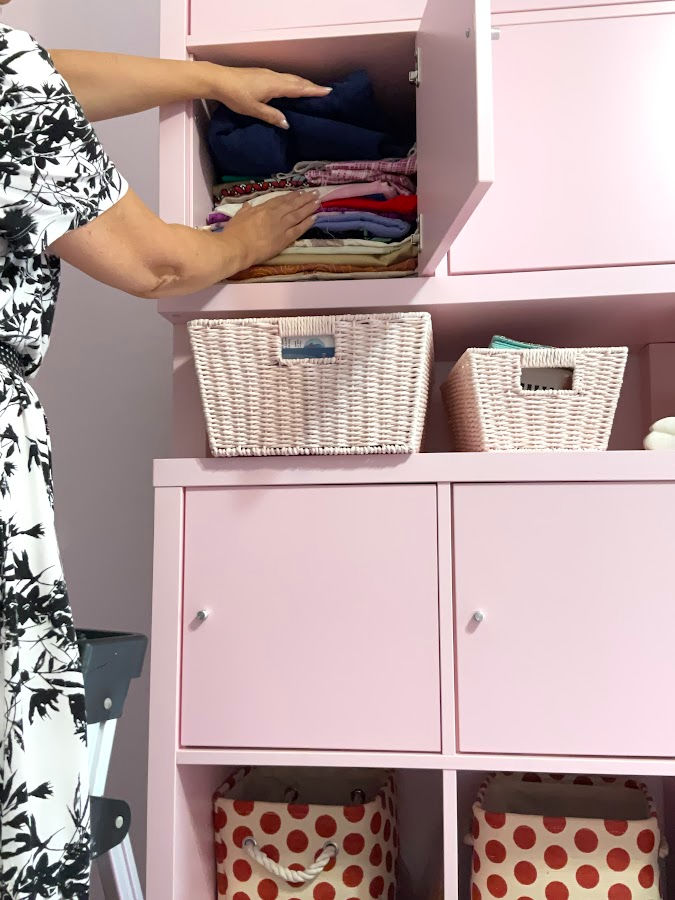
As I crack the door of my fabric cabinet, yards of forgotten purchases are screaming, “Remember me? You bought me for that project you never started three years ago!”
I begin the extraction process, pulling out contenders. “This could work,” I mutter, placing a lovely blue jersey on the table. But wait—is it the right shade of blue? Is it summer blue or winter blue? Is it “me” blue? Does it match my eyes? These are the critical questions that obviously require immediate answers.
Two fabrics become seven, then twelve. I spread them across every available surface like a deranged interior decorator. “I need to see them in different lighting,” I announce to my completely uninterested cat, who has already made her selection by napping on the most expensive option.
Just when I think I’ve narrowed it down, I remember that fabric I saw on Instagram last week. Was it better than these? I should check. One innocent scroll turns into a forty-minute deep dive into fabric stores I’m not easily distracted by, hey look, FABRIC! Before I know it, I’m taking screenshots of completely unrelated projects and considering ordering $200 worth of specialty cotton from Japan.
Pinterest is next, because clearly I need “inspiration boards” for these simple pants. Another hour disappears as I create not one but three different boards titled variations of “Fabric Vibes Summer 2025.” I briefly consider changing my entire project because I’ve fallen in love with a completely inappropriate sequined velvet.
Eventually, I return to my original fabric pile, now hopelessly wrinkled from being moved around seventeen times. I hold each piece up to my face, squinting critically in the mirror while making expressions no human should ever make.
The final decision comes not from careful consideration but from fatigue. “This one,” I declare weakly, selecting the very first fabric I pulled out hours ago. A fabric that, ironically, I bought specifically for this pattern last year.
As I put away the rejects (stuffing them haphazardly back into the cabinet for future fabric avalanches), I make a solemn vow to be more decisive next time — a promise both of us know I’ll break faster than cheap thread at a tension test.
✅ Serious tutorial: How To Cut Fabric Straight | 8 Easy Ways Explained
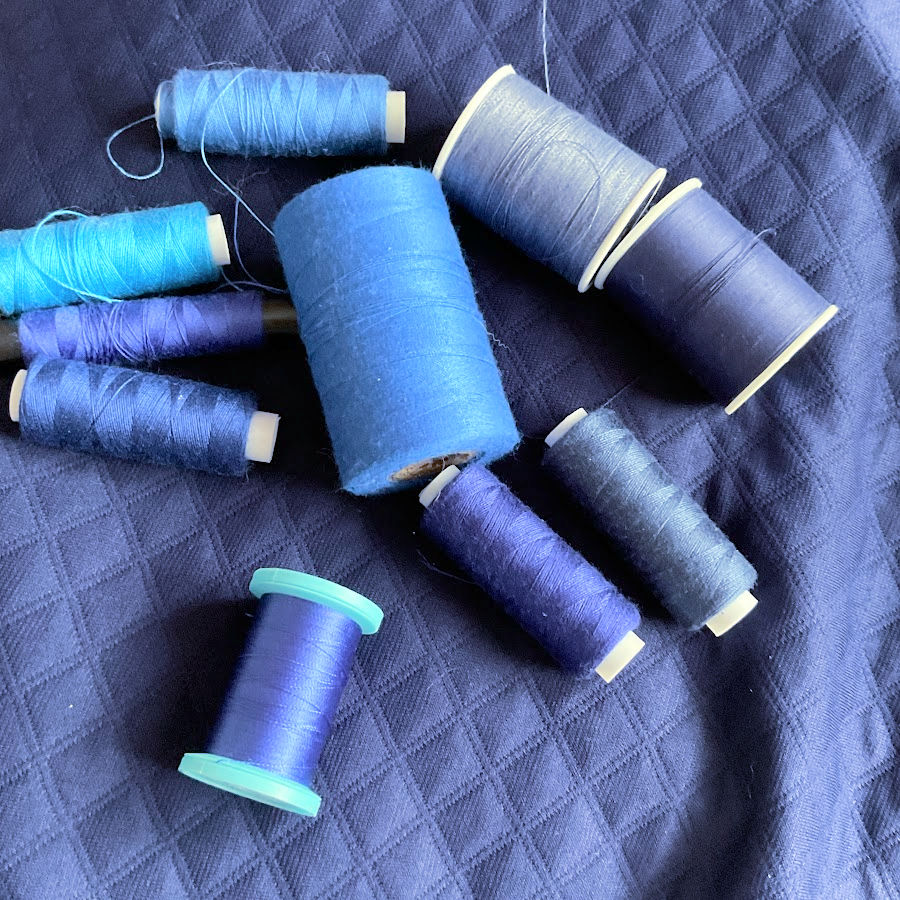
#4. Choosing Thread
What I should accomplish in 10 min:
Open drawers with threads, look at threads, match threads to fabric.
Actual finish:
Next, thread selection—that simple task where you just grab something in approximately the right color and get sewing! Said no sewist ever.
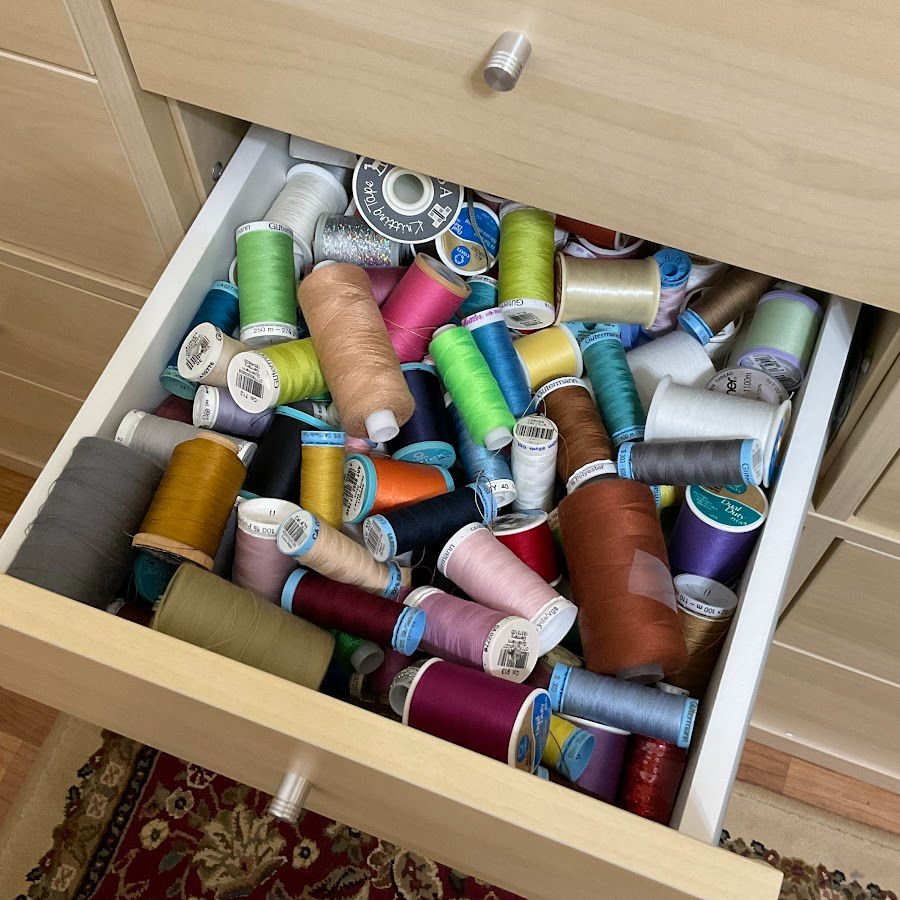
I approach my thread drawer with the solemnity of an archaeologist opening an ancient tomb. Inside lies a tangled history of my sewing life—threads from projects long forgotten, inherited spools from my grandmother, and that one neon green I bought for reasons that escape all rational explanation.
“I just need a basic blue,” I tell myself, pulling out what appears to be blue threads.
Then I hold ten slightly different blue spools against my fabric, squinting at them with the intensity of an art forger examining a brushstroke. I take them to the window for natural light. I take them to the bathroom for harsh LED lighting. I take them to the porch for “will this look good if I’m standing outside in broad daylight” light.
Just as I’m closing in on a decision, my phone buzzes. “I’ll just check quickly,” I lie to myself, knowing full well what’s about to happen. It’s a Facebook notification about someone I barely know commenting on a post from three days ago. Absolutely critical information.
One innocent peek becomes a forty-minute scroll session. I emerge from my social media trance to find myself watching a video tutorial on how to make a DIY thread stand. The creator promises it will “revolutionize my sewing room,” as if the problem with my sewing has always been insufficient thread elevation.
Back to the thread selection. Wait—do I have enough of this blue for the whole project? Better check. I unravel some around my hand, eyeballing whether this arbitrary amount seems “enough” for something I haven’t measured in any way.
I suddenly remember reading something about certain threads being better for stretch fabrics. Is my thread stretchy enough to qualify? Down the Google rabbit hole I go, emerging 30 minutes later as a self-proclaimed thread expert who can now lecture strangers about thread strength and fiber content.
By this point, my original thread candidates have scattered across every surface. My cat has decided this is the perfect moment to “help.” She gracefully leaps onto the table, sending three spools rolling onto the floor.
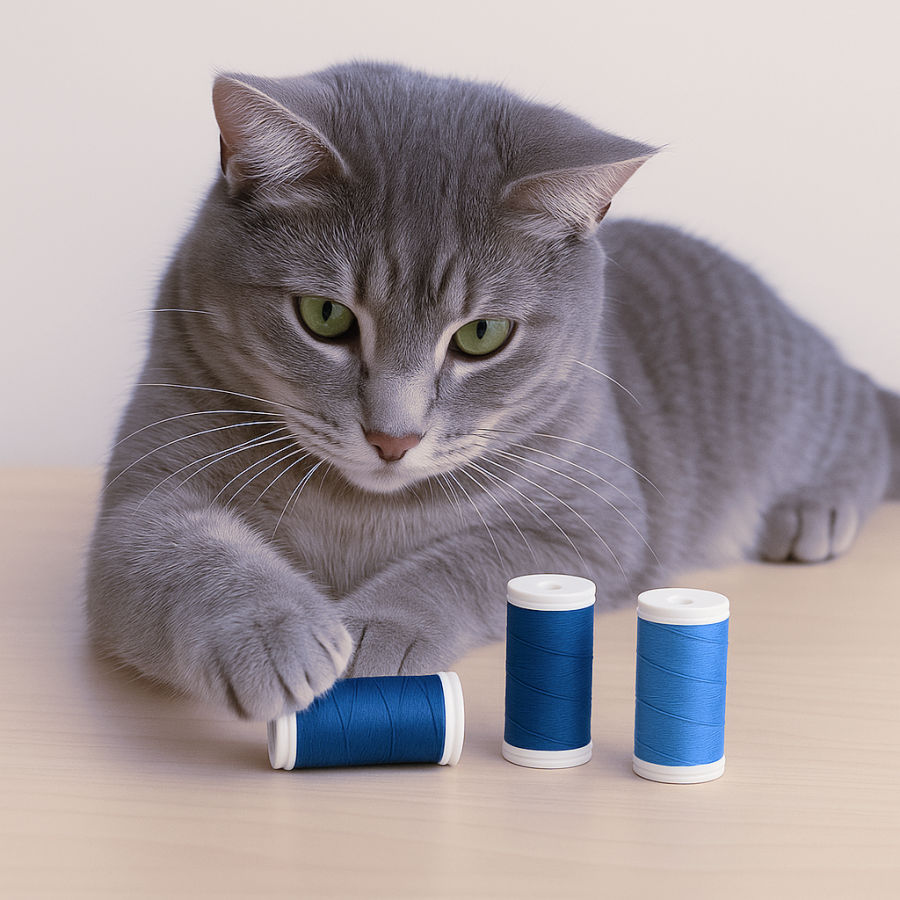
She then methodically bats a fourth under the cabinet, maintaining intense eye contact with me throughout this act of deliberate sabotage. When I attempt to retrieve the fallen threads, she settles herself firmly on top of my fabric, fur immediately adhering to it with the tenacity of industrial-strength Velcro.
“This isn’t helping,” I inform her. She slow-blinks at me, which in cat language translates roughly to “I know, and I don’t care.”
Finally, I triumphantly select… one of the threads I pulled out. I celebrate this momentous decision by immediately putting it down somewhere “safe” and then spending another ten minutes looking for it, only to discover Bobbin has claimed it as her new toy and is now defending it with surprising ferocity for something she didn’t care about until I wanted it.
The thread gods are laughing. I can hear them. They sound suspiciously like my unfinished projects crying from their storage bins.
✅ Serious tutorial: Sewing thread sizes and how to choose
#5. Setting Up Cutting Tools
What I should accomplish in 10 min:
Gather a rotary cutter, ruler, cutting mat, fabric shears.
Actual finish:
Setting up cutting tools should be simple, right? Just grab some scissors and go! Let me introduce you to the reality show I can call “Where Did All My Sharp Things Go?”
I begin by retrieving my rotary cutter, which is, mysteriously, not where I left it. After checking three drawers and finding it in the fourth (why?), I notice the blade has nicks. No problem—I’ll just replace it with one of those replacement blades I bought in bulk. You know, the ones I put somewhere “logical” where I’d “definitely remember.”
Twenty minutes later, after emptying every drawer in my sewing room, I finally remember I gave them to my husband because he insisted that blade replacement falls under his jurisdiction ever since “The Incident” when I somehow managed to slice through my fingertip and part of the sewing room table in one impressive motion.
Of course, he’s not home, which means I now have to text him asking where exactly in his meticulously organized (read: complete chaos) tool area he’s hidden my precious blades. His helpful response of “in the small container” narrows it down to approximately 17 different vessels of varying smallness.
I venture into the garage and finally find them nestled between automotive fuses and what appears to be prehistoric fishing hooks.
Now for my clear ruler—ah yes, there it is! Wait… why does it look like it’s smiling at me? The once-straight edge now has a gentle curve that would be catastrophic for precision cutting. How did it bend? Did it spend time in a hot car? Did someone use it as a doorstop? These are the mysteries that haunt my sewing room.
I decide to use my backup ruler, which requires excavating the bottom of my fabric stash. Halfway through this dig, I get distracted by three forgotten fabric pieces I absolutely must reassess right this minute. Forty-five minutes vanish as I refold my fabric, completely forgetting what I was looking for in the first place.
Oh right—cutting tools!
The cutting mat should be easy; it’s large and doesn’t move on its own, and I always know where it is. Except it’s now curved because I store it vertically behind the couch—which seemed like a perfectly reasonable storage solution at the time. Apparently, cutting mats need to be stored horizontally, a fact I’ve been told approximately sixteen times but continue to ignore because “where exactly am I supposed to find that much flat storage space in this house?
Now for my fabric shears—my precious, expensive, “I will disown you if you use these on paper” shears. They are nowhere to be found. I check their special case. I check the drawer where they belong. I check under fabric piles. I even check inside the refrigerator because at this point, why not?
An hour into this expedition, I have a vague memory of lending them to my neighbor “just for a quick project” three weeks ago. A panicked text message and an awkward front-door exchange later, I recover my beloved shears, now mysteriously sticky and definitely used on something that wasn’t fabric.
Back in my sewing room, I test the shears on a scrap and discover they now cut with all the precision of a spoon. This requires an emergency Amazon shopping session, because nothing says “I need it fixed immediately” like ordering something with one day shipping. I spend forty-five minutes comparing fabric scissors, reading reviews written by people who seem to have devoted their entire lives to the art of cutting things. “These scissors changed my life,” writes some user, and I believe her with my whole heart.
I add three different pairs to my cart, just to be safe. I splurge on the overnight shipping option, convincing myself that waiting 12 hours instead of 24 will somehow make a dramatic difference to this project I’ve already been procrastinating on for a while. The confirmation email promises my new shears will arrive “by 8am tomorrow,” which my brain immediately translates to “you can definitely finish this project tomorrow night!” in a stunning display of optimism that history has repeatedly proven unfounded.
So, 20 hours after starting this “simple” tool gathering process, I finally have everything I need. My rotary cutter has a fresh blade, my backup ruler is mostly straight, my mat is as flat as it’s going to get, and my shears have been delivered.
I’m ready to cut! Just as soon as I remember where I put the fabric I selected some time ago…
✅ Serious tutorial: Cutting Tools For Sewing: The Ultimate Guide

By the way… if you’ve made it this far, first of all—congratulations! You’ve already accomplished more than I did in my first 10 minutes of “sewing.” 😄
This parody tutorial turned out to be a bit longer than I planned (unlike my actual sewing progress), so I’ve decided to split it into two parts. That’s right—more fabric chaos, more thread-related existential crises, and definitely more needle-pricked fingers are coming your way soon.
I’ll continue this rollercoaster in my next article, because apparently, even writing about 10-minute sewing projects takes three days and snack breaks.
Stay tuned—part two is coming in a few days. And no, it won’t take just 10 minutes to read either.
Did you like this article? If so, save this pin on your sewing board so you can revisit this stunning exposé of sewing reality when you need a good laugh (or when you’re feeling bad about taking three weeks to finish a “weekend project”). Follow me on Pinterest for more brutally honest tutorials. Pin now, laugh later, and remember: the best sewists aren’t the fastest—they’re the ones who know where their scissors are. Sometimes.

latest posts
- What Do You Call a Person Who Sews? I Asked My Readers and Got 1,408 Opinions
- DIY Round Purse: PDF Sewing Pattern and Detailed Instructions
- Mini Wonder Clips By Clover: Useful Sewing Tool Or Just Another Notion?
- Non-Slip Grips For Quilting Rulers: A Small Notion With A Useful Job
- Fabric Eraser for Sewing: What It Removes and When to Use It
- What Is The Best Thread For Sewing Machine Projects? Let’s Find Out!
- Butterfly Quilt Block Tutorial – Foundation Paper Piecing
- How To Sew Quilt Squares So The Corners Match
- Sewing With Fork Pins: How They Help With Pattern Matching, Slippery Fabric, And Seams


This sewing project story was hysterical and I could relate to it so much! I am still laughing!
Hi Olga
Yes I’ve been there and I especially relate to the cat. Mine had white and creamy yellow fur. Doesn’t matter. Still sticks the same.
Looking forward to the next “installment”.
Thanks for posting this. The laughter has made my day.
I can completely understand what a person does for a “10 min project”. Let’s not forget the precious pieces of fabric in the end, called “scraps” which may be incooperated into another project. Heaven forbid wasting an irregular 1″ piece of fabric or the salvage. Sometimes it is discouraging to start because you know the project will not be done in “10 MINUTES”, even if you were so precise & not need the seam ripper, you will need to clean up. I also have a problem of actually making that initial cut into the beautiful fabric – to make one specific item, verse just admiring the texture, print, color of the fabric and the dreams of what I could make with such a beautiful piece of fabric. The person can compromise and just purchase the item and lose the satisfaction of actually having it “PERSONALLY HAND- MADE”