
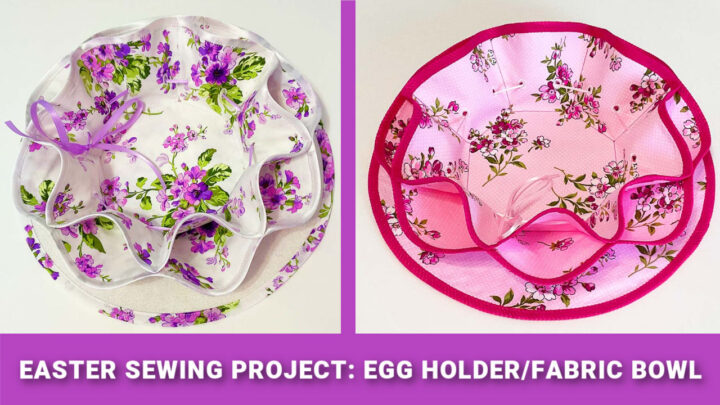
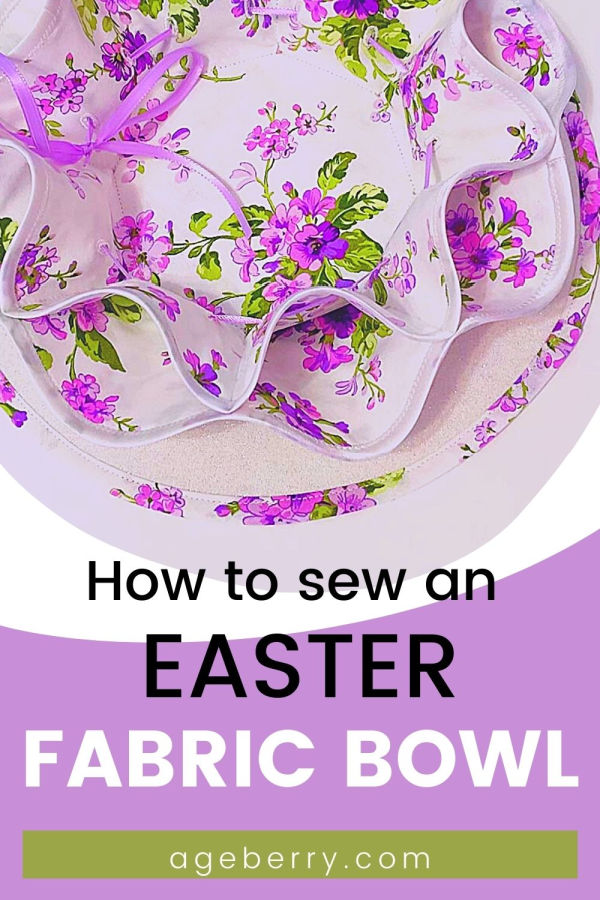
Easter Sewing Project You’ll Love To Make: Fabric Bowls DIY
Do you want to sew something special for Easter? I made these decorative fabric bowls – Easter egg holders.
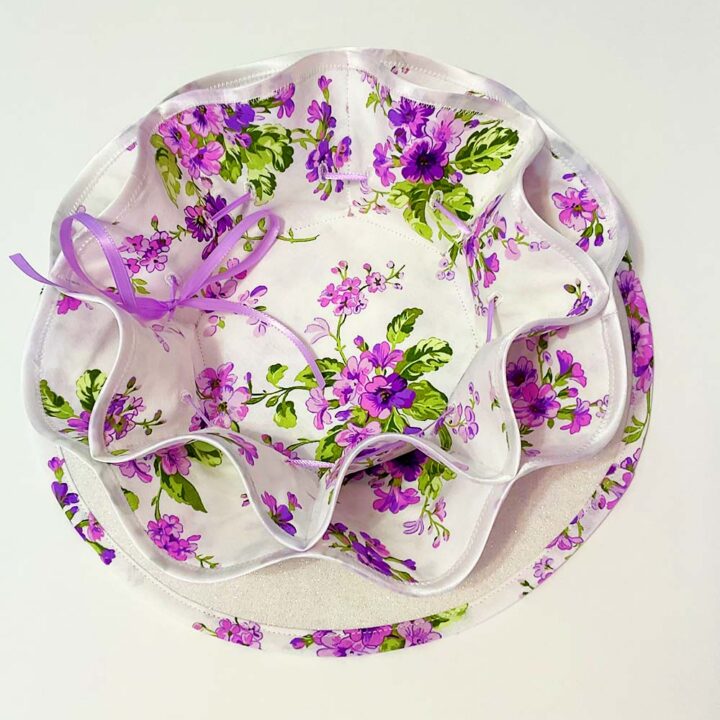
The 3D bowl looks like a vase and it’s very pretty. You can put easter eggs in it, use it as decoration on your table, or use it as a unique gift for your friends. The best thing is that this project doesn’t take much time, so you can do it even if you don’t have much free time at the moment. You will need some sewing skills, but I’m sure that even beginners will be able to do this project.
But even if you are an experienced sewist, this project is very good for polishing your sewing skills. You will cut fabric using a simple PDF pattern, bind a circle, sew binding, make buttonholes, use fusible interfacing, etc.
So if you are looking for an easy and fast Easter sewing project, here is my suggestion – try making these lovely fabric containers. Not only will you have made something beautiful but also improve your sewing skills by practicing them in action. And the best part – it’s so much fun!

Attention! If you like the video format, at the bottom of this post, look for a YouTube video version where there is a step-by-step tutorial on fabric bowls DIY/Easter egg holders. For a more complete picture, I recommend exploring both versions.
What you’ll need for sewing this fabric bowl/egg holder
- Fabric
- Fusible interfacing
- A piece of ribbon
- Sewing machine
- Buttonhole presser foot ( optional, the project requires making buttonholes)
- Regular sewing notions
- Template (or pattern) – it’s free for subscribers to my newsletter
What fabric to use?
I used 100% quilting cotton with lovely flower prints. These prints are so cheerful and perfect for the upcoming spring season! The colors are eye-catching and vibrant, making this fabric perfect for all sorts of fun projects.
Please, read all instructions before starting the project.
Note: Some of the links on this page are affiliate links. This means I will receive a commission if you order a product through one of my links. I only recommend products I believe in and use myself.
Step 1
Prepare all necessary materials for making this fabric bowl/egg holder
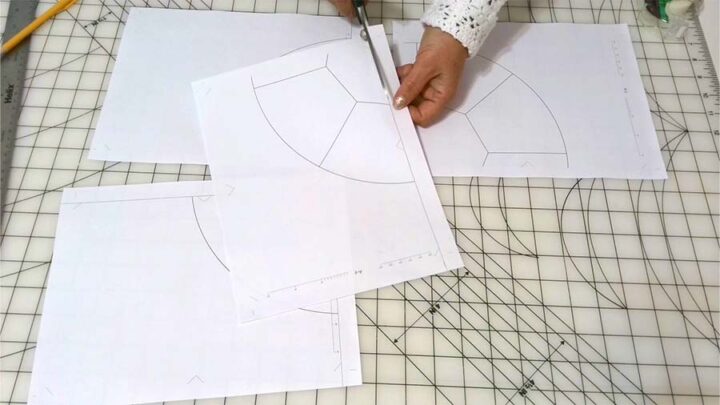
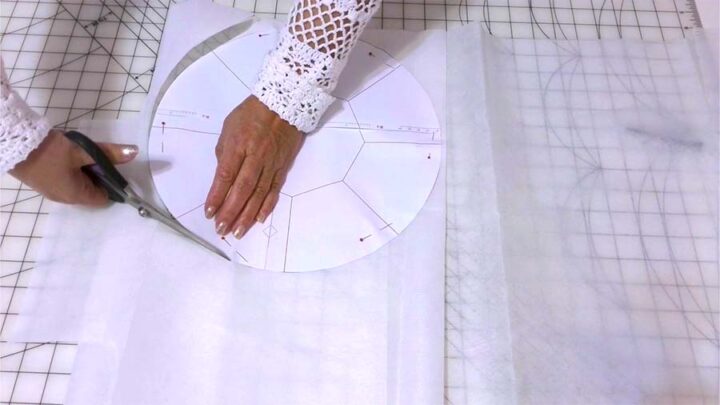
Download and print the PDF template/pattern and assemble it. It’s only 4 pages long. Assembling the pattern is pretty easy.
Start with your first row, pages 1 and 2. Draw a line like this on page 2, cut page 2 along this line, and overlap it on page 1.
But before I go on to the steps for this sewing project, let me first say a few words about printers.
If you’re a sewing enthusiast, then having a printer is an absolute must. You can print out your favorite sewing projects in no time and get started on them right away.
You don’t have to waste any more time going from store to store trying to find the perfect pattern or book that will help you learn new skills.
They also come with built-in wireless connectivity which means it doesn’t matter where in the house you keep yours because it will always be able to connect wirelessly when needed.
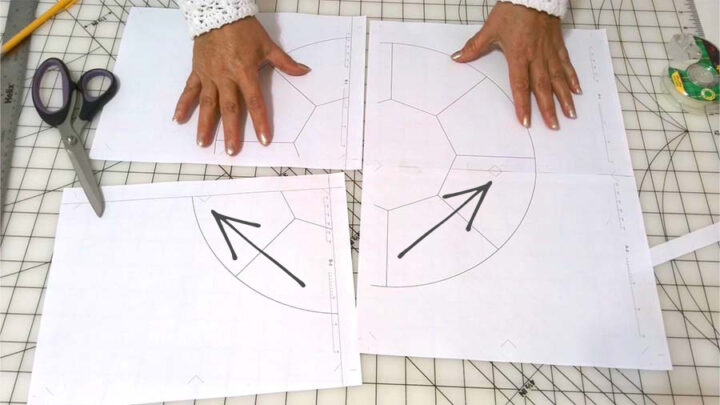
Line up the pattern lines. You will also see these small triangles that will help you line up your pattern even easier. Tape the pages together.
When taping, try to keep the pages so they don’t shift.
After your first row is assembled, continue on with the second row aligning the tops and the sides of your pages.
And this is the result, the template is ready. Cut out the circle carefully following the circle line of the pattern.

Choose your fabric. You can use the same fabric for the whole bowl, or you can choose a few different fabrics that match your decor.
Choose ready-made bias strips or choose fabric for making your own bias strips. I used both for my projects. The bias tape is a decorative element that makes the bowl look nicer and more professional.
If you make your own bias tape, you may use a wider range of fabric and match it with the fabric for the bowl.
Set up your sewing machine – thread it with matching color thread, try tension on scrap, etc. By the way, do you need to oil your sewing machine from time to time for it to run smoothly? You might want to check out my guide Sewing Machine Oil | Top 10 Questions Answered.
Step 2
Cut out the fabric and fusible interfacing for the bowl
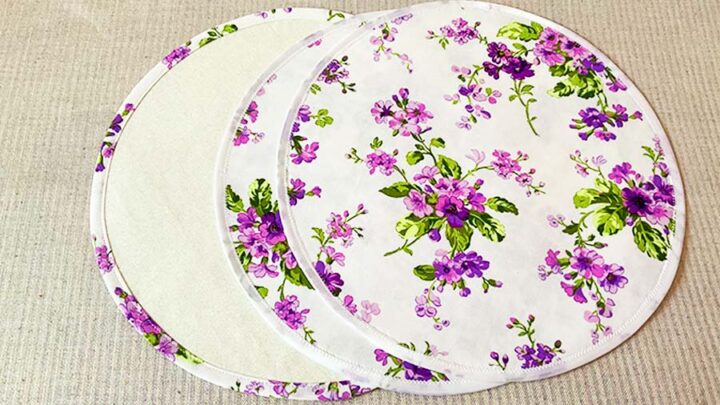
Cut 6 circles from the fabric of your choice and 6 circles from fusible interfacing. You can either use scissors to cut it out or a rotary cutter.
First, place the template on 3 layers of fusible interfacing and cut. Repeat for another 3 layers of interfacing. I use medium-weight fusible interfacing from Pellon.
Now you can fuse the interfacing to the fabric and after that, cut fabric circles one by one. Or you can cut circles from the fabric using the paper template (you can cut 2 circles at once if you fold the fabric) and fuse the interfacing to the fabric circles after that. Either way is good.
✅ Related tutorial: How to use fusible interfacing
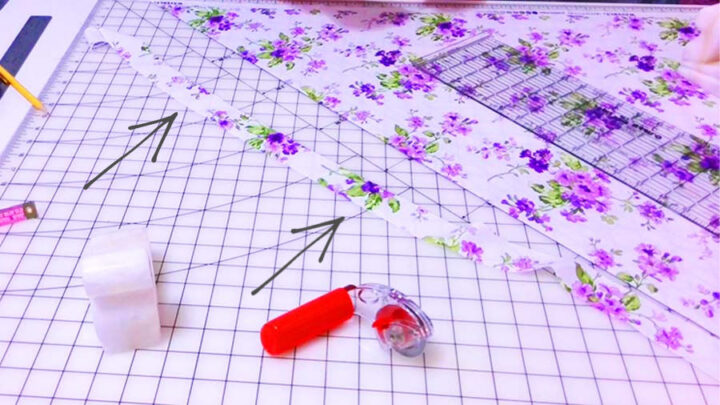
If you want to make your own binding cut bias strips 40″ long and 1.5″ wide. Binding strips must be cut on the bias, at 45 degrees angle, if you cut them straight on the grain you will have problems binding the circles and the circles will not lay flat.
Step 3
Binding the fabric circles
Place every 2 circles one on top of the other wrong sides together. You can secure the 2 layers with pins but I prefer to use a fabric glue stick. Just rub the stick over the area to be glued.
I used 3 different binding strips for my Easter bowls.
For the white bottom circle and for the pink bowl, I made my own binding strips.
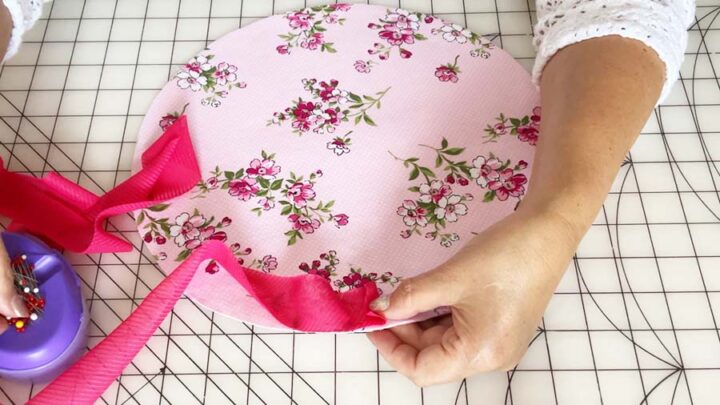
Position the edge of the bias tape along the edge of the fabric, right sides together, and use pins to attach it or use wonder clips. Don’t stretch the fabric.
Using sewing pins is the time-tested standard, but sewing clips are a recent invention that many sewists now prefer over pins. What do you prefer to use – sewing clips or pins? You might be interested in my article Sewing Clips vs Pins | Which To Choose?
To start, fold the end of the bias strip (about 3/8 inch) and work your way all around the circle, securing the bias strip with pins or wonder clips. Be careful not to stretch the bias edge. When you come to the place where you started overlap the ends. Don’t fold the second end, just place it on the folded end and pin.
✅ Related tutorial: Types of sewing pins and their uses: all you need to know about straight pins for sewing
Go to your sewing machine and stitch. I like to use a walking presser foot. My Janome machine has a built-in walking foot, it’s different from a regular walking foot. Seam allowances are 1/4 inch. Don’t sew over pins. Make sure you remove pins or clips when the needle is close to them.
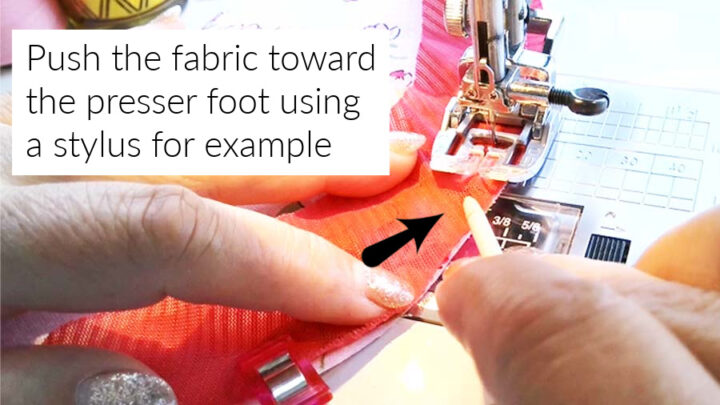
When stitching, make sure you don’t stretch the fabric. It has to be exactly the opposite – we have to ease the fabric while sewing the bias strip. For this, I like to slightly push the fabric toward the presser foot. Don’t do it with your fingers! Use a small stick. I am using a stylus that was supposed to be used with touchscreen devices. Well, it doesn’t work with my devices but I am often using it with my sewing machine. You really need to ease the fabric when attaching bias strips to circles and curves. Otherwise, the fabric will stretch and the circle will not stay flat.
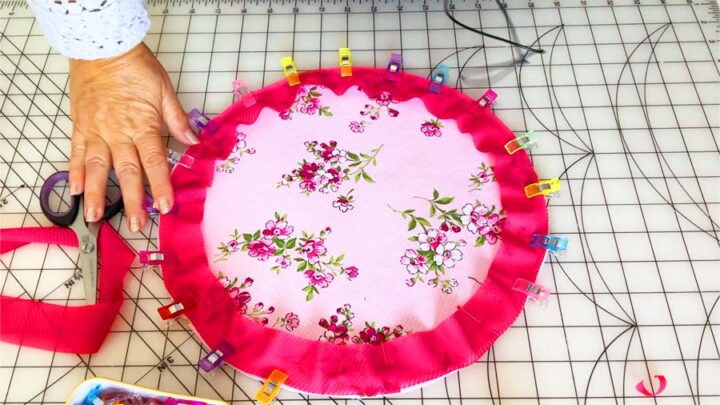
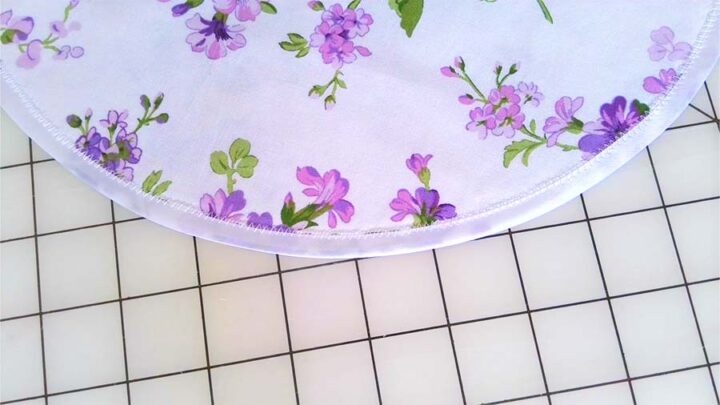
Now the bias tape is stitched in place. We have to wrap the bias strip over the fabric edges of the circle. After that, press it.
✅ Related tutorial: Iron buying guide
Next, fold the raw edge of the bias strip. The folded edge should just cover the stitches we made attaching the bias strip. Make sure it has the same size all over and doesn’t have any pleats or folds. Pin in place (on the wrong side of the circle). Press with a hot iron.
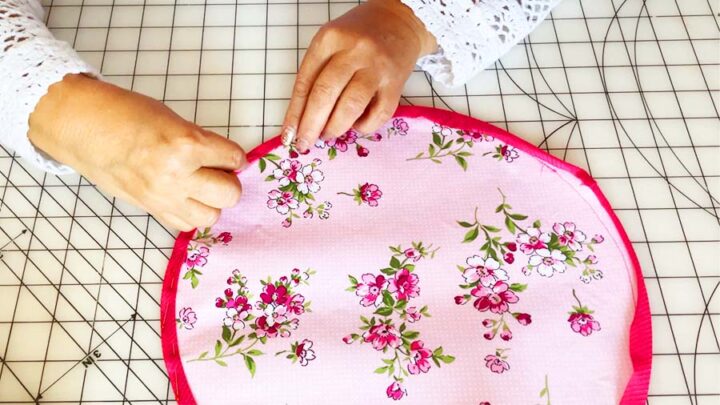
Go to your sewing table and take out the pins from the wrong side and insert them on the right side preparing the fabric for stitching.
Stitch on the right side of the circle close to the edge. If you correctly folded the edge of the bias strip on the wrong side you will have nice top stitches on both sides of the circle.
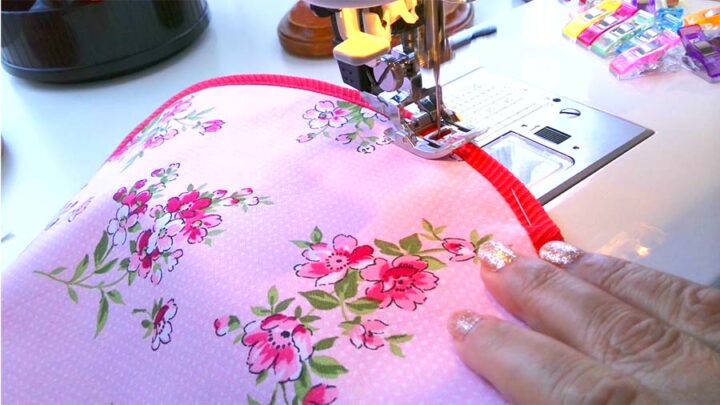
I used this technique for binding 4 circles of the bowls. For the other 2 circles, I used a different bias tape and a different method to attach it.
This single-fold bias tape is store-bought and the folded edges have very small seam allowances. So I just place the bias tape over the fabric trying to make the fold equal on both sides of the circle.
But here I will have a problem with overlapping the edges of the tape. I can’t do it as I described above. So I just leave about 3 inches on each end of the bias tape unpinned.
I measure where they are supposed to meet, cut the ends perpendicular to the tape and sew the ends together. After that, I press the tape making sure I have nice folded edges around this small seam.
Now I need to stitch the tape in place. But using a regular straight stitch might be a problem because the folded edges are equal on both sides of the circle. And if I sew on the right side I don’t see how it goes on the wrong side and I might not catch it all the way along.
So the solution is simple – use a zigzag stitch. These are the settings for the zigzag stitch – 3.5 mm wide and 1.5 mm long. And as you can see, all the edges on both sides of the circle are sewn nicely.
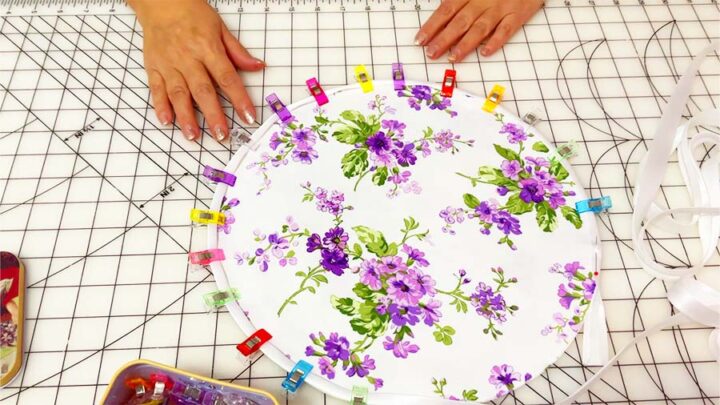
Press all the fabric circles after you are done binding.
Step 4
Finishing the fabric bowls
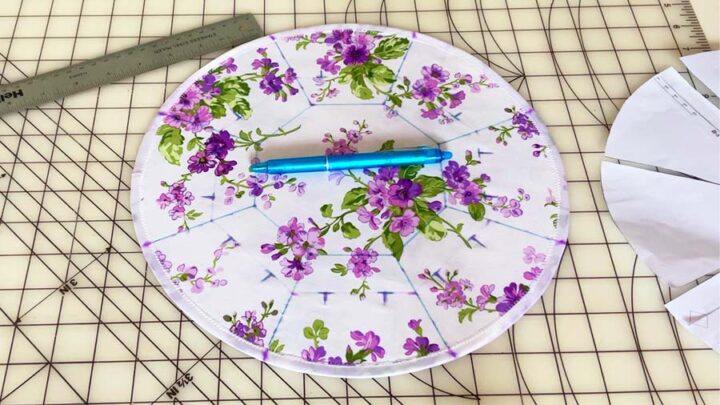
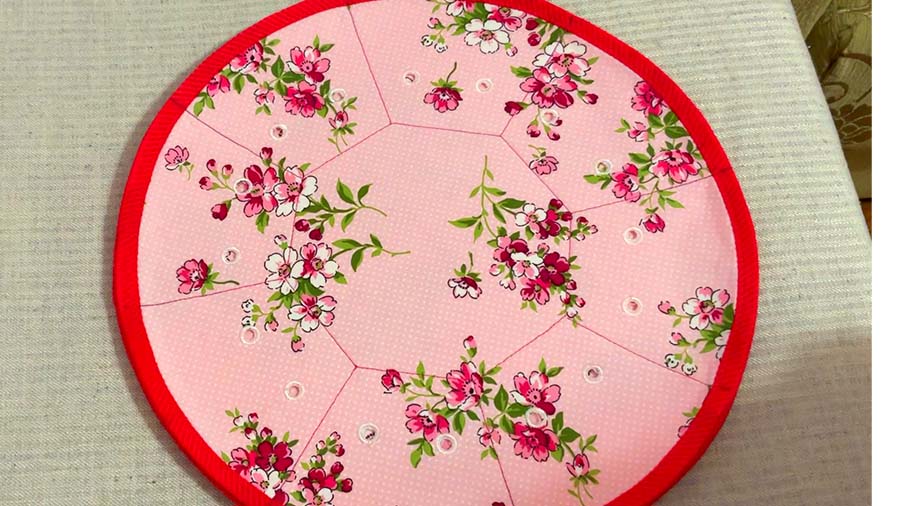
Using the template, mark some stitching lines on the top circle of each bowl.
For this cut the template along the sidelines that divide the circle into 8 segments.
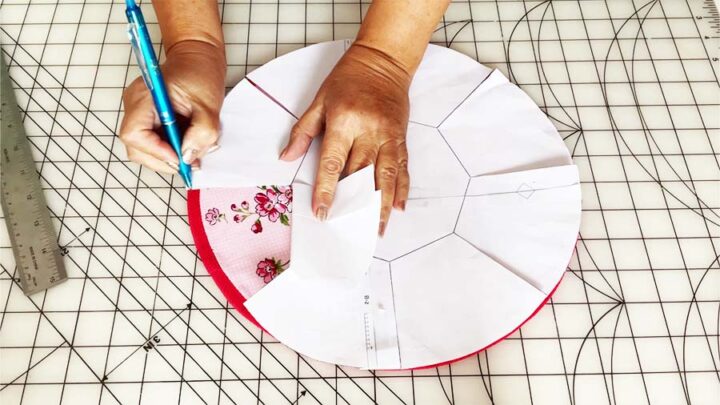
Use a suitable fabric marker to draw the lines.
I like to use my Frixion pen – marks of this pen are clearly visible on my fabric and will completely disappear with the heat of the iron.
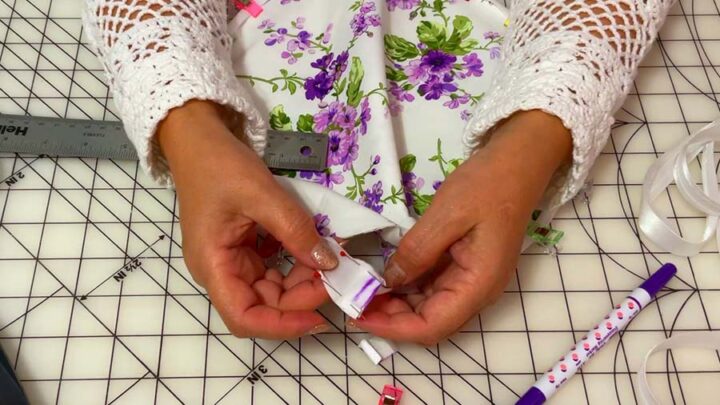
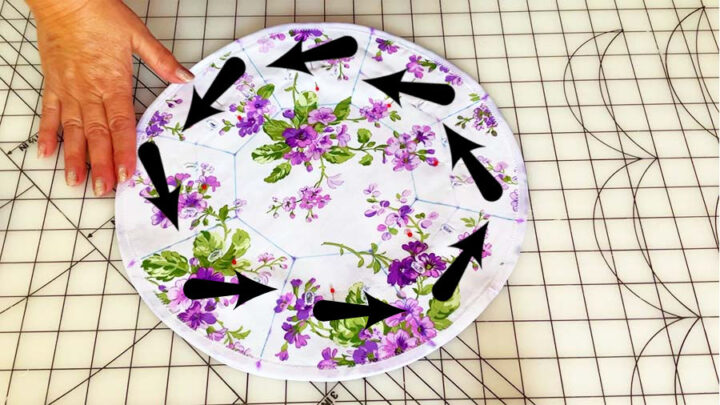
Now we need to mark a few buttonholes for the ribbon. Buttonholes are essential for this project. So take a ruler and start marking them.
Measure 1 3/4 inch from each point of the octagon in the middle. Connect these new points with straight lines using a ruler. Mark 2 buttonholes 3/8 inch long (about 3/4 inch from each side) on each line.
Make buttonholes using a buttonhole presser foot.
✅ Related tutorial: Buttonhole Presser Foot 101: What It Is And How To Use A Buttonhole Foot To Create Nice Buttonholes
I guess you can just cut the fabric for inserting ribbon and it’s not going to fray much because it’s quilting cotton and it has fusible interfacing on the wrong side.
But if you can make buttonholes with your sewing machine it will look more professionally done.
I was experimenting with my embroidery machine and made openings for the ribbon with my embroidery machine.

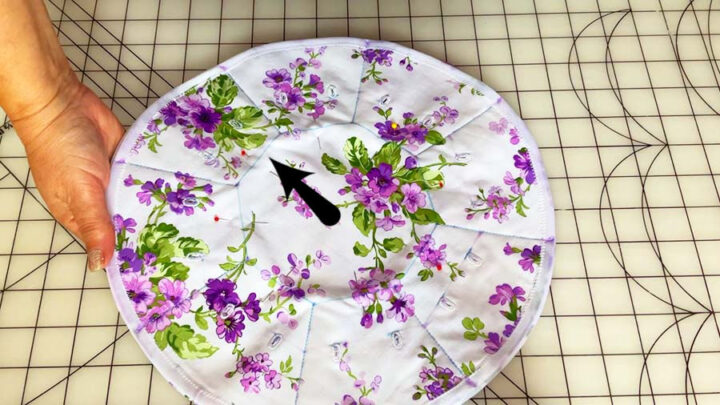
Now place 2 fabric circles one on top of the other and stitch along the side marked lines.
Next place them on the third circle and stitch the octagon in the middle.
Press over the stitches. If you have used the Frixion pen, the marks will disappear with the heat of the iron.
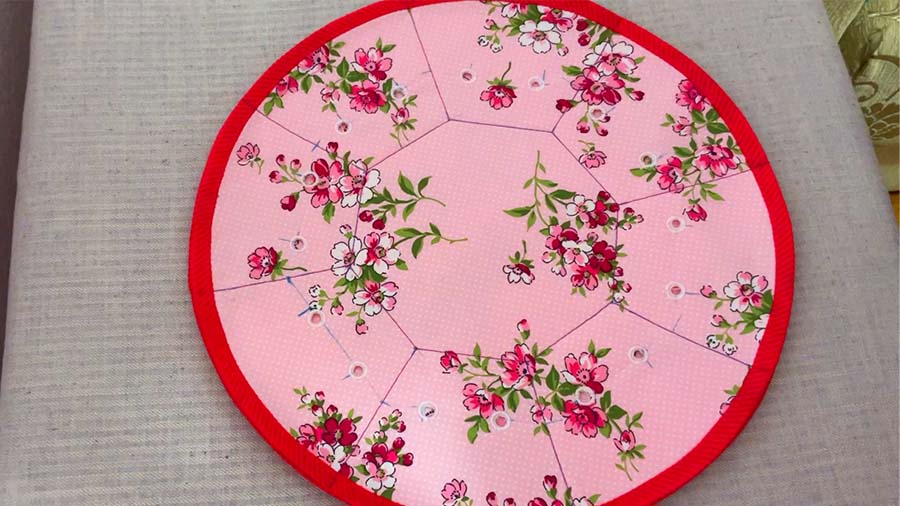
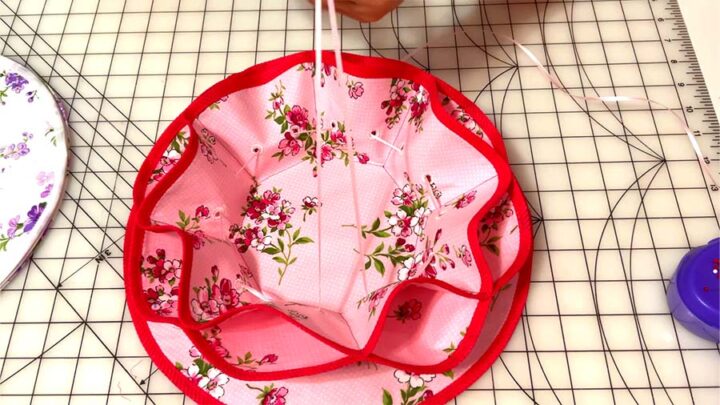
Insert the ribbon and make the 3D shape by tying the ribbon.
So here is my YouTube video. Check this out if you like to see a helpful video on how to make Easter egg holders (instead of reading).

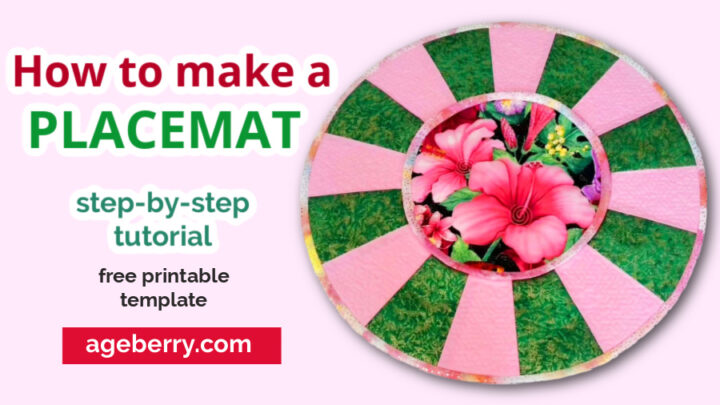
If you liked this project you might be also interested in this one How to make a round quilted placemat | Free printable template
Did you find this tutorial helpful? If so, save this pin (see below) on your sewing board so you can come to this tutorial later when you are ready to make fabric bowls DIY/ Easter egg holder, and follow me on Pinterest for more tips, tutorials, and inspiration!
latest posts
- Narrow Hem On Curves: A Unique Sewing Hack For Slippery Fabrics
- 10 Types of Buttonholes: How to Choose the Right One and Avoid Common Mistakes
- The Best Sewing Tools for Slippery Fabric, Bulky Layers, and Stretchy Knits
- 25 More Smart Sewing Shortcuts for Better Results With Less Effort
- 25 Sewing Shortcuts That Make Sewing Easier and More Efficient
- Types Of Sewing Machine Feet And Their Uses
- The Interfacing Cutting Guide: Methods, Folds, and Seam Lines
- Steam or Dry Heat for Fusible Interfacing: Which Actually Works
- Essential Sewing Tips: How to Apply Fusible Interfacing Correctly


I just found you, for the second time, and find your tutorials to be one of a kind. I’m so very impressed with the care and knowledge that you take and have. I love all the added information you put into the tutorials. Any sewing questions I have, I know I’ll find the answer on your site. Thank you for your work and time spent educating others.
Thank you!