
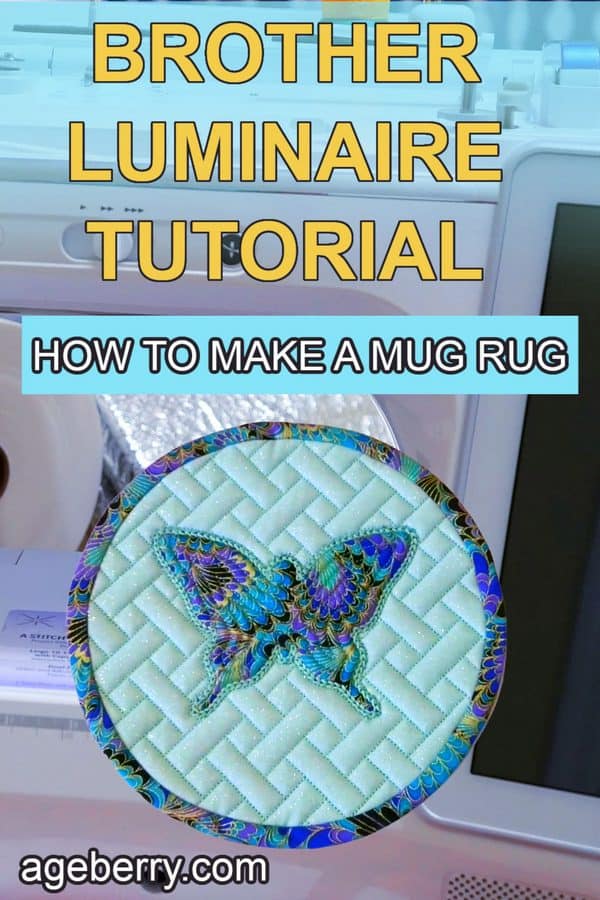
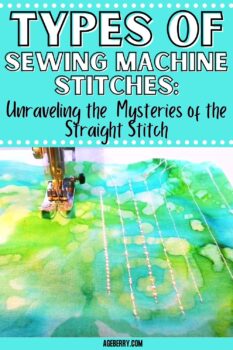
Brother Luminaire Tutorial: How To Make A Mug Rug In The Hoop
This is a fun and easy Brother Luminaire tutorial: how to make a mug rug in the hoop. But you can use many other modern embroidery machines to make this mug rug, for example, Babylock Solaris, Babylock Destiny, Brother Dream Machine, etc.
So let’s learn how to make a mug rug with an embroidery machine. You can easily design your own mug rugs with Brother Luminaire. But in this tutorial, I will not show you how to create designs with Luminaire but how to actually make the mug rugs with the machine using an already created design.
I design this mug rug myself and you can download the free design if you are a subscriber to my newsletter.
Attention! If you like the video format, at the bottom of this post, look for a YouTube video version where there is a step-by-step tutorial on how to make a mug rug with an embroidery machine. For a more complete picture, I recommend exploring both versions.

Step 1 – Prepare your Brother Luminaire machine and everything necessary for making the mug rug
Choose a design for your mug rug and load it into the machine. Have the design open on your screen.
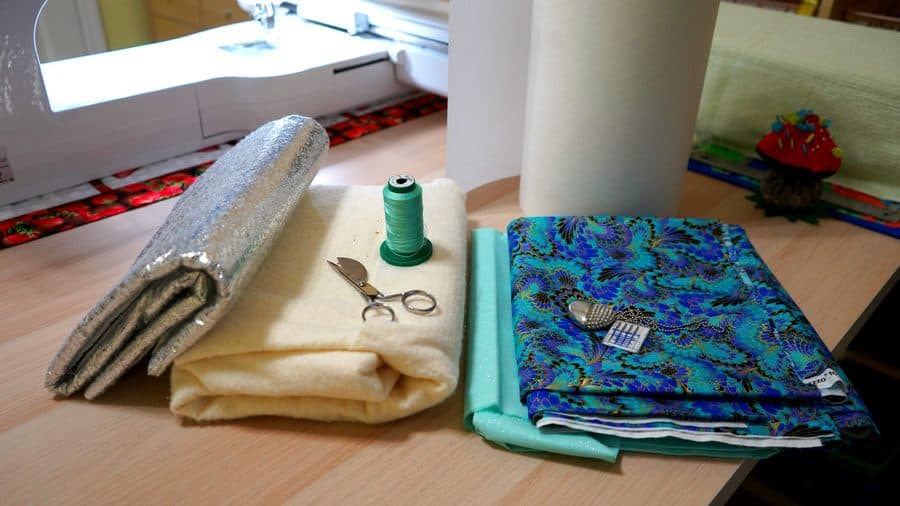
Choose the fabric combinations and embroidery threads you want to use. Obviously, you don’t need much fabric for one mug rug, but if you want to make the whole set then consider if you have enough fabric for everything you want to make. Make sure that the fabric for your mug rug is not bleeding. You will need to launder it often. Some dyes lose color when washed. Some of this color transfers to adjacent fabrics and leaves a stain. We don’t want this.
Note: Some of the links on this page are affiliate links. This means I will receive a commission if you order a product through one of my links. I only recommend products I believe in and use myself.
Choose your stabilizers and batting if necessary
I used a medium-weight tear-away stabilizer and Therm fleece. Therm fleece is a heat-resistant material that is used for hot and cold insulation and provides protection from hot surfaces up to 340 degrees Fahrenheit.
It’s designed as a liner material and should not make direct contact with heat sources. It has white fleece on one side that allows for machine or hand quilting with the dimensional effects and the silver lining on the other side
✅ Related tutorial: Flame Retardant and Heat Resistant Fabrics 101
Step 2 – Make a placement stitch with your embroidery machine
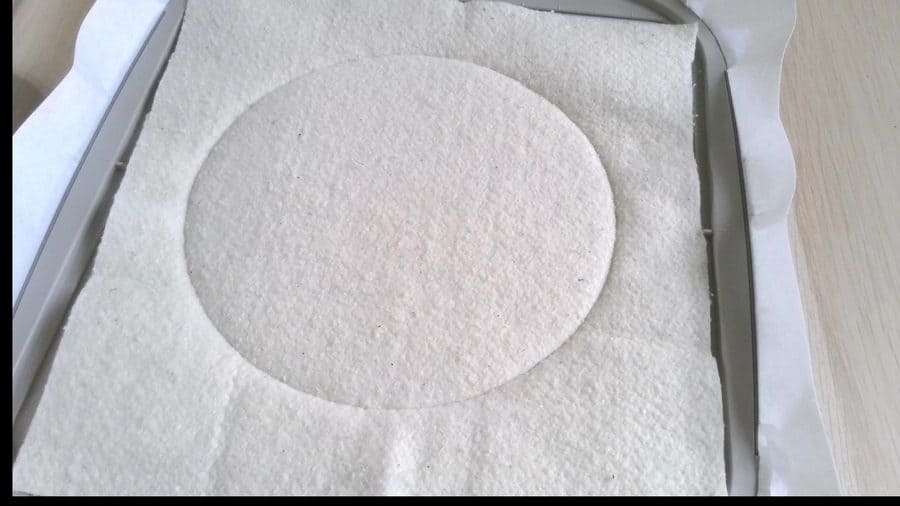
Hoop a piece of stabilizer. I use tear away stabilizer.
Cut a piece of heat-resistant material (I used Term fleece) and a piece of cotton batting and place them over the stabilizer. First goes Term fleece and after that the batting.
Run the first step of your mug rug design – I think it’s called a placement stitch. Usually, it’s a running stitch, not a satin stitch. Use embroidery thread that matches the color of your mug rug fabric.
Step 3 – Make a tack-down stitch for the mug rug fabric
Take the hoop out of the Luminaire machine. Place a piece of mug rug fabric right side out on the wrong side of the hoop. I mean the side that is down on the machine. The piece of fabric should cover the placement stitches completely. Use scotch to secure the edges of the fabric – it shouldn’t move when the embroidery machine is running the design.
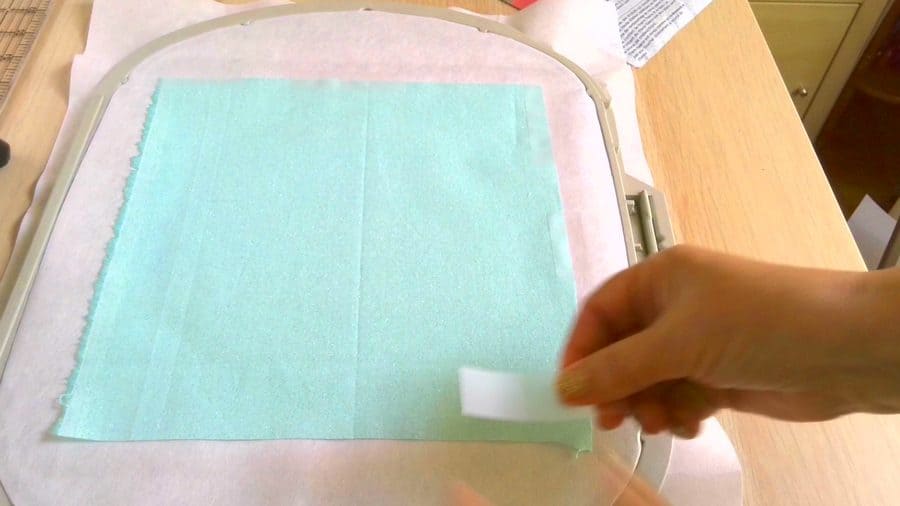
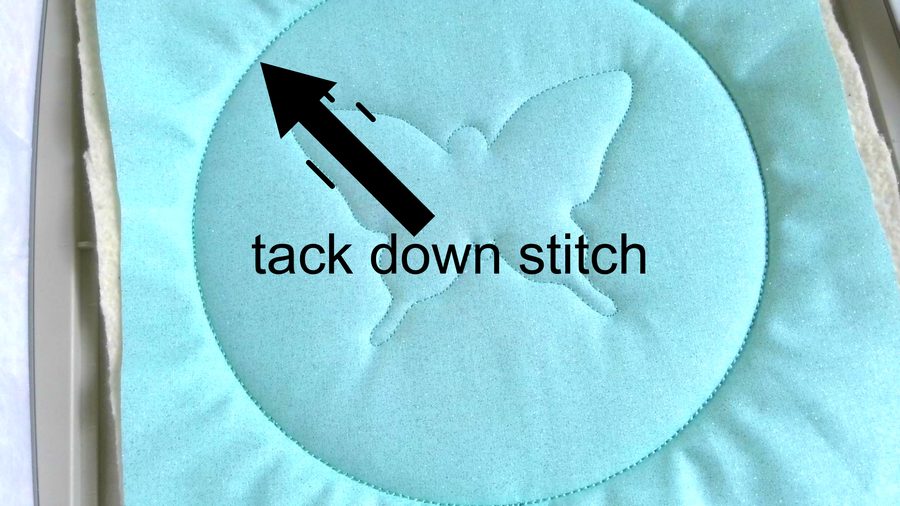
Place the hoop back in the Luminaire. Take a piece of fabric for the mug rug and lay it over the batting – it should cover the stitches completely and run the second step of the design – the tack down stitch that will tack down the fabric on top and at the bottom.
Hold the fabric so it doesn’t move but don’t pull.
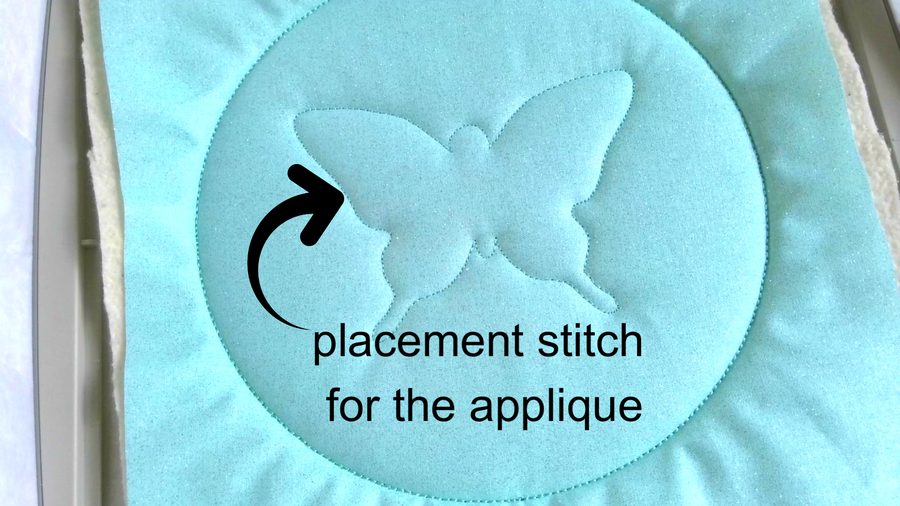
Step 4 – Run a placement stitch for the butterfly applique
The next step is to run a placement stitch for the applique. Use embroidery thread that matches the color of your base fabric.
✅ Related tutorial: Brother Luminaire tutorials: How to applique with an embroidery machine
Step 5 – Make the applique
Now take a piece of applique fabric and place it right side up over placement stitches. The applique fabric has to cover the stitches completely.
Run the next step of your applique design. In this step, the machine will attach the applique fabric to the mug rug fabric.
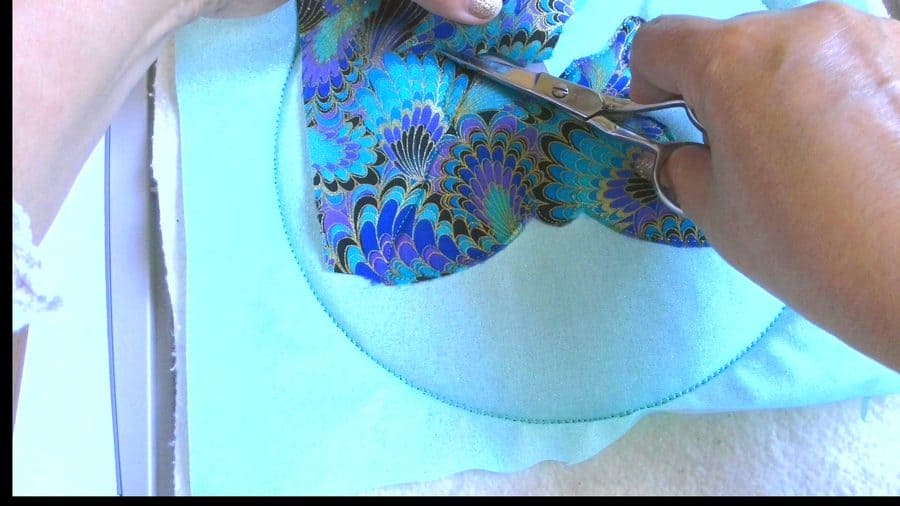
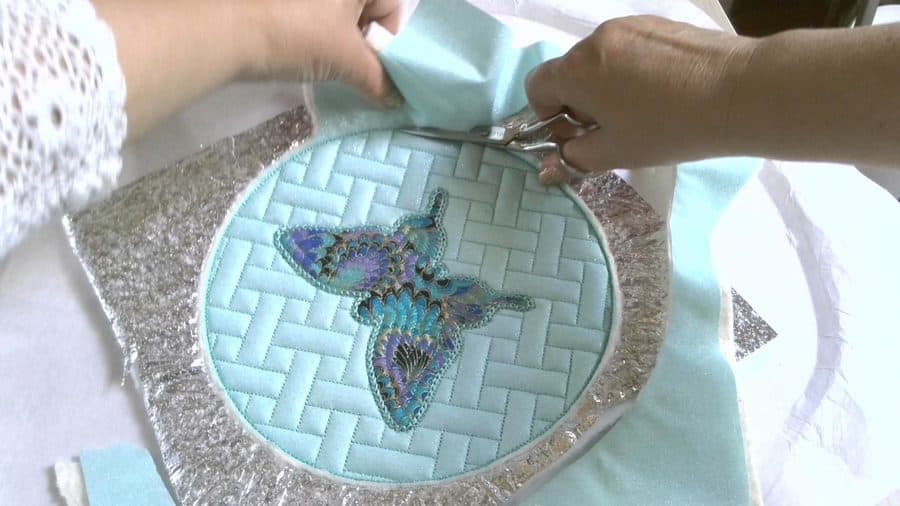
Take the hoop out of the machine. Take applique scissors and trim the excess fabric from the tacking stitches. I use duckbill scissors. Try to cut as close to stitches as possible.
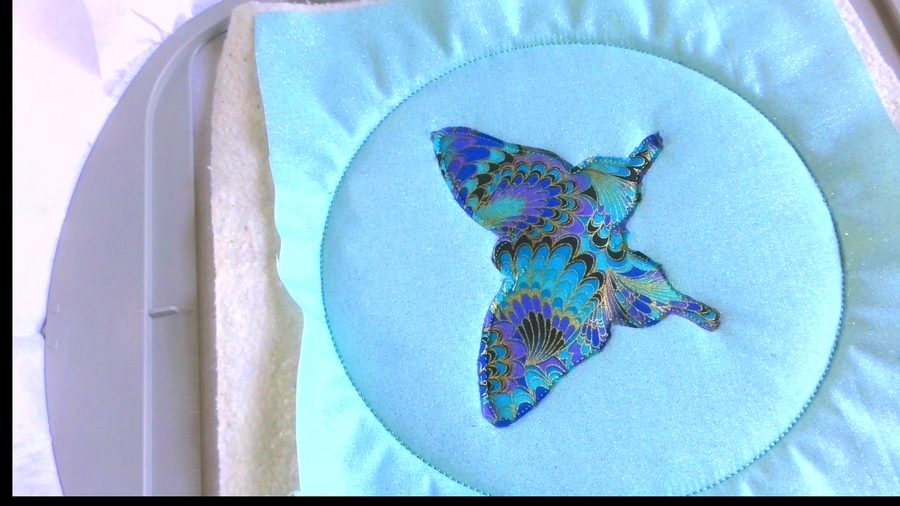
This is how your applique should look after you trimmed the fabric.
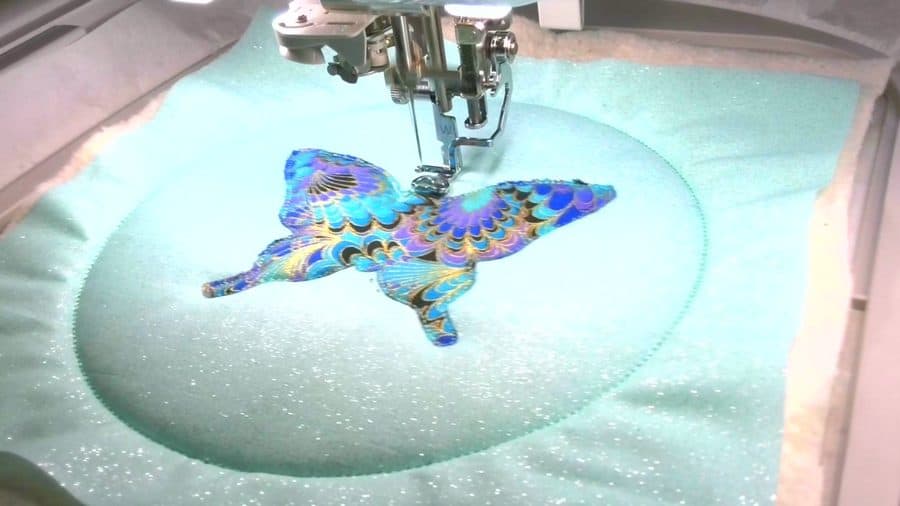
Run the next step(s) of your applique design. Choose an embroidery thread to use. It can be a matching thread for your applique fabric or you can use contrast colors. The machine will sew decorative stitches. They go all around the applique covering its raw edges.
Step 6 – Run quilting stitches for the mug rug
The next step is to run the quilting stitches on the mug rug. For the butterfly, I have chosen an eco-design.
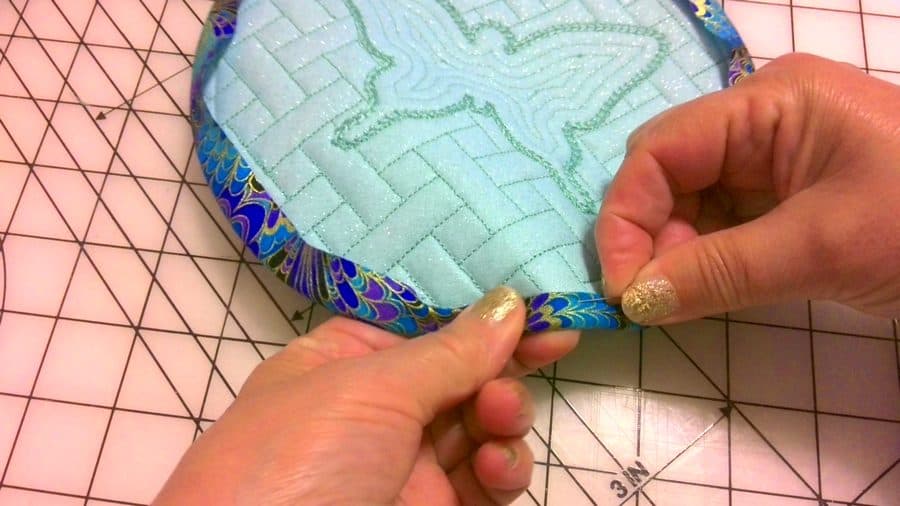
Step 7 – Sew a binding
Take the mug rug out of the hoop and cut all the layers close to stitches. Use the duckbill scissors again.
Finish the mug rug with a binding. Let me show you really quickly how to do it.
✅ Related tutorial: How to bind a quilt by serger
First – measure the circle so you can cut a bias tape for the binding. Measure it like I am showing now.
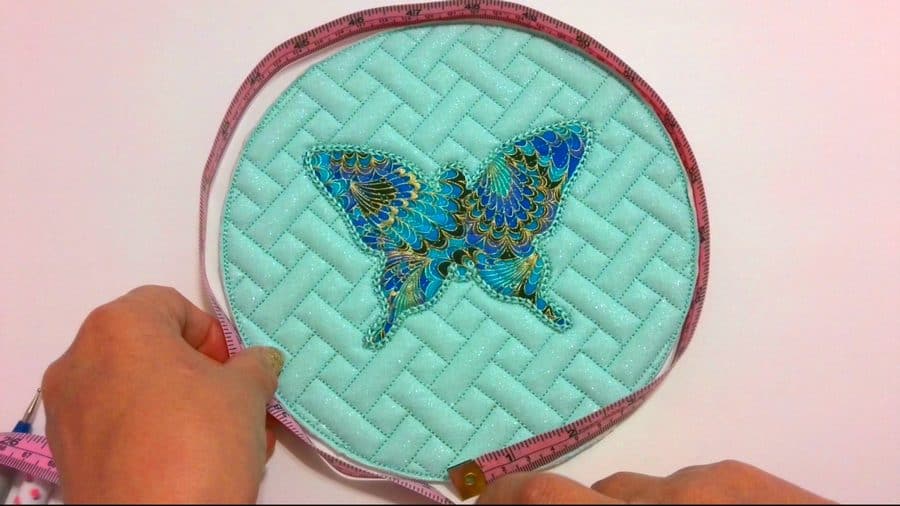
So my binding will be about 26 inches long.
Free embroidery design files!
Get my free machine embroidery design files
Subscribe (free!) to my weekly newsletter with helpful tips and video tutorials plus get instant access to my resource library with this file and other helpful files, printables, and patterns!
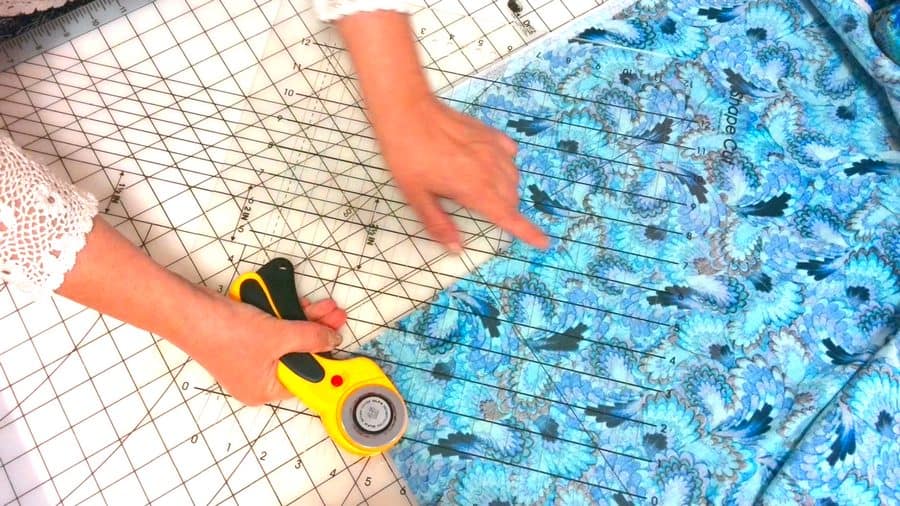
I don’t want to cut it in one piece, it will be too long for my nice fabric, I have to cut it on a bias. So I will cut it into two pieces.
I have a special ruler that allows me to cut bias tapes very fast. Shape cut that’s the name.
So I am using my cutting mat markings and the ruler markings, that way I will cut the strips at exactly 45 degrees.
The next step is to sew these bias strips together. I am going to use my cutting mat again. I align one of my strips with this marking line, and the other one goes exactly perpendicular to the first one. And this is my stitching line.
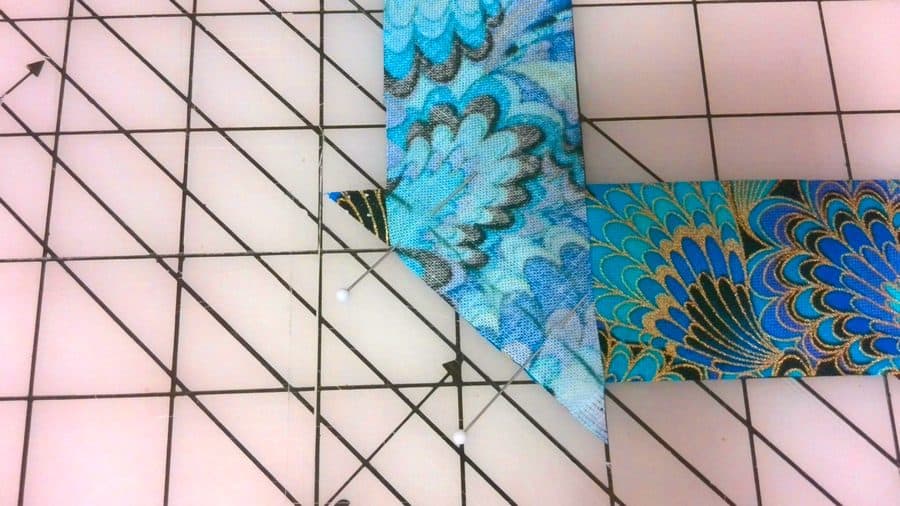
I pin it and mark it with my Frixion pen. Do you use Frixion pens as marking tools for fabric? I like it. The lines disappear after I iron them.
I stitched the strips together and pressed the seam open. The bias tape for the mug rug is ready.
So now I pinned it all around.
I cut the ends of the bias tape and make a stitch perpendicular to the strip sides.
I stitched the bias tape to the mug rug and now all that’s left is to turn it over and sew on the other side. I prefer to sew the binding on the wrong side by hand. I am going to use an invisible stitch.
✅ Related tutorial: How to sew an invisible stitch by hand
And that’s all for my mug rug with heat-resistant material inside. It’s cute, isn’t it?
So here is my YouTube video. Check this out if you like to see how to make a mug rug with Brother Luminaire instead of reading…

✅ Related tutorial: In The Hoop Embroidery Project: Fabric Christmas Tree Baby Bib
Did you find this tutorial helpful? If so, save this pin (see below) on your sewing board so you can come to this tutorial later when you are ready to make a mug rug with Brother Luminaire or another modern embroidery machine, and follow me on Pinterest for more tips, tutorials, and inspiration!
If you enjoyed this machine embroidery project, then you’ll love my tutorial on creating In-The-Hoop Lined Zippered Bags. Easy step-by-step instructions will help you make awesome zippered bags with your embroidery machine. You’ll get FREE design files for your embroidery machine in all popular formats, including PES.
latest posts
- What Do You Call a Person Who Sews? I Asked My Readers and Got 1,408 Opinions
- DIY Round Purse: PDF Sewing Pattern and Detailed Instructions
- Mini Wonder Clips By Clover: Useful Sewing Tool Or Just Another Notion?
- Non-Slip Grips For Quilting Rulers: A Small Notion With A Useful Job
- Fabric Eraser for Sewing: What It Removes and When to Use It
- What Is The Best Thread For Sewing Machine Projects? Let’s Find Out!
- Butterfly Quilt Block Tutorial – Foundation Paper Piecing
- How To Sew Quilt Squares So The Corners Match
- Sewing With Fork Pins: How They Help With Pattern Matching, Slippery Fabric, And Seams

I thought all mug rugs were rectangles. This looks to me like a pot holder. Is the heat resistant foil like batting really necessary for a cup of coffee? You usually hit it out of the park, but not with this one. Oh, well, we still love you.
Thank you! It can of course be used as a pot holder, and my purpose was to make an example to show the process. I don’t think mug rugs need to be rectangular, I have seen one in the shape of a heart. I have seen them named candle mats also. But this design and its cousin the happy sun (https://www.ageberry.com/brother-luminaire-tutorial-how-to-applique-embroidery-machine/) came out so pretty that I am afraid to use them, what if they get dirty?
Hello Olga
Where do you go for the Butterfly Design for the Round Mug Rug?
Regards
Caroline
I made the design myself; if you are a subscriber to my newsletter, you can download it for free from my resource library page