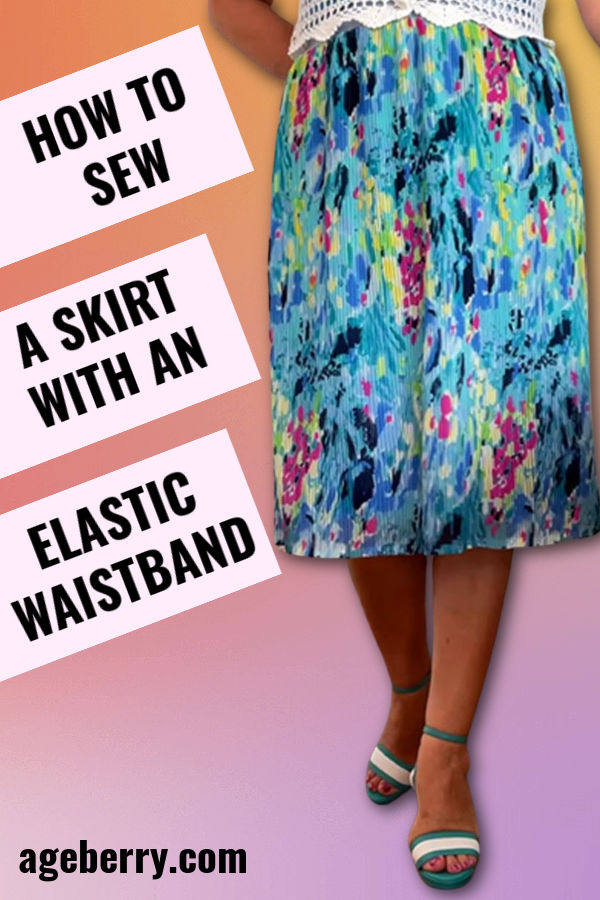
How To Sew A Skirt With An Elastic Waistband
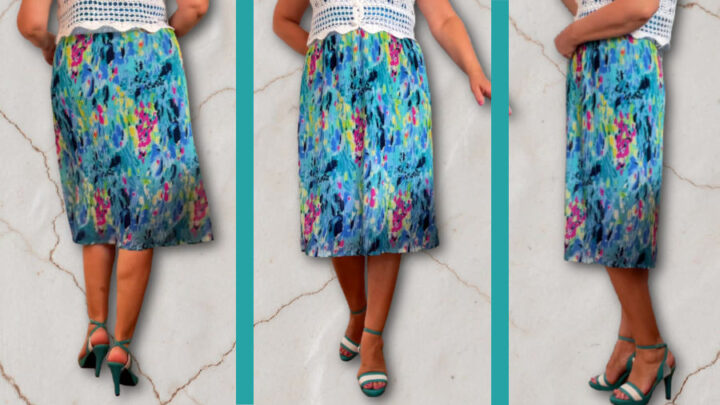
In this sewing tutorial, I will show you how to sew a skirt with an elastic waistband. This is a midi skirt with lining, no zipper necessary, and the elastic waistband is exposed. I sewed the skirt from micro pleated fabric with pleats that are set. The skirt is made from one pleated panel and has only one side seam. It has some gathers at the waist. This is an easy project for beginners. You don’t even need any pattern.
What you’ll need for the elastic waist skirt (see more about each item in the article below)
- Fabric for the skirt
- Elastic for waistband
- Fabric for the lining
- Serger/sewing machine
- Regular sewing notions
Attention! If you like the video format, at the bottom of this tutorial, look for a YouTube video on How to sew a skirt with an elastic waistband where you will find really helpful information on … well, how to make a skirt with an elastic waistband. For a more complete picture, I recommend exploring both versions.
My fabric choice for this elastic waist skirt
I’ve decided to go with pre-pleated fabric which is sometimes called “plisse” fabric. In French, the word “plisse” means “pleated”.
Pleating is one of the types of fabric processing. Pleated fabric is created by the formation of many symmetrical folds, which are usually laid in one direction. The width of the folds varies, and the pleating itself can go both over the entire width of the product or in its individual sections in groups at certain intervals.
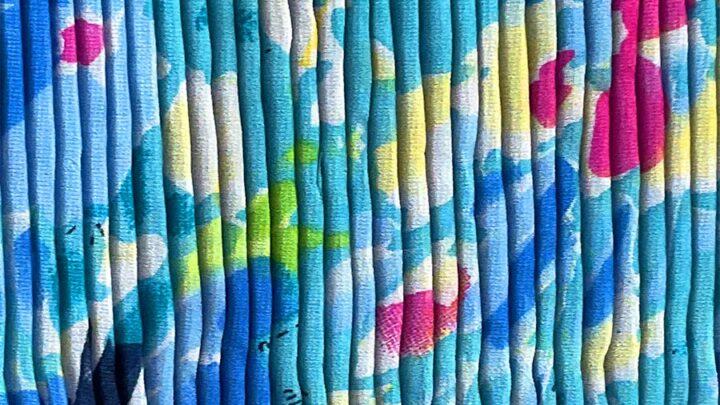
A variety of fabrics are suitable for creating pleats: cotton and linen, silk and polyester, wool, velvet, and even leather. For this elastic waist skirt, I used semi-transparent polyester fabric.
I am usually very much against using polyester fabric and I even wrote an article on my site The Chemicals We Wear Everywhere. But the truth is synthetic fabrics are ideal for pleating because they hold pleats well and don’t lose their shape after hand washing. Most of the time it’s not recommended to wash pleated fabrics though – it’s better to take it to dry cleaning.
So I made an exception in this case, especially since I never saw pre-pleated natural fabrics for sale. I also made a lining for the skirt and the lining material is 100 % cotton knit fabric. So polyester is never touching my skin.
Note: Some of the links on this page are affiliate links. This means I will receive a commission if you order a product through one of my links. I only recommend products I believe in and use myself.
You can buy pleated fabric online but I didn’t find much on Amazon. But Etsy has the best choice. Check out the link below.
For the skirt, you will need about 2 yards of pleated fabric. It can be much less – just calculate your hip measurement plus add 10 inches for cutting and stitching. For example, my hip measurement is 41 inches, so I need about 51 inches of pleated fabric.
But they don’t sell fabric in stores in INCHES. They sell fabric by YARDS. Then how many yards do I need?
I have a fabric conversion calculator for this. The calculator will give me the closest yard fraction which is greater than 51 inches and with that, I can go to the store to buy fabric. Go to this link and you will see that I need 1 ½ yard of pleated fabric. Simple!
I think a pleated skirt is a classic that we all love, regardless of age. It will never go out of style. Outfits with pleated skirts never disappear from the covers of fashion magazines. Well, we just have to support this fashion trend! Every woman should have at least one such skirt in her wardrobe.
The pleated skirt has many advantages, for example, it doesn’t need ironing, and combines very easily with any style of clothing.
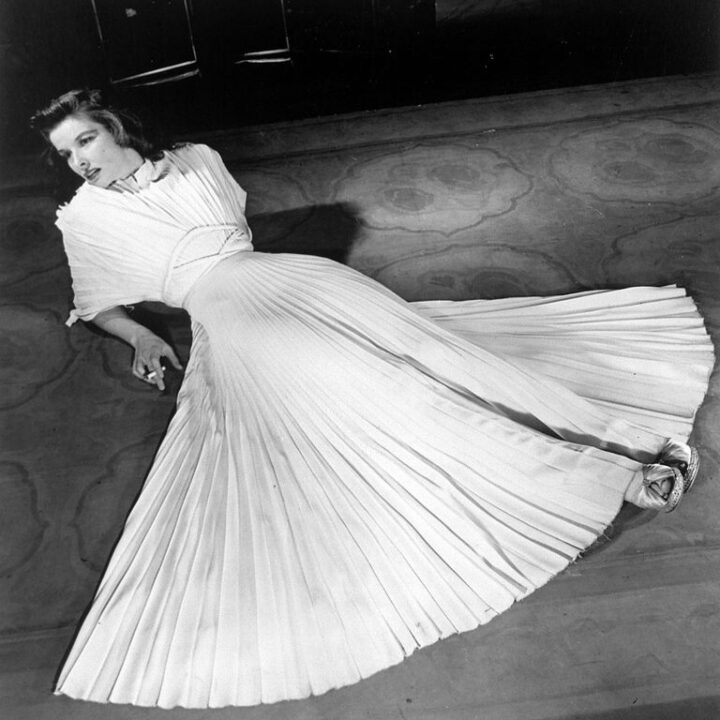
In the XX century, the popularity of pleated skirts began to grow rapidly and gain momentum. We see it in old movies, remember at least Katharine Hepburn in “The Philadelphia Story” or the famous “silly little dress” of Marilyn Monroe.
Pleated skirts can be straight or flared, long, midi, or short, and made from all kinds of fabrics, but in this tutorial, I will show you how to make a straight pleated skirt with an elastic waistband.
Despite the seeming complexity of its sewing, creating this skirt is an easy project. It will take very little time. You can sew this pleated skirt in just one hour. The skirt will have only one seam on the side and will have some gathers at the waist with an elastic waistband.
Take The Following Body Measurements For The Skirt With Elastic Waist
- Waist,
- hips and
- desired length of the skirt
If you would like to know how to take body measurements correctly check out my tutorial.
Prepare And Cut The Fabric For The Elastic Waist Skirt
Lay the pleated fabric on a table. I noticed that my pleated fabric doesn’t really have any visible difference between sides, so I had a hard time finding the right side – it was a little more bright than the wrong side.
Let me give you a helpful tip if you work with fabric like this. When I found the right side I marked it with a small piece of painter’s tape so I don’t need to look for the right side again when I cut and sewed the fabric. I have many tips like this one in my tutorial 36 simple and effective ways to sew faster.
Don’t stretch the fabric, let the pleats lay free and unstretched.
I’ve learned that the pleated fabric has peaks and valleys.
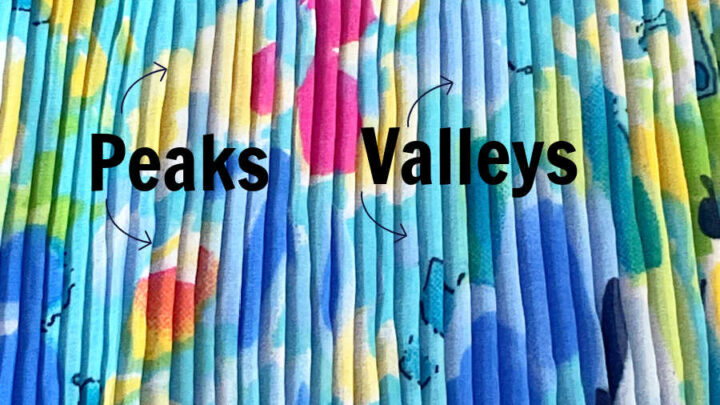
Check for the beginning of the fabric if it was cut correctly along the same peak or valley. If it was not – cut it straight.
Measure the distance equal to your hip measurement parallel to the selvages. Add 1 inch to this number and cut the fabric along one peak or valley.
Now determine where to make the next cut.
The fabric selvage on pleated fabric can be used as the skirt hem.
So now I need to cut the waistline. I measure the desired skirt length from the selvage plus ½ inch and cut.
But the best way to cut my pleated chiffon-like fabric is just to RIP IT. Then the cut will be very straight.
✅ Related tutorial: How to cut fabric straight
So now I have this rectangle for the skirt. That’s all. So easy!

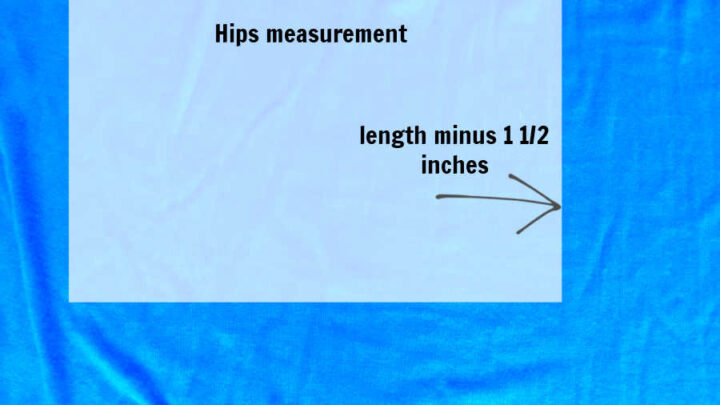
The next thing is cutting the lining fabric. I cut about the same rectangle from the lining fabric. But the lining has to be a little smaller, especially the length of it so the lining is not visible under the skirt. So here are the measurements for the lining:
Hips x length of the skirt minus 1 ½ inch.
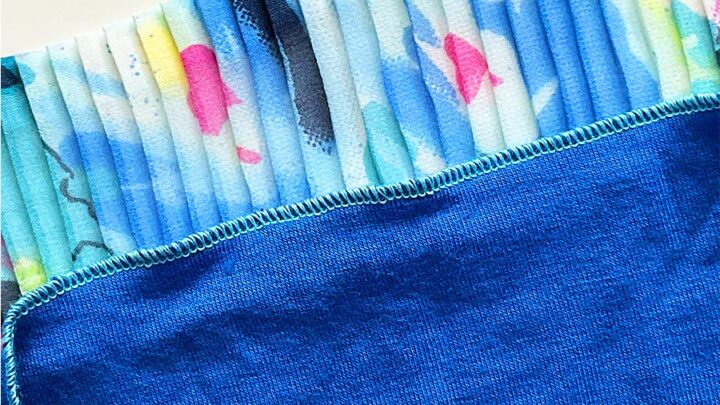
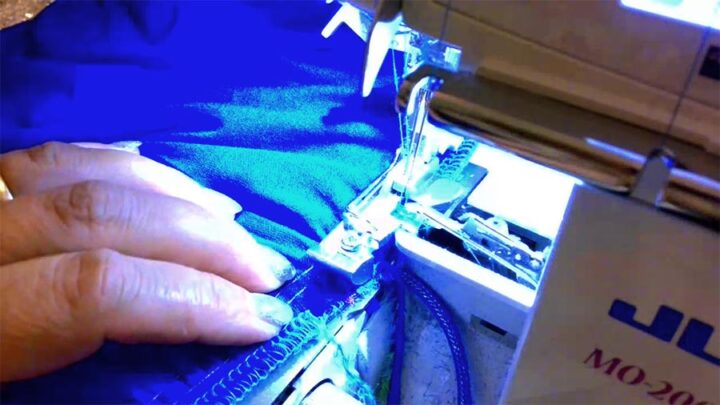
Make The Skirt Seam
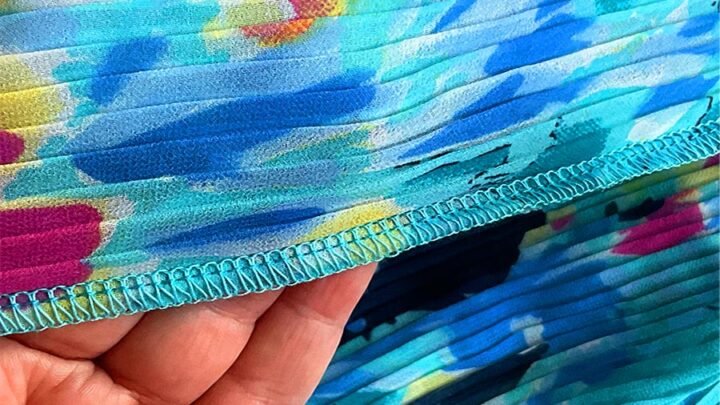
I strongly advise you to use your serger for making this skirt.
✅ Related tutorial: Best serger for beginners: Serger buying guide
The seam of the skirt needs to be without any puckers and the skirt should hang smoothly at the seam. The seam has to be practically invisible when you wear the skirt. So the serger seams are very good for this and they are also stretchy and durable. And the serger is also very fast! It sews the seam and finishes the raw edges of the fabric at once. And the good part is also you don’t need to press the seam with an iron.
I used a 4 thread 2 needle serger stitch. Check your settings on scrap fabric before making the stitch.
If you would like to know how to use a serger I have a very helpful course SERGER MADE SIMPLE. Check it out at this link.
Pin the fabric before stitching, the right sides together. Match either 2 peaks or 2 valleys on the seamline. Stitch the seam.
Hem The Lining Of The Elastic Waist Skirt
I use the rolled hem stitch of my serger.
Make The Side Seam On The Lining
Use the same serger stitch – 4 thread 2 needle stitch.
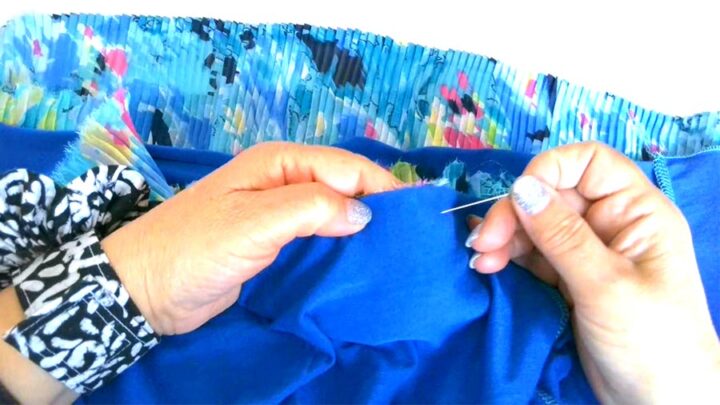
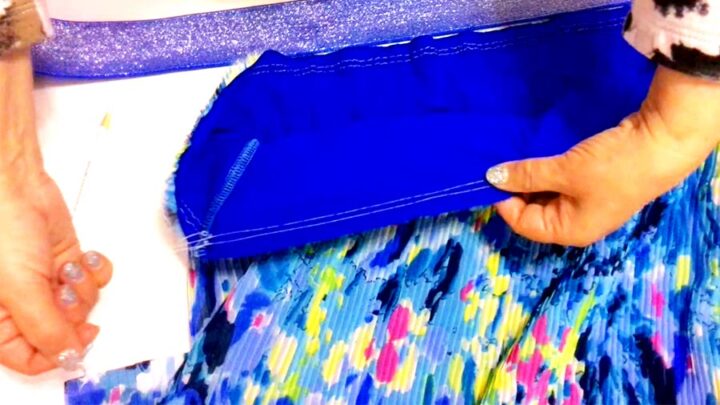
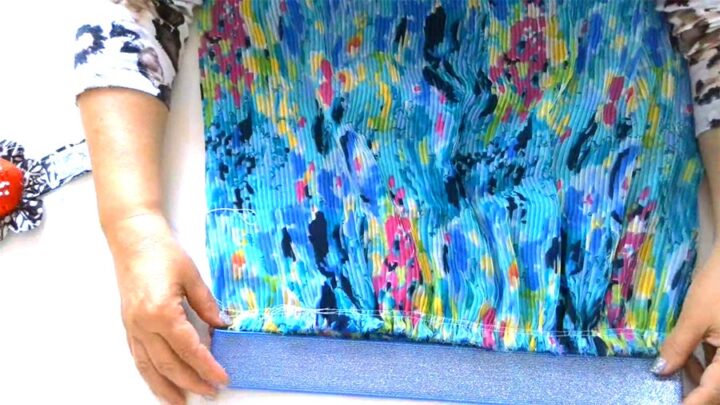
Connect The Skirt And The Lining At The Waist
Now I need to attach the lining to the skirt.
First, mark some points on the skirt and on the lining.
I prefer the seam to be the side seam.
But I need to mark the front and back center and the other side of the skirt and the lining with small cuts.
Fold the skirt and mark the other side (opposite to the seam), fold the skirt in half again and mark center front and center back. Do the same with the lining.
Pin the lining to the skirt – the wrong side of the lining goes to the wrong side of the skirt. Align all the notches you just made. The side seam of the skirt should be aligned with a notch on the side of the skirt. The side seam of the lining should be aligned with the notch on the side of the skirt. And front and back center notches should be aligned too.
Using a regular sewing machine, sew two rows of straight stitches to gather the skirt at the waistline. Use very strong thread so it doesn’t break when you gather the skirt and put your tension setting at 0, and the stitch length at 4 or 5.
✅ Related tutorial: All about stitch length
Prepare Elastic For The Elastic Waist Skirt
There are different types of elastic. For the elastic waist skirt, it’s better to use wide elastic, my elastic is 1 ½ inch wide. Choose one that’s coordinating with your fabric.
There are tons of wide elastic for sale on Amazon, check it out below.
First of all, measure the elastic around your waist so it’s comfortable and not too tight or too loose.
Cut the elastic adding ¾ inch to the elastic measurements for elastic seams.
Sew the wide elastic into a band. For this sew the short edges of the elastic together using a regular sewing machine. It’s better to use a special stretch stitch when sewing elastic and a special stretch needle.
✅ Related tutorial: Types Of Stretch Stitches On A Sewing Machine And When To Use Them

My elastic is fraying quite a lot so I need to stop fraying. I usually use a lighter to burn the edges of elastic. But be very careful with the lighter and always follow safety rules.
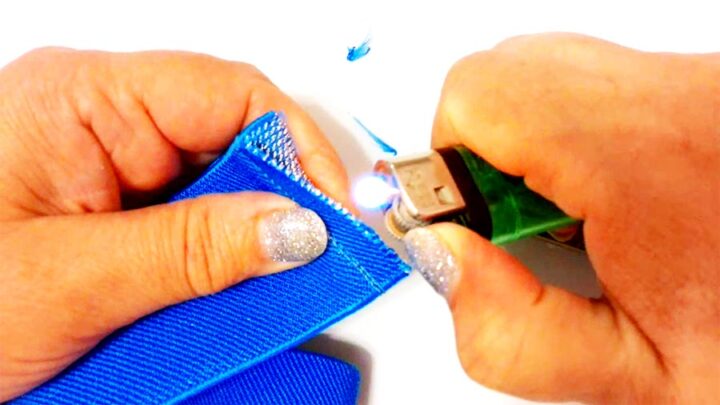
IMPORTANT SAFETY NOTE
Every time you are working with an open flame, as will be the case here, you will need to pay special attention to your safety and take extra care.
- Never leave the flame unattended
- Always extinguish the flame when you are done or when you take a break
- Never leave flammable materials around the flame
- Handle with care any materials near the flame
- Always keep your kitchen fire extinguisher handy
- Work with flame near your kitchen sink
- Fire is not a toy; never leave children, especially small children, around the lighter or alone in a place where fire can be easily started
Pin Elastic To The Skirt
First of all, gather the skirt a little so the length of the skirt matches the length of the elastic band. We made two rows of gathering stitches for this.
Pin the elastic to the skirt.

Make A Stitch By Serger Attaching The Elastic To The Skirt
Use 4 thread 2 needle stitch again.
Finish The Side Seams Of The Skirt
At this point, the skirt is practically ready. But it still needs some finishing touches.
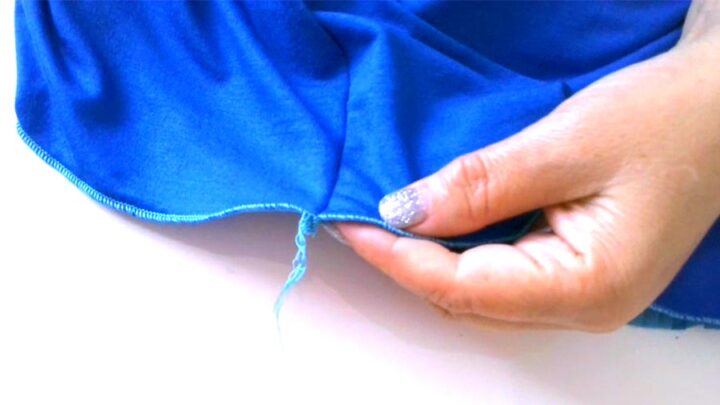
I need to hide thread tails at the hem on the skirt and lining, left after I stitched the seams by serger.
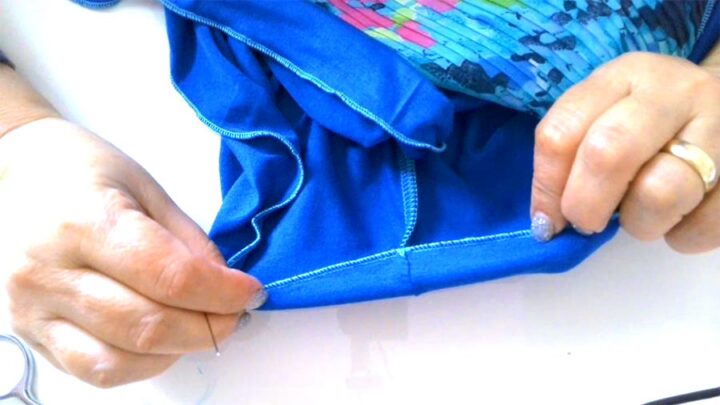
Sew also the edges of the elastic, and secure them at the top of the waistband
That’s all, now you know how to sew a skirt with an elastic waistband. And you can wear it practically with anything – romantic chiffon blouses or chunky knit sweaters. This wardrobe essential item fits perfectly into everyday life.
So here is my YouTube video. Check this out if you like to see how to sew a skirt with an elastic waistband instead of reading…

Did you find this tutorial helpful? If so, save this pin (see below) on your sewing board so you can come to this tutorial later when you are ready to sew a skirt with an elastic waistband and follow me on Pinterest for more tips, tutorials, and inspiration!
latest posts
- Corset Pressing Board for Sewing: What It Does and How I Use It
- 7 Essential Tools and Settings for Sewing Denim on a Regular Sewing Machine
- That Purple Thang: 10 Smart Ways to Use This Weird Little Tool
- 20+ Reasons Your Sewing Machine Thread Keeps Breaking (+ Solutions)
- Dresden Plate Quilt Block: 4th of July Fireworks
- How To Sew Curves the Easy Way Using a Curve Master Presser Foot
- 30 Sewing Hacks That Turn Ordinary Items into Useful Sewing Tools
- Seam Allowances in Sewing Patterns: What They Are and How to Use Them
- What Do You Call a Person Who Sews? I Asked My Readers and Got 1,408 Opinions