
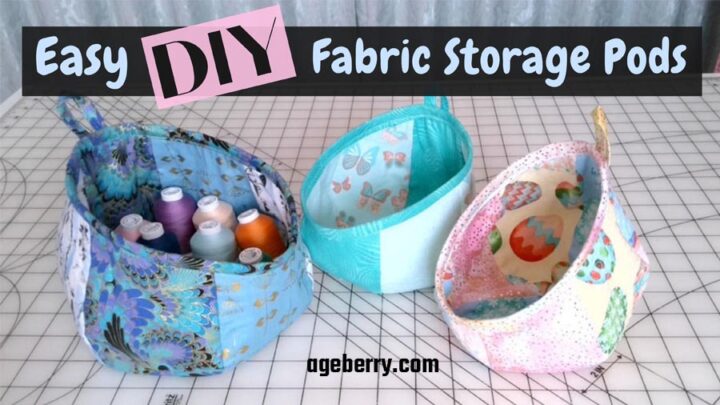
Easy DIY Fabric Storage Pods | Free Pattern And Tutorial
In this tutorial, I want to show you how to make fabric storage pods.
These fabric baskets (called bubble pods) are colorful, they are easy to make, you will polish your sewing skills by making them, and they can add some color to your room. They have many uses.
The fabric storage pods are the perfect way to store your sewing supplies. You can use them for thread spools, bobbins, sewing clips, fabric scraps or organize some yarn for your knitting project, or put Easter eggs. They are customizable with whatever color you want so that no two pods look alike. Plus, they look great on shelves or hanging from hooks on the wall.
I made them in two different sizes.
If you want to get a free printable pattern/template subscribe to my weekly newsletter with helpful sewing tips. You will receive the password needed to access the Resource Library page!
Note: Some of the links on this page are affiliate links. This means I will receive a commission if you order a product through one of my links. I only recommend products I believe in and use myself.
What you will need to make these fabric baskets
- Pattern/template – it’s free and you can find it in my Resource Library if you are a subscriber to my newsletter
- Some scrap fabric for the outer layer and lining
- Fusible fleece, lightweight fusible batting, or medium weight fusible interfacing
- Regular sewing supplies
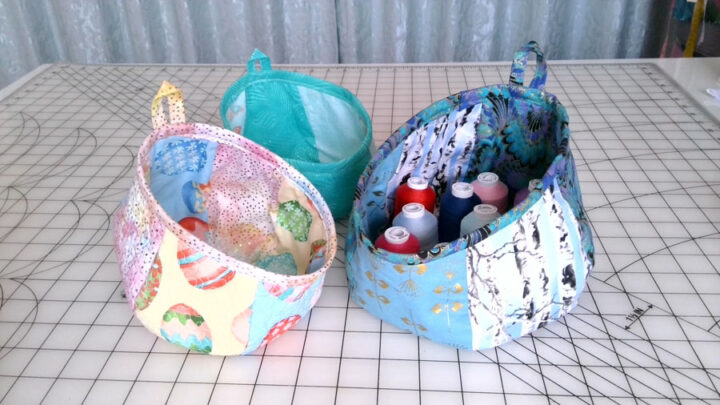
As you can see, I made 3 different bubble pods: the blue one has fusible fleece in it, the green one has just interfacing to stiffen it a bit and the lining is also interfaced, and the pink one has quilted outer fabric and the lining is not interfaced.
You can hang them up or just put them on a flat surface.
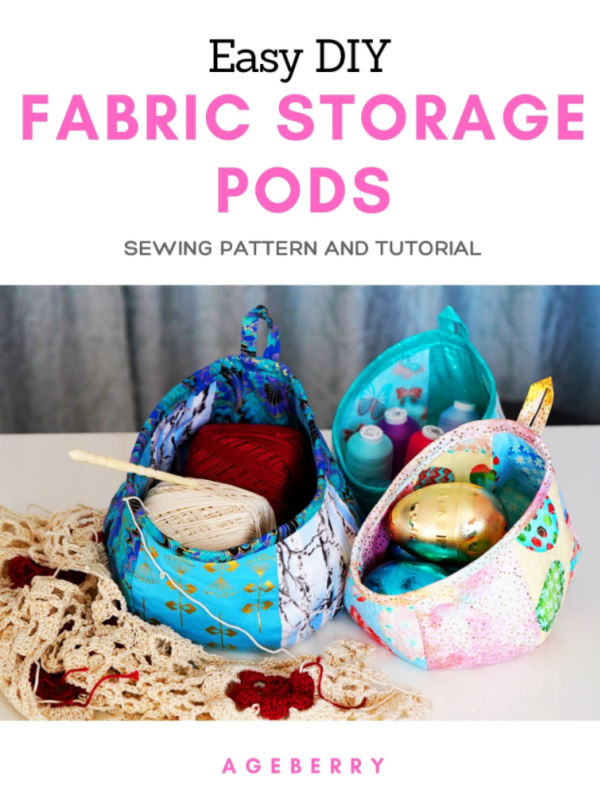
I made a helpful Printable PDF eBook Easy DIY Fabric Storage Pods | Sewing Pattern And Tutorial. This ebook includes a step-by-step tutorial and a sewing pattern/template in 2 sizes. I have all the information that you need in this eBook and no ads. You can purchase the PDF file for only $5.99. This way you can print it out and it will be available for you to refer to anytime you want.
Click on the image below to purchase
Step 1. Prepare all necessary materials for making fabric storage pods
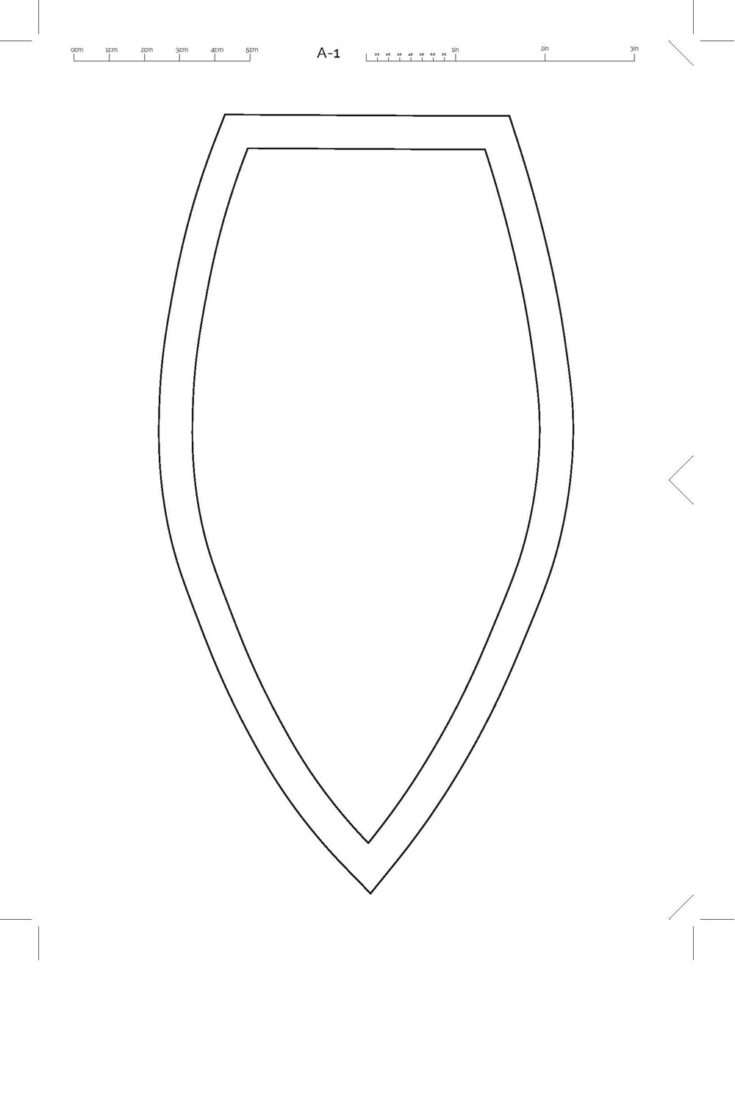
Download and print the PDF template/pattern. It’s only 1 page for 2 sizes. The bigger size is ⅜” bigger than the smaller one. Seam allowances are included and they are ⅜”.
Choose your outer fabric and lining. You can use the same fabric for the whole pod, or you can choose a few different fabrics that match your decor.
It’s better to use quilting cotton fabric and prewash/ preshrink it before cutting.
Decide what you will use for stiffening the fabric: fusible fleece or fusible interfacing
Set up your sewing machine – thread it with matching color thread, try tension on scrap, etc.
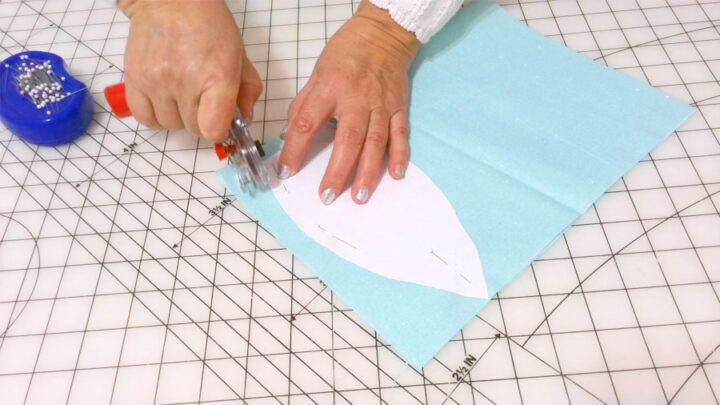
Step 2. Cut fabric for the fabric pods
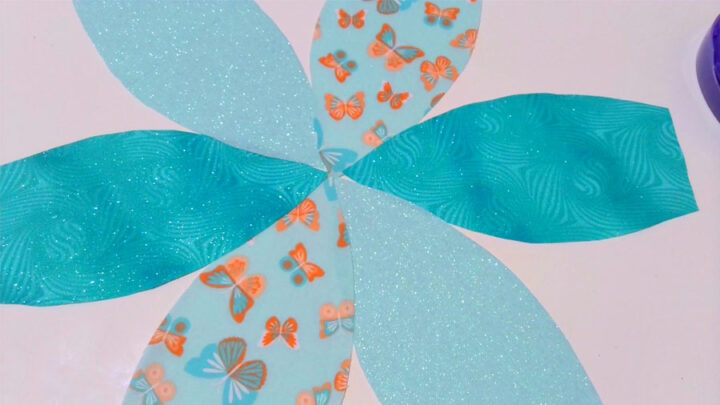
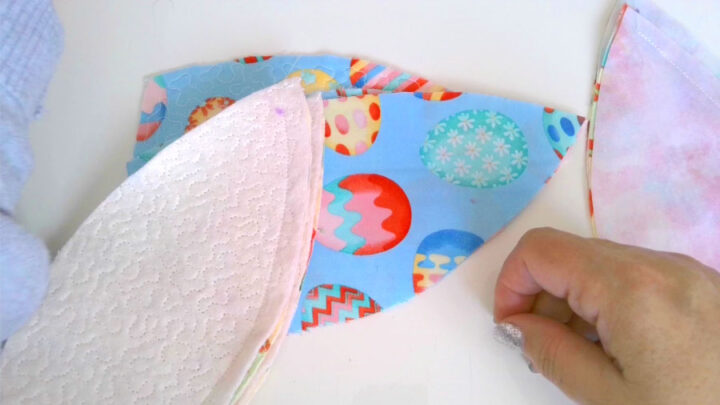
Cut 6 equal cone pieces of outer fabric and 6 pieces of the lining using the template. I have chosen 3 different fabrics and cut 4 pieces of each color.
You can cut with fabric scissors but I used my Martelli rotary cutter and a cutting mat to cut these shapes. I learned to use a rotary cutter without a ruler, just around a pattern piece, and it works really well.
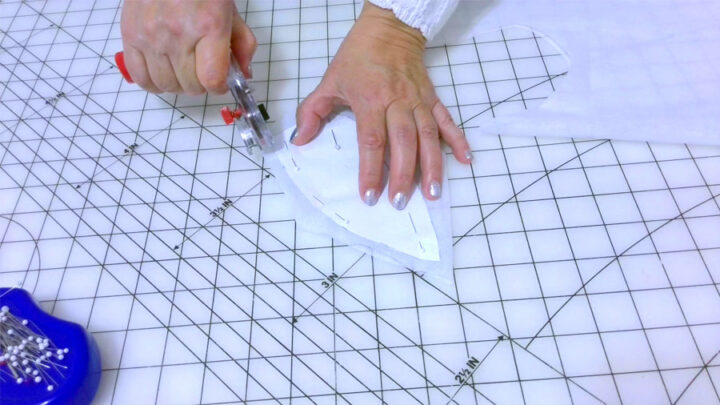
Cut also fusible fleece, interfacing, or batting, whatever you decided to use. Use exactly the same template.
✅ Related tutorial: How to use fusible interfacing
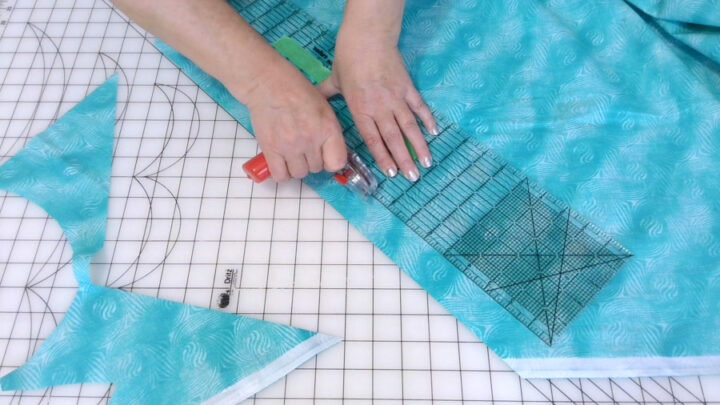
Cut a bias strip for binding.
For the bigger pod the size of the bias strip is about 21” x 1.5”, and for the smaller pod the size is 17” x 1.5”.
✅ Related tutorial: How to cut fabric on the bias
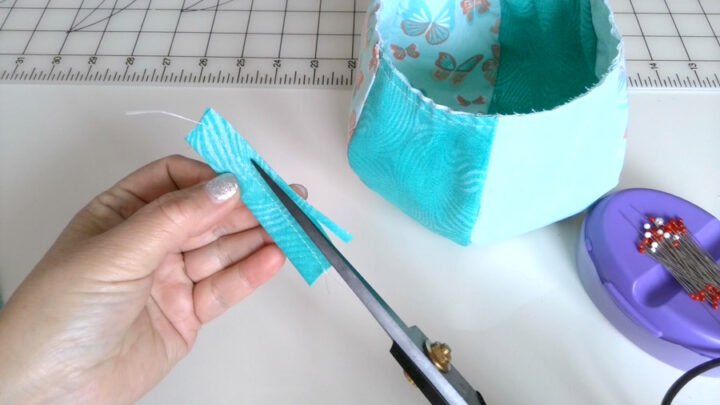
Cut a small piece of fabric for the tab, my rectangle was about 4” long and 1.5” wide.
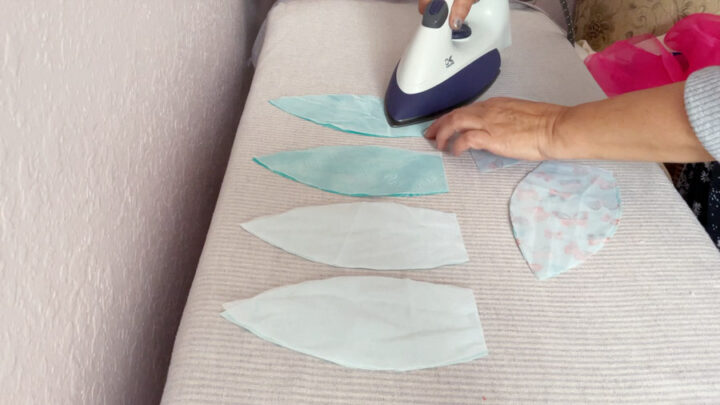
Step 3. Fuse interfacing or fleece
If you have decided to use fusible fleece, fuse it to outer pieces of fabric and fuse just a medium weight interfacing to the lining pieces.
If you want to use fusible interfacing, fuse it to outer fabric pieces and lining pieces. Check out my tutorial on How to use fusible interfacing.
After I fused fleece/batting to the fabric pieces of the pink pod I decided to quilt the outer pieces with stippling stitches from my embroidery machine.
Step 4. Sew together all the pieces
Decide in what order you will sew the outer fabric and lining.
Place every 2 pieces right sides together and stitch the sides. Seam allowances are ⅜”. Don’t start stitching from the top edge. Start from the point that’s ⅜ inch from both sides. You will have 4 different parts.
Add the third piece to those two (4 times).
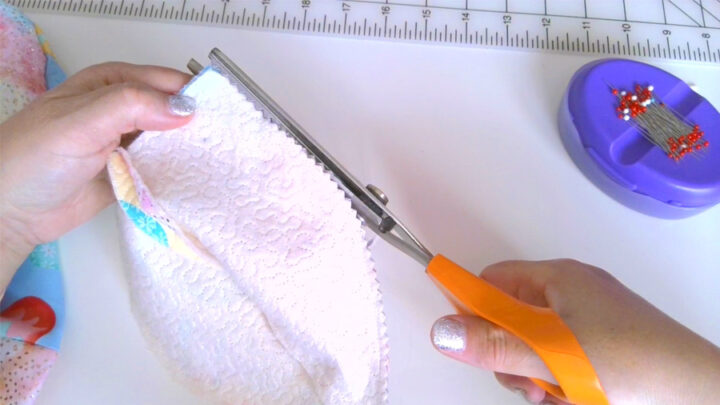
Cut seam allowances close to stitches. Use Pinking shears to do it.
Pin prepared sections (that have three cone pieces) right sides together and make a stitch from edge to edge aligning the top tips. Cut close to stitches using pinking shears. Do the same for the lining pieces.
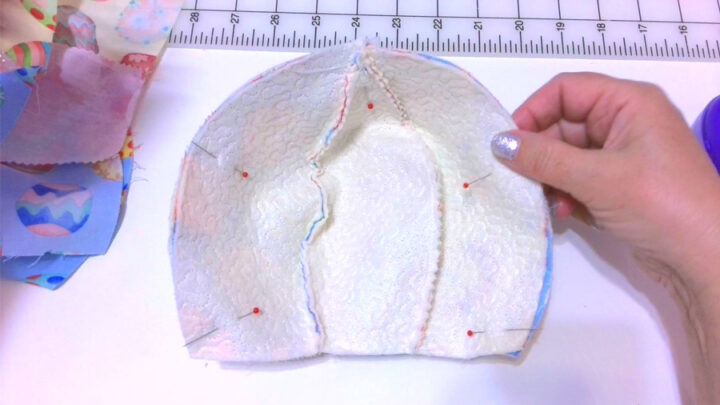
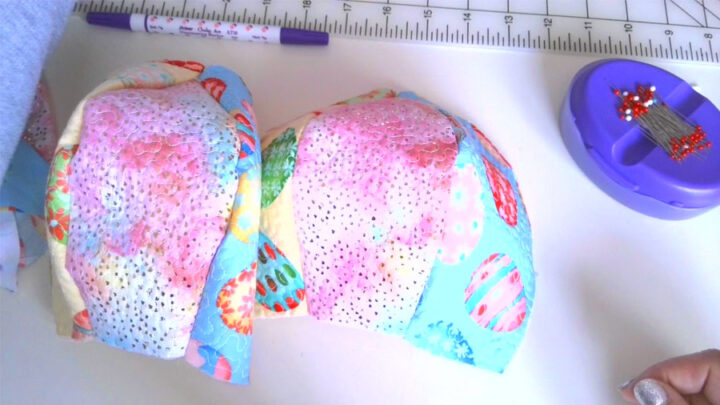
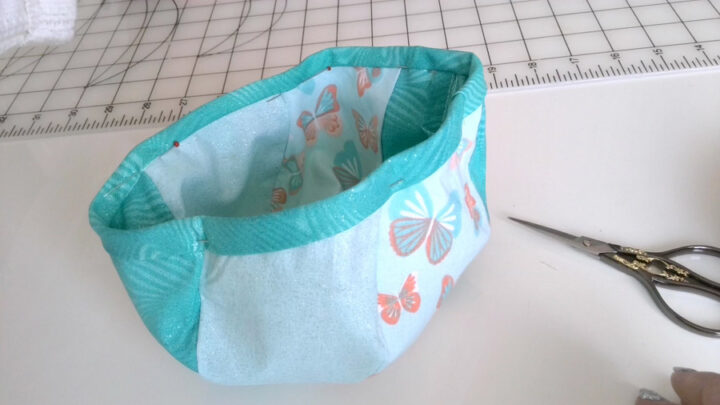
After you are done you will have 2 shapes: one is the outer part and another is the lining.
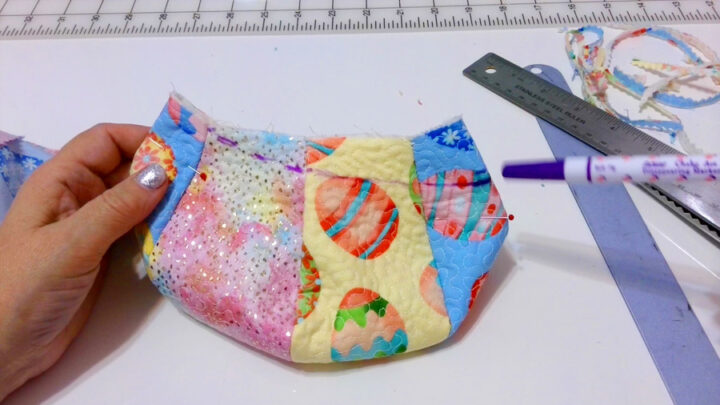
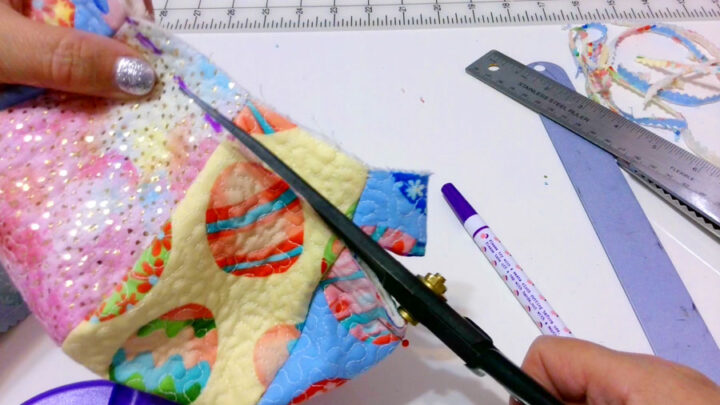
Step 5. Cut the shapes to the desired depth
Now we need to cut both shapes to make them look like pods so one side is higher than the other. You can do it in a few steps. If you didn’t cut enough the first time, cut more again. I cut about 2.5 inches on one side.
For this, find the center points, pin the sides together, mark the cut lines using a fabric marker and make the cut.
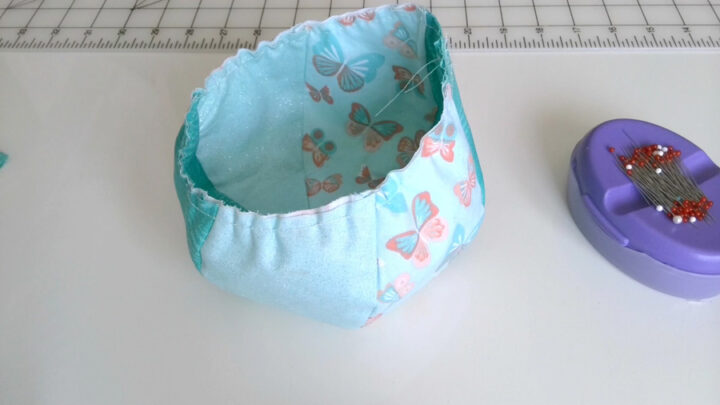
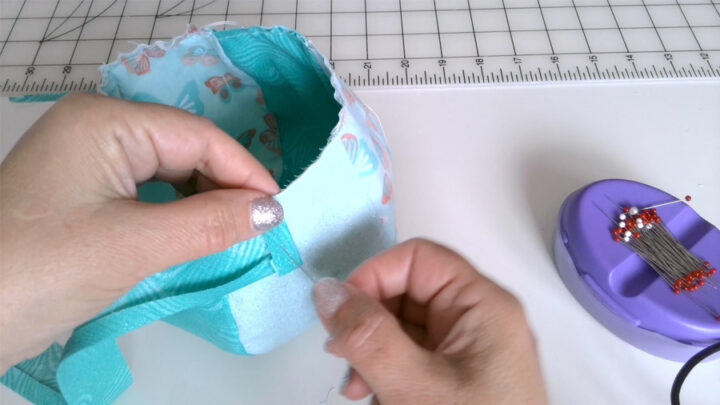
Turn the outer shape right side out and the lining shape right side it. Insert the lining inside the outer piece. Align the edges and seams and pin both shapes together.
Don’t manipulate the shapes too much as the cut edges might unravel. It’s ok if they unravel 1/16” but not more than that.
Stitch the outer piece and the lining together close to the edges, with ¼” seam allowances.
Now we have to gather this edge a little to make the shape of a pod.
For gathering, I make a gathering stitch (right next to the previous stitch) with stitch length at 4 or 5 and the tension at 0. Pull the bobbin thread and gather the edge evenly but don’t make any pleats or folds. Gather just like you gather a sleeve to attach to a bodice.
Step 6. Prepare the bias strip for binding the fabric storage pod and for the tab piece.
Fold the tab piece in half lengthwise and make a stitch.
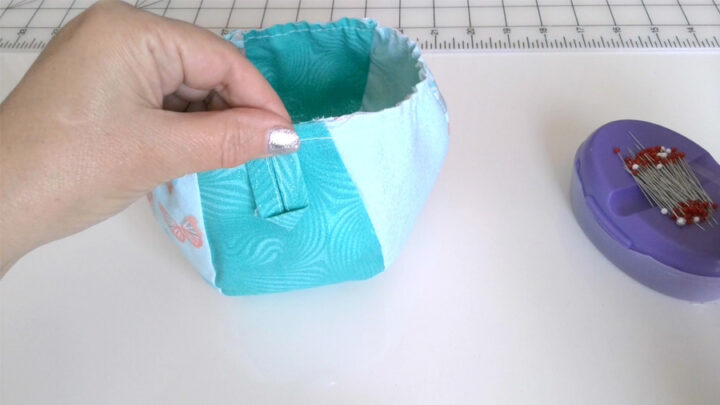
Turn it right side out using a safety pin or a bodkin. Press and fold the tab in half making a corner as you see in the image below.
✅ Related tutorial: What is a bodkin and how to use it
Place the tab on the center of the outer part of the pod and pin.
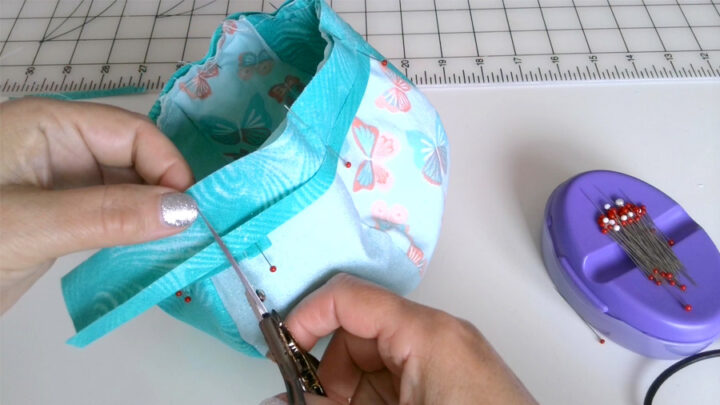
Take the bias strip and fold one edge about 1/4” in on one long side. Position another edge of the bias tape along the edge of the outer side of the pod, right sides together, and use pins to attach it or use sewing clips.
To start, fold the end of the bias strip (about 3/8 inch) and work your way all around, securing the bias strip with pins or sewing clips. Be careful not to stretch the bias strip. When you come to the place where you started, overlap the ends. Don’t fold the second end, just place it on the folded end and pin (and cut it if it’s too long).
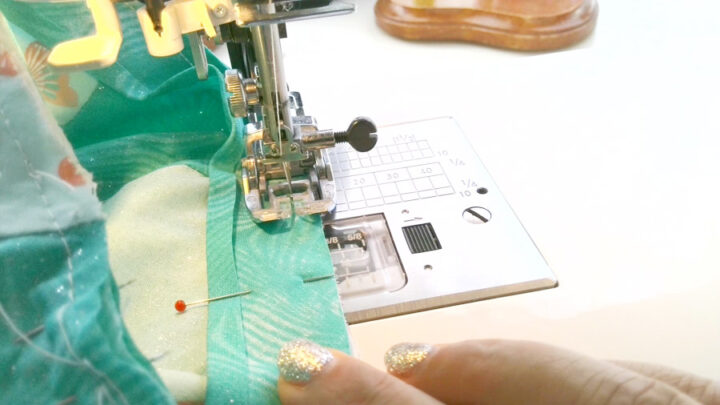
Go to your sewing machine and stitch. It’s better to flip the lining out and stitch the bias strip from the lining side. You might need to use a walking presser foot especially if you used fusible fleece/batting. My Janome machine has a built-in walking foot (as you see in the image below), it’s different from a regular walking foot. Seam allowances are 1/4 inch. Don’t sew over pins. Make sure you remove pins or clips when the needle is close to them.
After you have stitched the bias tape in place you have to wrap the bias strip over the fabric edges of the pod. After that, press it.
The folded edge of the bias strip should just cover the stitches we made attaching the bias strip. Make sure it has the same size all over and doesn’t have any pleats or folds. Pin in place. Press with a hot iron.
Flip the pod so the outer side is out (the lining side is in) and stitch in the ditch on the right side of the pod. If you correctly folded the edge of the bias strip on the lining side you will have nice stitches on both sides of the pod.
Did you find this tutorial helpful? If so, save this pin (see below) on your sewing board so you can come to this tutorial later when you want to make these fabric storage pods, and follow me on Pinterest for more tips, tutorials, and inspiration!
latest posts
- What Do You Call a Person Who Sews? I Asked My Readers and Got 1,408 Opinions
- DIY Round Purse: PDF Sewing Pattern and Detailed Instructions
- Mini Wonder Clips By Clover: Useful Sewing Tool Or Just Another Notion?
- Non-Slip Grips For Quilting Rulers: A Small Notion With A Useful Job
- Fabric Eraser for Sewing: What It Removes and When to Use It
- What Is The Best Thread For Sewing Machine Projects? Let’s Find Out!
- Butterfly Quilt Block Tutorial – Foundation Paper Piecing
- How To Sew Quilt Squares So The Corners Match
- Sewing With Fork Pins: How They Help With Pattern Matching, Slippery Fabric, And Seams


Why do you prefer that rotary cutter? Also how did you learn to use a rotary cutter so well?
I prefer Martelli rotary cutter because it is very comfortable in my hand and I don’t need to apply big pressure. It is very good to cut while sitting, and sometimes it is a big deal. I saw on YouTube a video where someone was cutting a pattern without a ruler and was making it look so easy. When I tried myself the first time, using regular cutters without a rules, and it was far from easy. The Martelli is easier to maneuver and I learned to use it with practice. When I wrote the article on rotary cutters (Rotary Cutter Tips) I didn’t have yet the Martelli, I bought it after and I like it more than all others.
I can’t figure out how to download the pattern for your adorable fabric storage pods. I have long been signed up for your (wonderful) emails but I can’t see where to sign in or use the password. I’m sure I’m overlooking something simple but I’m stuck–thanks for your help 🙂 Christina
Thank you for being a subscriber! All subscribers to my newsletter get access to my download page “Resource Library“, the password I repeat frequently in my newsletter!
I have moved to a considerably smaller sewing room and hoping the storage pods may reduce the space presently taken up with boxes, cases, and bags. Will write a further comment once I have a few of these pods added to my ever growing stash!
I thought that too. They DO reduce clutter, but somehow that allows me to take out more items from boxes 🥺
Hi, Olga, Thank you for the cute pattern! I have made one pod and I’m partly finished with the next one. I think they’ll be cute for holding coffee and decaf pods next to the coffee machine, and I’ll keep them in mind for hostess gifts. I am a quilter and used a standard quilt binding technique that starts with a 2 1/2″ strip and provides a double layer of fabric over the edge. It’s easier for me because I’ve had lots of practice with that type. Also, I used a fat quarter for the outer fabric, and by cutting the binding straight instead of bias, I was able to get enough fabric for the binding from the same fat quarter. A regular quarter yard would also work. The top edge of the pod has only a slight angle, so straight weave worked fine on the binding. These are really fun to make!
Thank you for the tips! If [possible, maybe you can send me an image in an email so we can all see your work?
wonderful new site for me. I am interested in the storage pod pattern and tutorial. Looks like a useful and fun ting to make. Thank you.