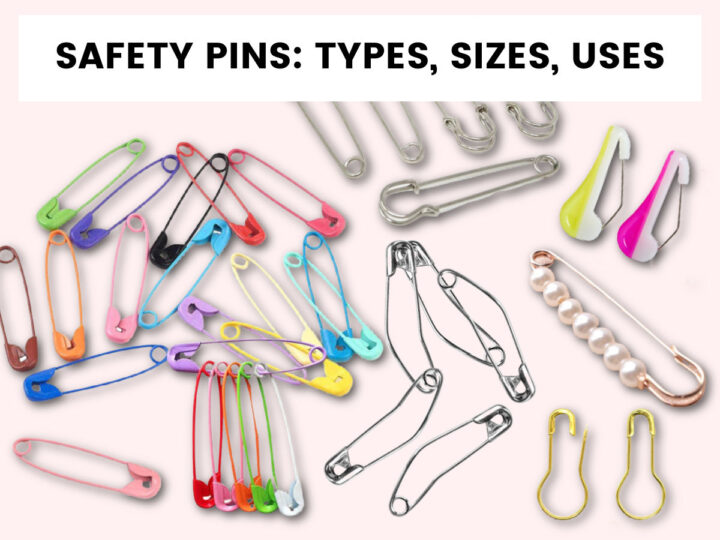
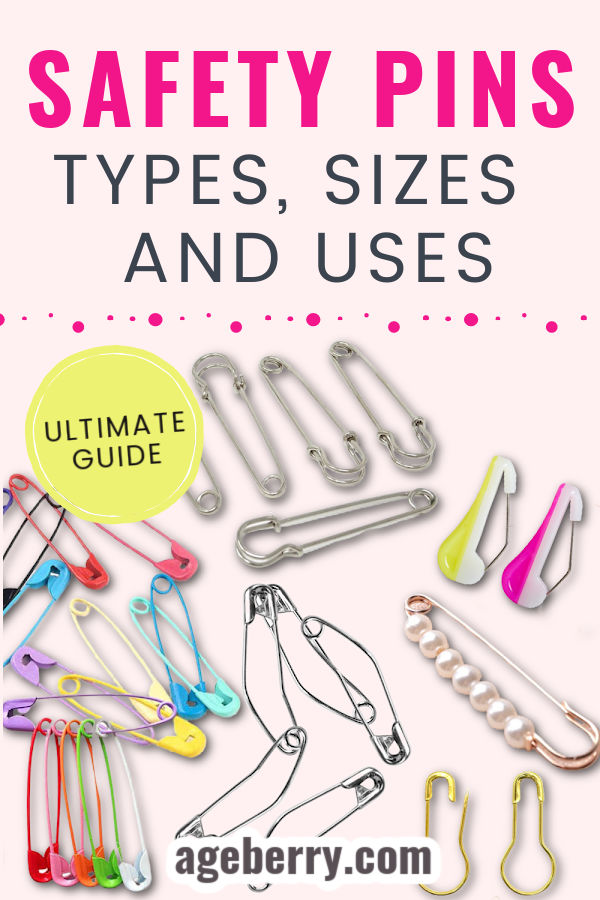
Safety Pins: Types, Sizes, and How to Use Them
In this tutorial, I want to talk about safety pins: types, sizes, and how to use them.
What once was used for very simple purposes, is now an essential multipurpose tool every sewist needs. Here’s your all-in-one guide to safety pins: everything from different types and styles of safety pins along with their uses.
Many sewists have a few safety pins on hand because they hold items together without sticking you. But, I’m guessing that unless you’re a highly experienced sewist you probably aren’t getting the full range of benefits out of your safety pins.
Let’s start with a little background. Safety pins started out as simple pins that could close to prevent pricks as well as hold items more securely without fear of falling out. In fact, the design hasn’t changed much since it was invented sometime in the 19th century because the original design is so effective.
What has changed, though, is that there are now different types of safety pins designed for different purposes (sewing-related and otherwise).
Today, I’m deep-diving into the differences between the types and sizes of safety pins, how to use them, and why you may want to use safety pins instead of straight sewing pins in certain circumstances.
Types of Safety Pins
- Traditional
- Curved
- Wonder pins
- Heavy duty or Skirt/ kilt safety pins
- Bulb (Gourd)
- Button safety pins
- Decorative safety pins
When I am sewing, I like to use safety pins in many different ways: basting quilts, holding fabric pieces together when I need to transport them, fitting clothing, threading elastic or a drawstring, hanging patterns, and more.
They are called safety pins because they are made to protect your fingers from scratches and pricks.
Attention! If you like the video format, at the bottom of this tutorial, look for a YouTube video Safety Pins: Types, Sizes and How to Use Them where you will find really helpful information on … well, types of safety pins for sewing. For a more complete picture, I recommend exploring both versions.
Here’s a look at the different types of safety pins and their purposes.
Traditional
These are the safety pins that come to mind when you think of safety pins with the locking head that keeps everything in place and prevents pinpricks. They can be used for quilting, sewing, and crafting. The pins can also range in size from ¾” to 4” long.

Note: Some of the links on this page are affiliate links. This means I will receive a commission if you order a product through one of my links. I only recommend products I believe in and use myself.
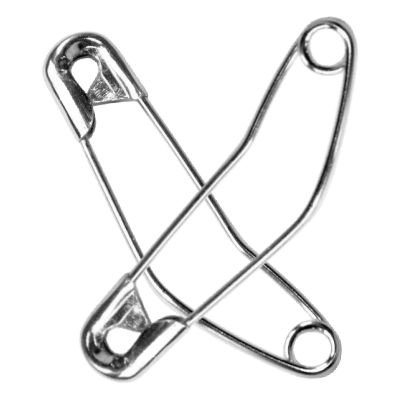
Curved
The curved bend allows this pin to easily pass through many layers of fabric, making it a great tool for basting quilts and other situations where you have multiple layers of fabric to hold in place. This safety pin style ensures that the layers don’t shift.
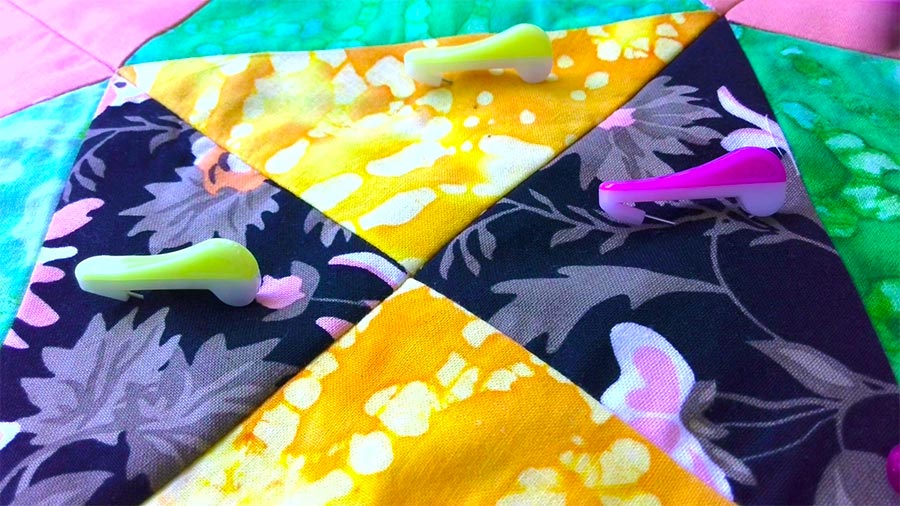
Clover Wonder Pins
This style is a relatively new and improved version of the curved safety pin. The design leverages the benefits of both safety pins and straight pins for one-handed pinning projects all in one convenient tool. They feature brightly colored plastic covers that are both easy to handle and easy to find on your quilt.
Plus, they’re heavy, strong, and sharp enough to use with multiple or heavy fabrics but also thin enough to not leave holes in your fabric.
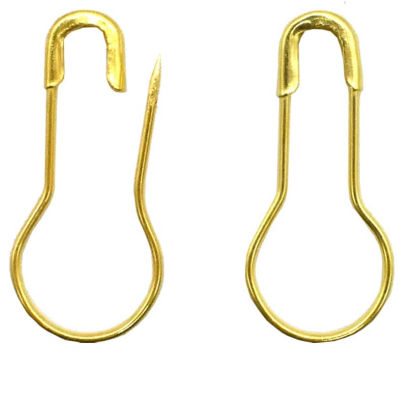
Bulb pins (or gourd safety pins)
This type of safety pin has a bulb (or pear) shape.
It’s mostly used to attach tags and labels to garments and quilts, but bulb pins are also great to use for craft projects and general household use. Can also be used for knitting & crochet projects.
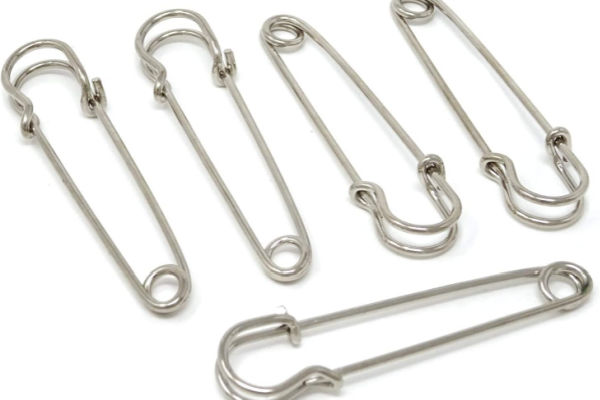
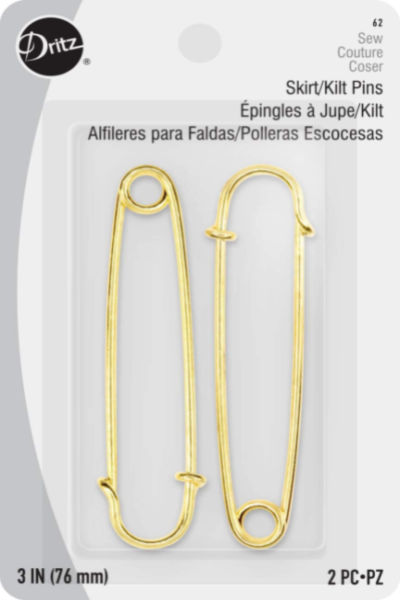
Heavy duty safety pins (or skirt/kilt pins)
These pins are thick, sturdy, strong, safe, and not easy to bend but they are not as sharp as a regular safety pin. They have a more ornamental design. They are used, for example, to keep a blanket in place in a duvet cover, or to keep a bed skirt in place.
Sometimes they are called skirt/kilt safety pins since it’s decorative pins used to hold kilts (and skirts) closed. The pin style is also a little more decorative in appearance to fit the job.
Button pins
These safety pins are not that popular but some people like using them.
The button style of safety pins has a small bump in the middle that can hold non-washable, delicate shank buttons in place on a garment.
These pins are made to hold shank buttons on garments without sewing, either as an emergency fix, to use a button as a brooch, or to attach a delicate button to a sweater or other garment so it can be easily removed for cleaning. All you need to do is thrust these pins through the inside of the fabric, the shank button, and the outer side of the fabric again. These shank button pins give you the convenience of removing and swapping buttons according to your requirement.

✅ Related tutorial: How to sew a button
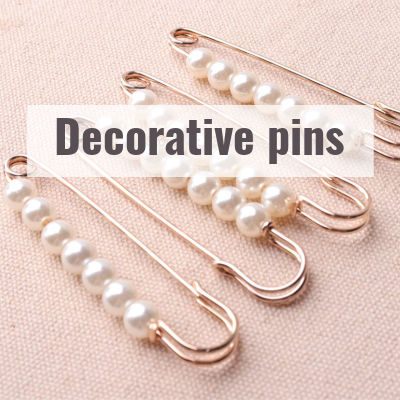
Decorative safety pins
Decorative safety pins are a kind of costume jewelry.
You can use these pins for many things, for example, to hold together a dress slit that is a little too high, or a top cut too low, or if you want to add a little bling to your outfit. Many women use them for scarves.

✅ Related tutorial: Types of sewing pins and their uses: all you need to know about straight pins for sewing
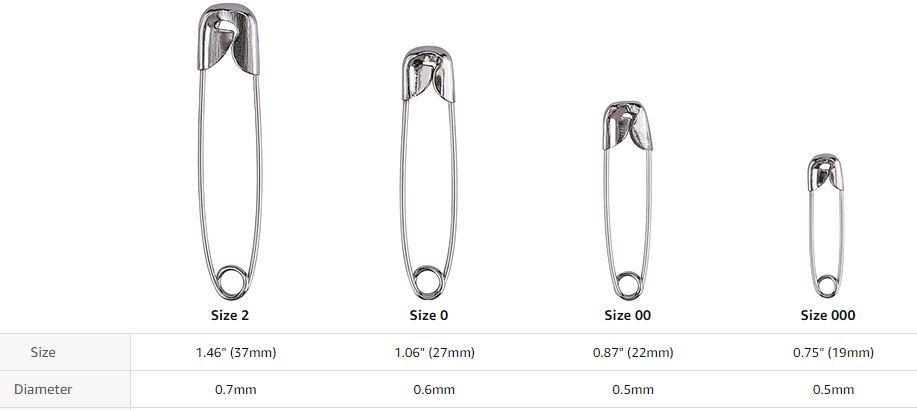
Safety Pin Sizes
Safety pins come in a variety of sizes. You can find safety pins in these sizes to fit all of your project needs:
- ¾ inch
- 7/8 inch
- 1-1/16 inch
- 1-1/2 inch
- 2 inches
- 3 inches
- 4 inches
Sometimes manufacturers mark their safety pin sizes like this:
- Size 000
- Size 00
- Size 0
- Sizes from 1 to 3
But this is not a problem because they always say the actual size of the pin in inches or centimeters.
By the way, if you would like to know how to convert centimeters to inches, etc. you can use my fast and easy fabric conversion calculator.
Safety pins characteristics
Not all safety pins are created equal.
If you want to have good quality safety pins for your sewing projects you should look for these features:
- Made of premium stainless steel
- Nickel plated or brass
- Rust resistant
- Corrosion resistant
- Have sharp points that don’t break the fabric and don’t leave big holes in the fabric
- Don’t bend even if inserted through thick layers of fabric
- Last through multiple projects
Don’t buy safety pins that you want to use for sewing and quilting projects in a dollar store or convenience store. They are not of good quality. It’s better to buy from fabric stores.
How to Use Safety Pins
There are many different ways to use safety pins and a few different types of pins that many people don’t even think to use. With that in mind, I wanted to do a quick rundown of different safety pin applications so that you get a sense of the best tools and how to use them.
✅ Related tutorial: Sewing Basics #1: 10+ essential sewing tools for beginners
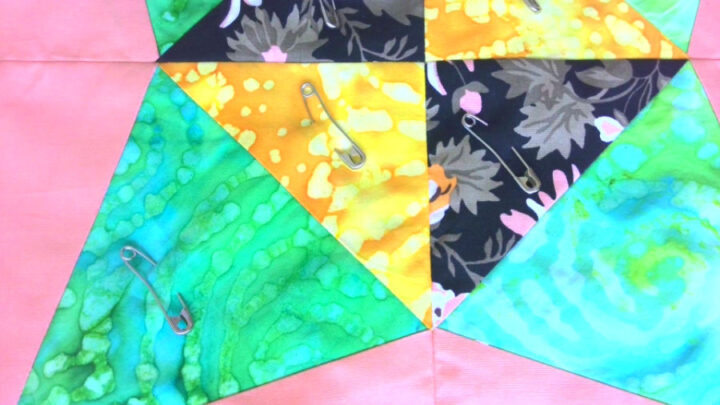
Basting a Quilt With Safety Pins
Using safety pins to baste your quilts is only one of many methods you can use, but it’s a tried and true way that many sewists prefer.
When it comes to quilting, your safety pins do a lot of heavy lifting to keep all the layers in place. The right tool for this job is the curved safety pin or the Wonder pin because the curve is specifically designed to grab just the right amount of fabric and come back up through the layers so you can close the pin easier.
Buying good quality curved safety pins is the key to not damaging your layers and protecting your fabric. Some of my favorite good-quality safety pins are:
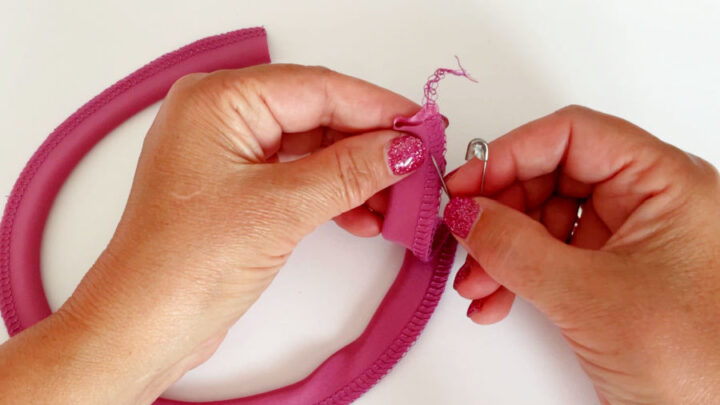
Safety Pins for Turning Tubes of Fabric Right Side Out
This trick may not be new to experienced sewists but, for those new to sewing, this method may be a huge timesaver. A traditional safety pin (and sometimes a curved pin) is the perfect tool to turn those narrow tubes of fabric right side out.
Here’s how.
- Start by inserting your safety pin through only one layer of your fabric from the outside to the inside.
- Close your safety pin and slide the head into the fabric tube.
- Once your pin is completely inside the fabric tube, gather your fabric over the pin while holding the pin in one hand.
- After you get a good gathering of fabric, gently pull the gathers off the pin on the opposite end. (Note: this step is more difficult for very narrow fabric tubes, so you may need to be patient and just keep pulling away at it.)
- You’ll start to see the tube folding onto itself. Continue repeating the process until the safety pin comes out on the opposite end of your tube. Pull the tube all the way through until your tube is completely right side out.
- If the fabric seems stuck at any point, don’t tug on it because you may rip the pin out of its place. Instead, loosen it so that the gather can slip past each other.
Pro Tip: I recommend using the largest safety pin that will fit into the fabric tube because it will give you a better grip as you work!
Check the video at the bottom of this post!
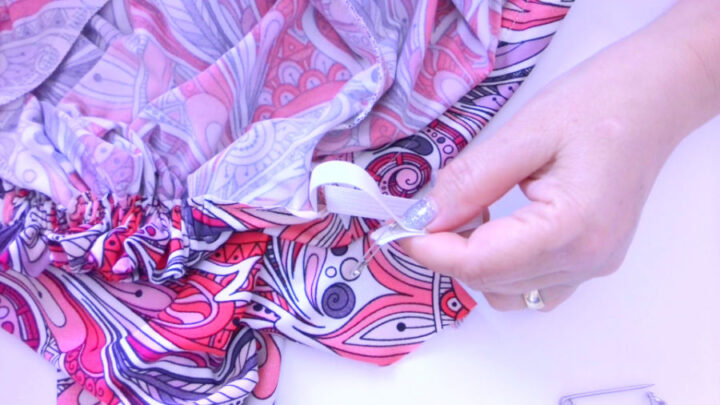
Safety Pins for Inserting Elastic
There are times when you’ll want to use elastic. Rather than sewing elastic directly into your fabric or clothing, sewing a casing is a great way to get the fit you want. But, the downside is that you’ll need to find a way to thread the elastic through once you’ve sewn your casing.
While there are specialty tools you can use, I prefer to use the handy safety pin for this task.
Here’s how to do it:
- Pin the safety pin through the piece of elastic and close the pin.
- Push the pin into your casing. As you slide the pin forward, you will see the fabric gathering over the pin.
- Pull the excess fabric back behind the pin.
- Repeat this process, again and again, to keep advancing the safety pin until it appears at the other end of the casing.
Here are a couple of issues you can potentially run into and how to resolve them.
- Every now and then, the pin may open as you’re threading it through the casing. When this happens, you may be able to just close it back up and keep moving forward. Take care not to accidentally pin the fabric as you do this! Worst-case scenario: pull the pin back out and start all over again.
- Feel the elastic as you go to ensure that it doesn’t twist. Once you get all the way through to the other side, do a quick double-check before securing the ends. If the elastic is twisted, simply twist the safety pin to straighten it out.
- If you pin too close to the end of the elastic, the pin may pull out and unravel the end of the elastic. To avoid this, pin in and out through the elastic a couple of times.
Safety Pins for Fitting Clothes
Some people use straight pins for fittings and alterations, but I prefer to use safety pins. And, because they closed, there are added benefits such as:
- No finger pricking
- Pins don’t fall out when the garment is moved or taken off
Tip: If you do fittings regularly, save time by having a pincushion devoted to safety pins – and make sure they’re all pre-opened and poked into the pincushion. That way you can grab and use them with only one hand as you work.
So here is my YouTube video. Check this out if you want to see how to use safety pins and what types of safety pins are available instead of reading…

I hope you’ve found the answers to all of your questions regarding safety pins! While safety pins may be small tools, their value is huge – just make sure to invest in good quality pins. If you have any additional questions about safety pins, leave them in the comments below so I can answer them for you.
Did you find this tutorial helpful? If so, save this pin (see below) on your sewing board so you can come to this tutorial later when you need the information on safety pins types and uses, and follow me on Pinterest for more tips, tutorials, and inspiration!
latest posts
- Types Of Sewing Machine Feet And Their Uses
- The Interfacing Cutting Guide: Methods, Folds, and Seam Lines
- Steam or Dry Heat for Fusible Interfacing: Which Actually Works
- Essential Sewing Tips: How to Apply Fusible Interfacing Correctly
- Types of Interfacing Explained: Woven, Non-Woven, Knit, Fusible, and Sew-In
- Fabric Eggs DIY: Quick Easter Craft Decorations From Scraps
- Stuffed Bunny Sewing Pattern And Tutorial (Free Download)
- Sewing Machine Basics: Simple Maintenance Tips Every Sewist Should Know
- Interfacing vs Stabilizer: Is There Really a Difference?